

Optimize Usage - Idle
Learn how to review idle cloud resource recommendations in CoreStack FinOps, filter and configure the results, and check RI/Savings Plan commitment coverage.
Feature Overview
Manage Idle is a capability within CoreStack's FinOps module, under Cost Optimizer's Optimize Usage page, that identifies cloud resources sitting idle across your connected accounts and estimates the monthly savings available if you act on them across all four supported cloud providers — AWS, Azure, GCP, and OCI. It is most relevant when you want to reduce spend on provisioned-but-unused resources without disrupting resources that are still needed.
This feature is most valuable to FinOps Practitioners and Cloud/Platform Engineers who review idle resource recommendations and decide whether to approve, reject, or remediate them. It is not a rightsizing tool --- recommendations for right-sizing running (non-idle) resources live under the separate Right Sizing tab.
Note: Resources covered by an active Reserved Instance (RI) or Savings Plan display a commitment-coverage indicator next to their Resource ID (see Step 8 below). This indicator is currently available only for AWS and Azure resources, on the Manage Idle and Manage Orphaned tabs.
How It Works
When CoreStack scans a connected cloud account, it flags resources with sustained low or zero utilization as idle and lists them in the Manage Idle table, along with the estimated monthly savings for each. From there, you filter and configure the table to focus on the accounts or savings range you care about, open an individual resource to review its utilization and savings detail, and choose an action --- submit the recommendation for approval or reject it. For resources covered by an RI or Savings Plan, CoreStack also surfaces the underlying commitment details so you can weigh commitment utilization before acting.
This is a near real-time view based on your most recent account scan, not a live utilization feed.
Prerequisites
Before you begin, ensure the following:
- Role: You have the FinOps Account Admin, FinOps Tenant Admin, FinOps Admin, or FinOps Practitioner role assigned in CoreStack
- Prior setup: At least one cloud account (AWS or Azure, for commitment coverage visibility) is connected and has completed an account scan
- Access: You can access
FinOps > Cost Optimizer > Optimize Usagein the CoreStack navigation
Opening Manage Idle
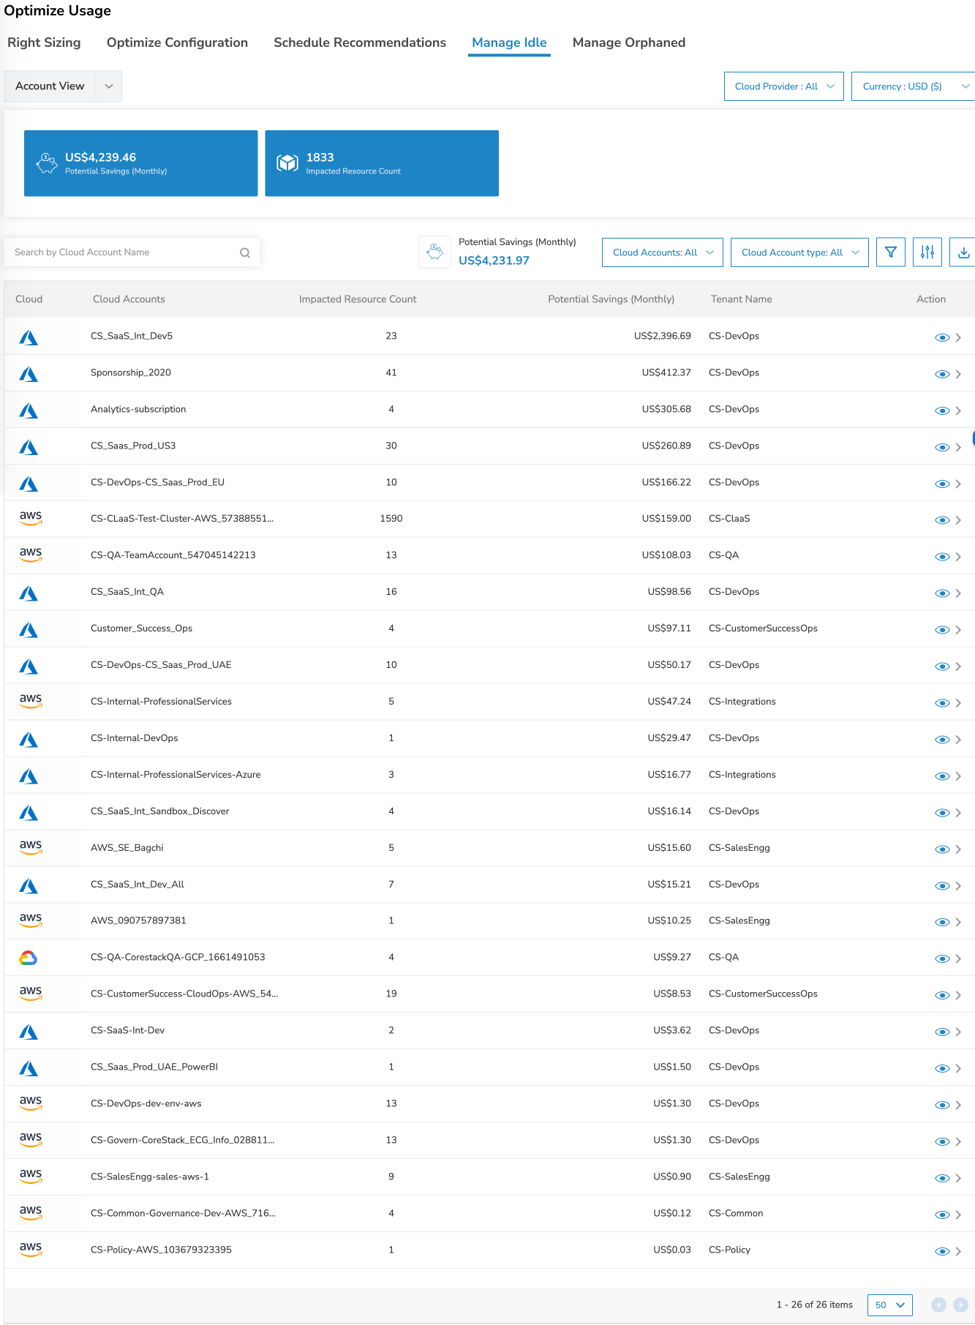
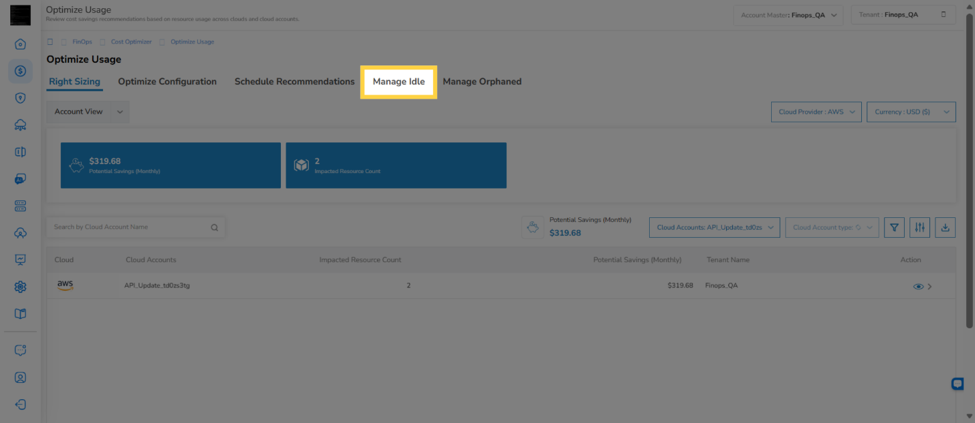
Navigate to FinOps > Cost Optimizer > Optimize Usage, then click the Manage Idle tab. The dashboard opens showing a table of your cloud accounts with resources currently in an idle state, along with the potential monthly savings and impacted resource count.
Reviewing Savings Summary and Filters
Start by reviewing the top-level savings numbers, then use the filters below them to scope the table to the provider, accounts, and currency you care about.
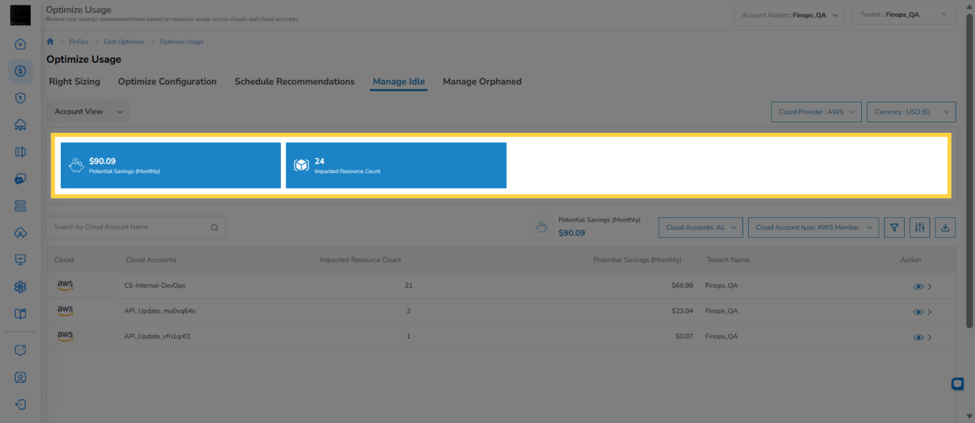
Step 1: Review Potential Savings and Impacted Resource Count
Review the Potential Savings (Monthly) and Impacted Resource Count summary cards at the top of the page. These totals reflect all idle resources currently matching your filters, and update as you apply the filters below.
Step 2: Filter by cloud provider
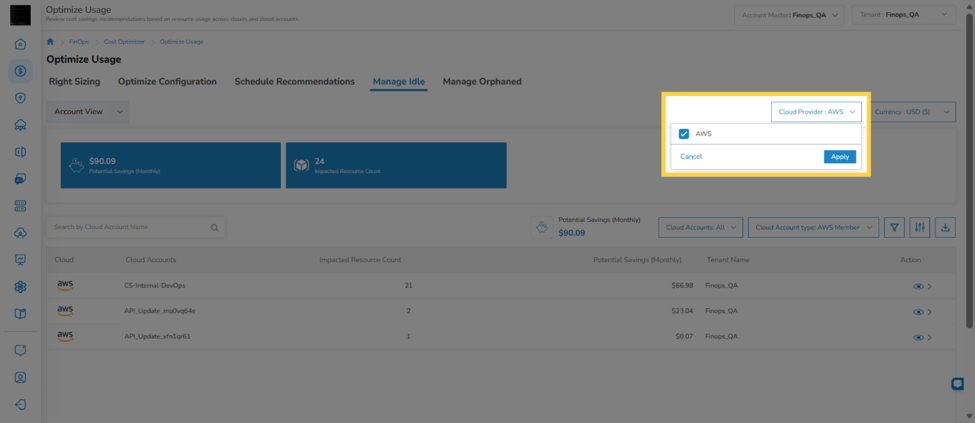
Click the Cloud Provider filter and select a provider. Click Apply to limit the table and the summary cards above to idle resource recommendations for that provider.
Step 3: Set the display currency
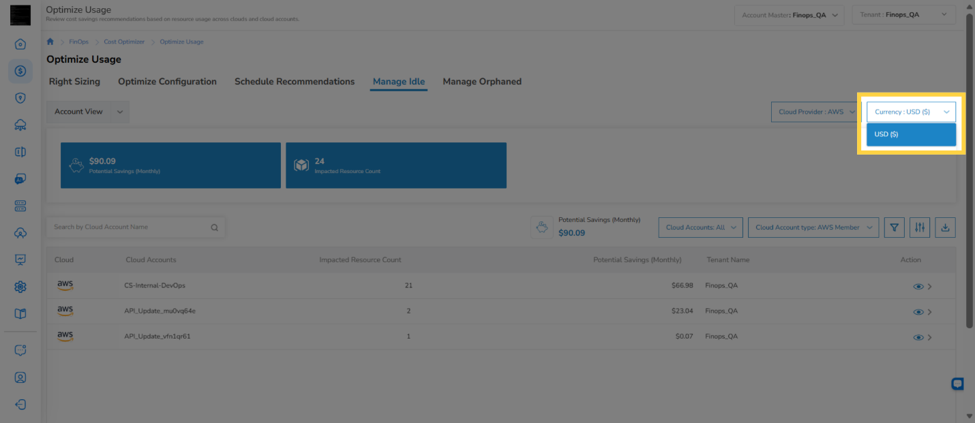
Click the Currency dropdown and select a currecy to display in the summary cards and table.
Reviewing the Resource List and Recommendation Detail
With the summary and filters set, drill into the resource list itself to review individual recommendations and take action.
Step 1: Review the resource list
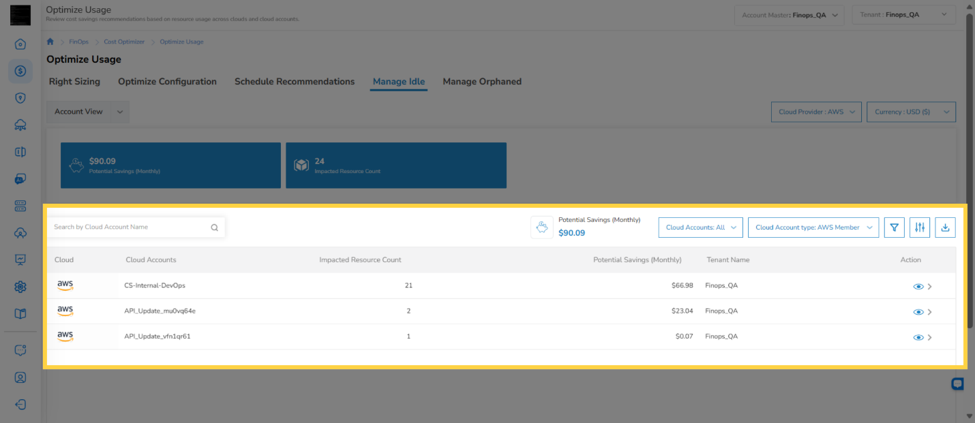
Review the resource list, which shows one row per cloud account with idle resources including the cloud provider, account name, impacted resource count, potential monthly savings, and tenant name.
Step 2: Open the account's resource list
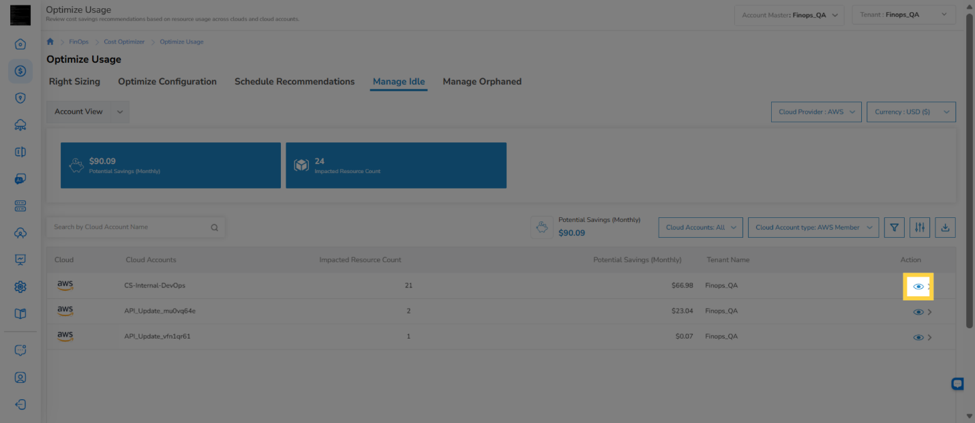
Click the eye icon in the Action column next to a cloud account to drill into the individual idle resources for that account. This opens a resource-level list showing each resource's ID, name, type, and potential monthly savings.
Tip: Check commitment coverage before remediating a resource --- deleting or stopping a resource under an active RI or Savings Plan can reduce your commitment utilization.
Step 3: Check commitment coverage
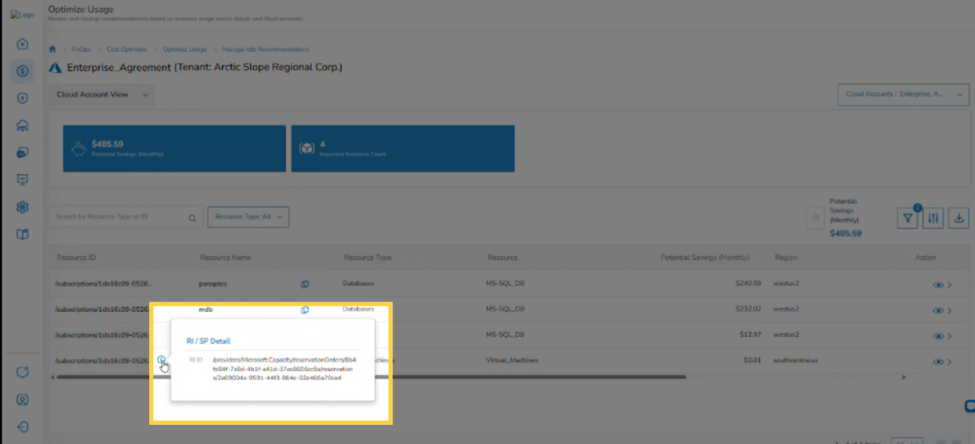
Look for an info icon next to a resource's Resource ID in this list. If present, the resource is covered by a Reserved Instance (RI) or Savings Plan. Hover over the icon to open the RI / SP Detail tooltip, which shows the RI or Savings Plan ID associated with the resource.
Note: Commitment coverage details are currently available only for AWS and Azure resources, and only on the Manage Idle and Manage Orphaned tabs — GCP, OCI, and the Right Sizing tab are not yet supported.
Step 3: Open a resource's recommendation detail
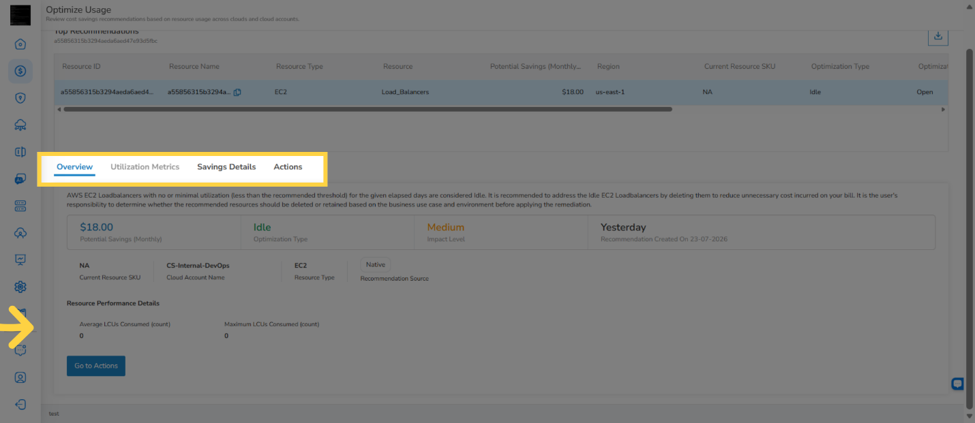
Click the eye icon next to one of the individual resources to open its recommendation detail view. The detail view has four tabs — Overview, Utilization Metrics, Savings Details, and Actions — each covering a different aspect of the recommendation.
Step 4: Review the resource overview
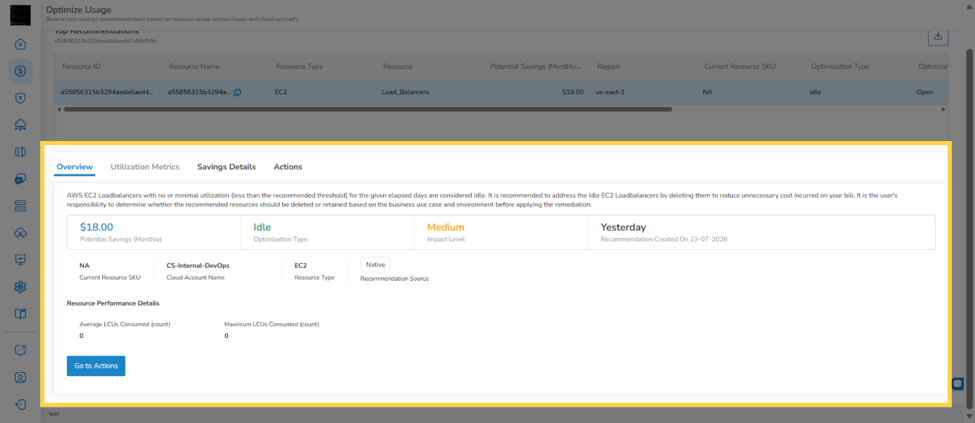
Review the Overview tab, which shows the recommendation's potential savings, optimization type, impact level, when the recommendation was created, and Resource Performance Details such as average and maximum utilization. Read the summary text to understand why the resource was flagged as idle.
Step 5: Take action on the recommendation
Click Go to Actions, or the Actions tab directly, to view the Take Action panel. Choose Submit for Approval to route the recommendation for approval, or Reject to dismiss it.
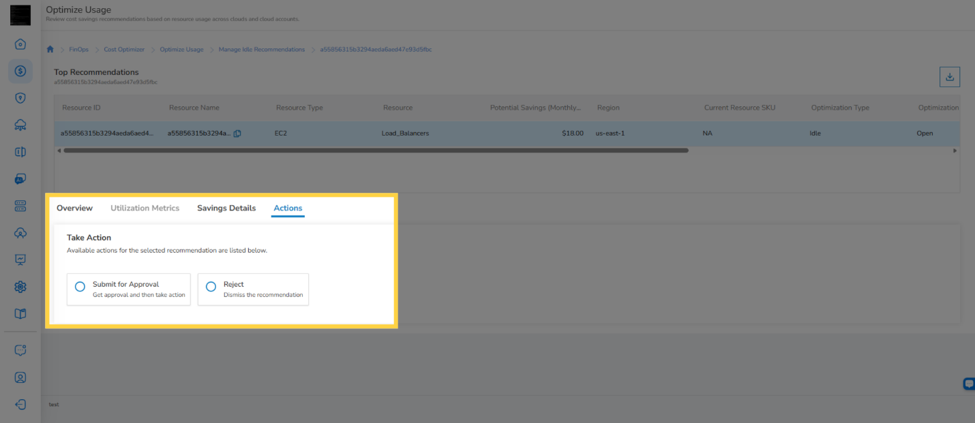
Note: This workflow exposes Submit for Approval and Reject only. The Remediate Now action, which applies the change directly, requires your role to have the Remediate access right enabled — see the FAQ below.
Step 6: Review utilization metrics
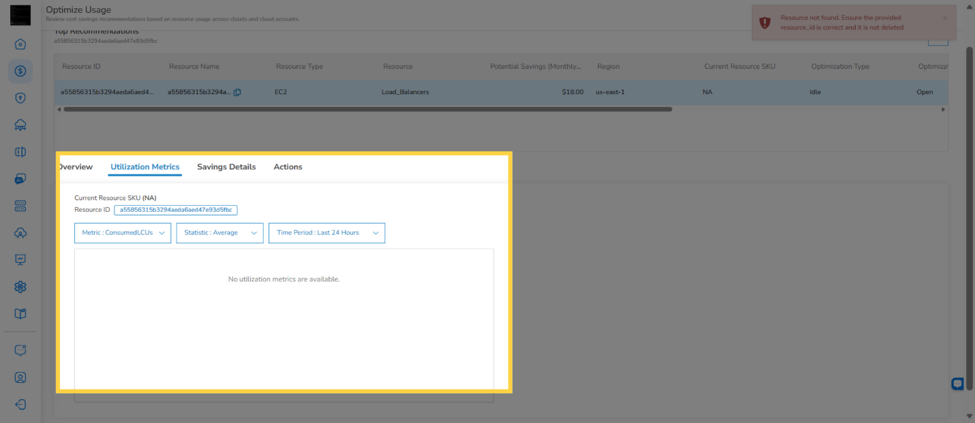
Click the Utilization Metrics tab to review consumption data for a selected metric, statistic, and time period. If no data is available for the resource, the tab displays a message stating that utilization metrics could not be retrieved.
Step 7: Review the savings breakdown
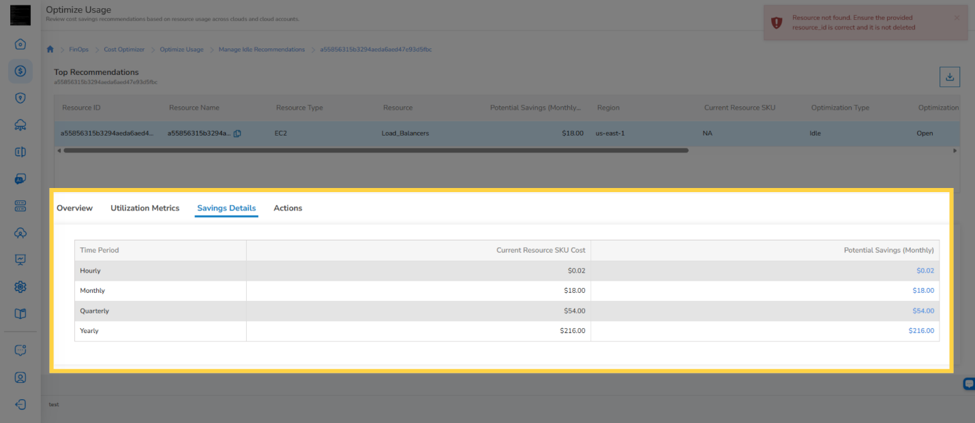
Click the Savings Details tab to view the resource's current cost and potential savings broken down by hour, month, quarter, and year.
Filtering, Editing, and Downloading the Resource List
Back at the resource list, use these controls to narrow results further, customize the columns shown, or export the data.
Step 1: Filter by cloud account
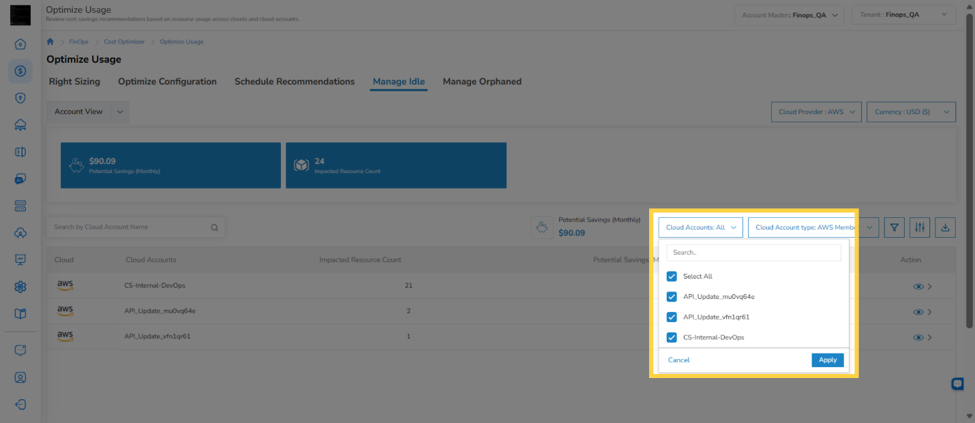
Click the Cloud Accounts filter to select specific accounts. Choose accounts individually or click Select All, then click Apply to update the summary cards and table.
Step 2: Filter by account type
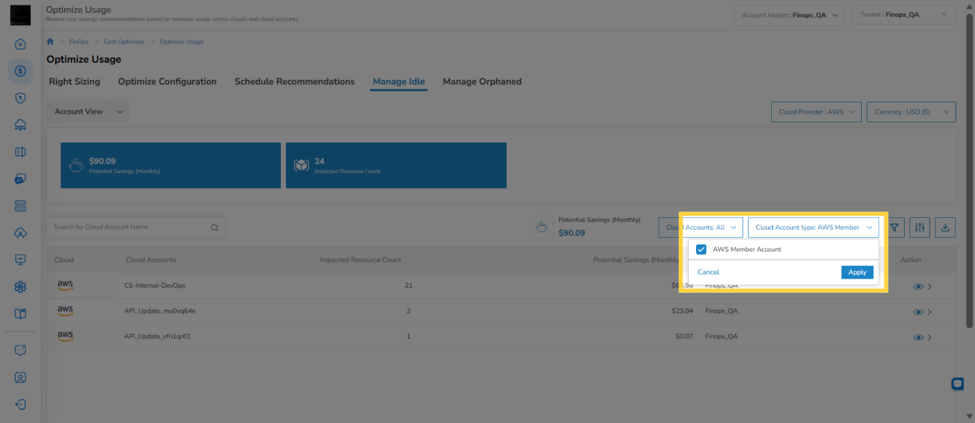
Click the Cloud Account type filter and select the Member Account (or the relevant type) to narrow results to that account type. Click Apply to update the summary cards and table.
Step 3: Set a savings range filter
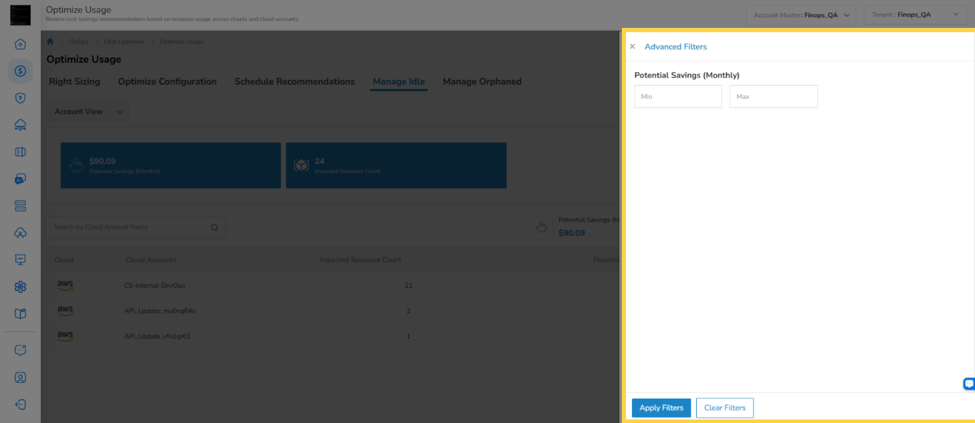
Click the Filter icon to open advanced filters, then enter a minimum and maximum value in the Potential Savings (Monthly) fields. Click to narrow the list to resources within that savings range.
Step 4: Configure table columns
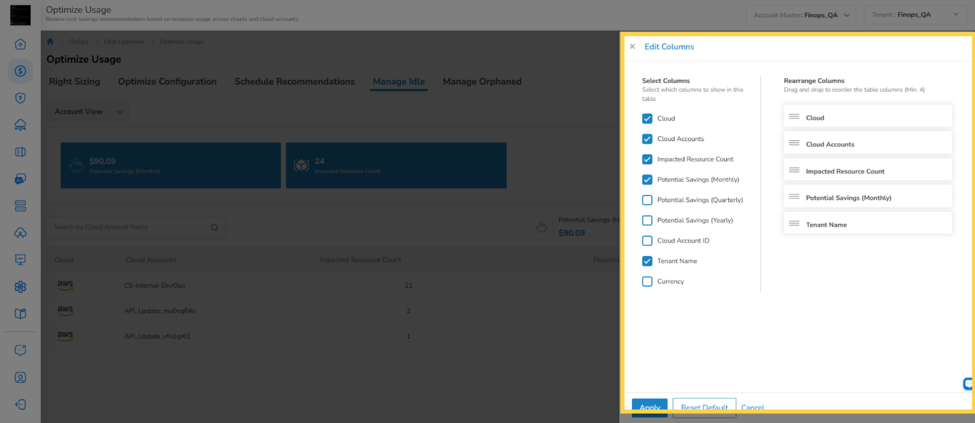
Click the Edit Columns icon, then check or uncheck fields — such as Potential Savings (Quarterly), Potential Savings (Yearly), or Cloud Account ID — to control what the list displays. Drag items under Rearrange Columns to set their order, then click Apply.
Step 5: Export recommendation data
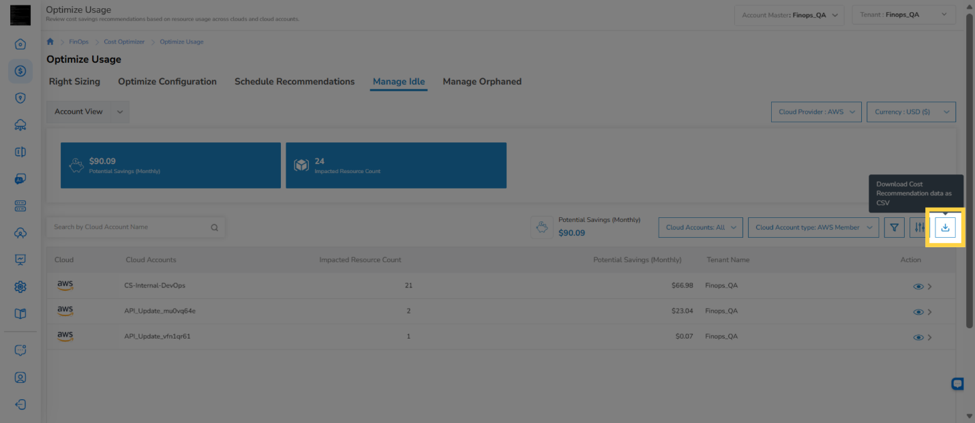
Click the Export icon to download the current idle resource recommendation data as a CSV file.
Frequently Asked Questions
Q: Why don't I see the commitment info icon next to some resource IDs?
The icon only appears when a resource is covered by an active RI or Savings Plan. If a resource has no active commitment, or belongs to GCP or OCI, no icon is shown.
Q: Does the commitment coverage indicator apply to the Right Sizing tab?
Not yet. It's currently available only on the Manage Idle and Manage Orphaned tabs.
Q: I don't see a Remediate Now option why?
This workflow's Actions tab only exposes Submit for Approval and Reject. Remediate Now, which applies the recommended change directly, requires your role to have the Remediate access right enabled. Contact your CoreStack admin if you need that access.
Q: What happens after I click Submit for Approval?
The recommendation moves into an approval workflow rather than being applied immediately. Check with your CoreStack admin about who reviews and approves submitted recommendations in your tenant.
Q: Can I undo a rejected recommendation?
Rejecting a recommendation dismisses it from the active list, but CoreStack will re-flag the resource in a future scan if it remains idle. There's no separate "undo reject" action, resubmit by reviewing the resource again after the next scan.
Troubleshooting
Idle resources aren't appearing in the table
Cause: The connected cloud account hasn't completed a recent scan, or no resources currently meet the idle criteria after your filters are applied.
Solution:
- Clear any active filters (Cloud Provider, Cloud Accounts, Account Type, Savings Range) to rule out over-filtering.
- Confirm the cloud account status shows as connected and scanned under account settings.
- Trigger a manual scan if the last scan is more than 24 hours old, then reload the Manage Idle tab.
If the issue persists, contact CoreStack support with your account ID, cloud provider, and the timestamp of your last scan.
Commitment coverage info icon isn't showing for a resource I know has an RI
Cause: Commitment coverage lookup is currently supported only for AWS and Azure, and only on the Manage Idle and Manage Orphaned tabs. Billing data sync delays can also cause a temporary gap.
Solution:
- Confirm the resource's cloud provider is AWS or Azure.
- Confirm you're viewing the Manage Idle or Manage Orphaned tab, not Right Sizing.
- Wait for the next billing data sync if the RI was recently purchased or renewed.
If the icon still doesn't appear after confirming the above, contact CoreStack support with the resource ID, cloud provider, and RI/SP ID.
Updated about 2 months ago