

Tags at Account Master/Tenant/Cloud Account
Introduction
Custom tags can be created at three levels: Account Master, Tenant, and Cloud Account. Tags are available in CoreStack based on the level they are created at. The advantage of having tags is that users gain the ability to pull or filter cloud resource details based on their defined tags.
- Tags created at the Account Master level shows as suggestions and users can choose the same tags if they want to apply it in all three levels: Account Master, Tenant, and Cloud Account.
- Tags created at the Tenant level are available as suggestions and users can choose the same tags if they want to apply it in the Tenant and Cloud Account levels.
- Tags created at the Cloud Account level are shown as suggestions to be added at the Cloud Account level only.
Creating Tags at the Account Master Level
At the Account Master level, tags can be created by a Product Admin. The Product Admin can edit an existing account master and add/edit tags.
Perform the following steps to add tags at the Account Master level:
-
Access the CoreStack application and go to Settings > Account Master.
-
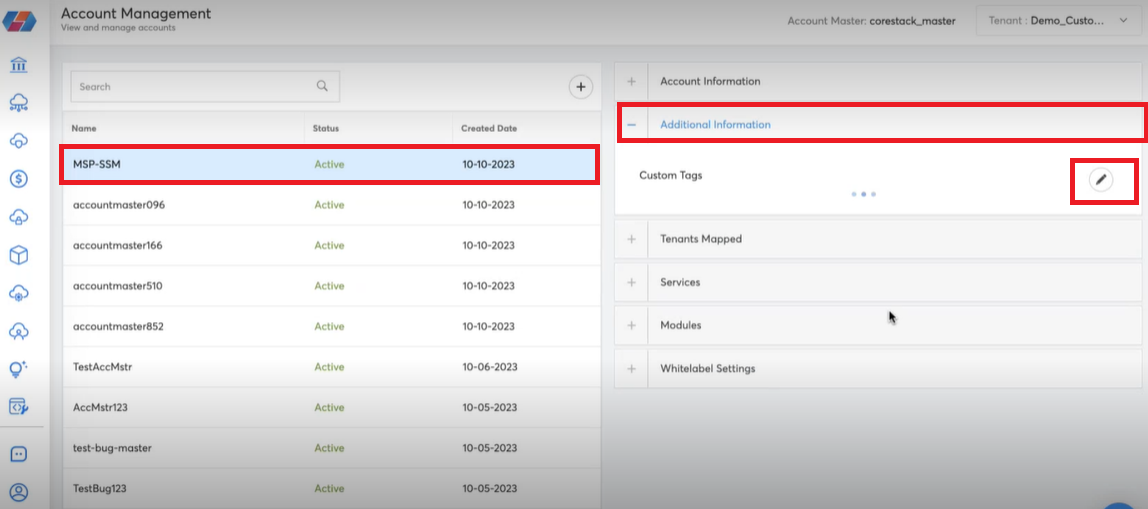
On the left pane, select an account master and on the right page, click + to expand Additional Information.
-
Click the pencil icon. The Custom Tags section displays.
-
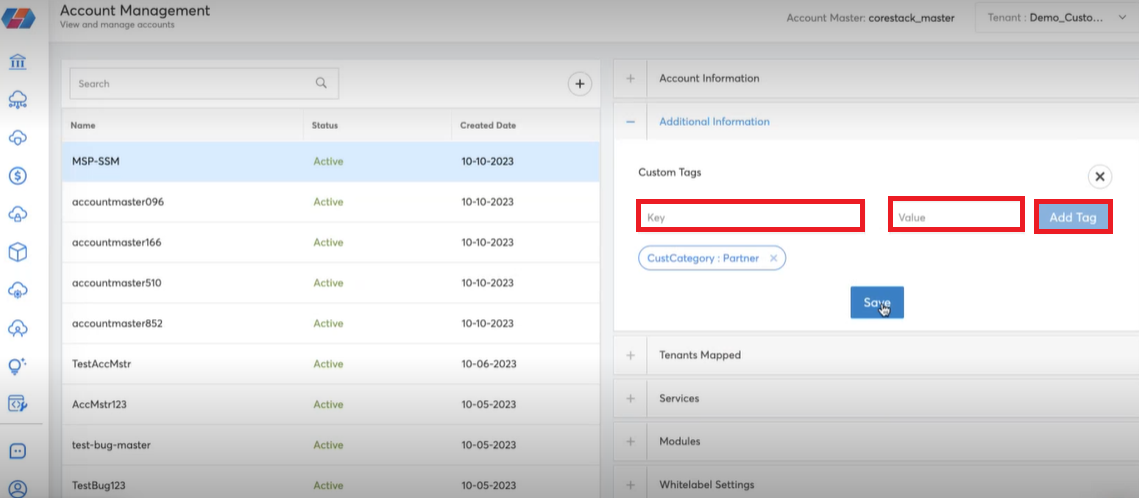
In the Key box, type a custom key and in the Value box, type the corresponding key value, and then click Add Tag.
-
Repeat the above steps to add more tags.
-
Click Save.
Adding Tags during Account Master Creation
Tags at the Account Master level can be added by Provider Admins and Product Admins while creating a new account master. Product Admins also have the ability to edit tag details.
Perform the following steps to create custom tags at the Account Master level at the time of account master creation:
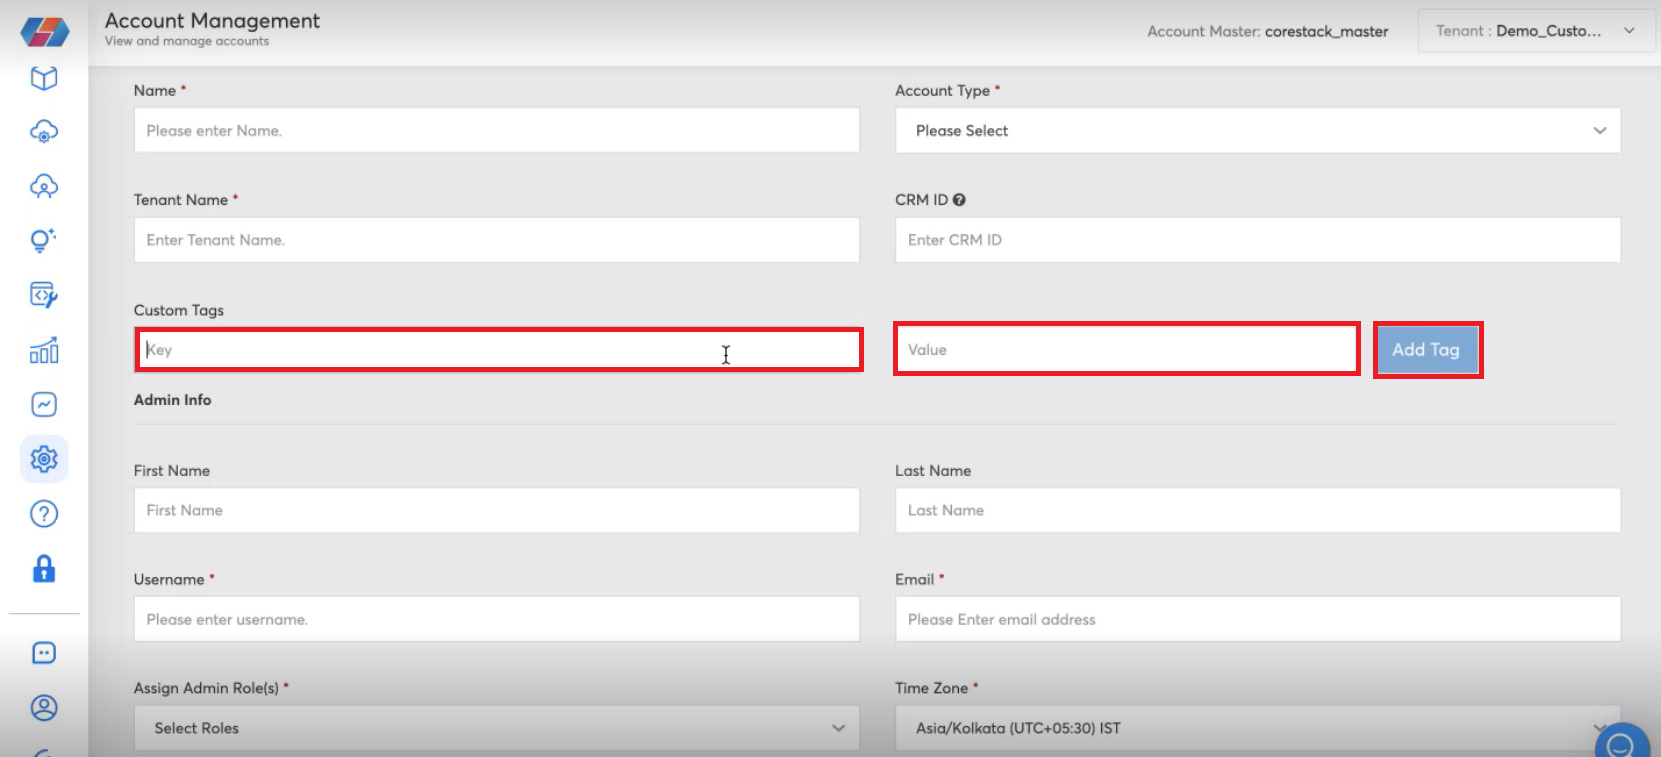
- In the CoreStack application, click Settings > Account Master/Account Hierarchy > create new account master by clicking plus symbol.
- In the Custom Tags section, in the Key box, type the key details and in the Value box, type the tag value details.
- Click Add Tag.
Creating Tags at the Tenant Level
Tags can be created at the Tenant level by Account Admins or Tenant Admins.
Perform the following steps to create custom tags at the Tenant level:
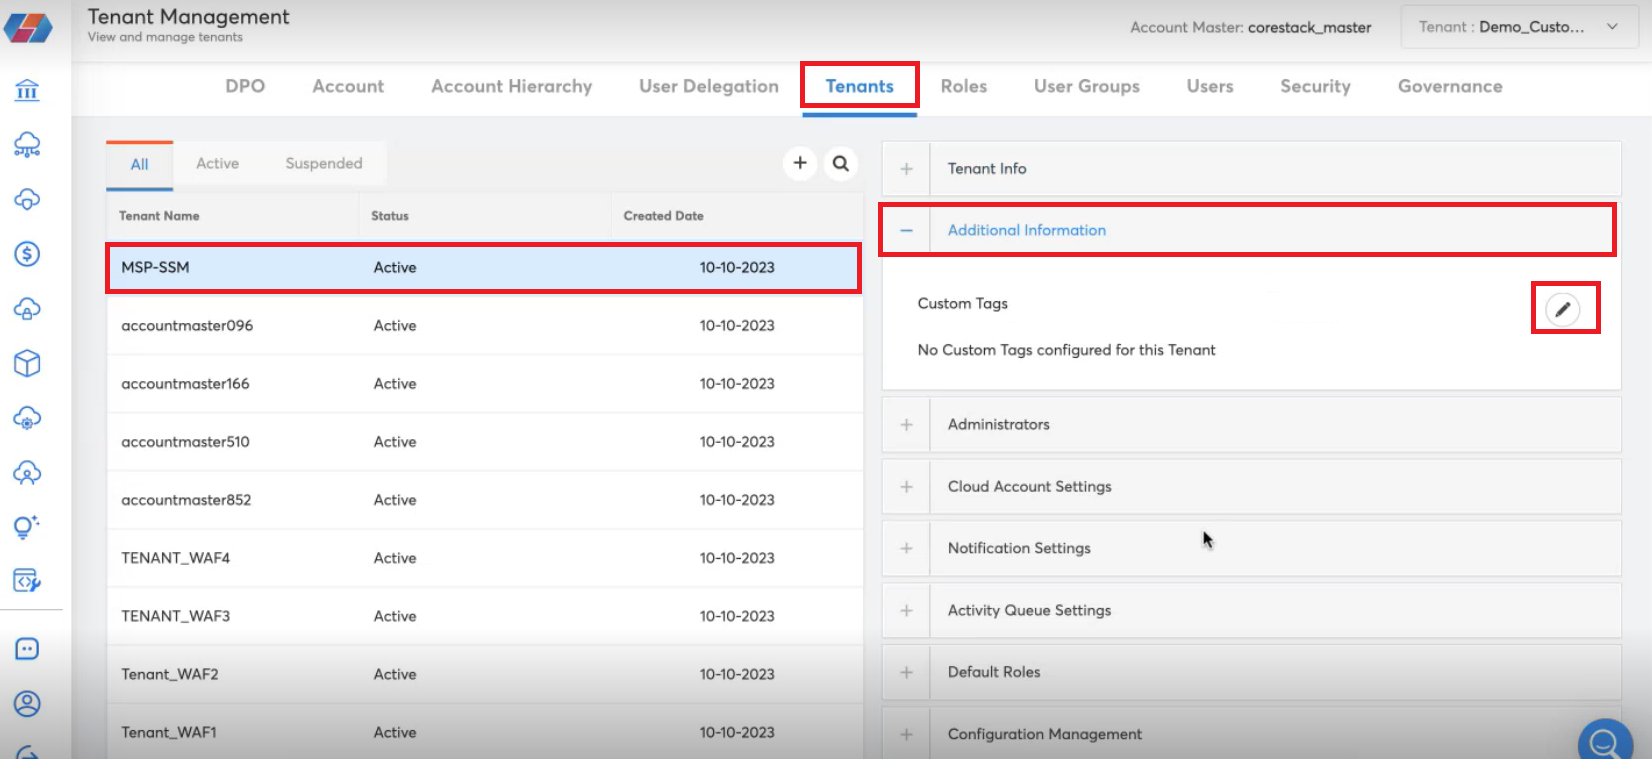
- Click Settings > Tenants.
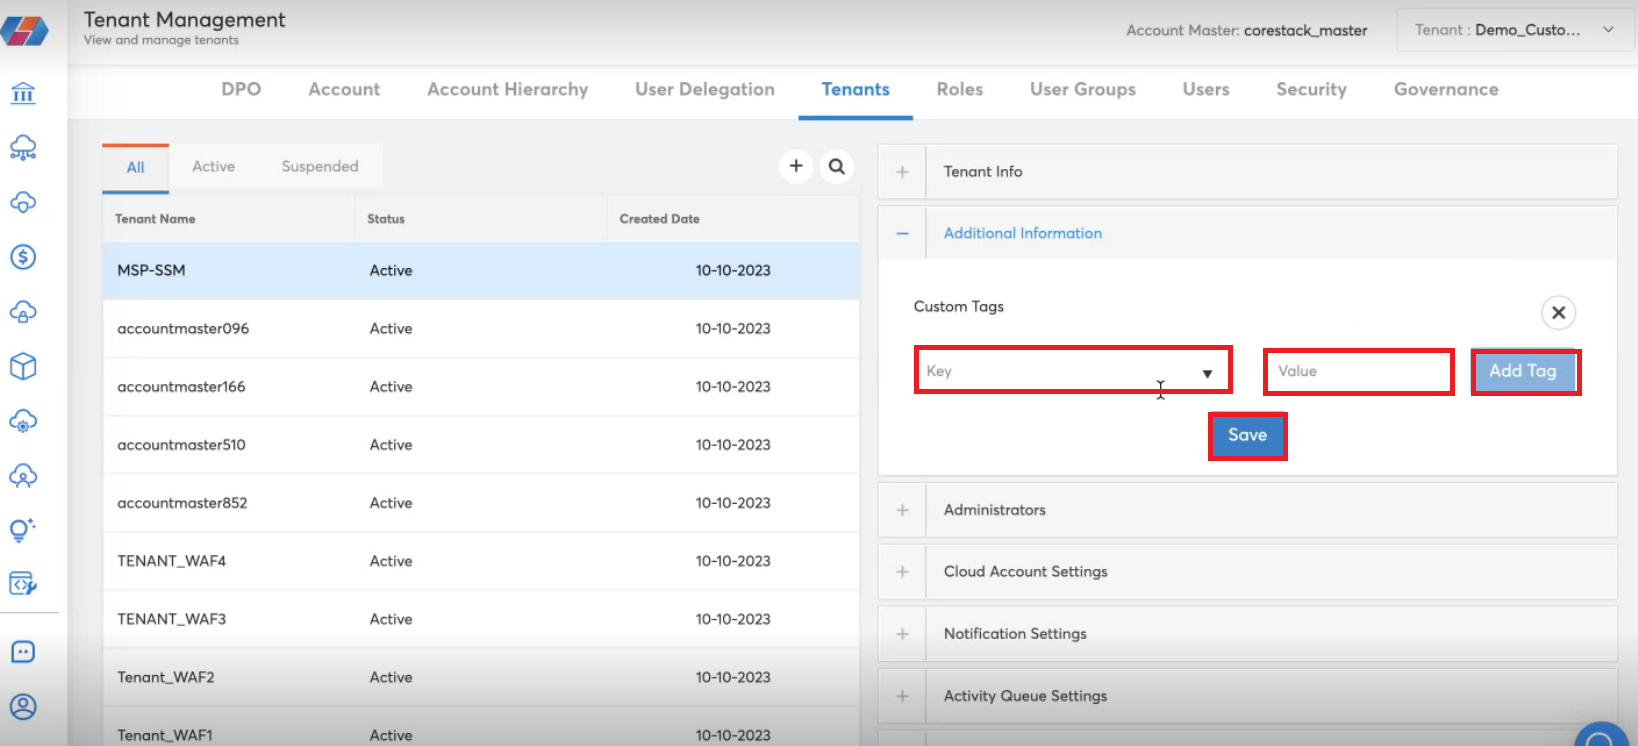
- On the left pane, select a tenant and on the right pane, click + to expand the Additional Information section.
- Click the pencil icon. The Custom Tags section displays.
- In the Key box, type a custom key or select an available key from the suggestion list, and in the Value box, type a custom value or select an available tag value from the suggestion list.
- Click Add Tag.
- To add more custom tags, repeat steps 4 and 5.
- Click Save.
Creating Tags at the Cloud Account Level
Tags can be created at the Cloud Account level by Account Admins or Tenant Admins.
Perform the following steps to create custom tags at the Cloud Account level:
-
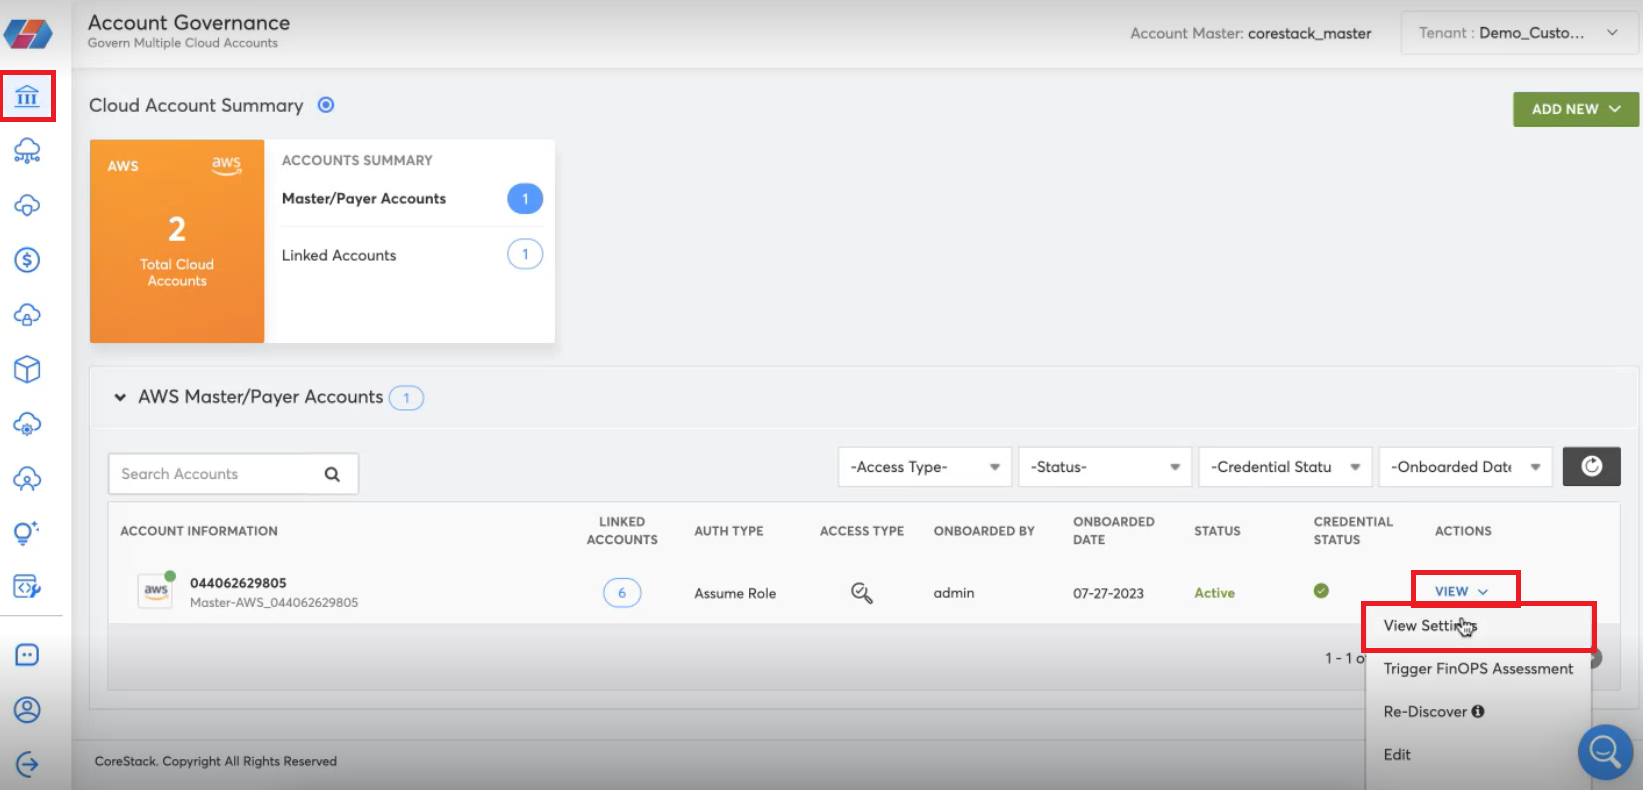
Click Governance > Account Governance.
-
For a particular cloud account, click VIEW > View Settings.
-
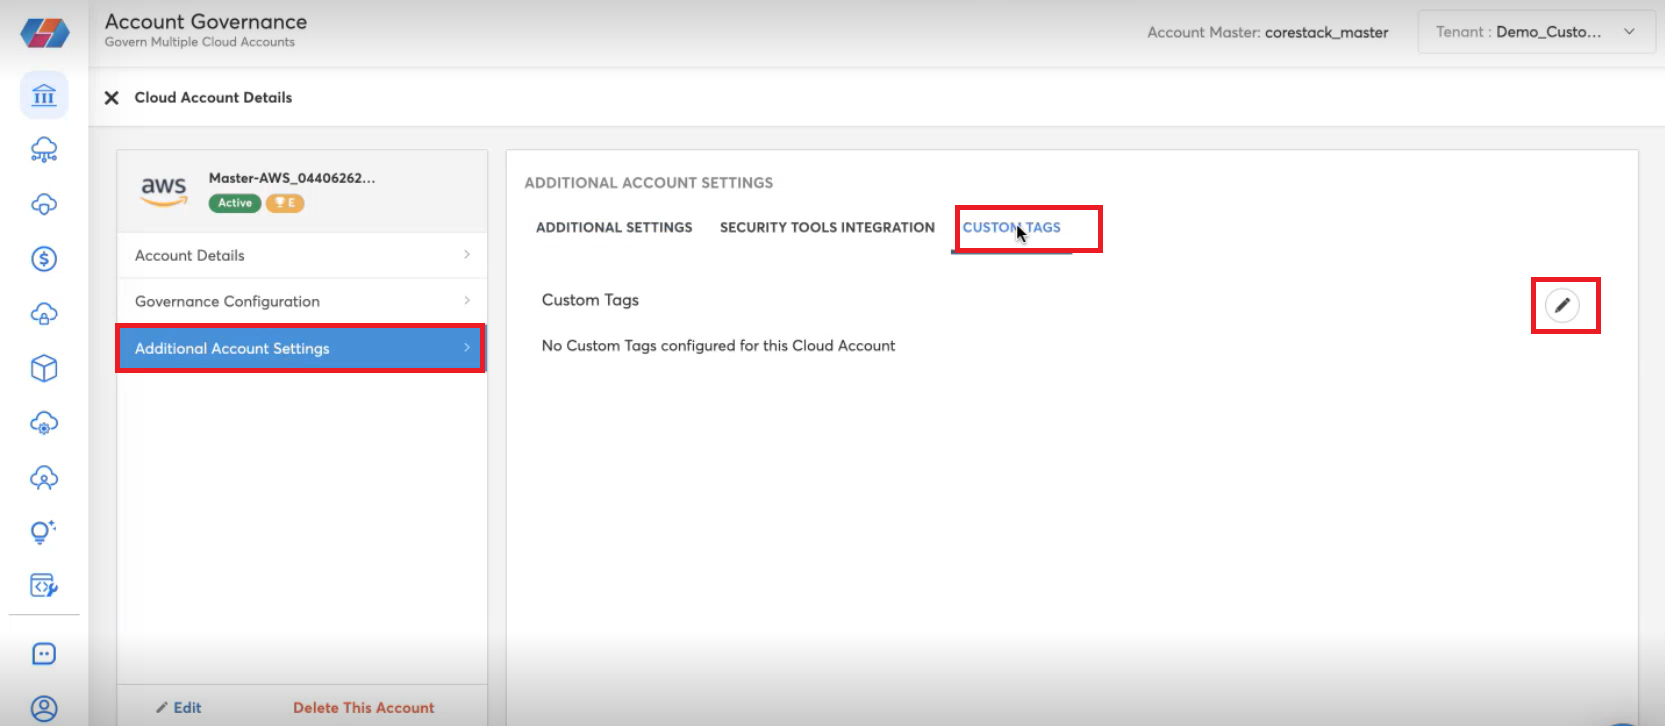
Click Additional Account Settings > CUSTOM TAGS.
-
To add a custom tag, click the pencil icon.
-
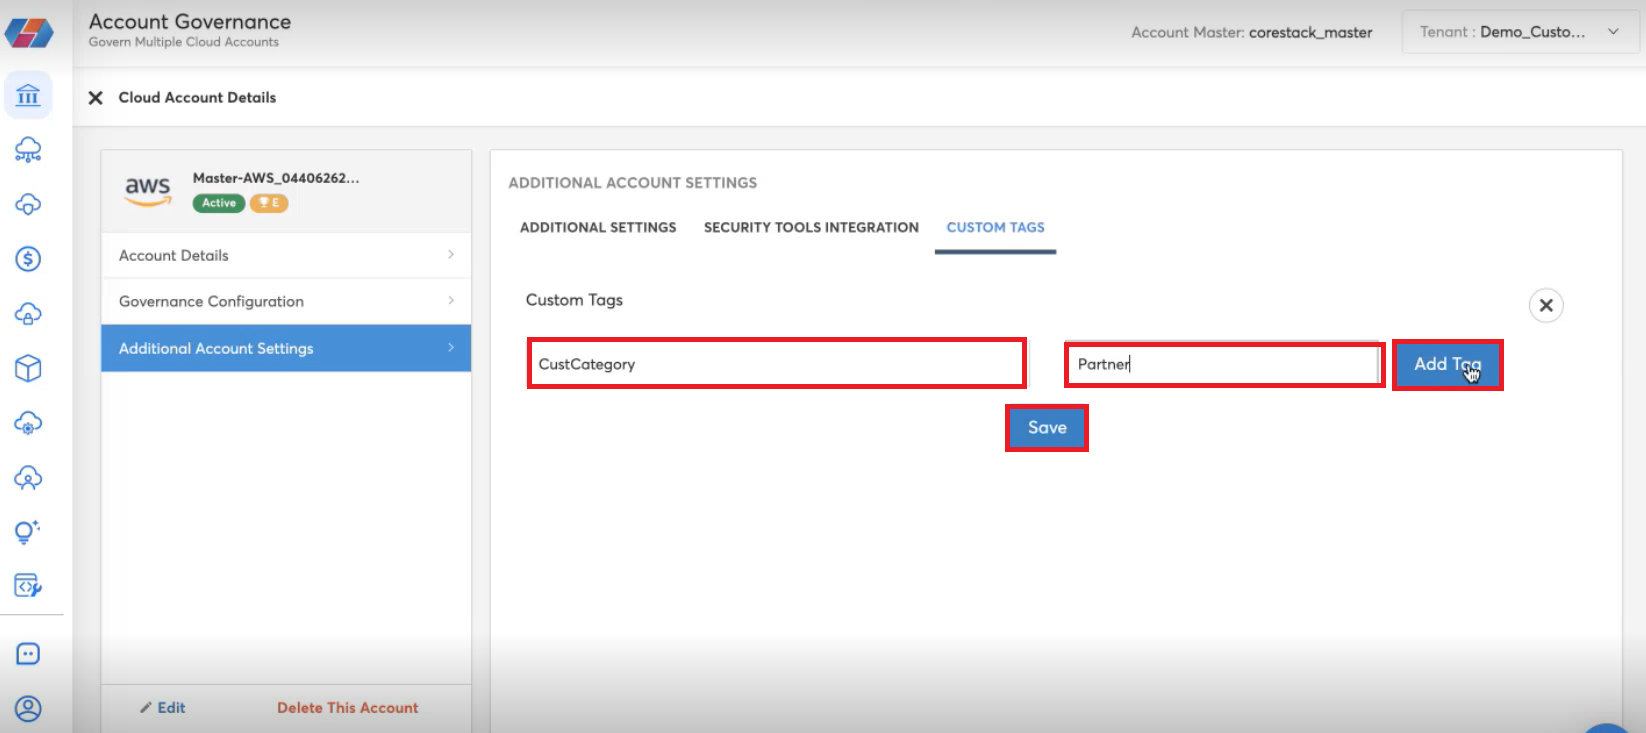
In the Key box, type a custom key or select an option from the suggestion list, and in the Value box, type a custom value or select an option from the suggestion list.
-
Click Add Tag.
-
Repeat step 5 and 6 to add more tags.
-
Click Save.
Updated 8 months ago