

Custom Frameworks
Learn how to create a custom framework to use when running Assesments against your cloud accounts/workloads.
Introduction
In the platform, users can add custom frameworks that are used to perform assessments.
Each framework has multiple questions and associated best practices. While creating a custom framework, best practices are uploaded in bulk. A user can modify or delete a custom framework anytime.
A framework is made up of a set of best practices that are identified through nature, type, classification, etc. If the nature of the best practice is Manual, then a user has to validate manually whether a best practice is implemented correctly or not. If the nature of the best practice is Automated, then it means that policies are mapped to it and the execution of policies provide clarity on the state of best practices.
Every assessment is associated with a workload and a framework and the user can go to the Assessments > Workload Assessments > View Details screen to view all the assessment details.
View Existing Frameworks
Marketplace frameworks are offered by CoreStack by default, and custom frameworks are user-defined frameworks.
Users can view marketplace frameworks and custom frameworks in two separate tabs on the Frameworks screen. Users can go to the Frameworks tab and view the list of available marketplace frameworks and they can go to Custom Frameworks tab to view the list of user-defined frameworks.
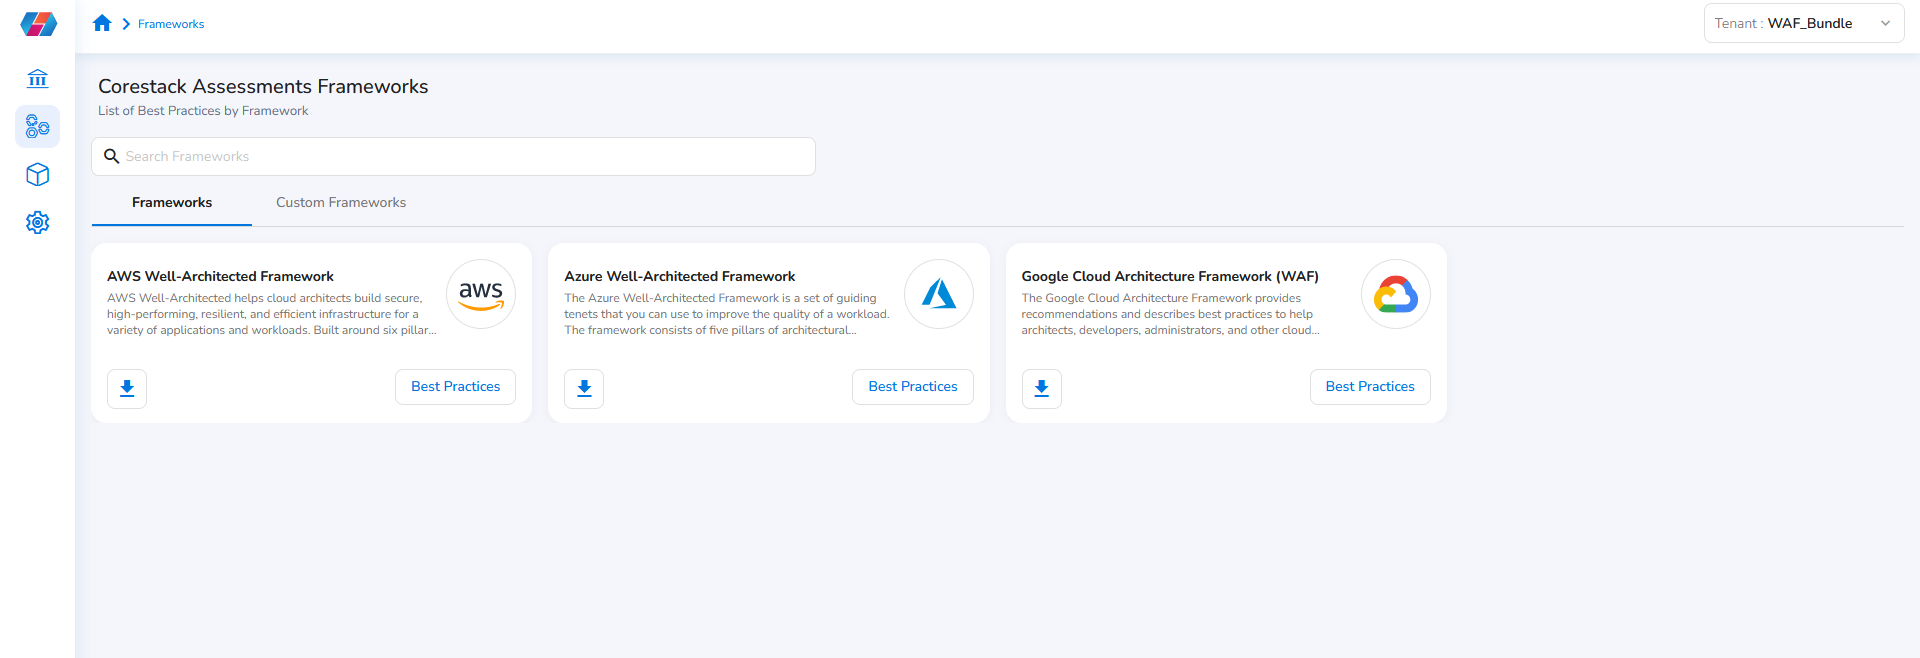
Every framework provides the option to download a copy of it and view related best practice details. Specifically, you can view the list of questions and list of best practices for each question.
Users can click the download icon to download a particular framework. A downloaded framework can be modified and then uploaded as a custom framework.
On a particular framework, you can click Best Practice to view the list of questions and the related best practices.
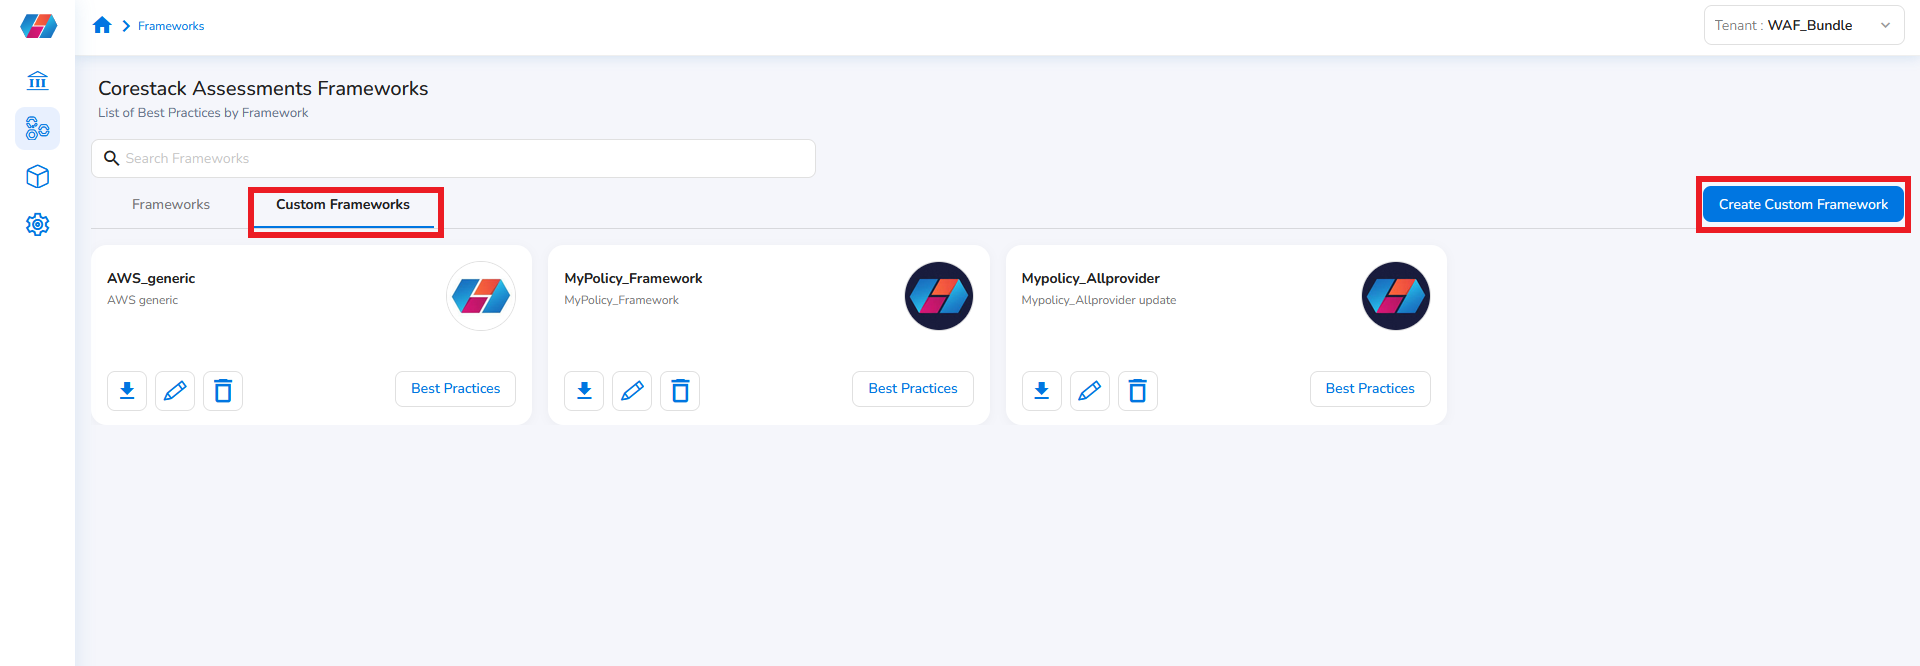
Create a New Custom Framework
Perform the following steps to create a new framework:
-
Sign in to the platform.
-
Click Assessments> Frameworks.
-
In the Tenant list, click to select a tenant.
-
Click Custom Frameworks > Create Custom Framework.
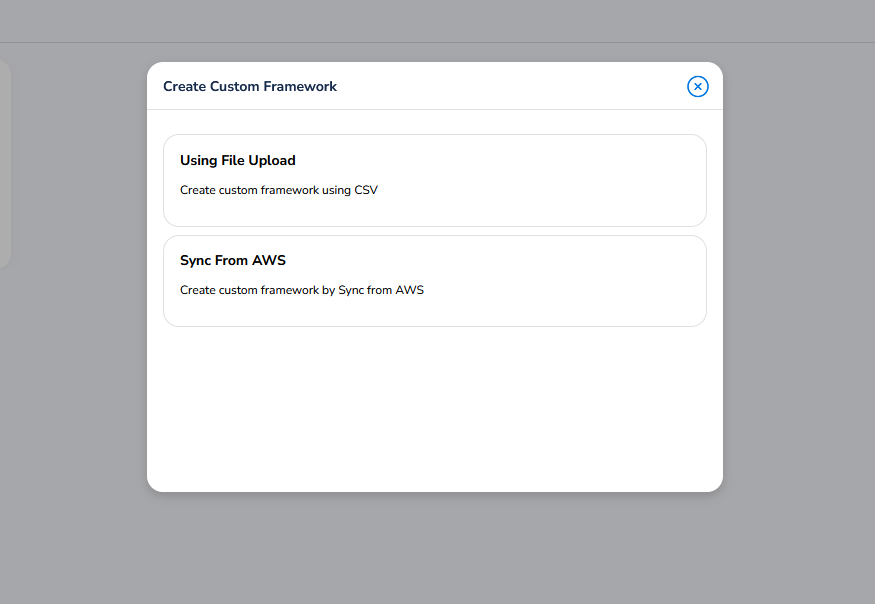
Next, a pop-up box will present you with two options for creating a custom framework:
- Using File Upload – Select this option to create a custom framework by uploading a CSV file. (This is the most common option)
- Sync From AWS – Select this option to create a custom framework by syncing it with a custom lens created in your AWS cloud account. (Only available when the cloud provider is set to AWS.)
Note:For more information on AWS custom lenses and how to create one, please refer to the official AWS documentation.
Create a Custom Framework – Using File Upload
The first and most common method of creating a custom framework is to upload a modified .CSV file containing your desired Best Practices details based on your preferences.
If you select the Using File Upload option, then you can follow the below steps to create a new custom framework.
A menu will appear along the right side of the page, with configuration options for a custom framework.
-
In the Name box, type a name for the new framework.
-
In the Description box, type a description for the framework.
-
In the Clouds list, click to select the cloud provider and then click Ok.
Users can select multiple cloud providers from AWS, Azure, and GCP. If the user selects a single cloud, then the framework is related to that particular cloud account. If the user selects multiple cloud providers, then the custom framework is applicable for the selected providers.
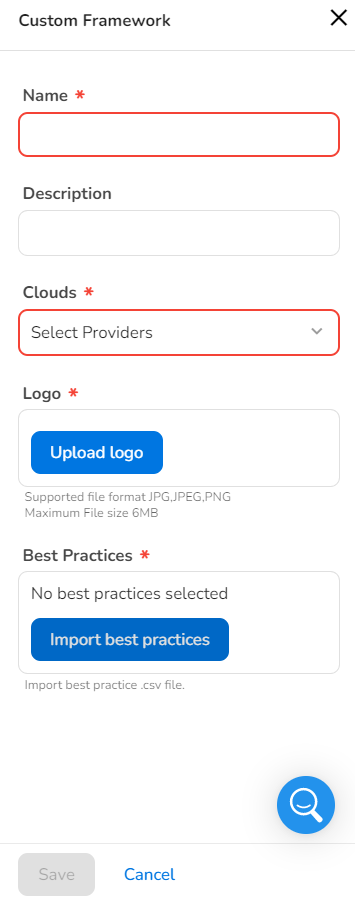
- In the Logo field, click Upload logo and perform the following:
- In the dialog box that opens, click Choose image, and then select a logo to upload it. Only .JPEG and .PNG files are the acceptable file formats that can be uploaded and the file size should not exceed 6MB.
- Click Upload logo.

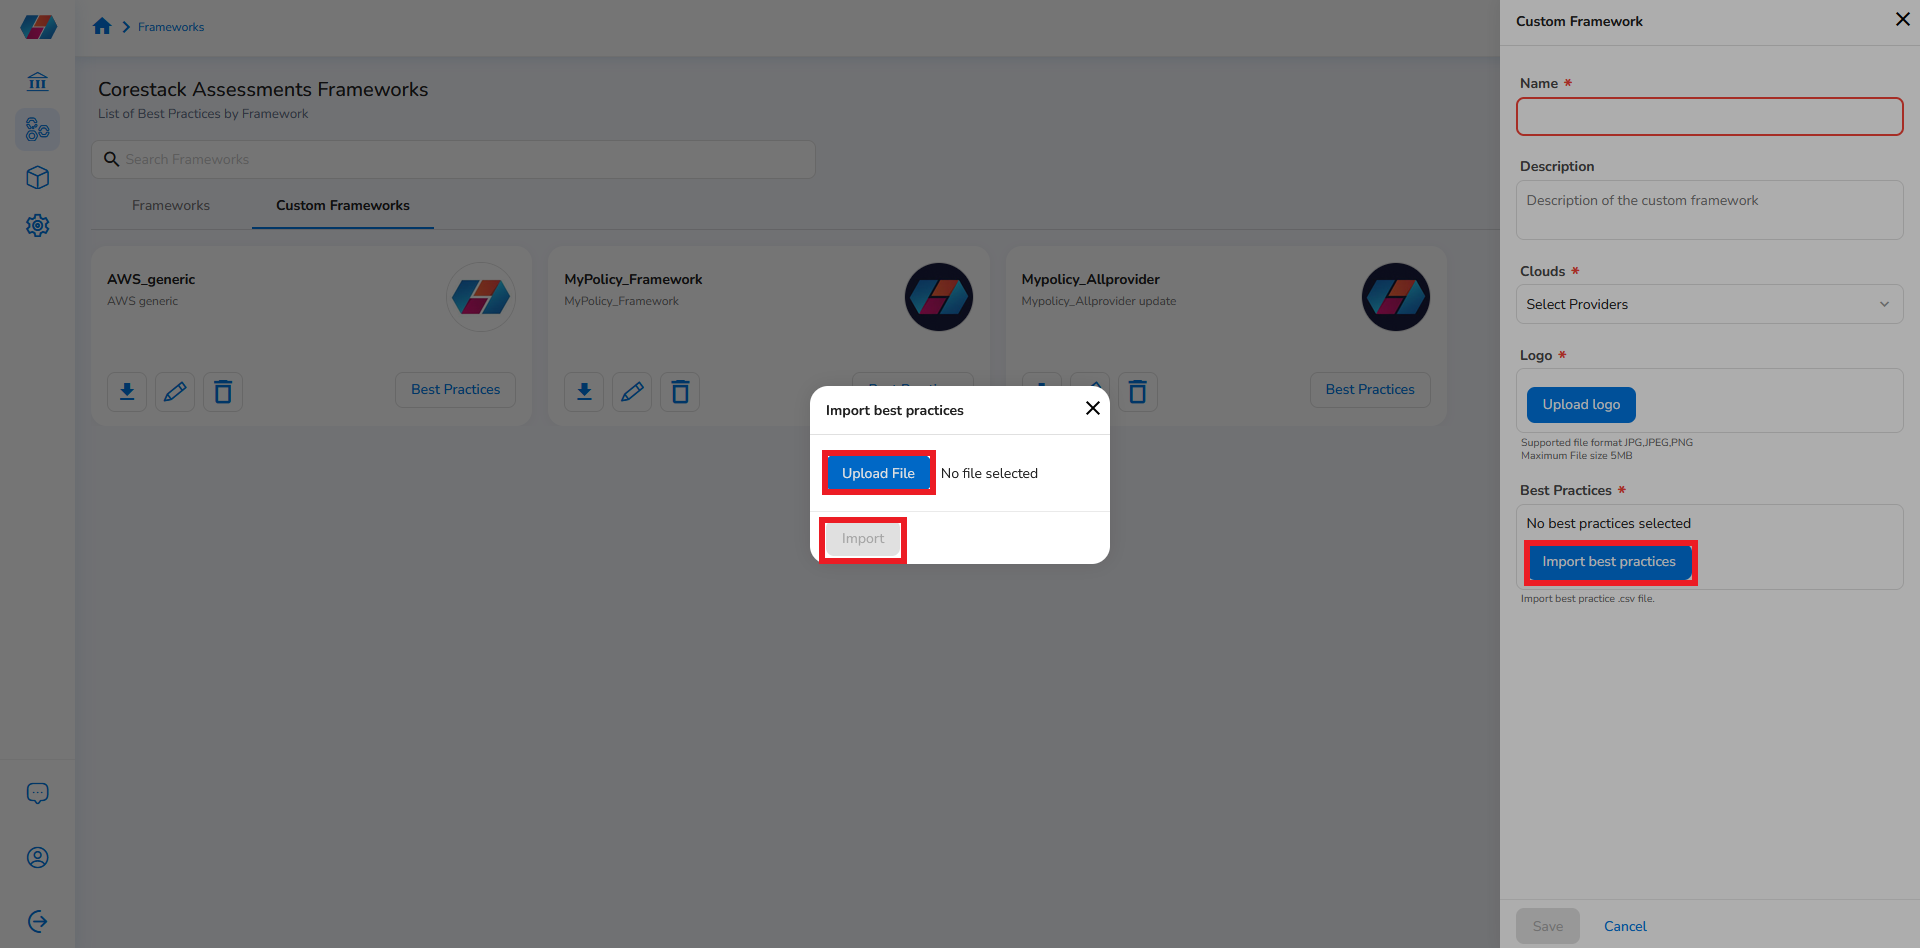
- In the Best Practices section, click Import best practices and perform the following:
- In the dialog box that opens, click Upload File and then select a file to upload it. The file to be uploaded should be in .CSV format only.
- Click Import.
Note:You can download a .CSV file from any of the existing frameworks to modify the best practices and re-use it.
The .CSV file, when uploaded, should contain details for the following fields:
- Pillar ID
- Pillar name
- Question ID
- Question
- Question description
- Best practice ID
- Best practice
- Best practice description
- Risk
- Recommendation
- Policies.
Once you’re done, click Save to save your configurations and create your custom framework.
After a new framework is saved, it is displayed on the Frameworks > Custom Frameworks screen.
Create a Custom Framework – Sync From AWS
Another option for creating a custom framework is to synchronize Best Practices and requirement details between the platform and a custom lens in your AWS cloud account.
This option enables seamless data flow between the platforms and AWS, ensuring that frameworks, assessments, and execution results are consistently updated and accurately reflected in both places.
Note:For more information on AWS custom lenses and how to create one, please refer to the official AWS documentation.
Additionally, if you want to use this sync option to create a custom framework by using a custom lens in AWS, please ensure the following required permissions are required for the platform:
"wellarchitected:ImportLens",
"wellarchitected:CreateLensVersion",
"wellarchitected:DeleteLens"
"wellarchitected:ListLenses",
"wellarchitected:ExportLens",
"wellarchitected:GetLens"
If you select the Sync From AWS option, then you can follow the below steps to create a new custom framework.
A menu will appear along the right side of the page, with configuration options for a custom framework by syncing with AWS.
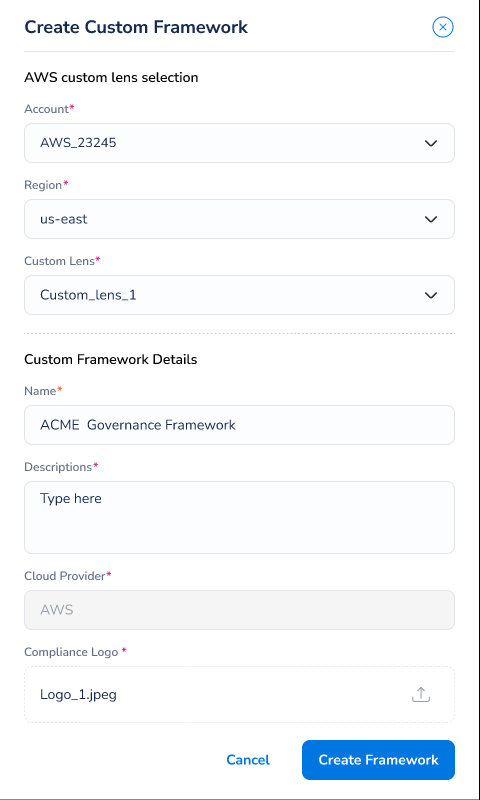
First, you’ll need to complete the Custom Lens Selection section:
- In the Account drop-down menu, select the onboarded cloud account you want to use for this framework.
- In the Region drop-down menu, select the Region in AWS you want to use.
- In the Custom Lens drop-down menu, select the custom lens in AWS you want to use to synchronize between AWS and the platform.
Next, you’ll need to complete the Custom Framework Details section:
- In the Name field, provide a name for the custom framework.
- In the Description field, provide a short description for this custom framework.
- In the Cloud Provider field, AWS should automatically be selected.
- In the Compliance Logo field, click to upload an image file of your choice (refer to the ‘Using File Upload’ steps above for image guidelines).
Once you’re done, click Save to save your configurations and create your custom framework.
After a new framework is saved, it is displayed on the Frameworks > Custom Frameworks screen.
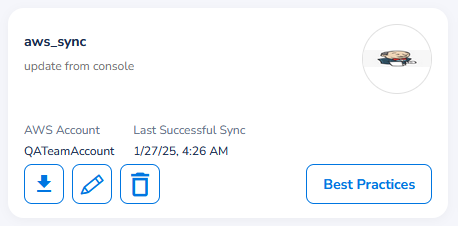
For custom frameworks with AWS Sync enabled, you will also be able to see the AWS cloud account name and the last successful sync timestamp on the card displayed on the Frameworks page.
Edit or Delete a Custom Framework
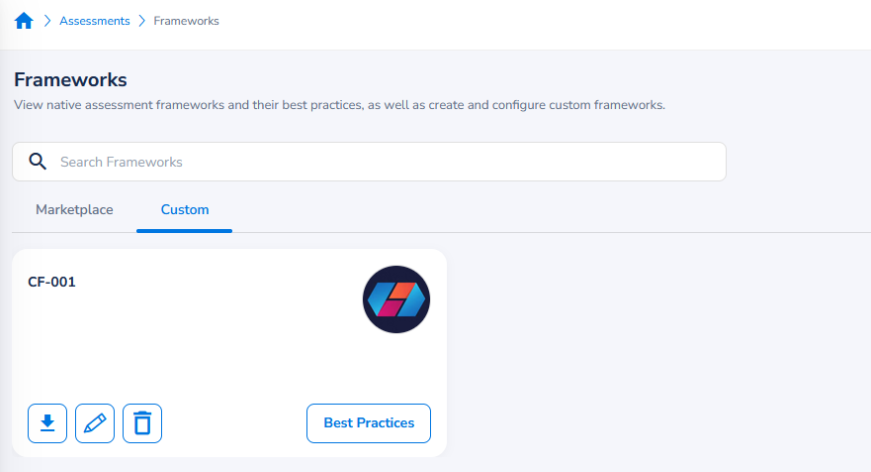
You can also edit or delete custom frameworks from the Custom tab on the Frameworks dashboard view.
To edit or delete a custom framework, navigate to the card for the custom framework and select from the options below:
- Select the pencil icon to edit the name, description, logo, or AWS sync details for a custom framework.
- Select the trash icon to delete the custom framework.
Note:Marketplace frameworks cannot be modified or deleted.
Selecting the pencil icon will open the custom framework editing view, where you can modify the name, description, logo, and AWS sync options.
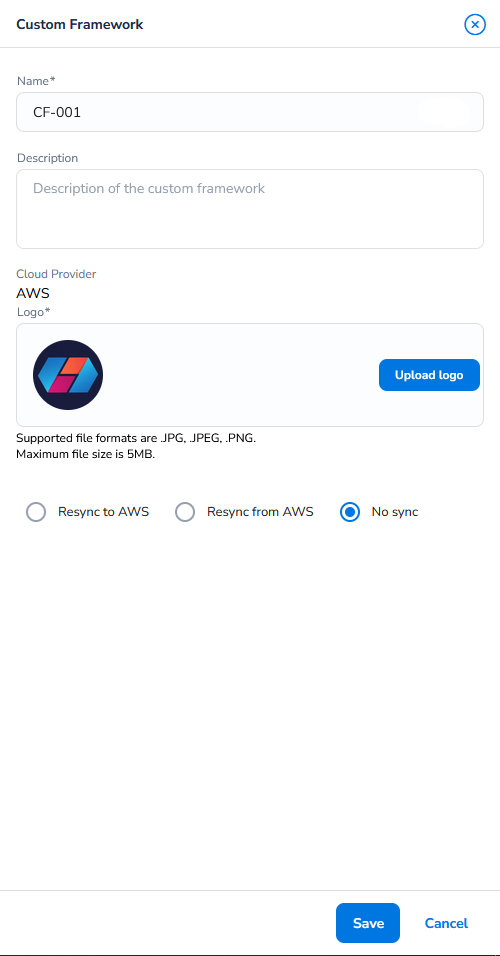
Editing AWS Sync Options
When editing a custom framework, you can select from the following AWS sync options:
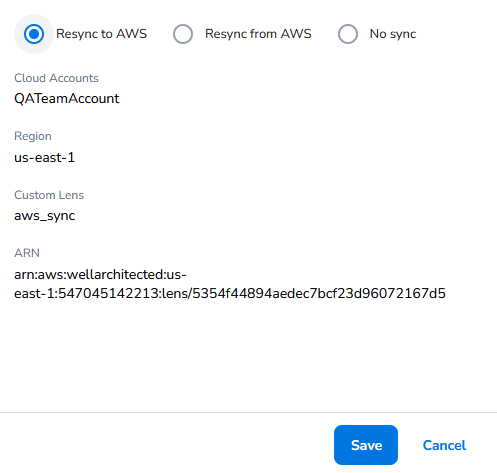
- Resync to AWS – Select this option to re-initiate a sync from the platform to your AWS cloud account, applying the configurations from the custom framework to your custom lens in AWS.
- Resync from AWS – Select this option to re-initiate a sync from your AWS cloud account to the platform, applying the configurations from your custom lens in AWS to the custom framework in the platform.
- No Sync – Select this option to stop syncing configuration changes between the platform and your AWS custom lens.
Note: Selecting either of the AWS Resync options will display the details of your cloud account, region, custom lens, and ARN ID.
Select Save to save and apply any changes, or select Cancel to cancel your edits and close the window.
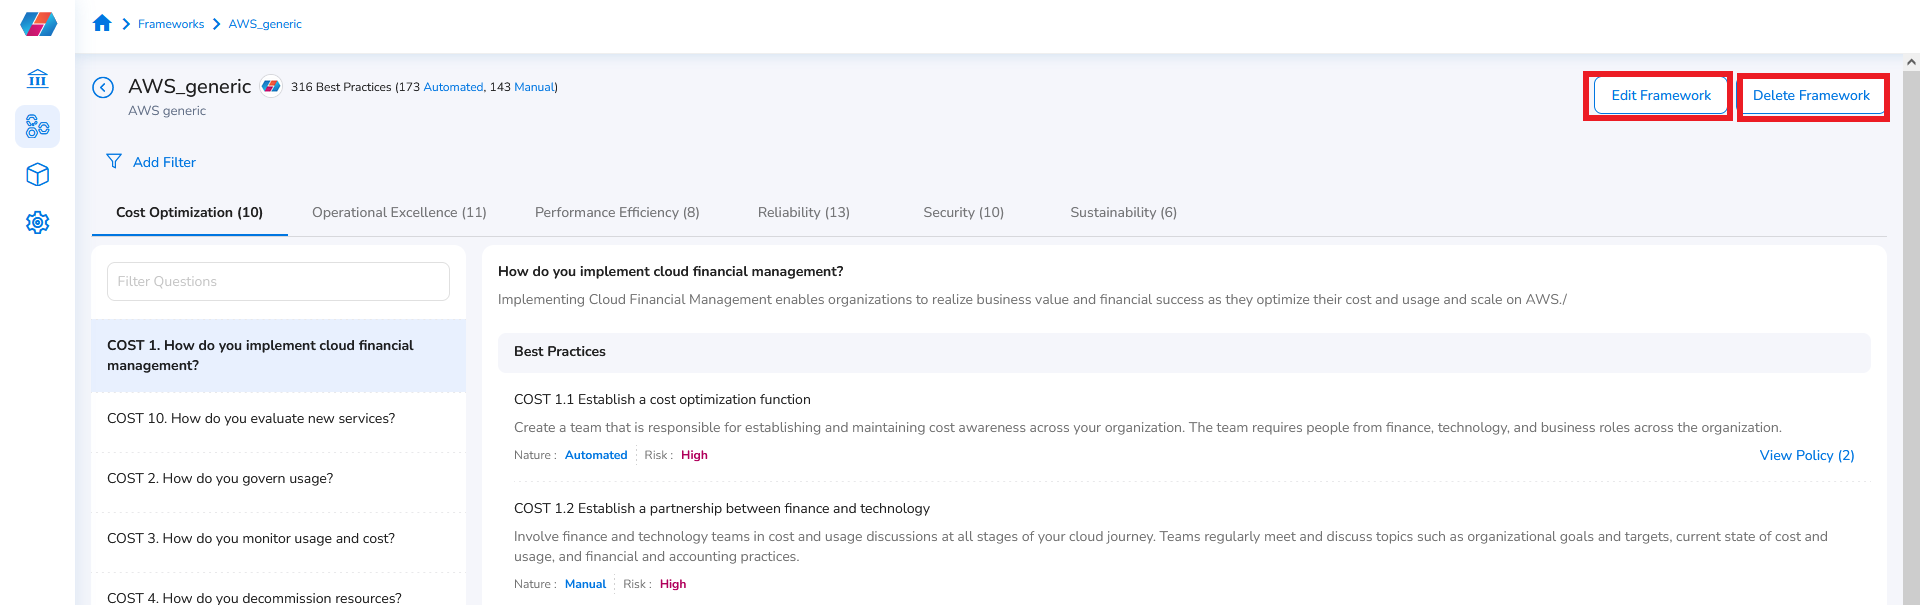
Editing and Deleting Custom Frameworks from Best Practices
Users can also edit or delete custom frameworks from the Best Practices view by selecting from the buttons available in the upper right corner of the page view.
Note:Marketplace frameworks cannot be modified or deleted.
Updated 9 months ago