

Onboarding for Azure Subscriptions (PayG, CSP Indirect)
Please read first:Before proceeding with onboarding for this type of cloud account, you must ensure the required pre-onboarding steps have been completed first.
For more information on what these prerequisites are and how to address them, please refer to the Pre-Onboarding for Azure Subscriptions user guide.
Introduction
An Azure Subscription is a cloud account that provides access to Azure services and resources. It acts as a container for resources such as virtual machines, databases, and storage.
The account onboarding process follows a step-by-step flow with five steps, described in the list below. Users must complete every step by filling in the appropriate details so that they can proceed to the next step.
The onboarding flow for Azure cloud accounts covers the following main steps:
- Azure Cloud Account Type: Select the type of Azure cloud account that needs to be onboarded.
- Prerequisites: Select the cloud account scope, access type, and product(s).
- Add & Validate Credentials: Select the authentication type and provide the required Azure account credentials.
- Basic Settings: Select and/or input the basic settings for the cloud account.
- Advanced Settings (optional): This optional step allows users to add tags and set up any required governance configurations. Account governance configurations can also be done after the onboarding steps.
As users add all necessary details for each step in the onboarding flow, it will be marked as completed and no longer appears greyed out in the left sidebar.
Detailed onboarding steps are explained in the sections below.
Note:Before starting the onboarding process on the platform, make sure that you have followed and completed all the prerequisite steps in the Azure cloud portal. Refer to the PRE-ONBOARDING user guides for more information on how to complete these steps.
Subscription Onboarding Steps
Perform the following steps to onboard an Azure Subscription Account:
Navigating to the Onboard Accounts Page
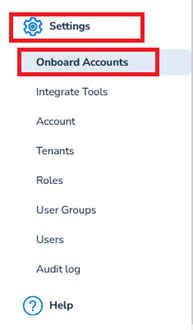
Log in to the platform and on the left menu bar, go to Settings > Onboard Accounts.
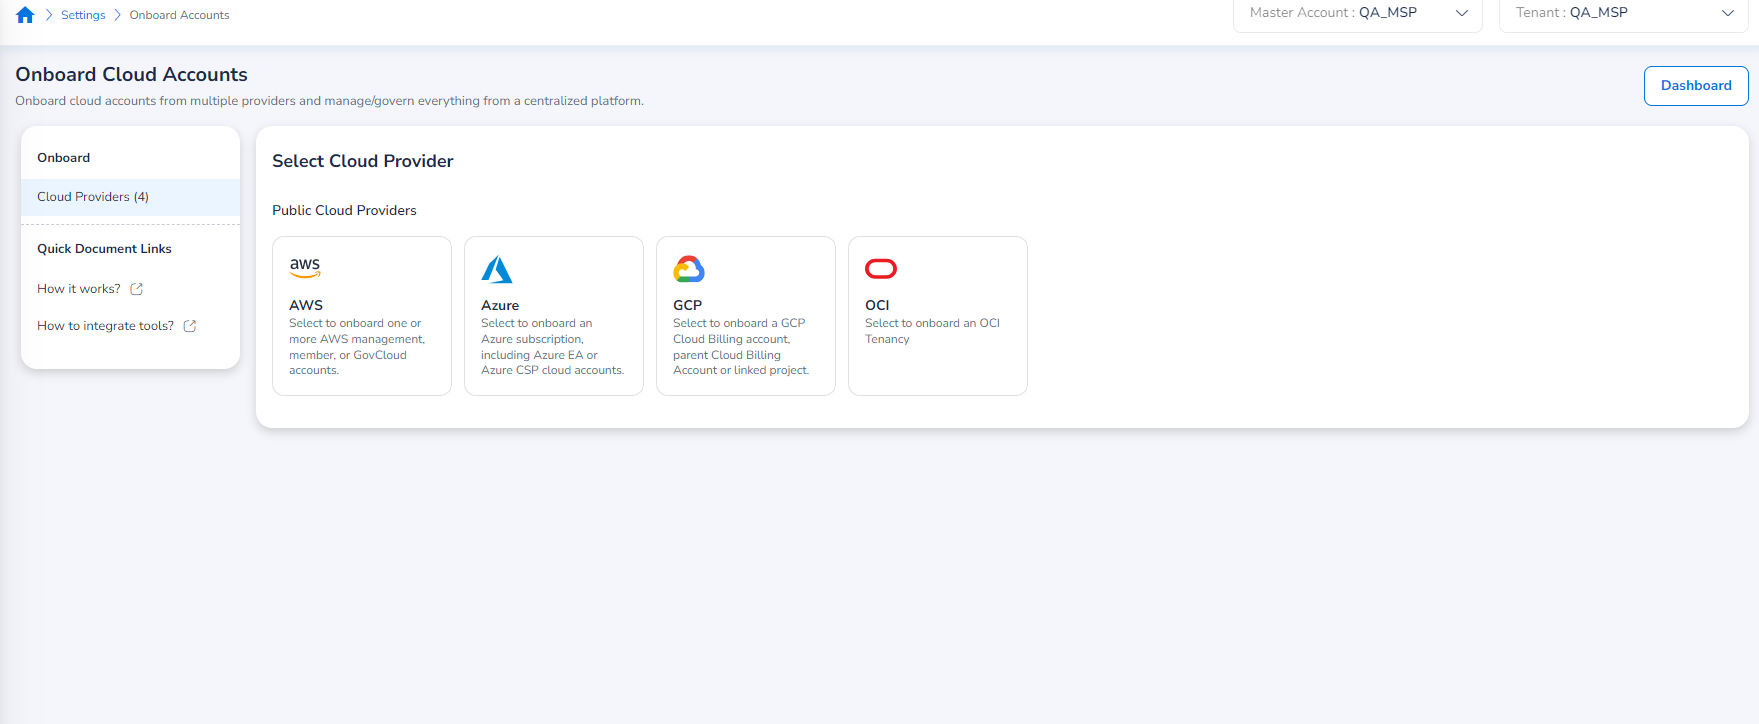
The Onboard Cloud Accounts starting page will appear. Here, users can select which cloud provider to onboard a new account for based on the available options.
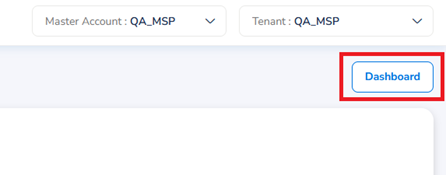
Note:Users can also use the Dashboard button in the upper right corner of the page to go directly to the Account Governance Dashboard (Cloud Accounts) as a shortcut.
Select Onboarding Option
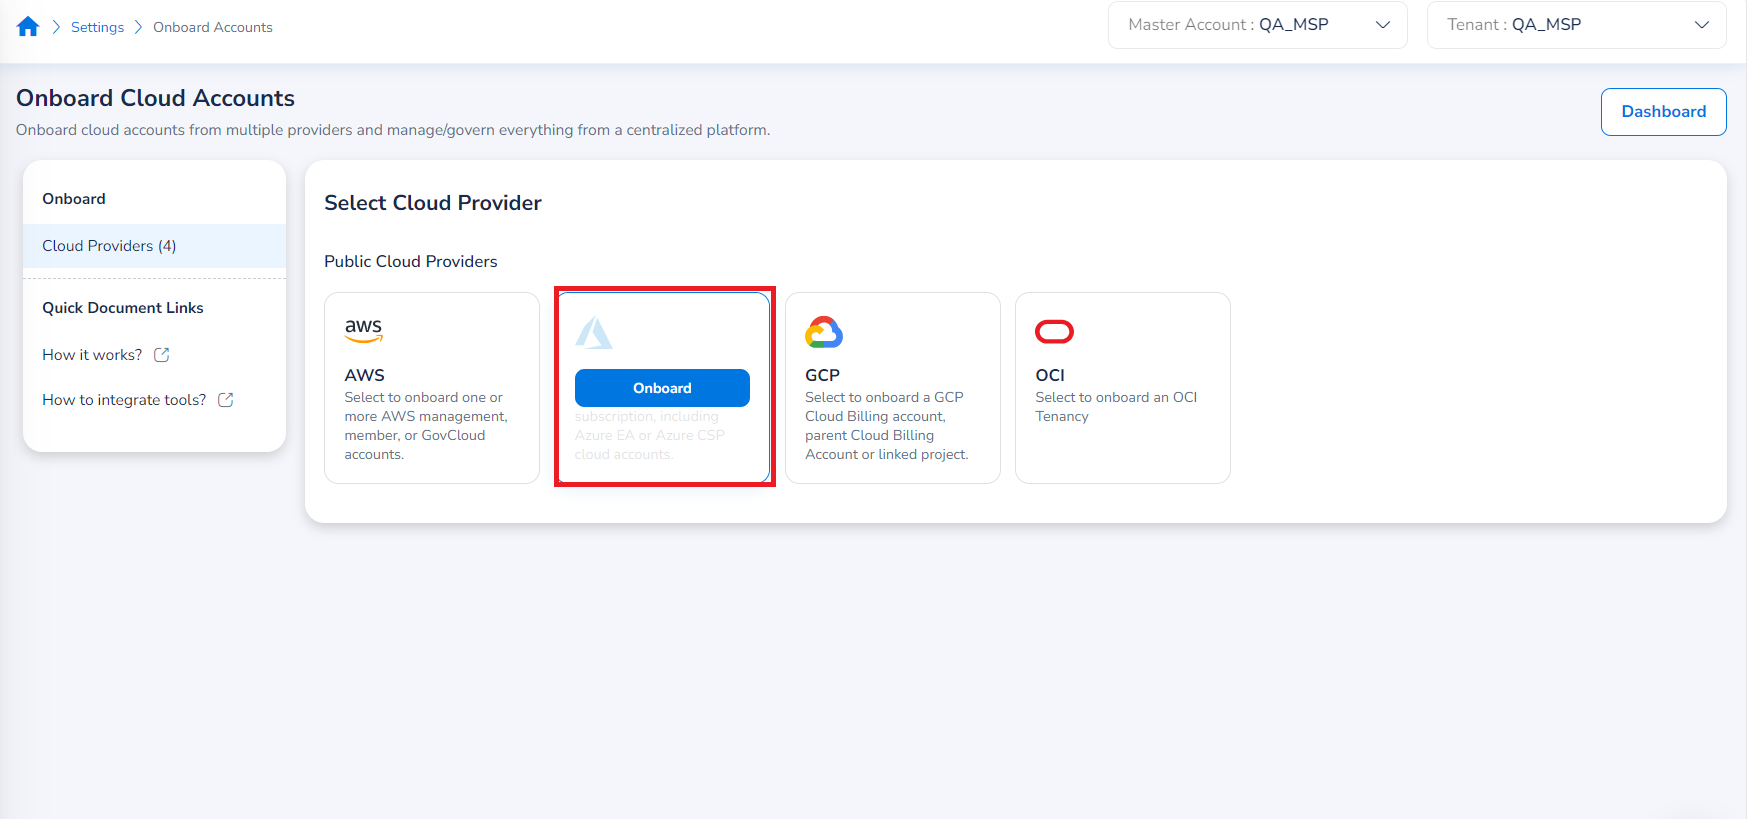
To start the onboarding process, hover over the Azure option under Public Cloud Providers, and an Onboard button should appear. Select Onboard to proceed.
Select Cloud Account and Environment
Once you’ve selected the Azure option, the page for the first step of the onboarding workflow should appear – Azure Cloud Account Type. In this step, users must select the specific Azure cloud account type to onboard, along with the Azure environment type (if applicable).
You can select one of the following cloud account types to be onboarded:
- Subscription – Select to onboard an Azure Subscription. Best suited for enabling visibility and governance for a single cloud account.
- Enterprise Agreement (EA Application) – Select this option to onboard an Enterprise Agreement (EA) cloud account, which is typically used to manage multiple Azure Subscriptions and access reports.
- Microsoft Partner Agreement (CSP Direct) – Select this option to onboard an Azure Cloud Solution Provider (CSP) Direct cloud account.
Next, you can select one of the following environments to onboard a cloud account from:
- Azure Global – Select this option to onboard cloud accounts from the Azure public cloud environment.
- Azure Government – Select this option to onboard an Azure account from Azure Government cloud.
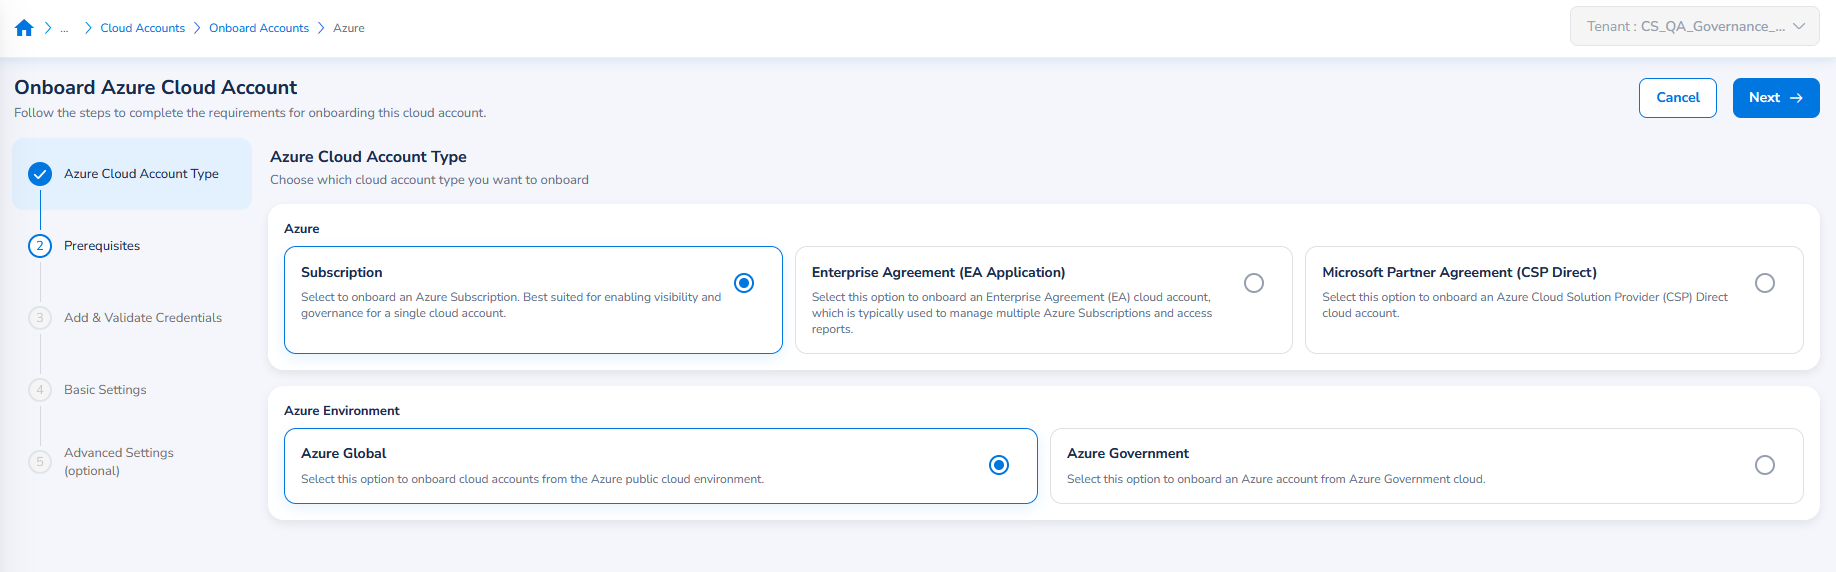
In this case, select Subscription for the cloud account type, then either Azure Global or Azure Government, based on your needs.
Click Next. The Prerequisites section appears.
Attention:If you want to onboard an Azure CSP Indirect or Azure Sponsorship cloud account, then you must select the Subscription option here on this page.
There will be an option to select the subscription type (i.e. CSP Indirect or Sponsorship) later, in the Basic Settings section.
Prerequisites
In the Select Cloud Account Scope field, select one of the following options:
- Tenant: This scope allows the cloud account to be available only in the tenant it is onboarded to. This option is selected by default.
- Account: This scope allows the cloud account to be available in all tenants.
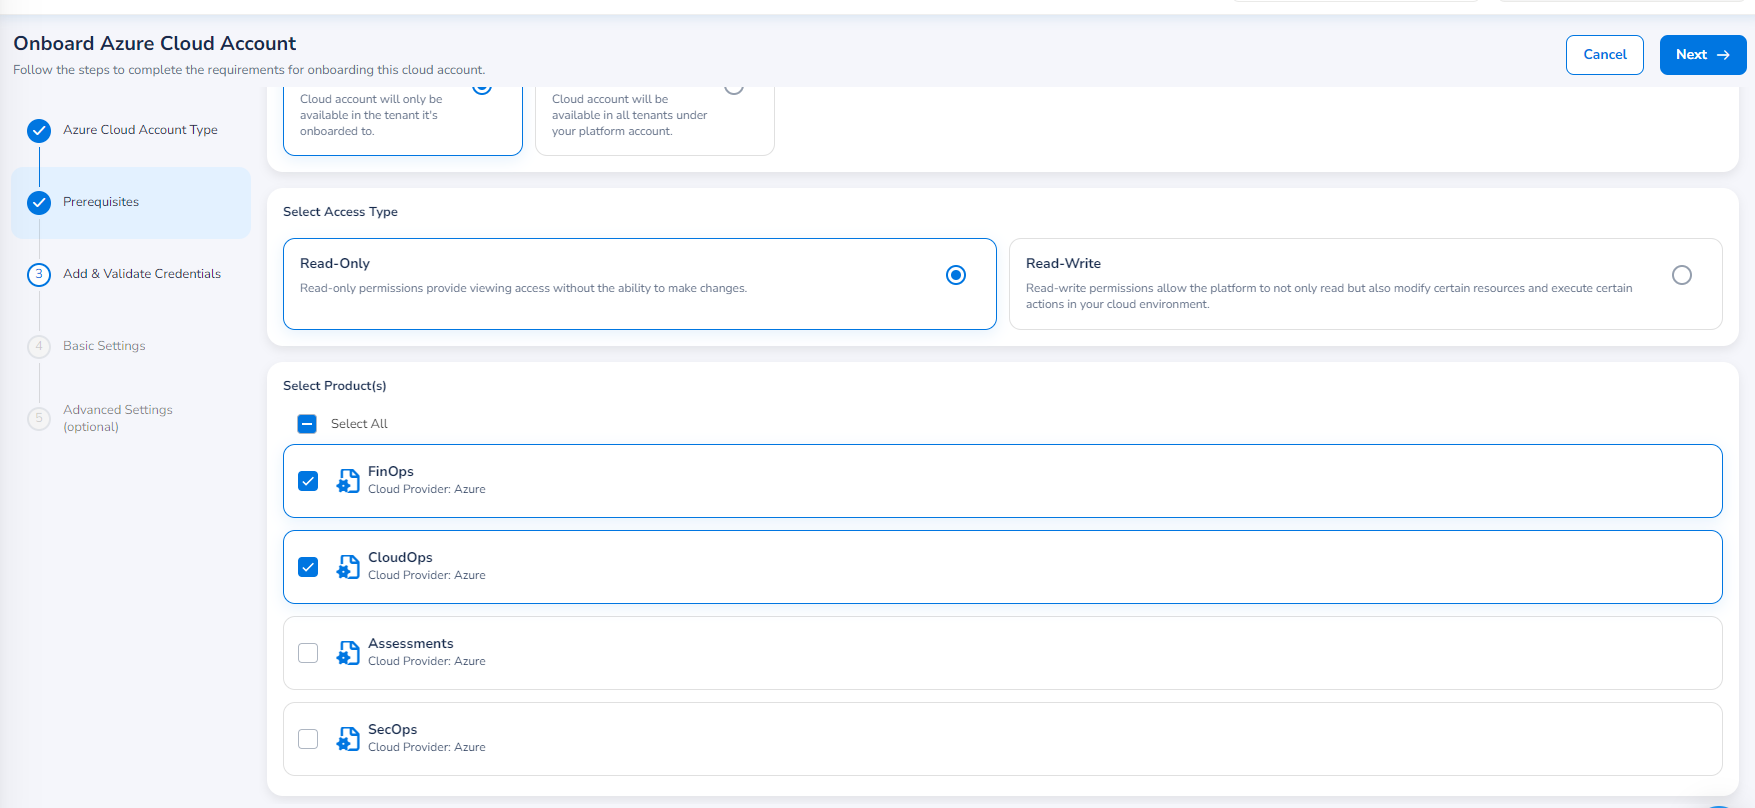
In the Select Access Type field, select one of the following options:
- Read-Only: This option provides viewing access without the ability to make changes.
- Read-Write: This option allows the users to view, modify, and manage resources.

In the Select Product(s) field, select the products that will be accessible through this account. The available products are shown based on the product bundle that was chosen during the account master creation. For example, the Governance product bundle includes: FinOps, SecOps, and CloudOps.
Click Next. The Add & Validate Credentials section appears.
Add & Validate Credentials
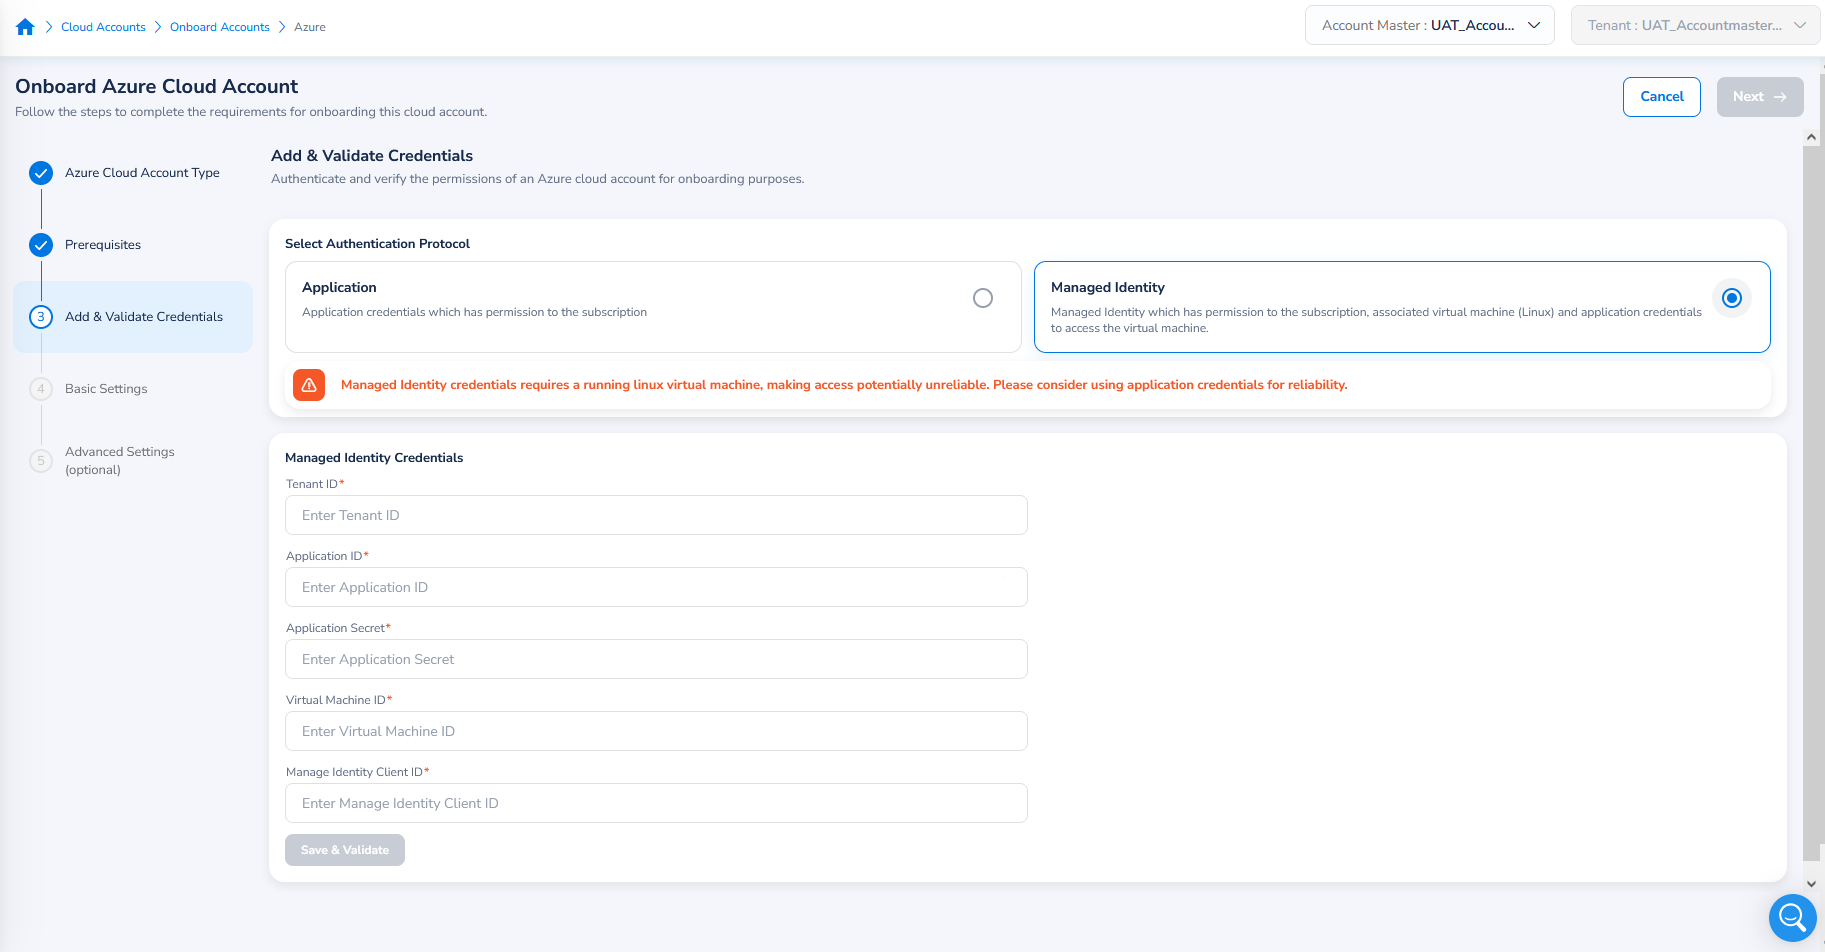
In the Add & Validate Credentials field, you will have two options to select from:
- Application -- Select this option to provide the platform with access to Azure Subscriptions available in your Azure tenant (most common scenario).
- Managed Identity -- Select this option to provide the platform with access only to Azure Subscriptions that are managed by a Managed Identity (UAMI).
Note:Using Managed Identity credentials requires a running Linux virtual machine, making access potentially unreliable. Please consider using Application credentials for a more reliable option.
Managed Identity (UAMI) Access Option
If you select the Managed Identity access option, you'll need to fill in the following fields related to the credentials:
- In the Tenant ID box, type the tenant ID.
- In the Application ID box, type the application ID.
- In the Application Secret box, type the application secret code.
- In the Virtual Machine ID box, type the ID for the virtual machine which is associated to the Managed Identity with access to your target Azure Subscription.
- (e.g. /subscriptions/{subscriptionId}/resourceGroups/{resourceGroupName}/providers/Microsoft.Compute/virtualMachines/{vmName})
- In the Manage Identity Client ID box, type the client ID associated with your Managed Identity (i.e. UAMI).
- Click Save & Validate.
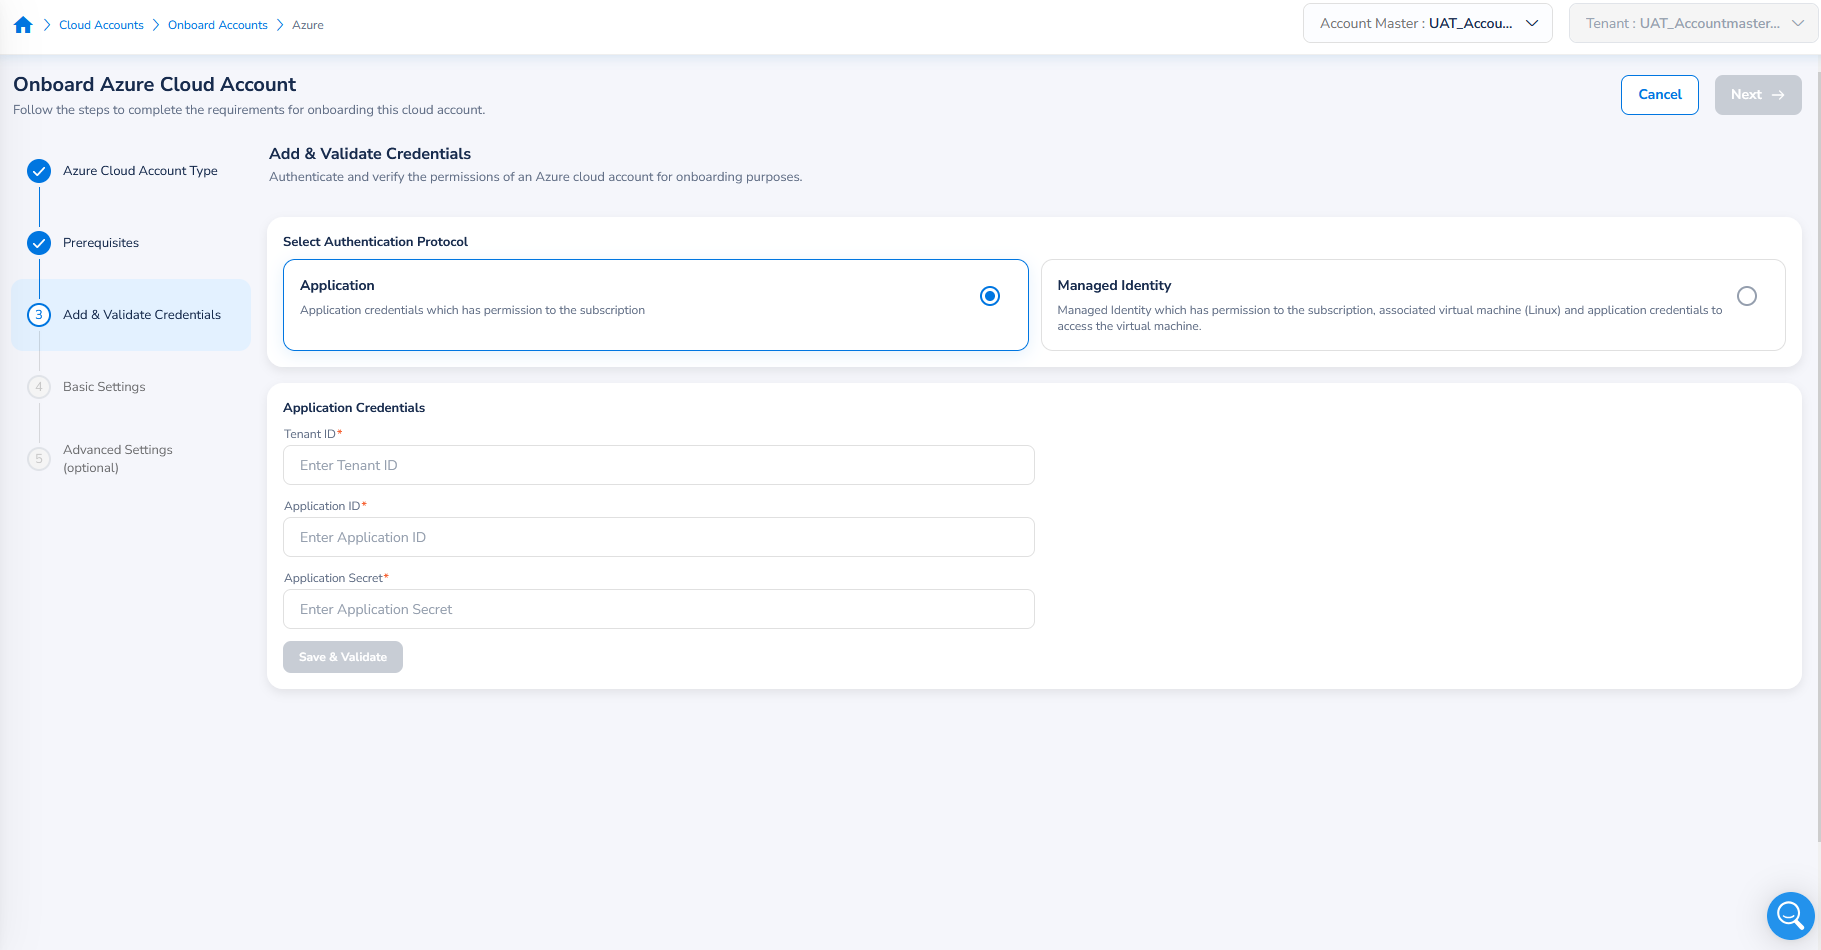
Application Access Option
If you select the Application access option, you'll need to fill in the following fields related to the credentials:
- In the Tenant ID box, type the tenant ID.
- In the Application ID box, type the application ID.
- In the Application Secret box, type the application secret code.
- Click Save & Validate.
Validation
If the validation is successful, then a success message will be displayed.
If the validation fails, then an error message will be displayed along with an option for View Log. You can click View Log to view the error details and then click Re-Validate to retry the validation.
Note:After the completion of successful validation, the Save & Validate button turns to Re-Validate. You can click Re-Validate to validate the account again.
Click Next. The Basic Settings section appears.
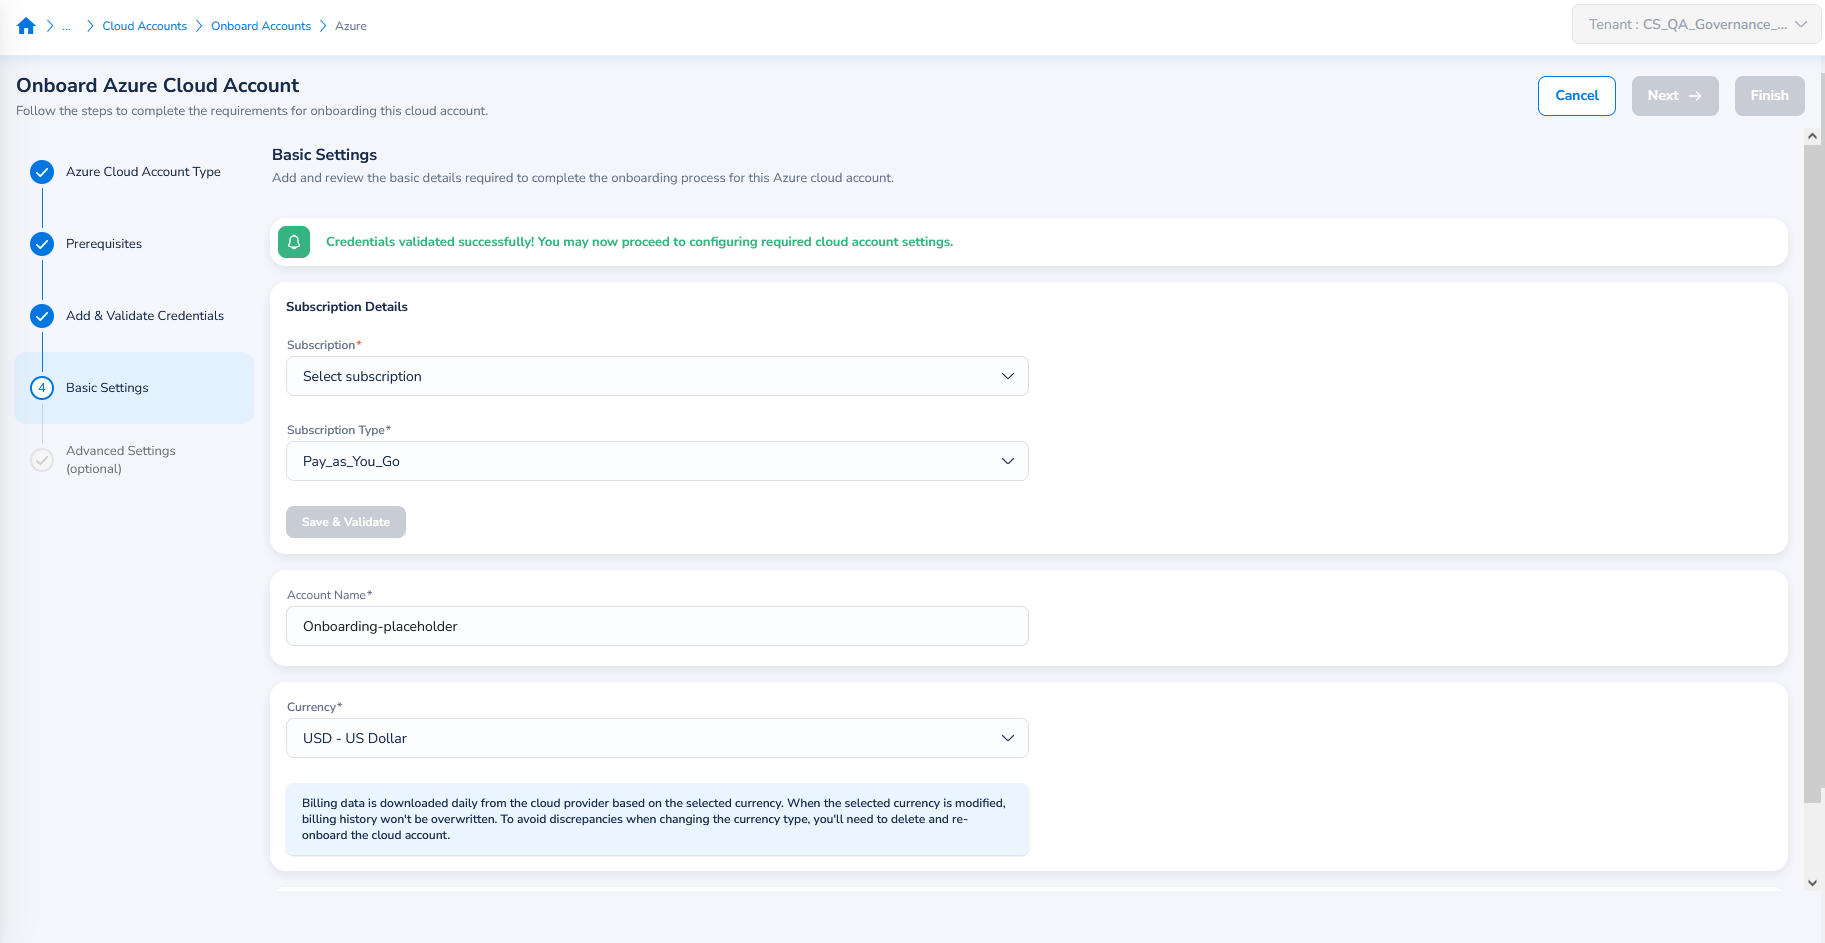
Basic Settings
In the Basic Settings page, you’ll need to provide some basic details for the cloud account(s) being onboarded.
The following basic details can be provided on this page:
- In the Subscription list, select an appropriate account subscription.
- In the Storage Account box, type the storage account name.
- In the Report Path box, type a path where cost reports will be available.
- In the Account Name box, the account name will be pre-populated. Based on the need, this field can be modified.
- In the Currency list, click to select the currency in which the cost report will be downloaded from the cloud provider.
- Select the Privacy Policy checkbox to accept the terms and continue with the onboarding process.
Note:Please be aware that if you selected the Azure Government environment type for onboarding, only USD can be selected for the Currency field.
Note:The Account Name field should not exceed the maximum character limit of 50 characters including special characters.
You can click Next to set up advanced settings or click Finish to complete the account onboarding.
Please note that the step for configuring Advanced Settings is not mandatory and can be skipped.
If you click Next, then the Advanced Settings section will be displayed.
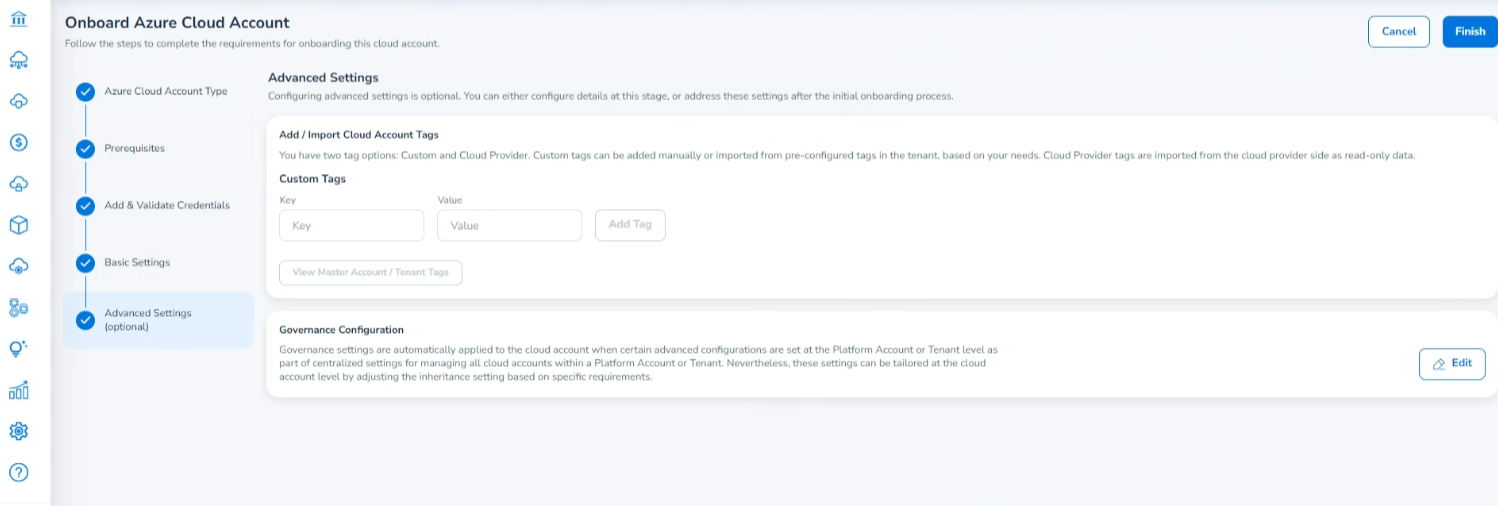
Advanced Settings (Optional)
The Advanced Settings page is where users can make additional configurations of the cloud account being onboarded, like tags and governance settings. Again, this section is optional and can be completed later, if desired.
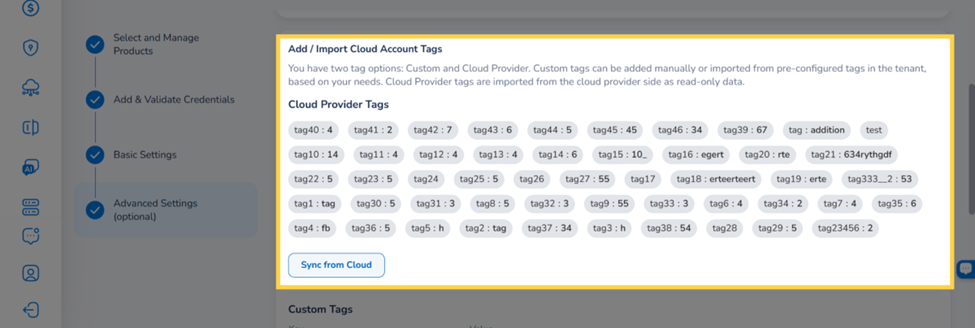
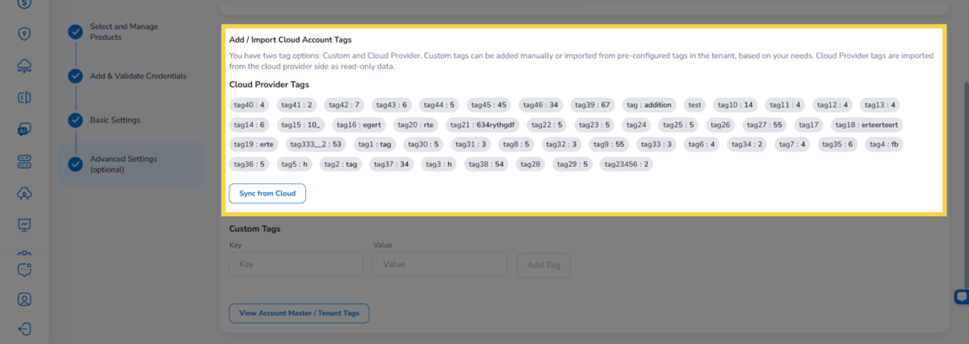
Add/Import Cloud Account Tags
The Add / Import Cloud Account Tags section offers two tag options:
- Cloud Provider Tags: Imported from the cloud provider side as read-only data.
- Custom Tags: Added manually or imported from pre-configured tags in the tenant.
Cloud Provider Tags
The Cloud Provider Tags section displays all account-level tags retrieved directly from your cloud account as read-only key:value pairs. These tags are imported from the cloud provider side and cannot be edited or deleted within CoreStack.
Note: Cloud Provider Tags are only available for Azure Management Accounts. This feature is not available for member accounts.
To pull the latest tags from your cloud account, click Sync from Cloud. The tag list refreshes to reflect any new, updated, or removed tags from the cloud provider.
Note: Tags synced from the cloud provider are read-only in CoreStack. To modify or remove a Cloud Provider Tag, update it at the cloud account level.
Tags removed from the cloud provider are automatically removed from CoreStack after the next sync.
Using Cloud Provider Tags in FinOps Dashboards
Once Cloud Provider Tags are configured on an account, they are available as filter criteria in FinOps dashboards, including the Cost Posture dashboard.
To filter by Account Tag Key:
- Navigate to FinOps and open the Cost Posture dashboard.
- In the Filter bar, click ADD+ to add a new filter condition.
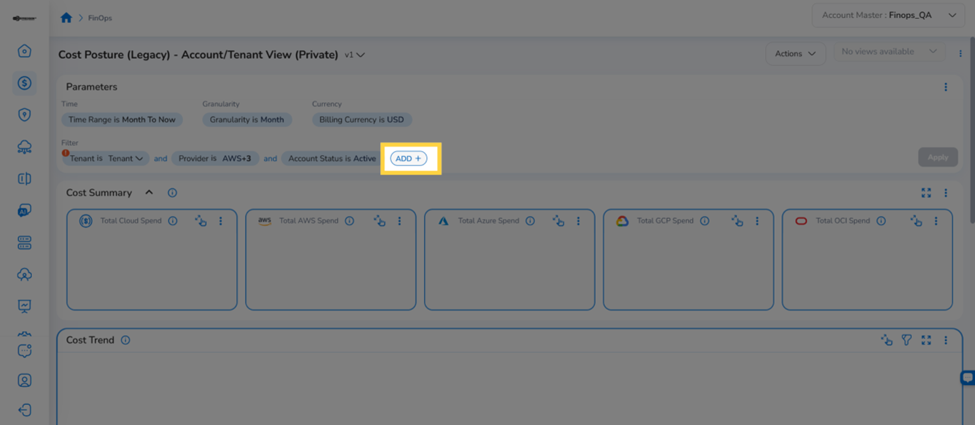
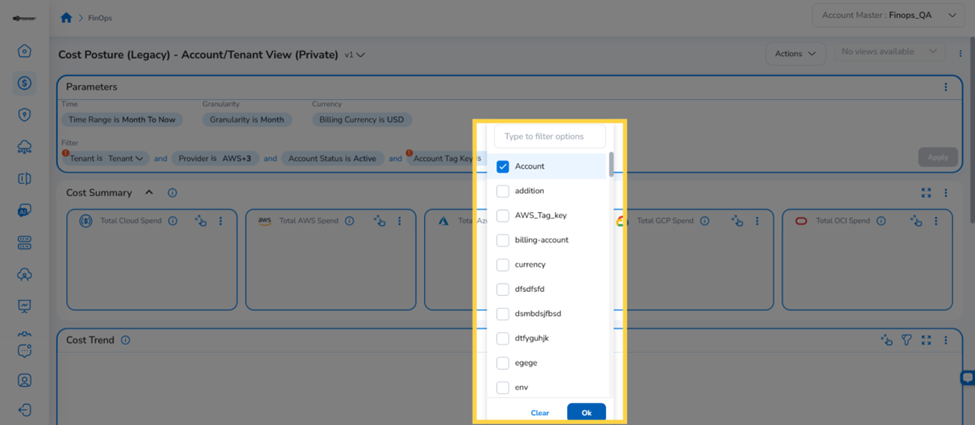
- Select Account Tag Key from the filter field dropdown. A filter chip appears in the filter bar.
- Click the Account Tag Key dropdown on the filter chip to view all available tag keys synced from your cloud accounts.
- Select the desired tag key and click Ok. The filter bar updates to reflect the active key.
To further narrow results by a specific tag value:
- Click ADD+ again in the Filter bar and select Account Tag Key Value from the dropdown.
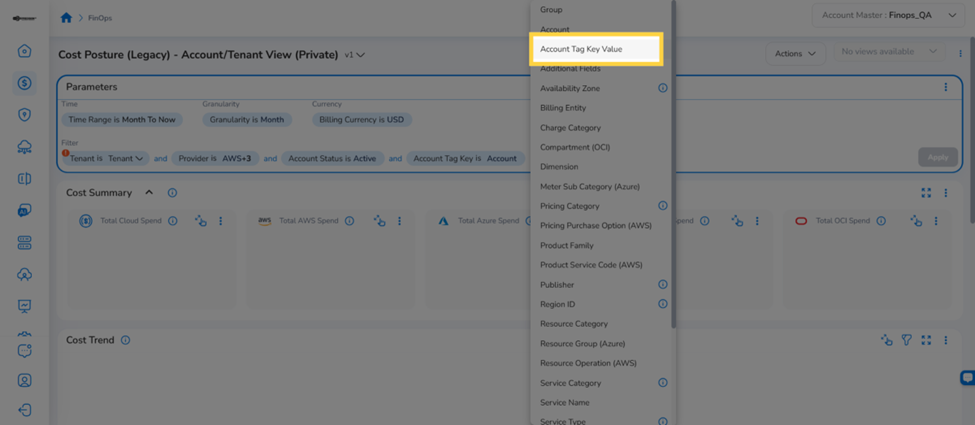
- Click Select Key on the filter chip and select the desired tag key from the list.
- Click Select Values to open the list of available values for the selected key.
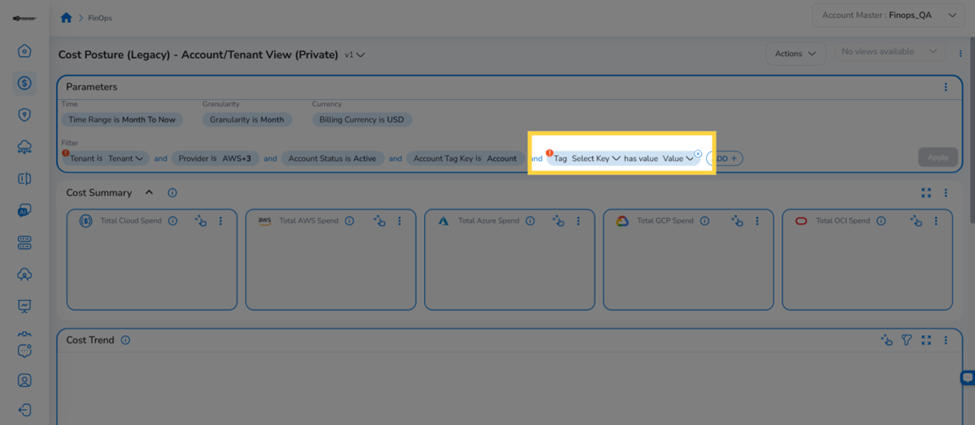
- Select the desired values and click Ok. The Cost Posture dashboard refreshes to display cost data for accounts matching the selected key-value combination.
Editing Cloud Provider Tags
To edit Cloud Provider Tags on an already-onboarded account:
-
Navigate to Governance > Account Governance > Cloud Accounts.
-
Click the Actions icon (⋮) on the account row and select Edit.
-
In the account configuration wizard, click Advanced Settings (optional) in the left navigation.
-
In the Add / Import Cloud Account Tags section, click Sync from Cloud to fetch the latest tags from your cloud provider.
Click Finish to save the updated configuration
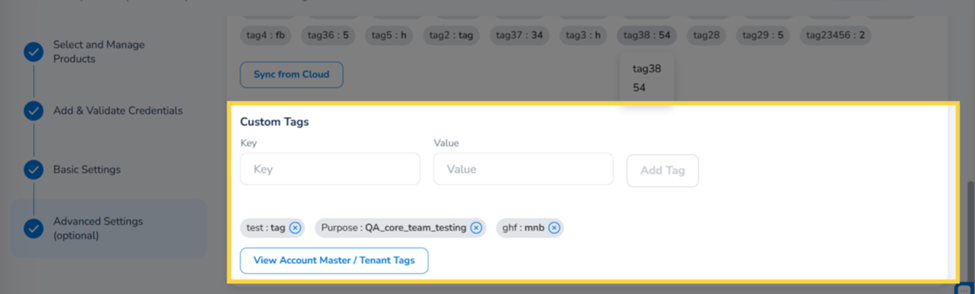
Custom Tags
The Custom Tags section allows you to manually add tags specific to this cloud account.
- Enter a Key and Value in the input fields, then click Add Tag. The tag appears as a badge below.
- Click View Account Master / Tenant Tags to import pre-configured tags from the tenant. Select the required tags and click Insert Selected Tags.
Governance Configuration
In the Governance Configuration field, click Edit to configure the required settings.
Refer to the Governance Configuration section for detailed steps.
Once you’re done with your configurations, select Finish.
The Onboarding Status dialog box appears that shows the progress of account onboarding. You can click Go to the Dashboard to return to the Account Governance Dashboard.
Note:We request that users ensure any individual Subscriptions that are part of the Azure EA root account have not already been onboarded when onboarding the Azure EA root account. If you want all Subscriptions to be part of the Azure EA root account after onboarding it, please remove any individual Subscription first, then onboard the Azure EA root account.
If an individual Subscription has already been onboarded and is not required to be part of the EA root account, you can still onboard the EA root account without mapping the Subscription to it.
Please note that individual Subscriptions show PAYG costs, while Subscriptions onboarded under the EA root will reflect costs according to rates applied in the EA root account.
Governance Configuration
The Governance Configuration page includes many sections where configurations can be made. You need to select the configuration you want to apply to your onboarded account. All the available configuration sections are explained below. Refer to the relevant configuration and follow the steps. These governance configurations can be made while onboarding the account or can be done post onboarding.
FinOps
The configurations that can be done for FinOps are explained below.
Cost Anomaly
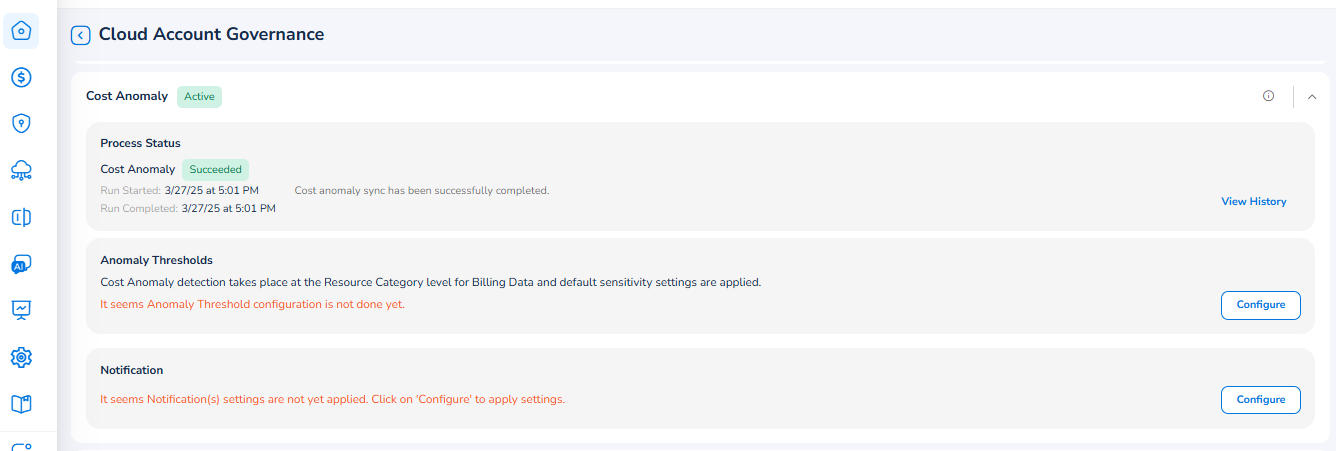
Perform the following steps to configure cost anomaly:
-
Expand the Cost Anomaly section.
-
In the Anomaly Threshold section, click Configure. The Create Anomaly Thresholds dialog box appears.
- Click Add Condition +.
- In the Anomaly Detection Scope filter, click to select either CloudAccount or ResourceCategory.
- If you select ResourceCategory, then the Resource Category filter appears. In the Resource Category filter, click the drop-down, select all applicable values, and then click Ok.
- Fill one of the following:
- In the Min. Cost Impact($) box, type the minimum cost impact value.
- In the Min. Cost Impact(%) box, type the minimum cost impact percentage and in the Min. Cost Spend($) box, type the minimum cost spend value.
- Click Save & Exit.
- You can click Add Condition + and add additional conditions.
-
In the Notification section, click Configure. The Notifications Settings dialog box appears.
- Select the Enable Notification checkbox. The Email Address, Webhook, and Microsoft Teams Webhook fields are displayed.
- In the Email Address box, type the email address of the user(s) and click Add.
- In the Webhook box, type the webhook link(s) and click Add.
- In the Microsoft Teams Webhook box, type the URL(s) for Microsoft Teams Webhook and click Add.
- Click Save & Apply.
Cost Optimization - Rate Based
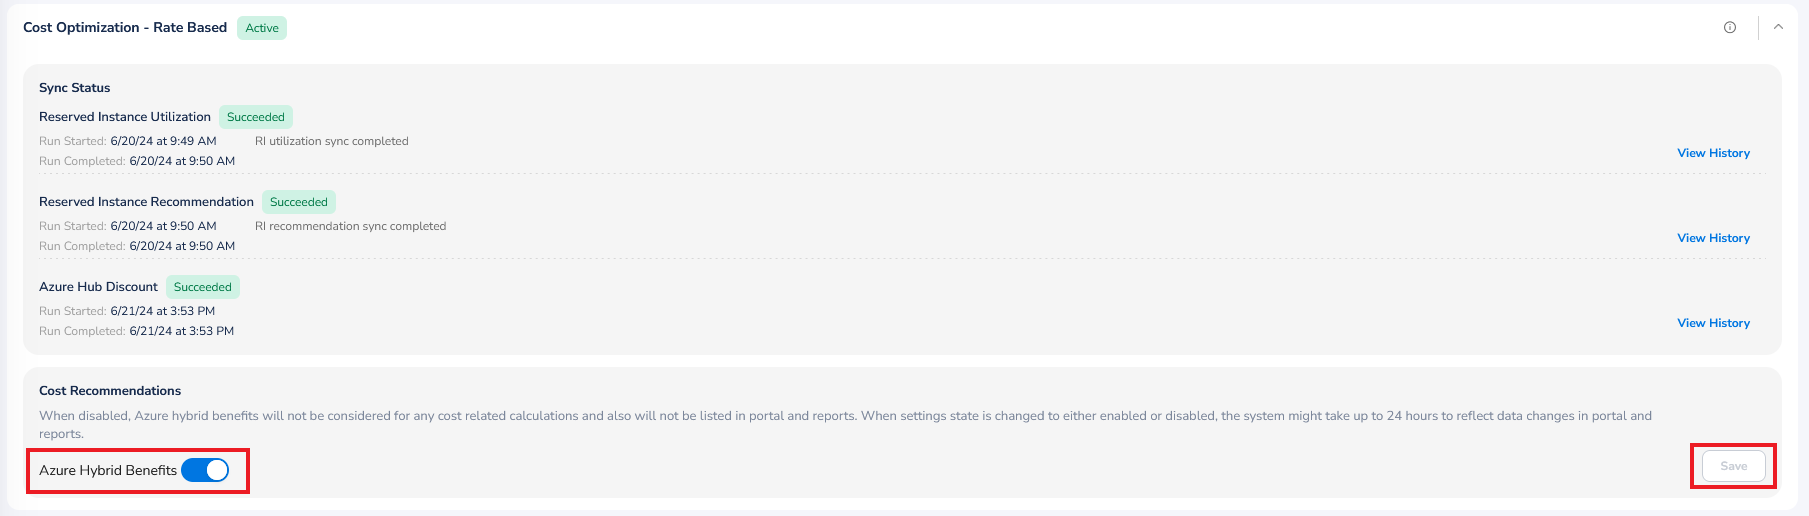
To enable Azure Hybrid Benefits, click to expand the Cost Optimization - Rate Based section. Enable Azure Hybrid Benefits field by moving the slider towards right and then click Save.
SecOps
The configurations that can be done for SecOps are explained below.
Threat Management
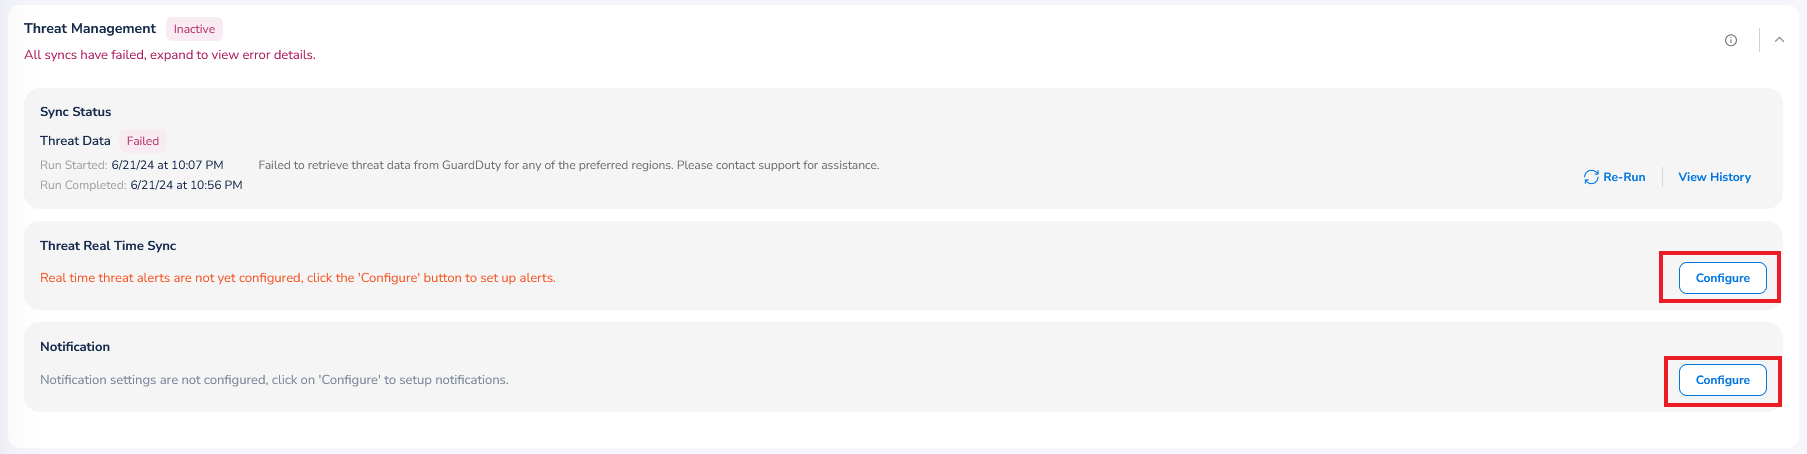
To make configuration for threat detection, perform the following steps:
- Click to expand the Threat Management section.
- To configure Threat Real Time Sync, click Configure. A dialog box displays.
- In the Select Resource Group list, select the relevant option and click Ok.
- Click Configure corresponding to the resource group added in the previous step.
- Select either Create New or Select Existing.
- If you select Create New, then in the Action Group Name box, type an action group name and then click Continue.
- If you choose Select Existing, then in the Action Group list, select an appropriate option and then click Continue.
- Click Validate.
- Click Save & Exit.
If configuration is already made for Threat Management, then you can click View to see the existing configuration or you can click Delete to remove the configuration.
To configure notifications related to threat management, perform the following steps:
- In the Notification section, click Configure. The Notifications Settings dialog box appears.
- Select the Enable Notification checkbox. The Email Address, Webhook, and Microsoft Teams Webhook fields are displayed.
- In the Email Address box, type the email address of the user(s) and click Add.
- In the Webhook box, type the webhook link(s) and click Add.
- In the Microsoft Teams Webhook box, type the URL(s) for Microsoft Teams Webhook and click Add.
- Click Save & Apply.
Vulnerability Assessments

To configure notifications for Vulnerability Assessments, perform the following:
- In the Notification section, click Configure. The Notifications Settings dialog box appears.
- Select the Enable Notification checkbox. The Email Address, Webhook, and Microsoft Teams Webhook fields are displayed.
- In the Email Address box, type the email address of the user(s) and click Add.
- In the Webhook box, type the webhook link(s) and click Add.
- In the Microsoft Teams Webhook box, type the URL(s) for Microsoft Teams Webhook and click Add.
- Click Save & Apply.
CloudOps
The configurations that can be done for CloudOps are explained below.
Activity

To configure alerts, perform the following:
- Expand the Activity section.
- In the Activity Log Configuration section, click Configure. A dialog box appears.
- In the Resource Group list, select the relevant option(s) and click Ok.
Next you will have to configure activity logs individually for the selected resource group(s). - Click Configure corresponding to a resource group.
- Select either Create New or Select Existing.
- If you select Create New, then in the Action Group Name box, type an action group name. In the Rule Name box, type the name of the rule and then click Continue.
- If you choose Select Existing, then in the Action Group list, select an appropriate option. In the Rule Name box, type the name of the rule and then click Continue.
- Repeat steps 4 and 5 to configure other resource groups selected in step 3.
- If you want to apply default template for activities to monitor your Azure setup, then select the Apply Default Template checkbox.
- Click Validate.
- Click Save & Exit.
If configuration is already made for activities, then you can click View to see the existing configuration or you can click Delete to remove the configuration.
To configure notifications for activity:
- In the Notification section, click Configure. The Notifications Settings dialog box appears.
- Select the Enable Notification checkbox. The Email Address, Webhook, and Microsoft Teams Webhook fields are displayed.
- In the Email Address box, type the email address of the user(s) and click Add.
- In the Webhook box, type the webhook link(s) and click Add.
- In the Microsoft Teams Webhook box, type the URL(s) for Microsoft Teams Webhook and click Add.
- Click Save & Apply.
Patch Management
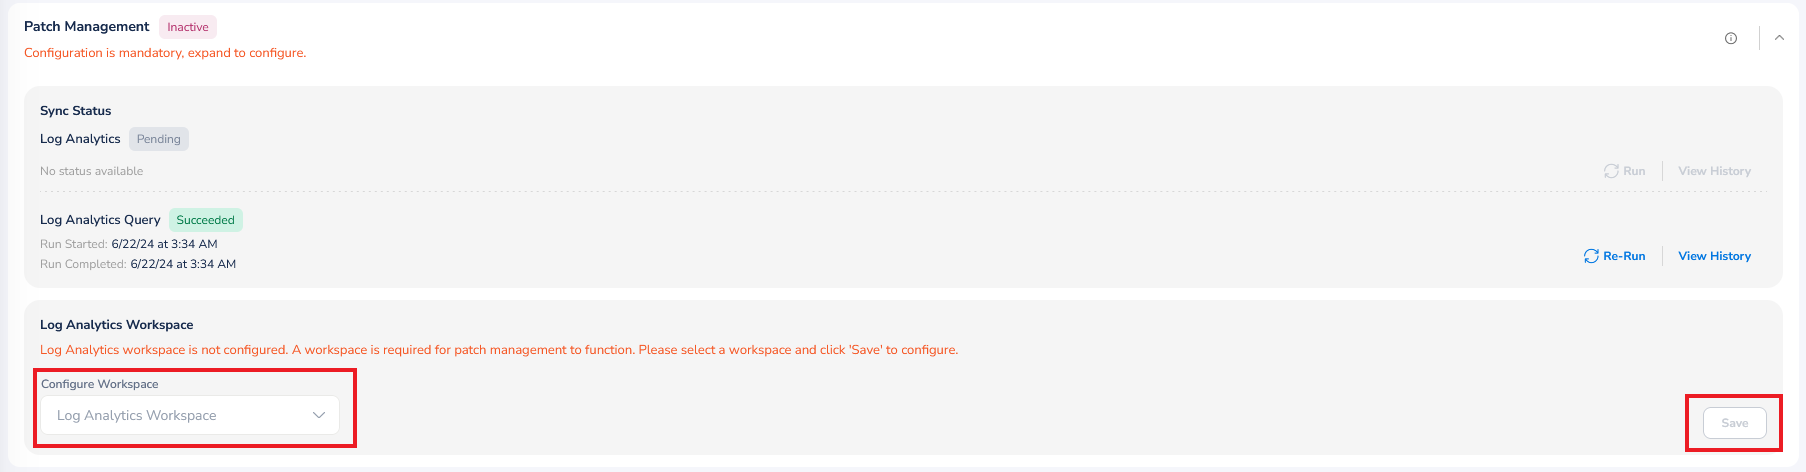
To configure workspace, expand the Patch Management section. In the Configure Workspace list, select relevant option(s) and click Ok, and then finally click Save.
Assessments
The configurations that can be done for Assessments are explained below.
Assessments Functionality
When a cloud account is onboarded, users can configure the auto-assessment functionality based on their requirements. Users can choose to either enable or disable the option for auto-assessment while an account is being onboarded (as part of account governance configurations). By default, the option to run an auto-assessment is disabled.
If a user disables the option for auto-assessment, no assessment will be triggered on the onboarded account. If a user enables the setting, it will be triggered automatically on the onboarded account.
If a cloud account is onboarded with auto-assessment disabled at first, but later the auto-assessment option is enabled, then the assessment will proceed to be triggered for that account.
- If the auto-assessment option is already enabled, users can disable it before the auto-assessment gets triggered.
- If the auto-assessment option is enabled and then the assessment is triggered, then after that point it cannot be disabled.
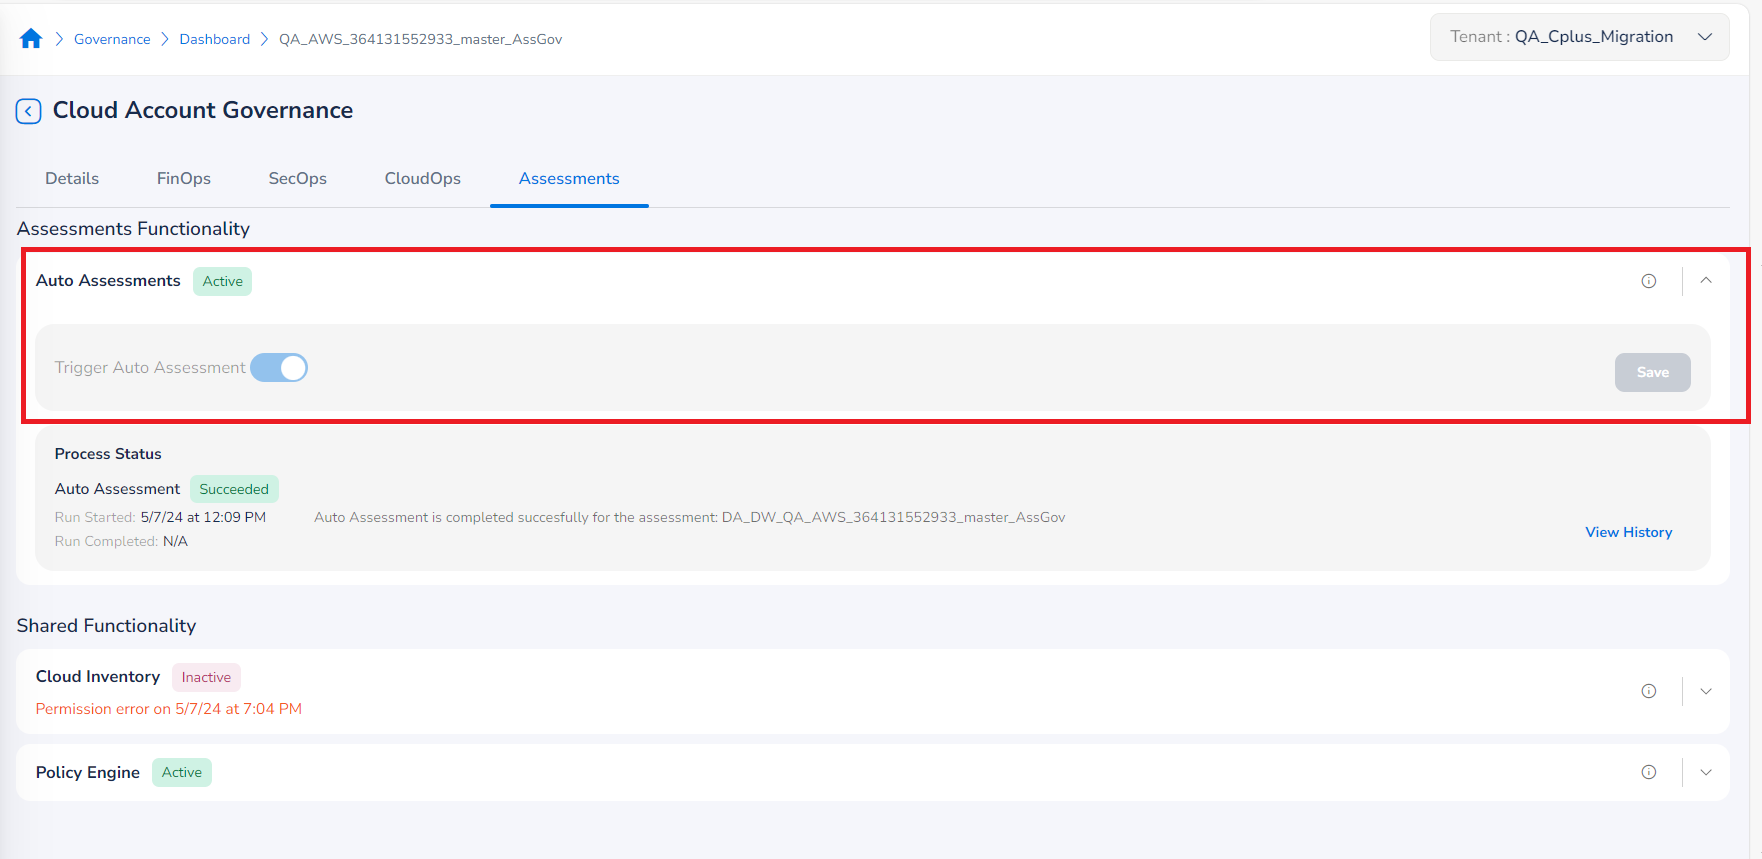
To enable auto assessments:
- Expand the Assessments Functionality section.
- In the Trigger Auto Assessment field, move the slider to right to enable it.
- Click Save.
Shared Functionality and Integrated Tools
The configurations that can be done for Shared Functionality and Integrated Tools (common across all products) are explained below.
Policy Engine
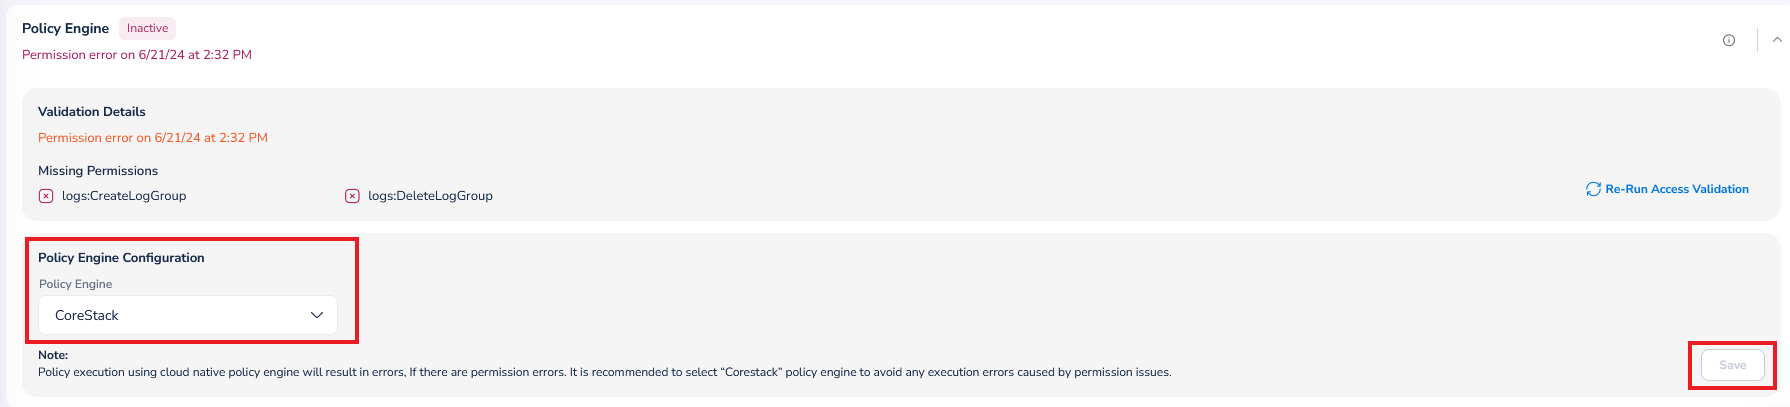
To configure the policy engine for an account, perform the following steps:
- Expand the Policy Engine section.
- In the Policy Engine Configuration section, select the policy engine.
- Set Policy Engine Preference by dragging and rearranging. The priority order follows from top to bottom for the selected policy engines.
- Click Save.
Monitoring
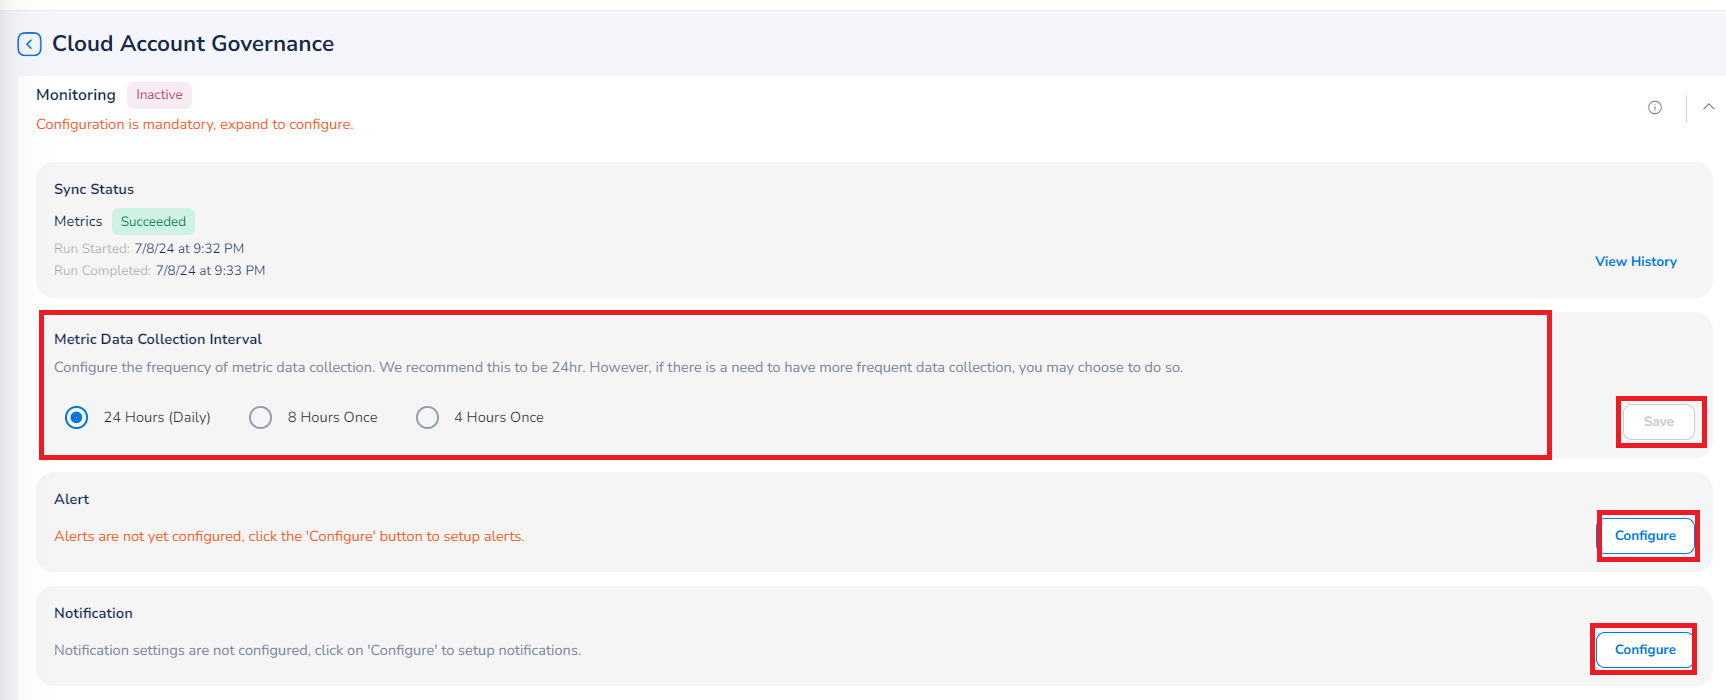
To configure monitoring of accounts, perform the following:
- Expand the Monitoring section.
- In the Metric Data Collection Interval field, select the frequency in which the metric data needs to be collected and click Save. The available options are 24 Hours (Daily), 8 Hours Once, and 4 Hours Once.
- Click Save.
To enable alerts:
- In the Alert section, click Configure. A dialog box appears.
- In the Resource Group list, select the relevant option(s) and then click Ok.
Next you will have to configure alerts individually for the selected resource groups. - Click Configure corresponding to a resource group.
- Select either Create New or Select Existing.
- If you select Create New, then in the Action Group Name box, type a name for the new action group and then click Continue.
- If you choose Select Existing, then in the Action Group list, select an appropriate option and then click Continue.
- Repeat steps 3 and 4 to configure other resource groups selected in step 2.
- If you want to apply default template for alerts to monitor your Azure Monitor setup, then select the Apply Default Template checkbox.
- Click Validate.
- Click Save & Exit.
If configuration is already made for alerts, then you can click View to see the existing configuration or you can click Delete to remove the configuration.
To configure notifications for monitoring alerts, perform the following:
- Click to expand the section, and then click Configure. The Notifications Settings dialog box appears.
- Select the Enable Notification checkbox. The Email Address, Webhook, and Microsoft Teams Webhook fields are displayed.
- In the Email Address box, type the email address of the user(s) and click Add.
- In the Webhook box, type the webhook link(s) and click Add.
- In the Microsoft Teams Webhook box, type the URL(s) for Microsoft Teams Webhook and click Add.
- Click Save & Apply.
Account Onboarding Using PowerShell Script
Overview
Users can utilize a PowerShell script that simplifies the process of onboarding new accounts into the platform by automating several critical steps. This allows for an efficient and error-free operation, ensuring that all required components are properly configured without the need for any manual intervention.
The steps involved in the onboarding process are:
- Selecting Azure Subscriptions
- Assigning roles
- Creating a service principal
- Registering the necessary resource providers
Prerequisites
Before going ahead with the automated process of onboarding Azure accounts, users must check for the following prerequisite conditions.
- First, check whether the Azure PowerShell module is installed. Run the command below to check for the Azure PowerShell module.
Get-Module -Name Az -ListAvailable- If Azure PowerShell module is not installed, then install it by running:
Install-Module -Name Az -AllowClobber -Scope CurrentUser Import-Module Az - Next, run the command below to check whether AzureAD module is installed.
Get-Module -Name AzureAD -ListAvailable- If AzureAD module is not listed, then install it by running:
Install-Module -Name AzureAD -AllowClobber -Scope CurrentUser Import-Module AzureAD - Users must have the appropriate permissions (i.e. Owner-level access in Subscription) to create applications and assign roles in Azure.
Script Description
The PowerShell script performs the following main tasks:
- Create a Service Principal: Facilitates the creation of a new service principal in Azure AD with a display name provided by the user.
- Select Azure Subscriptions: Allows the user to select one or multiple Azure Subscriptions or choose all enabled Subscriptions.
- Assign Roles to Service Principal: Assigns the selected roles (like Reader, Contributor, etc.) to the service principal across chosen Subscriptions.
- Register Azure Resource Providers: Registers a predefined list of Azure resource providers necessary for operations in the platform.
Refer to the PowerShell script below that can be used for onboarding.
# Function to create Service Principal and generate a secret
Connect-AzureAD
function Create-ServicePrincipal {
    $displayName = Read-Host "Please enter a display name for the new Service Principal"
    if ([string]::IsNullOrWhiteSpace($displayName)) {
        Write-Host "No display name provided. Exiting function."
        return $null
    }
    try {
        $application = New-AzureADApplication -DisplayName $displayName
        Write-Host "Application created with ID: $($application.AppId)"

        $servicePrincipal = New-AzureADServicePrincipal -AppId $application.AppId
        Write-Host "Service Principal created with Application ID: $($application.AppId)"

        $startDate = Get-Date
        $endDate = $startDate.AddYears(1)
        $passwordCredential = New-AzureADApplicationPasswordCredential -ObjectId $application.ObjectId -CustomKeyIdentifier "Access" -StartDate $startDate -EndDate $endDate
        Write-Host "Secret created for Application. Value: $($passwordCredential.Value)"

        # Fetch tenant ID
        $tenantId = (Get-AzureADTenantDetail).ObjectId
        Write-Host "Tenant ID: $tenantId"

        return $application, $servicePrincipal, $passwordCredential, $tenantId
    } catch {
        Write-Host "Failed to create service principal or secret: $_"
        return $null
    }
}

# Example of calling the function
$application, $servicePrincipal, $secret, $tenantId = Create-ServicePrincipal
 Start-Sleep -Seconds 10
 #Function to list and select the subscriptions
 function Select-Subscription {
    param (
        [string]$title,
        [array]$subscriptions
    )
    Write-Host $title
    for ($i = 0; $i -lt $subscriptions.Count; $i++) {
        Write-Host "$($i+1) : $($subscriptions[$i].name) - $($subscriptions[$i].id)"
    }
    # Adding an option for selecting all subscriptions
    Write-Host "$($subscriptions.Count + 1) : All Subscriptions"
    $indices = Read-Host "Enter the indices of the subscriptions (comma separated, or select 'All'):"
    # Check if the user selected "All"
    if ($indices -eq $($subscriptions.Count + 1)) {
        return $subscriptions
    }
    else {
        $selectedIndices = $indices -split ',' | ForEach-Object { [int]$_ - 1 }
        $selectedSubscriptions = $selectedIndices | ForEach-Object { $subscriptions[$_] }
        return $selectedSubscriptions
    }
}
# Assuming $subs is a JSON string from the output of `az account list`
$subs = az account list --query "[?state=='Enabled']" --only-show-errors
$subs_ids = $subs | ConvertFrom-Json
$selectedSubscription = Select-Subscription -title "Please select a subscription:" -subscriptions $subs_ids
# Displaying the selected subscriptions
foreach ($sub in $selectedSubscription) {
    Write-Host "Selected subscription: $($sub.name) - $($sub.id)"
}
$selectedSubscription | Format-Table -Property Name, Id, State, IsDefault -AutoSize
#Function to define the roles
function Show-Menu {
    param (
        [string]$title,
        [hashtable]$menuItems,
        [bool]$allowMultiple = $false
    )
    Write-Host "`n$title"
    $menuItems.Keys | Sort-Object | ForEach-Object { Write-Host "$_ : $($menuItems[$_])" }
    if ($allowMultiple) {
        $input = Read-Host "Enter choices separated by commas (e.g., 1,2)"
        $choices = $input -split ',' | ForEach-Object { $_.Trim() }
    } else {
        $choices = @(Read-Host "Enter choice")
    }
    $selectedItems = $choices | ForEach-Object { $menuItems[$_] }
    return $selectedItems
}
# Define the possible role definitions in a hashtable
$roleDefinitions = @{
    "1" = "Reader"
    "2" = "Contributor"
    "3" = "Resource Policy Contributor"
}
# Display menu and get user choices
$selectedRoles = Show-Menu -title "Select Role Definitions" -menuItems $roleDefinitions -allowMultiple $true
# Display the selected roles
$selectedRoles | ForEach-Object { Write-Host "- $_" }
#Assining the role to the selected subscriptions
foreach ($sub in $selectedSubscription) {
    $context = Set-AzContext -SubscriptionId $sub.id -ErrorAction SilentlyContinue
    if ($context) {
        Write-Host "Switched to subscription: $($sub.name)"
        # Assign each selected role to the service principal for the subscription
        foreach ($role in $selectedRoles) {
            try {
                # Make sure to use ServicePrincipal ObjectId
                $roleAssignment = New-AzRoleAssignment -ObjectId $servicePrincipal.ObjectId -RoleDefinitionName $role -Scope "/subscriptions/$($sub.id)" -ErrorAction Stop
                Write-Host "Successfully assigned $role to service principal $($servicePrincipal.AppId) in subscription $($sub.name)"
            } catch {
                Write-Host "Failed to assign $role to service principal $($servicePrincipal.AppId) in subscription $($sub.name): $_"
            }
        }
    }
}
#Registering the Mandatory Resources Providers for the selected subscription/subscriptions
$resourceProviders = @(
    "Microsoft.Authorization",
    "Microsoft.Billing",
    "Microsoft.Commerce",
    "Microsoft.Consumption",
    "Microsoft.CostManagement",
    "Microsoft.Insights",
    "Microsoft.Network",
    "Microsoft.PolicyInsights",
    "Microsoft.Security",
    "Microsoft.Compute",
    "Microsoft.ContainerInstance",
    "Microsoft.ContainerRegistry",
    "Microsoft.ContainerService",
    "Microsoft.DBforMySQL",
    "Microsoft.DBforPostgreSQL",
    "Microsoft.DevTestLab",
    "Microsoft.RecoveryServices",
    "Microsoft.SQL",
    "Microsoft.Storage",
    "Microsoft.Web"
)
foreach ($sub in $selectedSubscription) {
    # Set the Azure context to the current subscription in the loop
    $context = Set-AzContext -SubscriptionId $sub.id -ErrorAction SilentlyContinue
	# Pause after setting the context to ensure it has been applied
	Start-Sleep -Seconds 10
    if ($context) {
        Write-Host "Switched to subscription: $($sub.name)"
        # Now perform actions on the current subscription
        foreach ($provider in $resourceProviders) {
            try {
                $status = Get-AzResourceProvider -ProviderNamespace $provider
                if ($status.RegistrationState -eq "Registered") {
                    Write-Host "Resource provider $provider is already registered in $($sub.name)."
                } else {
                    Register-AzResourceProvider -ProviderNamespace $provider | Out-Null
                    Write-Host "Registered resource provider: $provider in $($sub.name)"
					# Wait after registering a provider to ensure the operation completes
					Start-Sleep -Seconds 20
                }
            } catch {
                Write-Host "Failed to retrieve or register the resource provider $provider in $($sub.name). Error: $_"
            }
        }
    } else {
        Write-Host "Failed to set context to subscription: $($sub.name)"
    }
}
exit-PSSession
Onboarding Steps
Perform the following steps to complete the onboarding process for Azure cloud accounts using the PowerShell script:
-
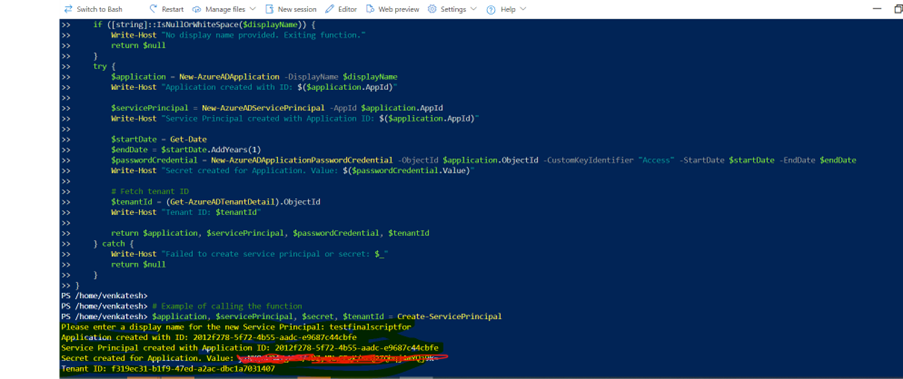
To create a service principal, when prompted, enter a display name for a new Azure AD application and service principal.
The script creates the application and service principal, and generates a secret key valid for one year. You can view the tenant ID, application ID, and secret value (Note: We strongly recommend copying these values down in a notepad).
-
When prompted, enter the indices of the Azure Subscription(s) for onboarding separated by commas, or choose all Subscriptions by entering a special index.
-
When prompted, select one or more roles to assign to the service principal. It then assigns the selected roles to the service principal for each chosen Subscription.
-
The script automatically attempts to register a set of required Azure resource providers if they are not already registered.
Error Handling:The script includes error handling to provide feedback if any operation(s) fail, such as role assignments or resource provider registration.
Updated about 1 month ago