

Onboarding for Azure MCA
This user guide takes you through the process of onboarding an Azure Microsoft Customer Agreement (MCA) cloud account using CoreStack.
Introduction
In this user guide, you will know about how to onboard an Azure MCA account, validate credentials, and manage the billing accounts to ensure successful onboarding.
Onboarding Steps
Perform the following steps to onboard Azure MCA account:
1. Click "Governance"
In the platform, on the left navigation menu, click Governance.
2. Select "Account Governance"
Click Account Governance.
3. Click "Cloud Accounts"
Click Cloud Accounts to view the Account Governance Dashboard page.

4. Click "Onboard Now"
To onboard an Azure Microsoft Customer Agreement (MCA) account, click Onboard Now.

5. Alternative Onboarding Step
Alternatively, users can click Settings and then select Onboard Accounts to start the onboarding process. Post this, onboarding steps are same irrespective of the menu where you started onboarding.

6. Click "Onboard"
Hover your mouse pointer over Azure and click Onboard.

7. Select "Azure Cloud Account Type"
In the Azure Cloud Account Type field, select the option Microsoft Customer Agreement Billing Account.
The Azure Environment field shows the option Azure Global that is selected by default.

8. Click "Next"
Click Next to move to the next step in the onboarding process.
9. Prerequisites Step
In the Prerequisites step, in the Select Access Type field, Read-Only is the only option that is selected by default. In the Select Product(s) field, ensure that the product FinOps is selected.
10. Click "Next"
Click Next to proceed to the next step.
11. Add & Validate Credentials
In the Add & Validate Credentials step, fill the following fields and then click Save & Validate.
- Billing Account ID
- Tenant ID
- Application ID
- Application Secret Note: When billing profiles sync through hierarchy sync, the application ID must have Billing Admin Reader permissions at the billing account scope. Because zero-cost billing profiles sync only via hierarchy sync, missing permissions can prevent synchronization and lead to downstream impacts.

12. Click "Next"
After the application credentials are validated, click Next to proceed to the next step.
13. Add Basic Settings
In the Basic Settings step, fill the following fields related to subscription and then click Save & Validate.
- Subscription
- Storage Account
- Actual Cost Path
- Amortized Cost Path

14. Update "Account Name"
In the Account Name field, you can update the account name.
15. View "Currency"
The Currency field is displayed and its value cannot be changed.
16. Select "Privacy Policy"
Select the Privacy Policy checkbox.

17. Click "Next"
Click Next to proceed to the Advanced Settings step, which is an optional step or you can click Finish.
18. Advanced Settings Step
The Advanced Settings step is not a mandatory step and can be skipped.
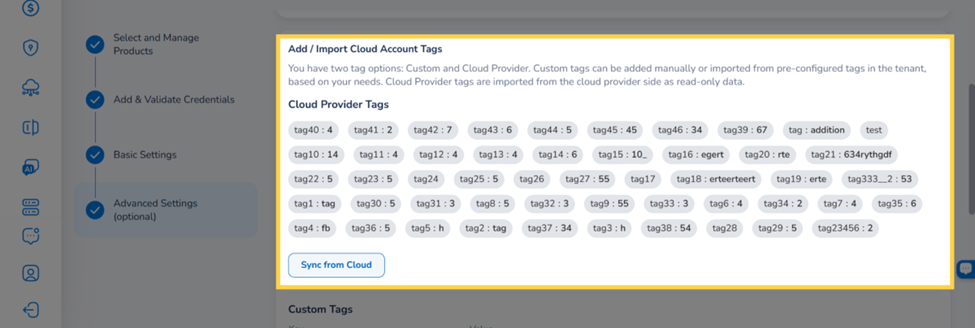
19. Add/Import Cloud Account Tags
The Add / Import Cloud Account Tags section offers two tag options:
- Cloud Provider Tags: Imported from the cloud provider side as read-only data.
- Custom Tags: Added manually or imported from pre-configured tags in the tenant.
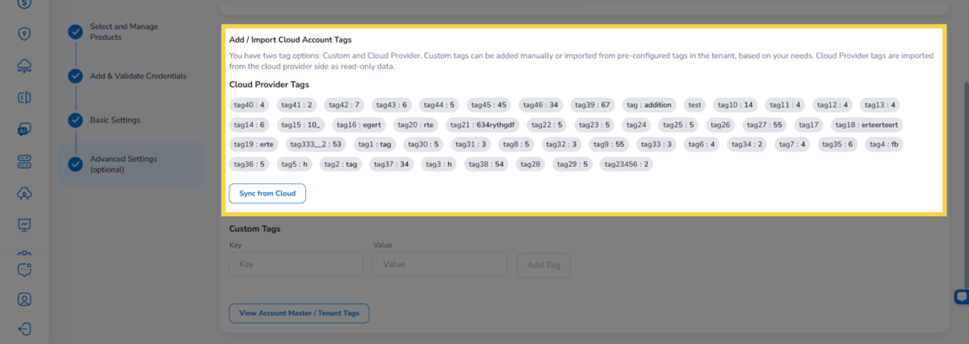
Cloud Provider Tags
The Cloud Provider Tags section displays all account-level tags retrieved directly from your cloud account as read-only key:value pairs. These tags are imported from the cloud provider side and cannot be edited or deleted within CoreStack.
Note: Cloud Provider Tags are only available for Azure Management Accounts. This feature is not available for member accounts.
To pull the latest tags from your cloud account, click Sync from Cloud. The tag list refreshes to reflect any new, updated, or removed tags from the cloud provider.
Note: Tags synced from the cloud provider are read-only in CoreStack. To modify or remove a Cloud Provider Tag, update it at the cloud account level.
Tags removed from the cloud provider are automatically removed from CoreStack after the next sync.
Using Cloud Provider Tags in FinOps Dashboards
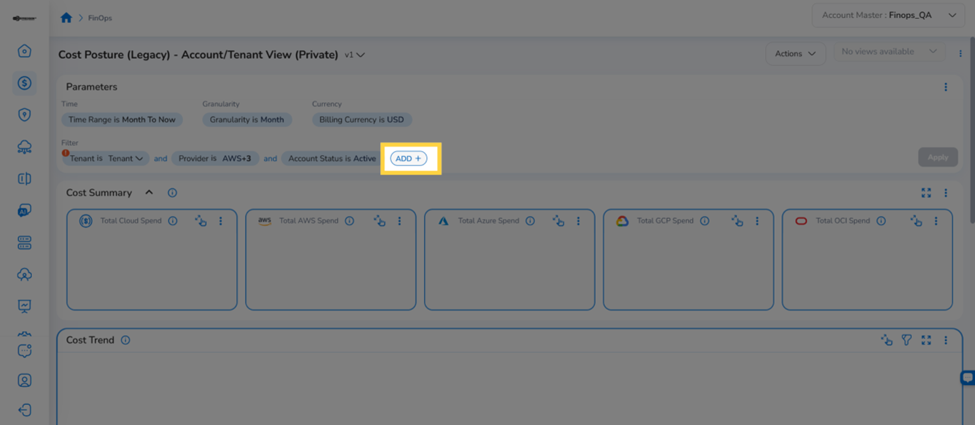
Once Cloud Provider Tags are configured on an account, they are available as filter criteria in FinOps dashboards, including the Cost Posture dashboard.
To filter by Account Tag Key:
- Navigate to FinOps and open the Cost Posture dashboard.
- In the Filter bar, click ADD+ to add a new filter condition.
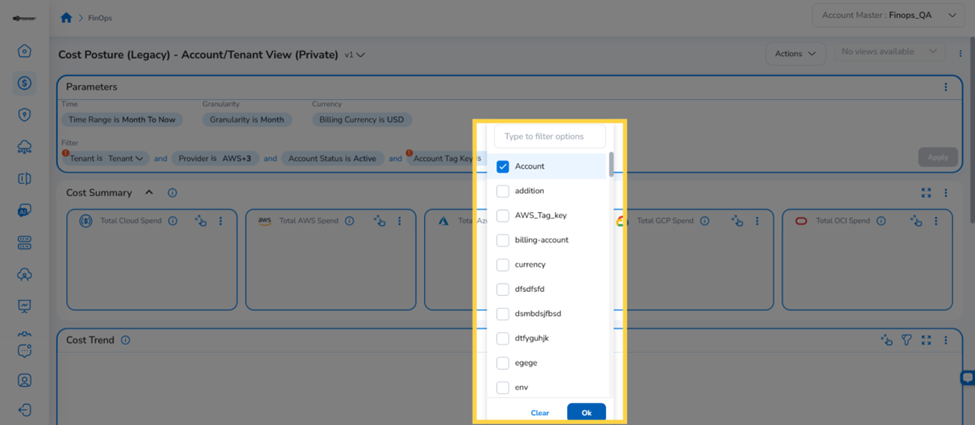
- Select Account Tag Key from the filter field dropdown. A filter chip appears in the filter bar.
- Click the Account Tag Key dropdown on the filter chip to view all available tag keys synced from your cloud accounts.
- Select the desired tag key and click Ok. The filter bar updates to reflect the active key.
To further narrow results by a specific tag value:
- Click ADD+ again in the Filter bar and select Account Tag Key Value from the dropdown.
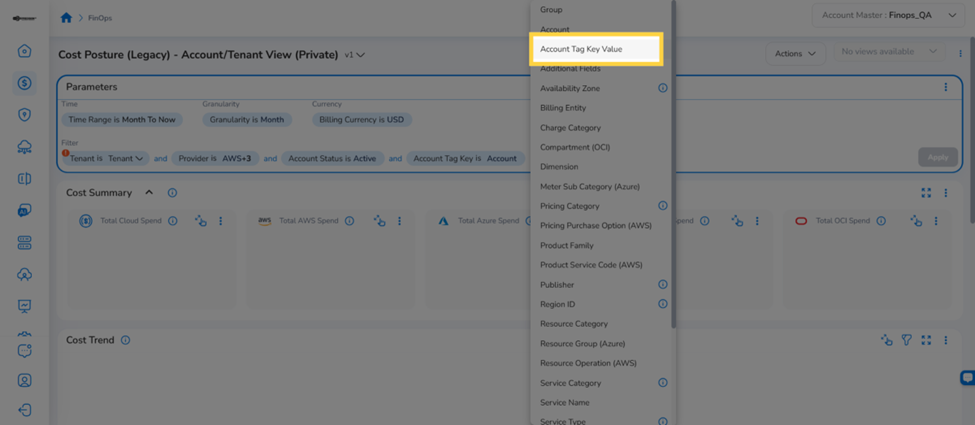
- Click Select Key on the filter chip and select the desired tag key from the list.
- Click Select Values to open the list of available values for the selected key.
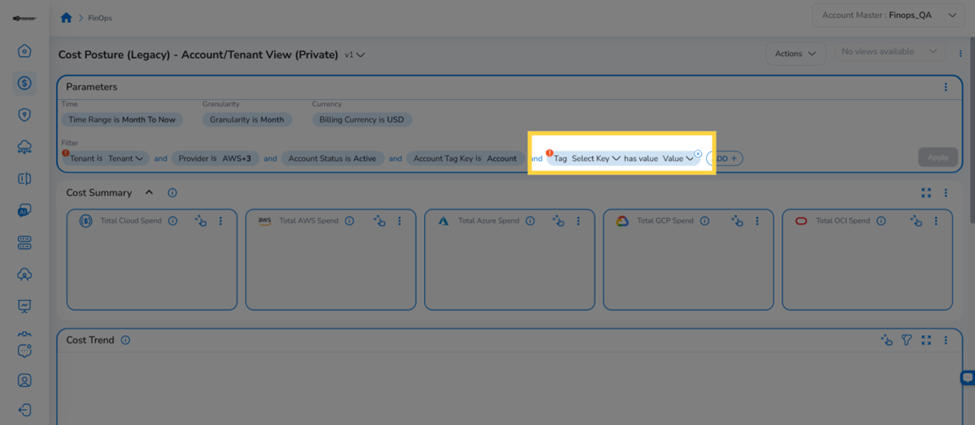
- Select the desired values and click Ok. The Cost Posture dashboard refreshes to display cost data for accounts matching the selected key-value combination.
Editing Cloud Provider Tags
To edit Cloud Provider Tags on an already-onboarded account:
-
Navigate to Governance > Account Governance > Cloud Accounts.
-
Click the Actions icon (⋮) on the account row and select Edit.
-
In the account configuration wizard, click Advanced Settings (optional) in the left navigation.
-
In the Add / Import Cloud Account Tags section, click Sync from Cloud to fetch the latest tags from your cloud provider.
Click Finish to save the updated configuration
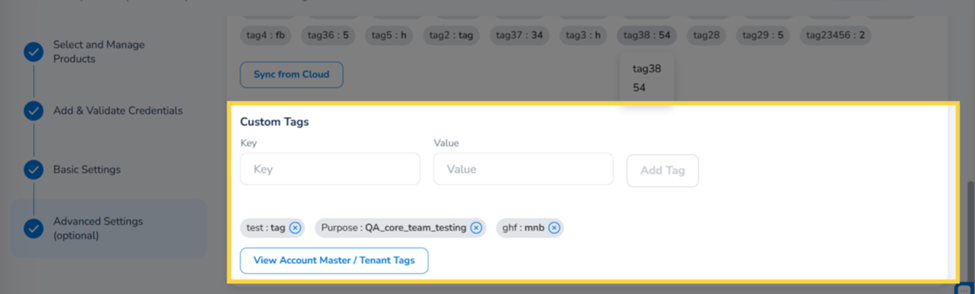
Custom Tags
The Custom Tags section allows you to manually add tags specific to this cloud account.
- Enter a Key and Value in the input fields, then click Add Tag. The tag appears as a badge below.
- Click View Account Master / Tenant Tags to import pre-configured tags from the tenant. Select the required tags and click Insert Selected Tags.
20. Governance Configuration
To do Governance Configuration, click Edit.

21. Select "Yes"
To edit governance settings, in the Edit Governance Configuration dialog box, click Yes, else click No.

22. Click "FinOps"
To make the configuration, go to the FinOps tab.

23. Expand "Cost Anomaly"
Click to expand the Cost Anomaly section.

24. Click "Configure"
Click Configure to configure anomaly thresholds.

25. Create Anomaly Threshold
The Create Anomaly Threshold screen opens where you must add settings for the anomaly threshold. Click Add Condition.

26. Add the Cost Details
Fill one of the following conditions and then click Save & Exit.
- In the Min. Cost Impact($) box, enter the minimum cost impact amount.
- In the Min. Cost Impact(%) box, enter the minimum cost impact percentage and in the Min. Cost Spend($) box, type the minimum cost spend amount.
Note:
- You can use the up and down arrows provided in these boxes to set the relevant values.
- Click the cross symbol to remove a condition.
- To add additional conditions, click Add Condition.

27. Configure Cost Anomaly Notification
To configure notifications for cost anomaly, click Notification. The Notification Settings screen opens.

28. Enable Notifications
In the Notification Settings screen, click to select the Enable Notifications checkbox.

29. Add Details for Notification
- In the Email Address box, type the email address of the recipient and then click Add. You can add multiple email addresses and can click the cross symbol to remove any email address.
- Select one or both of these checkboxes as per need -- Daily Summary and On Detection.
- In the Teams Webhook box, type the Teams webhook address and then click Add.
- In the Webhook box, type the webhook and then click Add.
- Click Save & Apply to save the configuration.
30. Click the Back Arrow
Click the back arrow to go back to the Advanced Settings screen.
31. Click "Finish"
In the Advanced Settings step, after adding all the relevant details, click Finish.
View Account Details
The newly added account appears on the Account Governance Dashboard under the Azure tab.
In the Azure tab, the top card displays the type of Azure account in different status. You can click the MCA Billing Account(s) tab to view the count of accounts in invalid, deactivated, and active states.

View the table with account details and its status. Users can view these columns on the screen -- Billing Account Name, Billing Account ID, Billing Profiles, Invoice Sections, Subscriptions, Onboarding Status, Access Type, Cloud Account Status, Credential Status, Products List, Currency, Tenant, Onboarded By, Created Date, Is Active, In Cloud, and Actions.
Actions on Account
Under the Actions column, users can click the ellipses corresponding to an account and take any of these following actions:
- View
- Edit
- Deactivate
- Delete

View Action
Users can click the ellipses corresponding to an account and select View to view the account details.
Users can view the Details tab that appears by default and they can view the account details in these sections -- Cloud Account Details, Prerequisites, Credentials, Basic Settings, and Advanced Settings.

Users can click the FinOps tab and view details about these -- Budget Management, Cost Anomaly, Cost Optimization, and Rate Based.
Edit Account Details
To update account details, under the Actions column, click the ellipses and then select Edit.
The Edit Azure Cloud Account page opens and shows the step-by-step flow. Go to the relevant step where you would want to make the updates and ensure to click Finish after making the updates.
Note: Use the Next button to move to the next step.

Deactivate Cloud Account
To deactivate the Azure MCA account, click the ellipses under the Actions column and select Deactivate.
Click Yes to deactivate the Azure MCA account, else click No.

Delete Cloud Account
To delete an Azure MCA account, under the Actions column, click the ellipses and select Delete.
To delete the cloud account, in the dialog box that appears, type "Yes" in the text box and then click Yes; else click No.

Updated about 1 month ago