

ServiceNow
This guide walks you through integrating ServiceNow Incident, Change, Configuration Management with CoreStack.
Introduction
The new “Change Management” option allows attribute mapping like Title, Description, Configuration Item, Priority, Requester, etc. In Cost Recommendations, users can request approval via ServiceNow. This creates a Change Request with mapped attributes. Upon approval, CoreStack executes the optimization action automatically.
Onboarding New ServiceNow Tools Account
Perform the following steps to onboard a new ServiceNow tools account:
1. Login to the Platform
Login to the platform. You should see a landing page based on your preferences. There are two places from where ServiceNow account can be onboarded, that is, the first option is from the Settings menu and another option is from the Governance menu. Although there are two different places from where onboarding can be started, but the steps involved in onboarding remains the same.
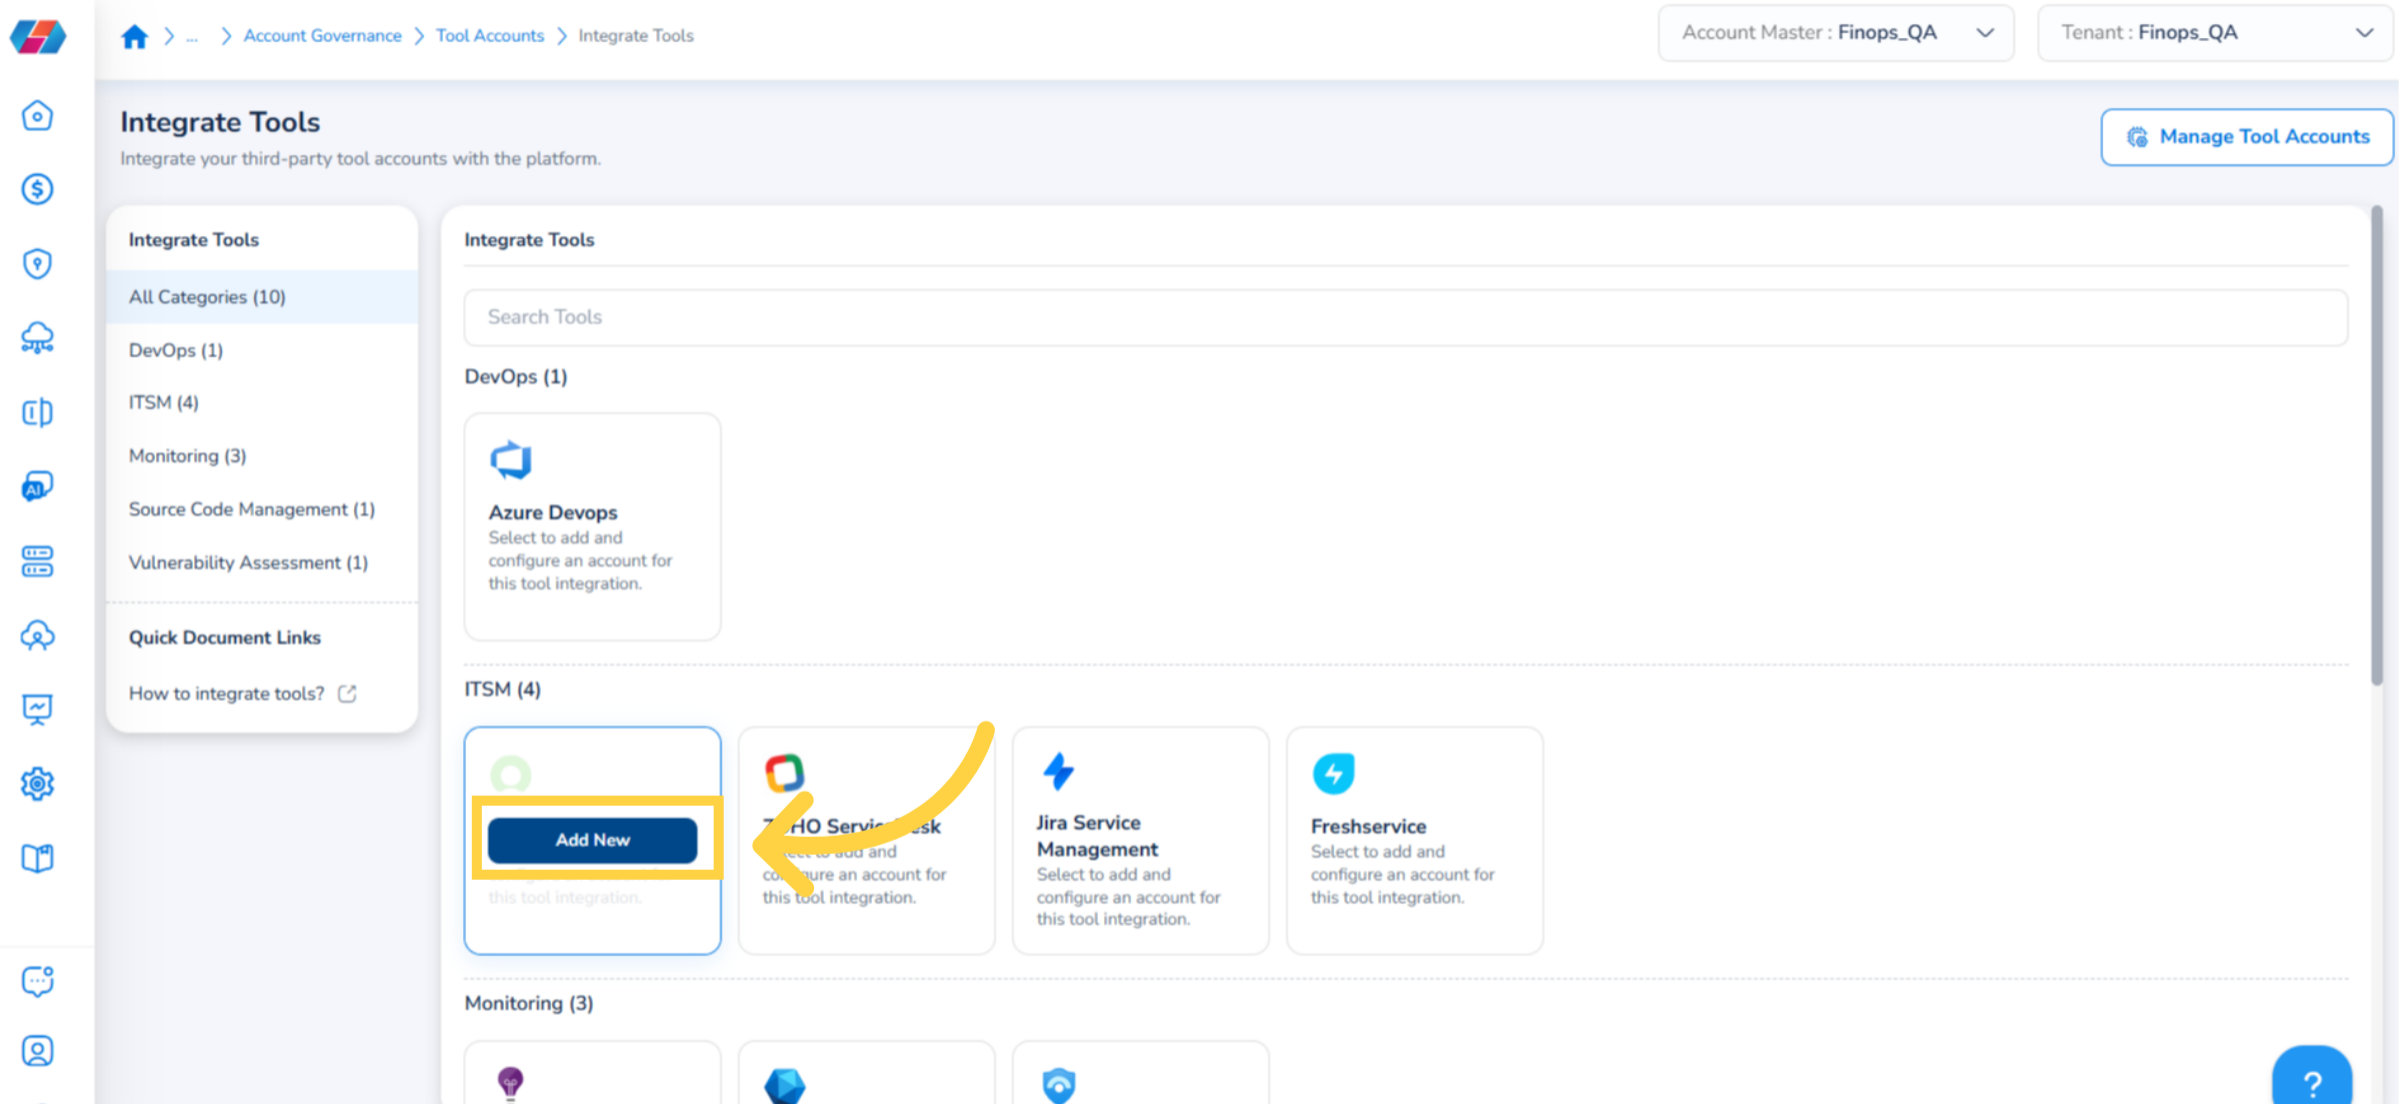
2. Option 1: Navigate to "Settings" in the Menu and Select "Integrated Tools"
On the main menu, click Settings and then click Integrated Tools. The Integrated Tools page opens and this is the preferred place to start the ServiceNow account onboarding.
3. Click "Add New"
Hover the mouse pointer over ServiceNow and click Add New to start the onboarding process.
4. Option 2: Navigate to "Governance" in the Menu and Select "Account Governance" and then Select "Tools" in the Menu
Alternatively, on the main menu, navigate to Governance, then select Account Governance, and then select Tools. The Integrated Tools page appears and you can start the ServiceNow onboarding from here.
5. Click "ITSM"
On the left pane, click the ITSM category to expand it and access the available IT service management tools.
6. Click "ServiceNow"
Click to select ServiceNow from the list of ITSM tools to start the integration process.
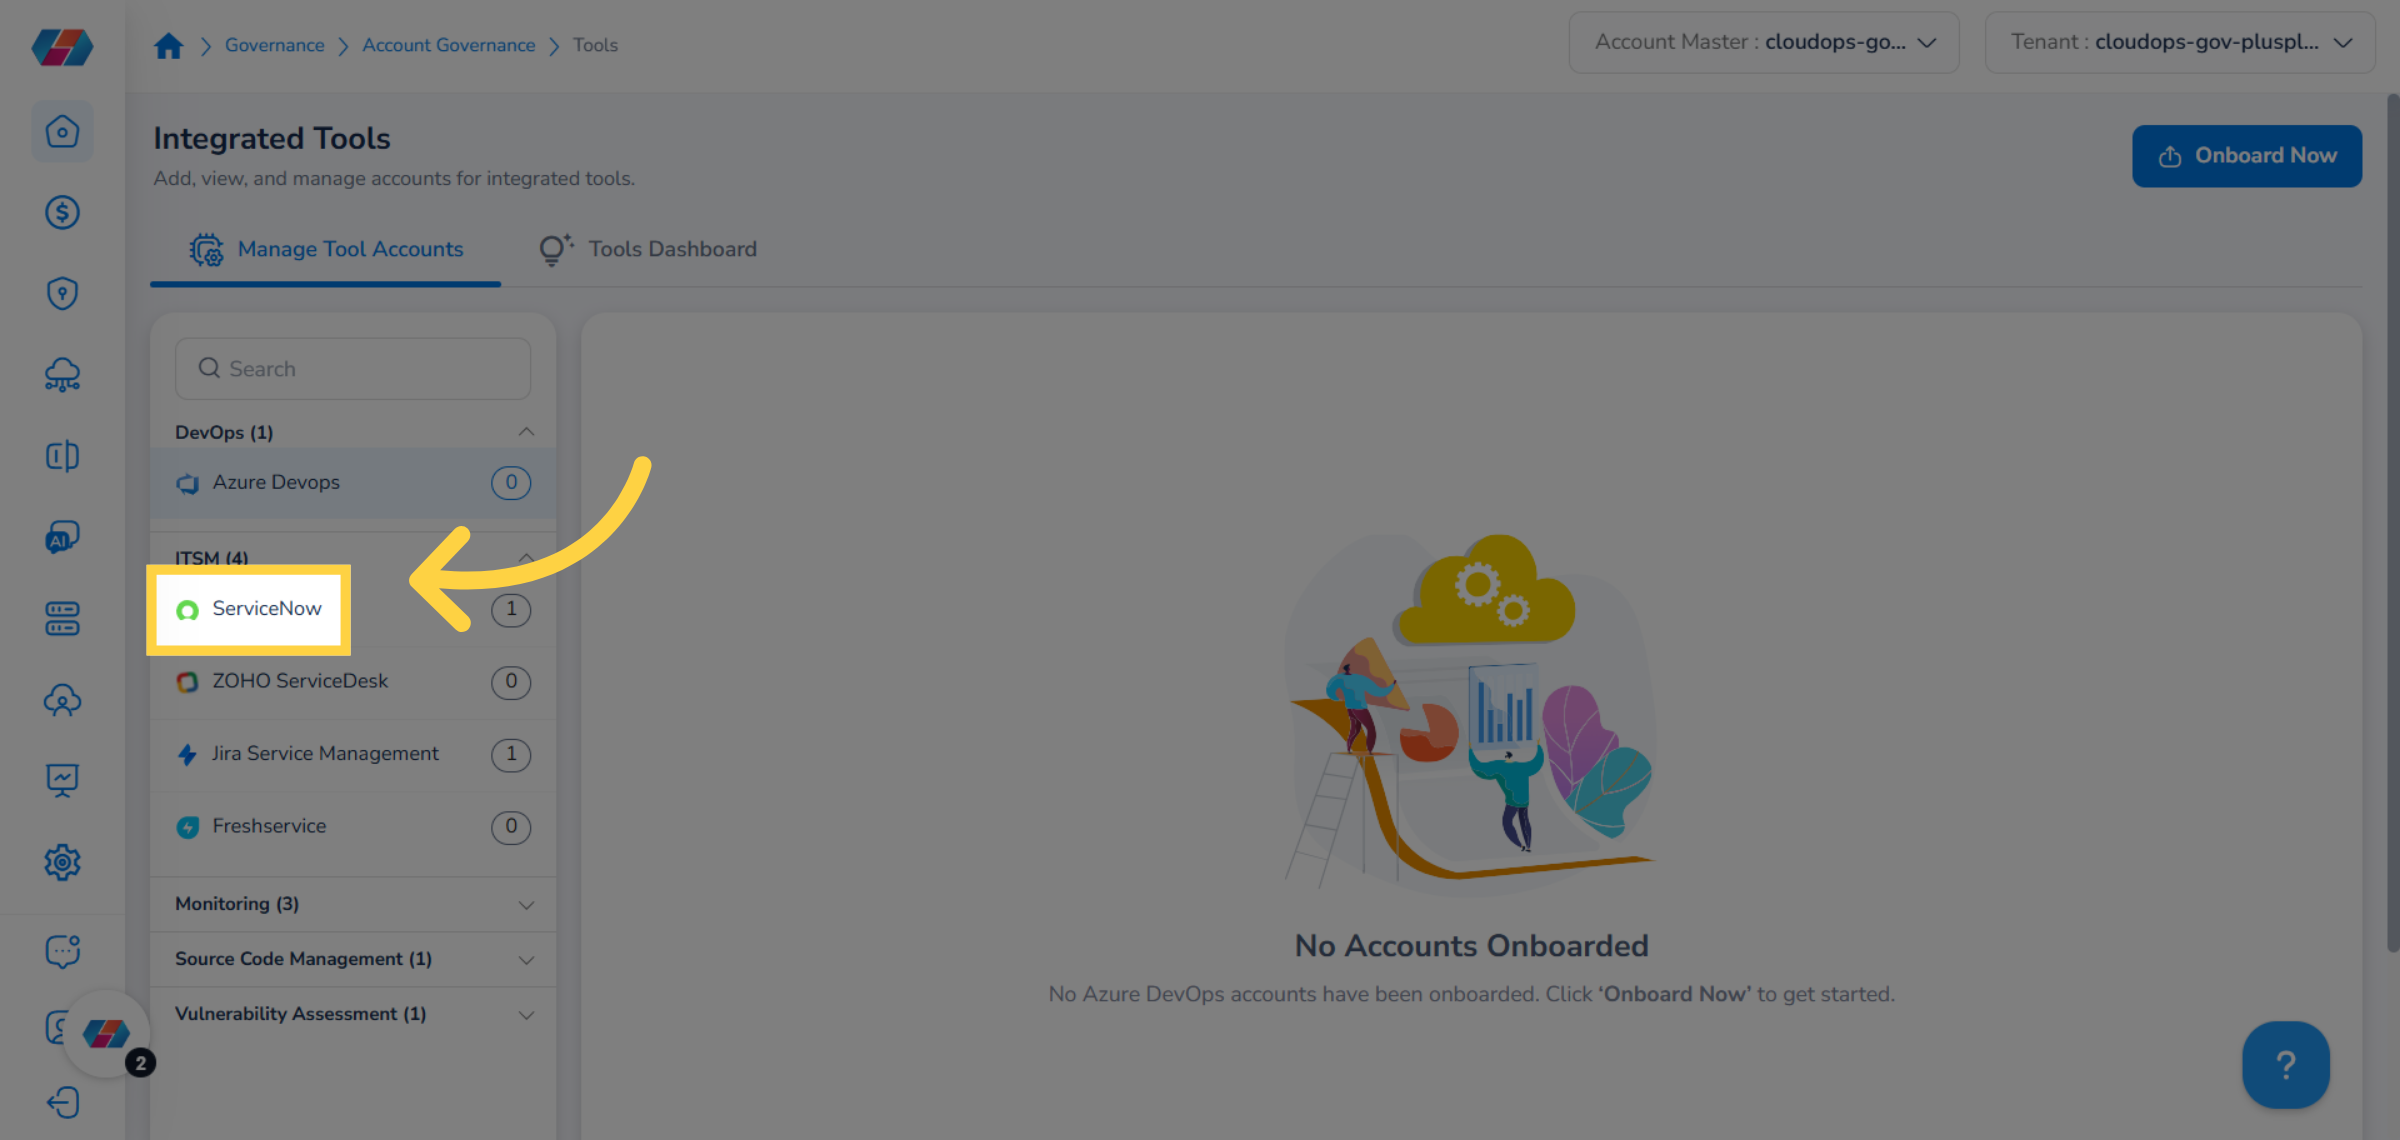
7. Onboard ServiceNow Tool Account
To onboard a new ServiceNow tool account, click Onboard Now.
8. Click Add New
In the ITSM section, hover the mouse pointed over ServiceNow, and then click Add New.
9. Select Tool Account Scope
Note:From this step onwards, the onboarding process is same irrespective of whether you started the onboarding from Governance or the Settings main menu.
In the Prerequisites step, in the Select Tool Account Scope field, select either Tenant or Account.
- Tenant: If you select this option, then the tool account will only be available in the tenant it's onboarded to.
- Account: If you select this option, then the tool account will be available in all tenants under your platform account.
Click Next to fill details in the Add & Validate Credentials step.
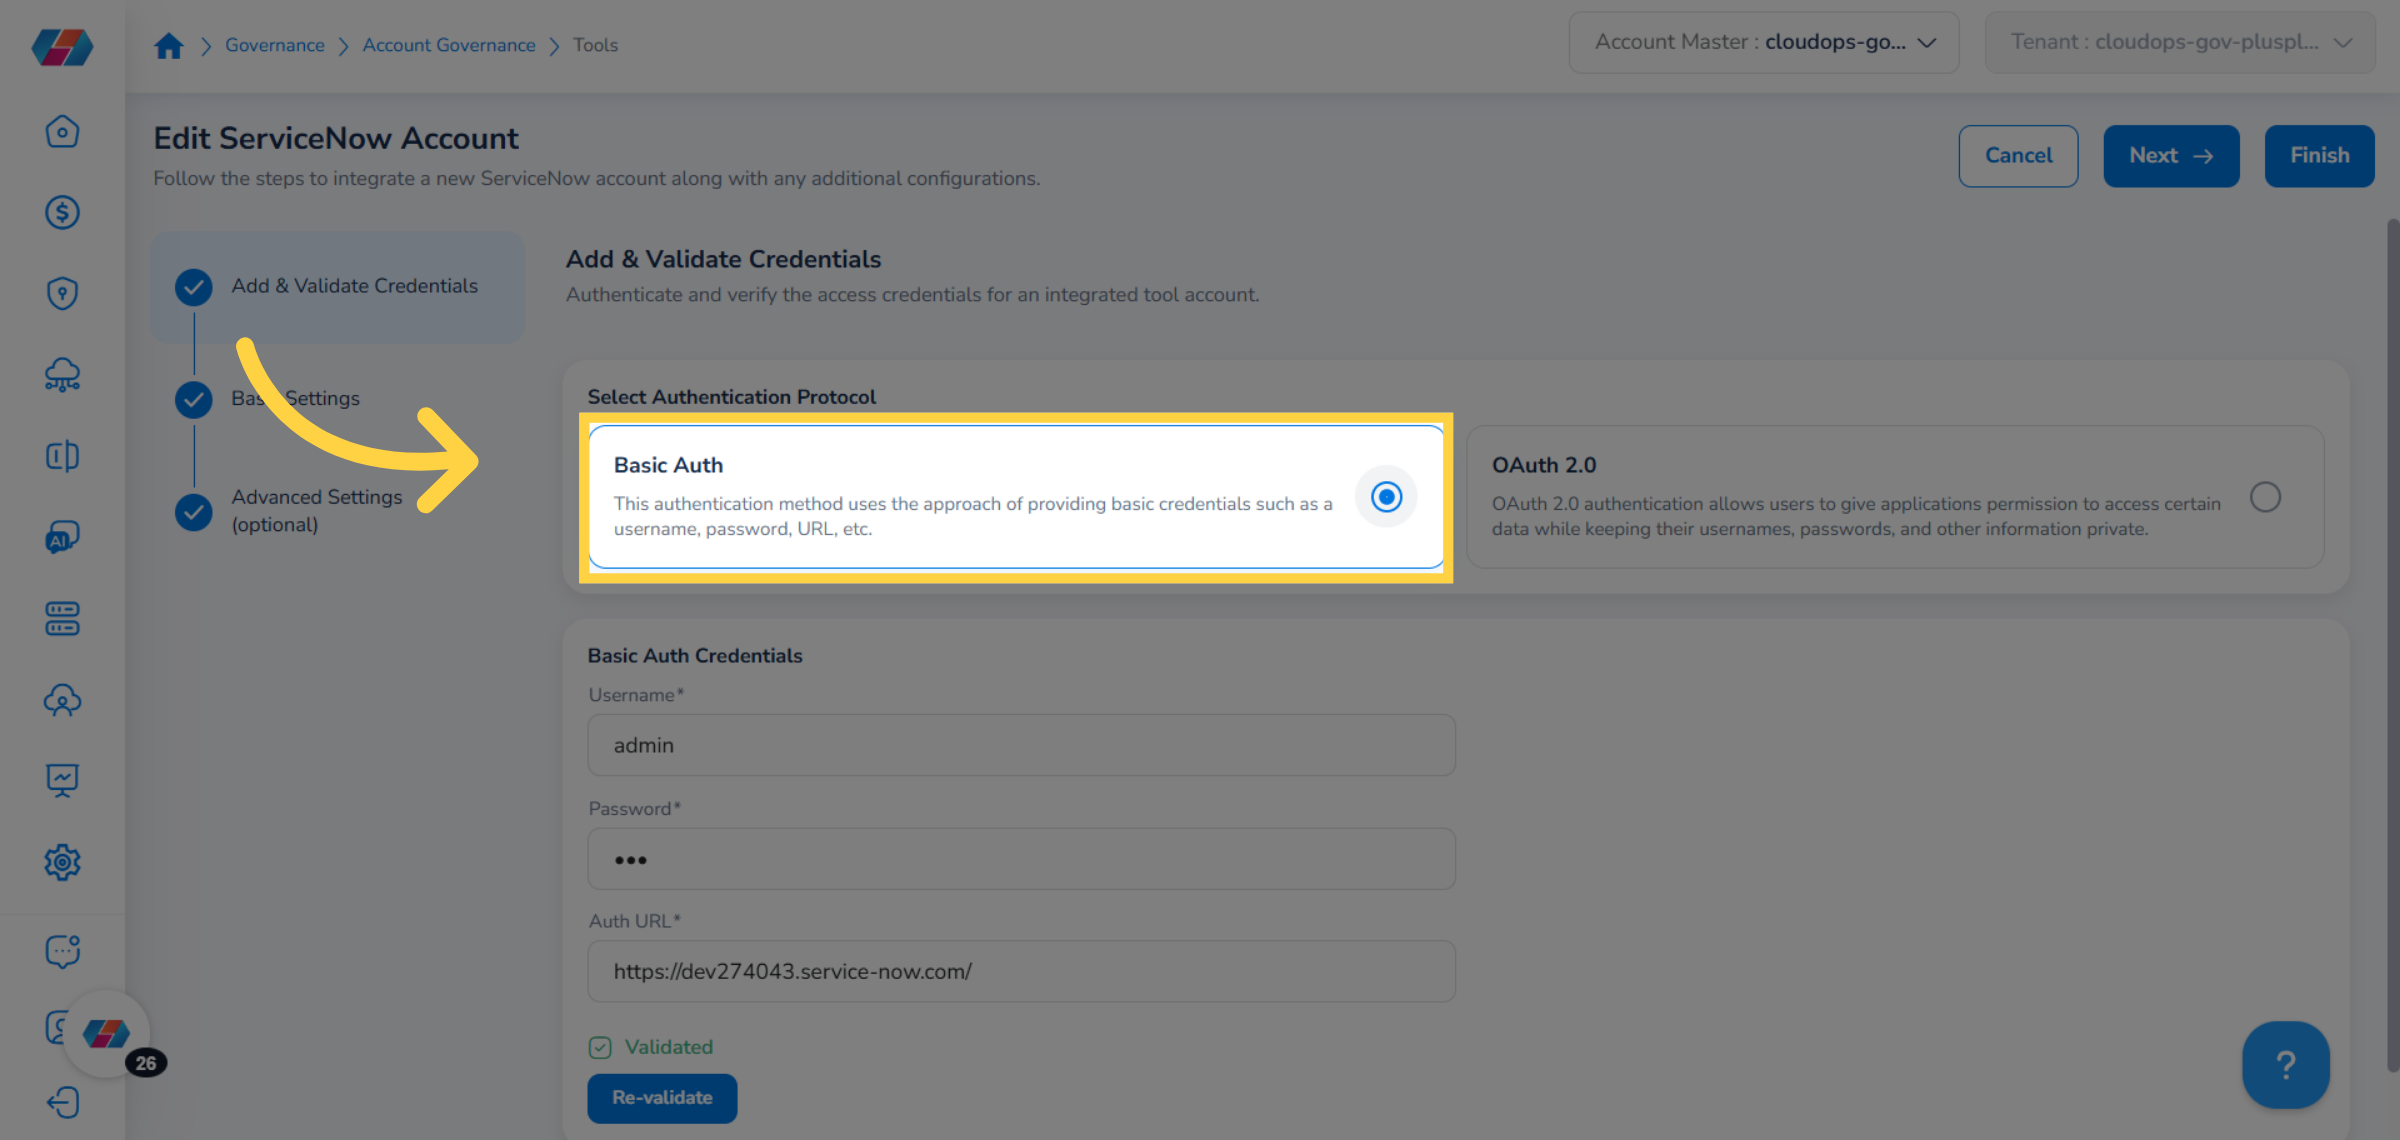
10. Select Authentication Protocol
In the Select Authentication Protocol field, select either Basic Auth or OAuth 2.0.
11. Select Basic Auth
If you select the Basic Auth option, then fill the following fields and then click Save and Validate.
- Username
- Password
- Auth URL
Note:Click Re-validate to validate the details again.
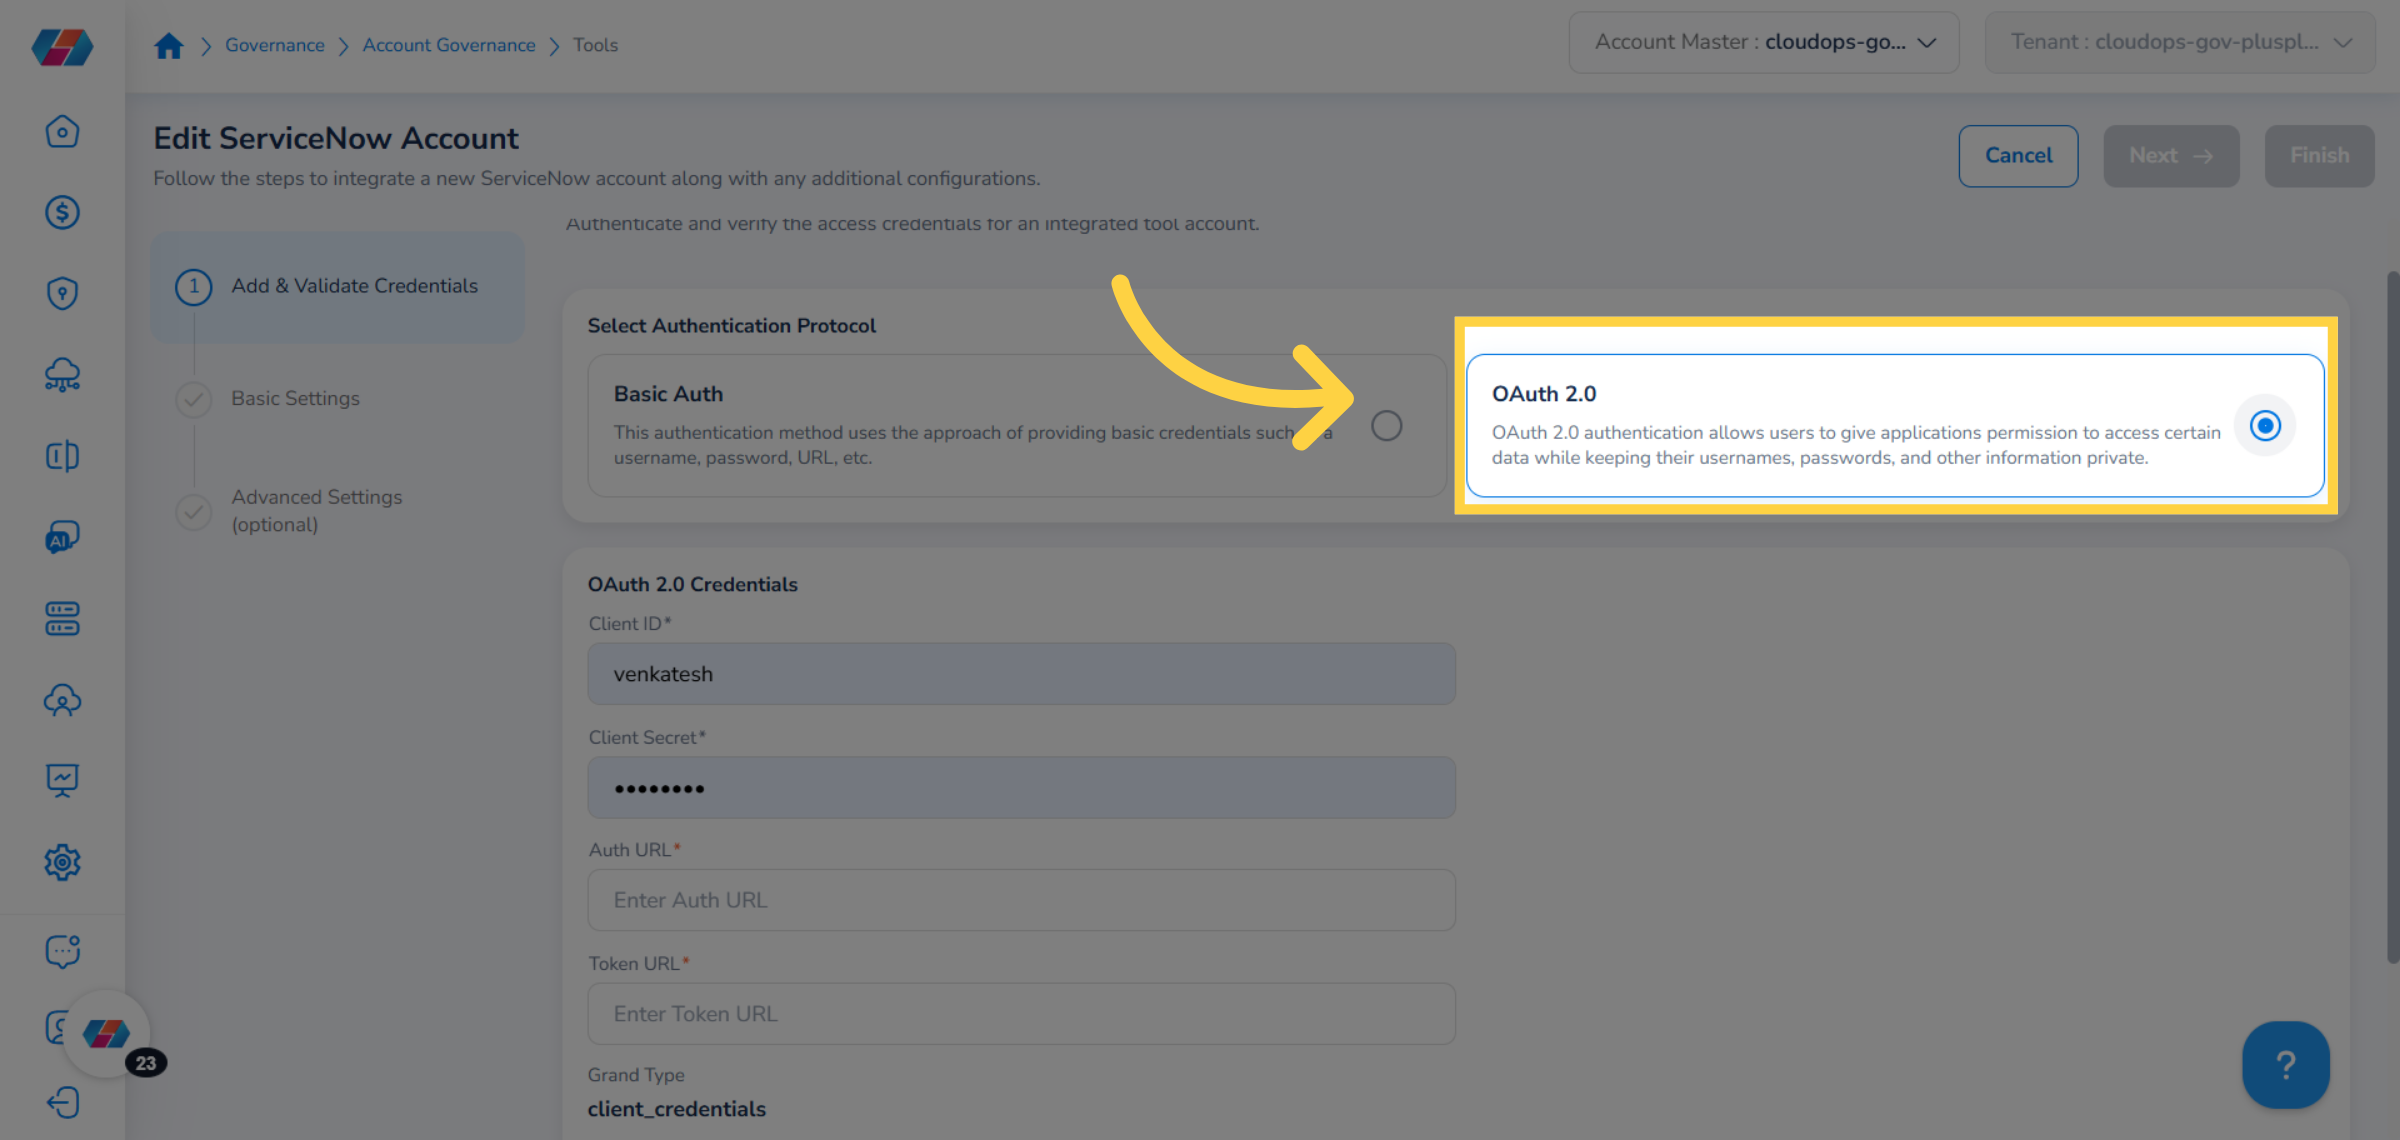
12. Select OAuth 2.0
If you select the OAuth 2.0 option, then fill the following fields and then click Save & Validate.
- Client ID
- Client Secret
- Auth URL
- Token URL
Note:Click Re-validate to validate the details again.
13. Click "Next"
To go to the Basic Settings page, click Next.
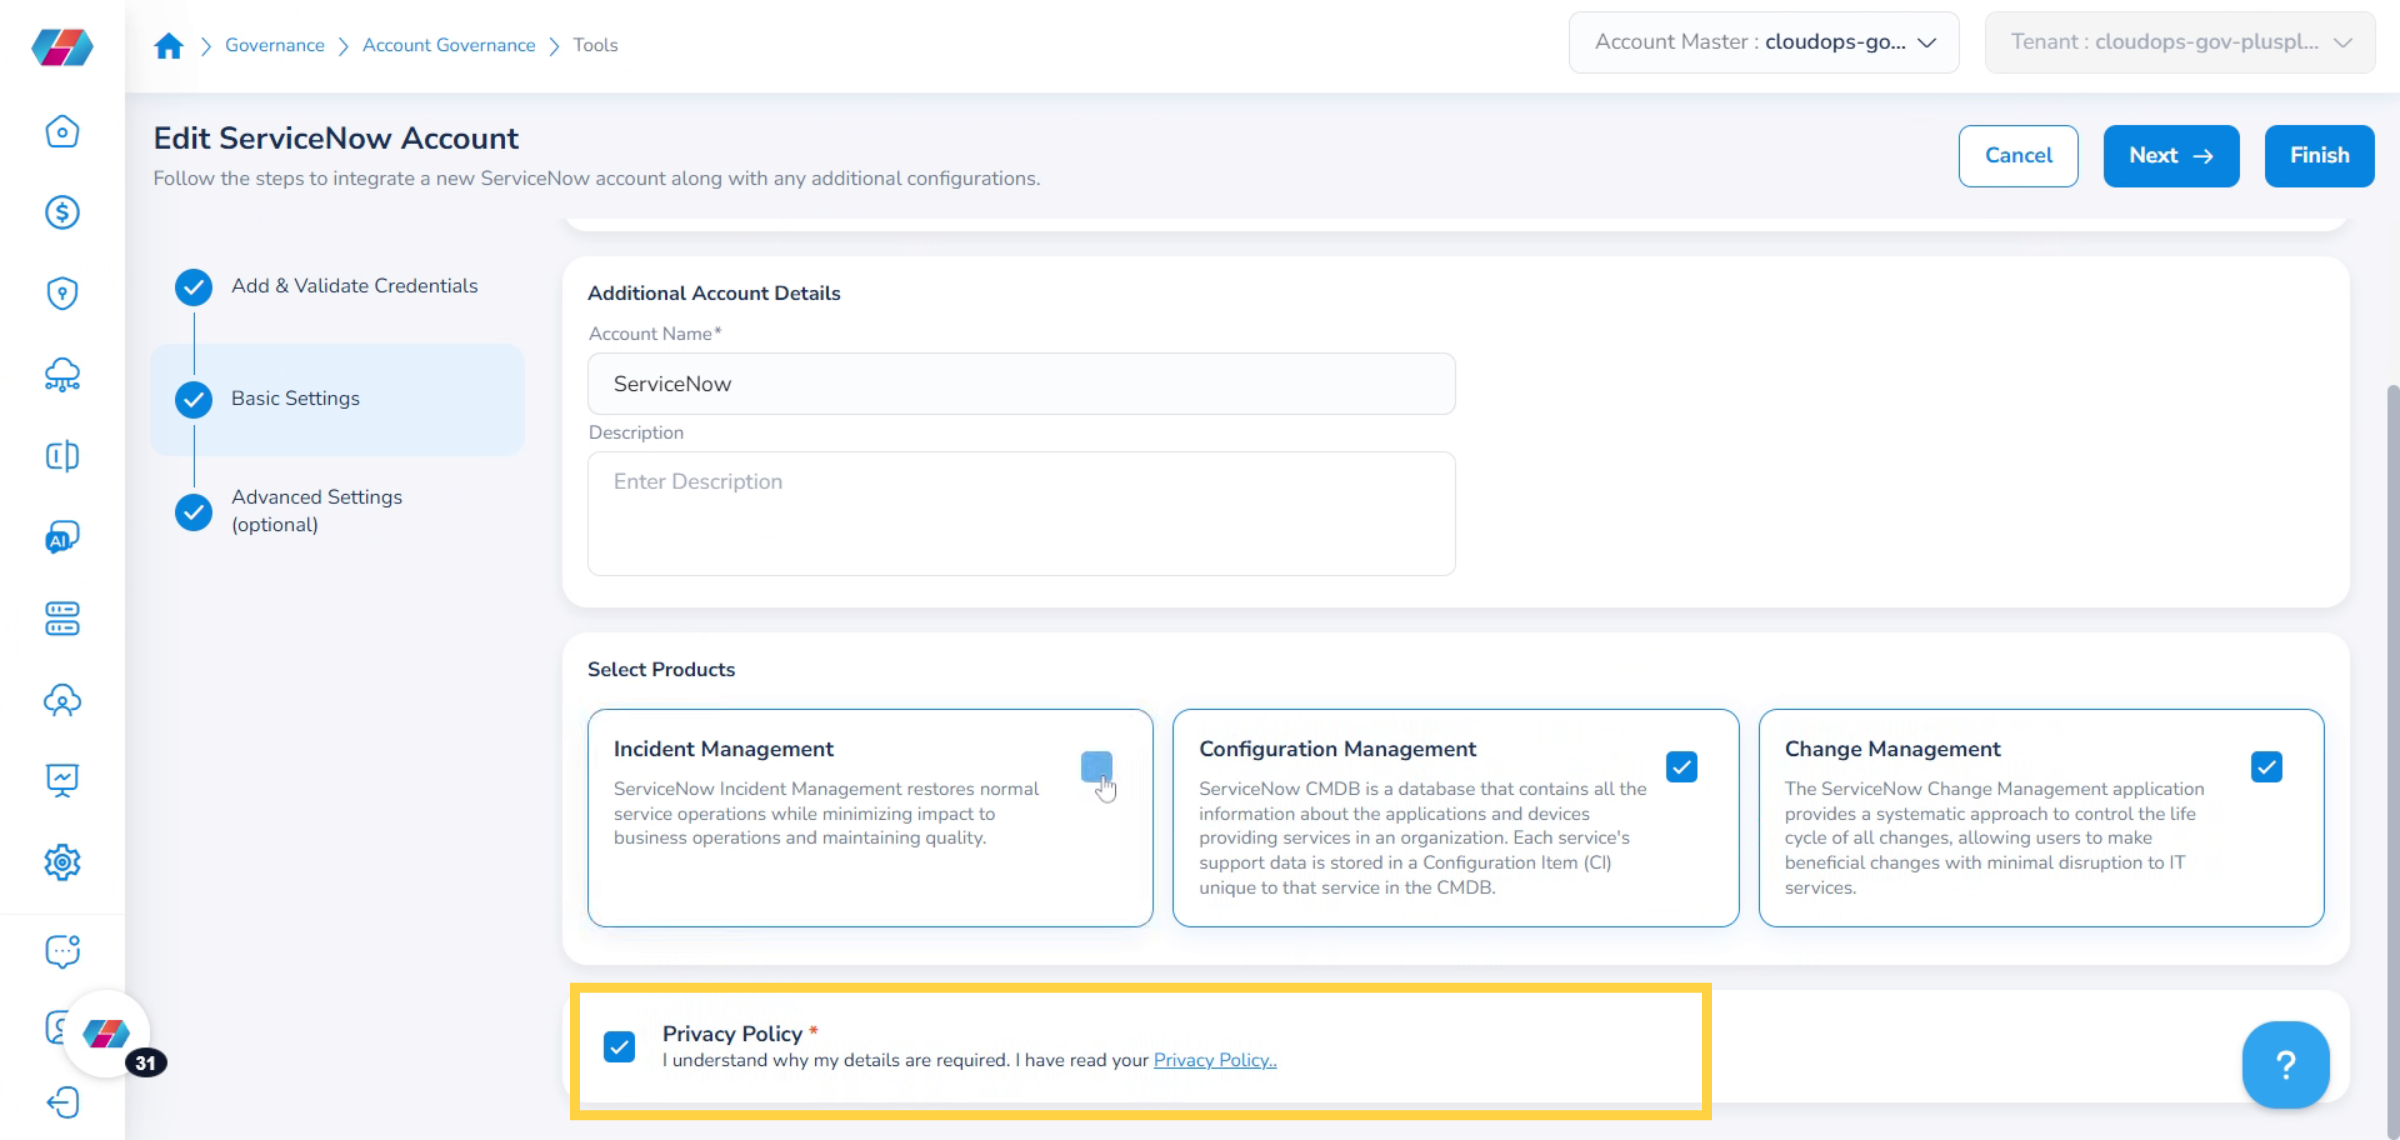
14. Enter Additional Account Details
In the Account Name box, enter the name of the account and in the Description text box, type a description for the account.
15. Select Products
In the Select Products section, select any of the following options:
- Incident Management: ServiceNow Incident Management restores normal service operations while minimizing impact to business operations and maintaining quality.
- Configuration Management: ServiceNow CMDB is a database that contains all the information about the applications and devices providing services in an organization. Each service's support data is stored in a Configuration Item (CI) unique to that service in the CMDB.
- Change Management: The ServiceNow Change Management application provides a systematic approach to control the life cycle of all changes, allowing users to make beneficial changes with minimal disruption to IT services.
16. Select "Privacy Policy"
Select the Privacy Policy checkbox and click Next.
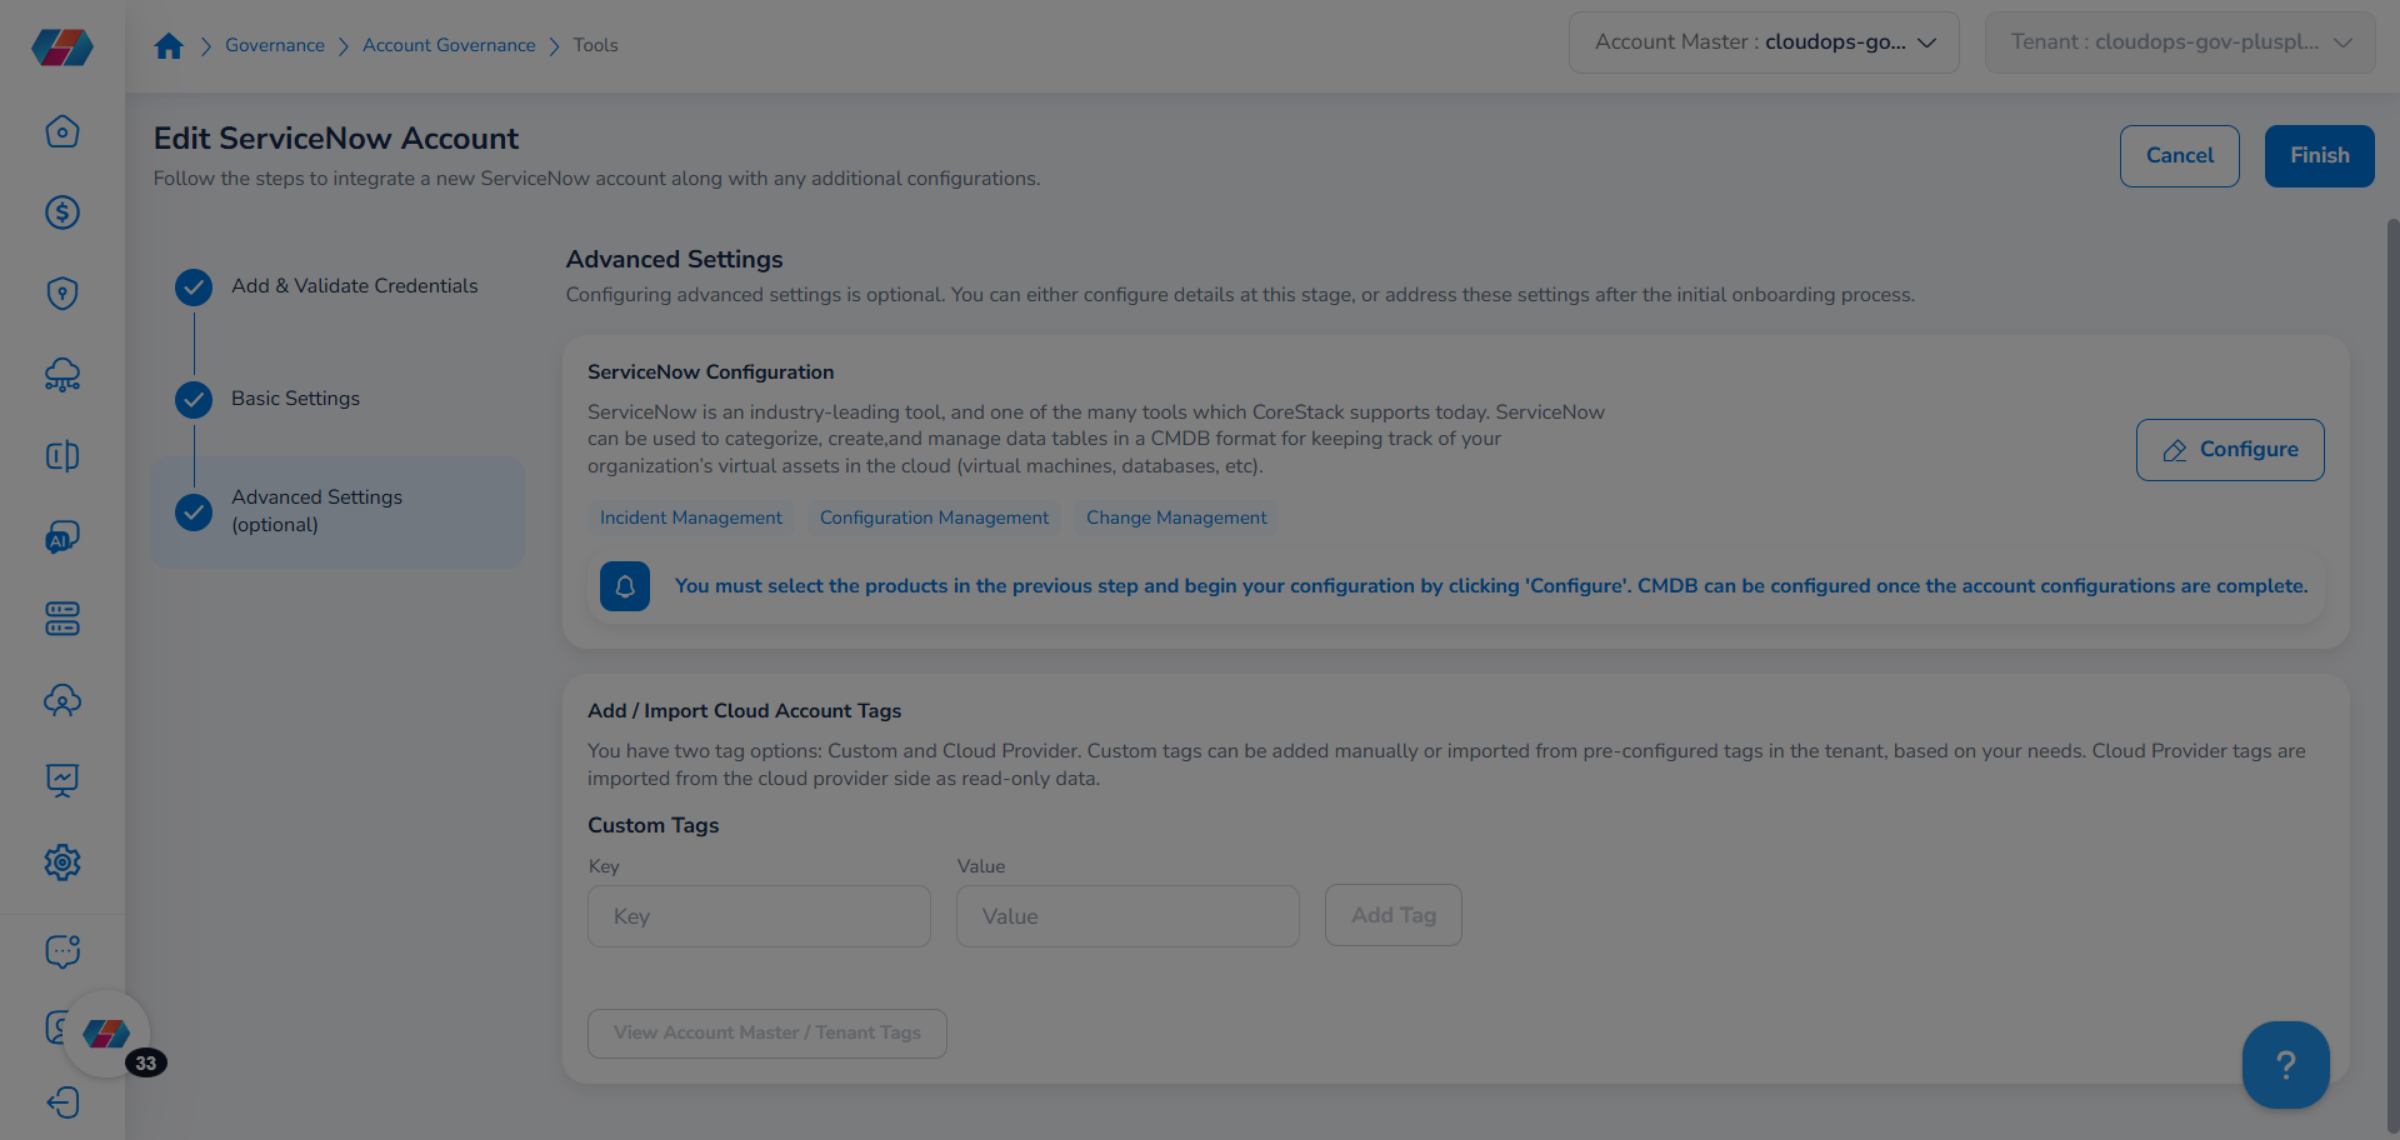
17. Advanced Settings Page
The last and optional step for onboarding a ServiceNow tool account is configuring the Advanced Settings page.
18. Add Custom Tags
To add a custom tag:
- In the Key box, type the tag key.
- In the Value box, type the tag value.
- Click Add Tagand the newly added tag displays below.
ServiceNow Configuration
Perform the following steps to configure a ServiceNow tools account:
1. Click Configure
To make ServiceNow configuration, click Configure.

2. Select Incident Management or Change Management
On the left panel, users can click Incident Management and configure attributes. Similarly, users can click Change Management and configure attributes.
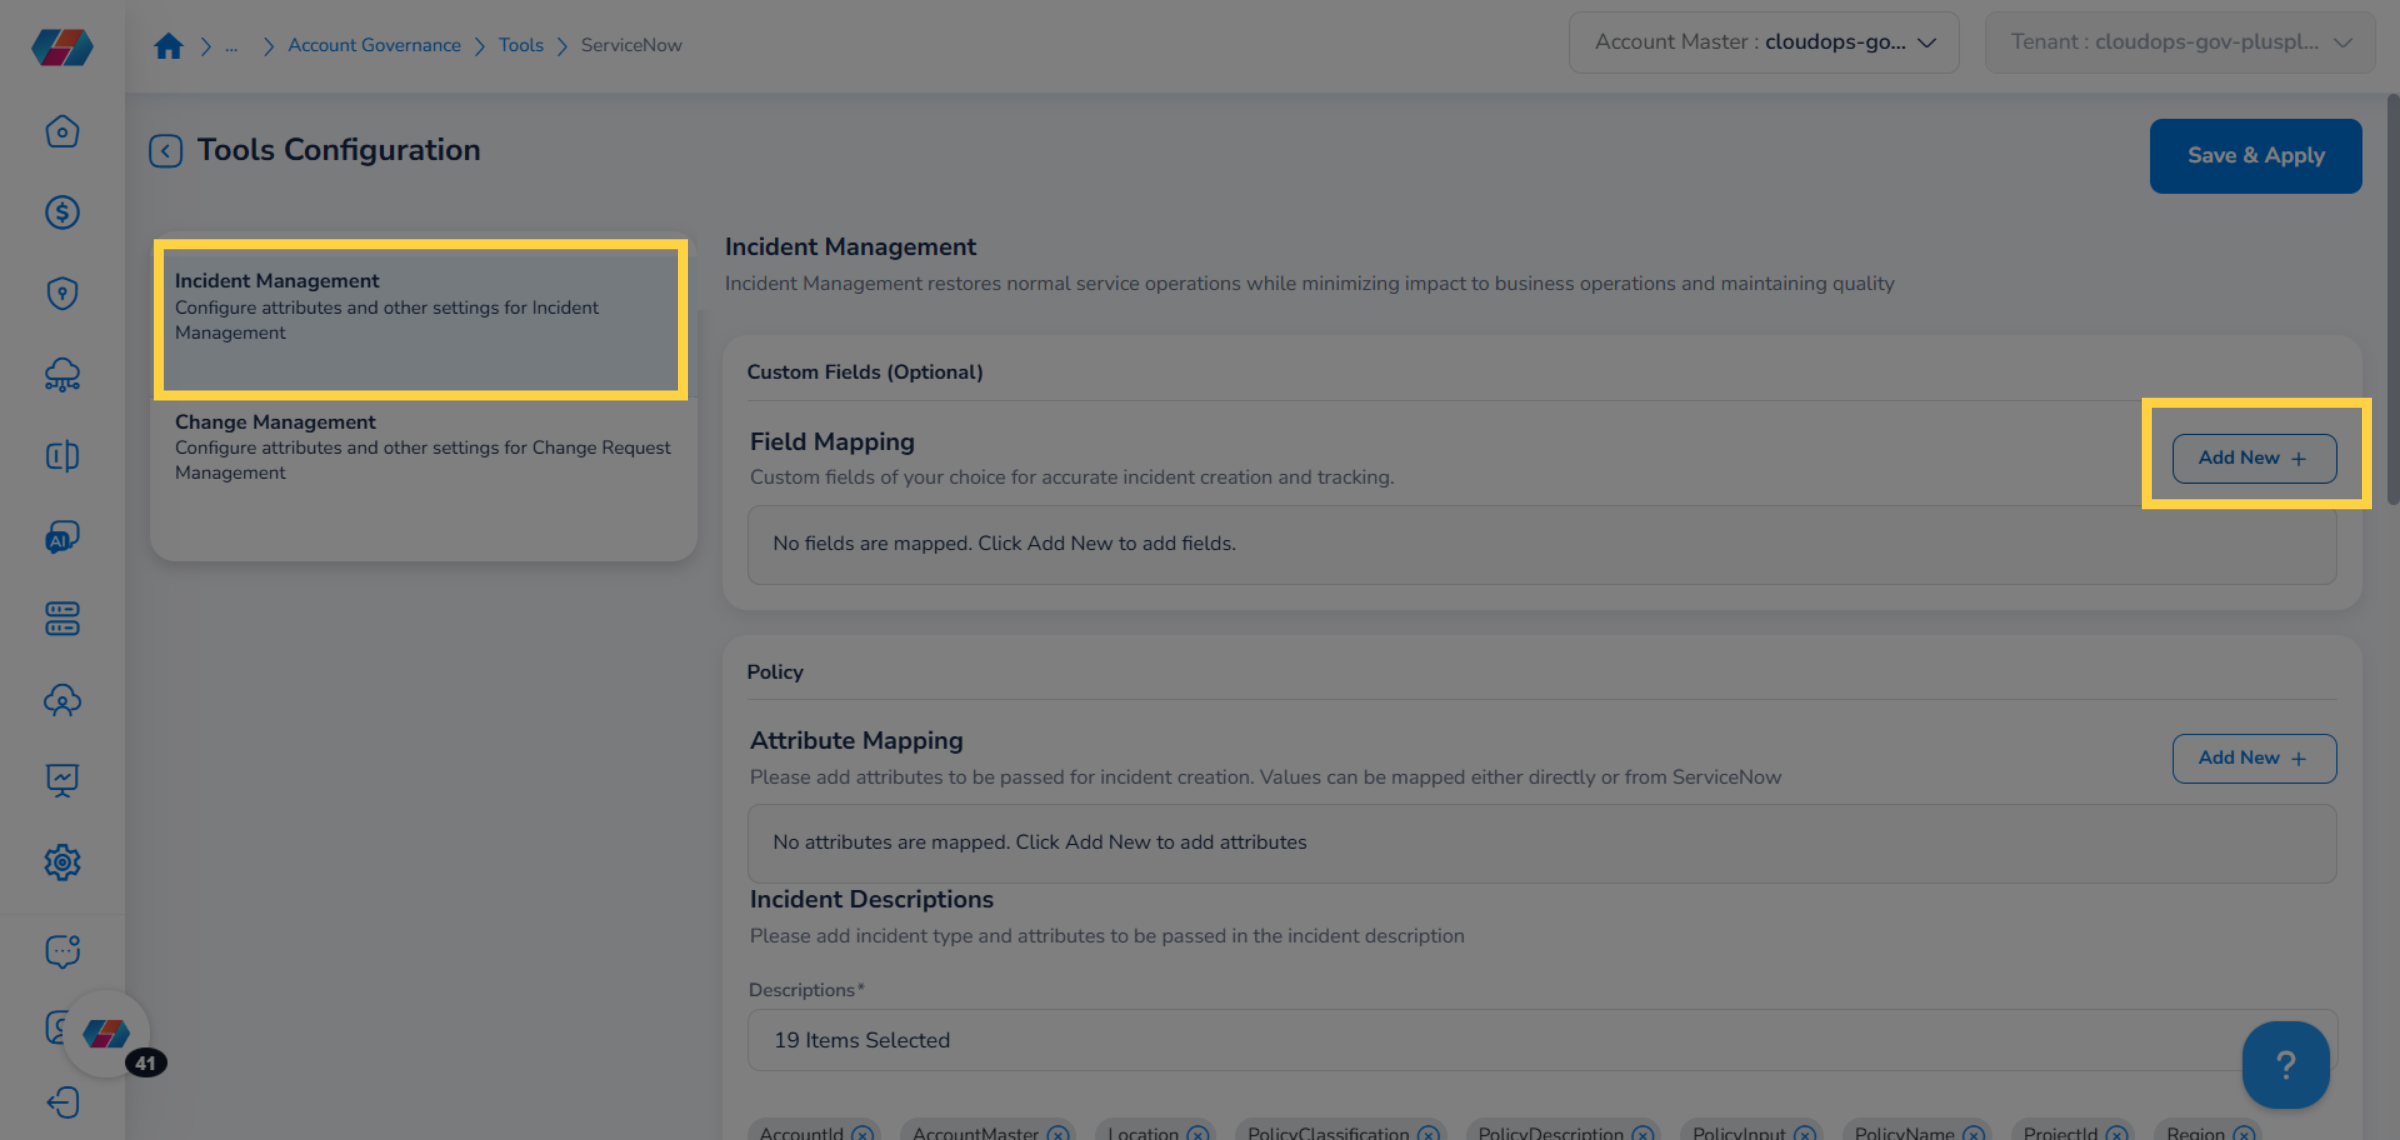
Incident Management Configuration
Perform the following steps to configure incident management:
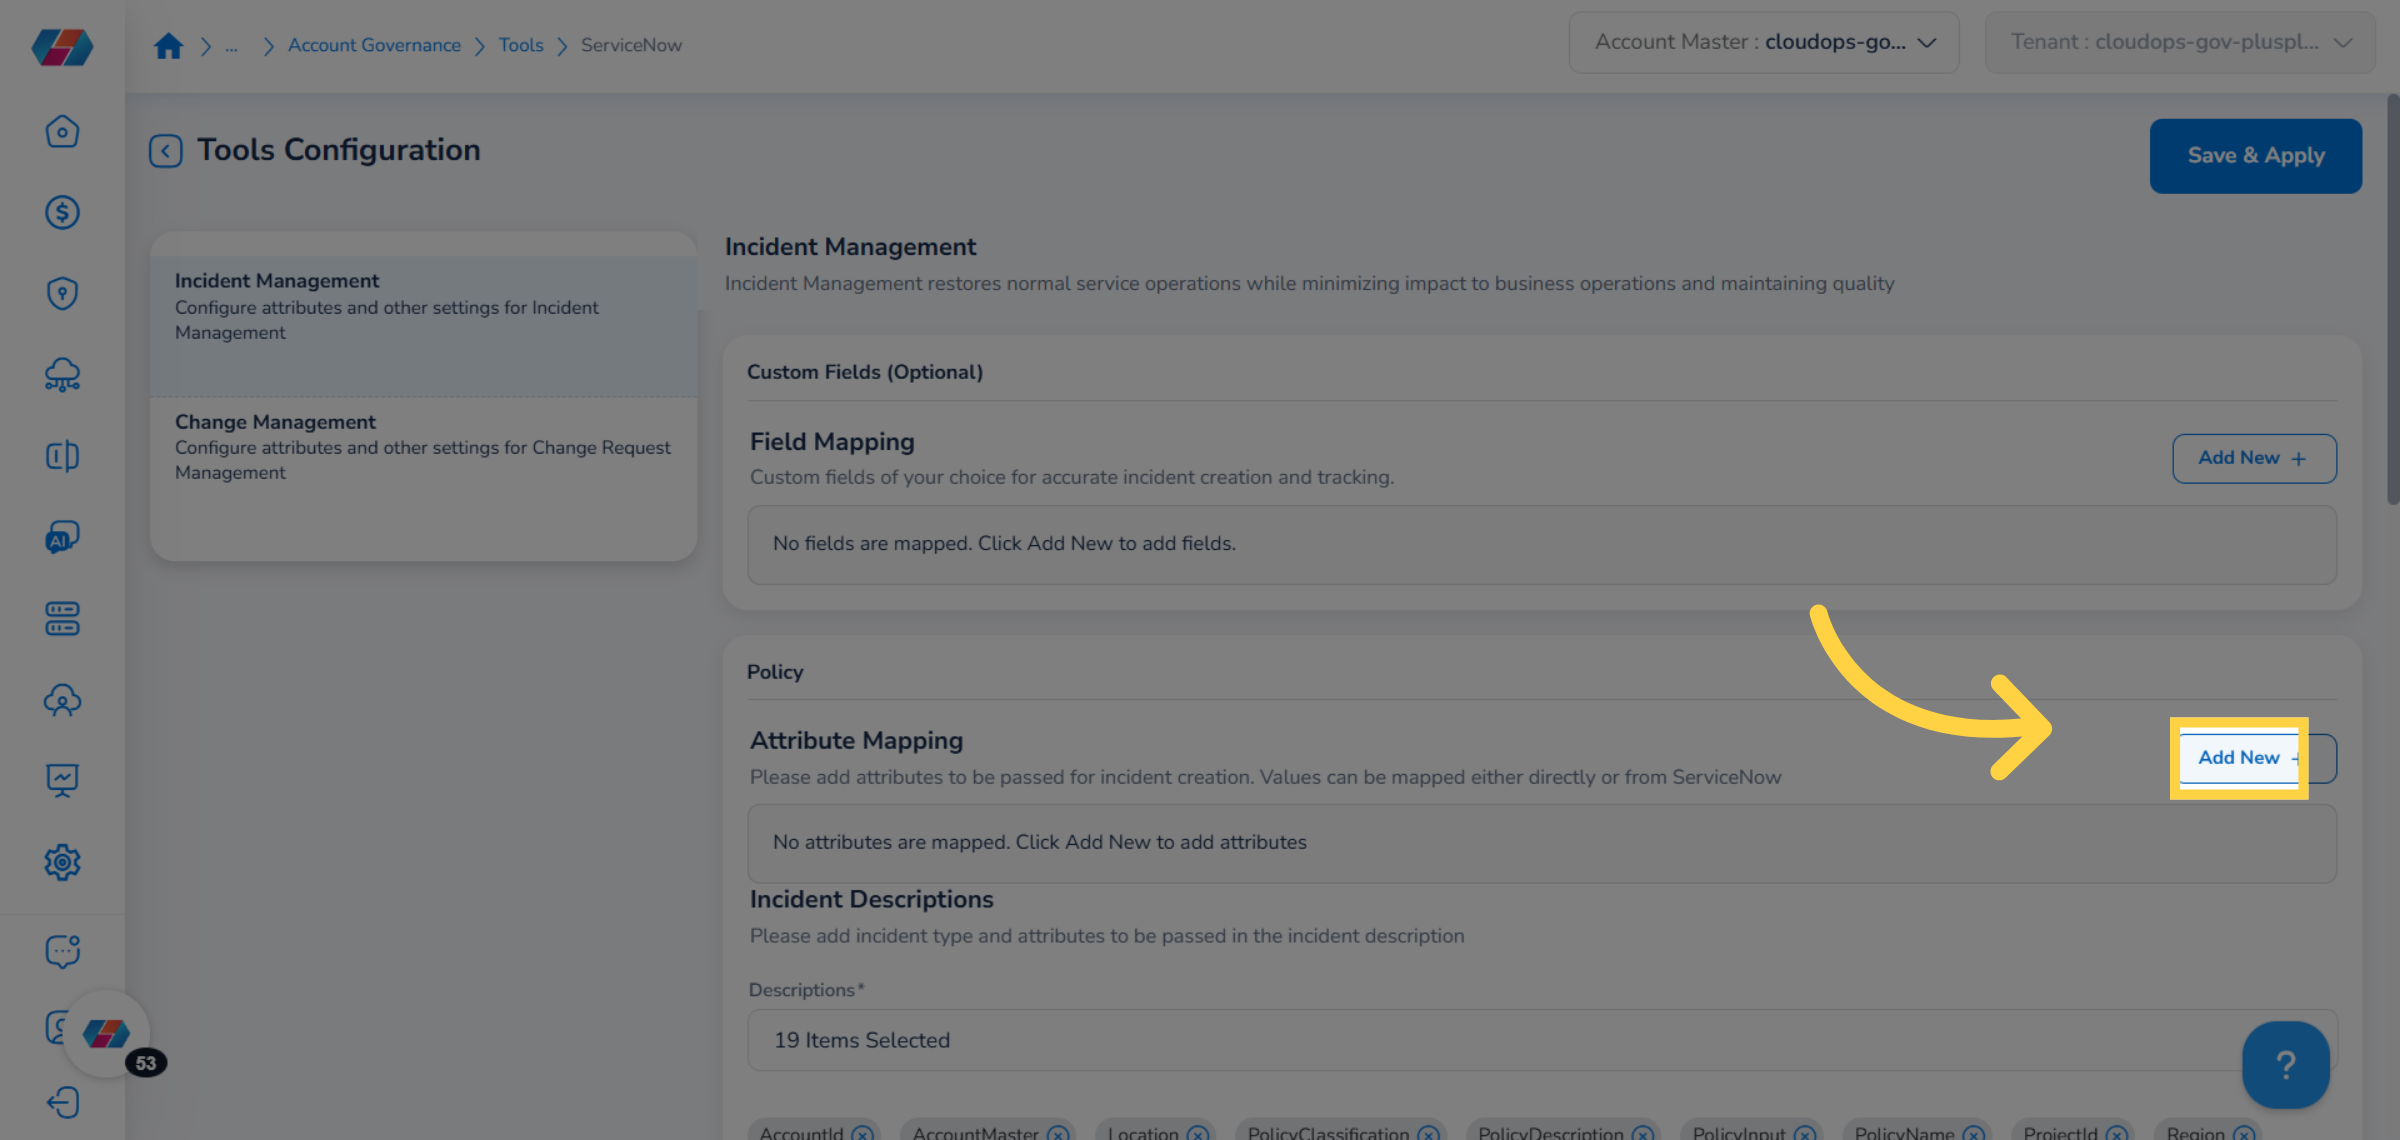
1. Incident Management - Configure Custom Fields (Optional)
On the left panel, click Incident Management to configure attributes. Next, in the Custom Fields (Optional) section, click Add New to add new fields.
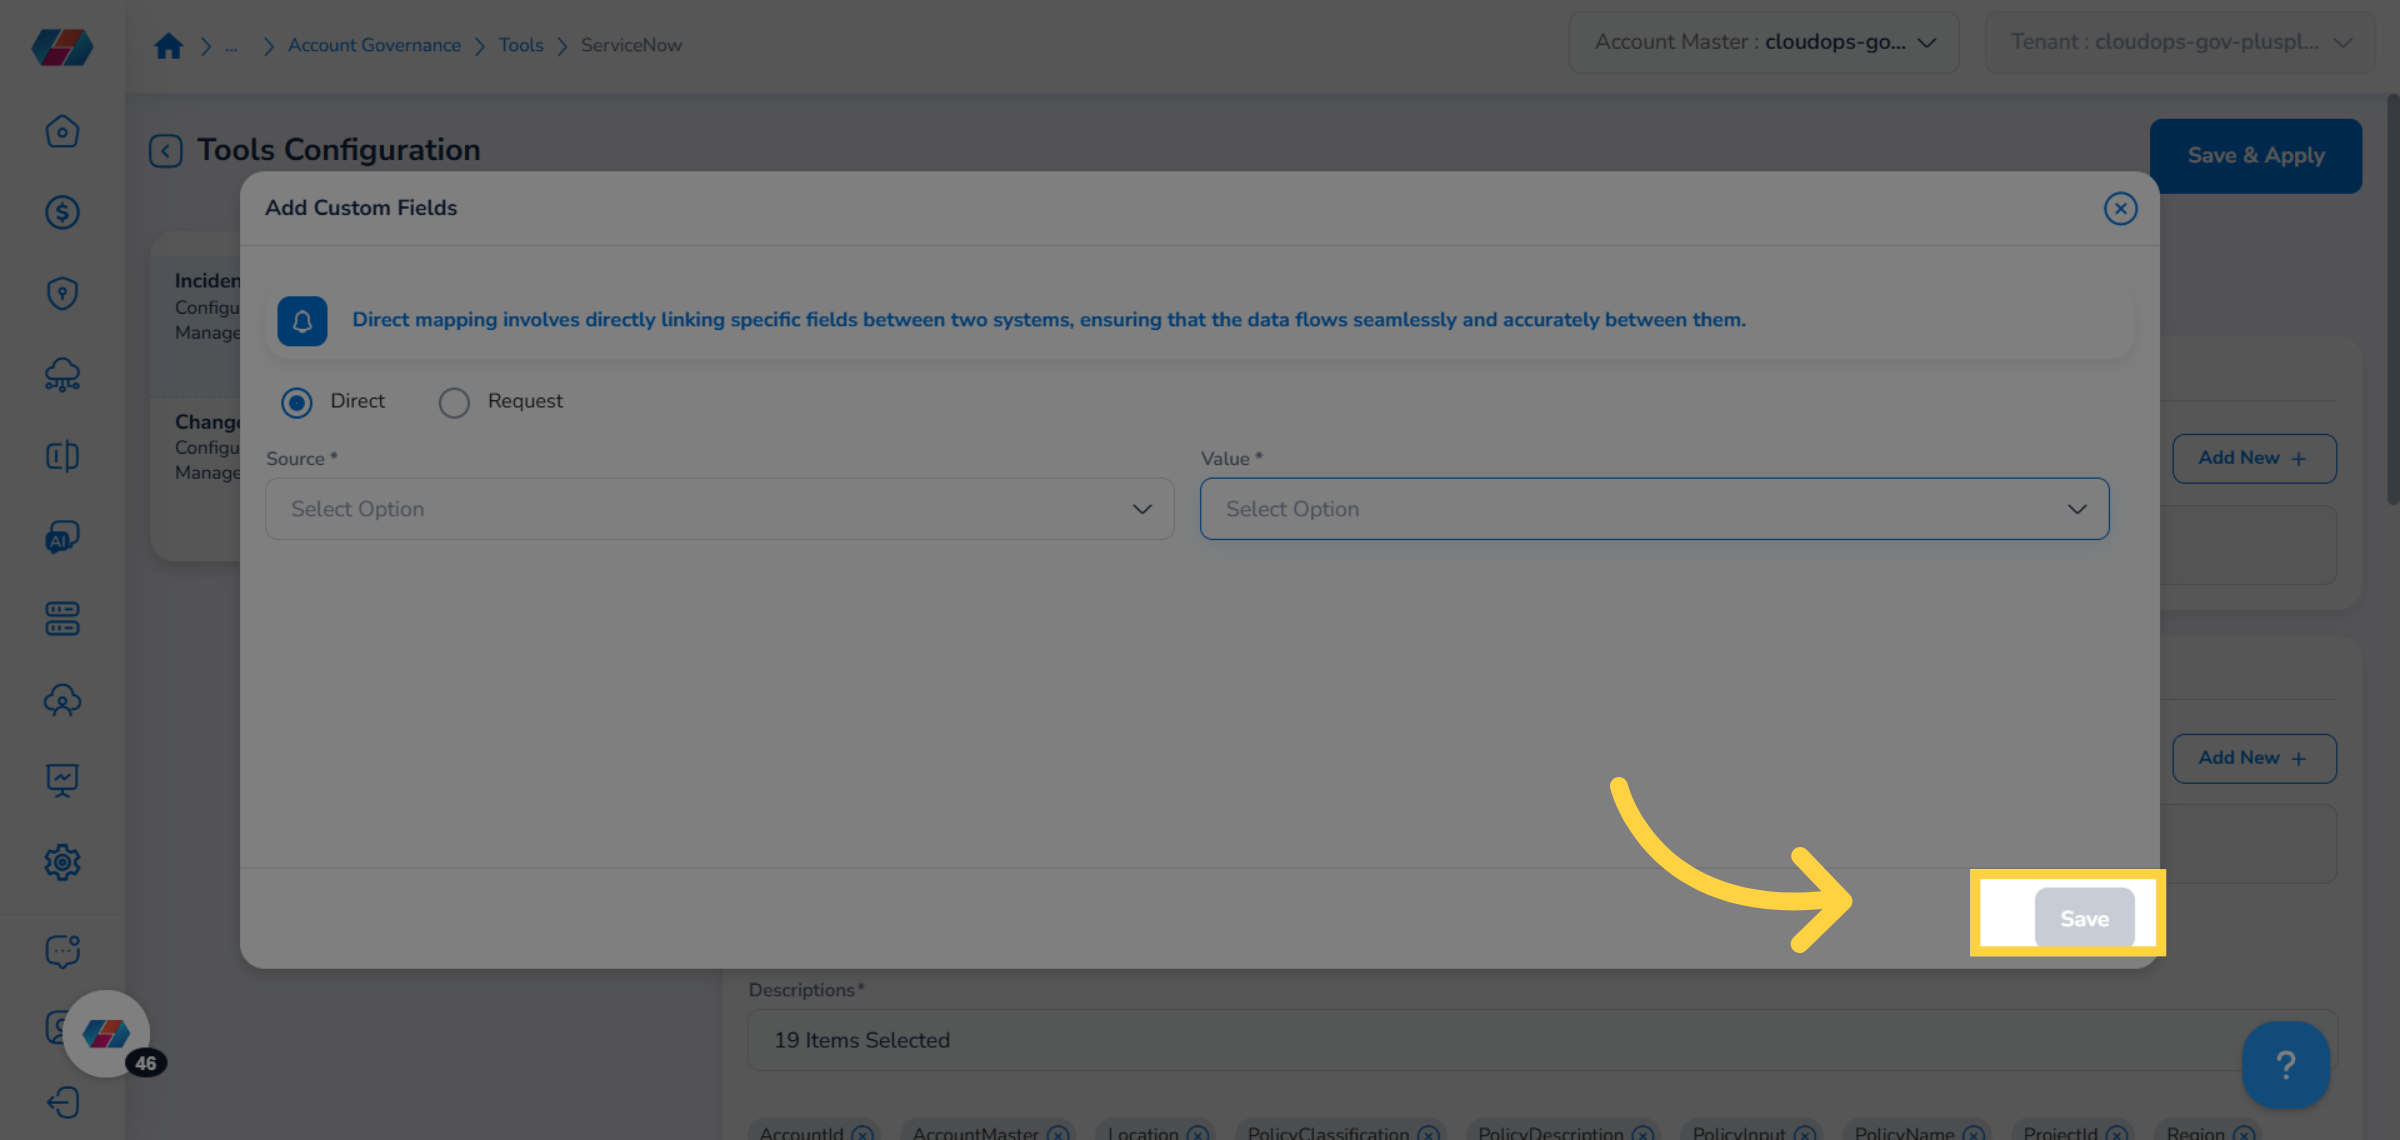
2. Select Direct or Request
In the Add Custom Fields dialog box, select either Direct or Request.
3. Select Options for Source
The direct mapping involves directly linking specific fields between two systems, ensuring that the data flows seamlessly and accurately between them. In the Source drop-down list, click to select relevant option(s) and click Ok.
4. Select Options for Value
In the Value drop-down list, click to select relevant option(s) and click Ok.
5. Click "Save"
Click Save to add the field.
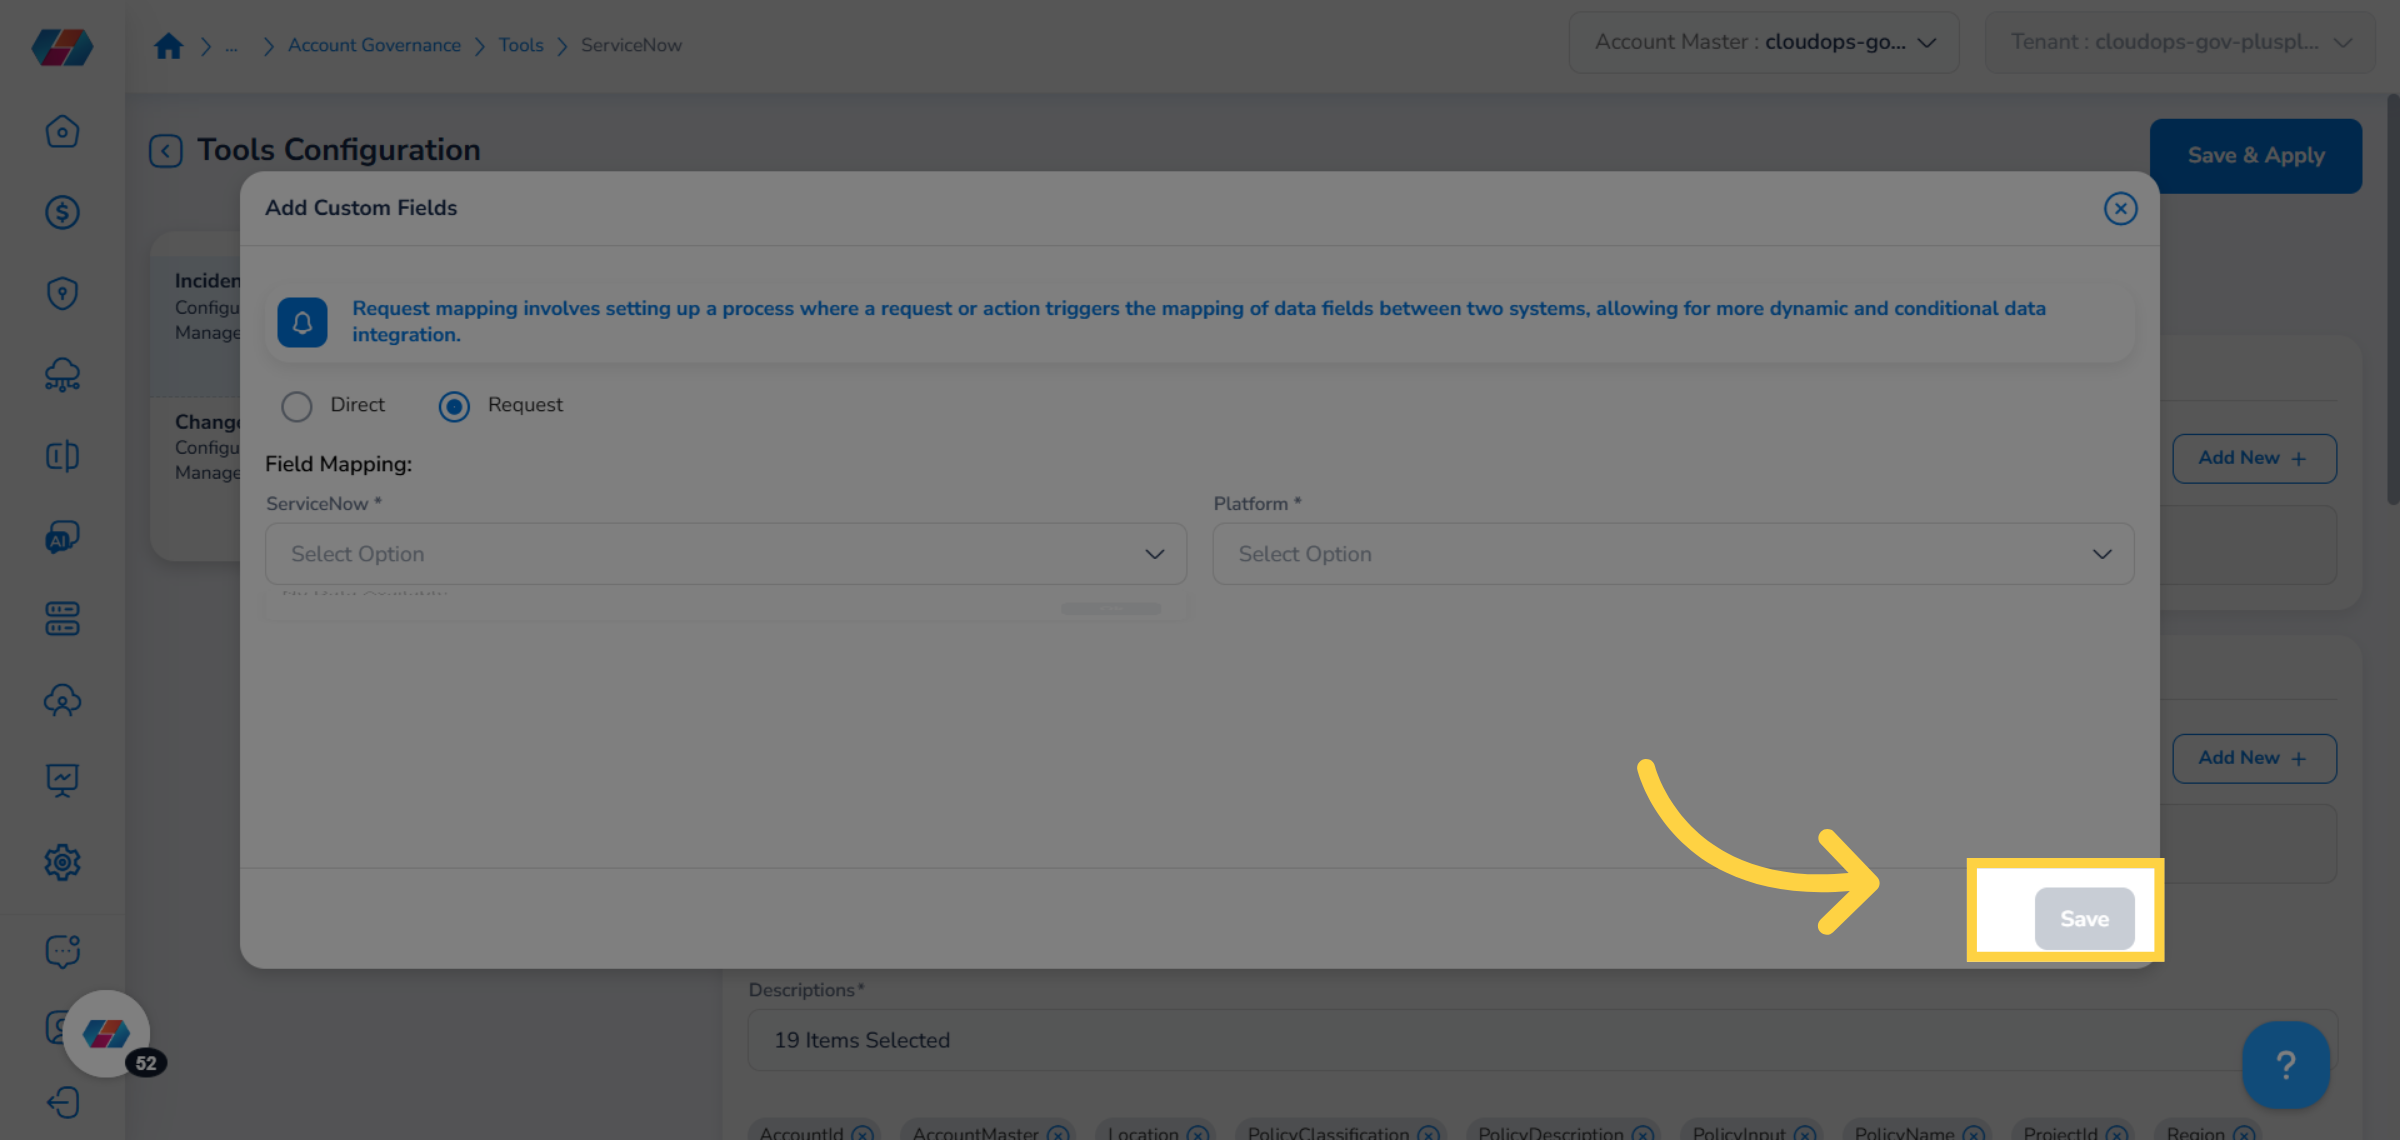
6. Select "Request"
You can select the Request option for field mapping. The request mapping involves setting up a process where a request or action triggers the mapping of data fields between two systems, allowing for more dynamic and conditional data integration.
7. Click "ServiceNow"
In the ServiceNow drop-down list, click to select relevant option(s) and click Ok.
8. Select "Platform"
In the Platform drop-down list, click to select relevant option(s) and click Ok.
9. Select "Tenant Value" and "Tenant Name Value"
In the Tenant Value drop-down list, click to select relevant option(s) and then click Ok. After that, in the Tenant name value drop-down list, click to select an option and then click Ok. Click Add to add the value mapping. The field added by you appears below.
Note:To remove the value mapping, click the cross symbol.
10. Click "Save"
Click Save to add the field.
11. Click "Add New"
To perform attribute mapping for Policy, click Add New.
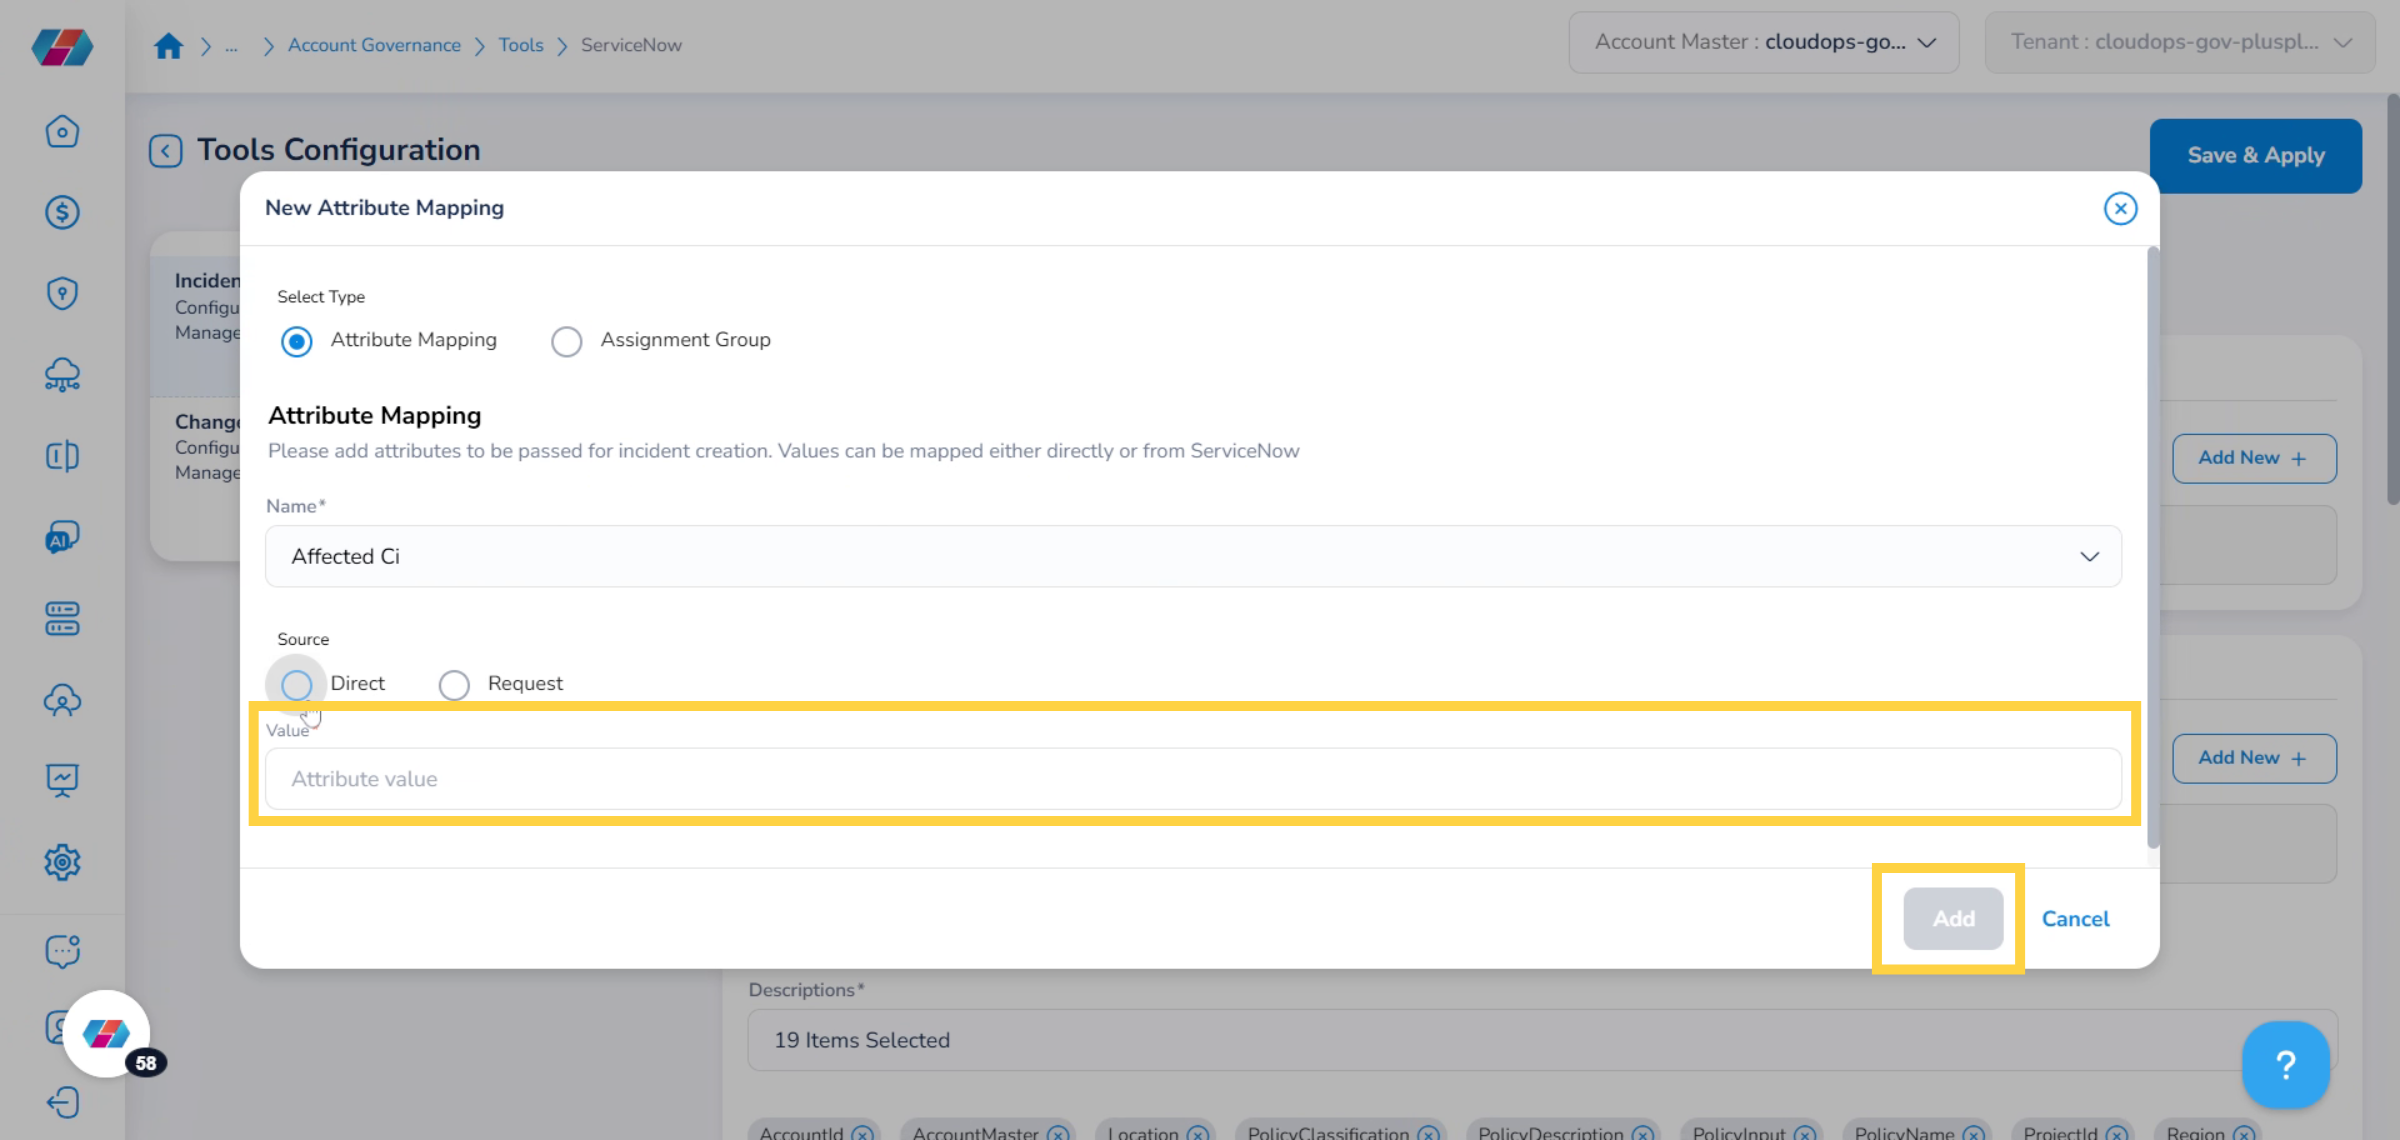
12. Select "Attribute Mapping"
In the New Attribute Mapping dialog box, select Attribute Mapping. This option is used to add attributes to be passed for incident creation. Values can be mapped either directly or from ServiceNow.
13. Select "Name"
In the Name drop-down list, select an option and click Ok.
14. Select a "Source"
In the Source field, select either Direct or Request.
15. Enter "Value"
In the Value box, enter a value for source and then click Add. The new attribute is added and is displayed on the screen.
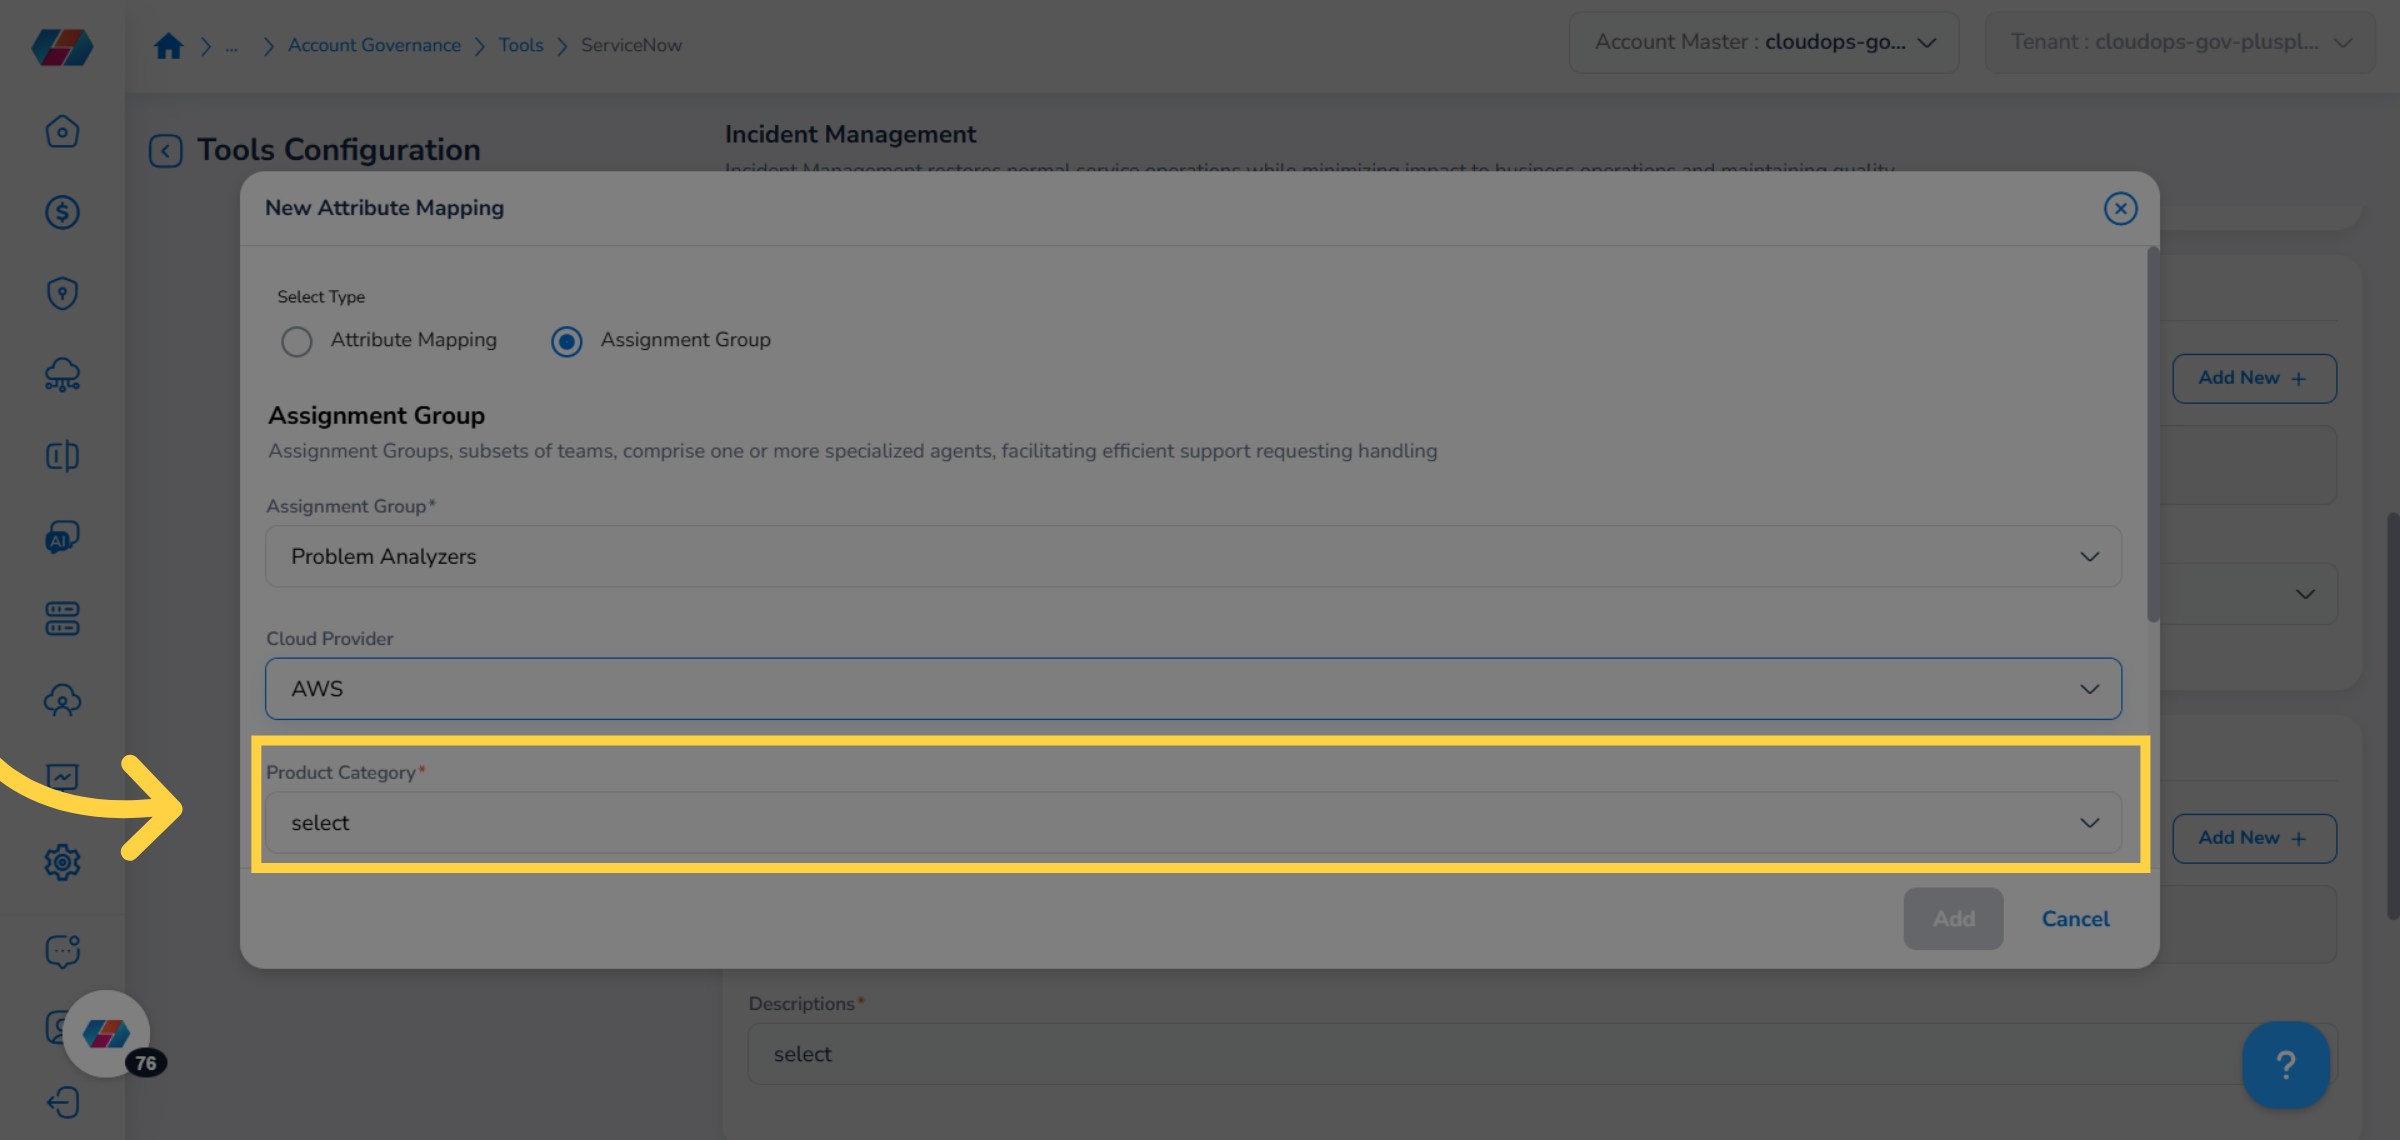
16. Select "Assignment Group"
In the Select Type field, select Assignment Group. The assignment groups, subsets of teams, comprise one or more specialized agents, facilitating efficient support requesting handling.
17. Select "Assignment Group"
In the Assignment Group drop-down list, select an option and click Ok.
18. Select "Cloud Provider"
In the Cloud Provider drop-down list, select the cloud provider.
19. Select "Product Category"
The Product Category field is enabled. In the Product Category drop-down list, click to select all the required options and click Ok.
20. Select "Resource Types"
In the Resource Types drop-down list, click to select all the relevant options and click Ok.
21. Select "Resources"
In the Resources drop-down list, click to select all the required options and click Ok.
22. Click "Add"
After all the fields are filled, click Add to add the attribute. The newly added attribute displays on the screen.
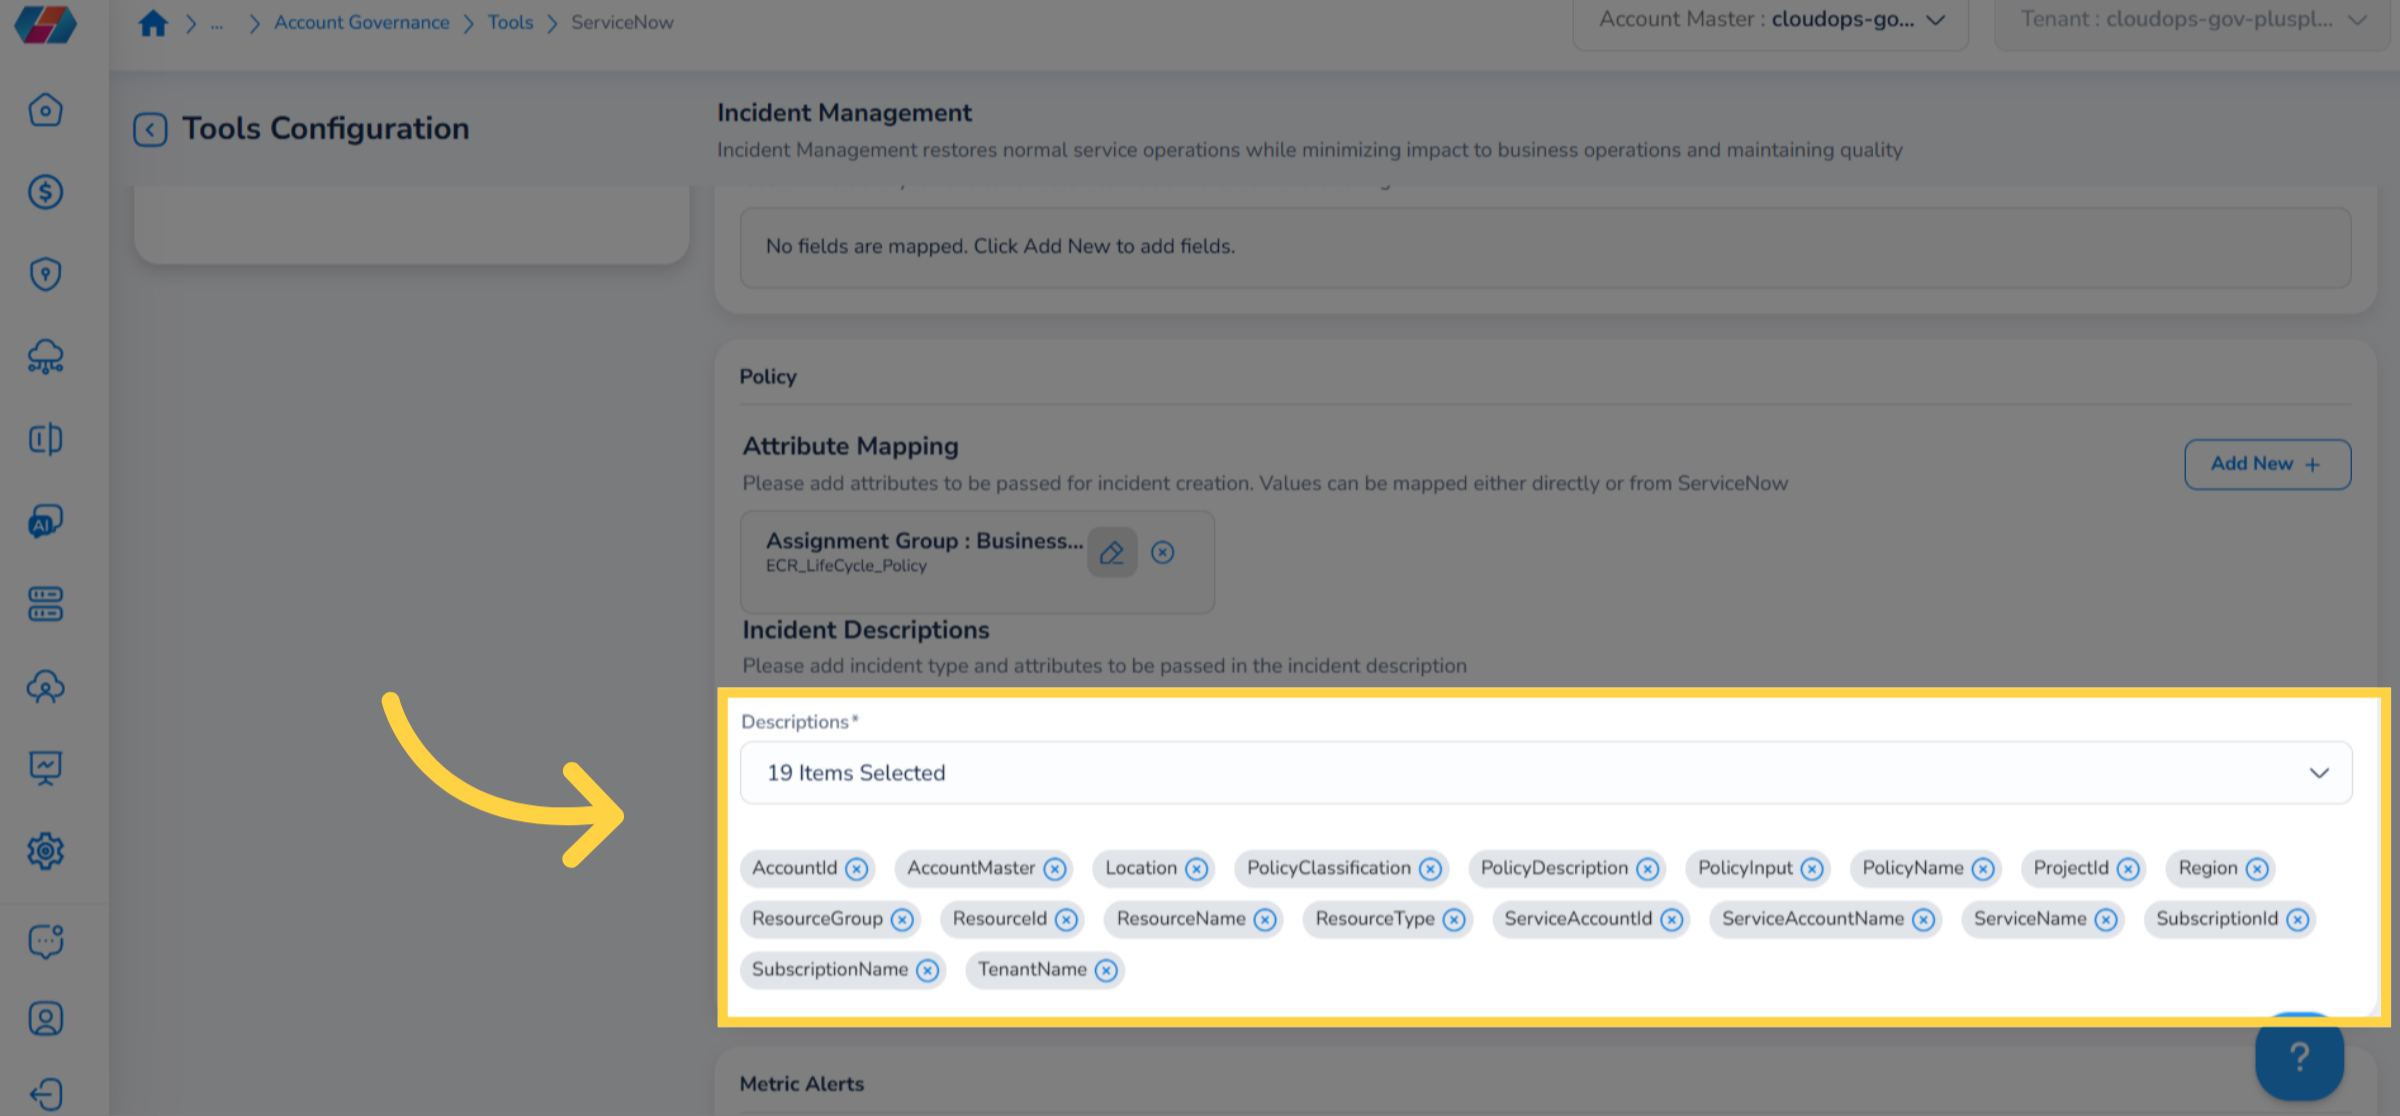
23. Select "Descriptions"
To add descriptions for a particular section, click the Descriptions drop-down list, select the relevant options, and then click Ok. The selected options appear below. If you want to remove any option, then just click the cross symbol.
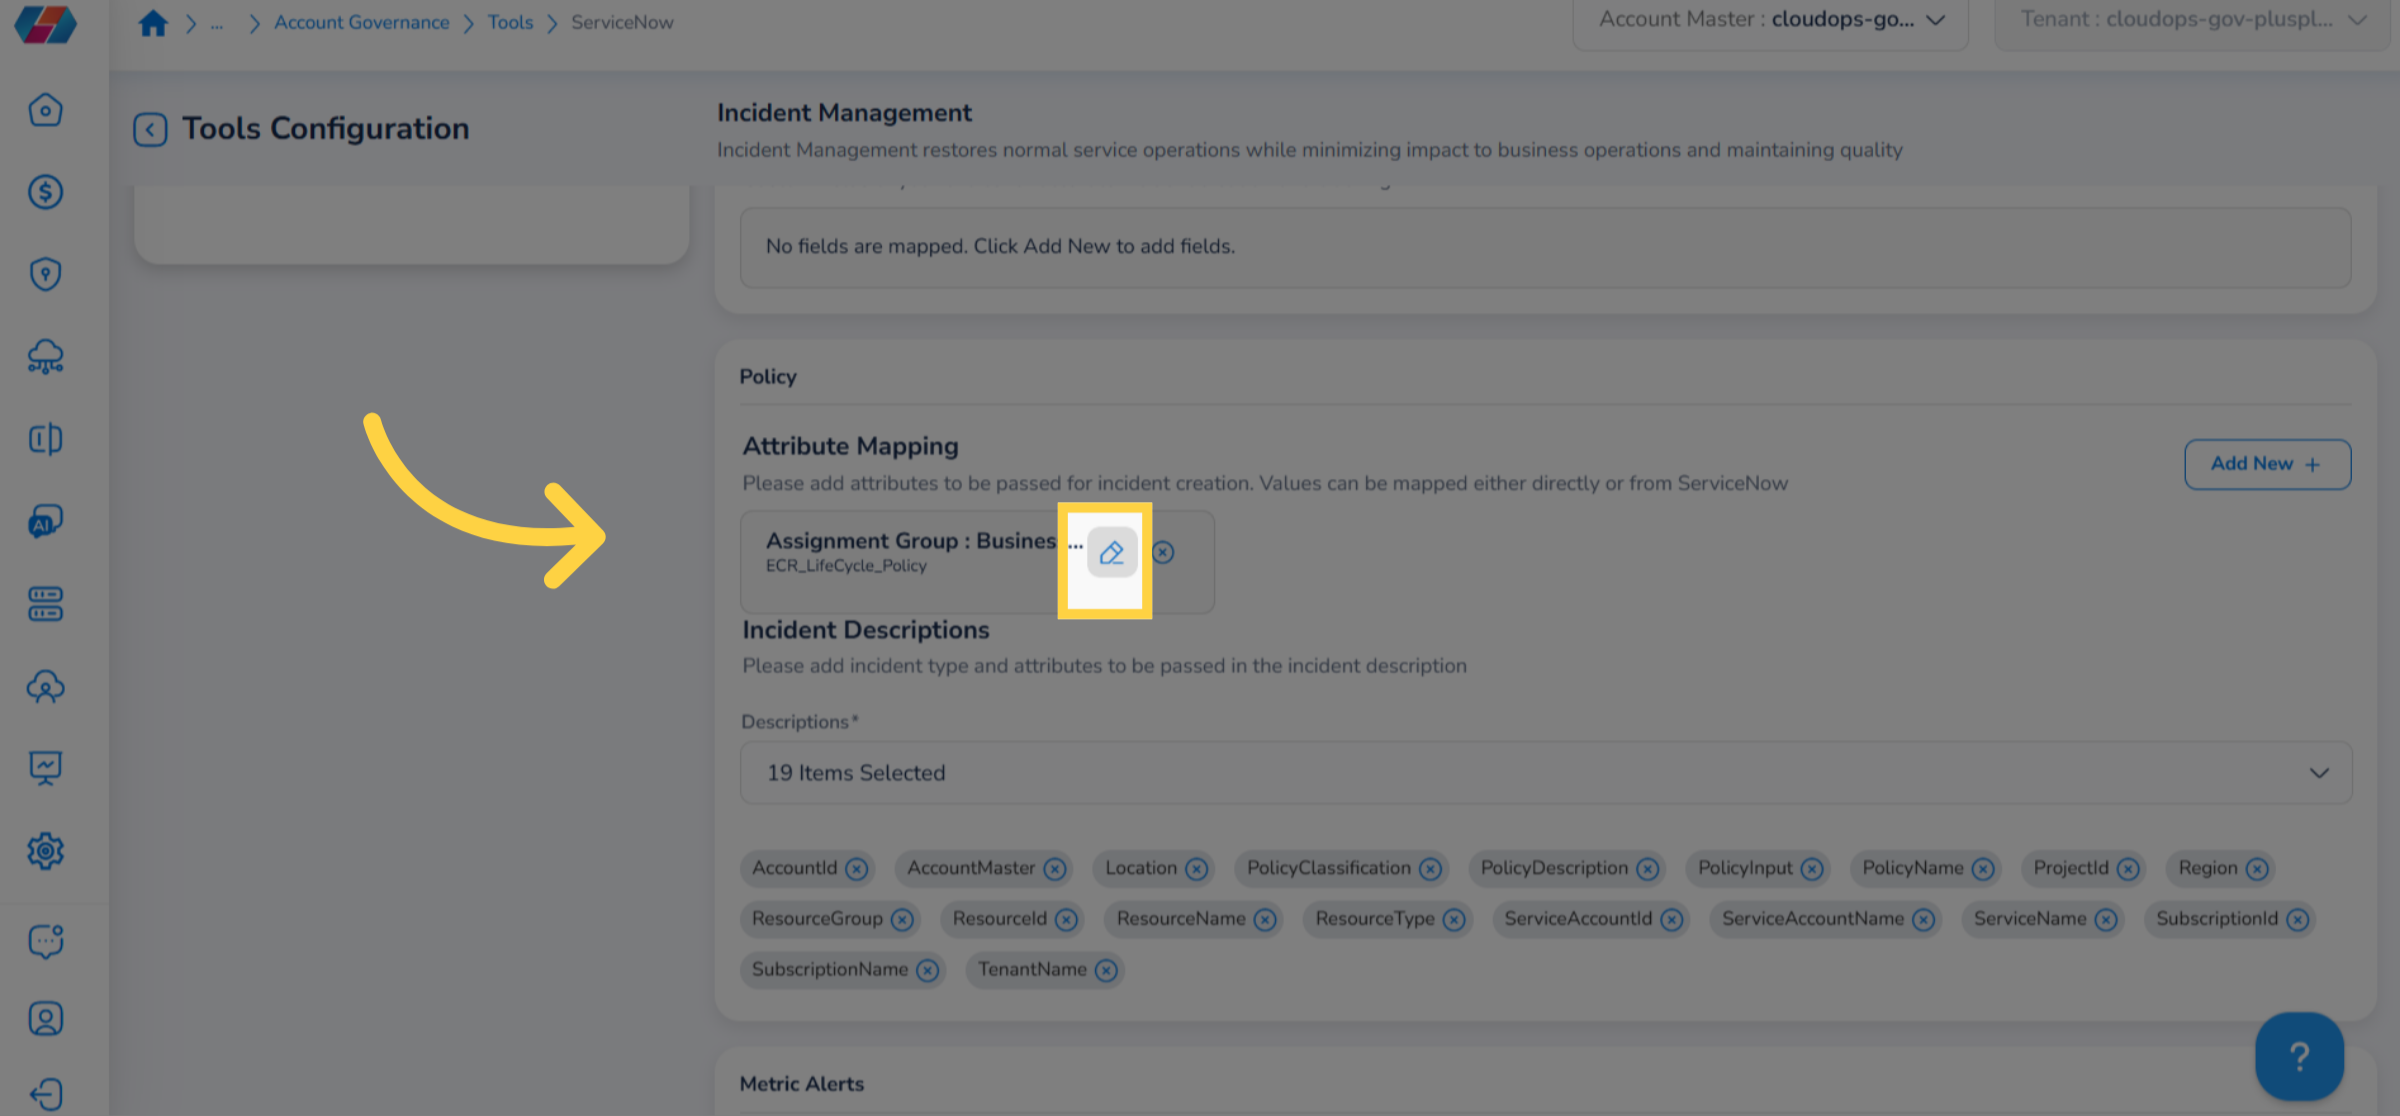
24. Edit Existing Attribute
After attributes are added, users can edit them and make changes.
In this case, in the Policy section, click the edit icon that appears next to the attribute. A dialog box appears and users can make the relevant changes and finally click Add.
Note:To delete an existing attribute, click the cross symbol next to it.
25. Attribute Mapping for Other Sections
To perform attribute mapping for other sections (such as Metric Alerts, Budget Alert, and Security Alert), click Add New and proceed by selecting relevant options. You can add multiple attributes for a given section.
Tenant Management Settings for Incident Management
Perform the following tenant management settings:
1. Click "Settings" and then Click "Tenant Management"
To perform tenant management settings for ServiceNow, on the left navigation pane, click Settings and then click Tenant Management.
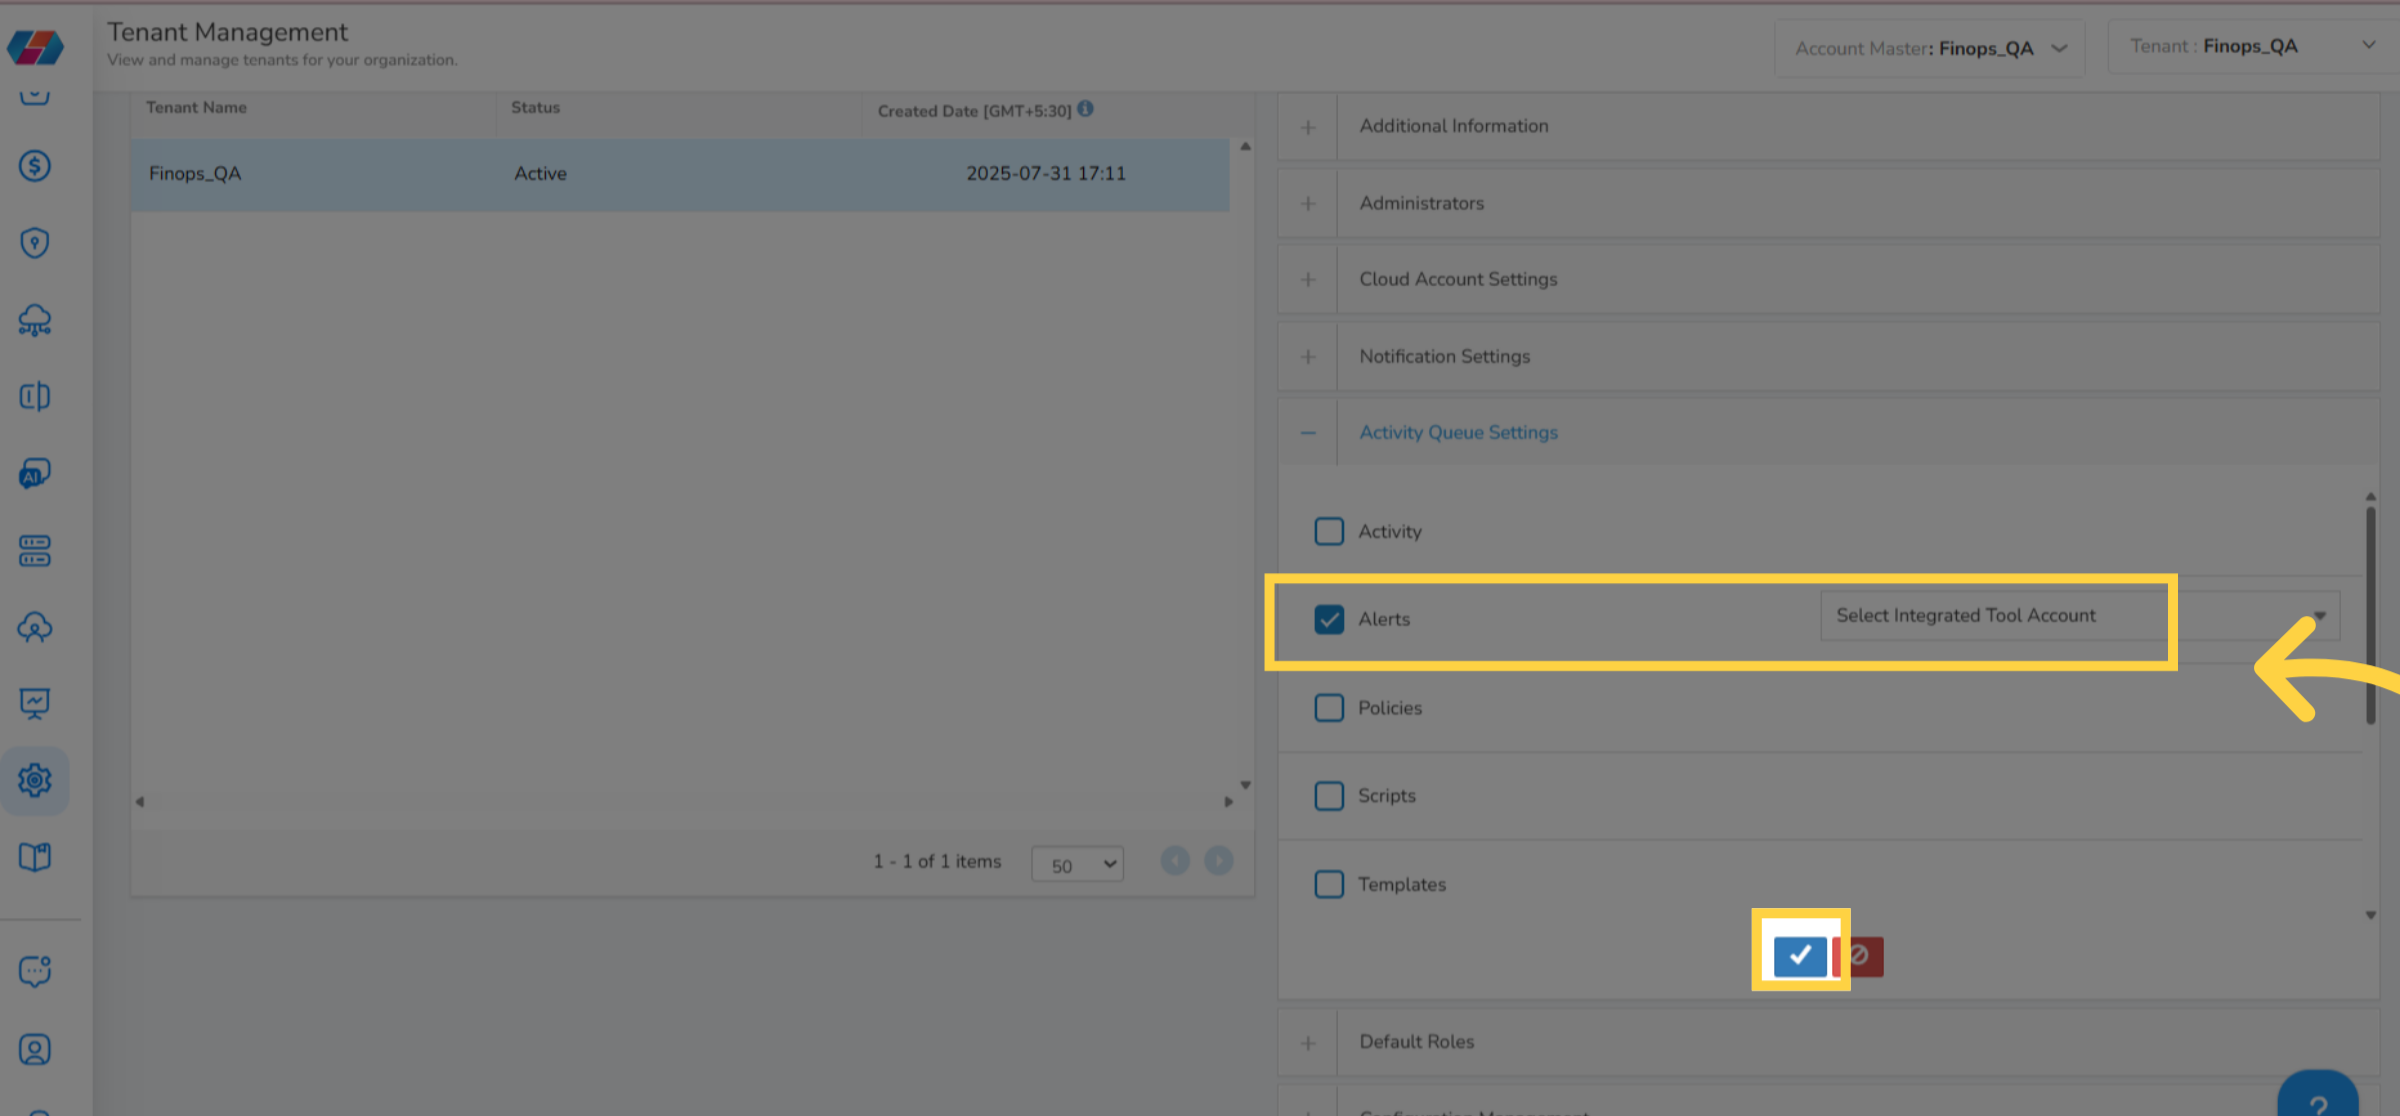
2. Expand Activity Queue Settings
On the Tenant Management page, expand the Activity Queue Settings and click the Edit icon to make the settings.
3. Select an Option and Apply Settings
Select the checkbox(s) for ServiceNow. In this case select the Alerts checkbox. In the drop-down list that appears on the right, click to select the integrated tool account and then click the Apply icon (tick mark). This completes the tenant level setting.

Change Management Configuration
Perform the following steps to configure Change Management:
1. Click "Change Management"
To configure attributes for change request management, on the left panel, click Change Management.
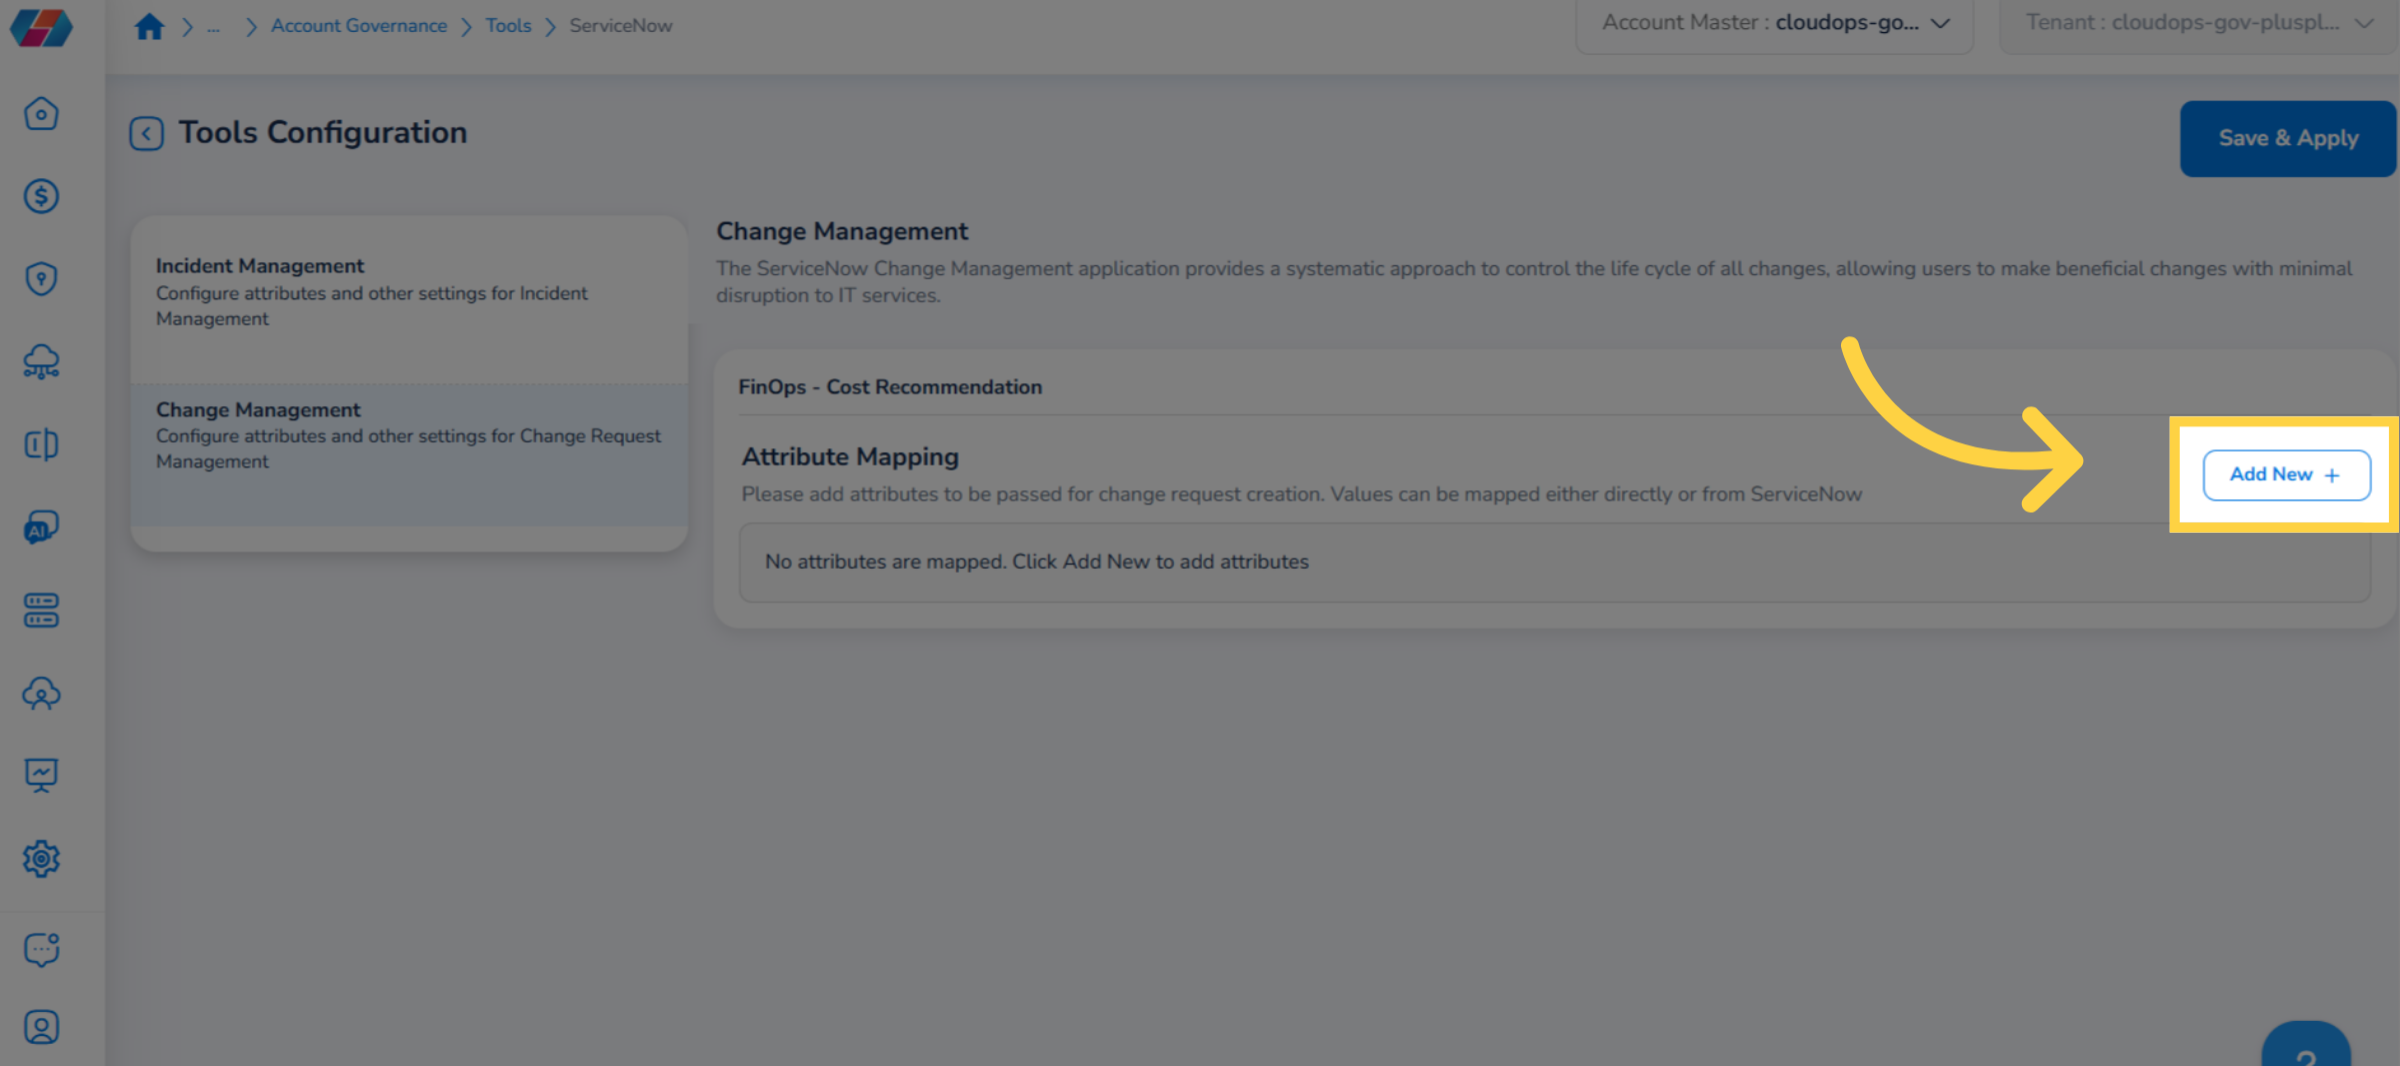
2. Click "Add New"
To add attributes to be passed for change request creation, click Add New.
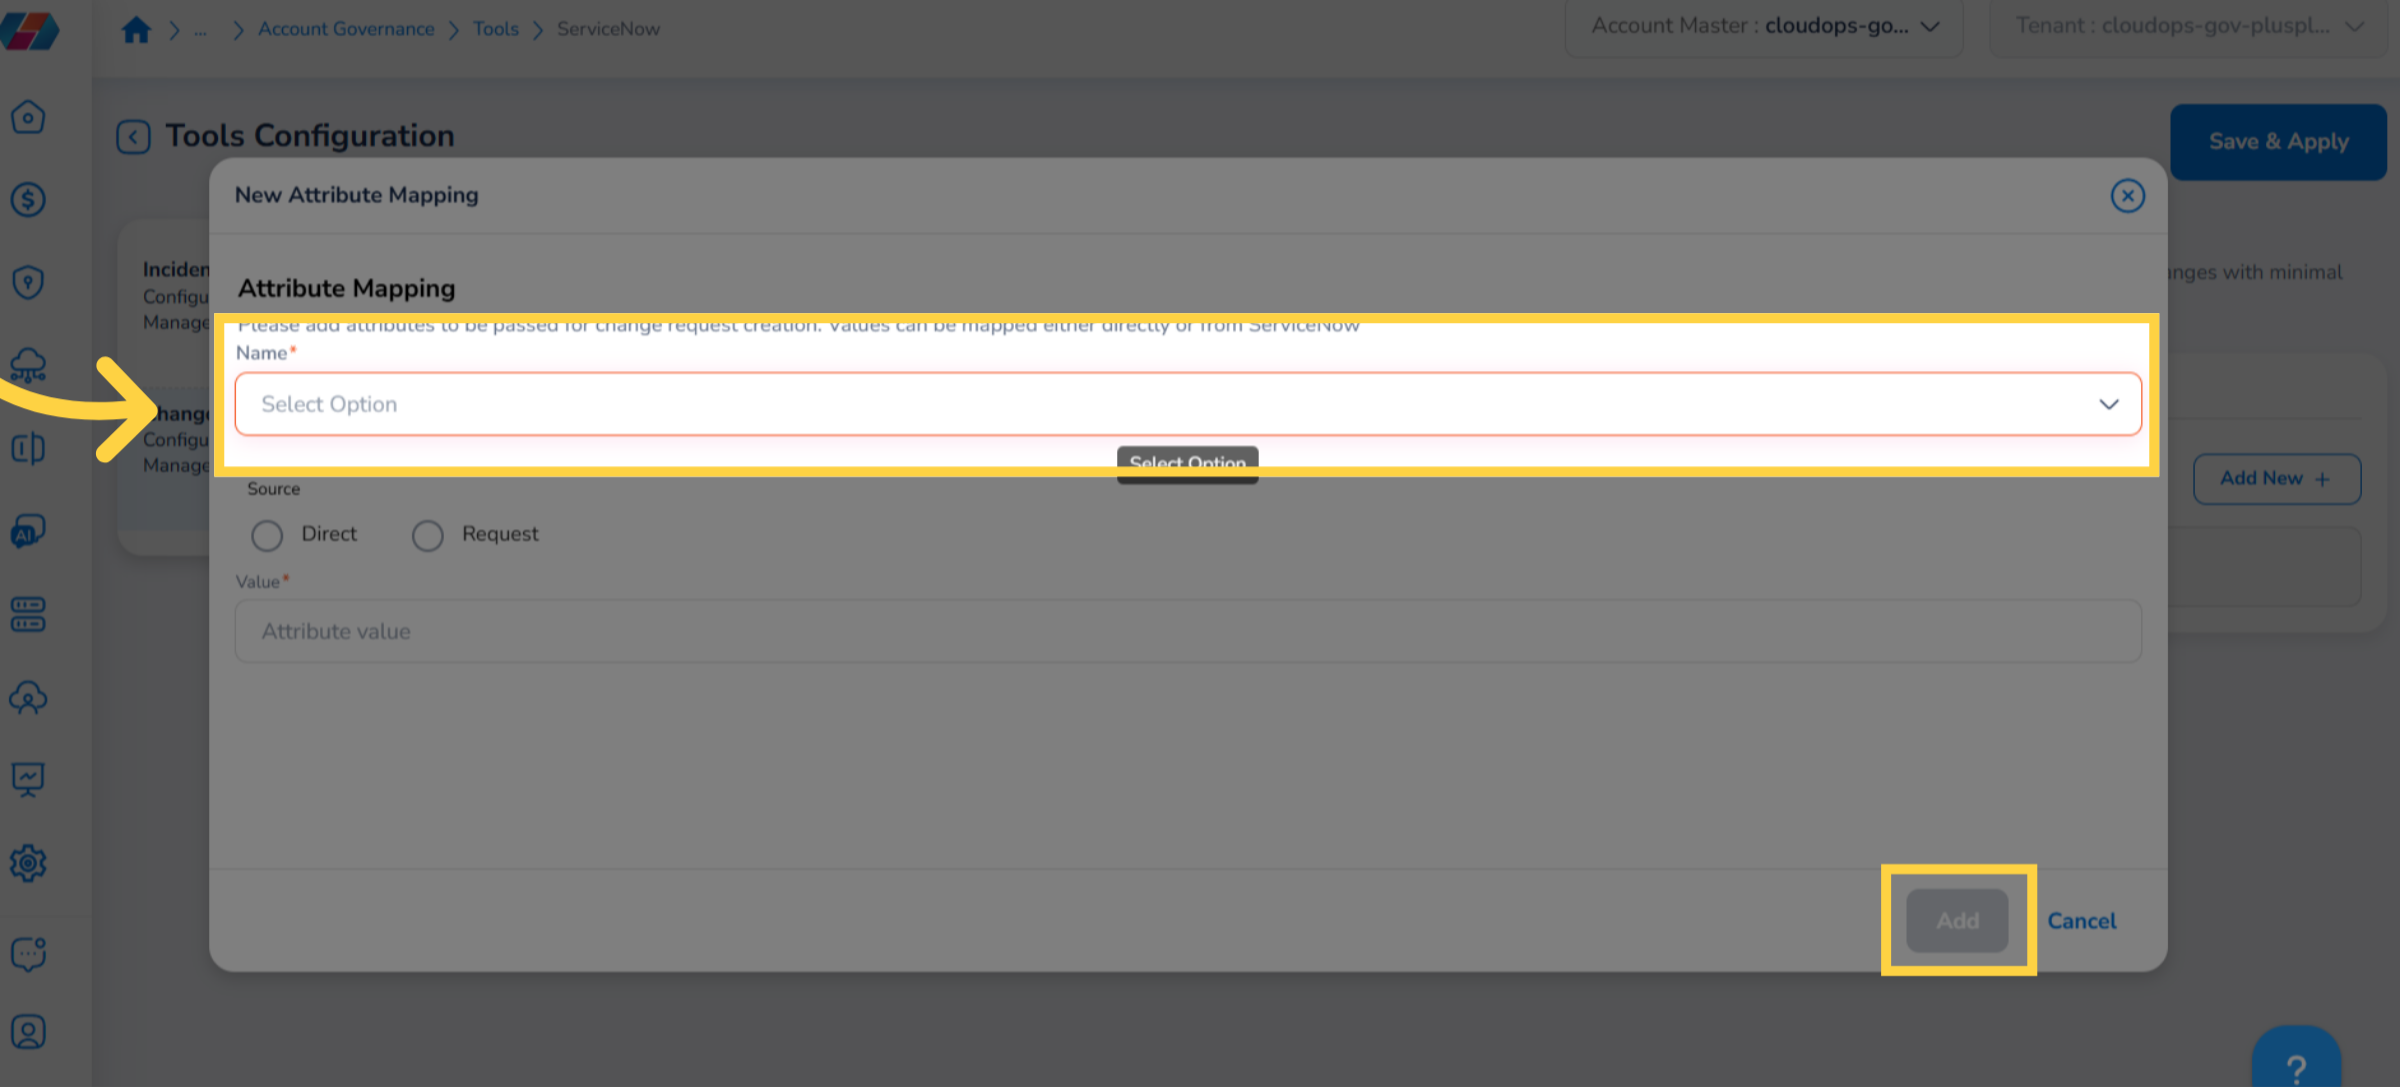
3. Select "Name"
In the Name drop-down list, click to select an option and then click Ok.
4. Select "Source"
In the Source field, select either Direct or Request.
5. Enter "Value"
In the Value box, type a value for the selected source and then click Add. The newly added attribute appears on the screen.
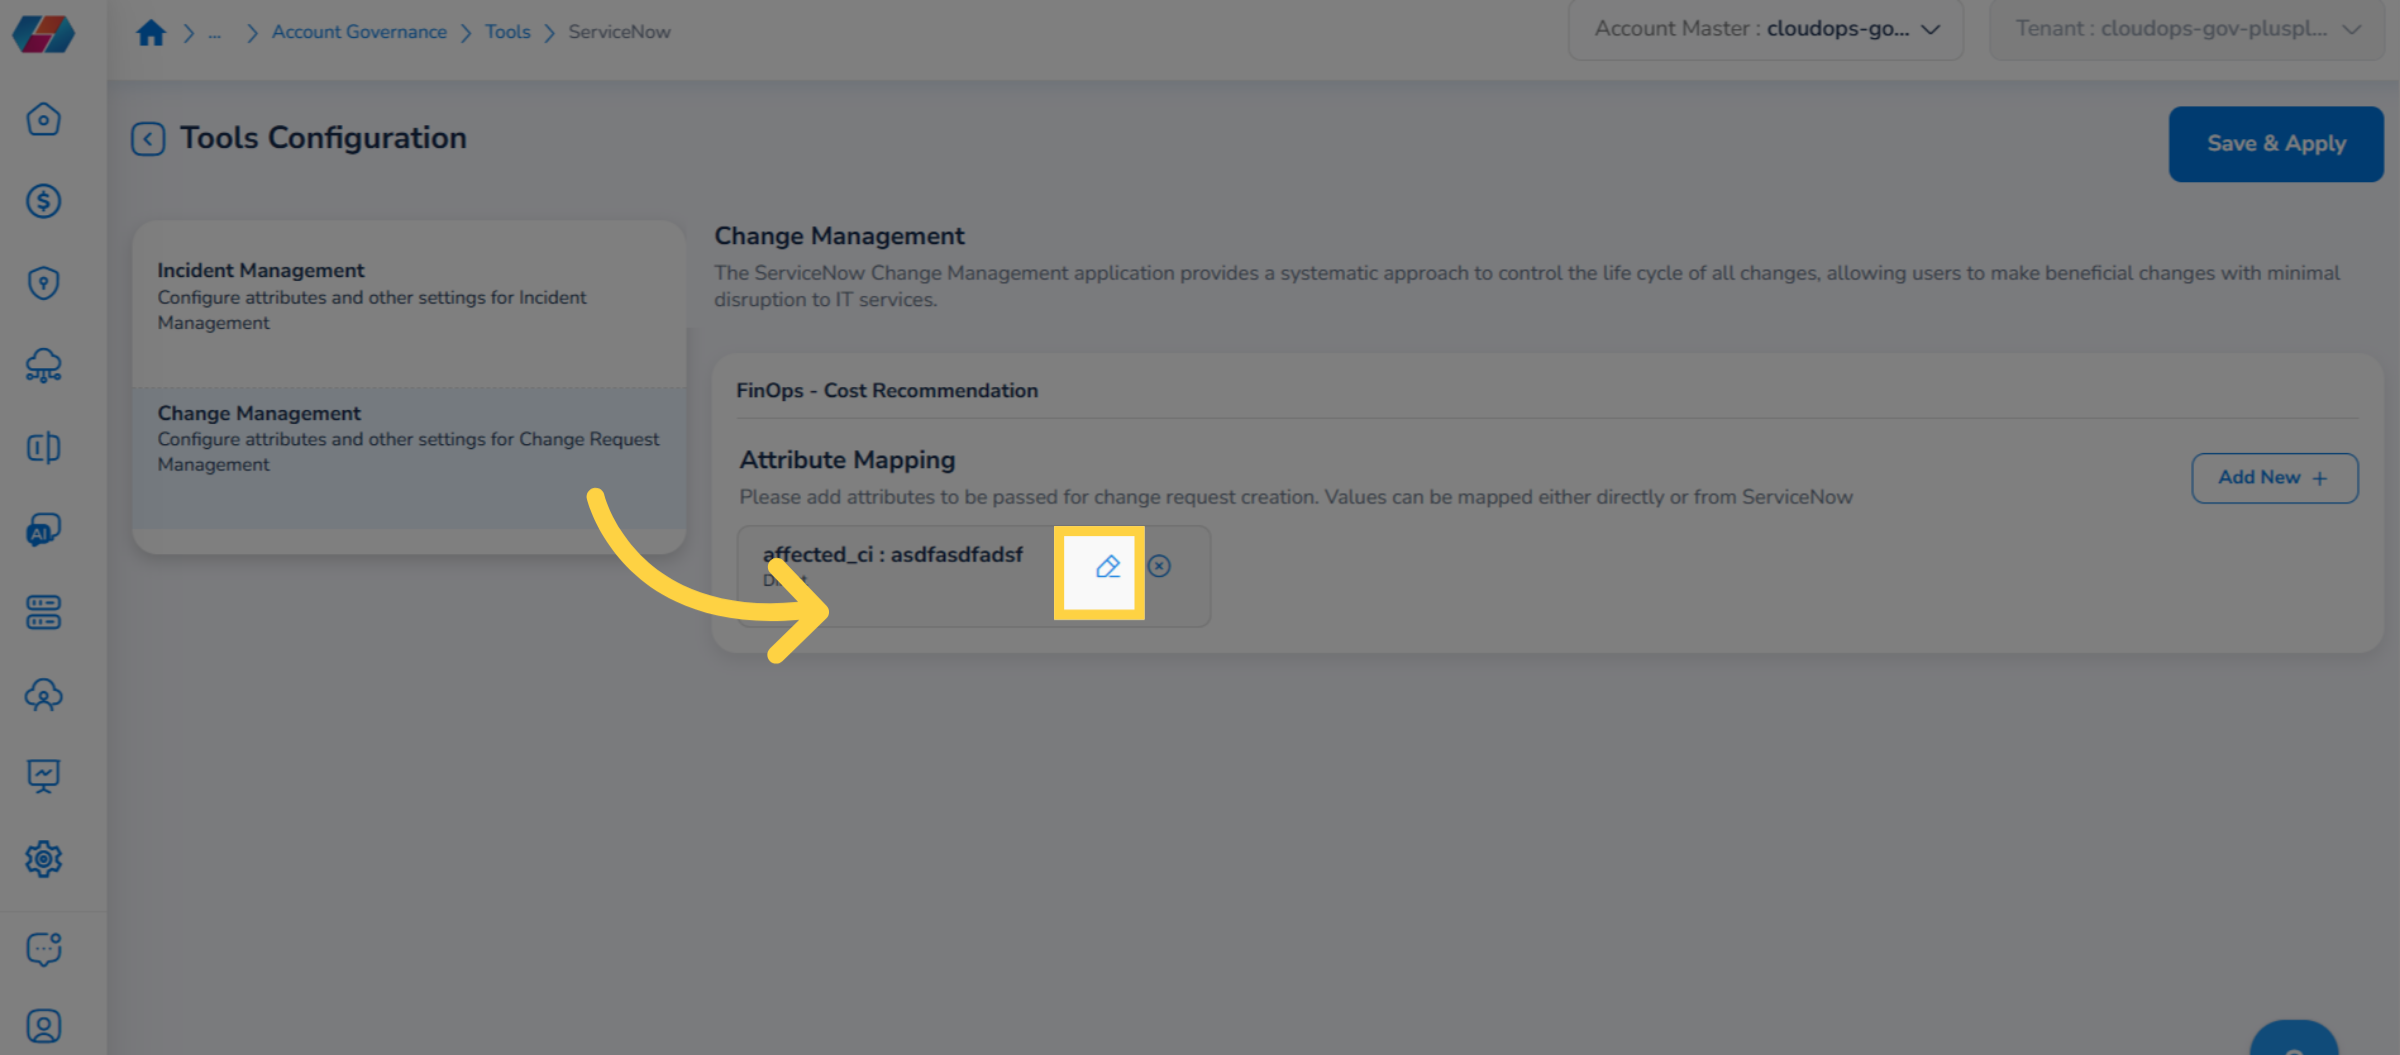
6. Edit an Attribute
To modify attribute details of an existing attribute, click the edit icon next to an attribute. The Edit Attribute Mapping dialog box appears where the users can make the changes and then click Add.
Note:To delete an existing attribute, click the cross symbol next to it.
7. Save & Apply
After all the details are added and tools configuration is complete, users can click Save & Apply to save the account details.
Tenant Management Settings for Change Management
Perform the following steps to do tenant management settings:
1. Click Settings > Tenant Management
To perform tenant management settings for ServiceNow, on the left navigation pane, click Settings and then click Tenant Management.
2. Expand Activity Queue Settings
On the Tenant Management page, expand the Activity Queue Settings section and click the Edit icon to make the settings.
3. Select an Option and Apply Settings
Select the checkbox(s) for ServiceNow. In this case select the Alerts checkbox. In the drop-down list that appears on the right, click to select the integrated tool account and then click the Apply icon (tick mark). This completes the tenant level setting.
View Intergated Tools Page
Let us now see that details that users can view on the Integrated Tools page.
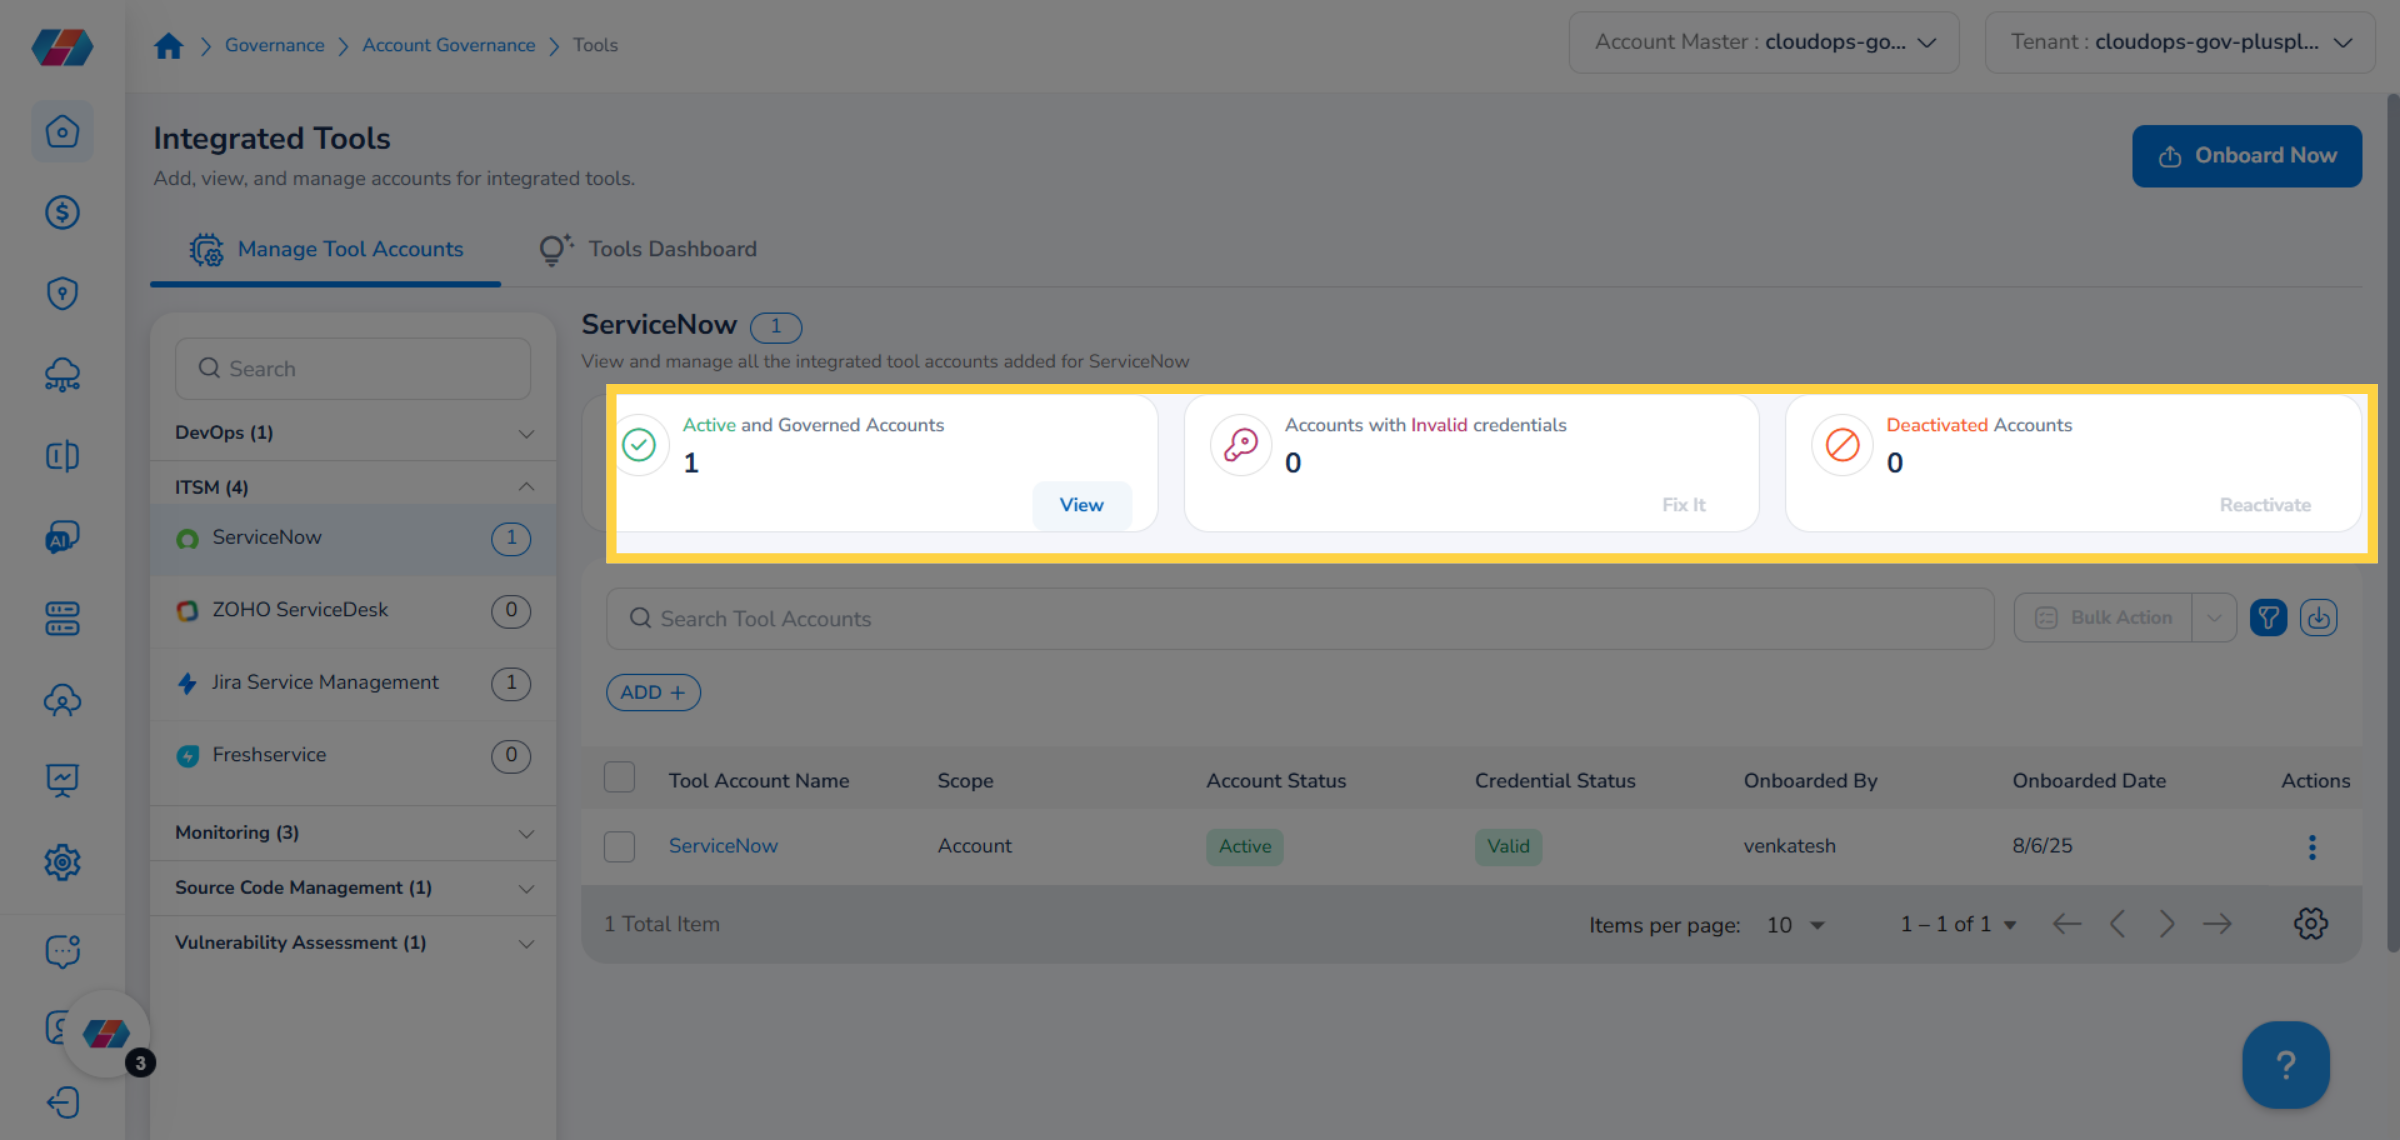
View Top Cards
On the Integrated Tools page, you can see the ServiceNow tool accounts. There are three cards on the top of the page -- Active and Governed Accounts, Accounts with Invalid Credentials, and Deactivated Accounts. Each of these cards show the count of accounts and a link to click on. Users can click the link provided in the individual boxes to view the list of active or invalid or deactivated accounts.
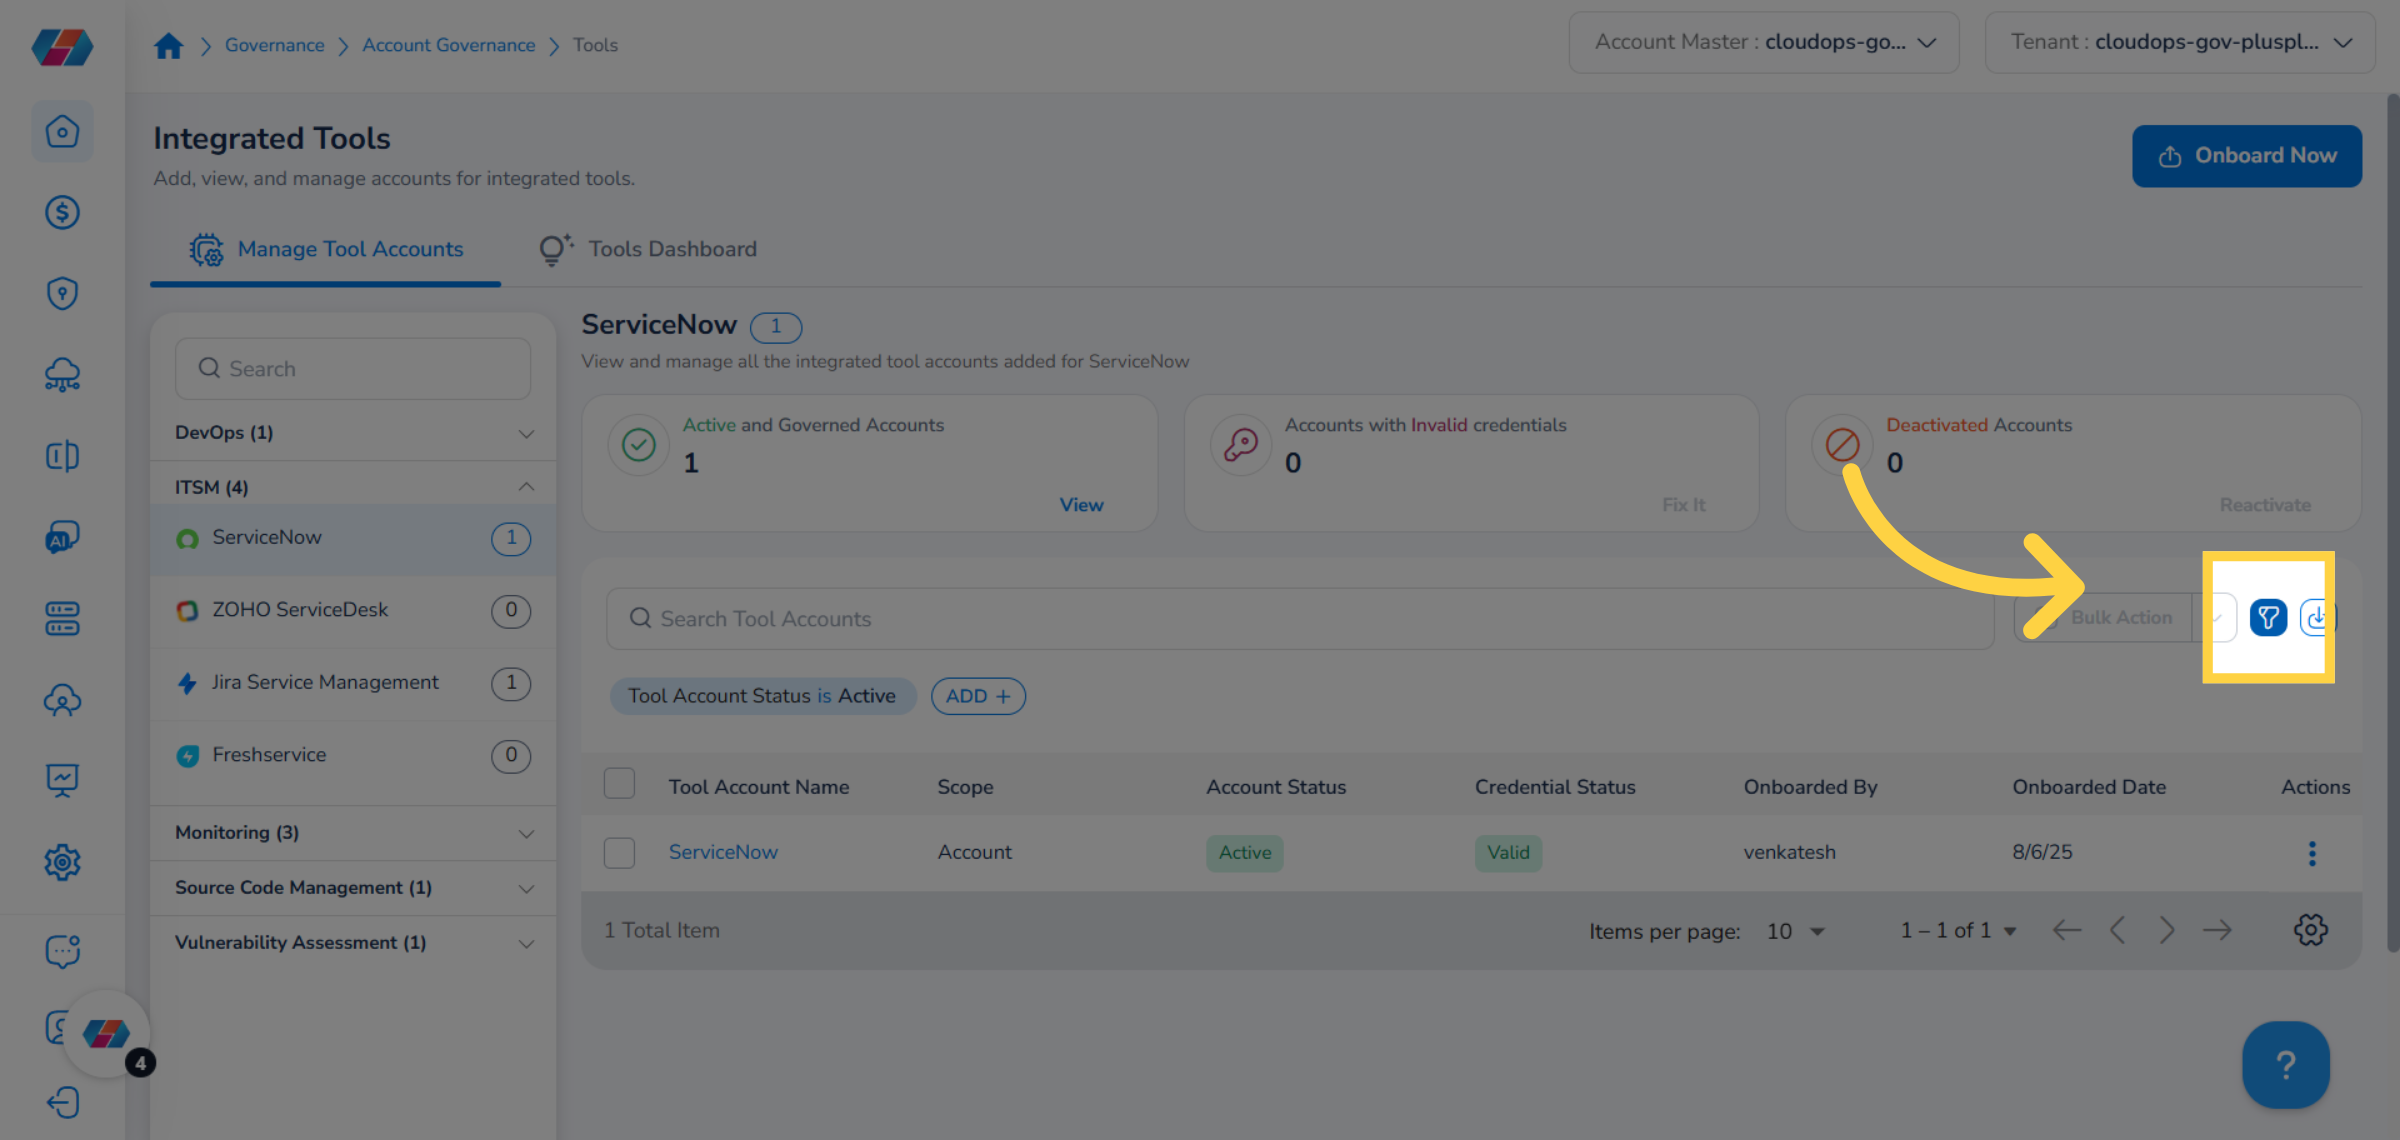
Filters
Users can apply filters and can hide or display the filter option.
Hide/Display Filter
On the Integrated Tools page, click the Filter icon to hide or display the ADD+ custom filter option.
Adding Filter
Perform the following steps to add a filter:
1. Add Filter
To add a filter and refine your view, click ADD+ and select an option.
2. Add Values
To add value(s) for filter, click the drop-down list and select relevant option(s). Click Ok to confirm your selection. The tool accounts will be filtered as per the applied values. Click the cross symbol that appears on top of an applied custom filter to remove a filter.
Additional Options
Users can use the Search box to find any account and they can click the Download icon to download tool account details.
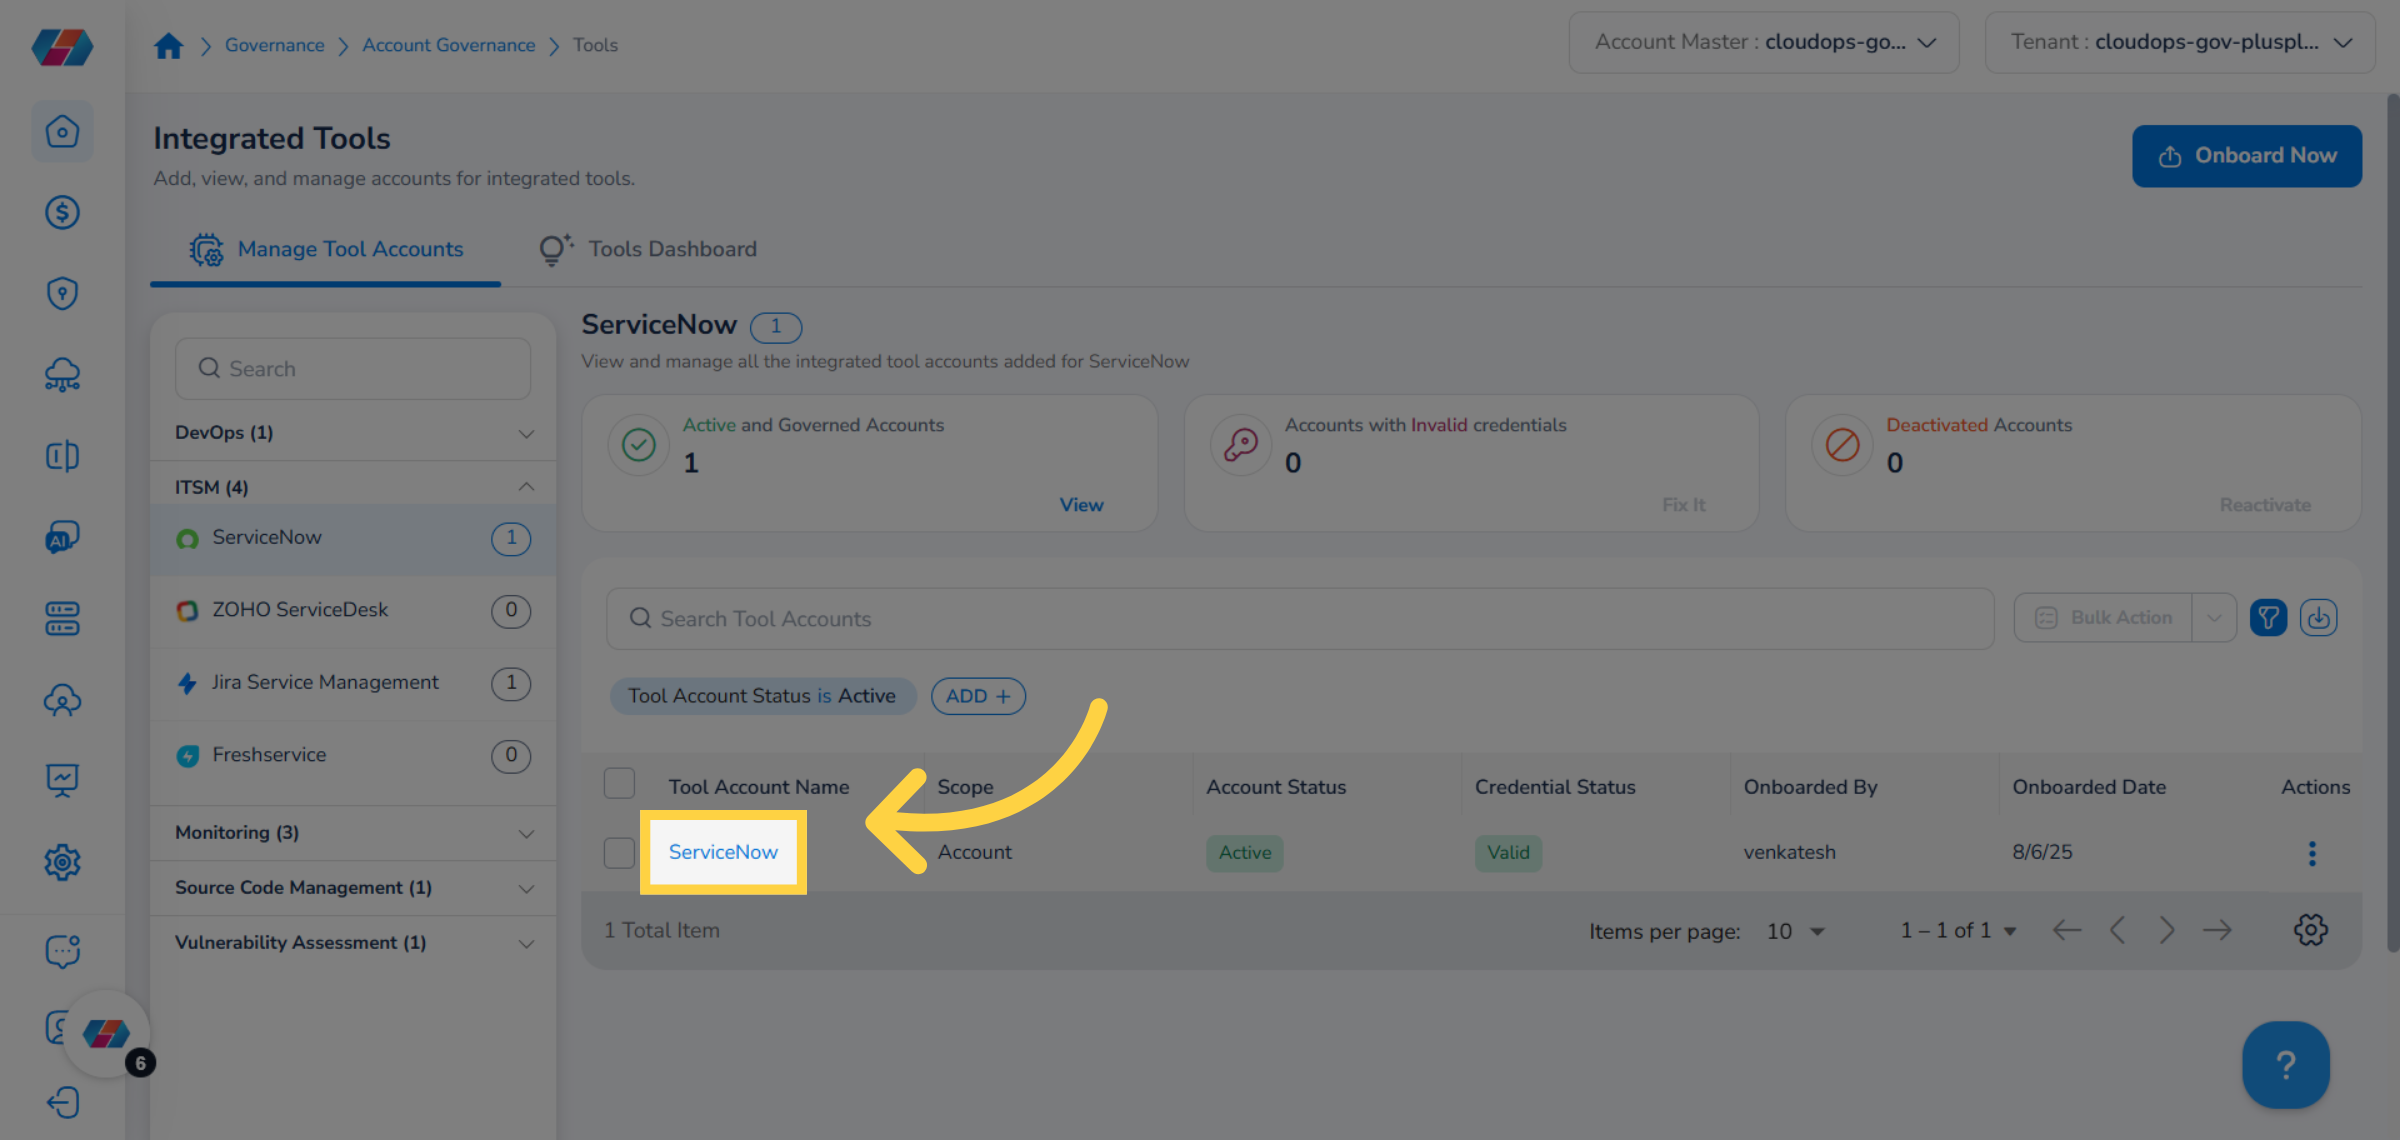
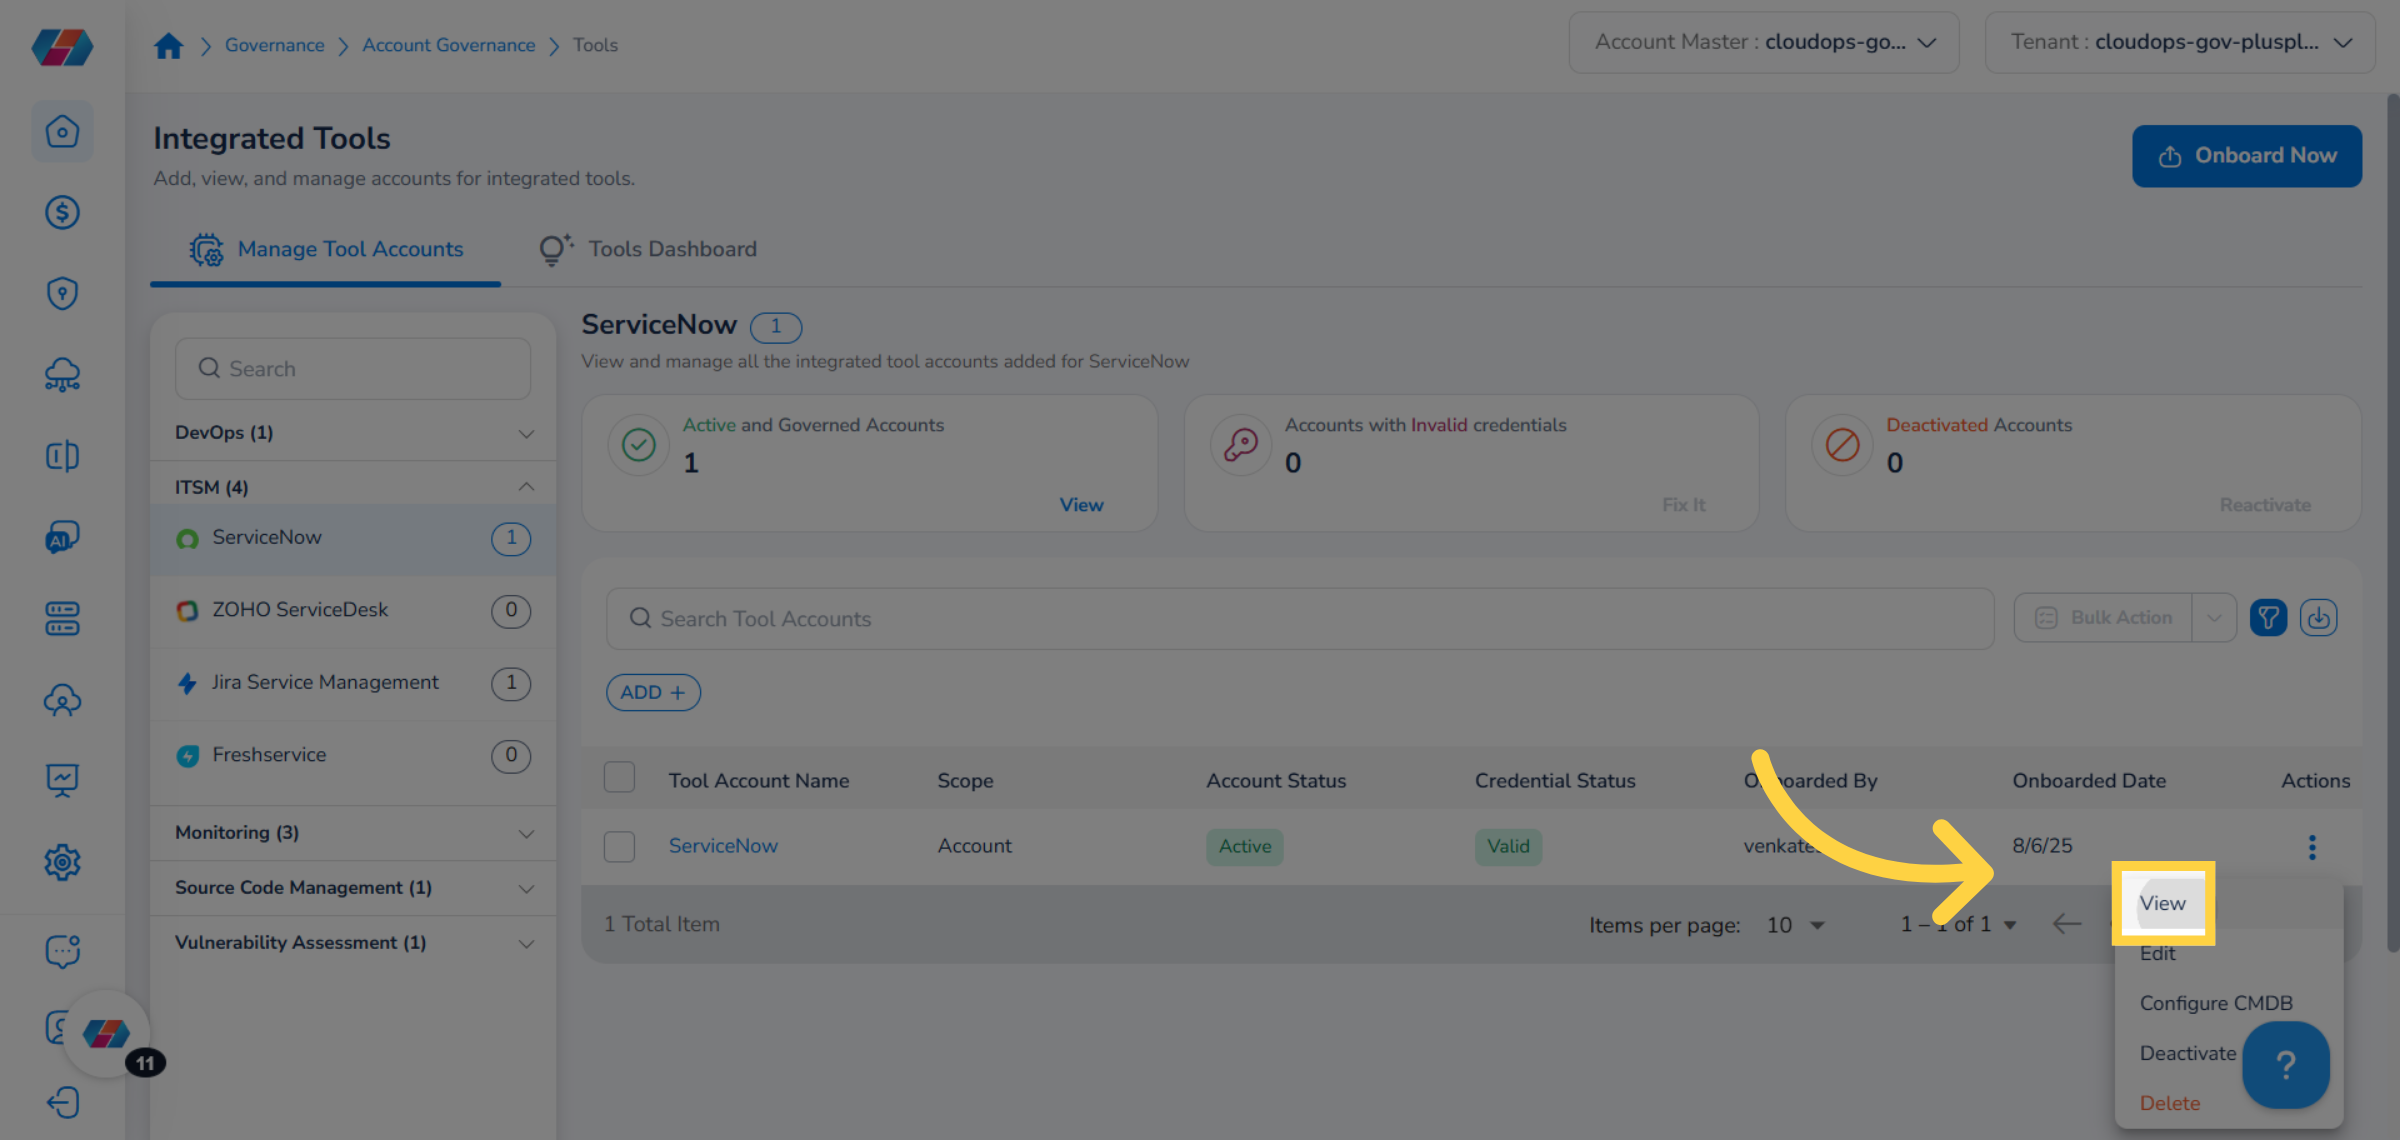
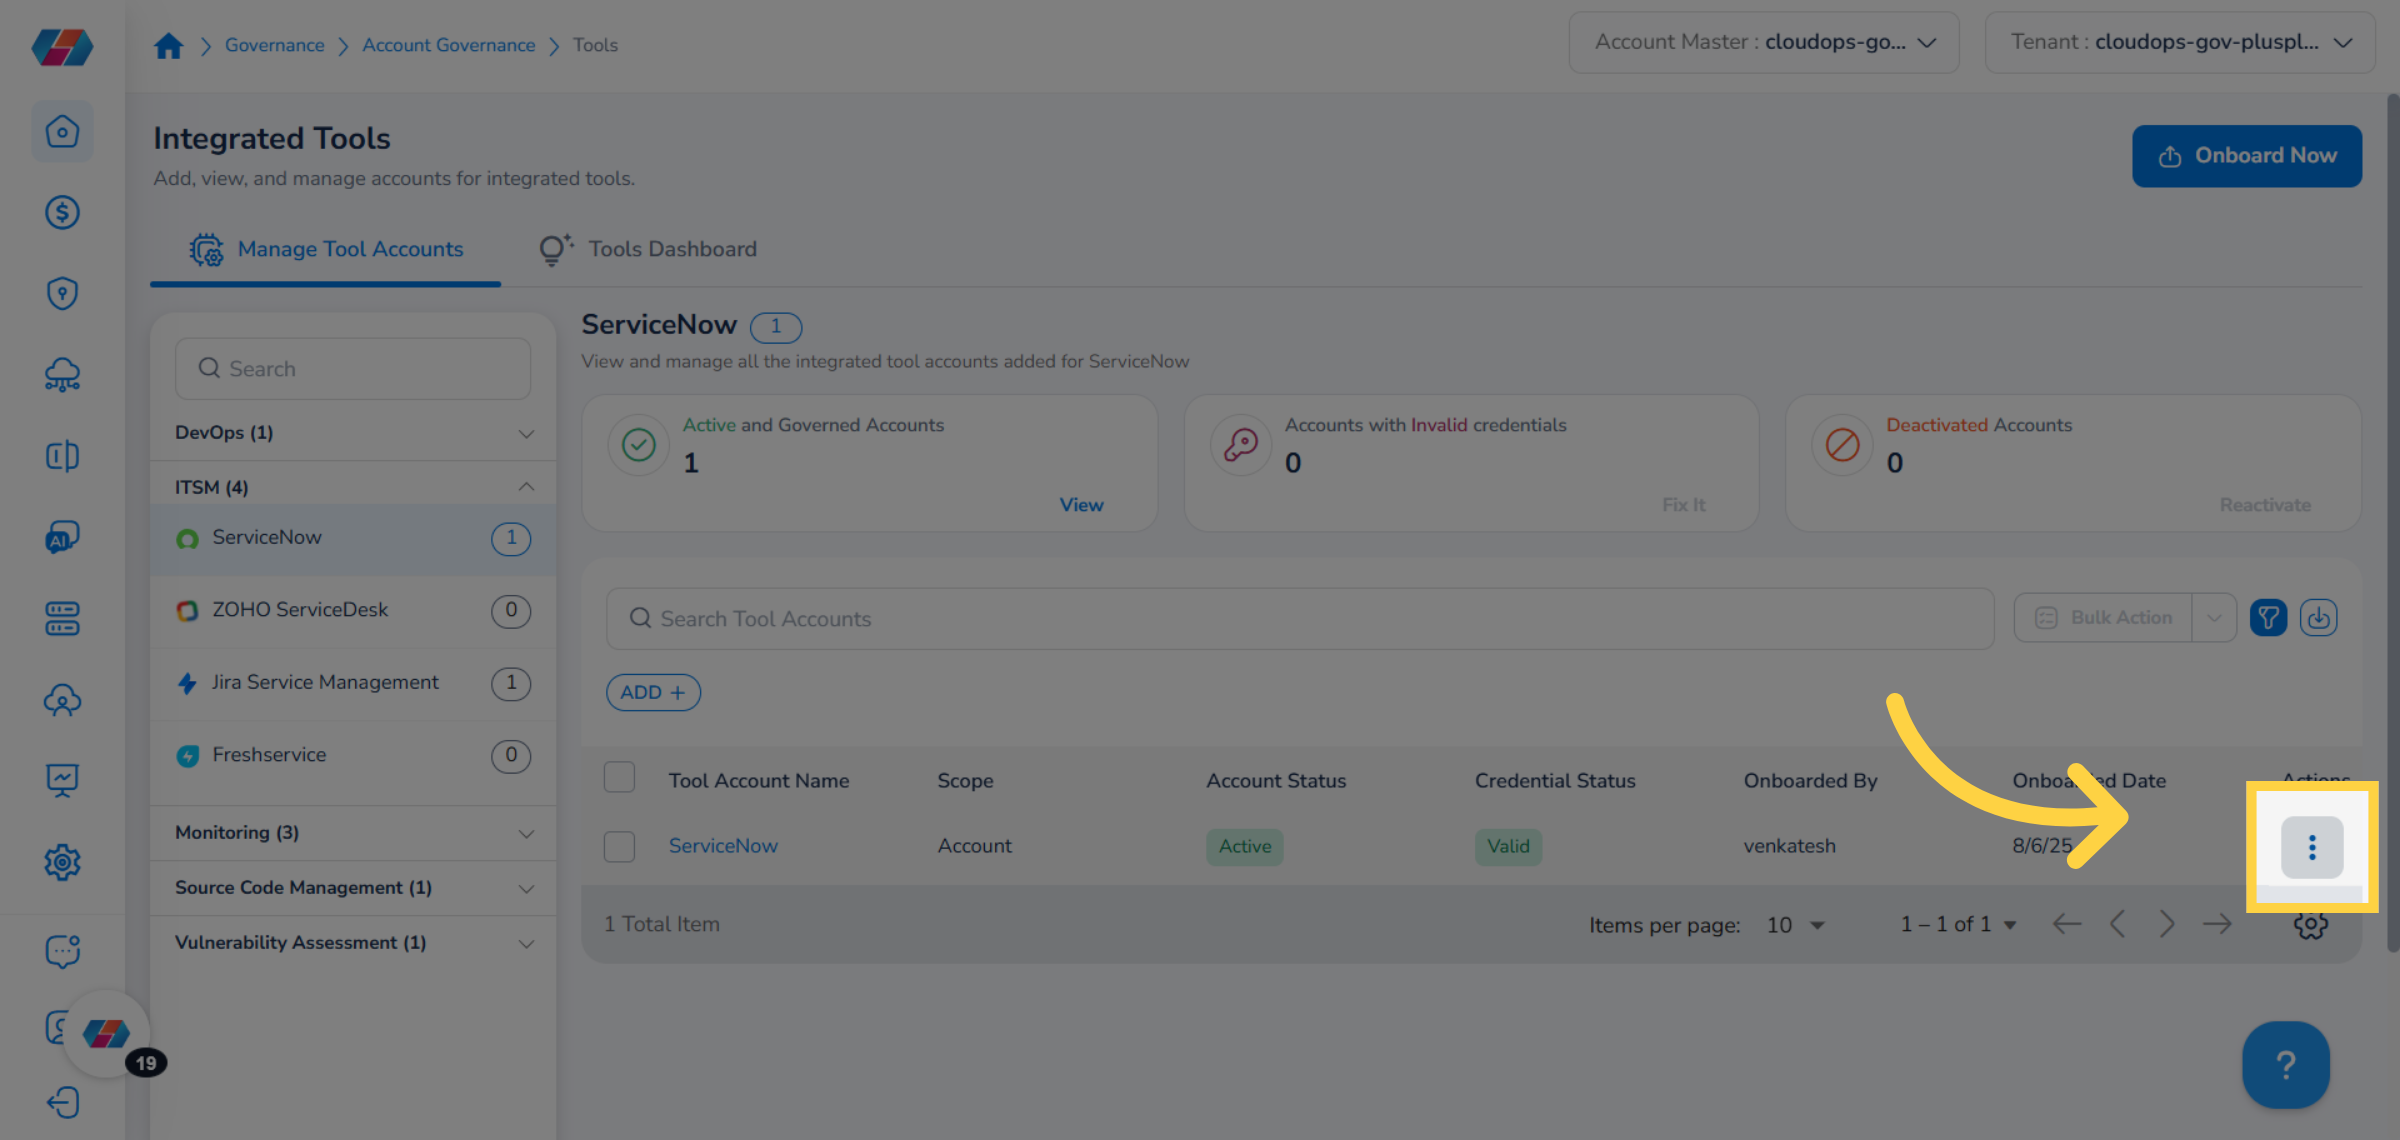
The tabular grid shows ServiceNow tool account details and users can view these columns -- Tool Account Name, Scope, Account Status, Credential Status, Onboarded By, Onboarded Date, and Actions. The Actions column allows the users to take any of these actions -- View, Edit, Configure CMDB, Deactivate, and Delete. To view ServiceNow tool account details, under the Tool Account Name column, click on the name of an account.
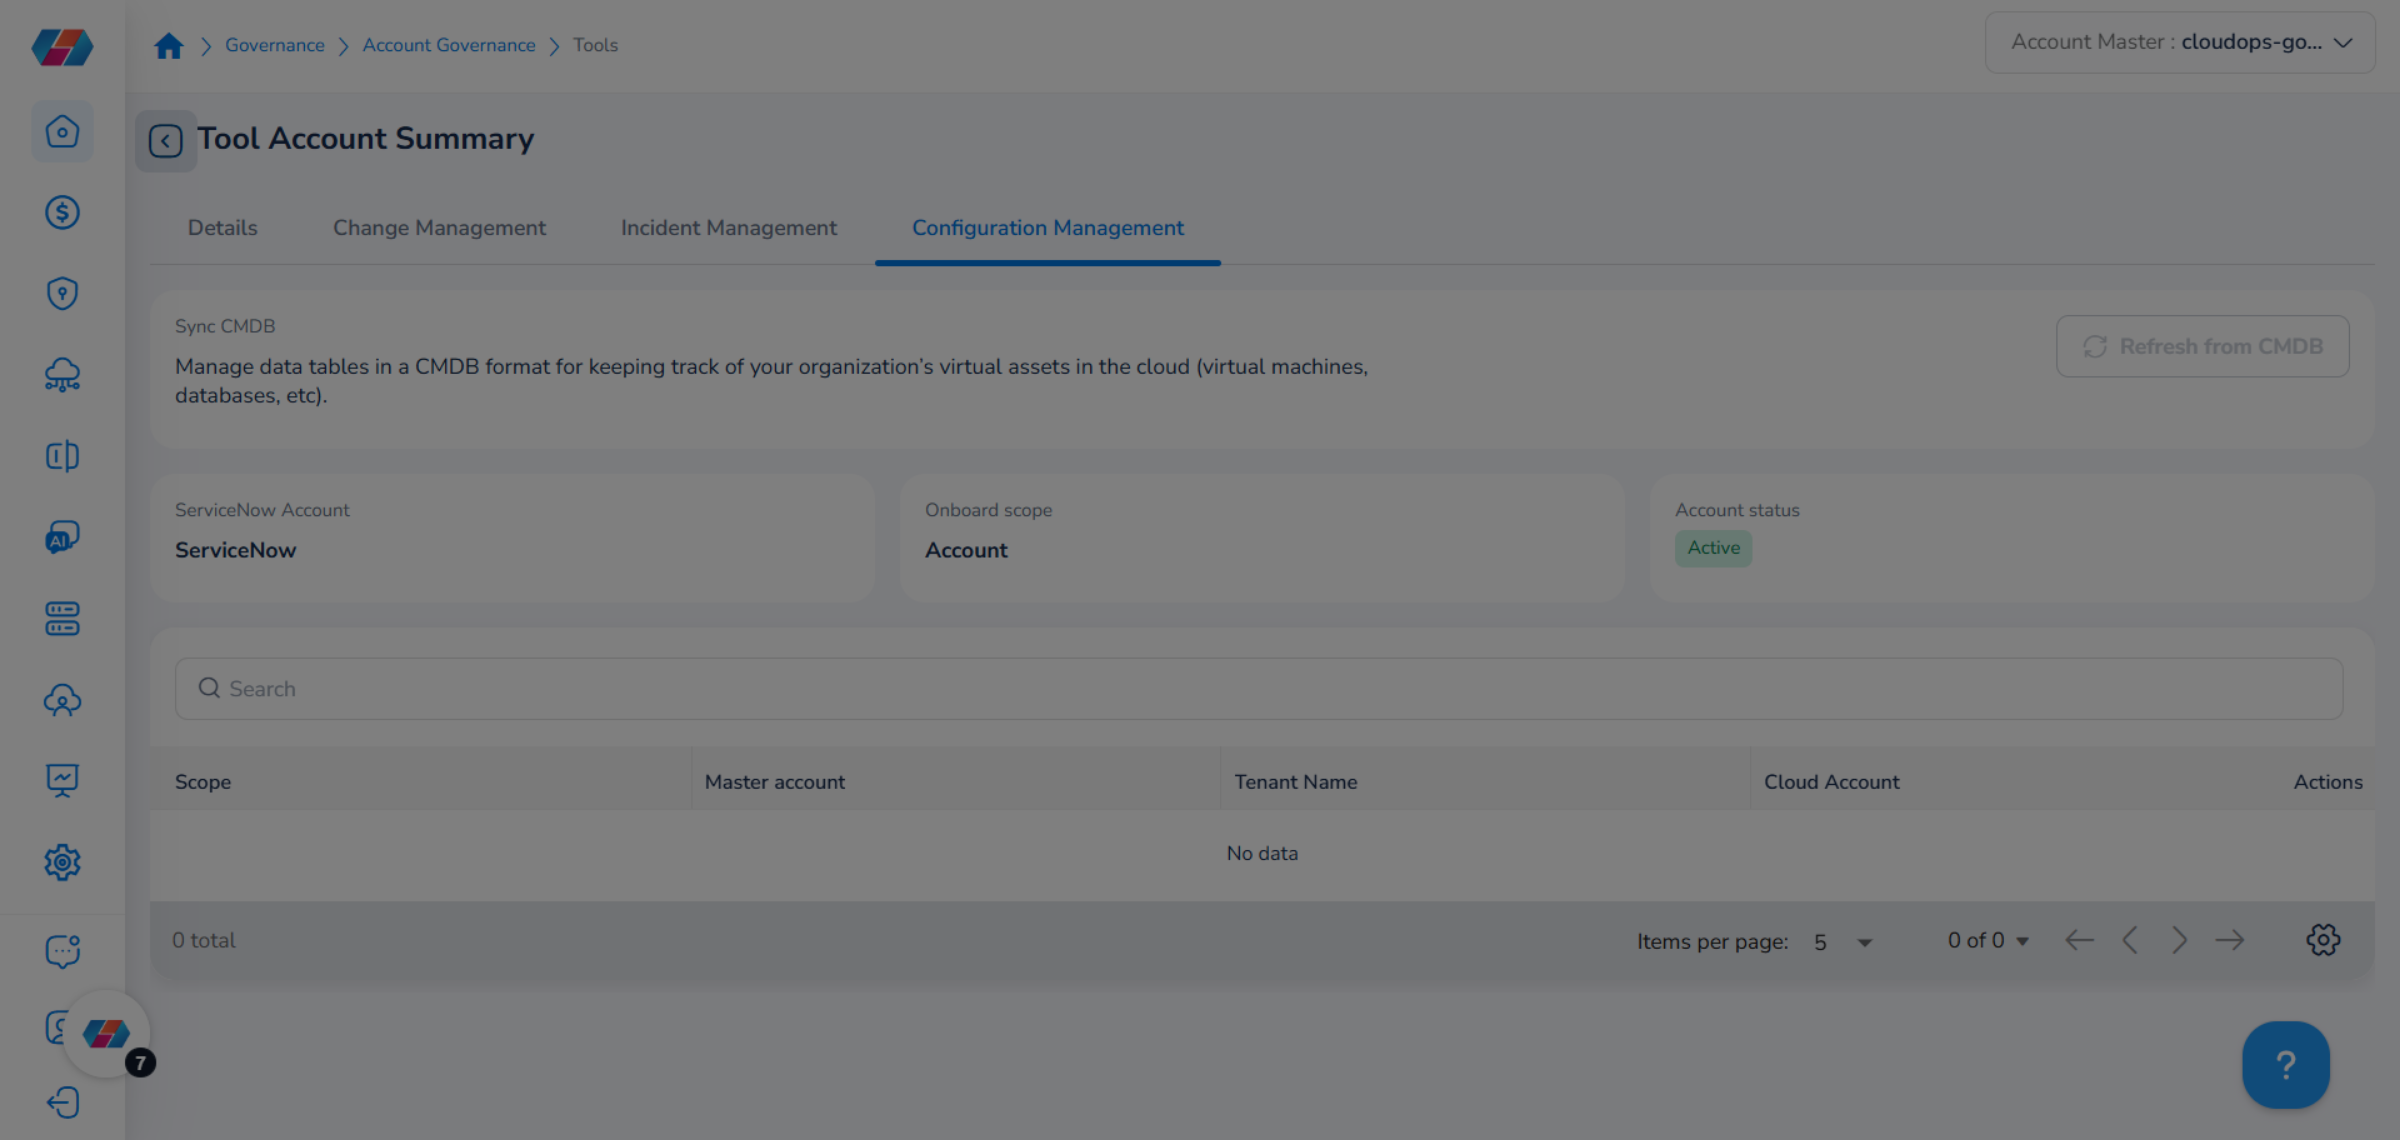
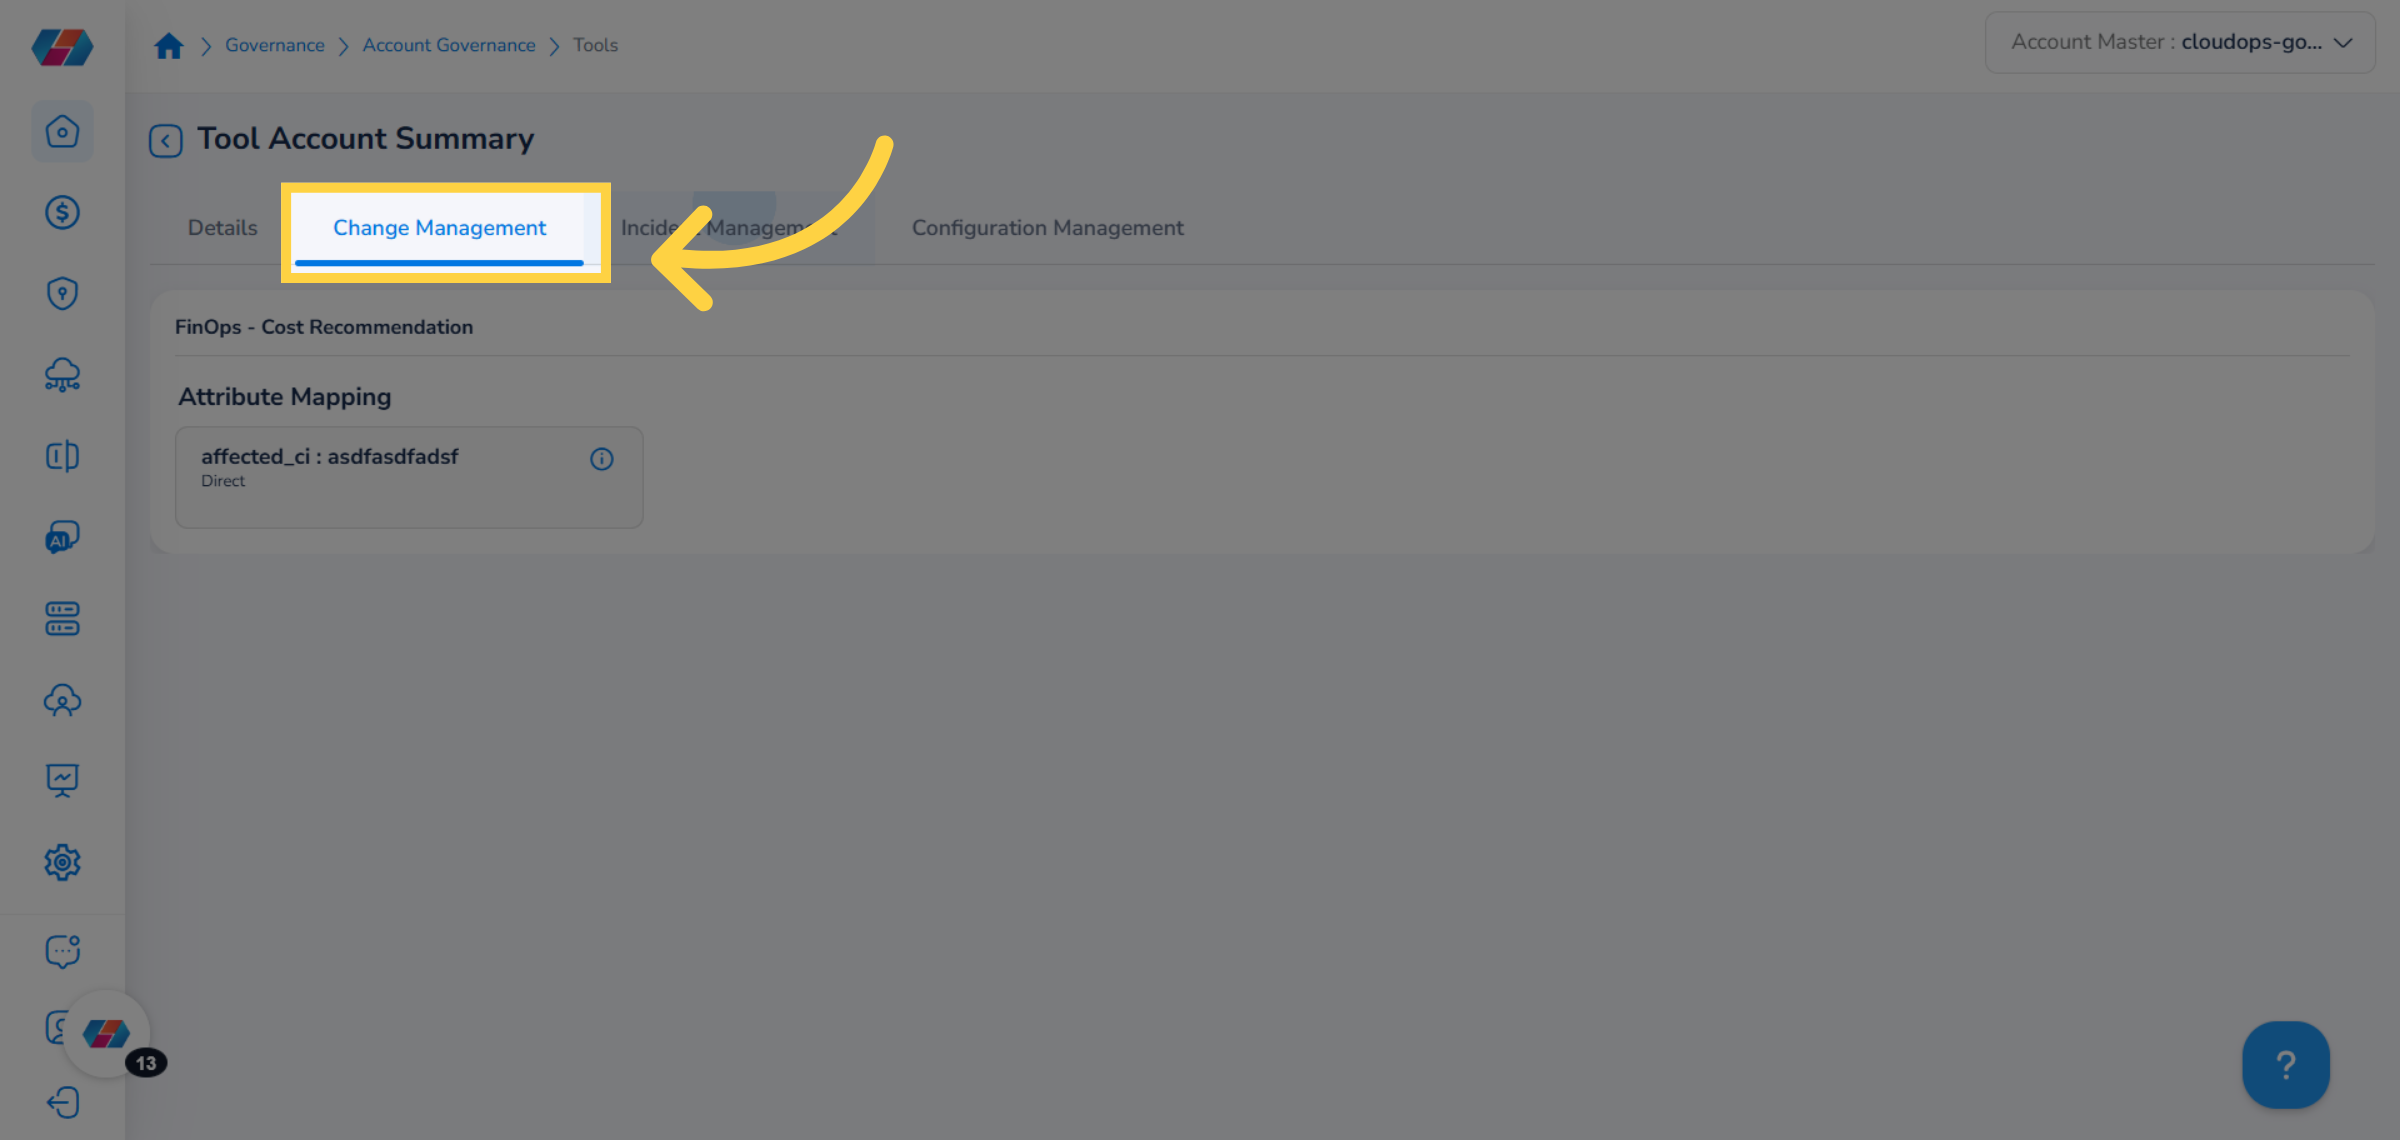
The Tool Account Summary page opens and shows the Details tab by default. Users can view the following tabs in this page: Details, Change Management, Incident Management, and Configuration Management. Users can go through each of these tabs and view the tool account details.
To take an action on a ServiceNow tool account, click the ellipses corresponding to a tool account. The available options are -- View, Edit, Configure CMDB, Deactivate, and Delete.
View ServiceNow Account Details
Perform the following steps to view ServiceNow tools account details:
1. Select the "View" Action
To view ServiceNow tool account details, select the View option.
2. View "Details" Tab
Click the Details tab to view the tool account details.
3. View "Change Management" Tab
Click the Change Management tab to view details.
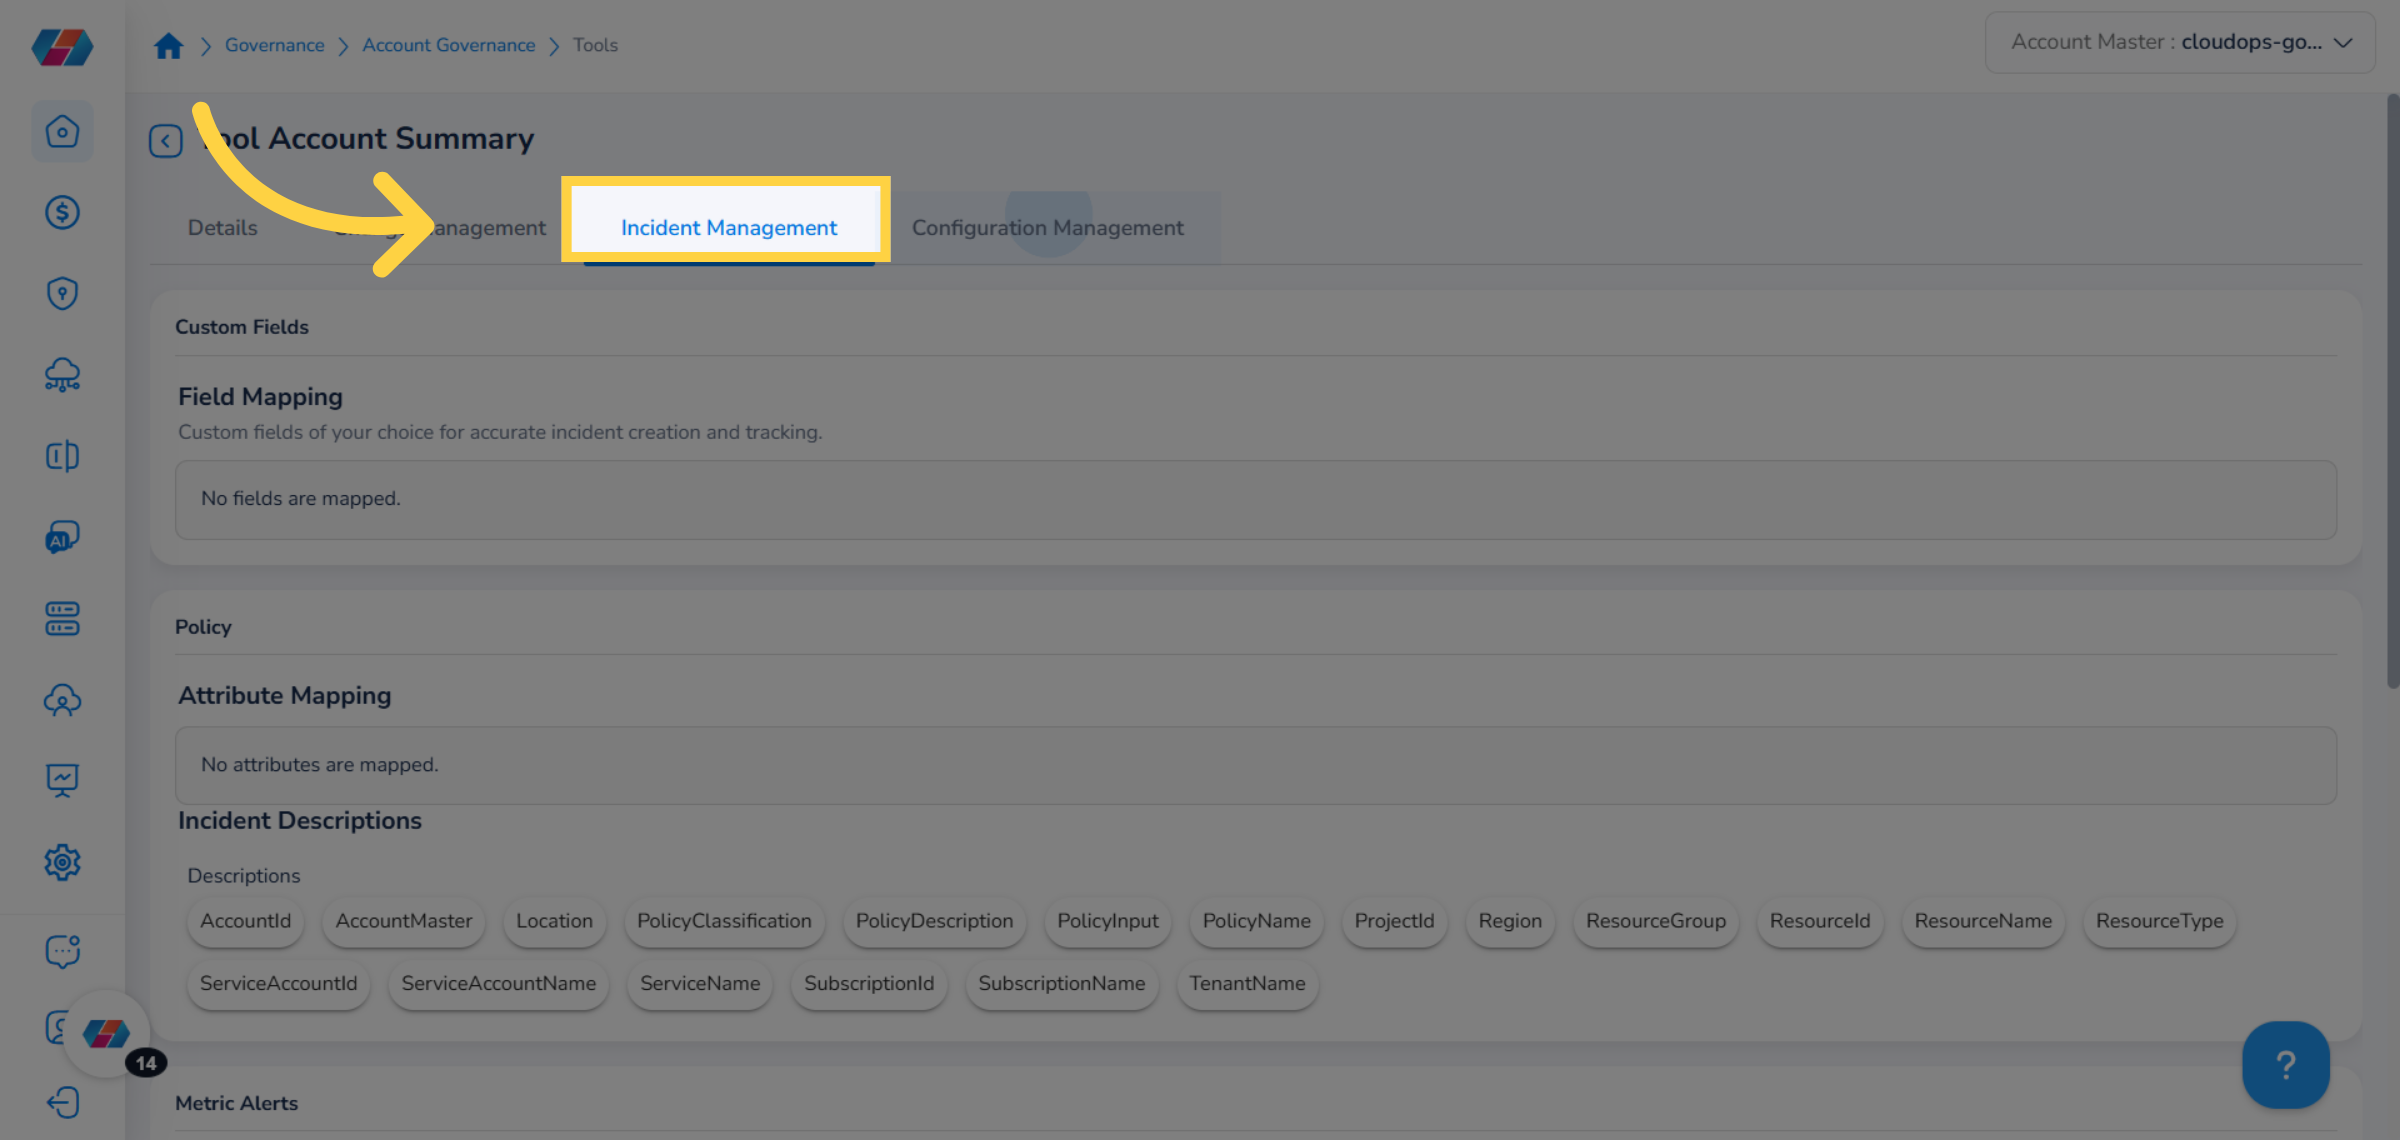
4. View "Incident Management" Tab
Click the Incident Management tab to view details.
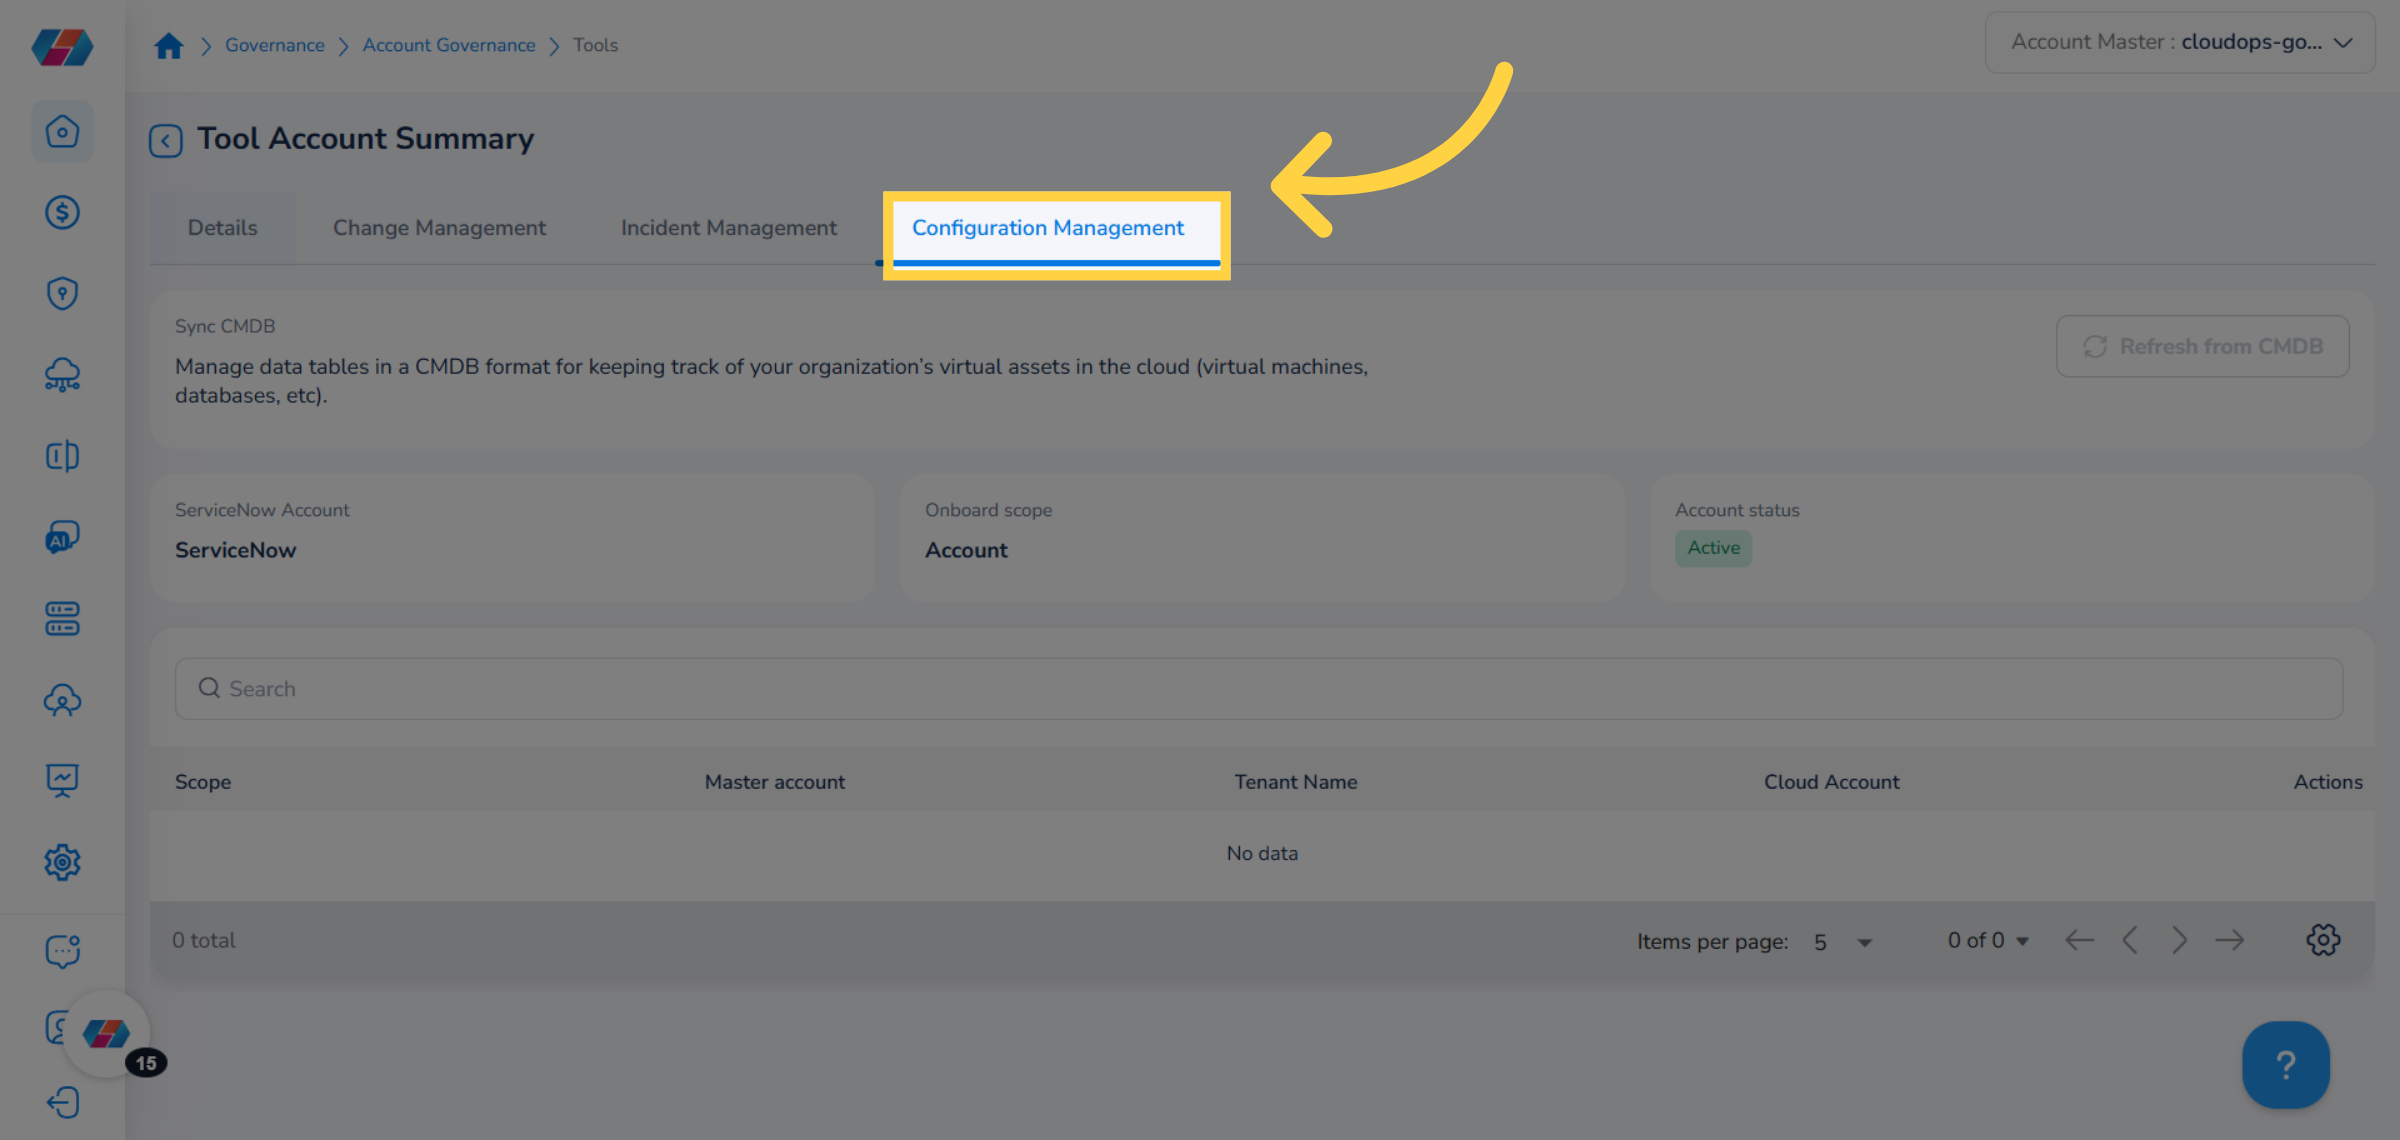
5. View "Configuration Management" Tab
Click the Configuration Management tab to view details.
Edit ServiceNow Account Details
Perform the following steps to edit ServiceNow tools account details:
1. Click Ellipses
To take another action on a ServiceNow tool account, click the ellipses.
2. Select the "Edit" Option
To modify ServiceNow tool account details, click to select the Edit option.
3. Edit Details
You can now make updates in the relevant fields.
4. Go to Next Page
To go to the next page, click Next and after making all the relevant updates, click Finish.
Configure CMDB
Perform the following steps to configure CMDB:
1. Select the "Configure CMDB" Option
To configure CMDB for a ServiceNow tool account, click the ellipses and select Configure CMDB.
2. Select Scope
The CMDB Configuration screen appears where the users must fill all relevant details. In the Scope field, select one option from -- Account, Tenant, and Cloud Account. After selecting the scope, click Next.

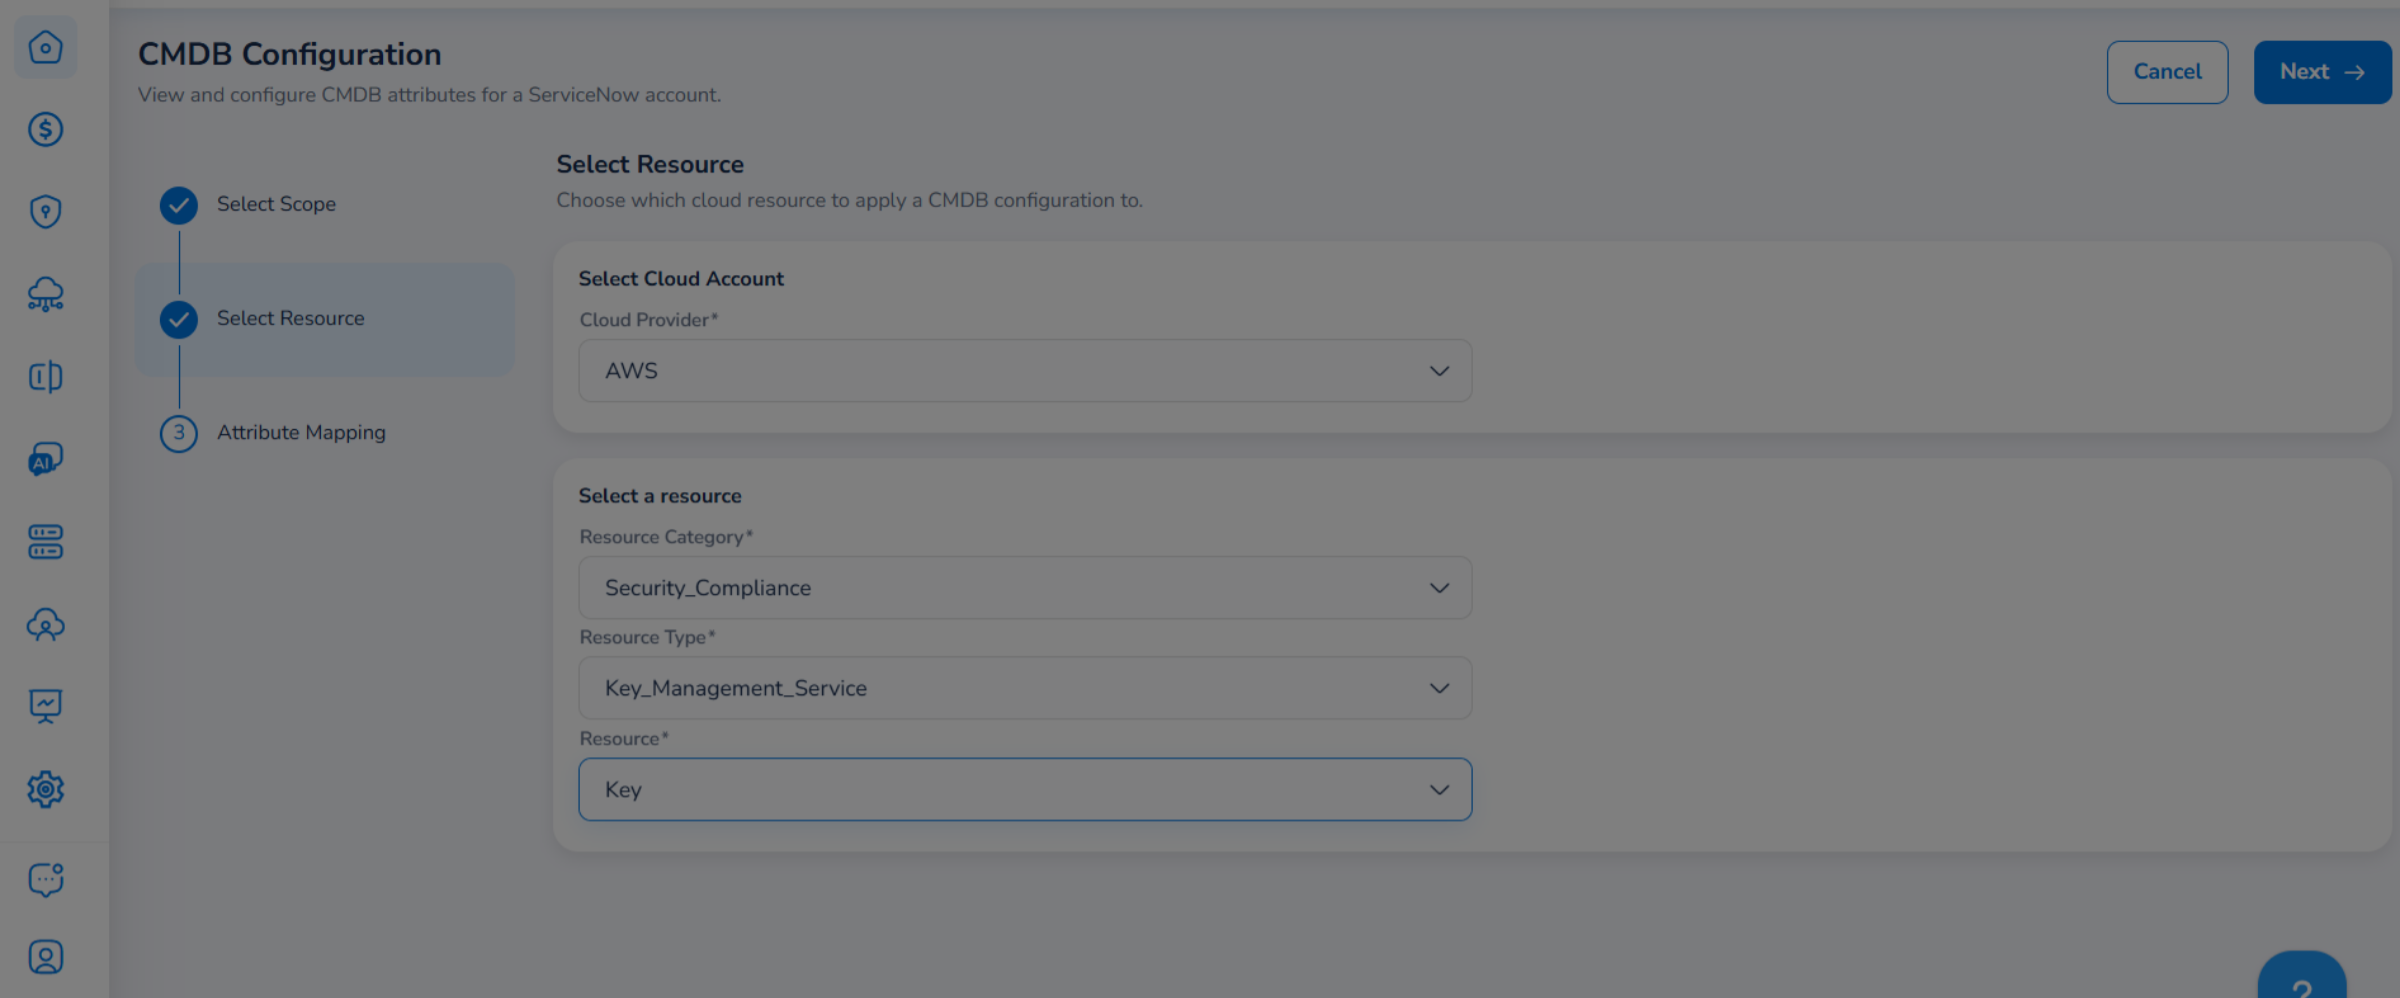
3. Select Resource
In the Select Resource step, fill the following fields.
- Cloud Provider
- Cloud Accounts (this field appears only if the scope is selected as cloud accounts)
- Resource Category
- Resource Type
- Resource
After filling all the details, click Next.
4. Attribute Mapping
In the Attribute Mapping step, in the CMDB CI Class Name drop-down list, click to select an option. After this, complete the configuration in the CI Class Settings (CRUD) section.
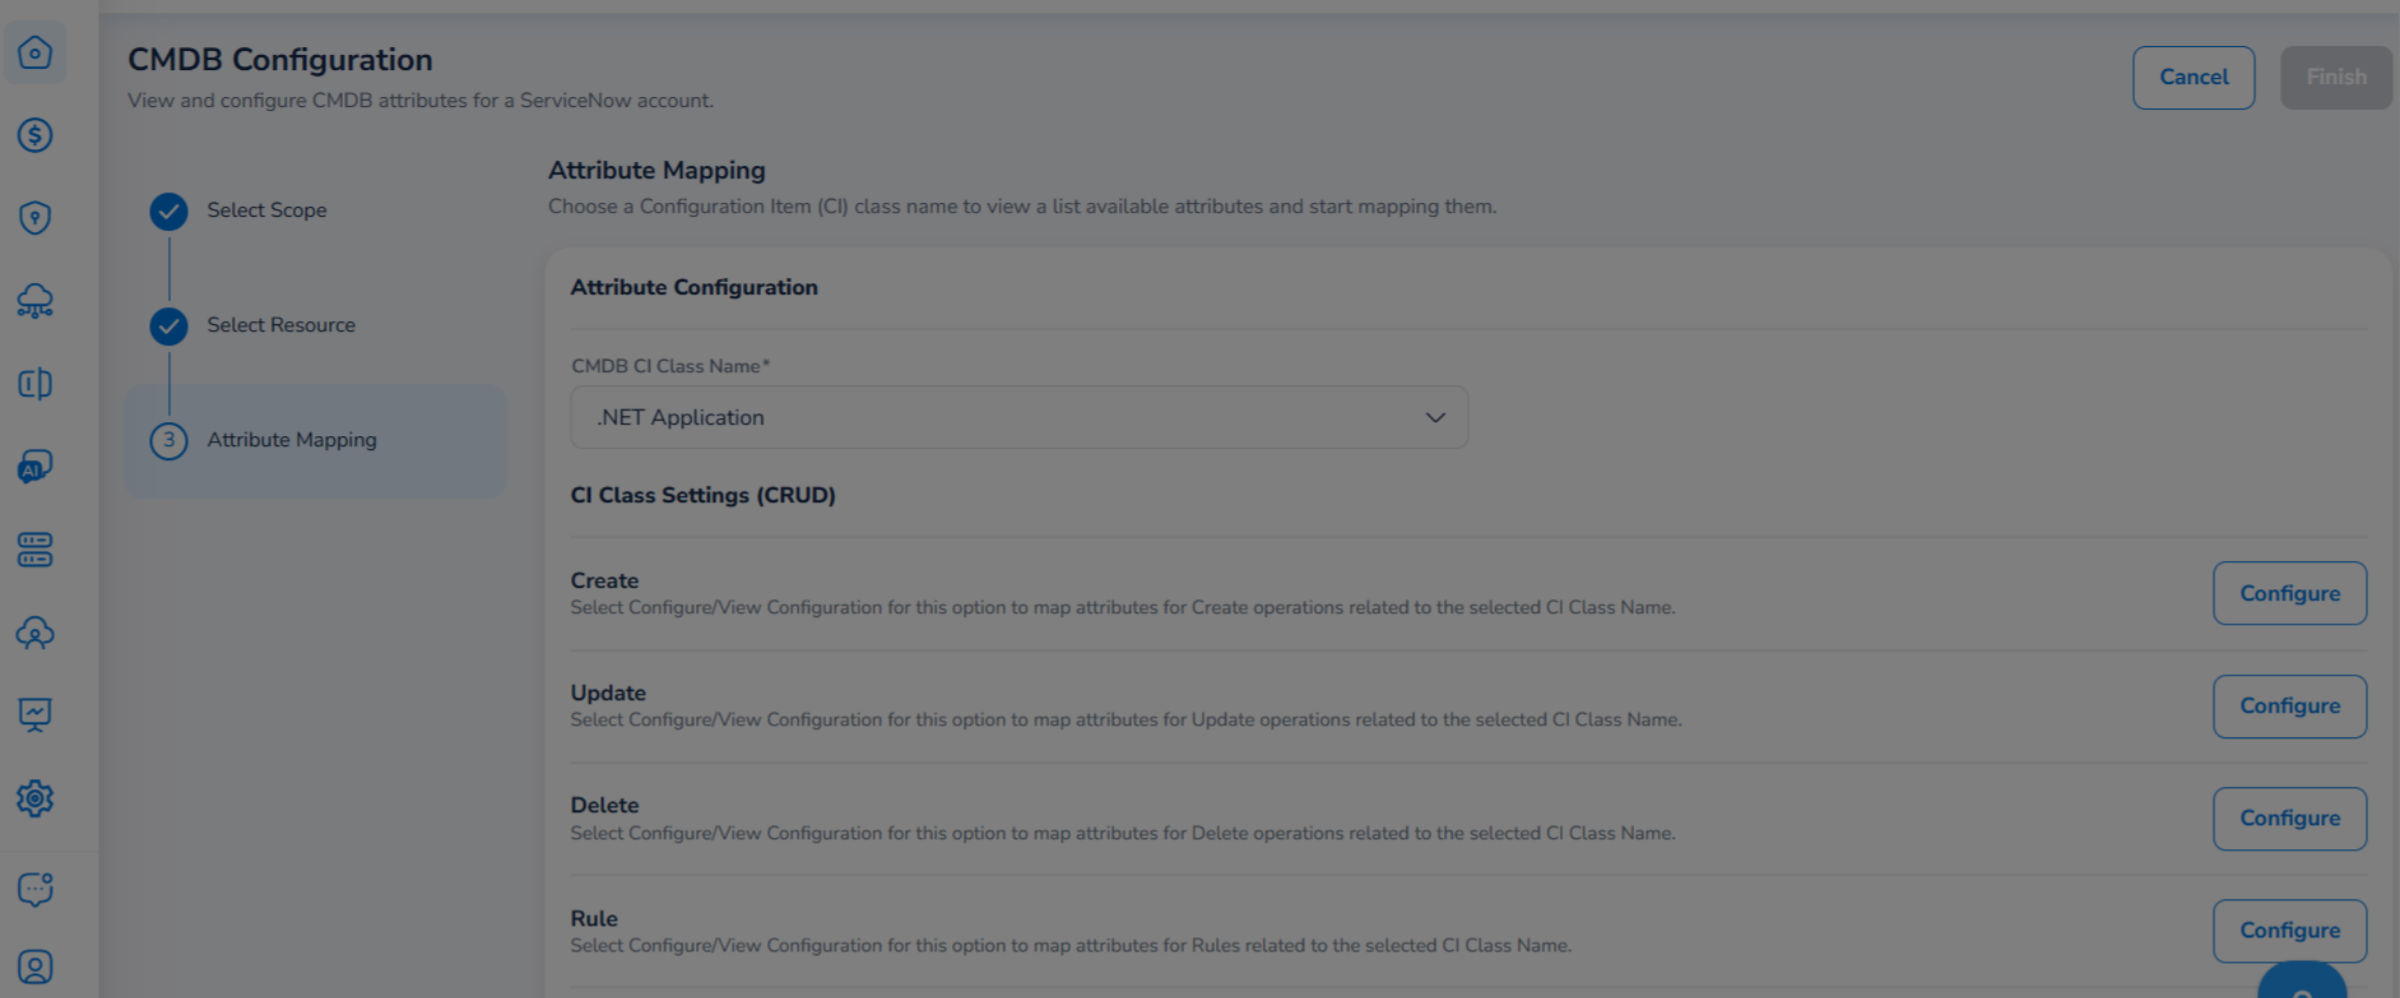
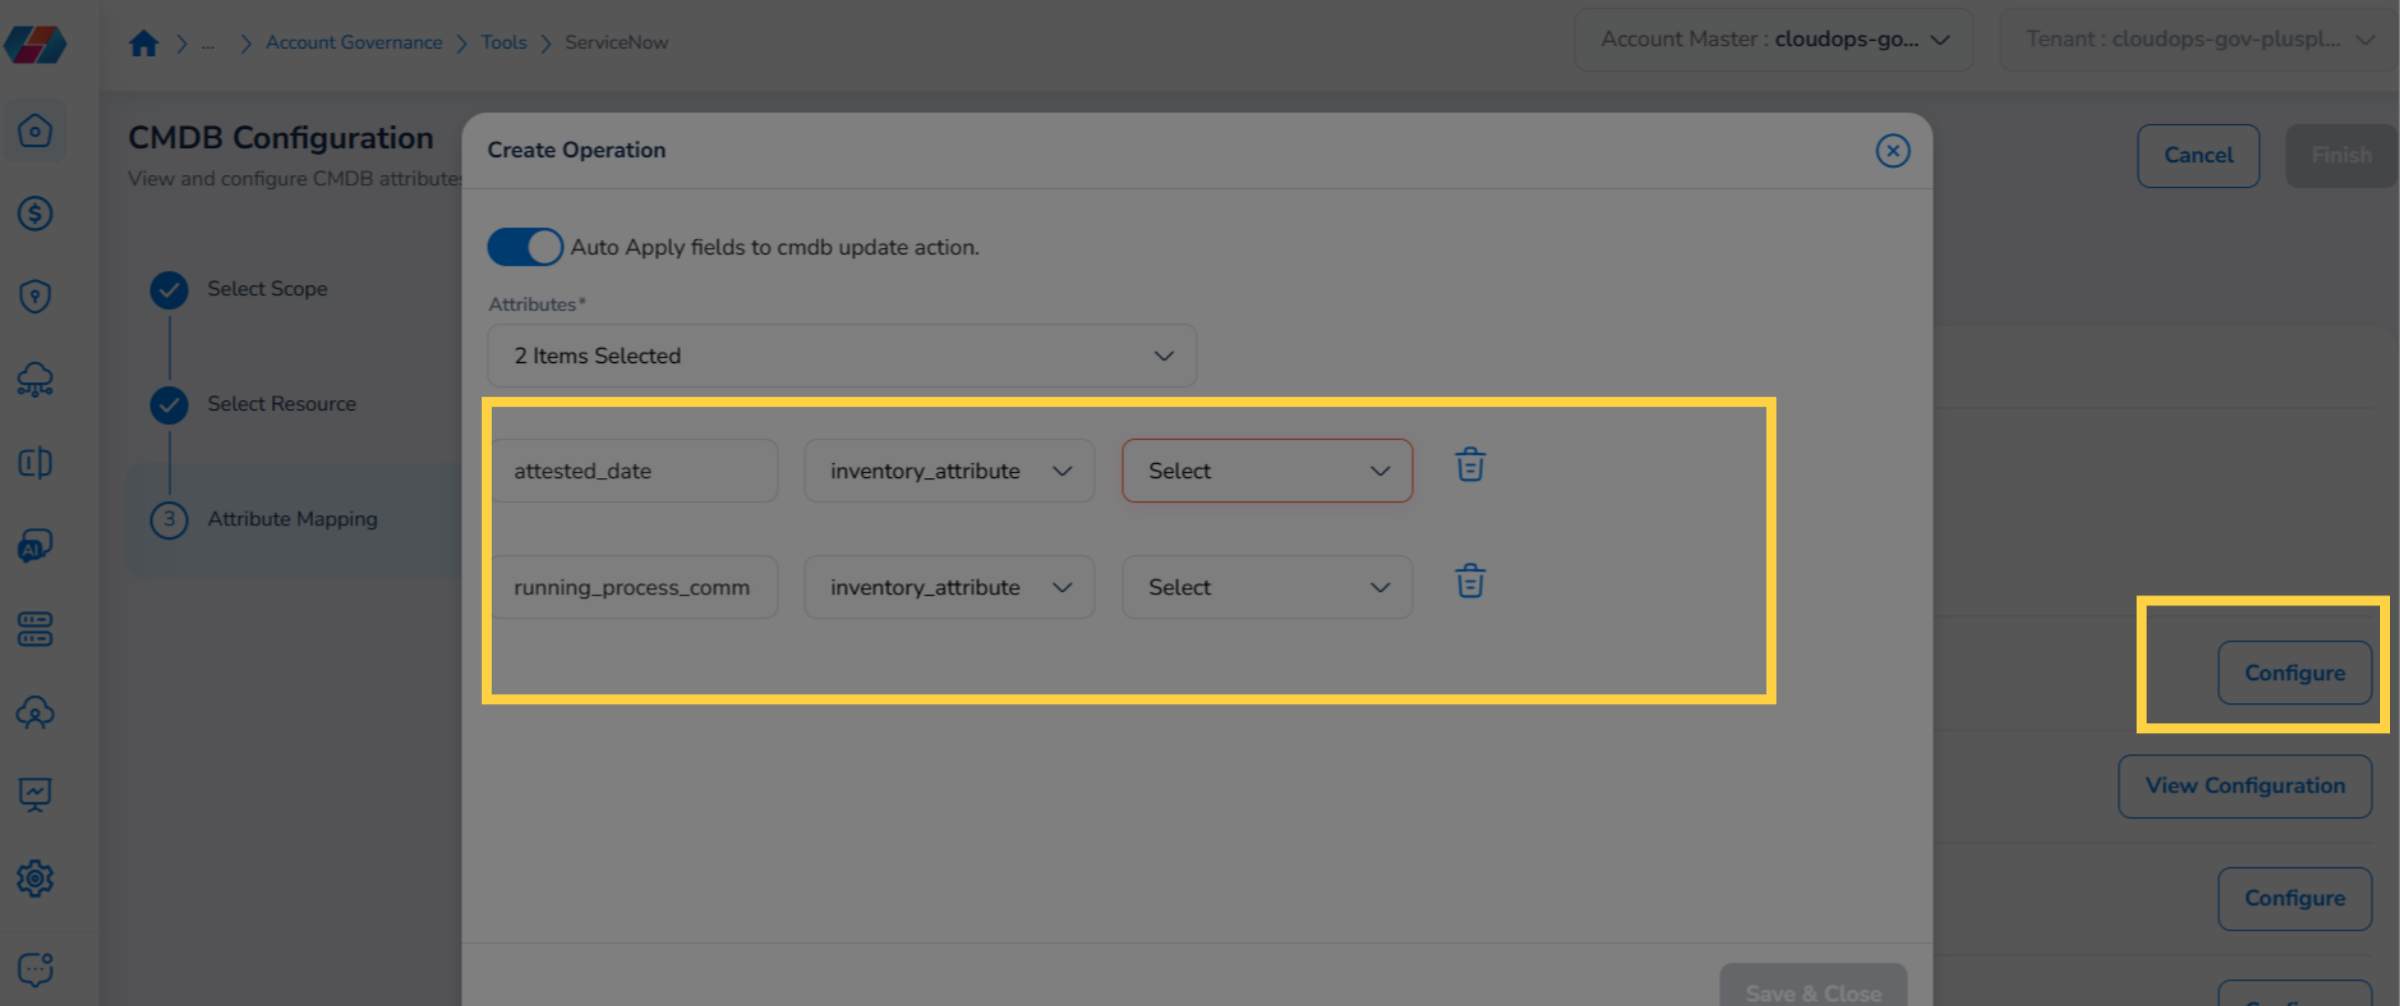
5. Configure Create / Read / Update / Delete access
In the CI Class Settings (CRUD) section, click Configure next to Create and fill the following fields:
- In the "Auto Apply fields to CMDB update action." field, move the slider towards right to enable it.
- In the Attributes drop-down list, select all relevant options and then click Ok.
- Select applicable option in the drop-down list that appears in the end of each row.
- Click Save & Close after filling all details.
Note:Click the delete icon to remove an entry.
Similar way the settings can be applied for Read or Update or Delete access types.
6. Click Finish
After making all configurations, click Finish. Users can click View Configuration to view the existing configuration and can make changes to it.
Deactivate ServiceNow Account
Perform the following steps to deactivate a ServiceNow account:
1. Select the "Deactivate" Option
To deactivate a ServiceNow tool account, click the ellipses and select Deactivate.
2. Select "Yes" or "No"
A dialog box appears where the users can either select Yes to confirm deactivating the account or they can select No.
Delete ServiceNow Account
Perform the following steps to delete a ServiceNow account:
1. Select the "Delete" Option
To delete a ServiceNow tool account, click the ellipses and select Delete.
2. Select "Yes or "No"
A dialog box appears where the users can either select Yes to confirm the deletion of the tool account or they can click No.
This guide covered the comprehensive steps to integrate and configure a ServiceNow account within CoreStack.
Updated 9 months ago