

Real-Time Threat Configuration for Azure
Overview
This user guide explains the configuration steps and pricing details to enable real-time threat detection using Microsoft Defender for Cloud, set up Policy Assignments, configure Defender Plans, define Action Groups, and configure Activity Log Alert Rules to receive security alerts.
Users must perform the following steps in the Azure portal.
Step1: Create Policy Assignment
Create a Policy Assignment using the sample JSON code shown below.
{
            "name": "SecurityCenterBuiltIn",
            "properties":
                {
                    "displayName": "Enable Monitoring in Azure Security Center",
                    "description": "Policy Assignment to enable security center",
                    "policyDefinitionId": "/providers/Microsoft.Authorization/policySetDefinitions/1f3afdf9-d0c9-4c3d-847f-89da613e70a8",
                    "parameters": {},
                    "metadata": {
                        "assignedBy": "Security_Center",
                        "corestack-system-manage": "true",
                        "corestack-system-category": "enable_azure_security_center"
                    }
                }
        }
To enforce the use of Defender for Cloud, apply a built-in Azure policy. Note that Policy Assignment is done only for Audit purposes.
- To create Policy Assignments, refer to: Azure Policy Assignment
- To create and manage policies to enforce compliance, refer to: Azure Policy Assignment Guide
Step 2: Enable Services and Select Pricing Tier
In the Defender for Cloud application, enable all required services and select pricing tier.
In Defender plans, the Foundational Cloud Security Posture Management (CSPM) tier is currently free. Other Defender plans (for example: Servers, Containers, SQL, etc.) incur usage-based charges. Please review cost breakdown details in the Defender for Cloud Pricing page.
Services to be enabled are:
- Defender for Cloud
- Log Analytics
- Azure Monitor
Steps for pricing tier selection:
- Go to Defender for Cloud > Environment Settings >[Subscription] > Pricing & Settings.
- Select pricing tier for the required resource types (VMs, Containers, SQL, etc.).
- Click Save.
Step 3: Create Action Group with Webhook Receiver
Create Action Group with Webhook Receiver using the following JSON code.
{
"location": "Global",
"tags": {
"corestack-system-manage": "true"
},
"properties": {
"groupShortName": "<first_8_chars_of_action_group_name>",
"enabled": true,
"webhookReceivers": [
{
"name": "security_webhook",
"serviceUri": "<webhook_url>"
}
]
}
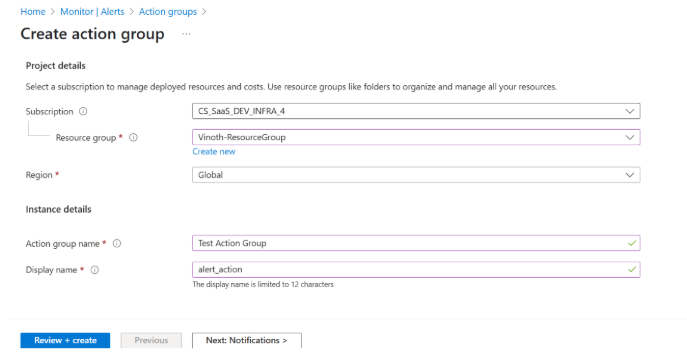
} Steps to create an Action Group:
-
Navigate to Azure portal > Monitor > Alerts > Action groups.
-
Click + Create.
-
Select appropriate options in Subscription and Resource group fields.
-
In the Action group name box, type the action group name and in the Display name box, type the short name.
-
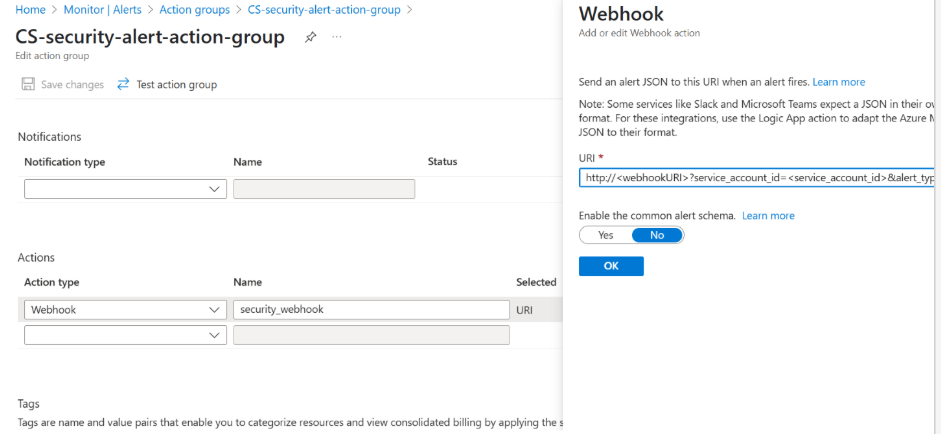
In the Actions type list, select the Webhook option and fill the following:
- In the Name box, type security_webhook.
- In the URI box, (for IndiaSaas) add: https://86qondv6w3.execute-api.us-east-1.amazonaws.com/StageName/alerts?service_account_id=<service_account_id&alert_type=security_threats and click Ok.
-
Add any additional tags such as: corestack-system-manage=true
-
Click Review + create.
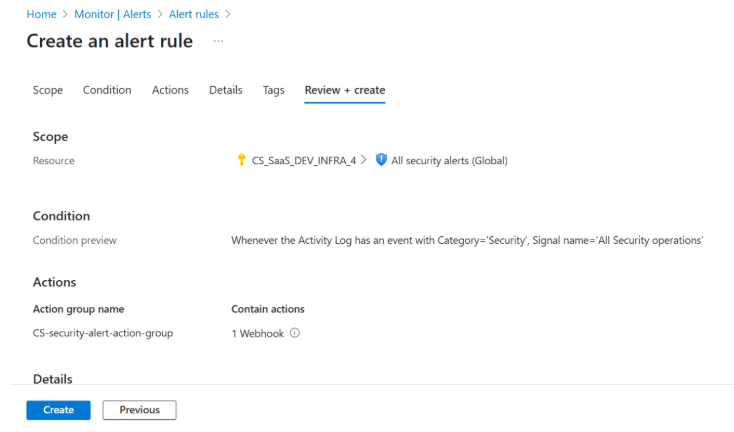
 Step 4: Create Activity Log Alert Rule
Create Activity Log Alert Rules to monitor specific actions in your Azure environment and trigger notifications or automated responses. Refer to the following example.
{
                "location": "global",
                "tags": {
                    "corestack-system-manage": "true"
                },
                "properties": {
                    "scopes": [
                        f"/subscriptions/<subscription_id>
                    ],
                    "enabled": True,
                    "condition": {
                        "allOf": [
                            {
                                "field": "category",
                                "equals": “Security”
                            },
                            {
                                "field": "resourceType",
                                "equals": "Microsoft.Security/locations/alerts"
                            }
                        ]
                    },
                    "actions": {
                        "actionGroups": [
                            {
                                "actionGroupId": <Above created Action group ID>
                            }
                        ]
                    },
                    "description": "This alert rule is created to trigger security threats in this subscription"
                }
            }}
Steps to Create Alert Rule:
-
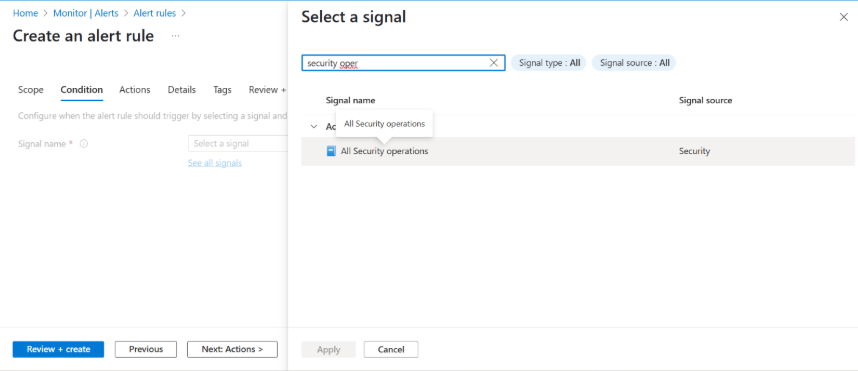
Navigate to Azure portal > Monitor > Alerts > Alert rules.
-
Click + Create and choose Activity Log Alert.
-
Select Subscription and Scope.
-
In the Condition tab, define conditions (for example: in the Signal name field, type Security).
-
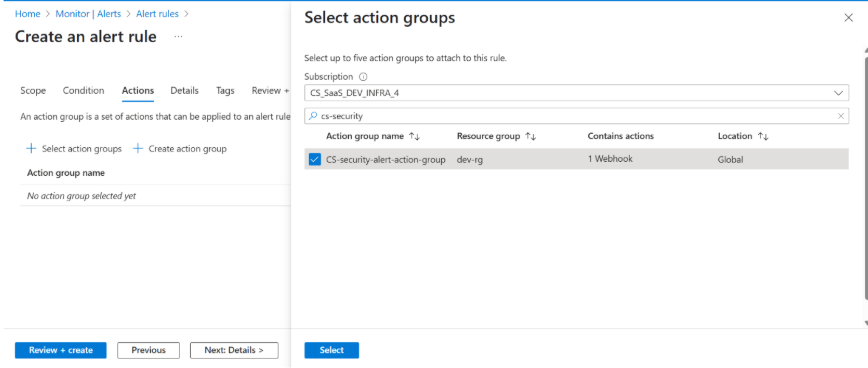
In the Actions tab, in the Subscription drop-down list, select the previously created action group to attach it.
-
In the Review + createtab, review the details and click Create.
Step 5: Perform Threat Configuration in the Platform
After completing all the steps in Azure portal, refer to the following link and perform threat configuration in the CoreStack platform.
https://docs.corestack.io/docs/onboarding-for-azure-subscriptions#threat-management
Summary Table
| Component | Free | Cost Notes |
|---|---|---|
| Policy Assignment | Yes | Free |
| Defender CSPM (Foundational) | Yes | Free |
| Defender Plans (Servers, SQL, etc.) | No | Usage-based |
| Action Group Creation | Yes | Free |
| Action Group Actions (SMS, Voice, etc.) | No | Usage-based |
| Activity Log Alert Rule | Yes | Free |
| Log Analytics (ingestion/storage) | No | ~$2.30/GB + retention |
Cost Breakdown Details
Action Group Pricing
| Action Type | Pricing Detail |
|---|---|
| SMS | ~$0.01–$0.02 per message (varies by region) |
| Voice Call | ~$0.02–$0.05 per call |
| Webhook | Free from Azure, but external Webhook platform may have its own cost. |
| Logic App | Based on number of executions (per Logic App pricing). |
| Azure Function | First 1M executions/month free; $0.20 per million after that. |
| Automation Runbook | First 500mins/month free; then ~$0.002/min. |
Log Analytics Cost
- Typical event size: ~10–25 KB
- Ingestion price: ~$2.30 per GB (varies by region)
- Data retention: First 31 days free, ~$0.10/GB/month after that
References
Updated 8 months ago