

Save Views
Introduction
Users can apply certain filters for a report and then save the selected parameters for future use as a view. This feature is available only for analytics reports in the platform.
A viewcan be saved and marked as the default view for a report. When a user wants to apply a saved view for a report, they can just select the view and apply it to the report. All the filter options and selected parameters will be applied to the report automatically based on the selected view.
When a view is marked as the default view, the next time a user opens that particular report, the default view will be selected and applied by default. Users can change the default view or delete an existing view.
The advantage of using views is that users don’t have to set filtering options for a report every time they want to view it. Based on the saved views for a particular report, users can select one and then view the report.
Save a View
Perform the following steps to add and save a view for a report:
-
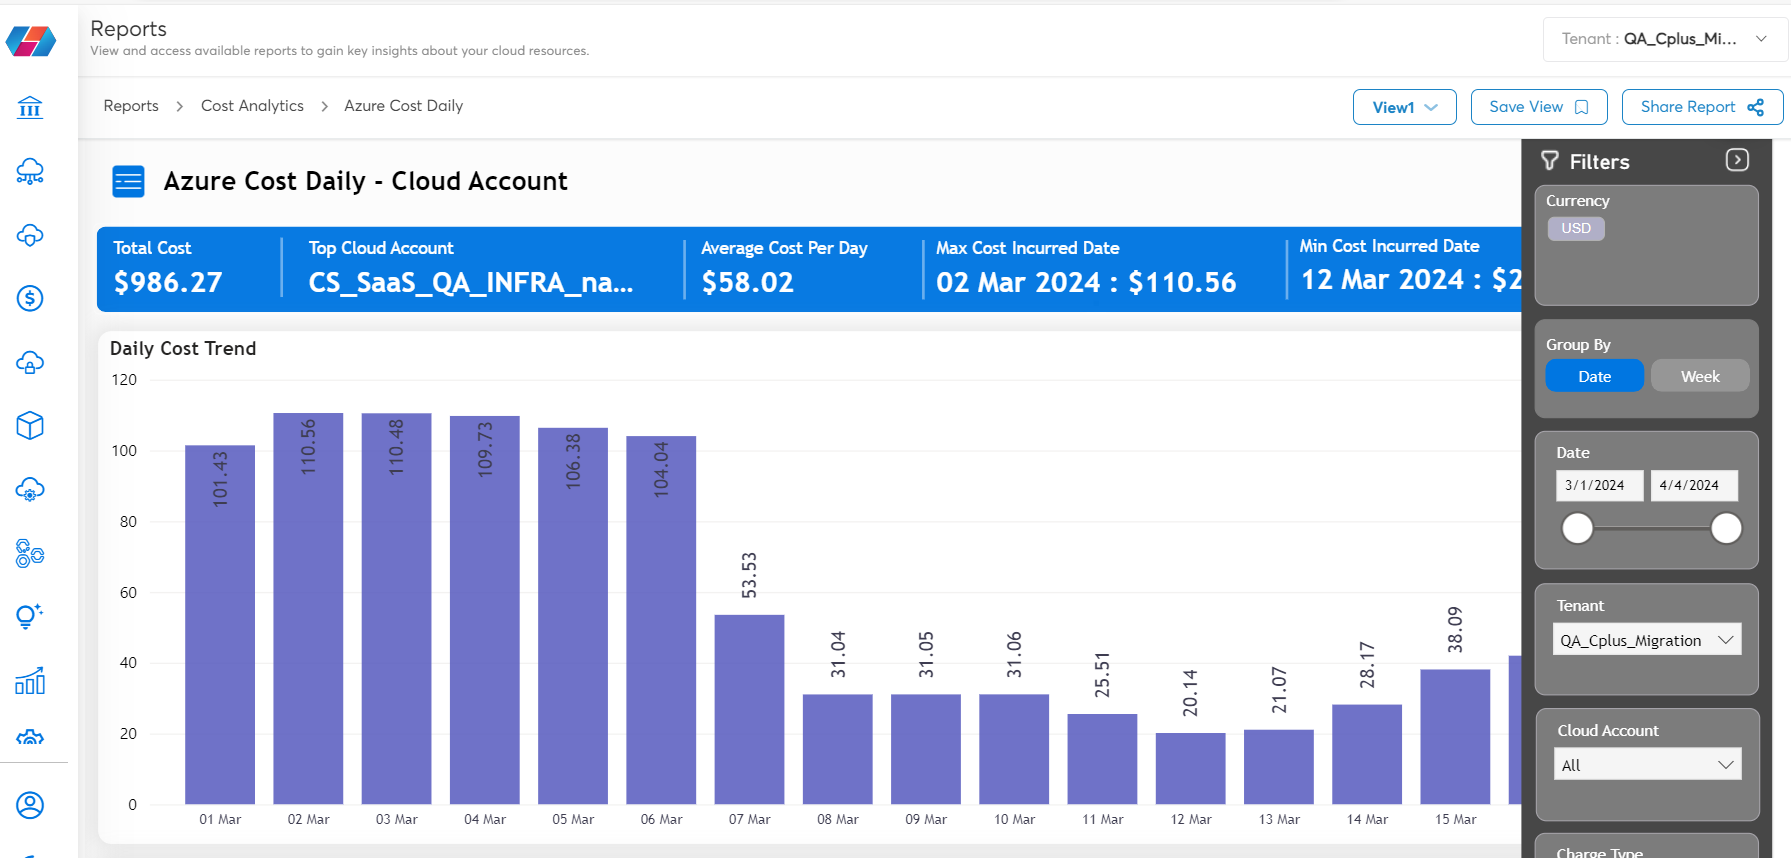
Navigate to any analytics report to view it. The Filterpane is displayed on the extreme right side of the screen.
-
Click the arrow to expand the Filterspane.
-
Select the required options in the fields that appear.
-
Click Save View.
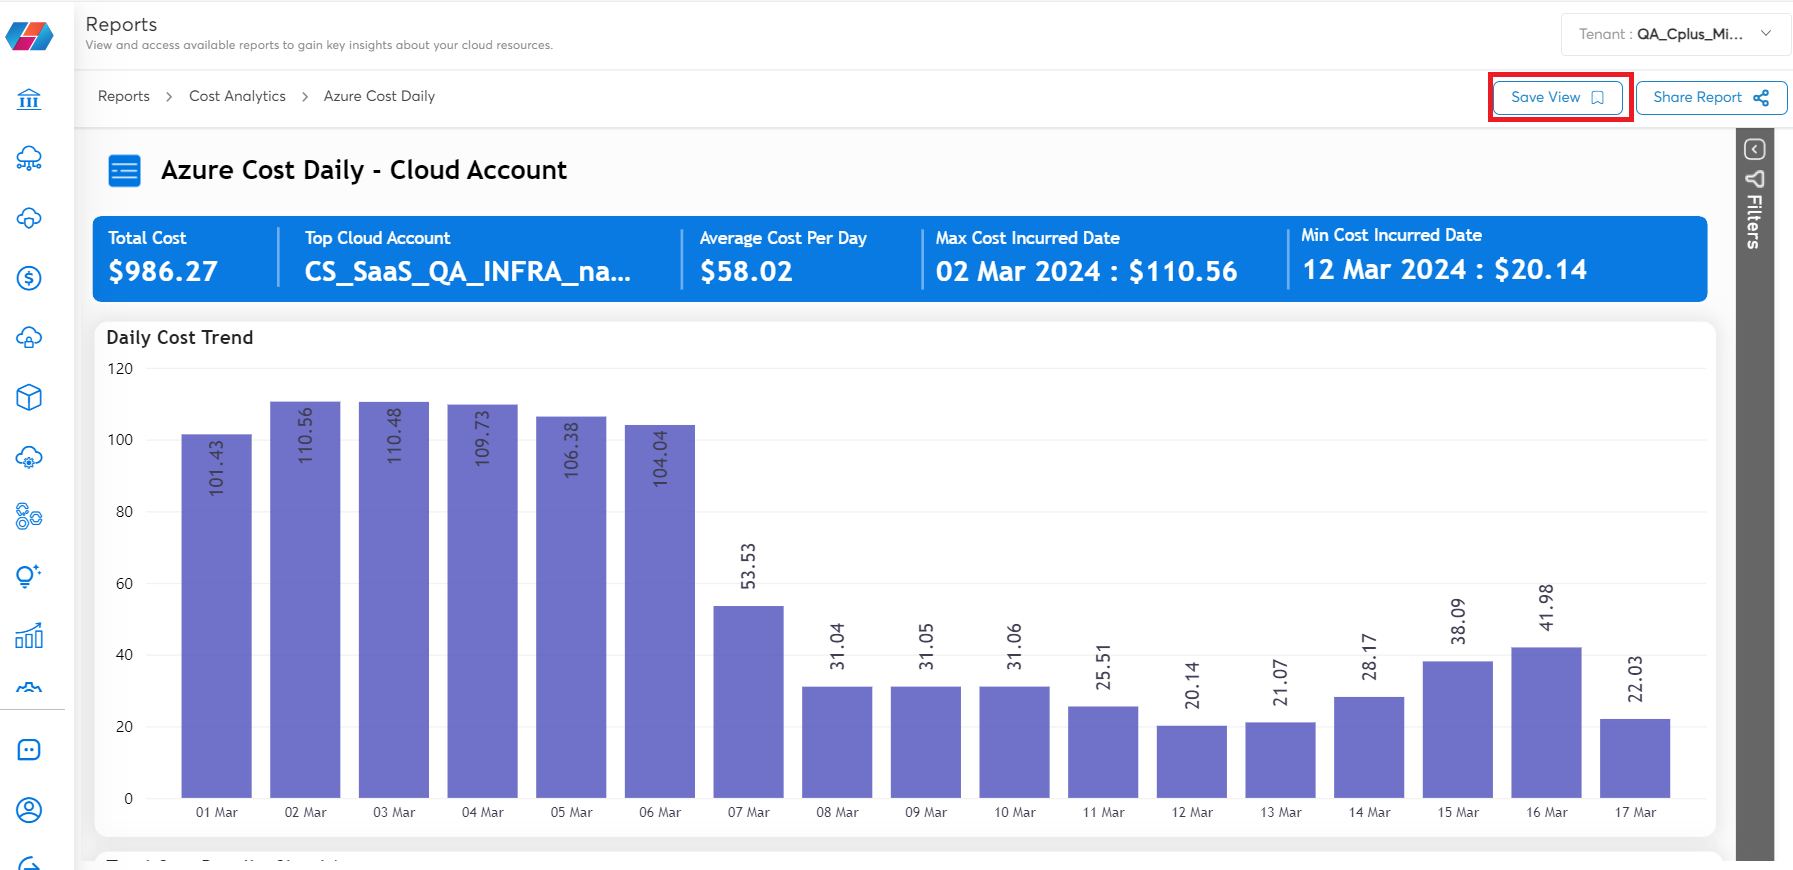
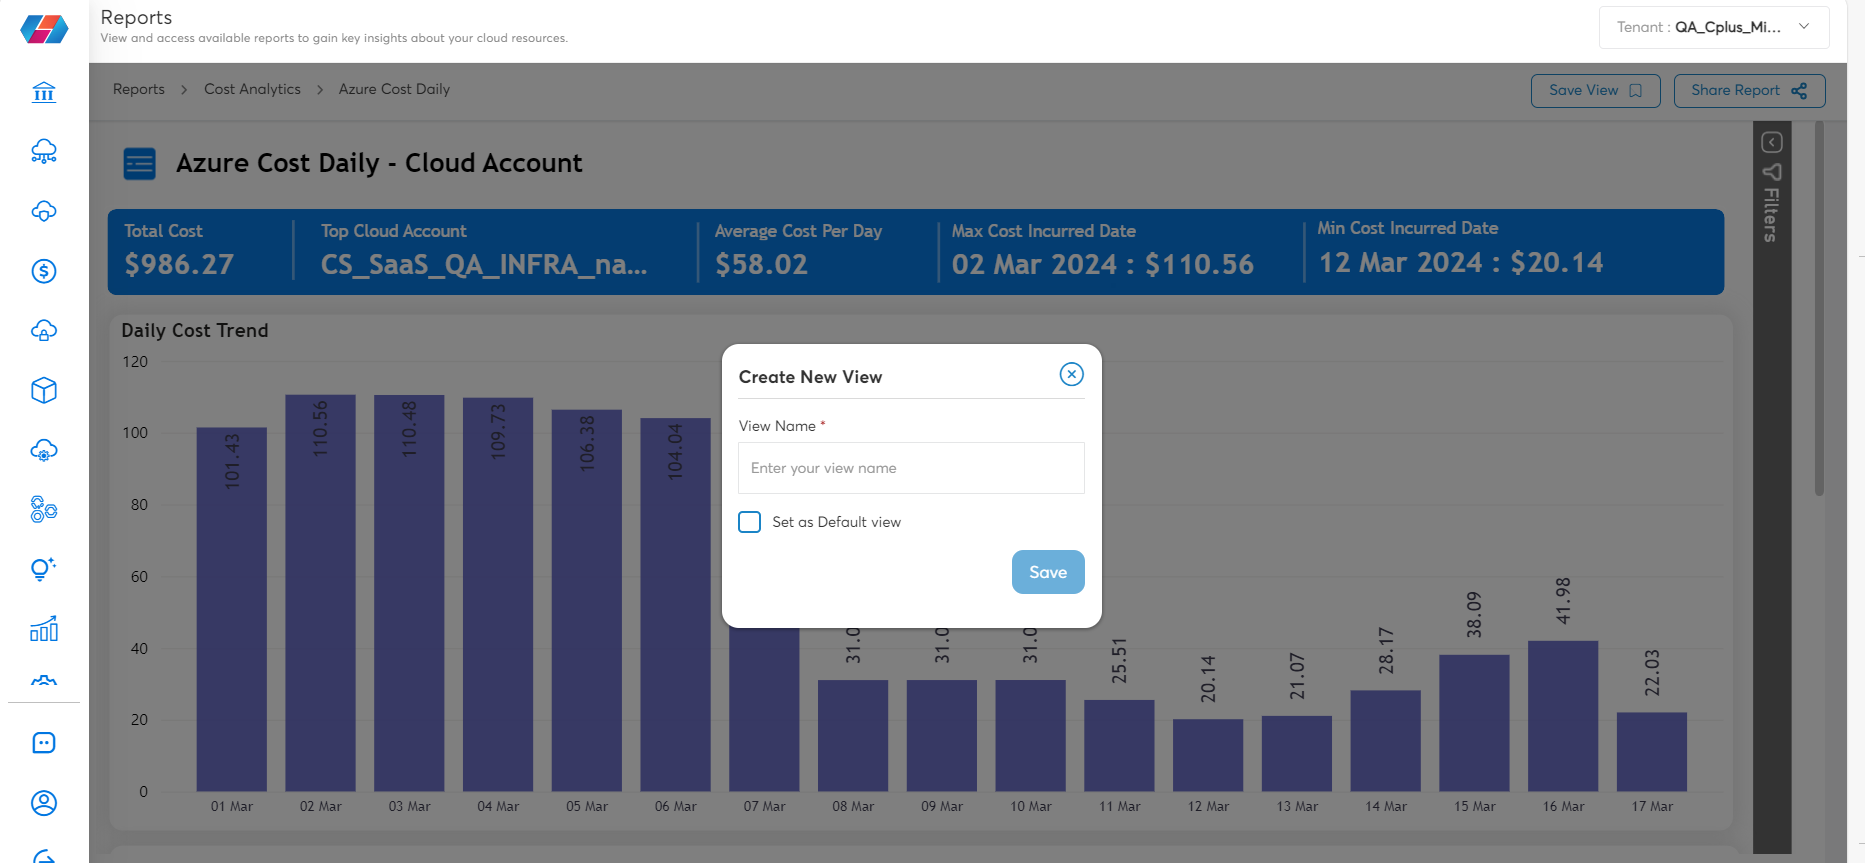
The Create New View dialog box appears.
-
In the Create New Viewdialog box, in the View Name box, type a name for the view that you’d like to be saved.
-
Select the Set as Default View checkbox to mark this view as the default view. If a view is set as the default view, then every time you open this report, the default view will be shown on the screen.
-
Click Save.
The saved view will be shown on the report screen.
Switch View
To switch to another view for the report:
-
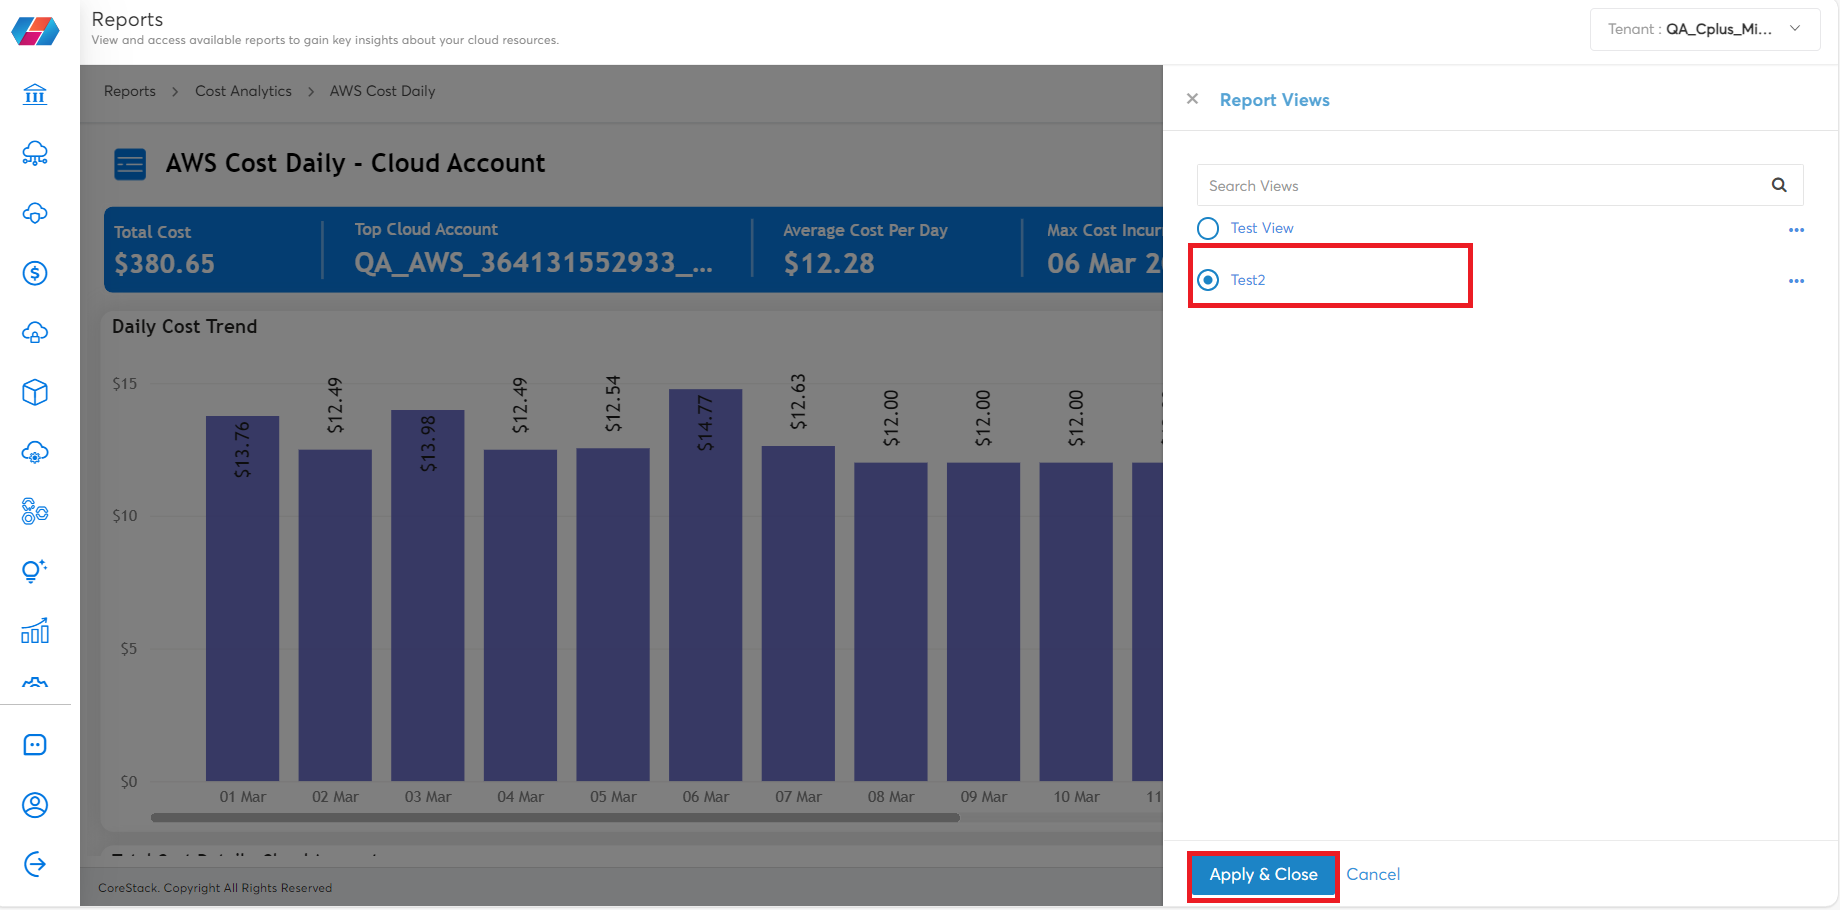
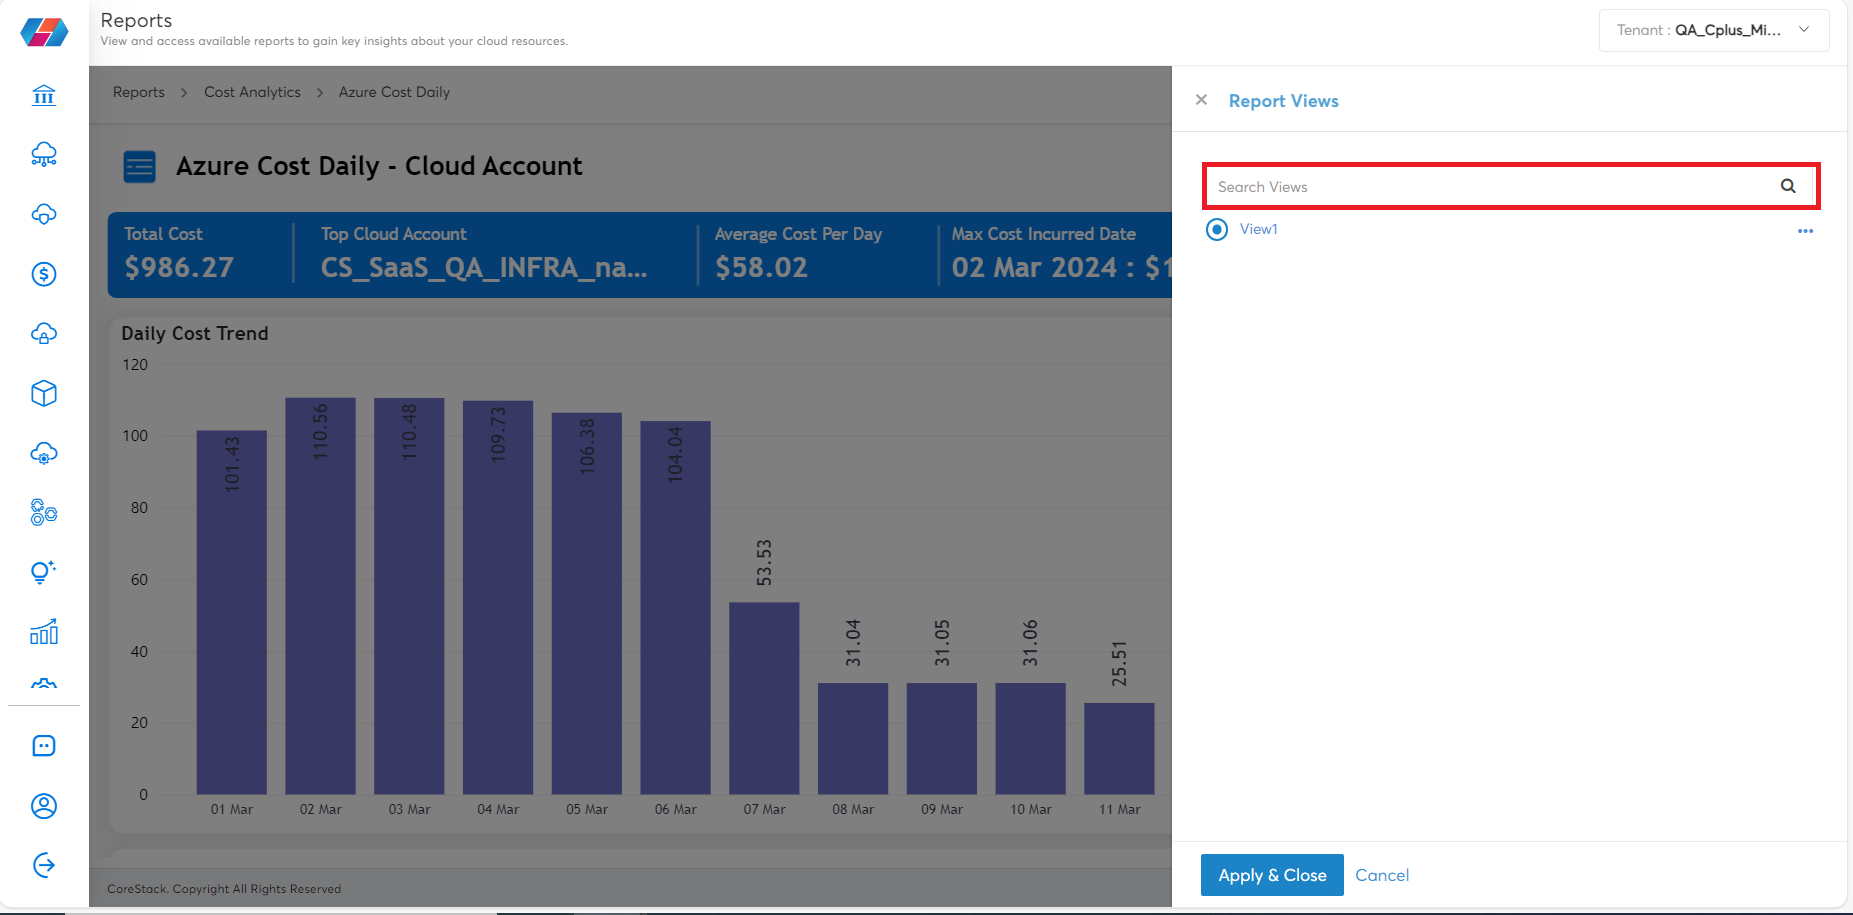
Click the custom view name that appears on the screen. The Report Views screen appears.
-
On the Report Views screen, select the view you want to see for the report and click Apply & Close. As per the selected view, all the filtering options will be applied to the report.
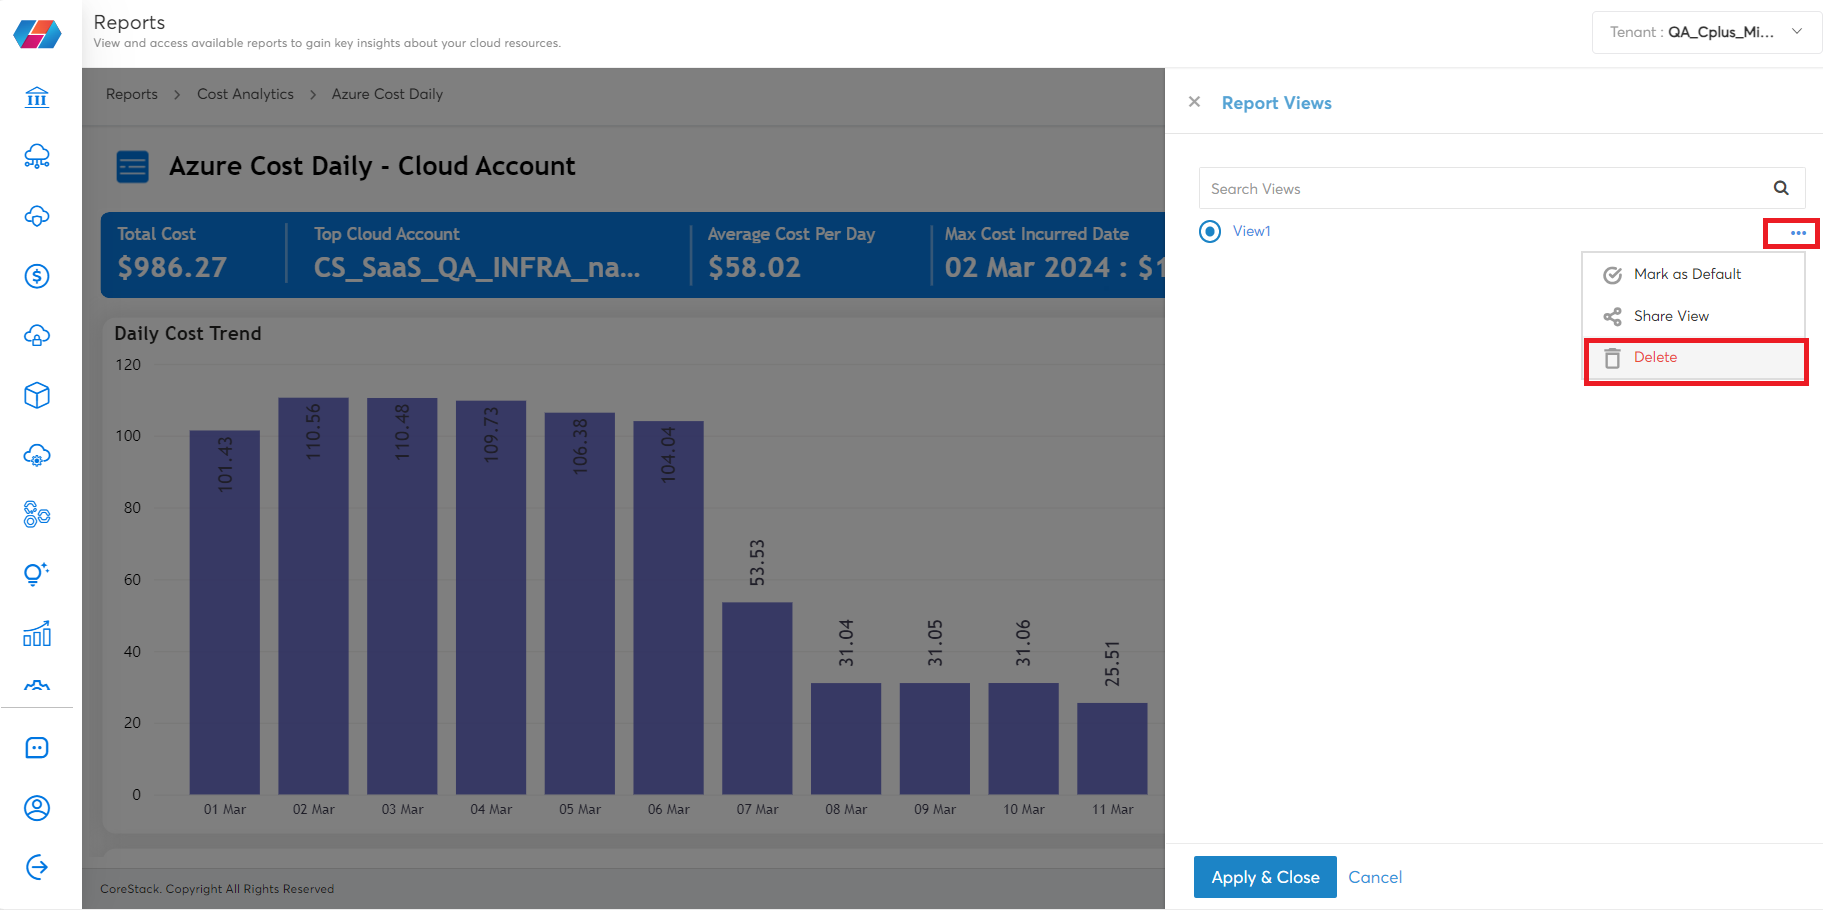
Delete a View
To delete a view:
-
On the report screen, click on the custom view name.
-
On the Report Views screen, select a view.
-
Click the three horizontal dots, and then click Delete. A dialog box opens in which you can click OK to confirm the deletion.
Default View
To mark a view as the default view:
-
Click on the custom view name.
-
On the Report Views screen, select the required view.
-
Click the three horizontal dots, and then click Mark as Default.
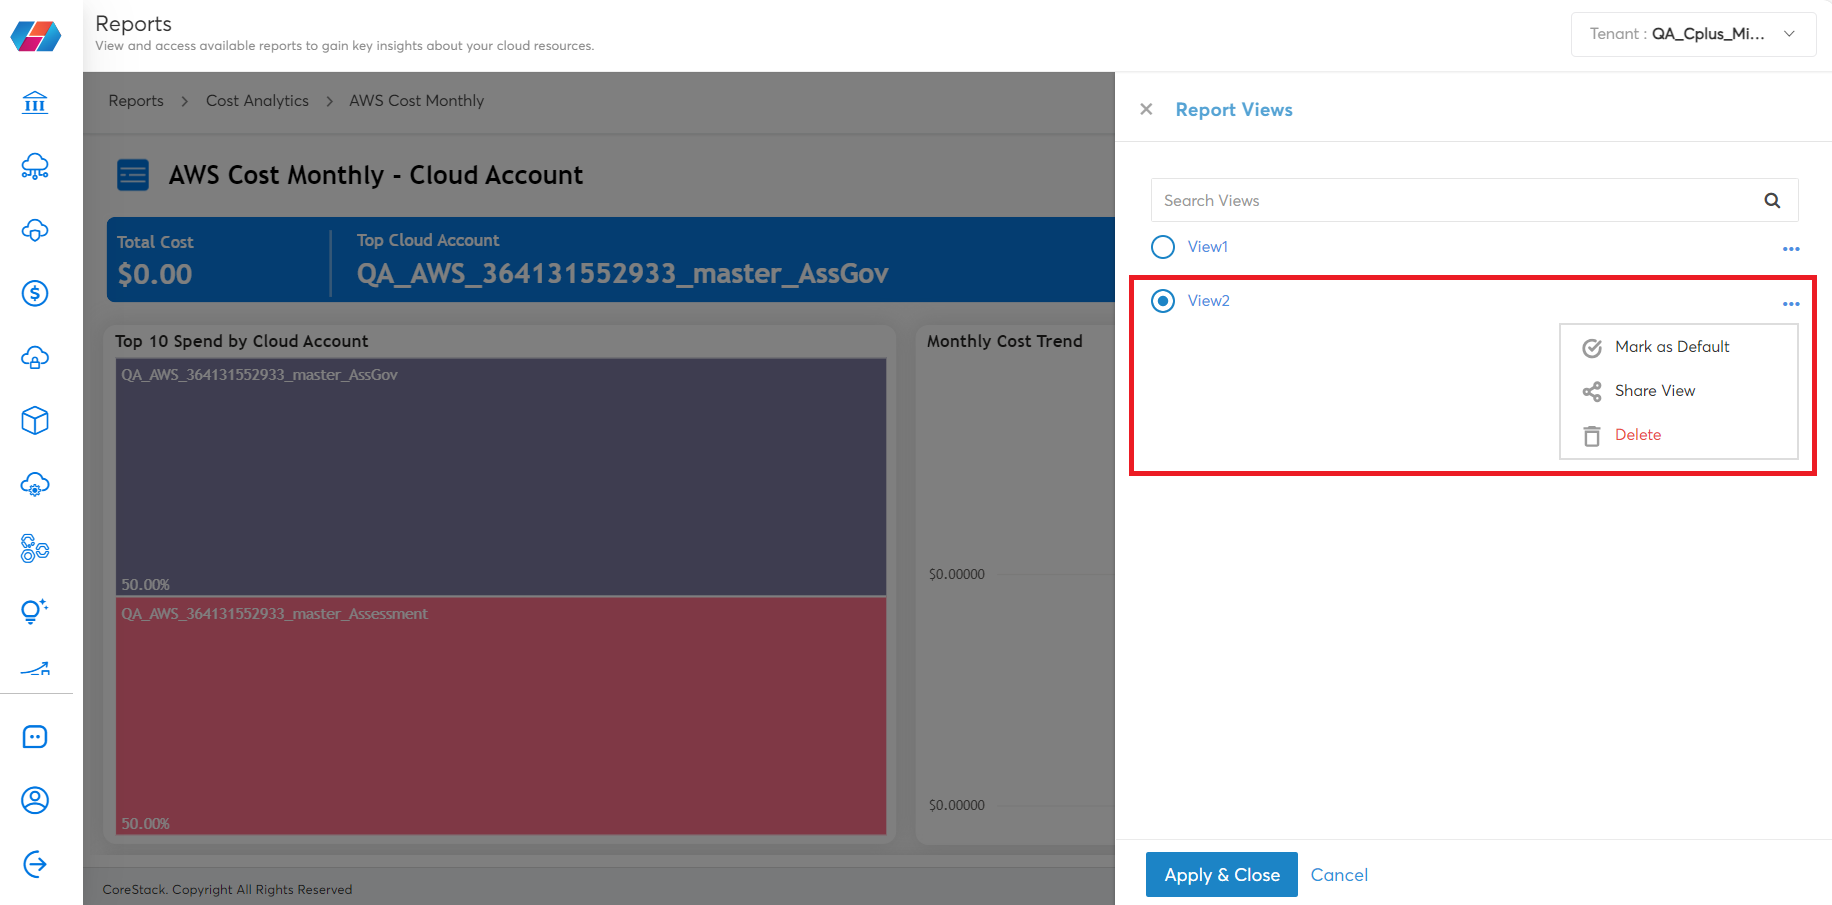
Note:A green tick/check symbol will be shown next to any view marked as the default view.
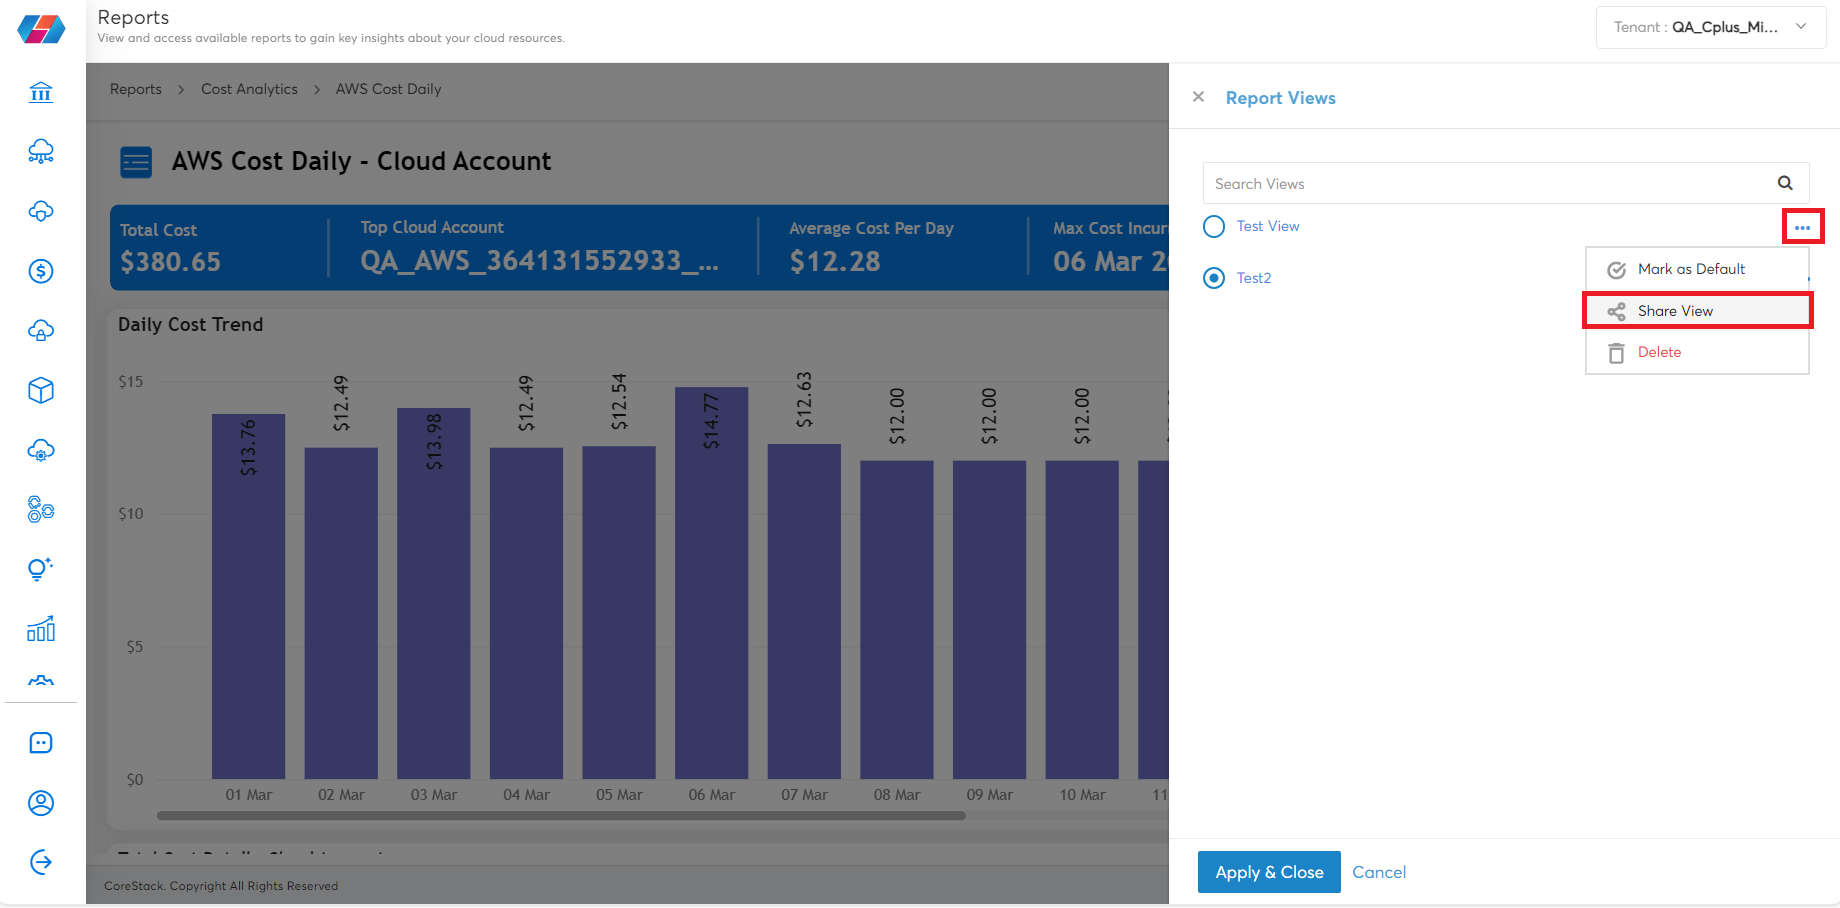
Share a View
To share a view:
-
Click the custom view name.
-
On the Report Views screen, select a view.
-
Click the three horizontal dots, and then click Share View. The Share View dialog box appears.
-
In the Share View dialog box, type the email ID(s) of users with whom the view needs to be shared and then click Share.
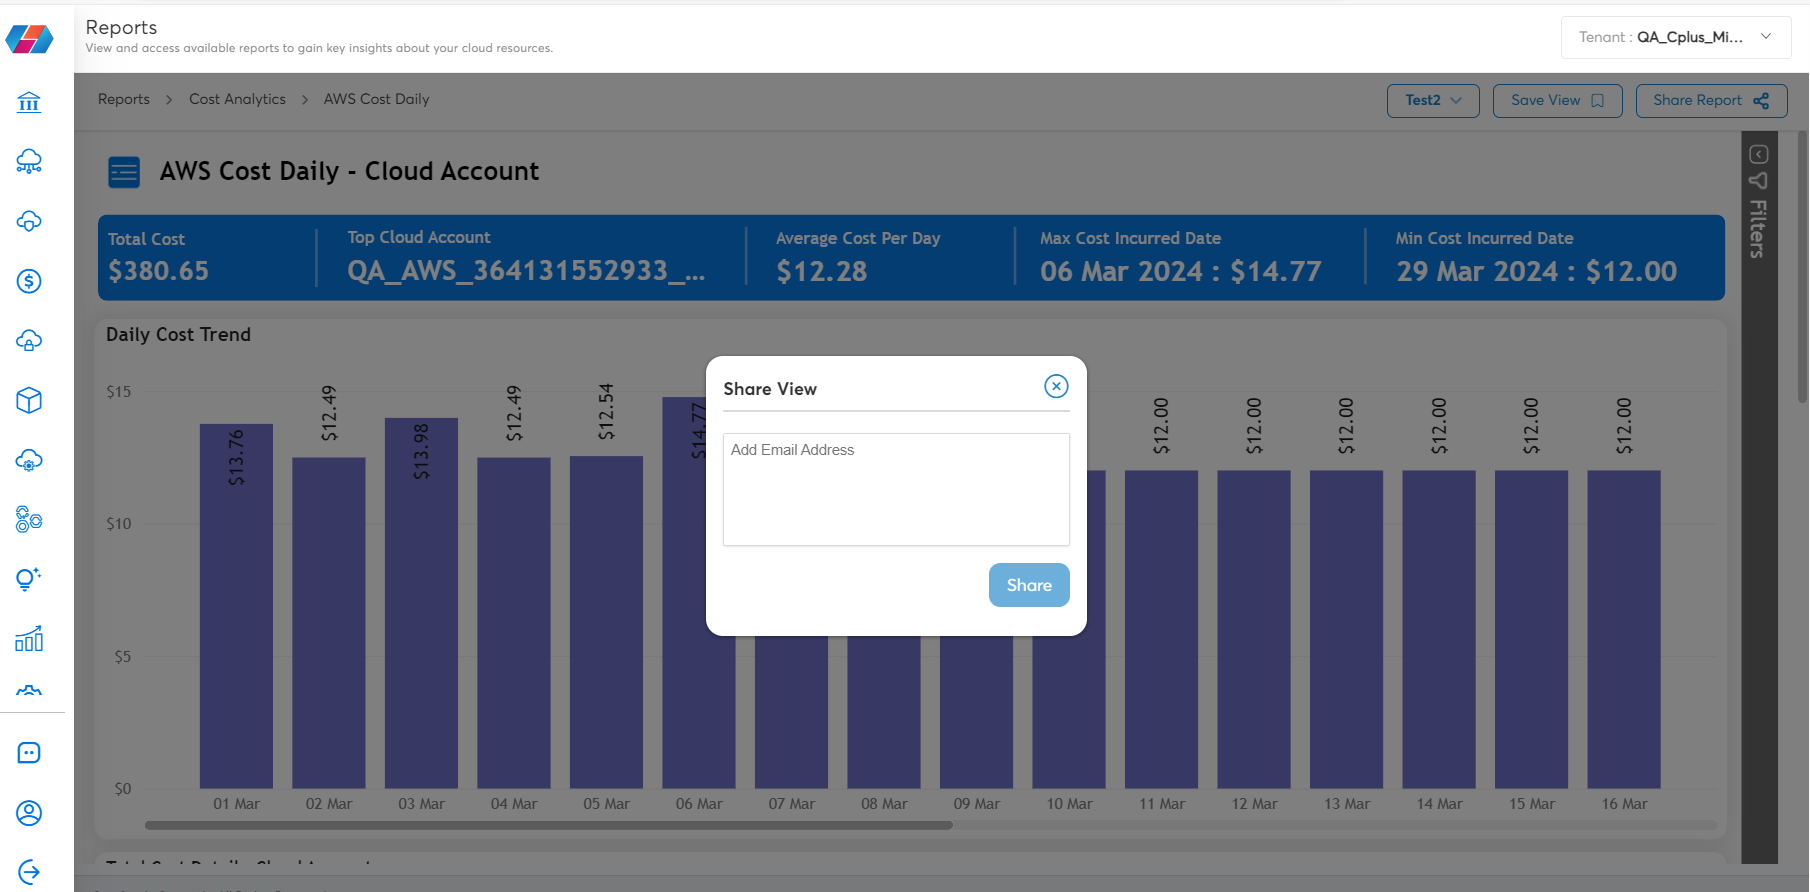
After clicking Share, the platform will send an email to the listed users with a link they can use to access the report.
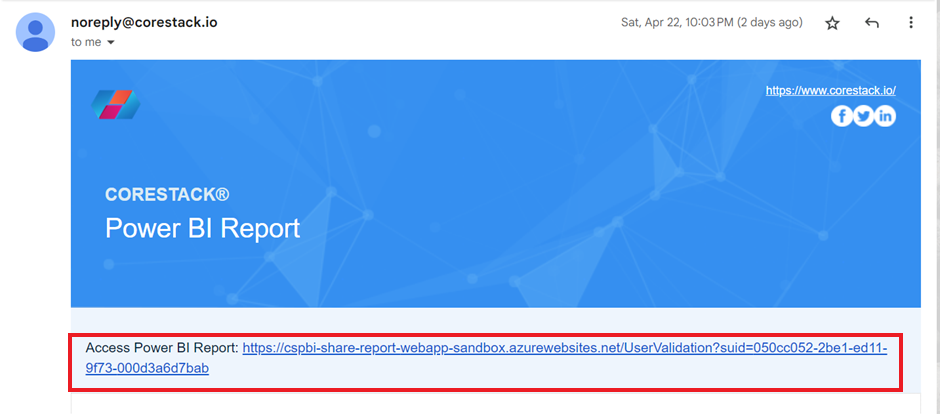
How to Access Shared Reports (via Email)
After a report is shared with them, the recipient(s) must open the email sent from the platform and click the link to access the report.
A SIGN IN dialog box displays and it needs to be filled.
In the Emailbox, the recipient must type their email ID and then click SEND OTP.
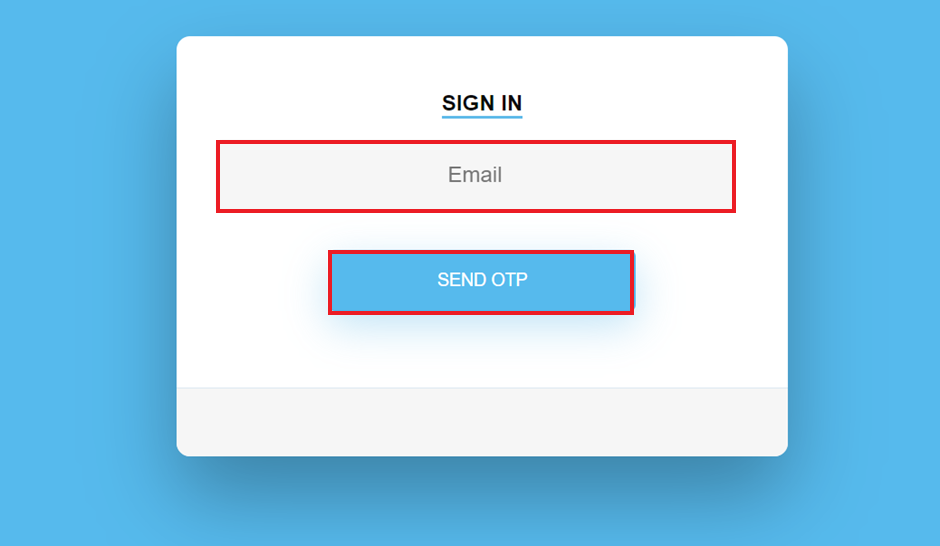
After the one-time password (OTP) is sent to their email, the recipient must type in the OTP. The OTP authenticates the email ID of the recipient, and they can then access the report sent from the platform.
Tip:
- If the recipient of the report link forwards that report link to another person (who is not included as a recipient), then that other person will not be able to open the report with their email. The other person will not receive the OTP as well.
- Only a valid recipient with whom the report link is shared can open the report by entering their email ID and OTP sent to their email address.
Search for a View
To search for a particular view on the Report Views screen, use the Search Views box.
Update Existing View
To update an existing view, apply the filters using the Filters pane in the selected view, click Save View, and then click Update Existing. The selected view should be updated now.
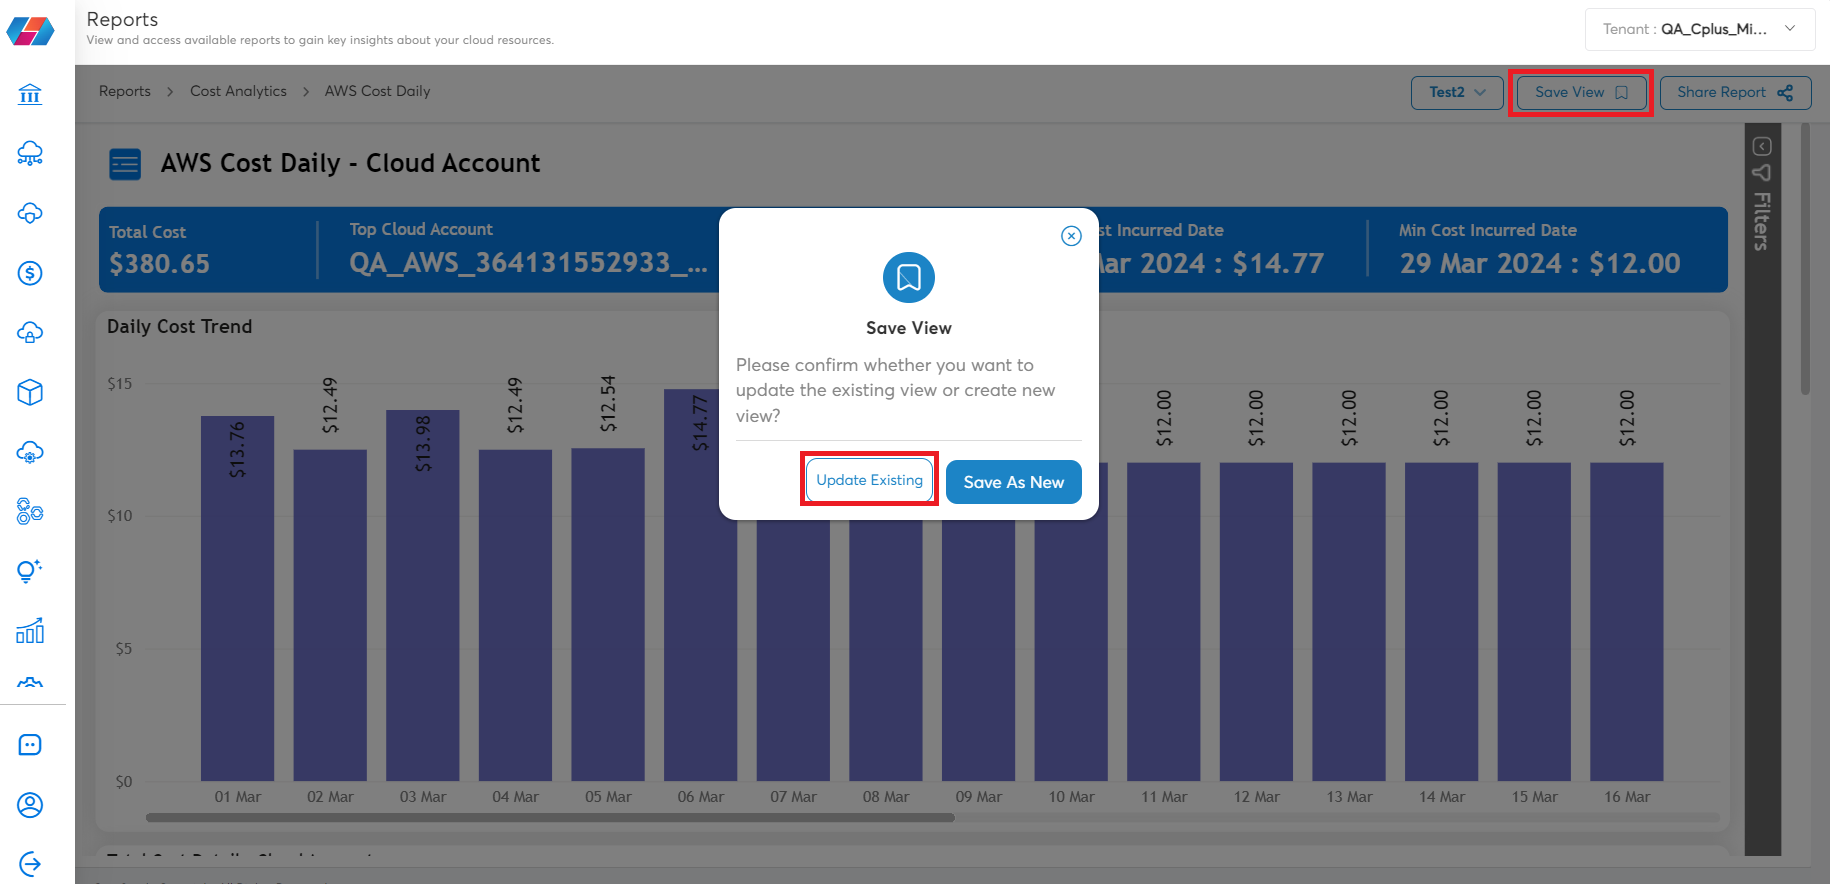
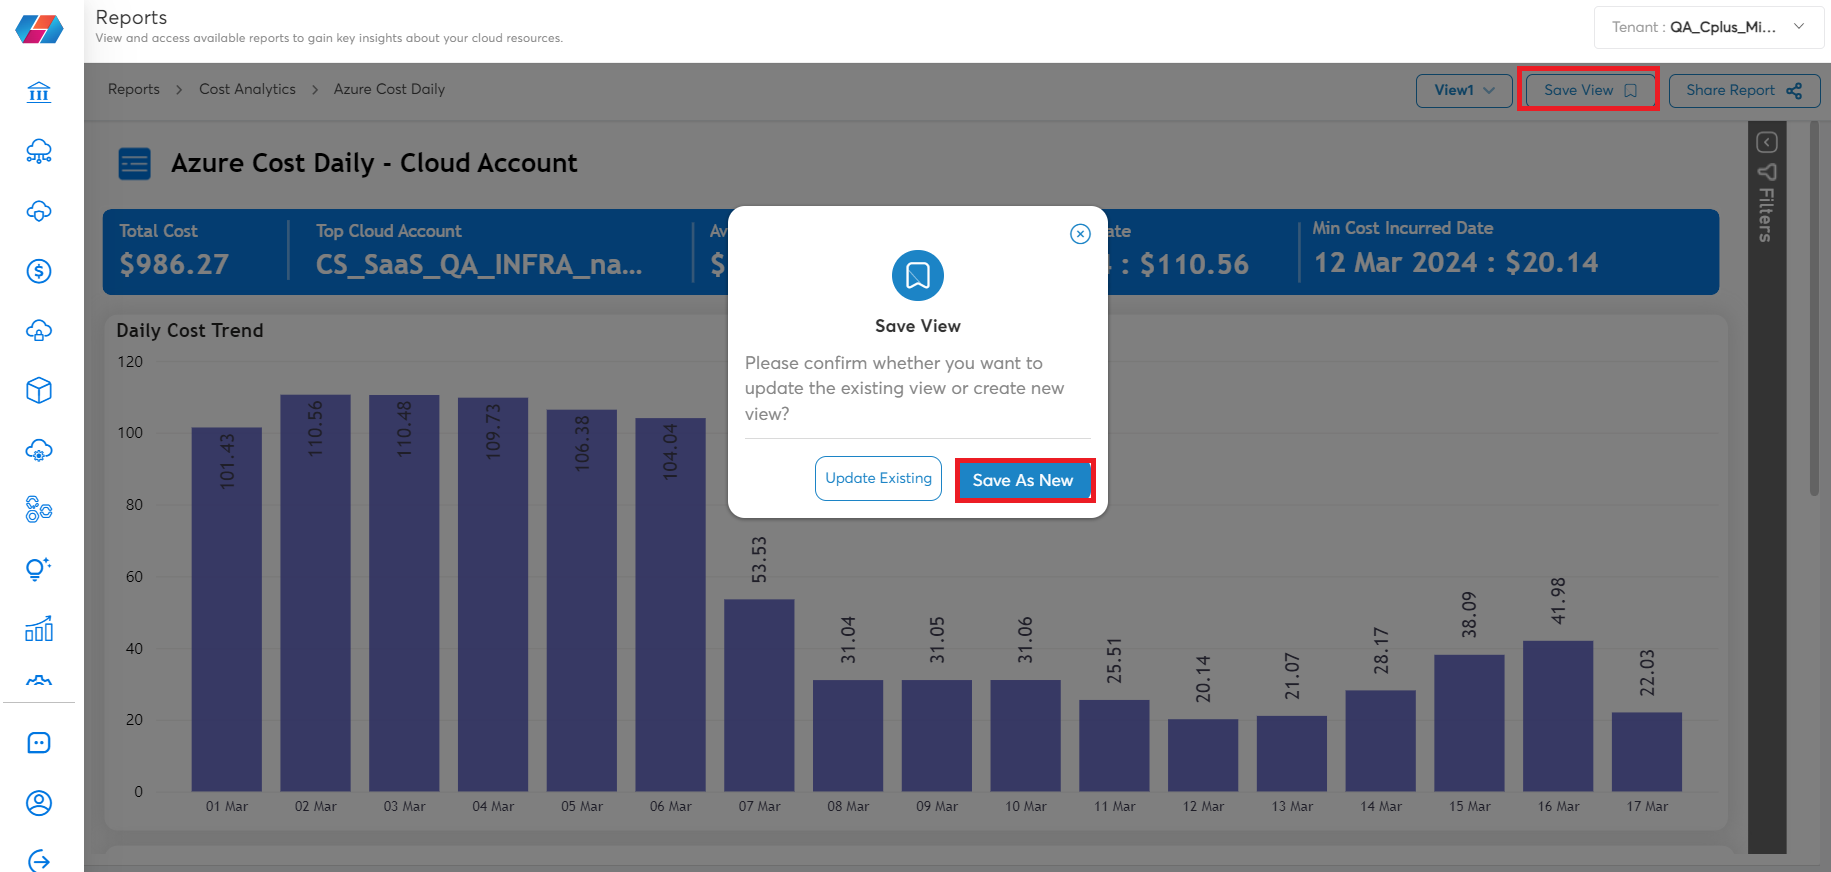
Save as a New View
To save an existing view as a new view, select the required view, apply the required filter from the Filters pane that exists on the right side of the screen, click Save View > click Save as New.
Updated 8 months ago