

Add, Edit, and Remove Dashboard Permissions
Introduction
This guide will walk you through the process of adding, editing, and removing permissions for users or roles within the application.
Add/Edit Dashboard Permissions
Follow the below steps to add dashboard permissions.
1. Navigate to the dashboard.
Using the left-nav menu, navigate to FinOps > Dashboard and select the dashboard you want to add/edit permissions for.
1. Click "Actions".
Click the Actions drop-down list to view all the available actions for a dashboard.
2. Click "Edit Permissions".
Click Edit Permissions to add new permissions or modify the existing permissions.
3. Click "Add Permissions +".
To grant new permissions to a user or role, click Add Permissions +.
4. Select "Account Scope" (to add permissions at account level).
To add permissions at the Account level, select the scope for the permissions as Account Scope.
6. Select an account master.
In the Account drop-down list, select an account.
7. Select role types.
In the Role Types list, click to select all the applicable role types for the permissions, and then click Ok.
8. Select Roles.
To select FinOps roles, click Role Types > FinOps > select applicable roles, and then click Ok.
9. Select permissions.
In the Select Permissions section, tick to select the permissions to be granted or denied.
10. Click "Apply".
Click Apply to make the permissions applicable for the dashboard.
11. Click "Add Permissions +" (to add permissions at tenant level).
To add permissions at the Tenant level, click Add Permissions +.
12. Select "Tenant Scope".
Select Tenant Scope to assign permissions at the tenant level.
13. Select a tenant.
In the Tenant list, select a tenant.
14. Select roles.
In the Roles list, select all the relevant roles, and then click Ok.
15. Select permissions.
In the Select Permissions section, tick to select the permissions to be granted or denied.
16. Click "Apply".
Click Apply to add the permissions to the dashboard.
17. Edit permissions
Click on Pencil icon to edit permissions.
18. Edit permissions
Select or unselect the options to edit the permissions and click "Apply".
19. Delete Permissions
In the Actions section of the Edit Permissions screen, users can do the following:
- Click the pencil icon (edit icon) to edit and update the existing permissions.
- Click the delete icon to remove a permission.
- Drag the "=" (equal to icon) to reorder the permission priority.
20. Click "Update".
Click Update to update and save the changes.
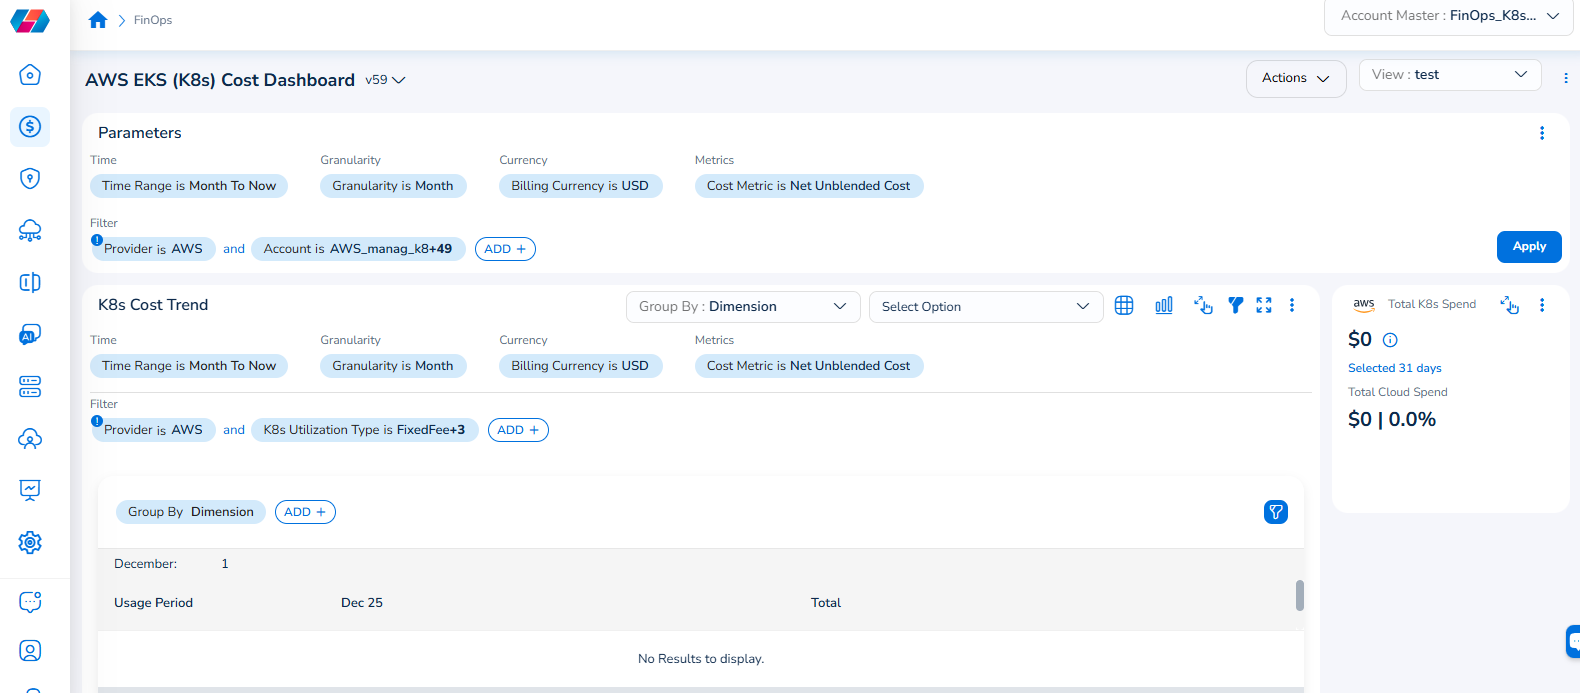
Note that the Cloud Account filter has been renamed to Account, and the Cloud Provider filter has been renamed to Provider.
For example, if you see the dashboard shown in the screenshot below, the Parameters > Filter section shows the Provider filter for which the value selected is AWS.
To add the Account filter, users can click ADD+ and select Account. In the drop-down list that appears, users can select all applicable values, and click Ok. Details will be displayed in widgets as per the selected filter(s).
In every widget that is available within a dashboard, users can click the Filter icon that appears on the top-right side of the widget and view the pre-defined filters. The Provider filter appears as a pre-defined filter. Users can use the ADD+ option to add custom filters and they have the option to add the Account filter from here.
Updated 7 months ago