

Cost Anomaly - Remediation Workflow
Feature Overview
Automation Workflows is a rule-based remediation engine within CoreStack's FinOps module that automatically detects cost optimization opportunities and cost anomalies, then triggers configurable actions such as task creation or email notifications. It is most relevant when you want to operationalize cloud cost governance — moving from manual review of recommendations to systematic, automated responses. This feature is most valuable to FinOps Practitioners and Cloud Administrators who need to ensure cost issues are tracked and actioned without relying on ad hoc monitoring. It does not execute cloud resource changes on its own — it creates tasks and sends notifications to route remediation to the right people.
Note: Automation Workflows must be enabled at the account level before workflows can be created. The toggle is off by default. See the Prerequisites section for the enabling steps.
How It Works
When CoreStack detects a cloud resource that matches a configured workflow rule — either a cost optimization opportunity or an unexpected cost spike — it evaluates the event against the rule's scope, filters, and thresholds. If the condition is met, the workflow triggers one or both of its configured actions: creating a task in a connected ITSM system (such as ServiceNow) or sending an email notification to designated recipients. For Cost Optimization workflows, the rule set includes filters for potential savings thresholds and recommendation categories; for Cost Anomaly workflows, the rule evaluates the impacted cost against a defined threshold. All violations — instances where a rule condition is breached — are queued in the ITSM account until resolved or dismissed.
Prerequisites
Before you begin, ensure the following:
Role: You have a role with access to Settings > Account Management in CoreStack. [VERIFY: confirm required role]
Role: You have a role with permission to create and manage Automation Workflows. [VERIFY: confirm required role — likely FinOps Admin or Provider Admin]
ITSM integration: If you plan to use the Create Task action, a ServiceNow (or other ITSM) account must already be integrated with CoreStack.
Cloud account: At least one cloud account must be onboarded to CoreStack.
Automation Workflows toggle: This feature must be enabled per account — see Step 1 below.
Enabling and Configuring Automation Workflows
Part 1: Enable Automation Workflows for Your Account
Navigate to Settings > Account Management > Account Info > Advanced Settings.
Move the Automation Workflows slider to the right to enable it.
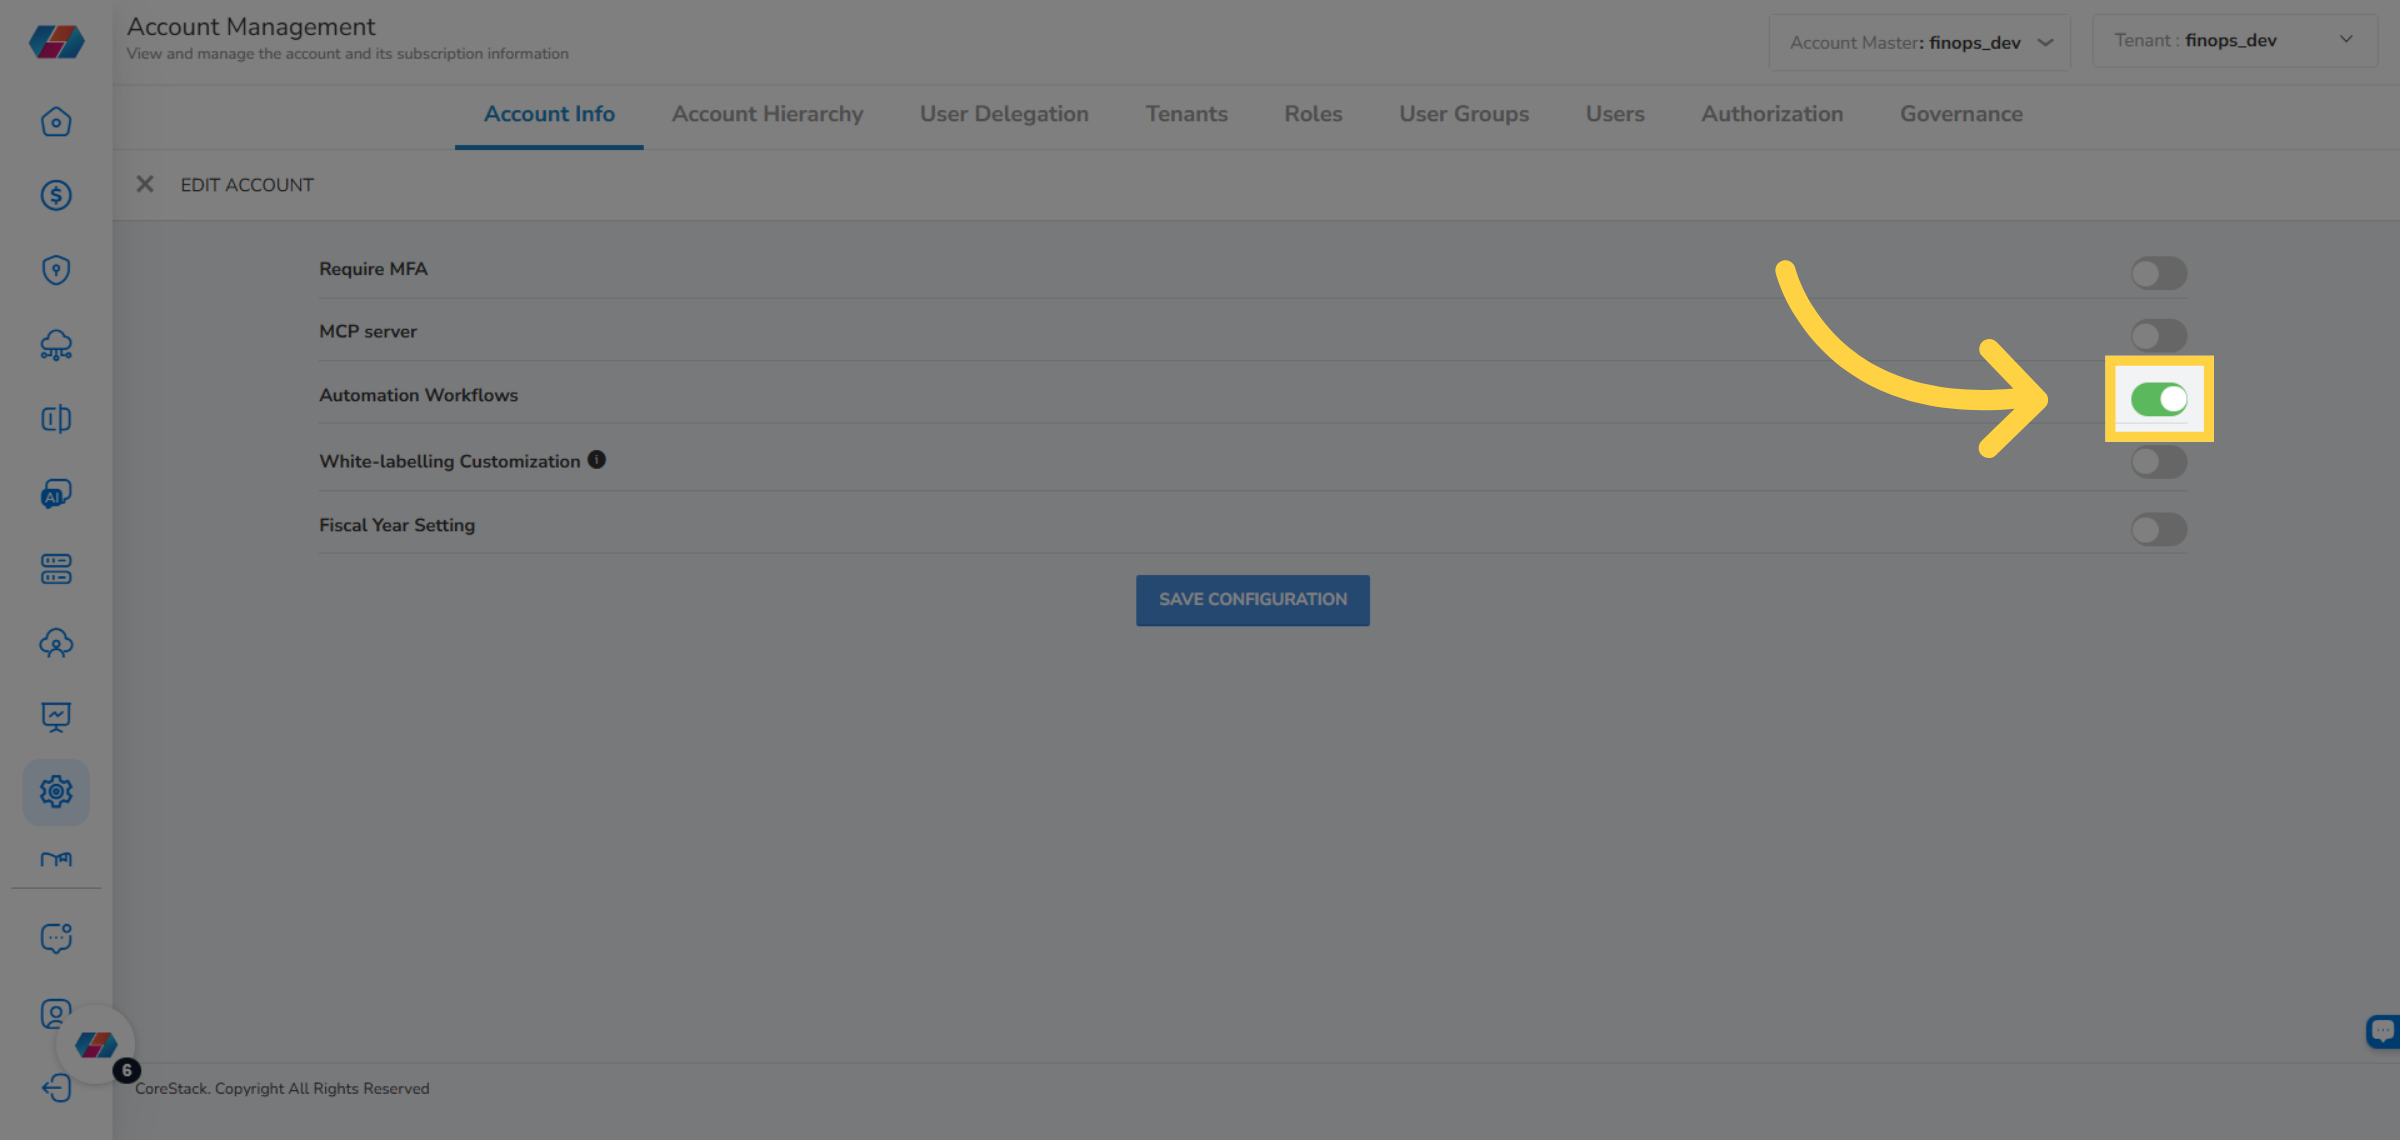
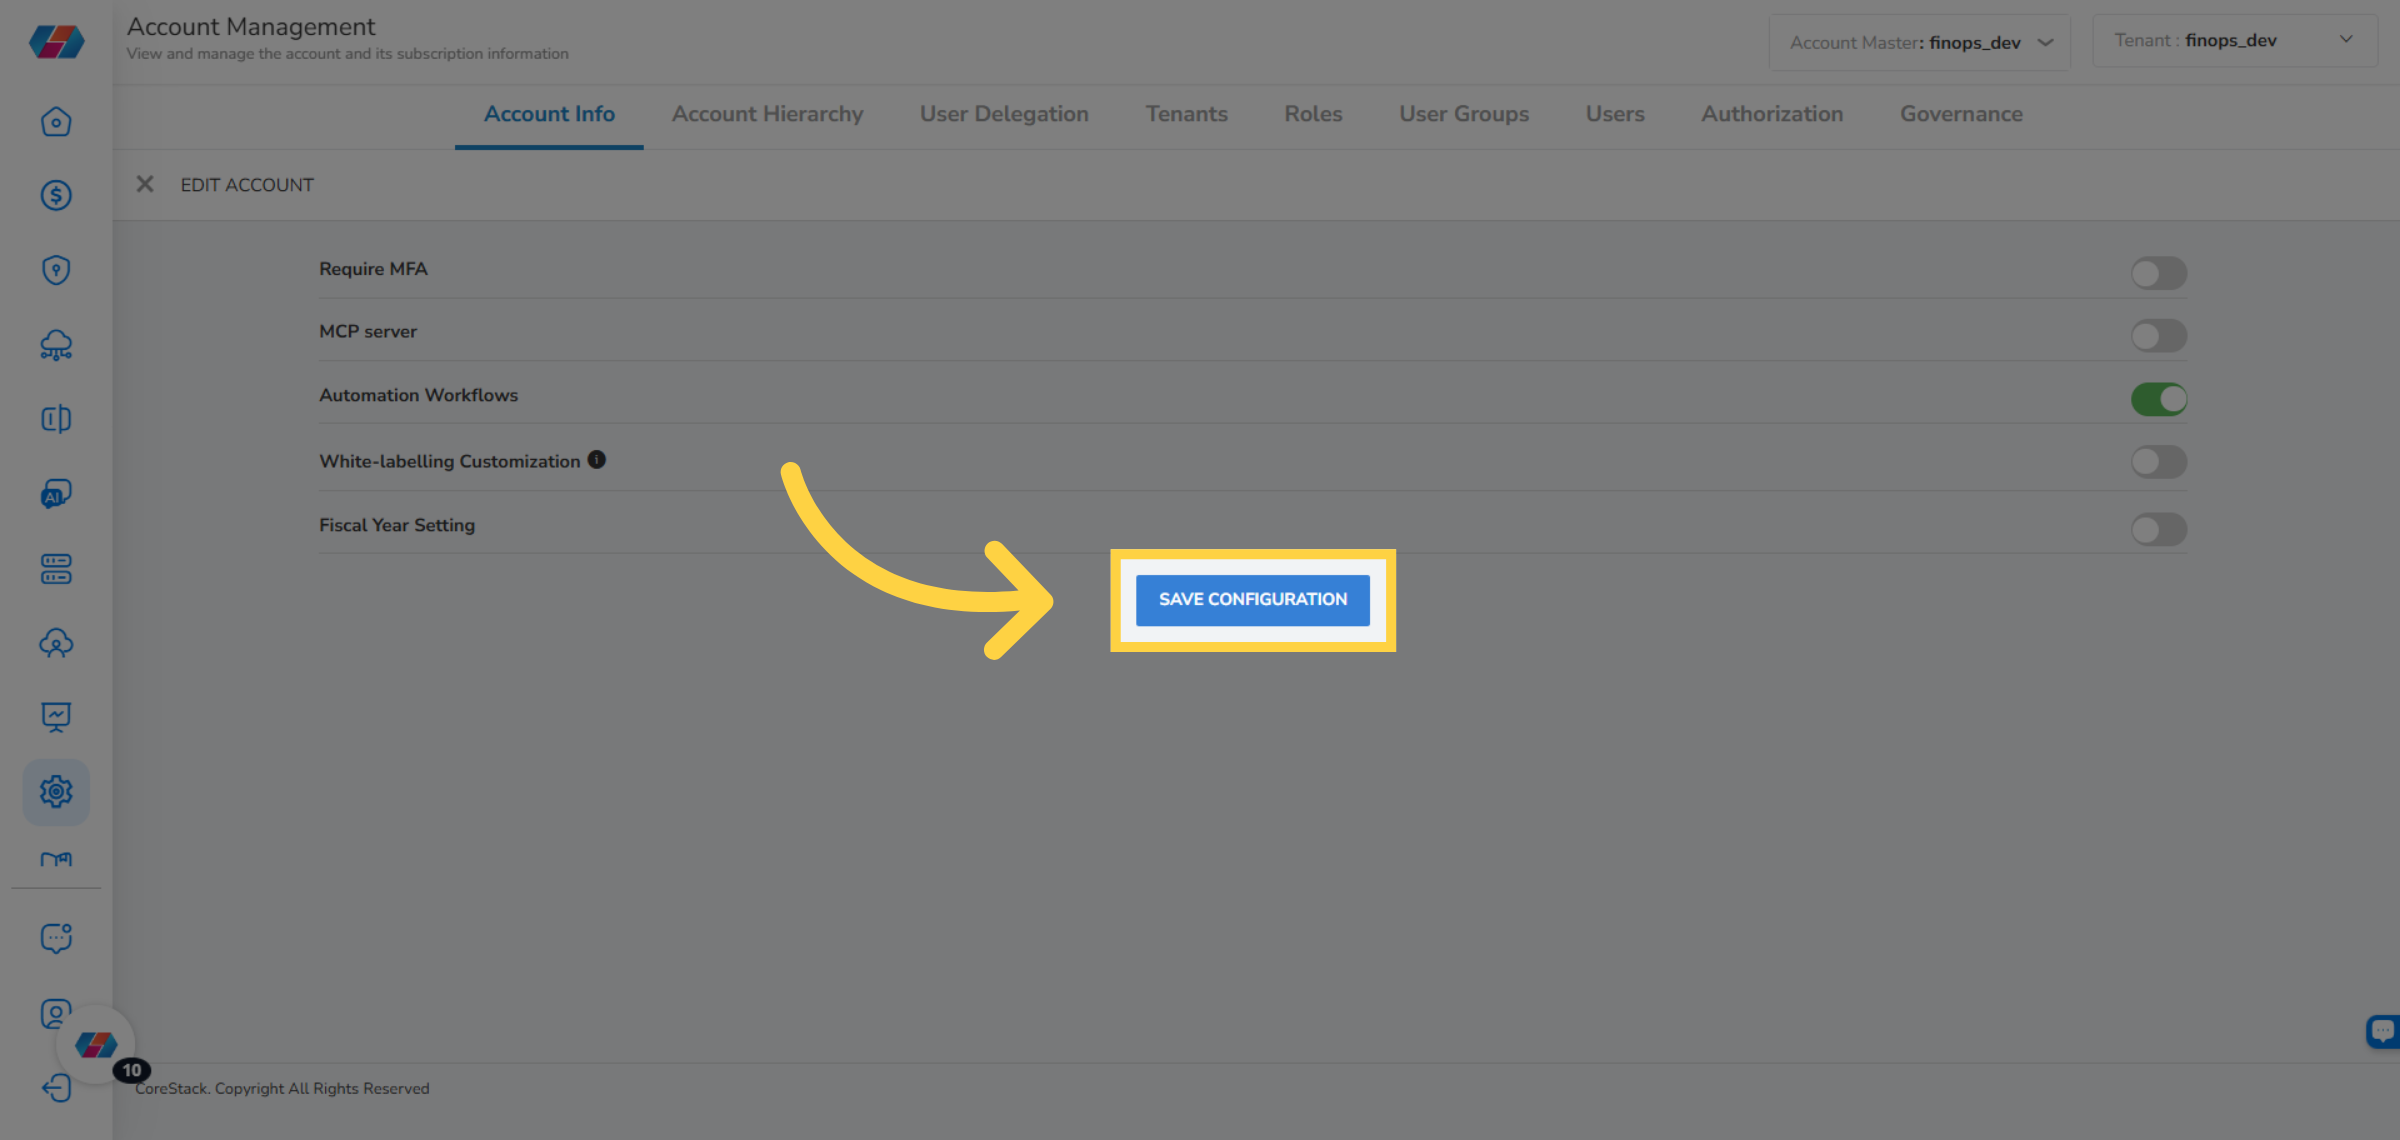
Click Save Configuration.
Part 2: Create an Automation Workflow
Navigate to Settings > Automation Workflows.
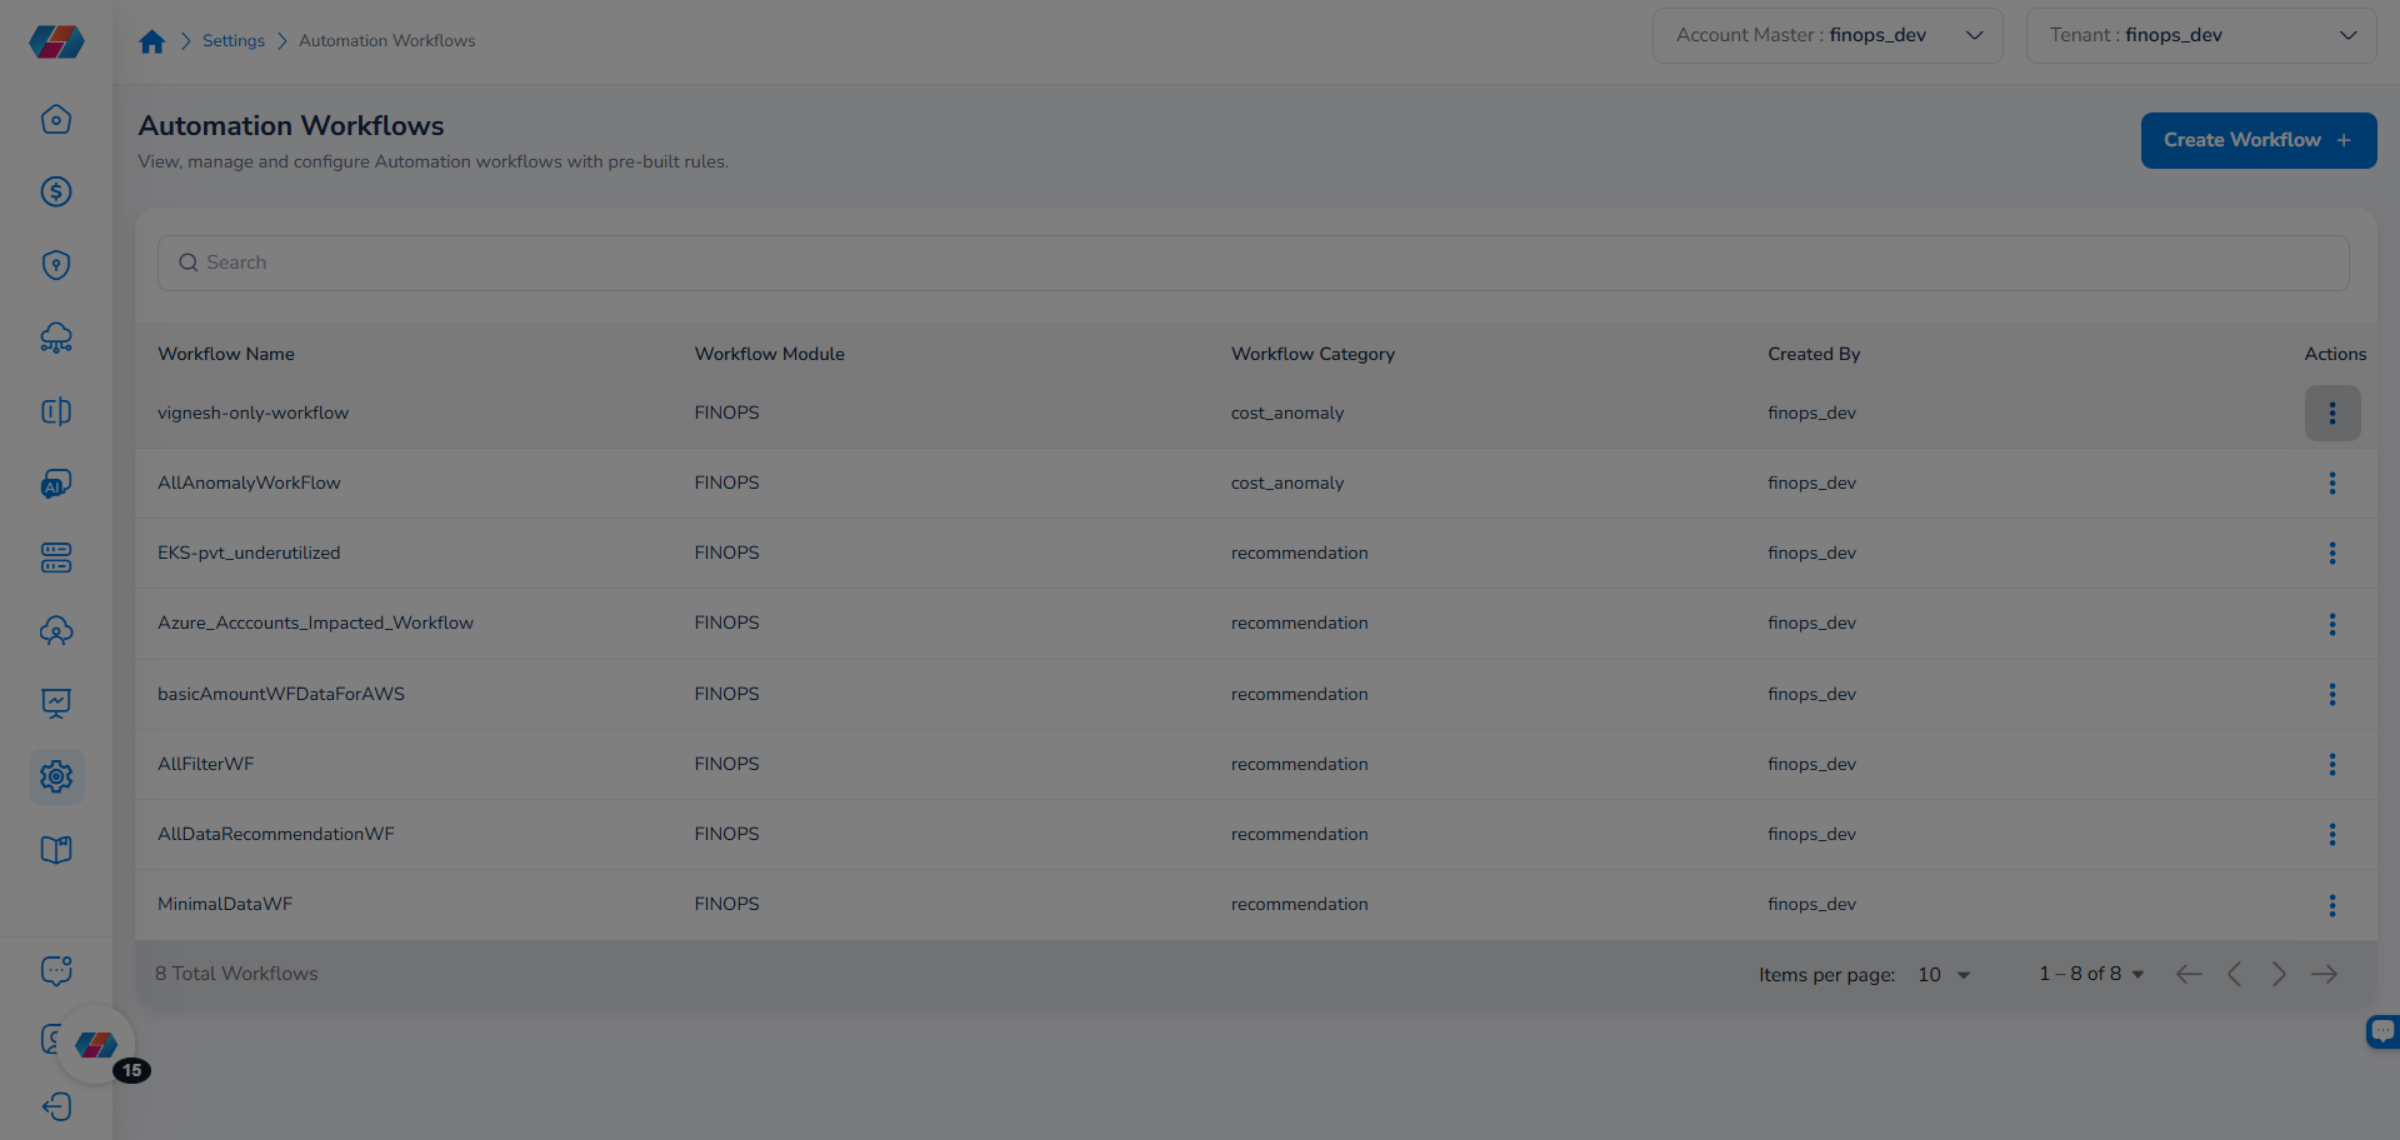
Click Create Workflow. The workflow creation wizard opens at the Basic Settings step.
Step 1: Select the Workflow Type
In the Select Workflow Type field, choose one of the following:
Cost Optimization — triggers the workflow based on cost-saving recommendations and optimization opportunities.
Cost Anomaly — triggers the workflow when unexpected cost spikes are detected.
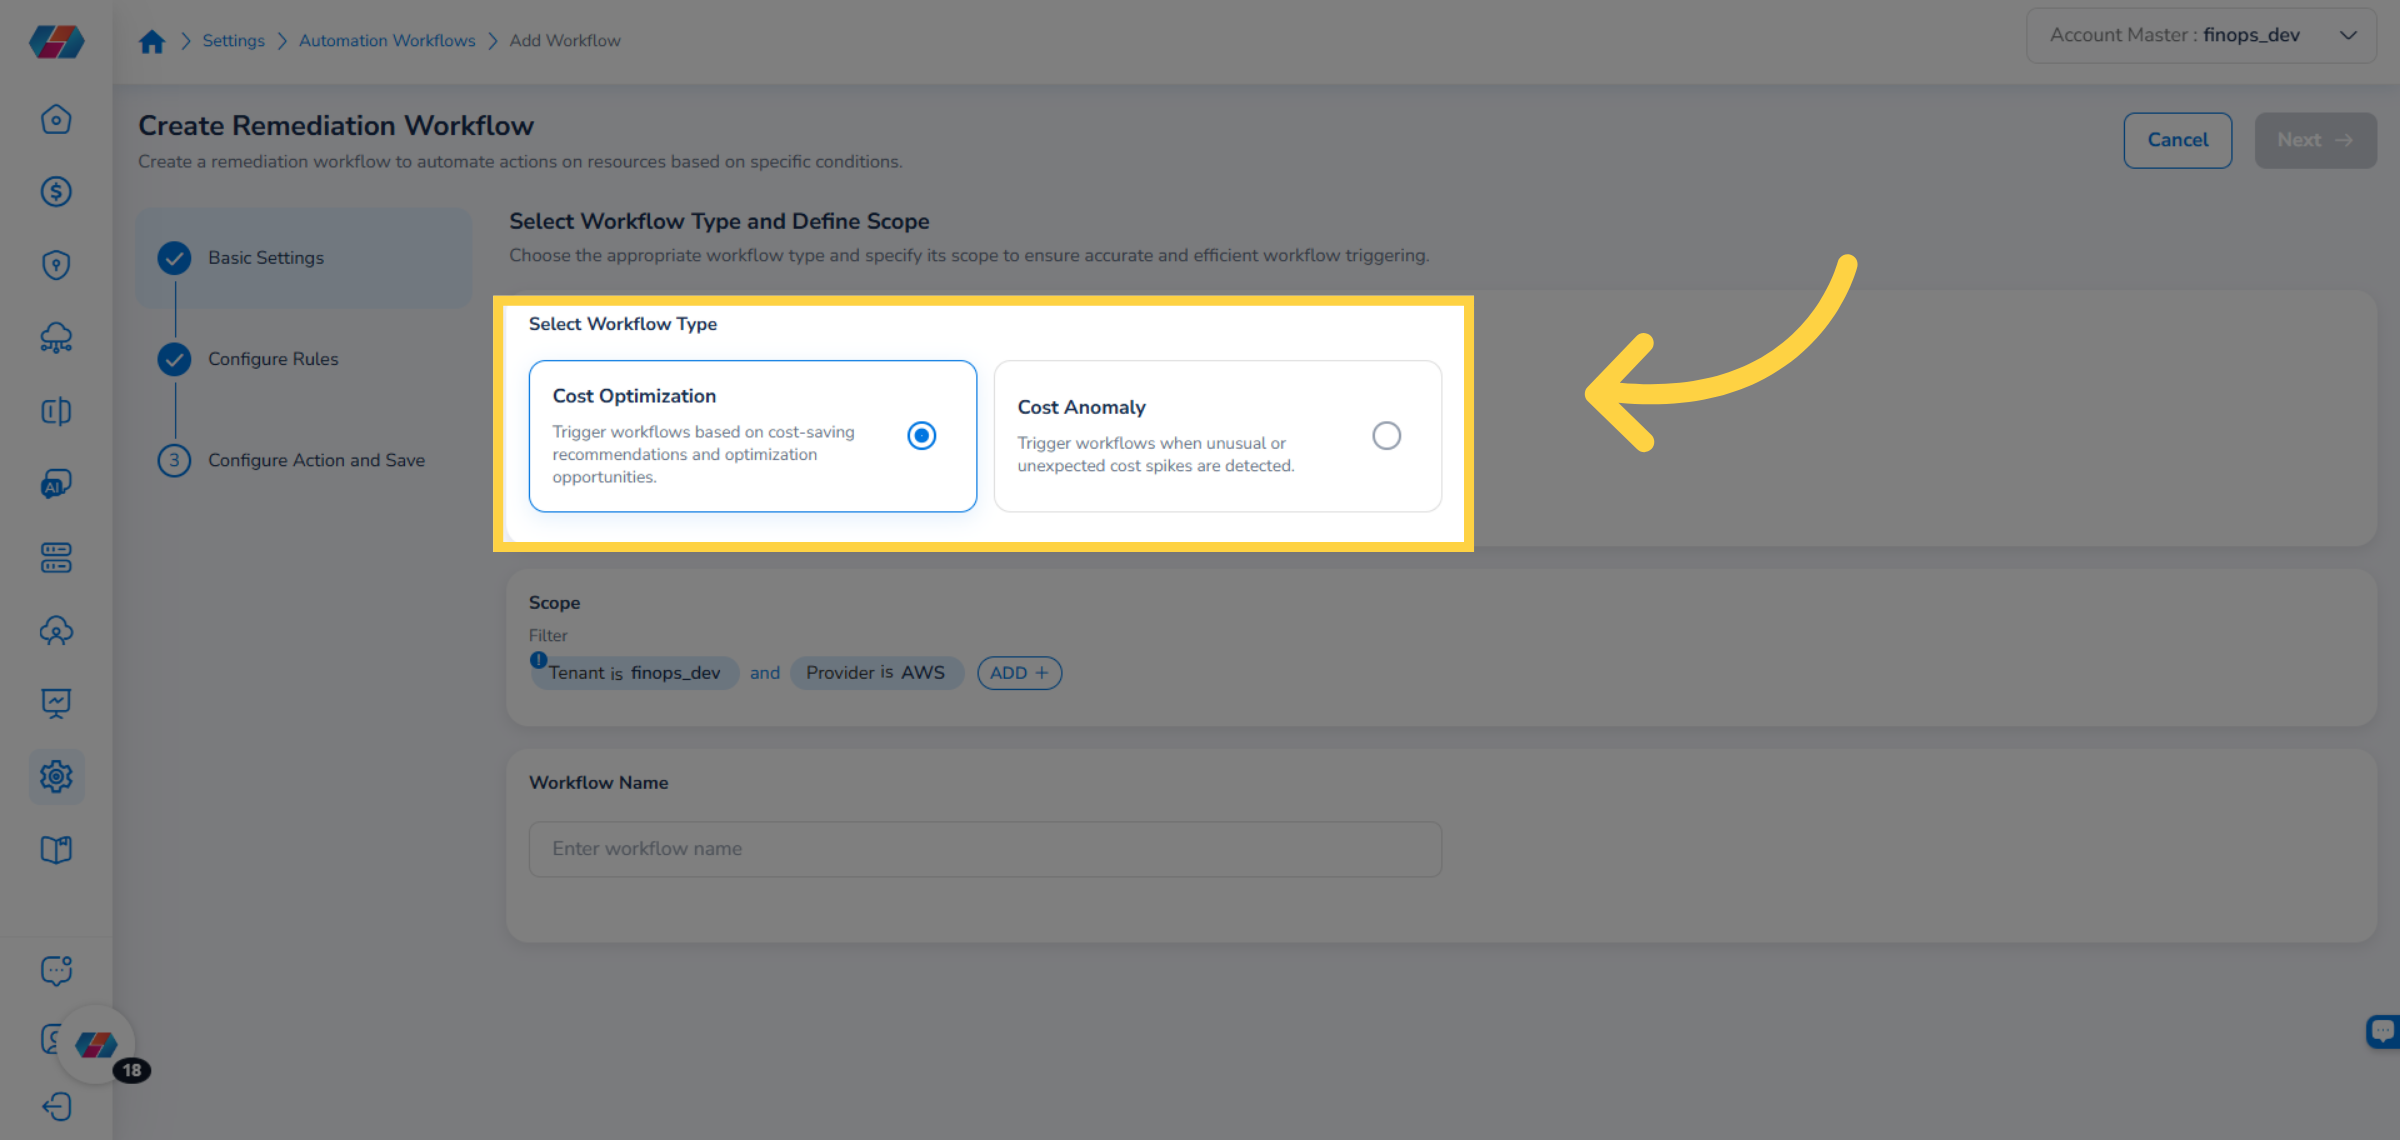
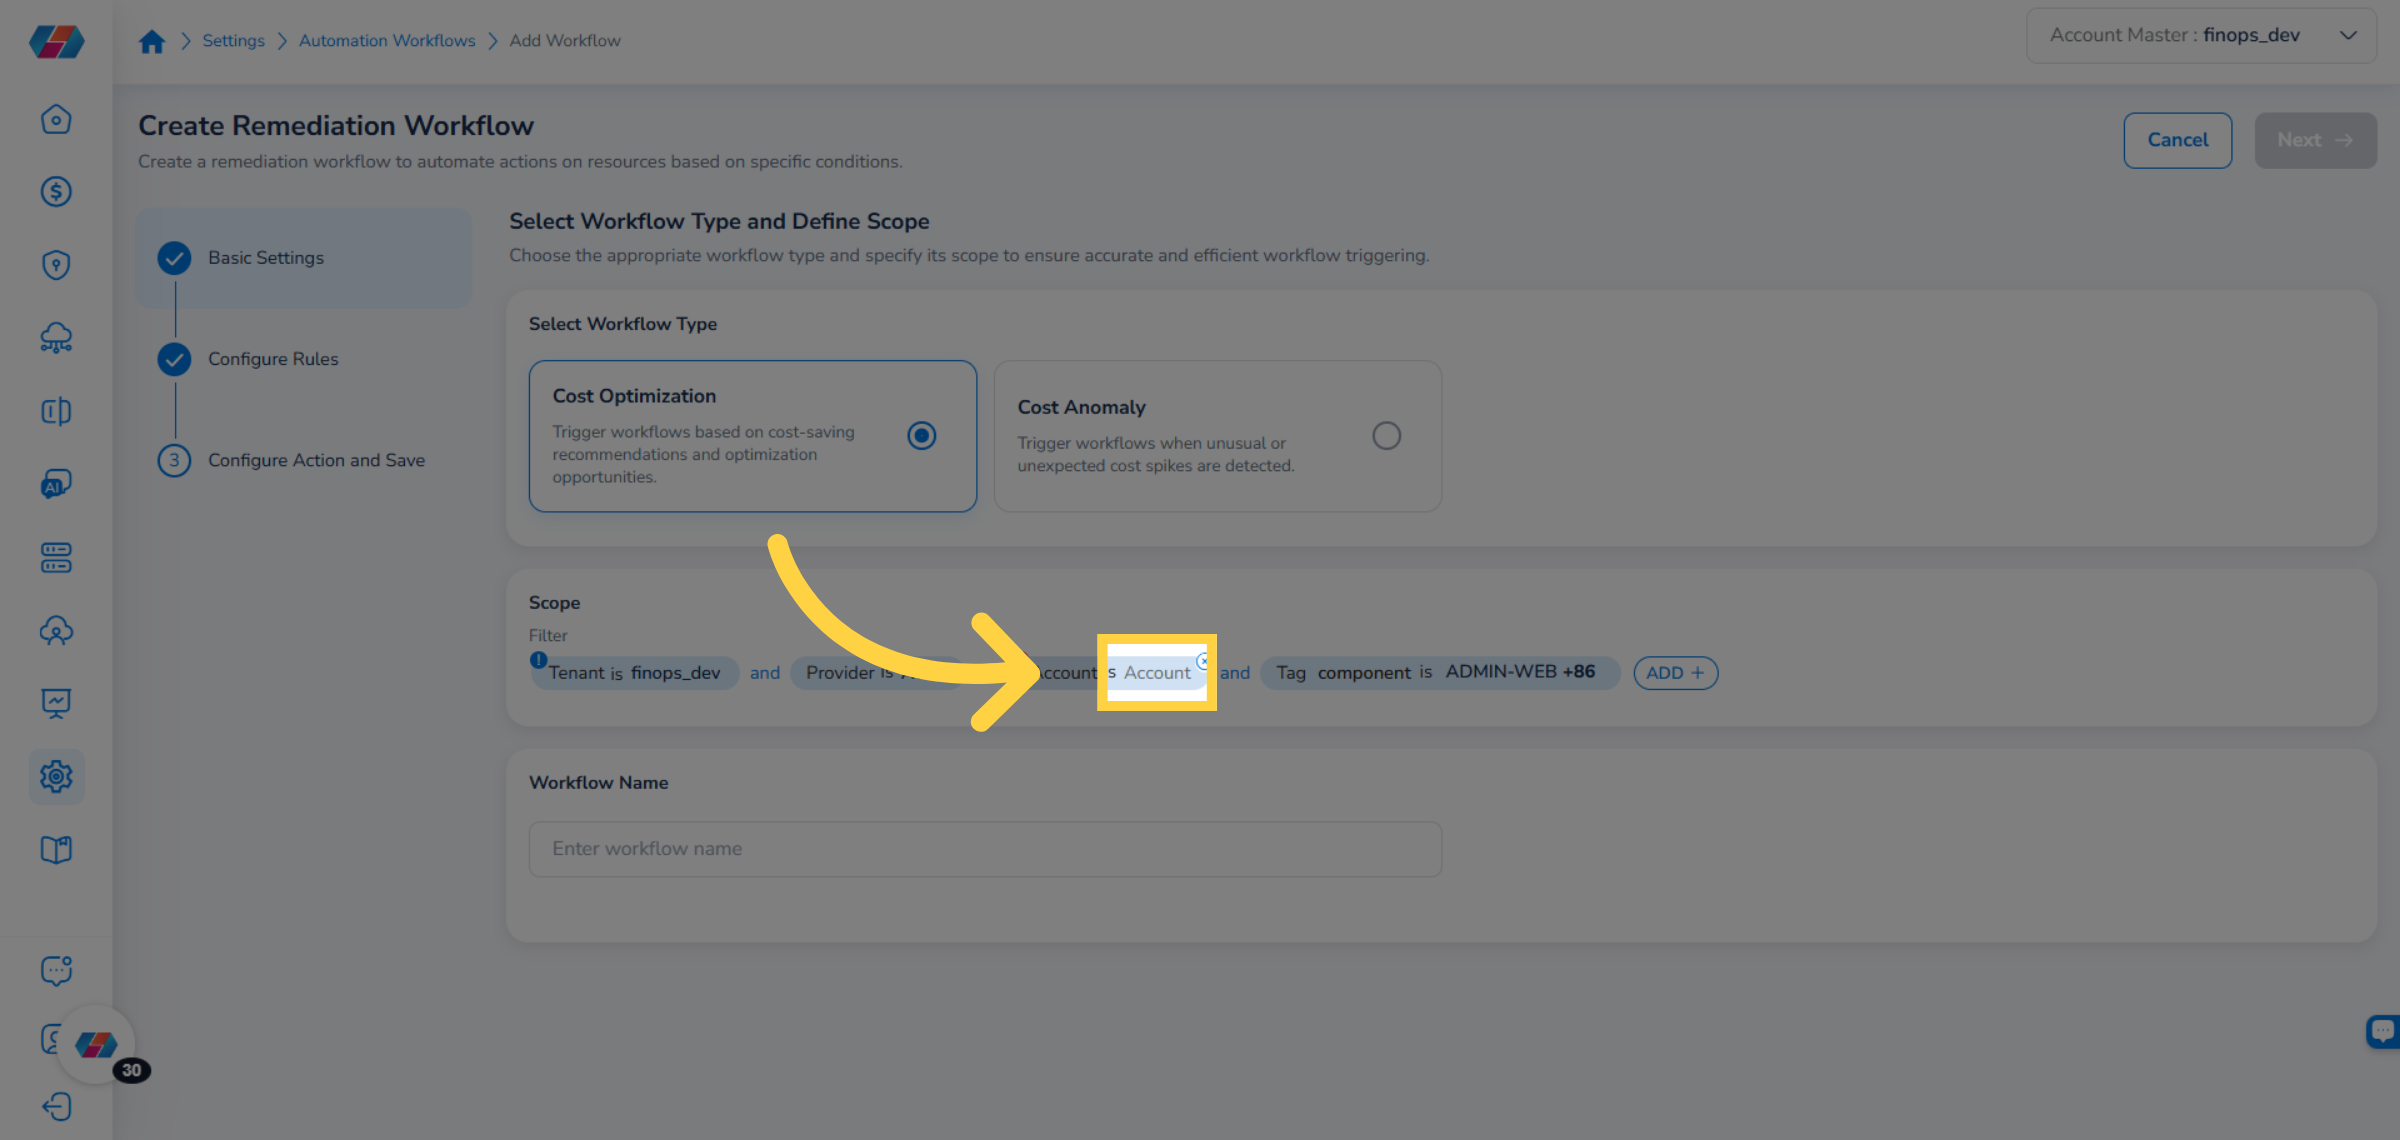
Step 2: Set the Scope
In the Scope section, define which cloud resources this workflow applies to. Click ADD and configure one or more of the following filter types:
Tag Key Value — filter by resource tags. Select a tag key from the Select Key dropdown, then select one or more values from the Tag Key Value dropdown and click Ok.
Account — filter by specific cloud accounts. Select accounts from the dropdown and click Ok.
Step 3: Name the Workflow
In the Workflow Name field, enter a descriptive name for the workflow.
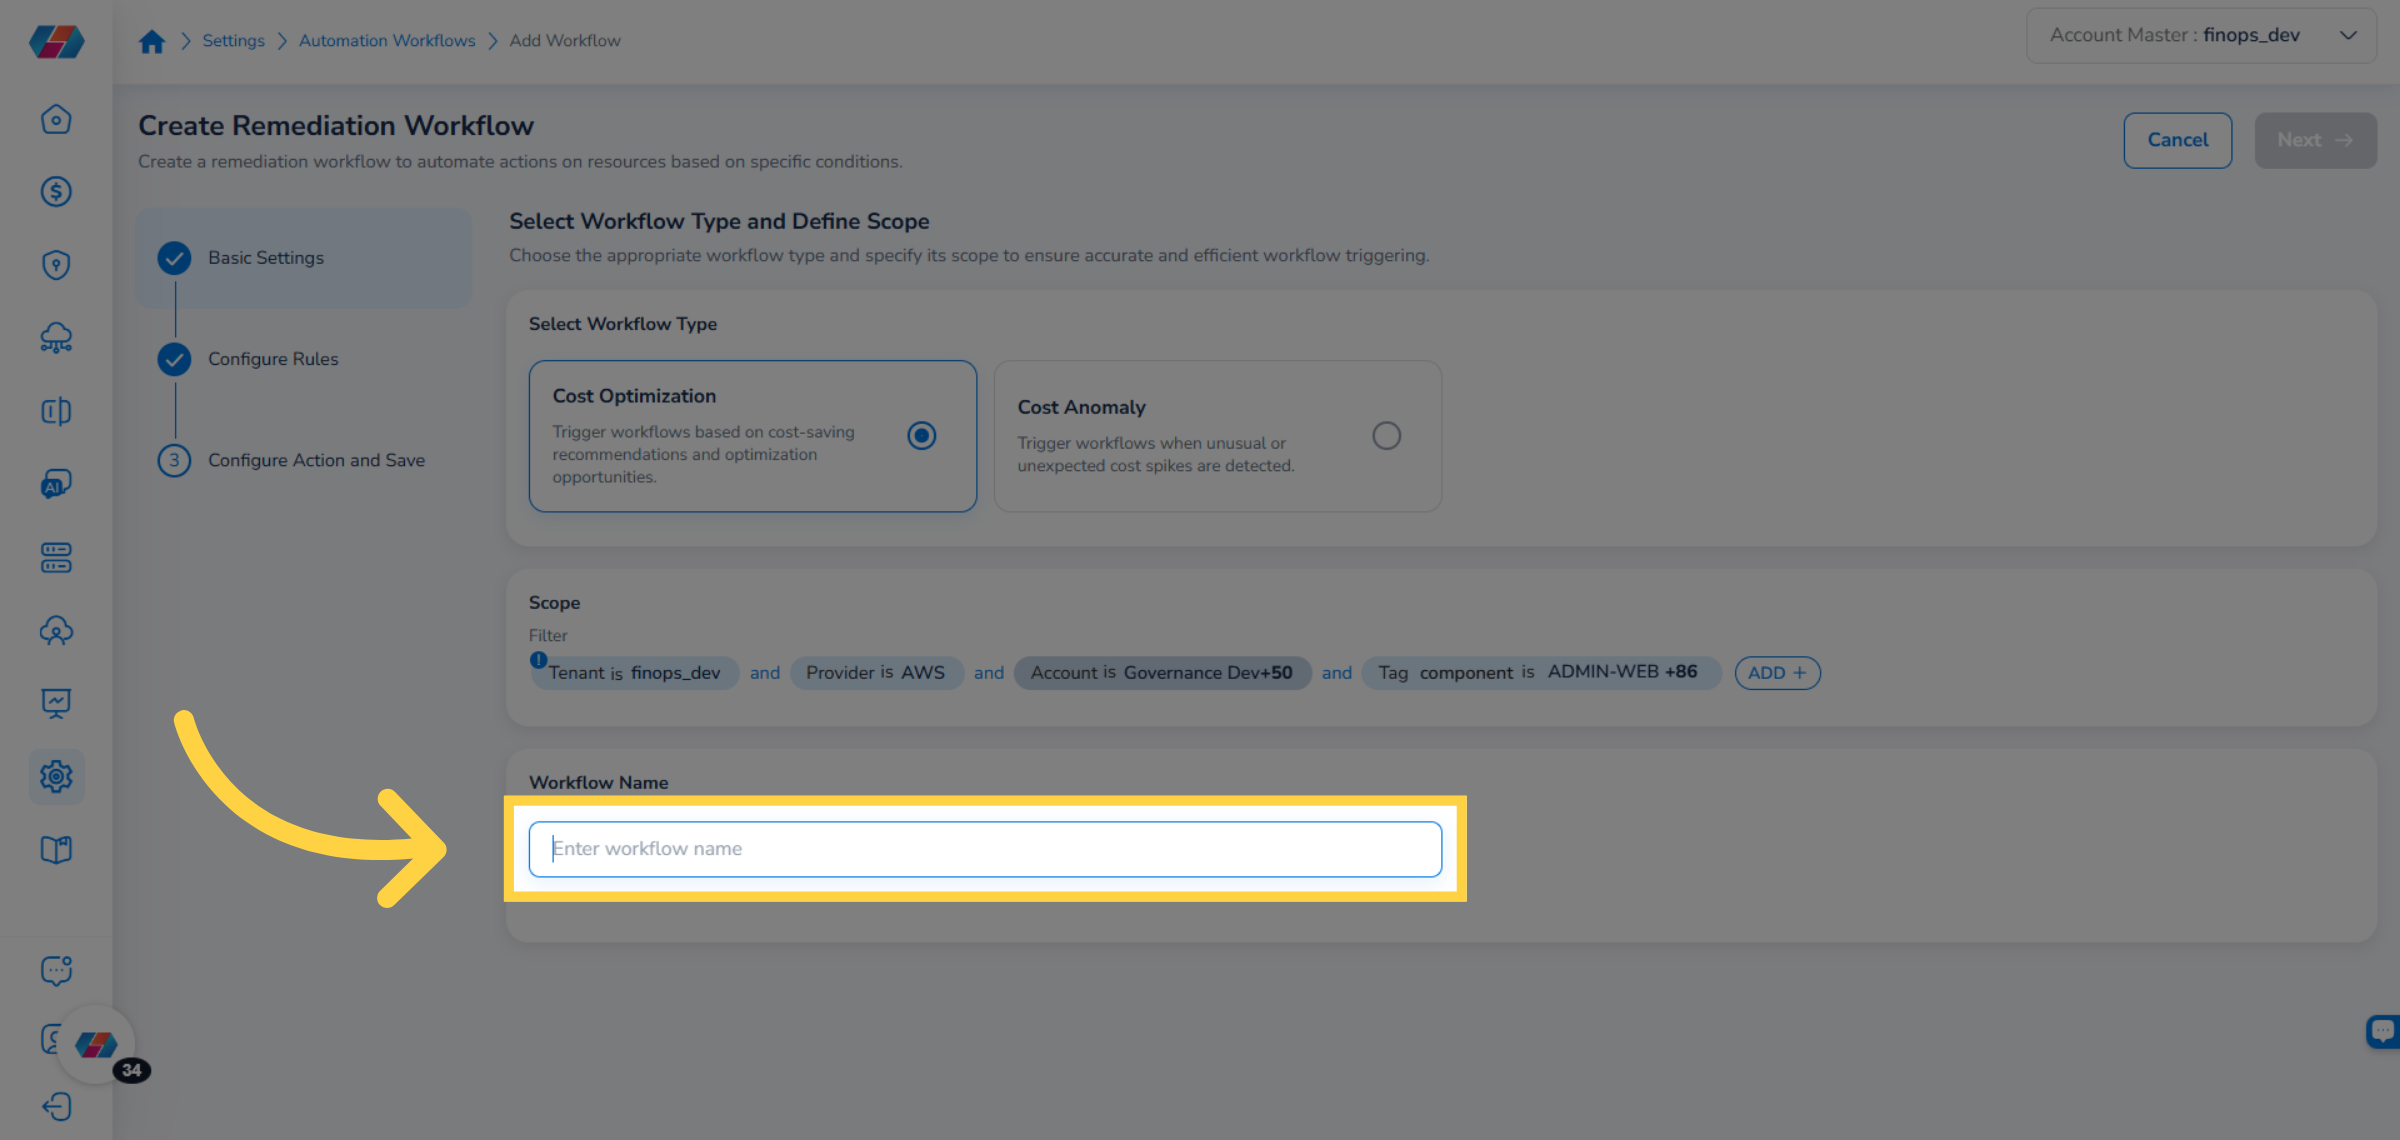
Click Next.
For Cost Optimization workflows — Configure Rules
The Configure Rules step appears with the following default rules:
Potential Savings Filter — filters by savings amount.
Filter by Cost — filters by cost value.
Filter by Recommendation Category — filters by the type of optimization recommendation.
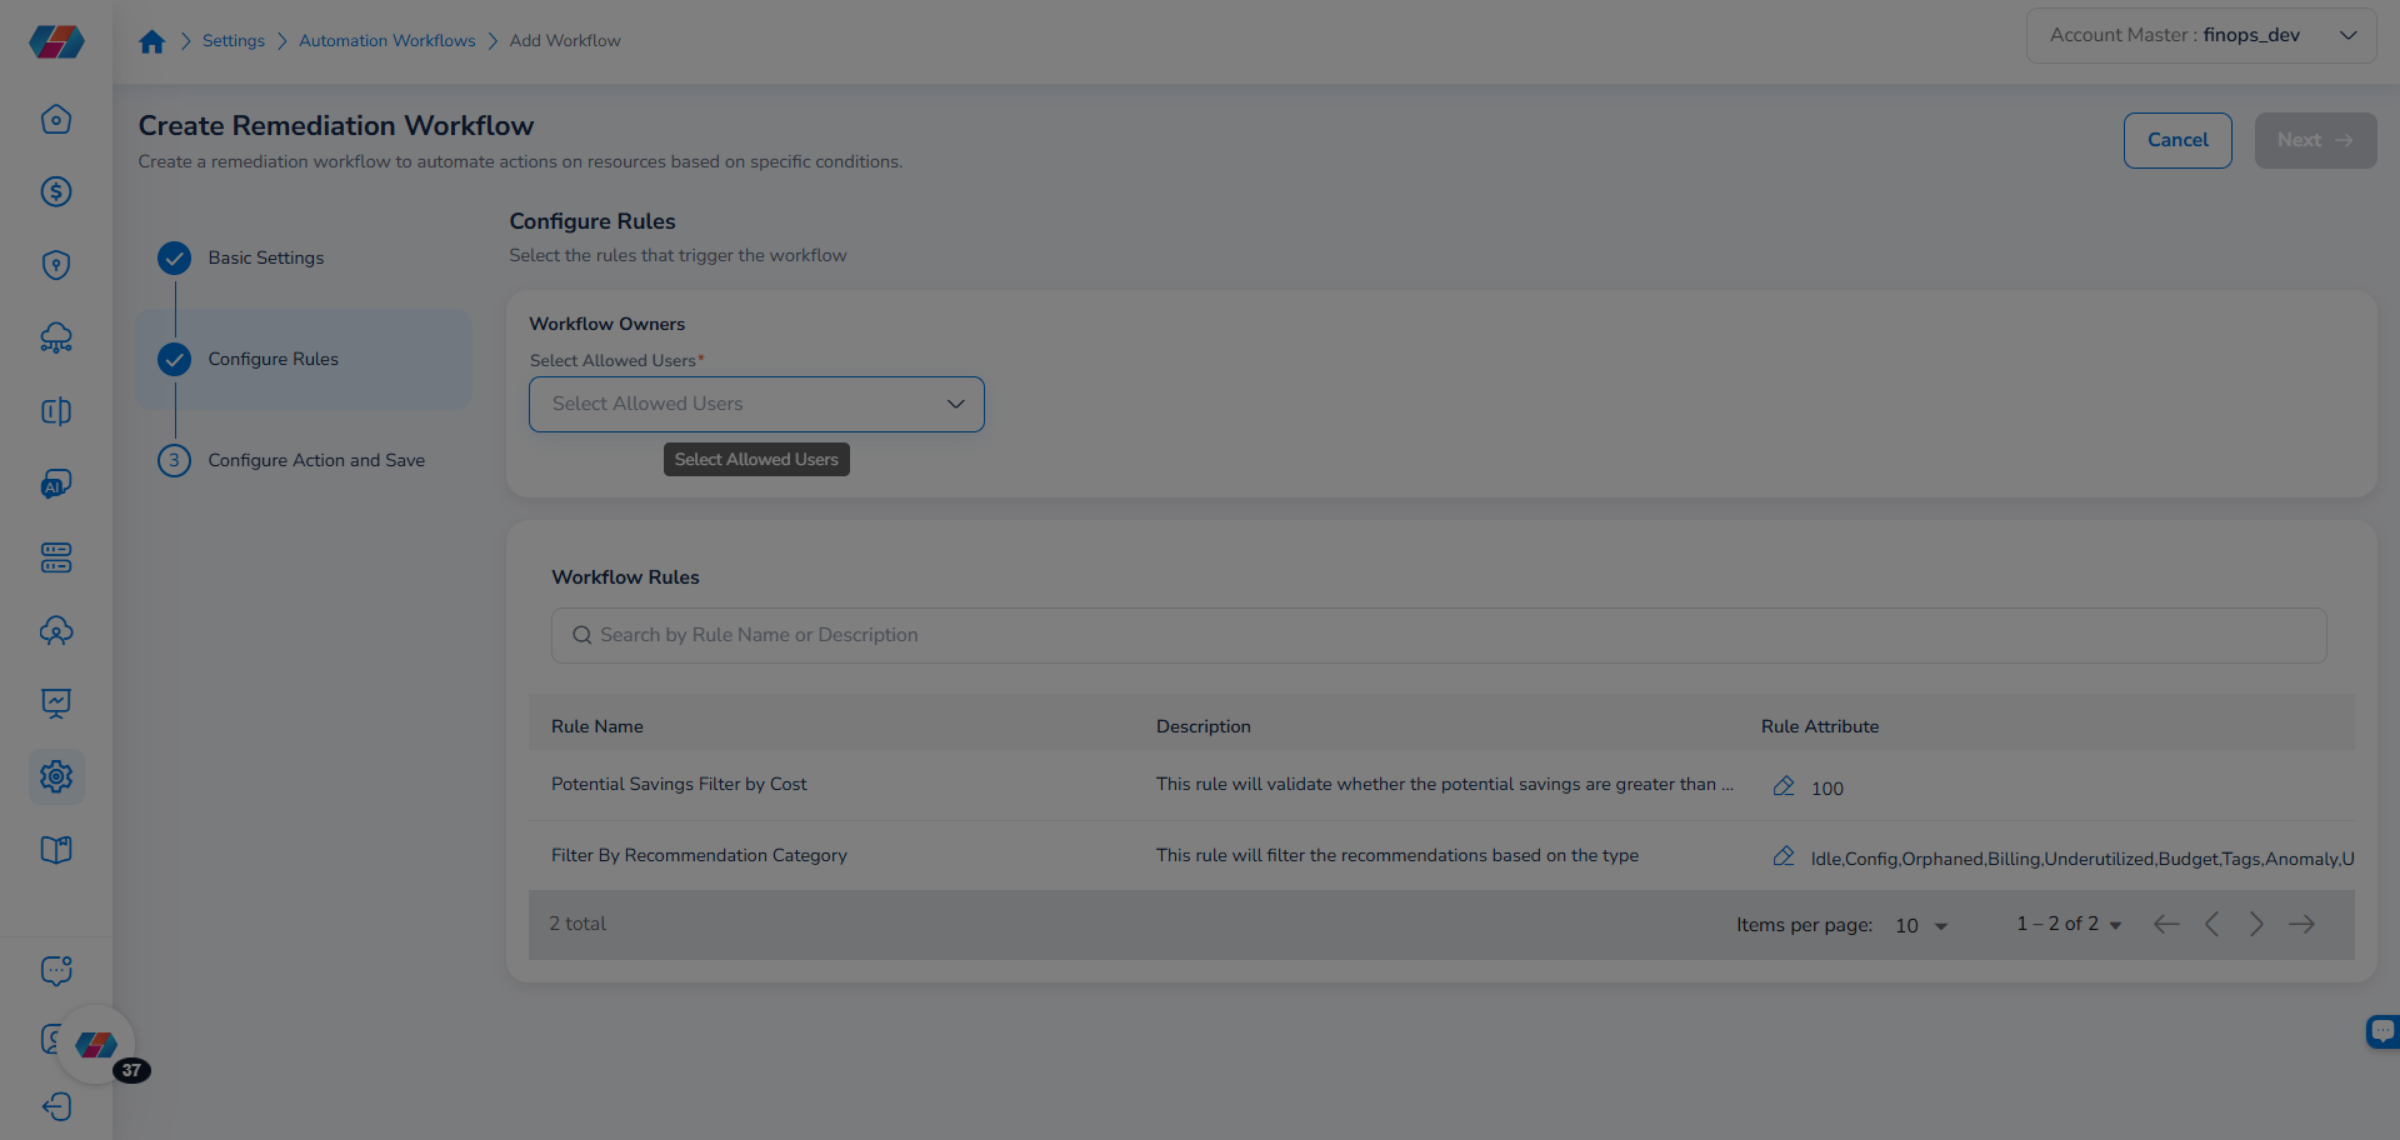
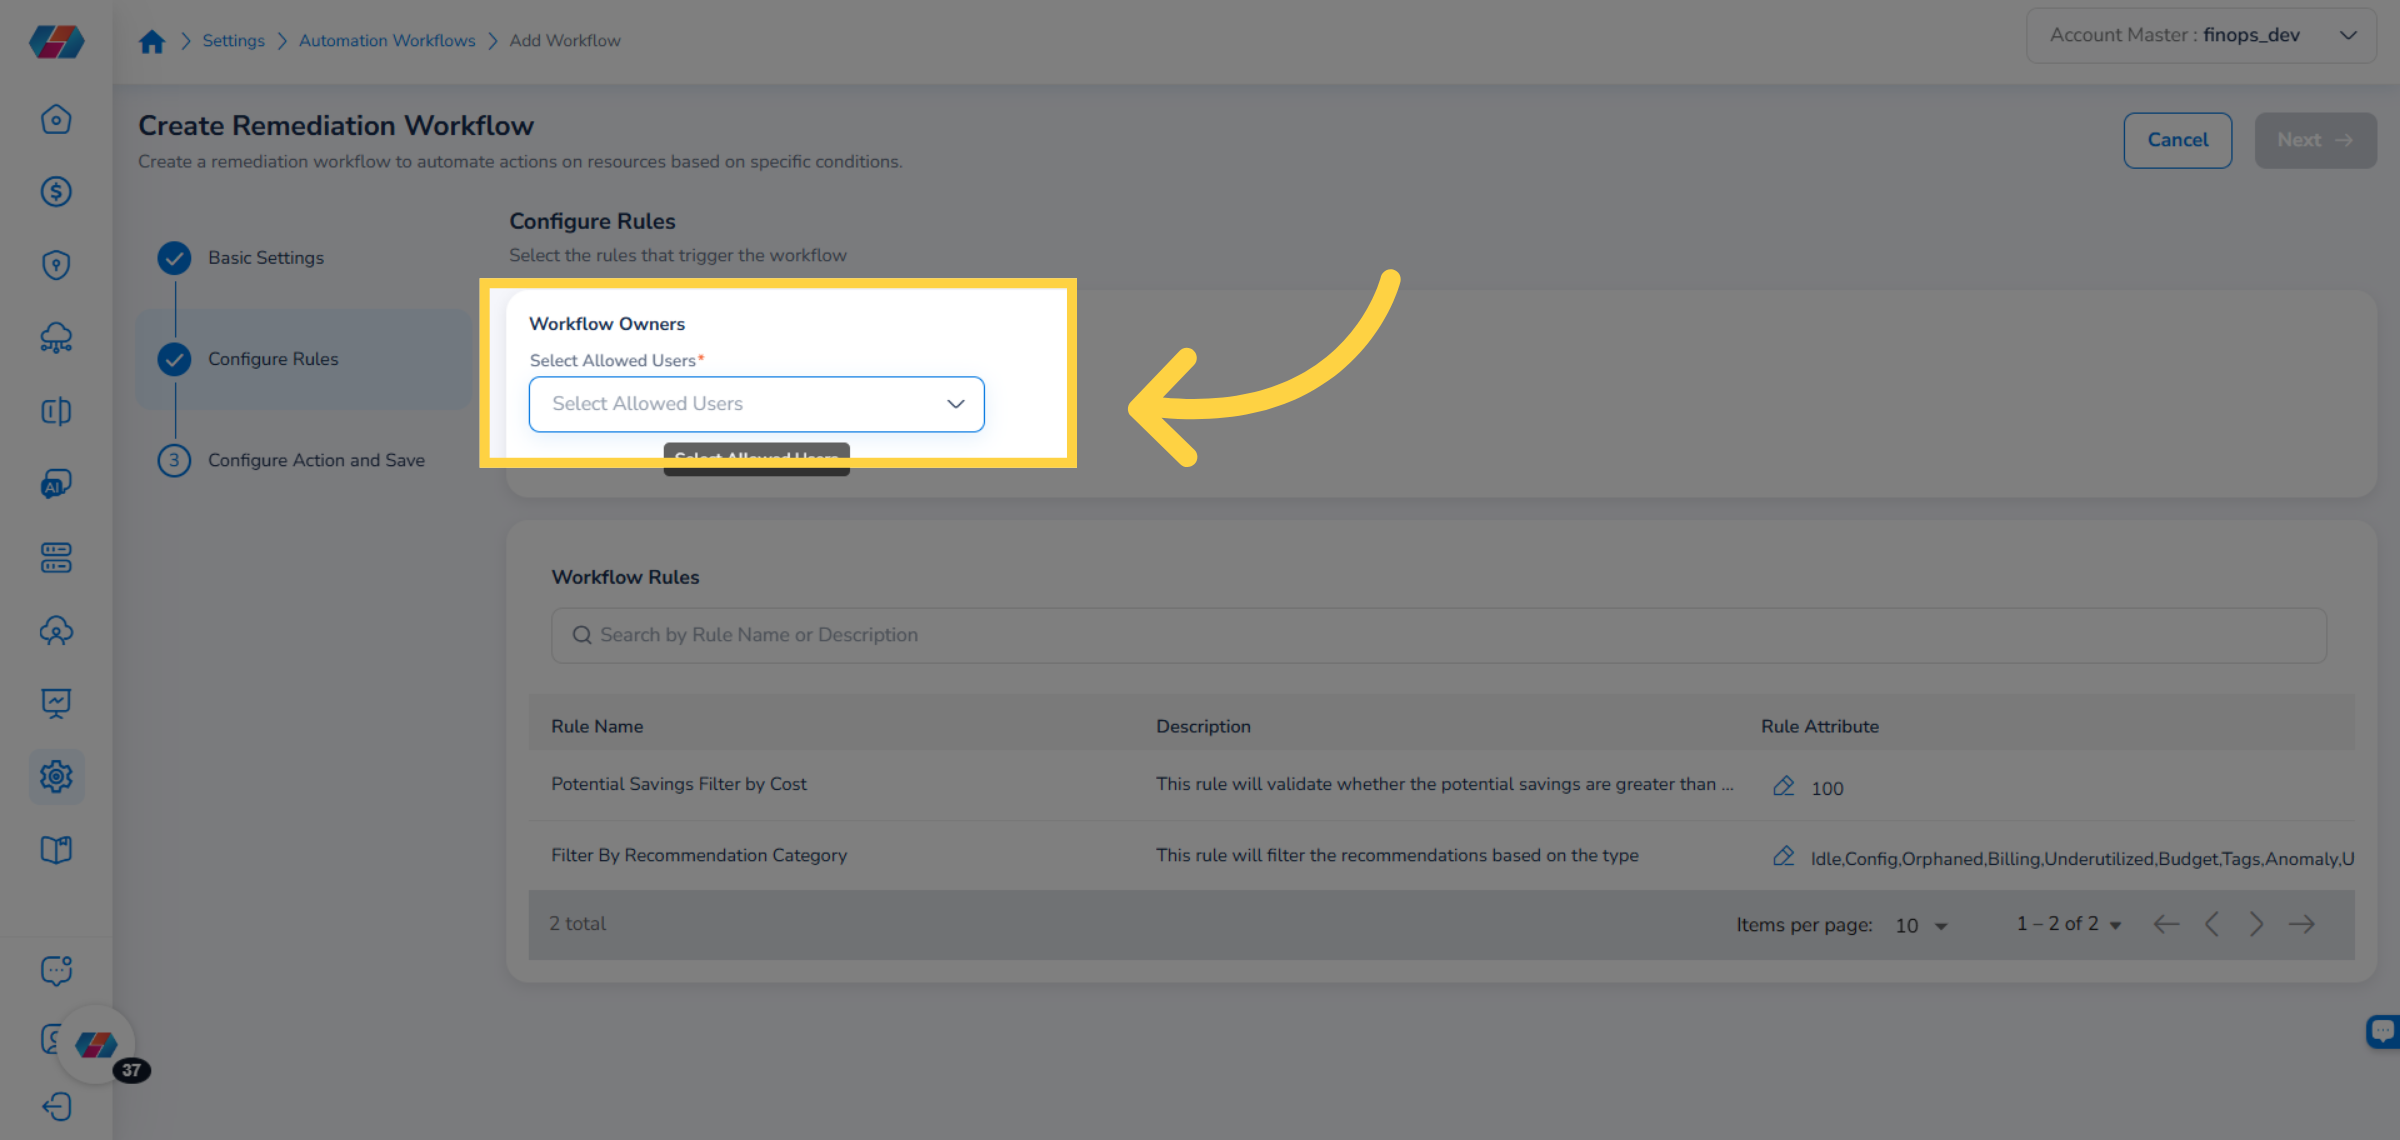
Step 4a: Set Workflow Owners
Click the Workflow Owners dropdown, select the users who are authorized to manage this workflow, and click Ok.
Step 4b: Edit Rule Attributes (Optional)
To modify a rule's threshold or value, click the pencil icon next to the rule name. The Edit Attribute dialog opens.
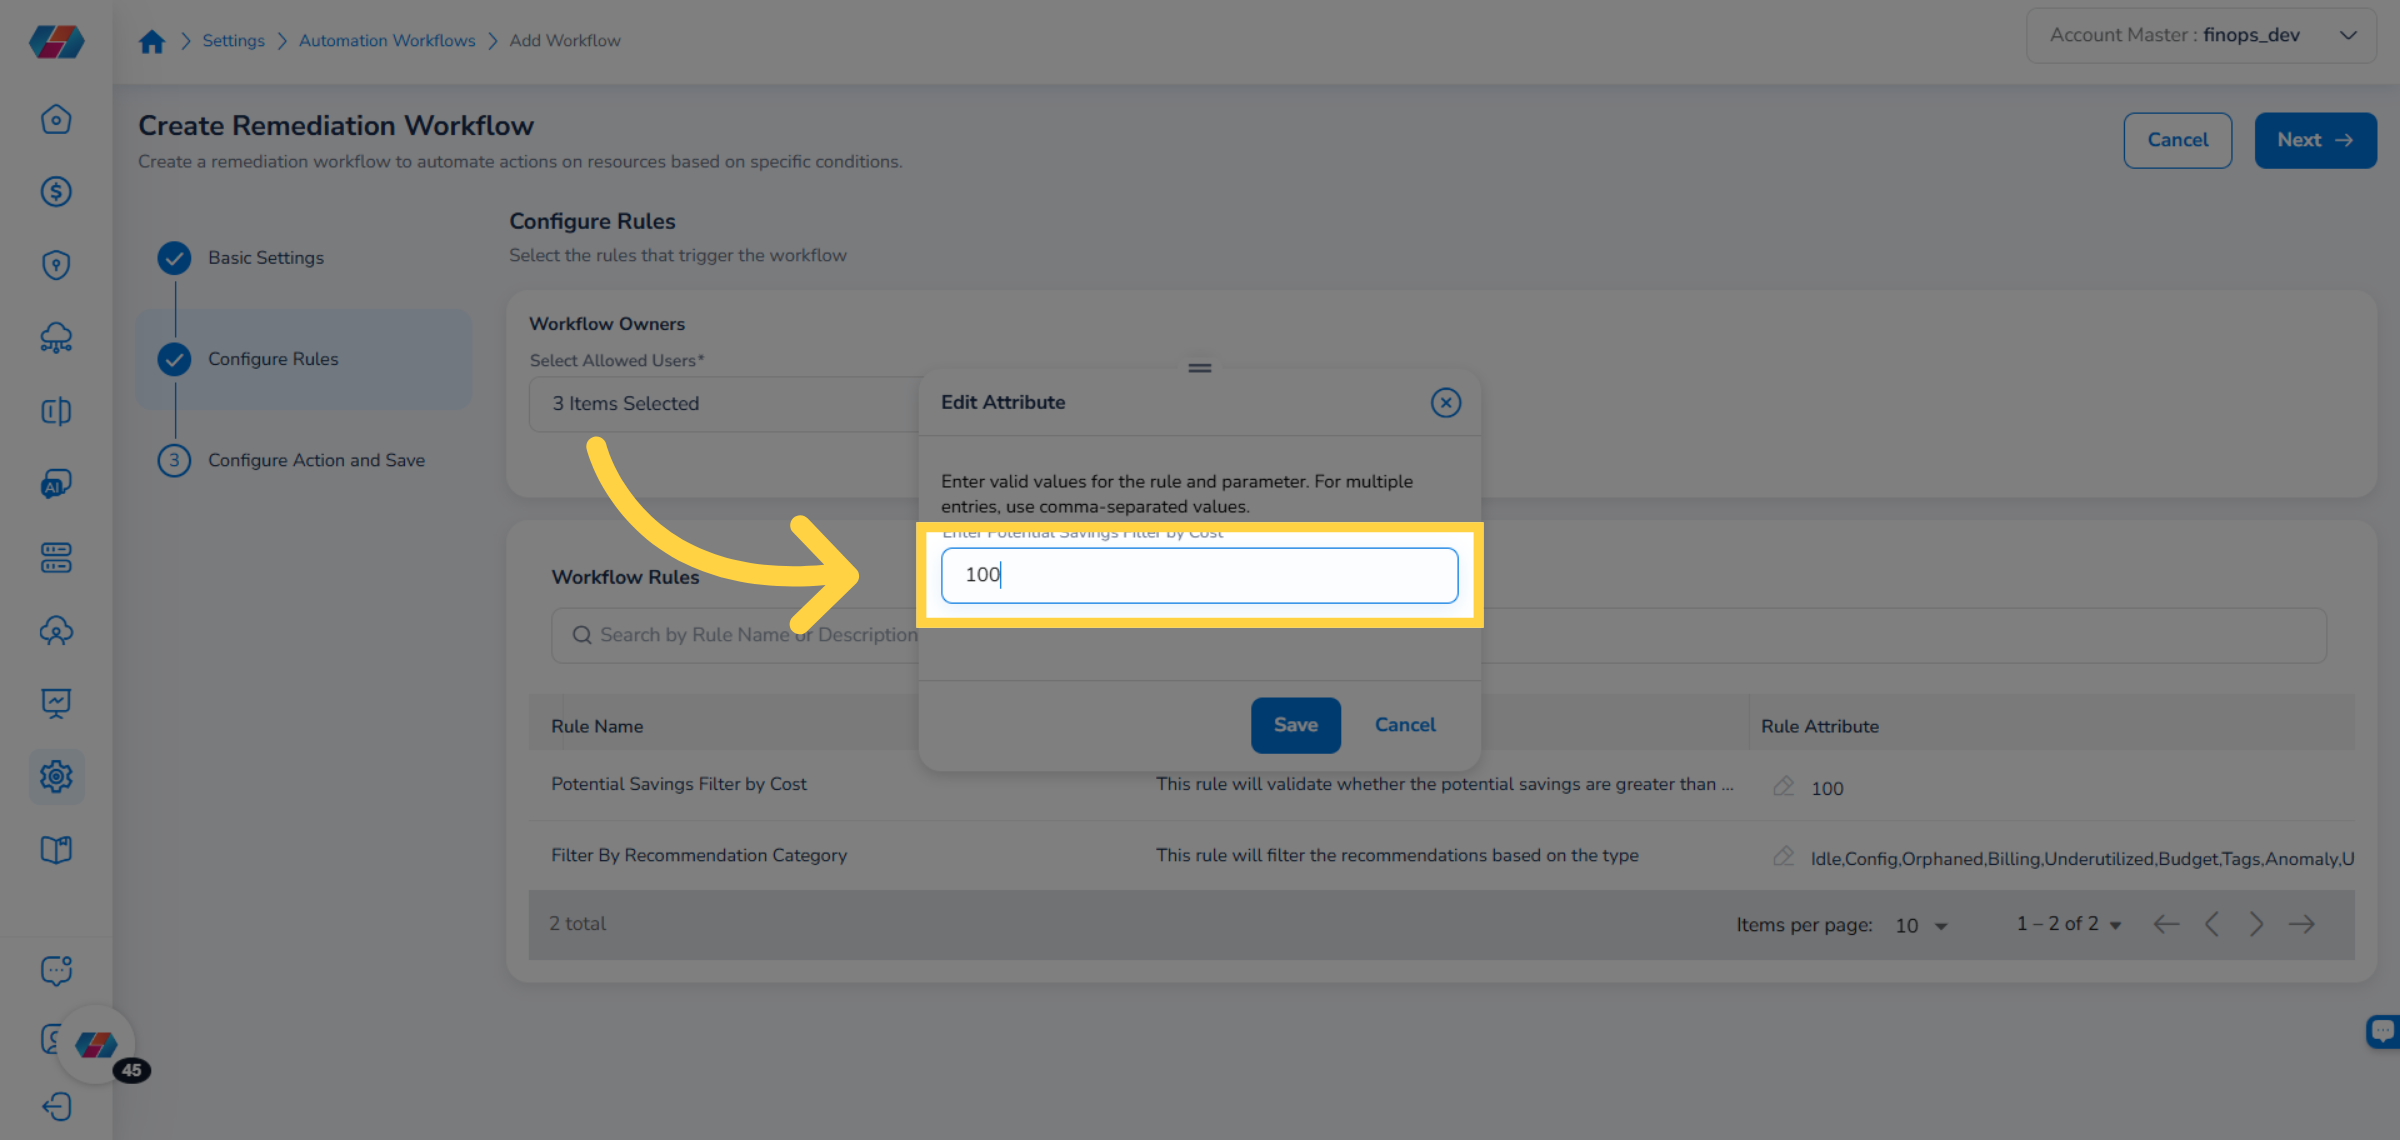
Update the value and click Save.
Click Next to proceed to the Configure Action step.
For Cost Anomaly workflows — Configure Rules
The Configure Rules step shows a single rule:
Validate Impacted Cost — triggers a violation when the cost anomaly exceeds a defined threshold.
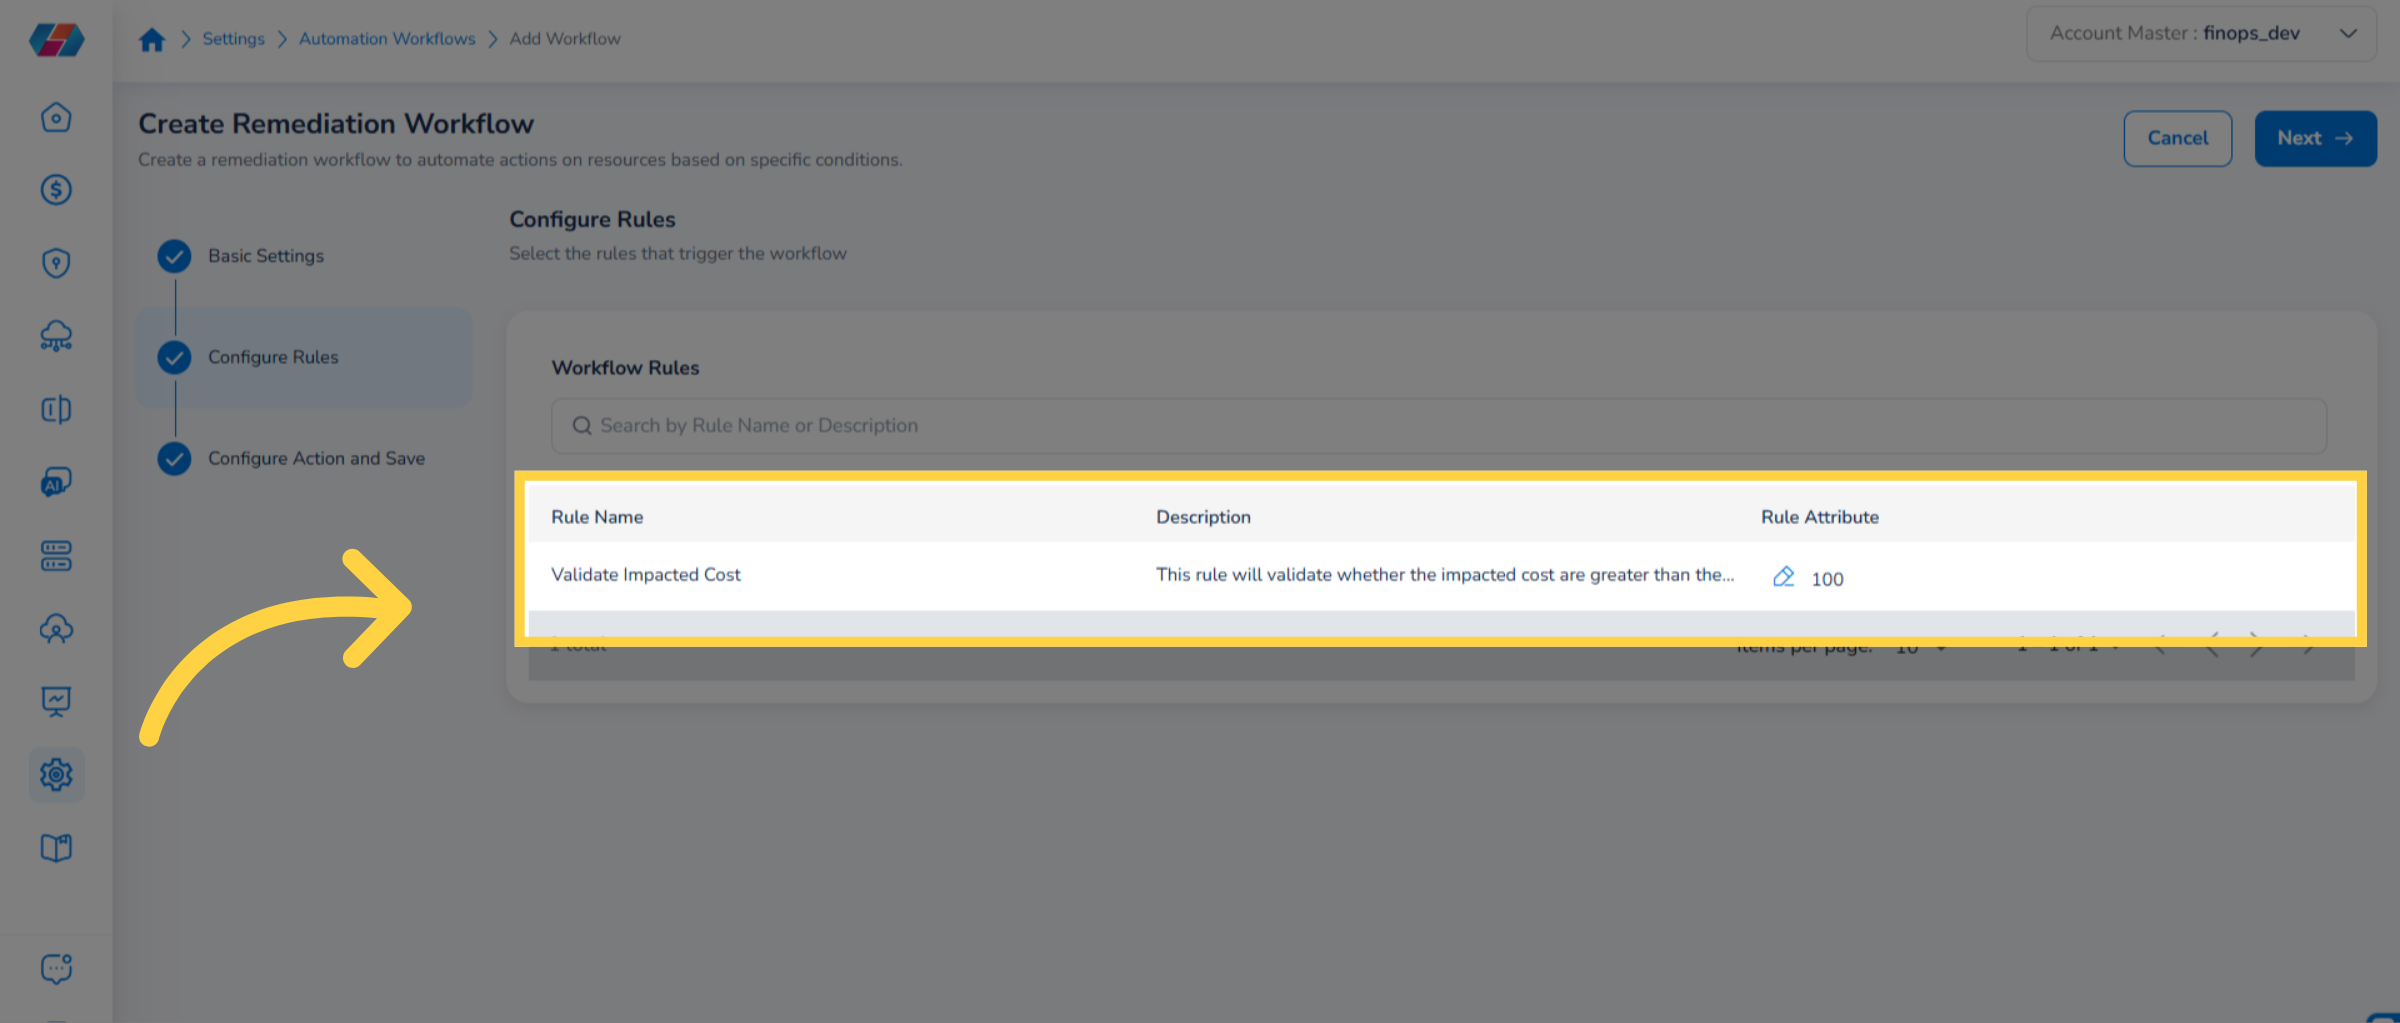
To modify the threshold, click the pencil icon next to Validate Impacted Cost, update the value in the Edit Attribute dialog, and click Save.
Click Next to proceed to the Configure Action step.
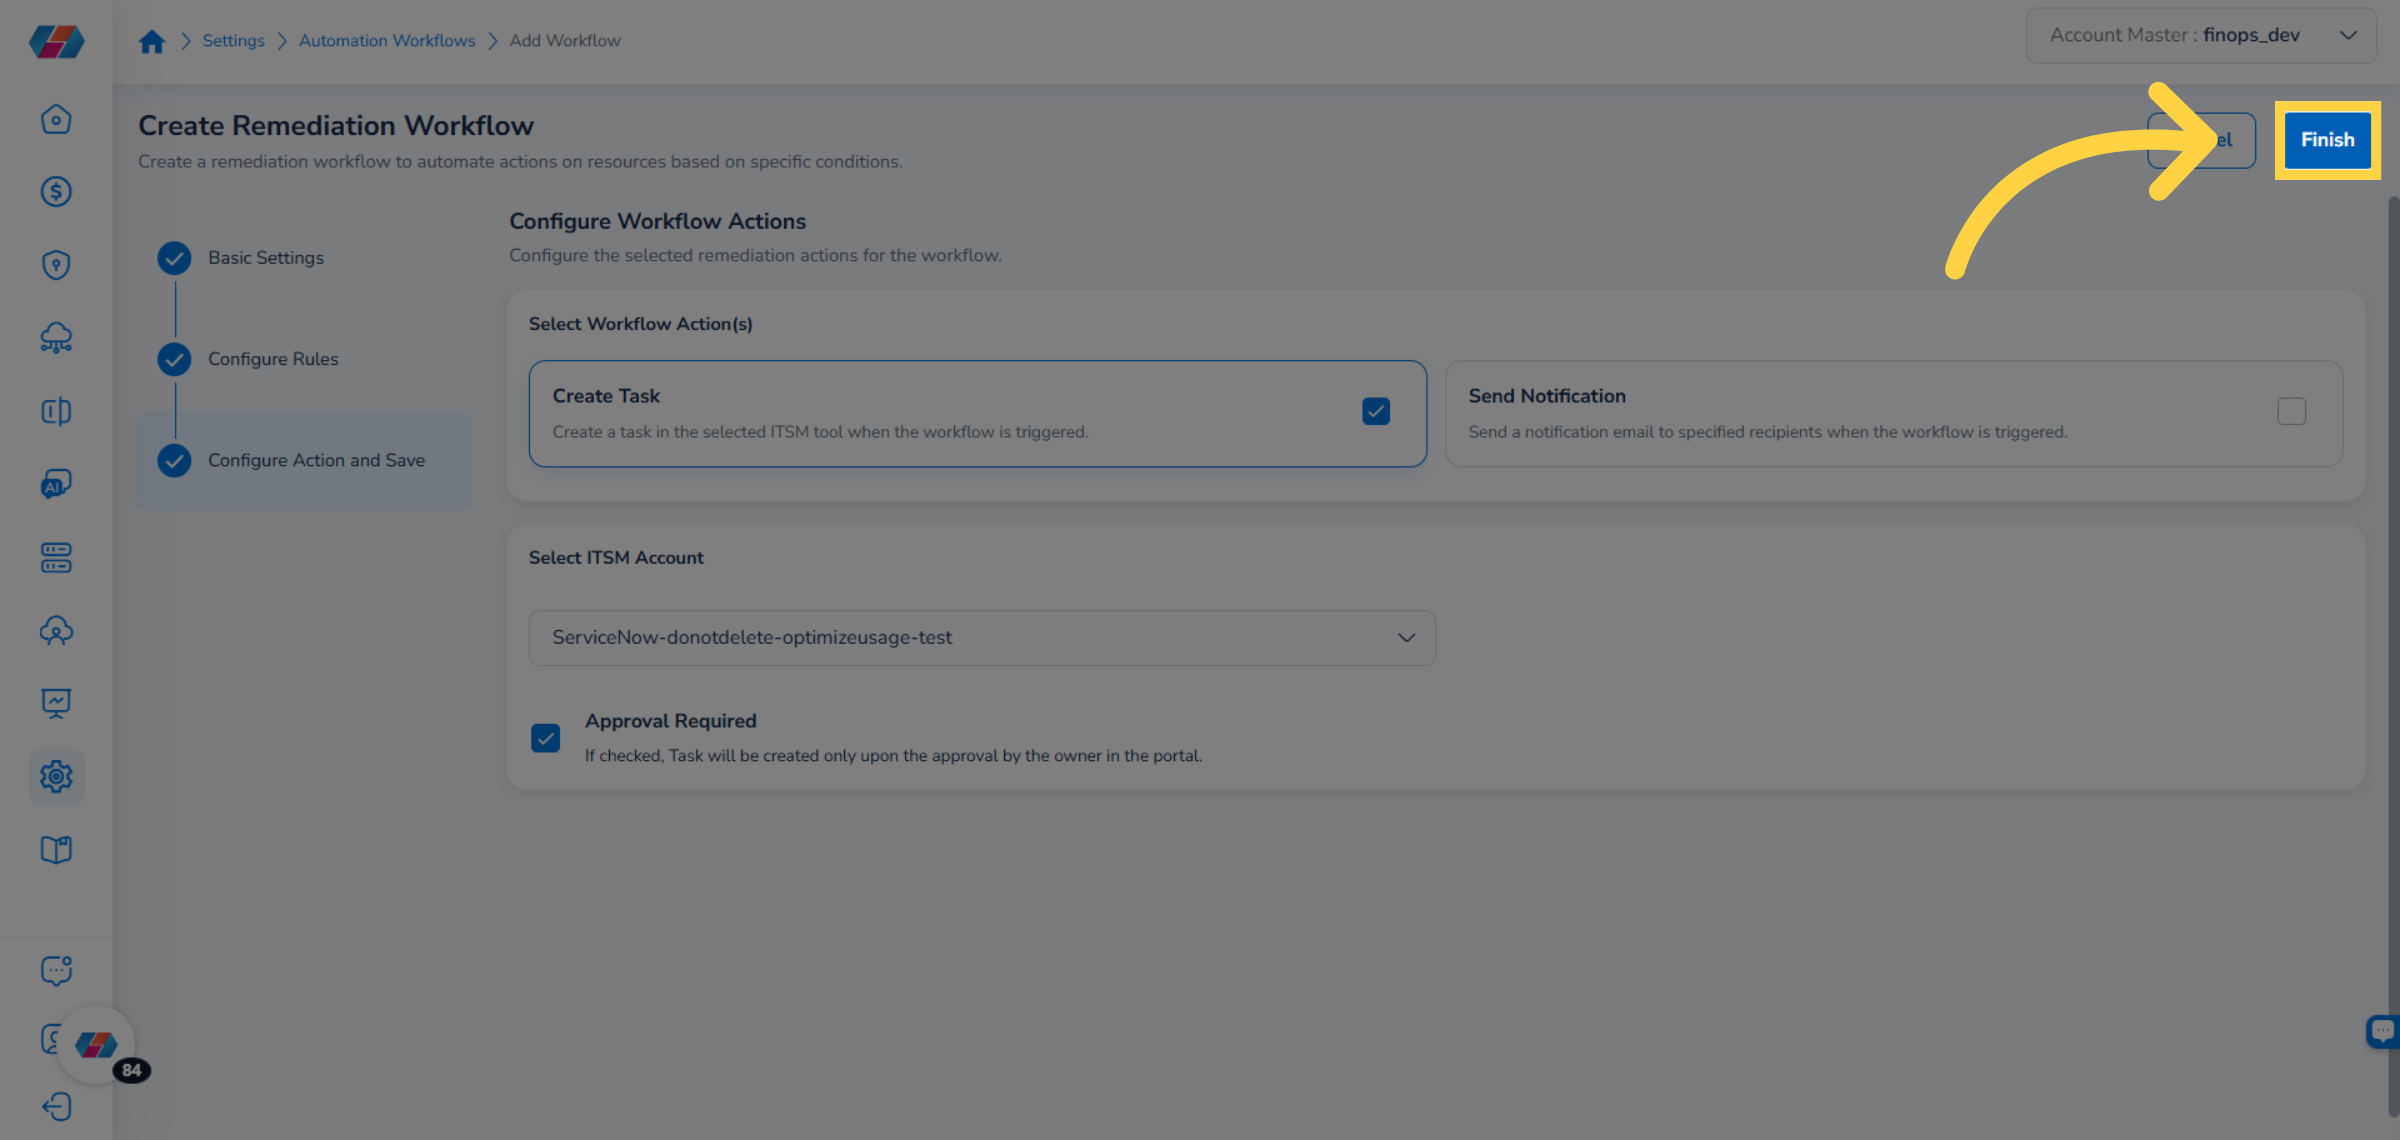
Step 5: Configure Workflow Actions
In the Configure Action and Save step, choose one or both of the following actions. Both are selected by default.
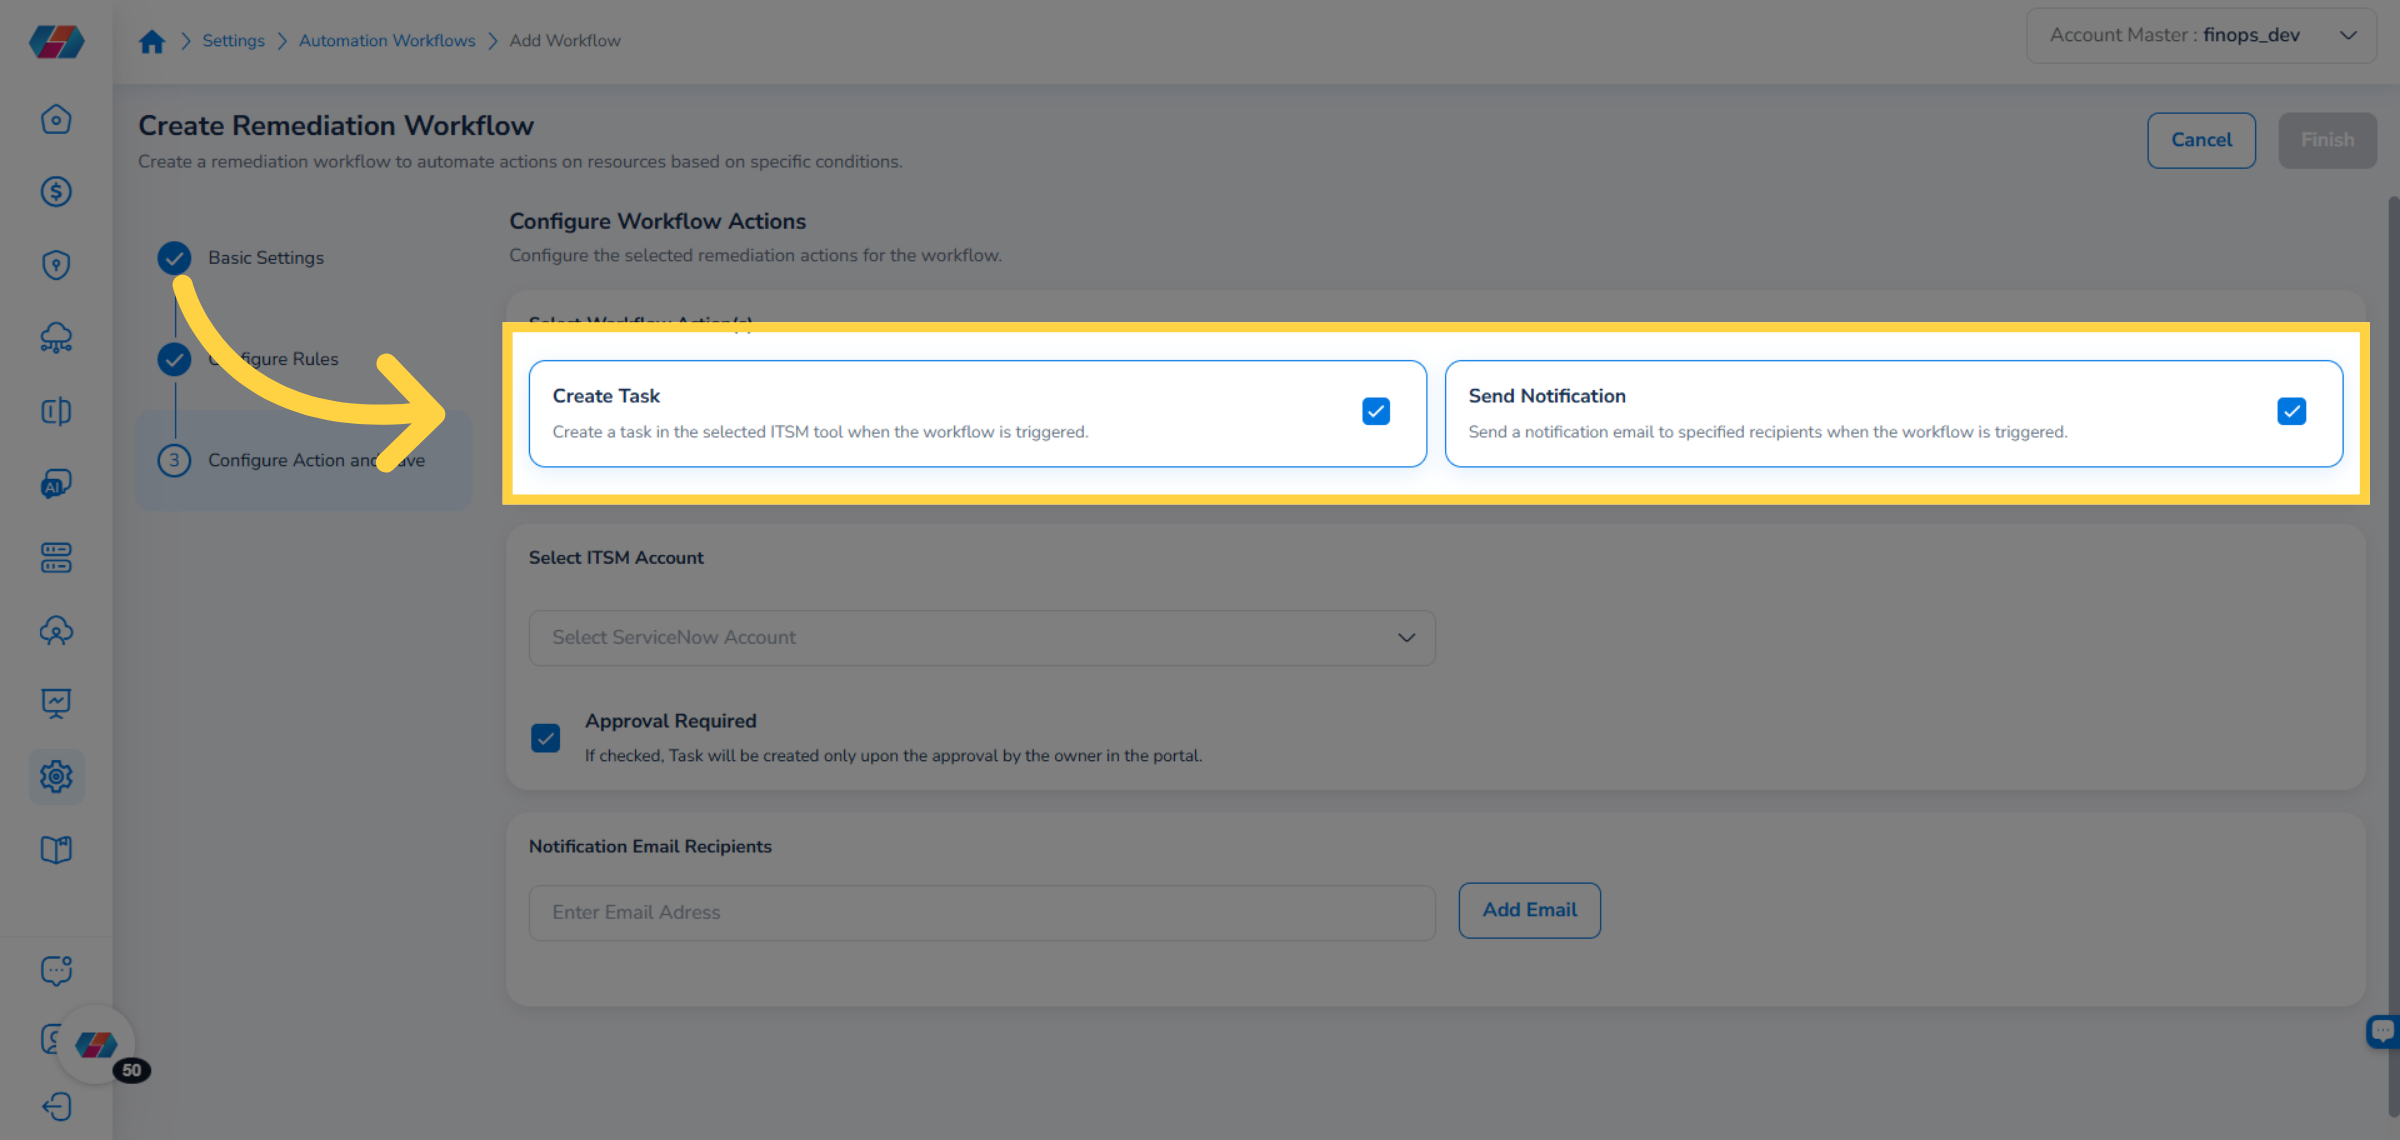
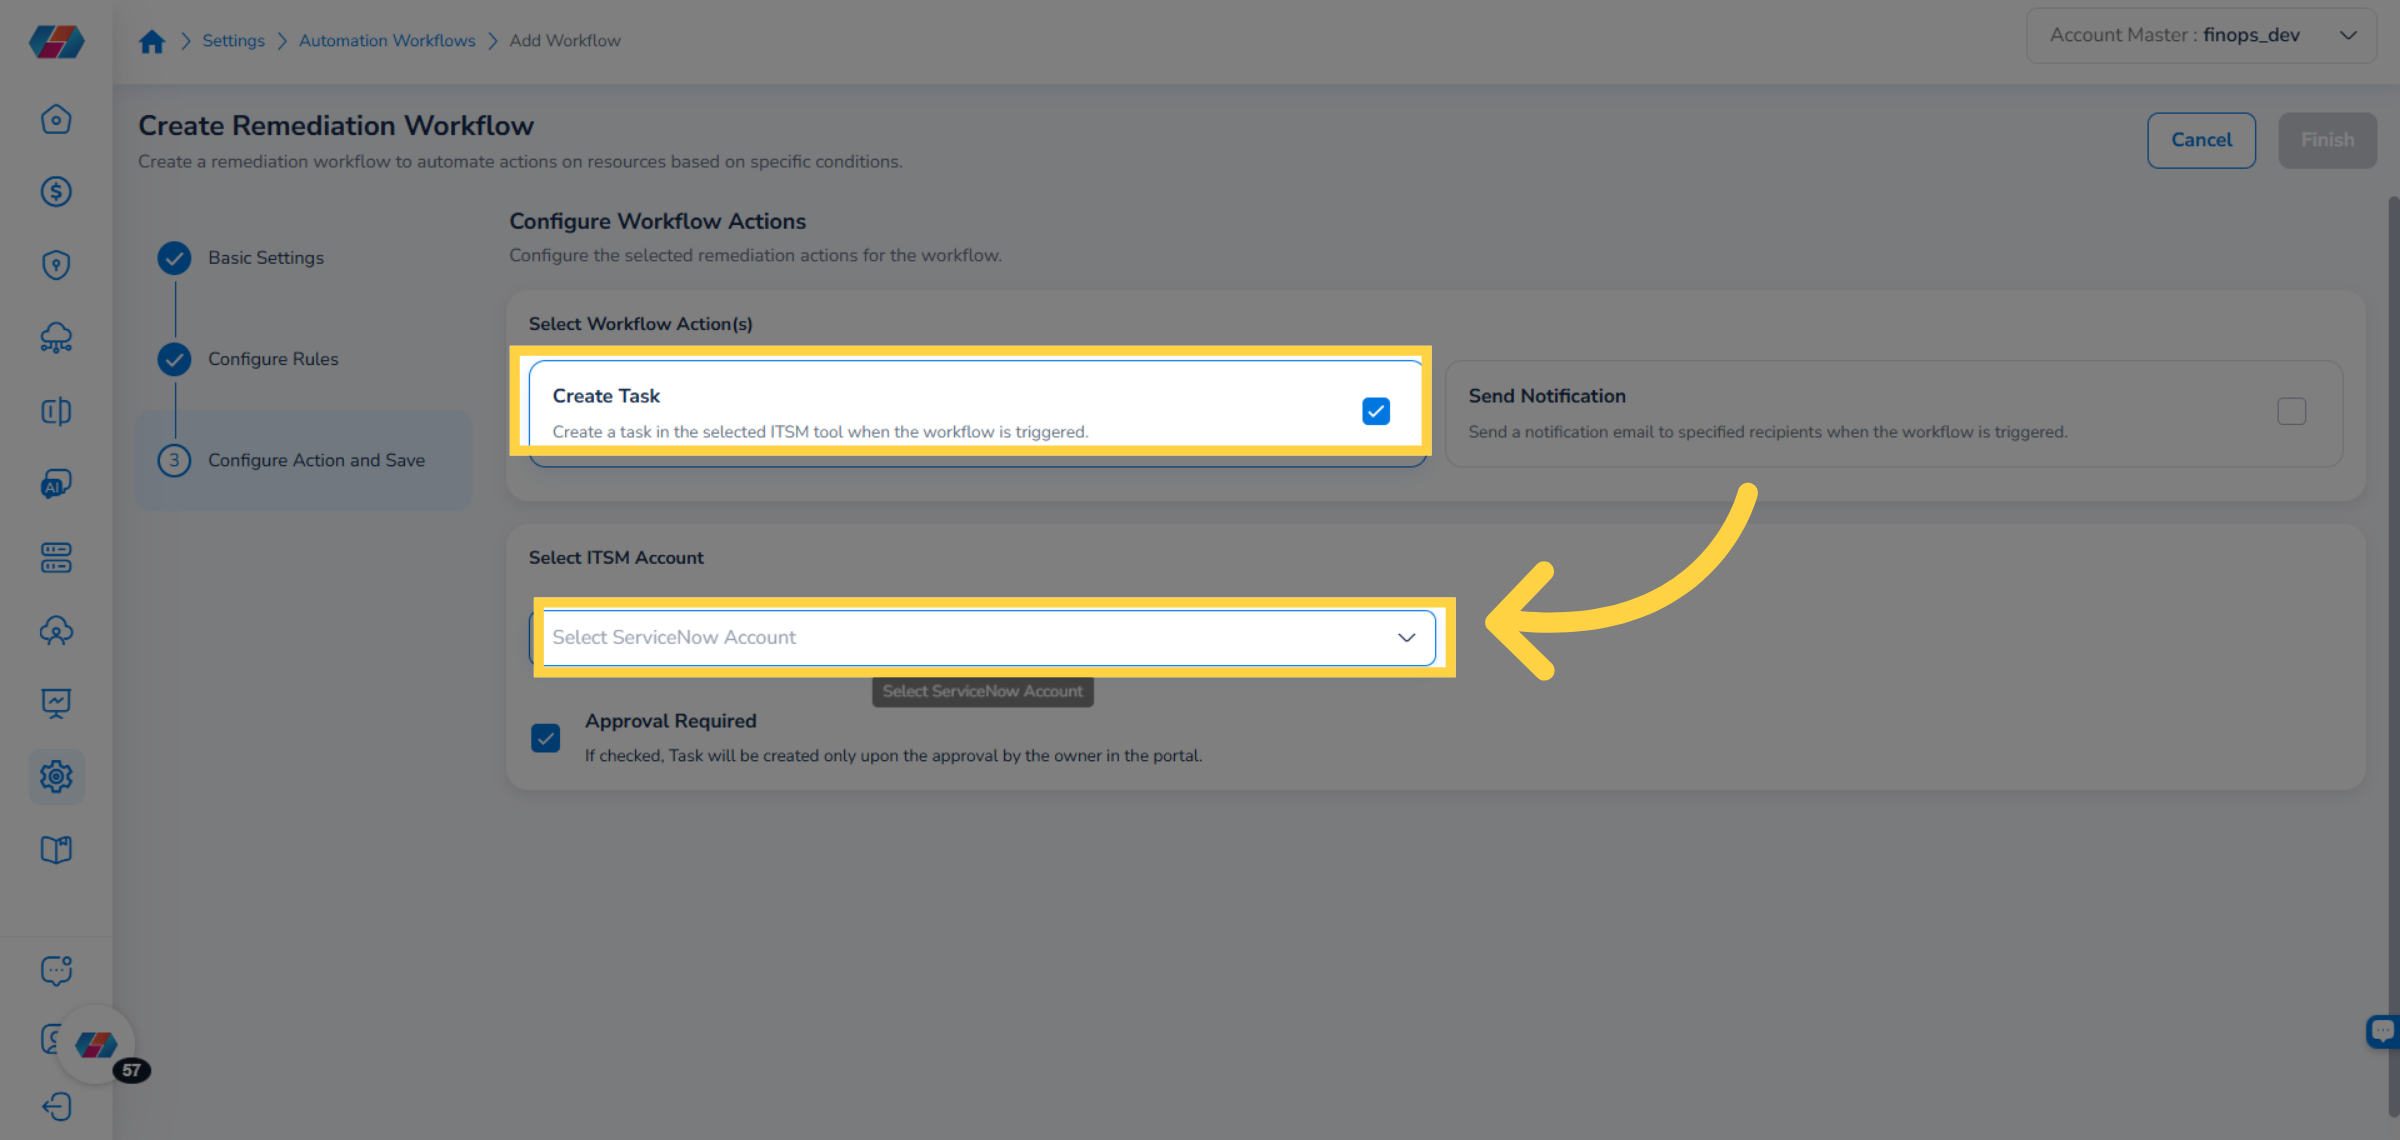
Create Task
In the Select ITSM Account dropdown, select the ITSM account where violations will be queued.
To require approval before a task is created, select the Approval Required checkbox. When enabled, the task is created only after a workflow owner approves it in the portal.
Send Notification
In the Notification Email Recipients field, enter an email address.
Click Add Email. The address appears below the field.
Repeat for any additional recipients.
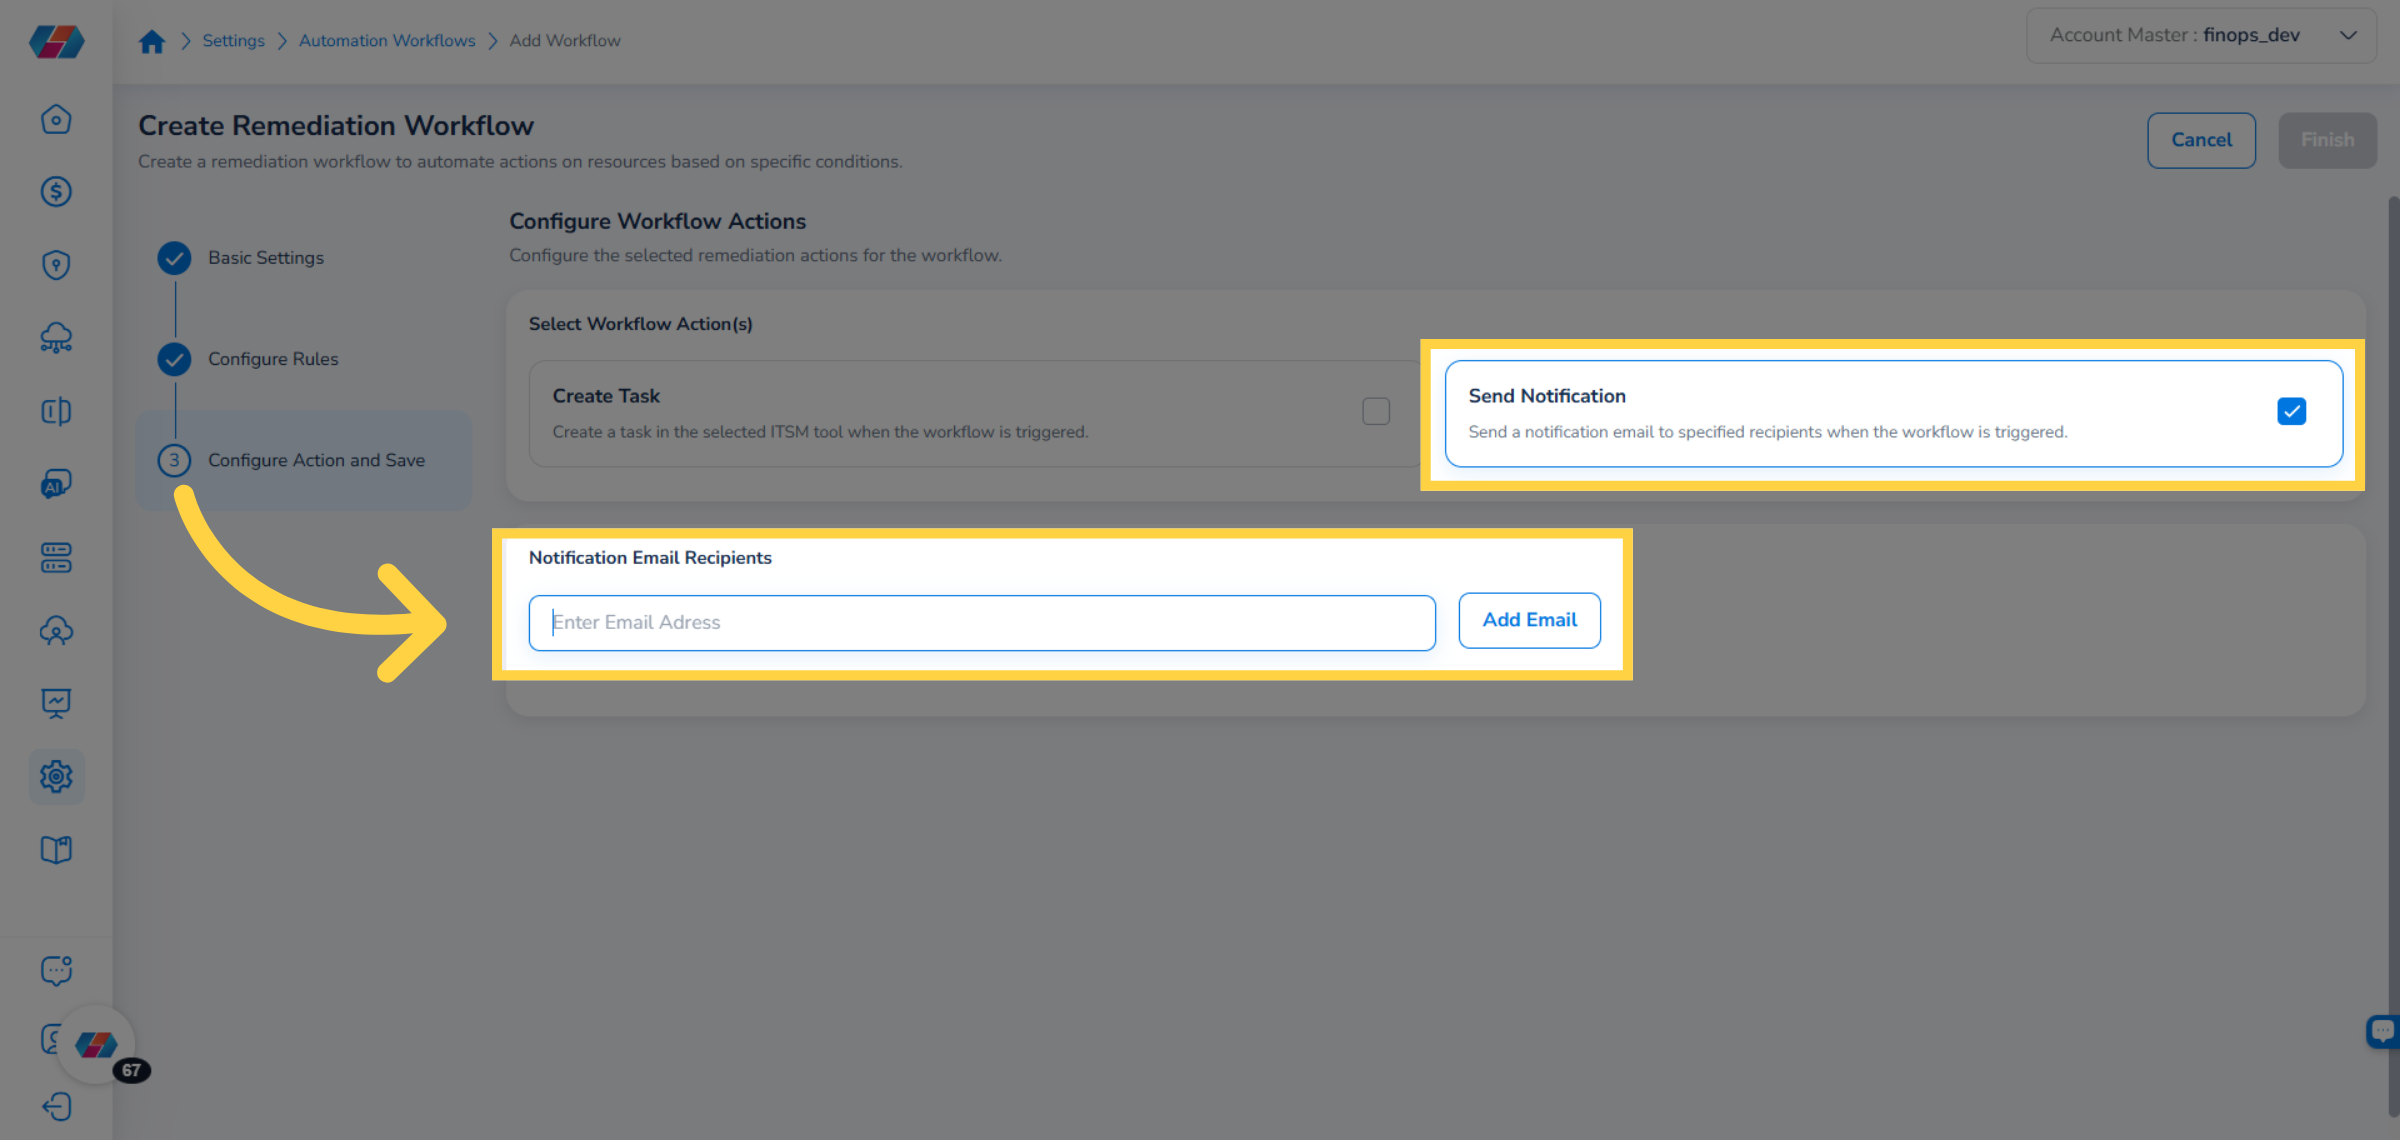
Tip: You can use both actions together, or deselect one to use only the other. If Send Notification is unchecked, the email recipients section disappears from the screen.
Step 6: Finish
Click Finish.
Part 3: Manage Existing Workflows
From the Automation Workflows list, click the ellipsis (⋯) icon in the Actions column for the workflow you want to manage.
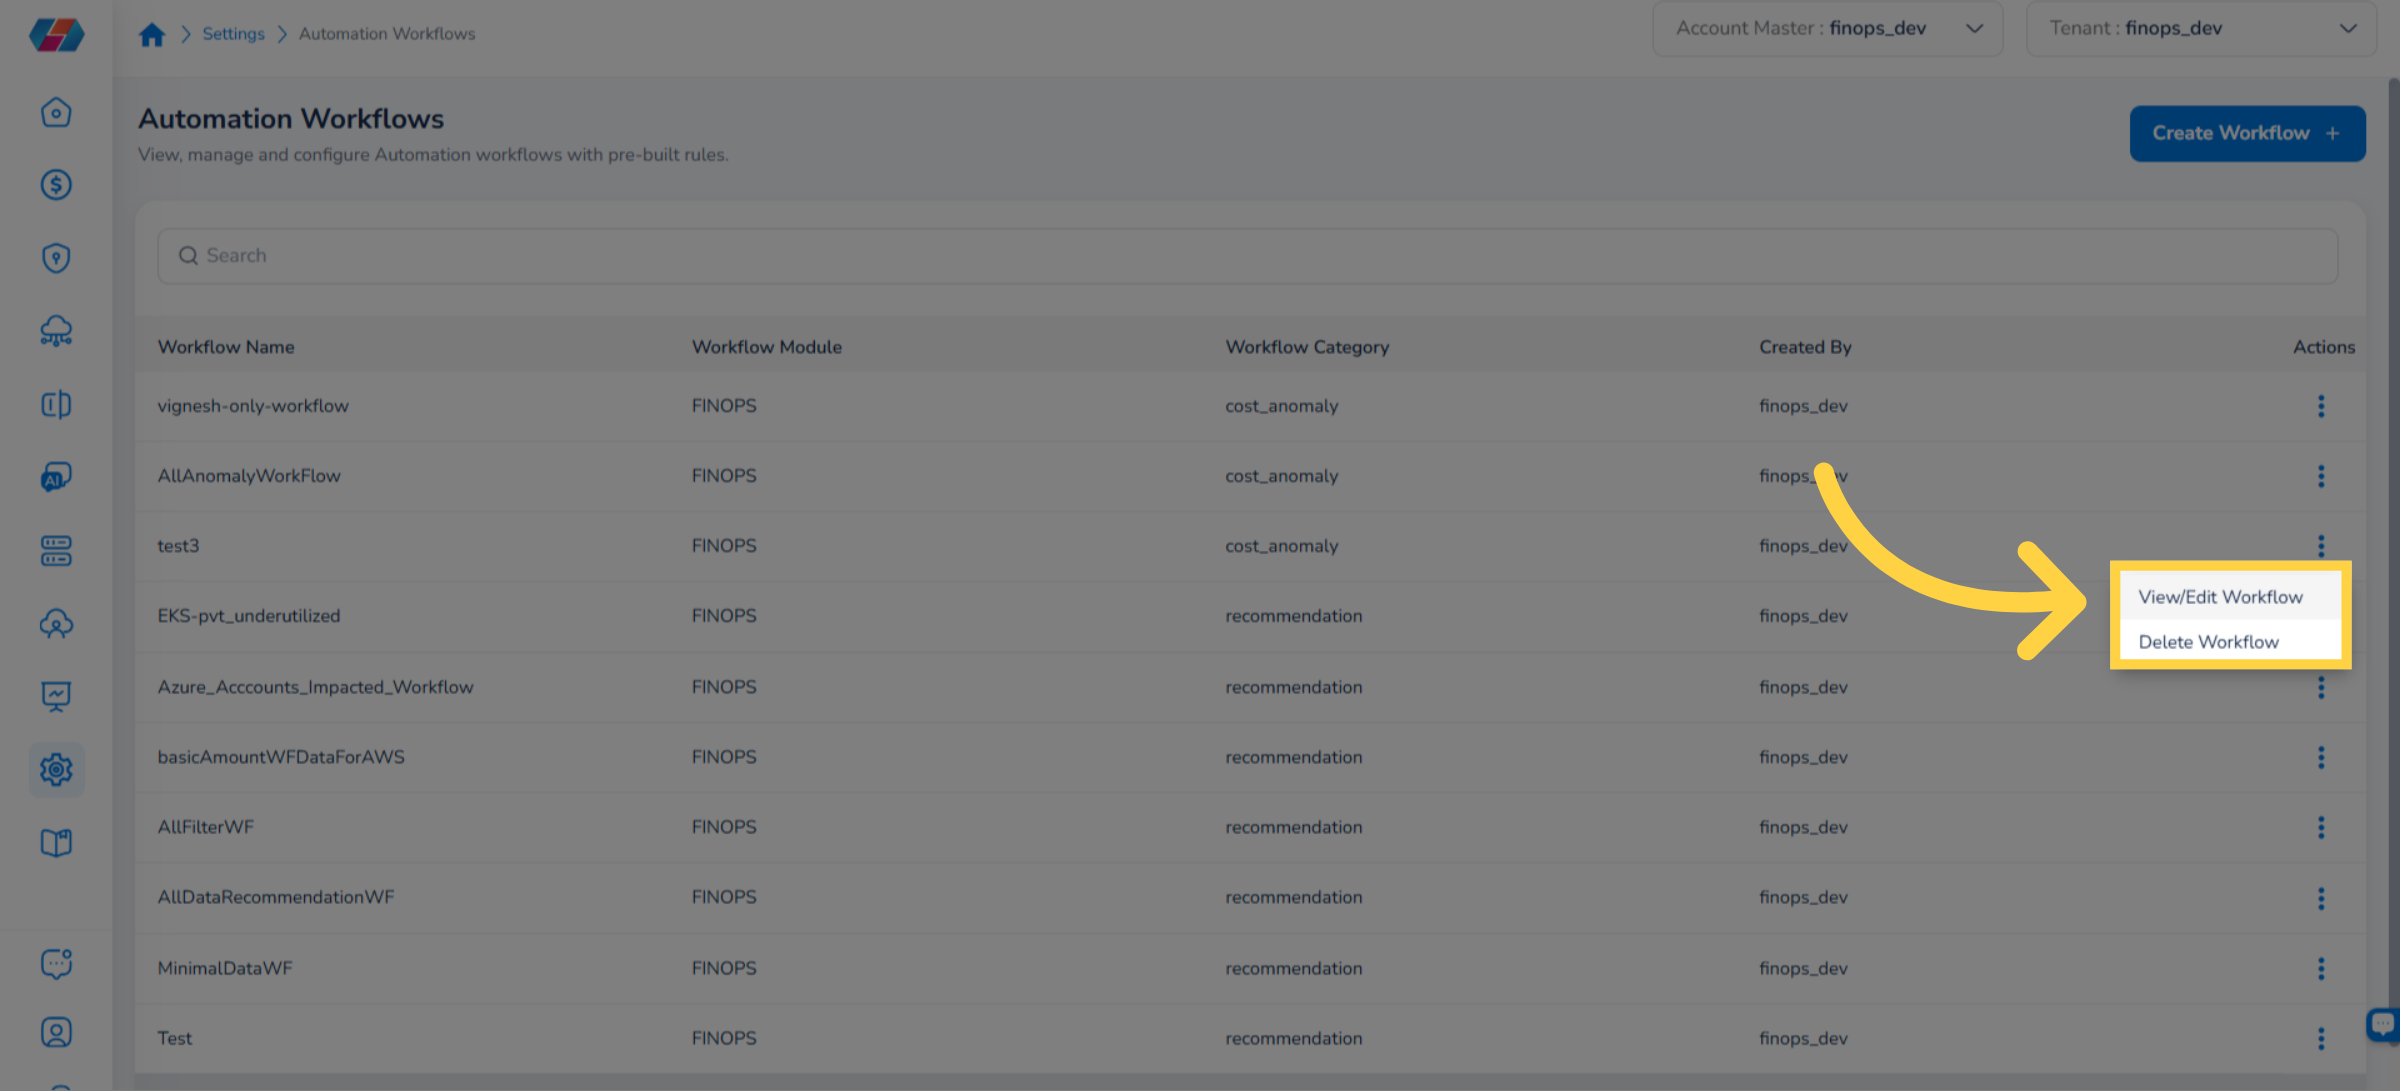
Select one of the following:
View/Edit Workflow — opens the workflow in the wizard where you can modify any setting and save your changes.
Delete Workflow — opens a confirmation dialog. Click Yes to permanently delete the workflow, or No to cancel.
Note: Deleting a workflow is permanent. Existing open tasks in your ITSM system are not automatically closed when a workflow is deleted.
Frequently Asked Questions
Q: What is the difference between Cost Optimization and Cost Anomaly workflow types?
Cost Optimization workflows trigger based on ongoing recommendations — for example, identifying underutilized resources or rightsizing opportunities. Cost Anomaly workflows trigger when an unexpected spike in cost is detected and the impacted cost exceeds your configured threshold. Use Cost Optimization for proactive governance and Cost Anomaly for reactive alerting.
Q: Can I create a workflow without an ITSM integration?
Yes. If you do not have an ITSM account integrated, you can still create a workflow using only the Send Notification action. Deselect Create Task during the Configure Action step and configure email recipients instead.
Q: What happens if I enable the Approval Required checkbox?
When Approval Required is selected, a task will not be automatically created in your ITSM system when a violation is detected. Instead, a workflow owner must review and approve the action in the CoreStack portal first. This is useful when you want human review before any remediation ticket is opened.
Q: Why don't I see the Automation Workflows option in the Settings menu?
The Automation Workflows menu item only appears in Settings after the feature has been enabled for at least one cloud account. Follow Part 1 of this guide (enable the toggle under Settings > Account Management > Account Info > Advanced Settings) and then return to the Settings menu.
Troubleshooting
Automation Workflows option is missing from the Settings menu
Cause: The Automation Workflows toggle has not been enabled for any account in your environment.
Solution:
Navigate to Settings > Account Management > Account Info > Advanced Settings.
Move the Automation Workflows slider to the right.
Click Save Configuration.
Return to the main Settings menu — the Automation Workflows option should now appear.
If the option still does not appear after saving, log out and log back in to refresh your session.
No violations appear in the ITSM system after the workflow is active
Cause: The workflow scope or rule thresholds may be too restrictive, or the connected ITSM account may not be configured correctly.
Solution:
Navigate to Settings > Automation Workflows and click the ellipsis (⋯) icon for the affected workflow, then select View/Edit Workflow.
Review the Scope filters — ensure the selected accounts and tag filters match resources that exist in your environment.
Review the rule attribute values — for example, if the Potential Savings Filter threshold is set very high, few recommendations will qualify.
Verify that the ITSM account selected under Create Task is active and correctly integrated.
If the issue persists, contact CoreStack support with your workflow name, account ID, and the ITSM integration name.
Email notifications are not being received
Cause: Email addresses may have been entered incorrectly, or the Send Notification action may have been deselected.
Solution:
Open the workflow via View/Edit Workflow and navigate to the Configure Action and Save step.
Confirm that the Send Notification checkbox is selected.
Review the listed email addresses for typos.
Remove and re-add any incorrect addresses using the Add Email flow.
If notifications are still not received after correcting the addresses, ask the intended recipients to check their spam or junk folders and whitelist the CoreStack notification sender address.
Related Resources
Updated about 2 months ago