Blueprints
Maintaining IT assets on the cloud requires carefully performing tasks on your cloud resources. Operating cloud resources can be difficult at times, especially if carried out manually. You can automate these tasks and reduce the manual intervention associated with cloud operations with blueprints.
CoreStack allows you to automate your cloud operations using blueprints. You can define the tasks to be performed on each cloud resource as a template and group multiple templates into a blueprint for automated management of resources.
This topic guides you to learn the capabilities of blueprint and automate your cloud operations.
Navigation
Navigate to Automation submenu under Operations in the Left navigation menu and select Blueprints option to land in Blueprints (Marketplace).
The tabs at the top represent the scope of the blueprints. There will be 2 tabs available: Marketplace and My Blueprints.
Marketplace
CoreStack provides a wide range of pre-defined blueprints that helps you to automate the most common cloud operations with ease. The marketplace lists the blueprints available across multiple clouds and tools.
These blueprints are available across all tenants and are usually created by the Product Administrator.
Tip: These blueprints have the scope value set to Global.
My Blueprints
These blueprints have been created by users within the tenant. These are available only for users within the tenant. You can add more blueprints or edit/delete existing blueprints in this tab based on your role and access policies.
Tip: These blueprints have the scope value set to Tenants.
Viewing Blueprint Details
To get more information about a specific blueprint, click on the blueprint to open its 'Meta Data' page. You can view the blueprint's general details such as scope, status, created by, etc. Click on 'Template Details' option to view the attributes associated with the templates used in the blueprint.
Blueprint Actions
Actions that can be performed on a blueprint will be visible when you hover the mouse on a blueprint in the list. The applicable actions will be listed based on the scope of the blueprint (Marketplace, My Blueprints) and RBAC access the user has for the blueprint.

- Execute – Executes the blueprint immediately and redirects to "Job history" where you can see the status and output of the execution.
- Edit – Modifies the blueprint's properties, metadata, associated templates and its sequence. Information provided at the time of Blueprint Creation can be modified.
- Delete – Deletes the blueprint.
Creating Custom Blueprints
CoreStack also provides the option for users to create their own blueprints and use them to execute on their accounts.
Create Blueprint window will be displayed with 2 sections as follows: Blueprint Details and Blueprint Inputs.
The following steps need to be performed to create a new blueprint.
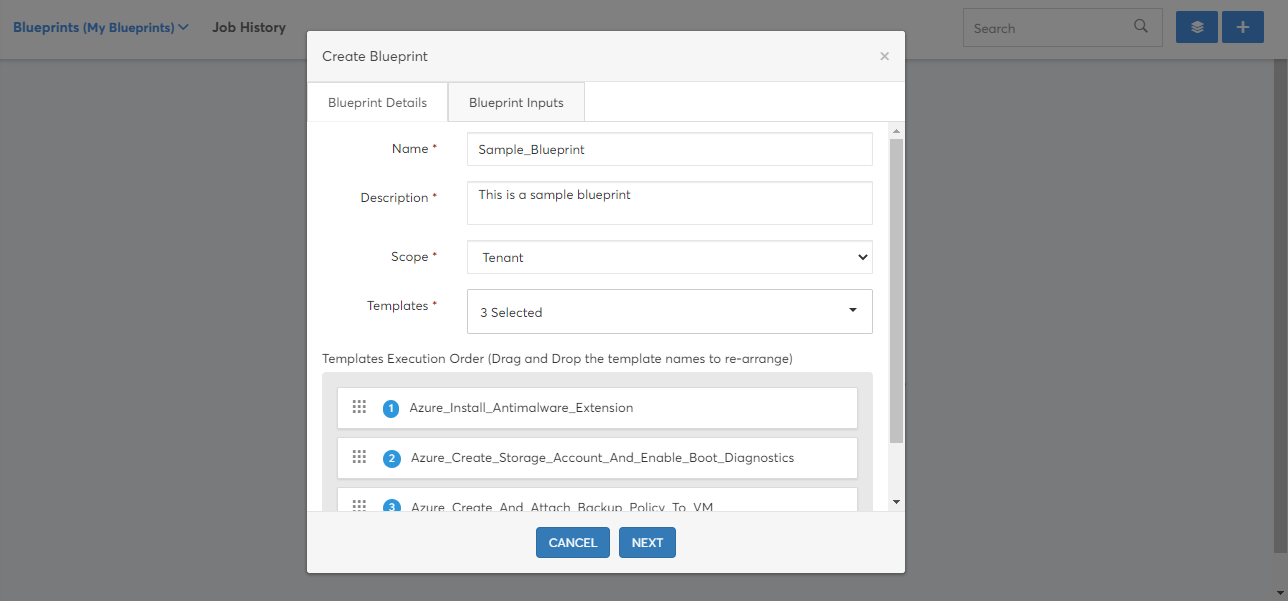
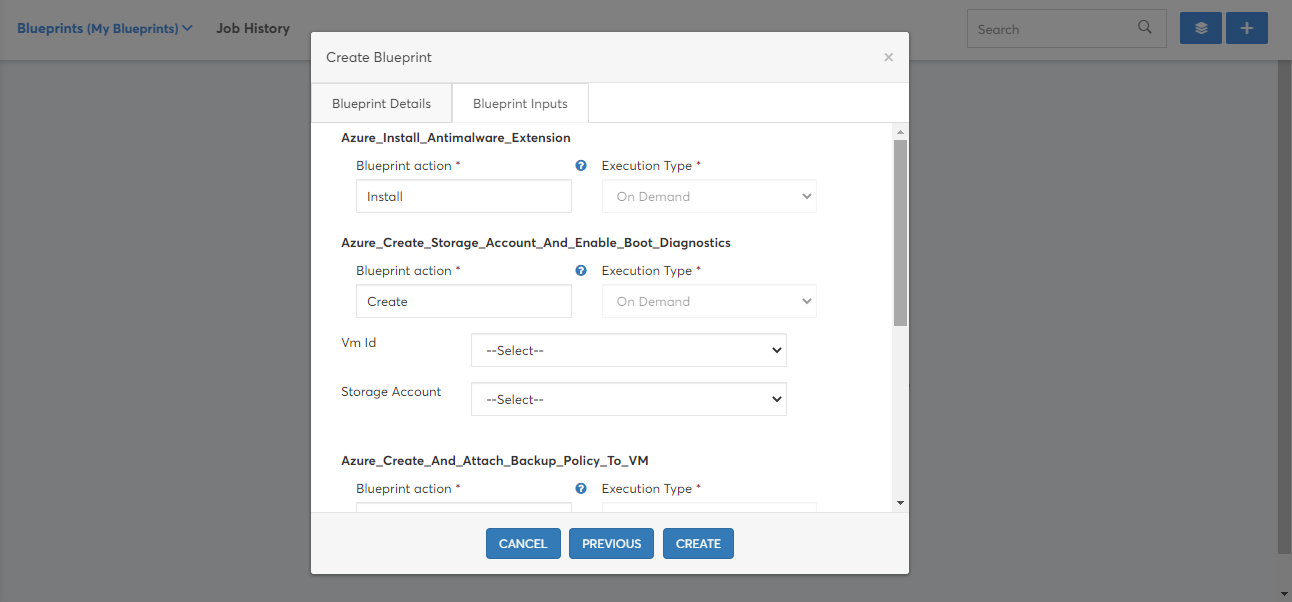
- Click on '+' button next to the 'Search' bar at top right. Create Blueprint window will be displayed with 2 sections as follows: Blueprint Details and Blueprint Inputs.
- Provide the following details to create the blueprint.
| Field | Description |
|---|---|
| Name | Name of the blueprint. |
| Description | Detailed description of the blueprint with purpose and use cases. |
| Scope | Select the required boundary for the blueprint: Account, Tenant or Private. |
| Templates | Select the required templates that must be used in the blueprint. The templates must be ordered (using reorder icon if required) to define the sequence of desired execution events. |
| Template Parameters | Values for the parameters used in the templates that are associated with the blueprint. |
- Click on Create button to create the blueprint.
A new blueprint will be created and listed in the Blueprints (My Blueprints) screen.
Viewing Blueprint Templates
The custom templates must be configured and allowed for use in blueprint creation. The eligible templates can be viewed by clicking on "View Blueprint Templates" icon.
To get more information about a specific template, click on the template to open the 'Meta Data' page. You can view the attributes related to the template and its values.
The actual content of the template, which is in 'YAML' or 'JSON' format, can be viewed by clicking on 'Content' option.
Executing Blueprints
Executes the blueprint on selected cloud accounts and performs the tasks specified in the templates configured in the blueprint. In 'Job History' you can find the status and outputs for this execution. Execute requires following inputs:
- Blueprint Job Name – Optional. If it is not provided, system generates this automatically.
- Cloud Account – Cloud accounts on which each template listed in the blueprint must be executed.
- Cloud Account Additional Information – Additional information about the cloud resources required by the templates (E.g., Resource Group, Location, Region).
- Execution Parameters – Additional parameters required by the templates for execution.
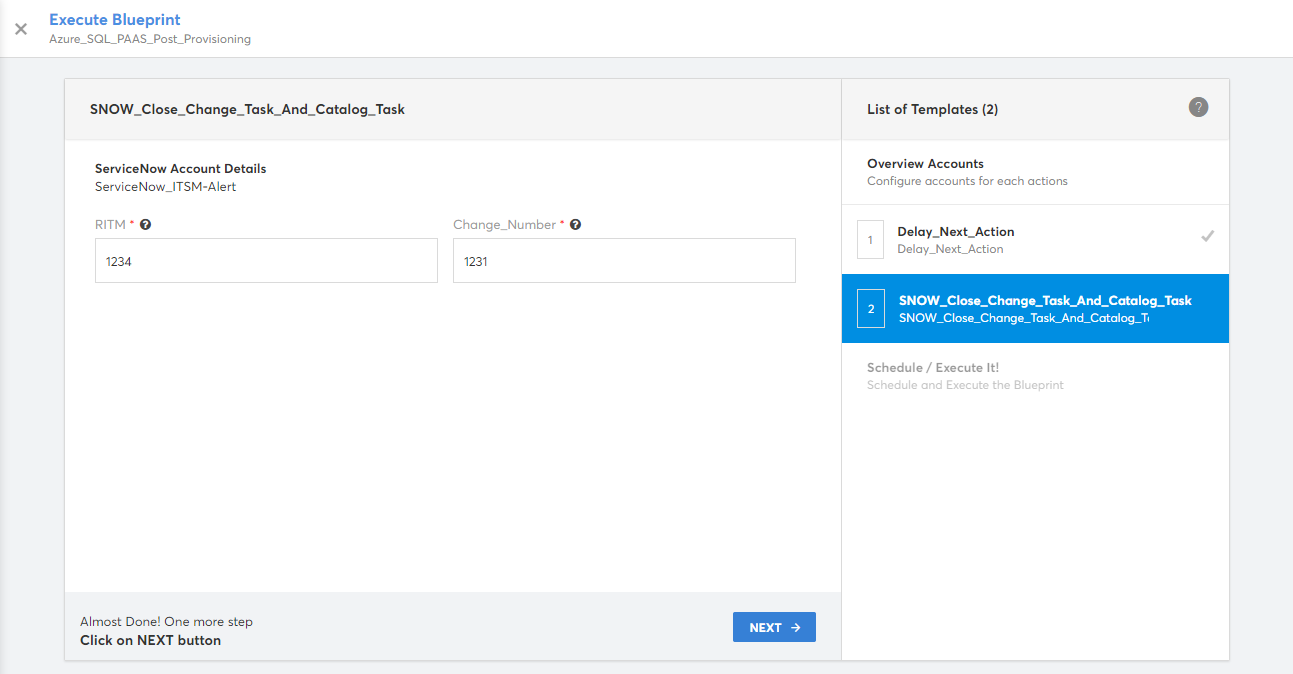
A sample Blueprint Execute window for 'Azure_SQL_PAAS_Post_Provisioning' is shown below:
- The cloud accounts to be used for each action must be selected from the available list of Azure cloud accounts in this Tenant.
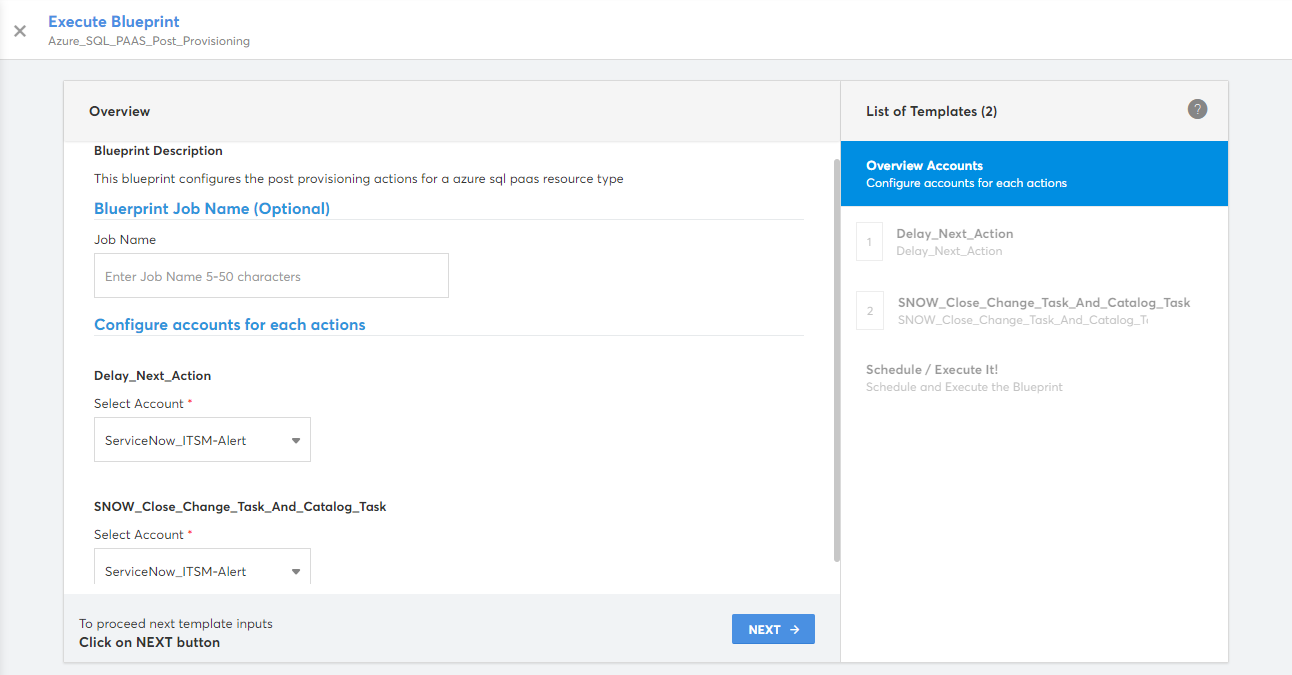
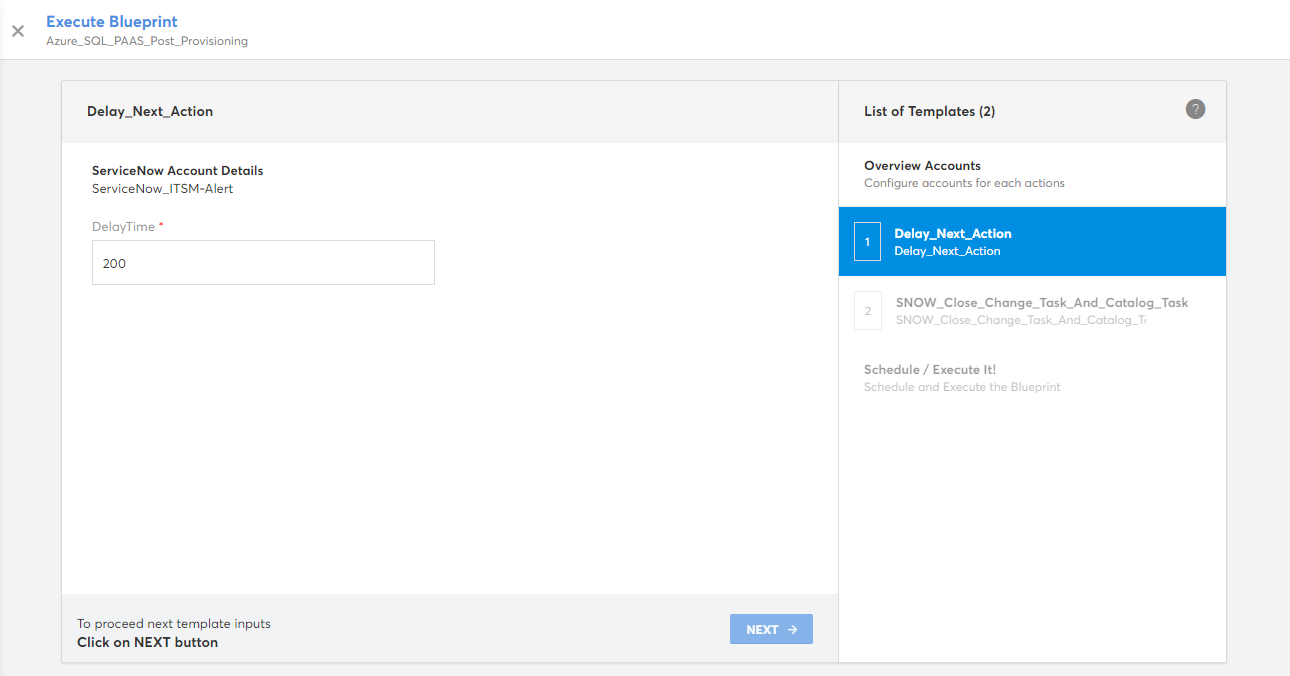
- Once the cloud accounts are selected, click on "Next" to provide the input parameters for each template. Inputs for each template will be prompted in individual screens.
- Input values can be entered in textboxes/selected from dropdown lists for parameters.
- Click "Yes, Start Execute" to execute the blueprint.
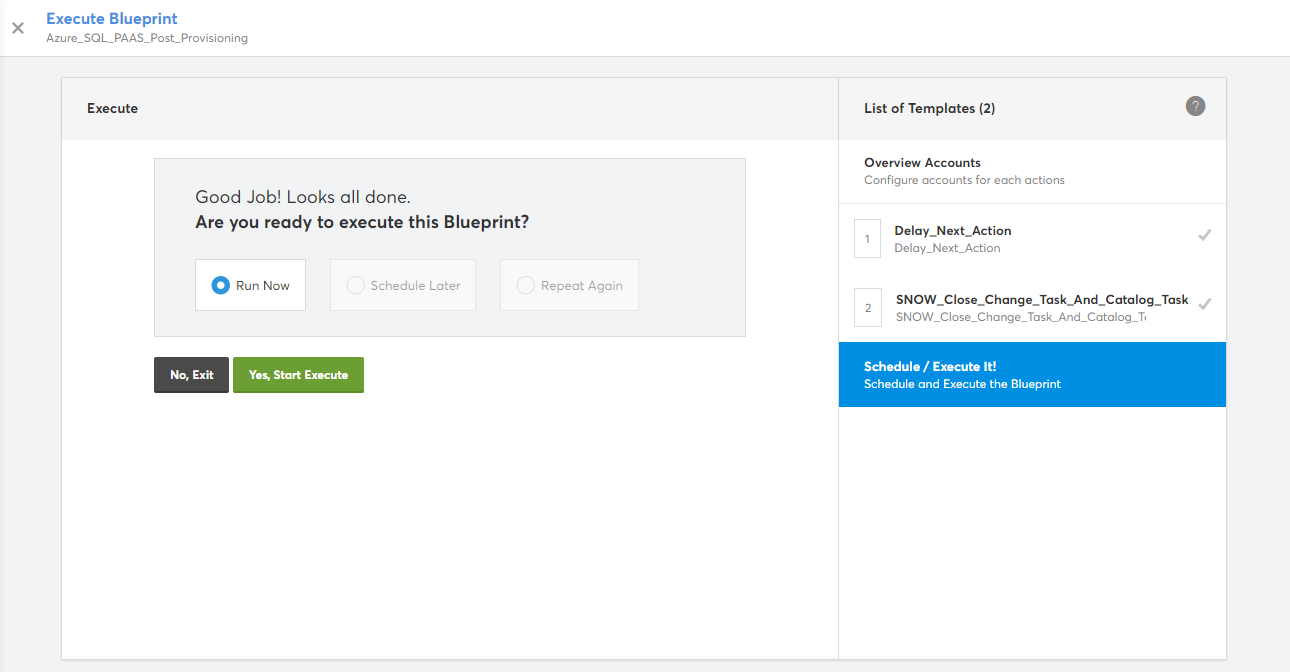
- Once the blueprint execution is initiated, it will run as a "Job" within CoreStack. You can check the execution logs and job status in the "Job History" tab.
Tips
- Most of the input parameter values are fetched automatically from the respective cloud account. This is very useful in choosing real-time values from the cloud. There is no need to login to the AWS Console to refer these details.
- You can use the "?" on the right side of each input parameter to understand more about the parameter.
Viewing Job History
This section lists the information associated with blueprint executions of the current tenant.
Blueprint Job History page offers search and filter functions to help quickly look for the executions. The Search bar is available at the top right side of the Job History tab. To Filter Jobs, you can click on the "Filter" icon placed to the right end of the Job History Details tab.
The jobs list and its information in the Job History page can be refreshed by clicking on the refresh icon.
Blueprint Jobs list displays the following columns.
- Job Name – Name of the Job which is generated by the CoreStack with blueprint name and some random characters.
- Project Name – Name of the Tenant Account used for blueprint execution.
- Run Date – Date & Time of the Job execution.
- Status – Status of the Job execution.
Blueprint Job Details will be shown on the right side by clicking a Job from the list. This will show three tabs: Inputs, Output and Tasks.
- Inputs – Cloud Account details and input parameters passed for the execution.
- Output – Outputs from the blueprint execution.
- Tasks – List of tasks or resources executed in this blueprint.
Updated 3 months ago