

Compliance Standards
Run cloud compliance assessments in CoreStack Graphion against CIS, NIST, HIPAA, and SOC 2, create custom standards, schedule scans, and set up alerts.
Feature Overview
Compliance Standards is a page within CoreStack’s Graphion module where you assess your cloud accounts against industry benchmarks and regulatory standards. Each standard contains controls, which are the individual rules your resources must meet. Use the page when you need to measure compliance, track improvement over time, or define your own standards for internal audits.
The page is most valuable to Compliance Admins and Compliance Members who run assessments and report on compliance. It supports AWS, Azure, GCP, and OCI accounts. It does not show trends or violated policies by account. To review those, use Compliance Posture.
Note: You must have at least one cloud account onboarded to Compliance before you can run an assessment or configure a notification.
The page has five tabs:
| Tab | Purpose |
|---|---|
| Marketplace Standards | System standards available to all tenants. View controls, run assessments, and download controls. |
| Custom Standards | Standards created by users in your tenant. Create, edit, delete, and assess them. |
| Assessment History | Assessment jobs across all standards, with status and progress. |
| Schedules | Recurring assessments for a standard. |
| Notifications | Email and webhook alerts for each cloud account. |
How It Works
When you run an assessment, CoreStack evaluates the selected cloud account against each control in the standard. Automated controls take their status from the policies mapped to them. Manual controls start as Open and you set their status yourself. The assessment stays In Progress until you mark it Complete, so you can track improvement within the same assessment over time.
Any policy run updates every in-progress assessment that the policy is mapped to, including runs started outside Compliance. Control statuses update to match. Once you mark an assessment Complete, it appears in Assessment History as a finished record, and CoreStack sends any configured notifications.
Prerequisites
Before you begin, ensure the following:
- Role: You have the Compliance Admin or Compliance Member role.
- Cloud account: At least one cloud account is onboarded to Compliance.
- Policies: For automated controls, the policies you want to use exist in your tenant.
- Access: You can reach
Graphion > Compliance > Compliance Standardsin the left navigation pane.
Supported Standards
CoreStack provides 1600+ policies (guardrails) mapped to the standards below. You assess once to measure compliance against multiple standards.
| Standard | Description |
|---|---|
| AC3 | Abstracted Cloud Compliance Controls, including the platform’s internal standards |
| CIS AWS 2.0 / 3.0 / 5.0 / 6.0 | Center for Internet Security Amazon Web Services Foundations Benchmark |
| CIS Azure 2.0 / 2.1 / 4.0 / 5.0 | Center for Internet Security Microsoft Azure Foundations Security Benchmark |
| CIS GCP 3.0 / 4.0 | Center for Internet Security Google Cloud Foundations Security Benchmark |
| CIS OCI 2.0 / 3.0, CIS Oracle Cloud | Center for Internet Security Oracle Cloud Foundations Security Benchmark |
| CIS Kubernetes 1.23 | Center for Internet Security Benchmark for Kubernetes version 1.23 |
| GCP CAF | Google Cloud Platform Cloud Adoption Framework |
| FedRAMP Moderate / High | Federal Risk and Authorization Management Program |
| GDPR | General Data Protection Regulation |
| HIPAA | Health Insurance Portability and Accountability Act |
| ISO/IEC 27001 | Information security management systems |
| ISO/IEC 27017 | Security controls for cloud services |
| NIST 800-171 | National Institute of Standards and Technology |
| NIST SP 800-53 Rev. 4 / Rev. 5 | National Institute of Standards and Technology |
| PCI DSS v4.0 | Payment Card Industry Data Security Standard |
| SOC 2 | System and Organization Controls Type 2: Trust Services Criteria |
Browsing Marketplace Standards
Navigate to Graphion > Compliance > Compliance Standards. The page opens on the Marketplace Standards tab.
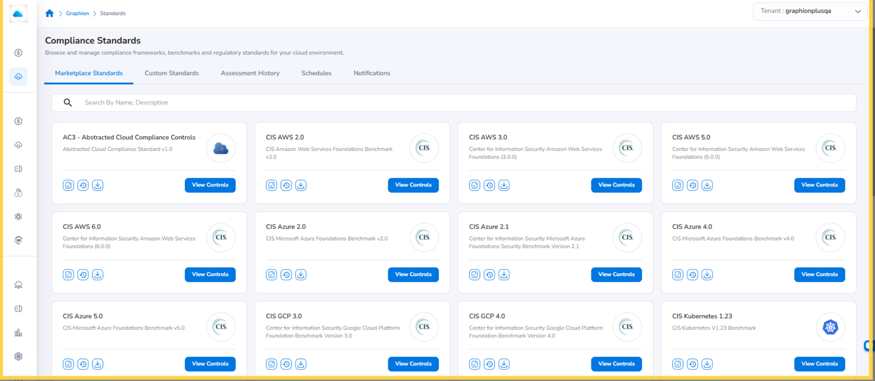
Compliance Standards page showing the five tabs and the Marketplace Standards cards
Marketplace standards are managed by CoreStack and available to all tenants. Each card shows the standard name, a short description, and three icons for Assess, History, and Download, plus a View Controls button.
To find a standard, type a name or description in the Search box above the cards.
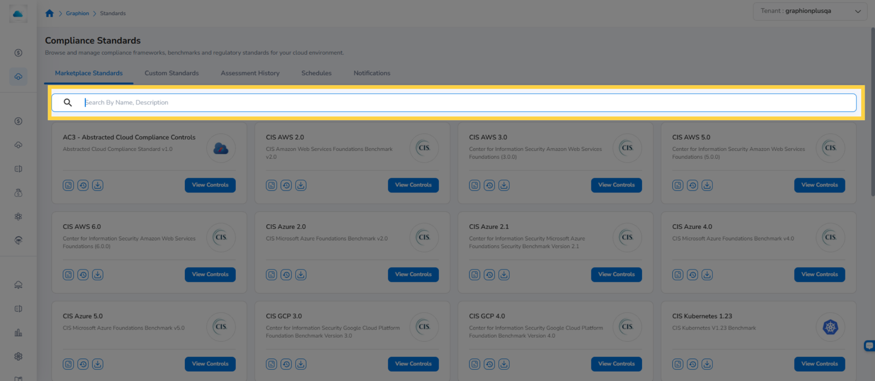
Search box above the Marketplace Standards cards
Viewing Controls in a Standard
-
Click View Controls on a standard card. The controls page opens with a Control Family / Sub-Family panel on the left.
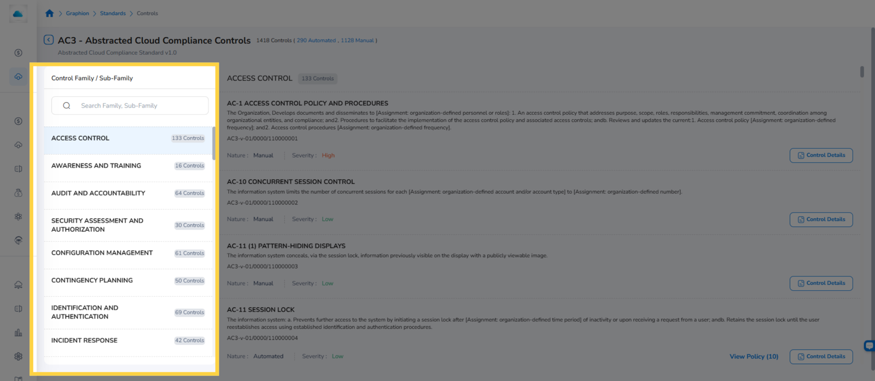
Control Family / Sub-Family panel with control counts per family
-
Click a family, or type in the panel’s search box to find one. The controls in that family appear on the right.
Each control shows its statement, its Nature (Manual or Automated), and its Severity. Automated controls also show View Policy, which lists the policies mapped to the control.
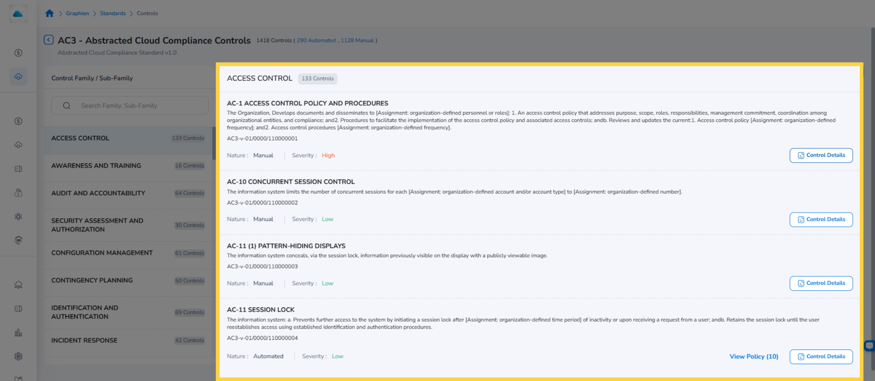
Controls in a family showing Nature, Severity, View Policy, and Control Details
- Click Control Details on a control. The Control Details panel opens.
The panel shows the control name, family, and statement under Control Attributes. Control Action Attributes lists the category, baseline, classification, level, nature, purpose, and action method.
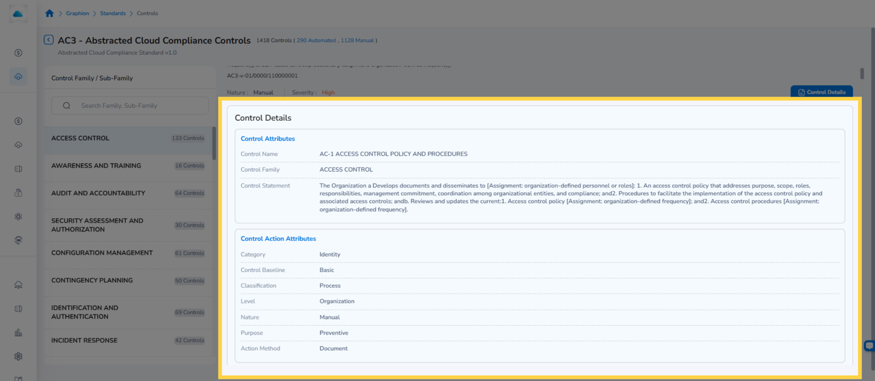
Control Details panel with Control Attributes and Control Action Attributes
Downloading Controls
-
Click the Download icon on the standard card. CoreStack prepares the file.
-
In the Download Controls dialog, click Download when the message “Your download is ready!” appears.
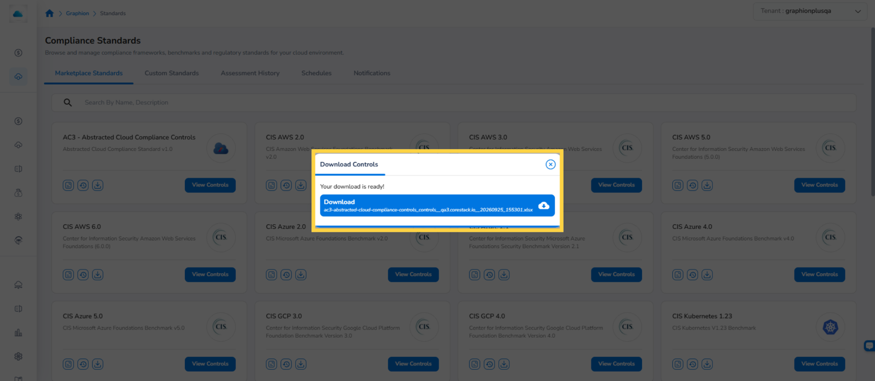
Download Controls dialog with the Download button
Running an Assessment
An assessment evaluates one cloud account against one standard. You can run it on demand from any Marketplace or Custom standard.
-
Click the Assess icon on the standard card. The Start Compliance Assessment dialog opens.
-
In the Cloud Accounts list, select the cloud account to assess.
-
Click Start Assessment. CoreStack assesses the account’s resources against the controls in the standard.
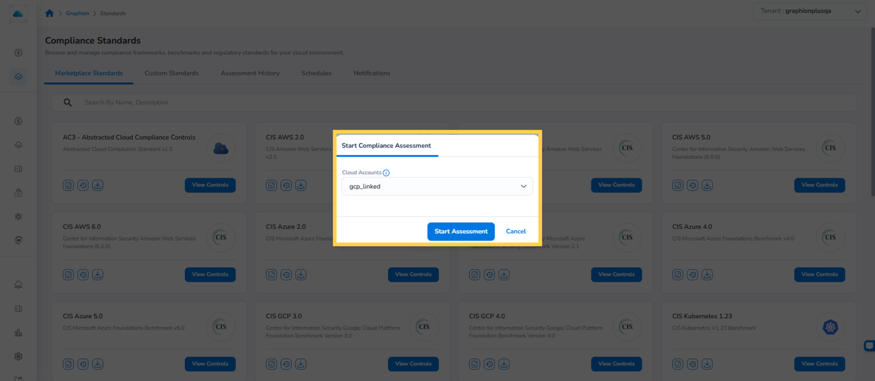
Start Compliance Assessment dialog with the Cloud Accounts list and Start Assessment button
Note: If the standard already has an assessment in progress for the account, you can complete the current assessment first before starting a new one.
You can also run an assessment at the control level.
Continuing an Assessment
An assessment stays In Progress until you mark it Complete. Use Continue Assessment to work through it control by control through the Compliance Posture page.
Open the in-progress assessment. The control-by-control view opens.
- Review the status of each control. Automated controls show the result of their mapped policies.
- Answer each control that needs your input, and add comments and attachments as evidence.
- To refresh results, re-scan at the standard level or the control level.
- When you finish, click Complete to mark the assessment complete*[*
Policy runs update in-progress assessments automatically. You don’t need to re-scan after a mapped policy runs, and this includes runs started outside Compliance.
Updating Manual Controls
Manual controls cannot be automated, so you set their status yourself. Each manual control starts as Open.
- In the control-by-control view, open the manual control.
- Set the status to Success or Violation.
- Add a comment and attach evidence, such as a screenshot or document.
- Save your changes. The control status and the assessment summary update.
You can also override the status of an automated control. Add a comment to explain the override.
Managing Assessment History
The Assessment History tab lists assessment jobs across all standards. Each row shows the assessment job ID, standard, cloud account, user, created date, last scan date, and status. An assessment shows IN_PROGRESS until you mark it complete, then COMPLETED.
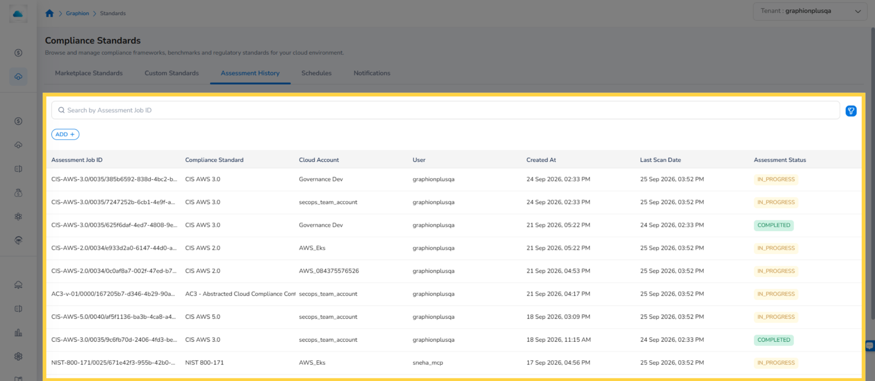
Assessment History tab with assessment jobs and status column
-
Search: Type an assessment job ID in the Search box.
-
Filter: Click ADD and select Cloud Account or Compliance Standard, then choose a value.
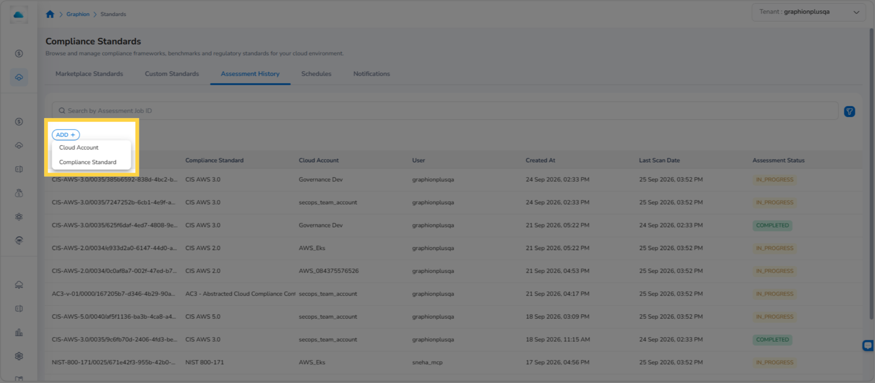
ADD menu with Cloud Account and Compliance Standard options
To see the history of one standard, click the History icon on its card. The tab opens filtered to that standard.
Managing Custom Standards
Custom standards are visible only to users in your tenant. Open the Custom Standards tab to see them. Each card has the same icons as Marketplace cards, plus Edit and Delete.
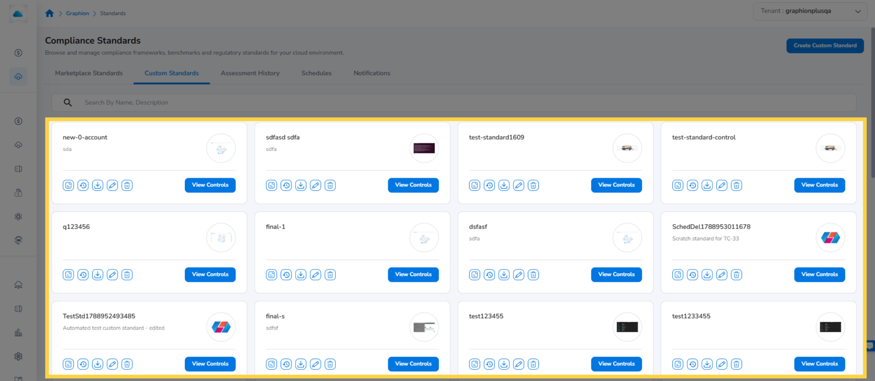
Custom Standards tab showing cards with Assess, History, Download, Edit, and Delete icons
Creating a Custom Standard
You create the standard and all its controls in a single upload.
-
On the Custom Standards tab, click Create Custom Standard. The New Standard panel opens.
-
Under Basic Information, enter a Name and, optionally, a Description.
-
Under Configuration, select a Cloud Provider and a Scope
-
Under Assets, click Choose Logo and select an image. Supported formats are PNG and JPG. The recommended size is 48 x 48 px, and the maximum file size is 2 MB.
-
In Control Definitions, click Upload and select your control definitions file.
-
Click Create. The new standard appears on the Custom Standards tab.
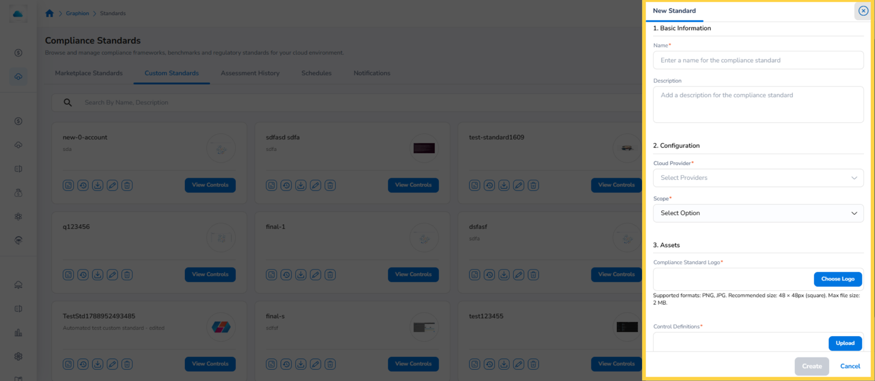
New Standard panel with Basic Information, Configuration, and Assets sections
Note: CoreStack validates the file before it creates the standard. If validation fails, correct the file and upload it again.
Editing a Custom Standard
-
Click the Edit icon on the standard card. The Edit Standard panel opens.
-
Update the name, description, cloud provider, scope, or logo.
-
Click Update. CoreStack runs validation checks before it saves the changes.
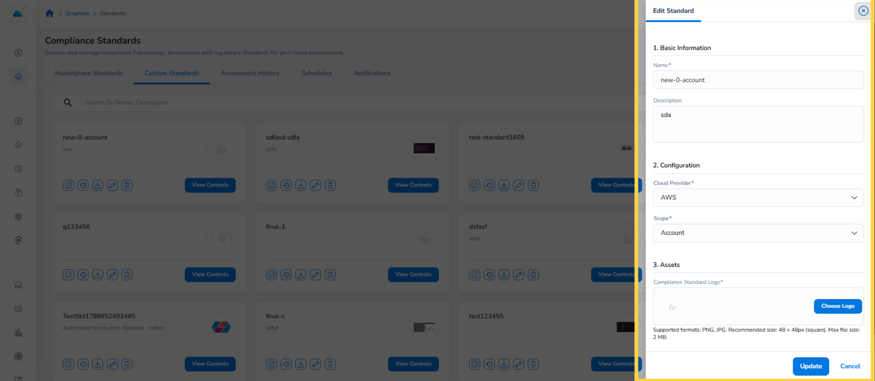
Edit Standard panel with Update and Cancel buttons
Deleting a Custom Standard
-
Click the Delete icon on the standard card. The Delete Standard dialog opens.
-
Click Yes to delete the standard, or No to keep it. CoreStack runs validation checks before it deletes the standard.
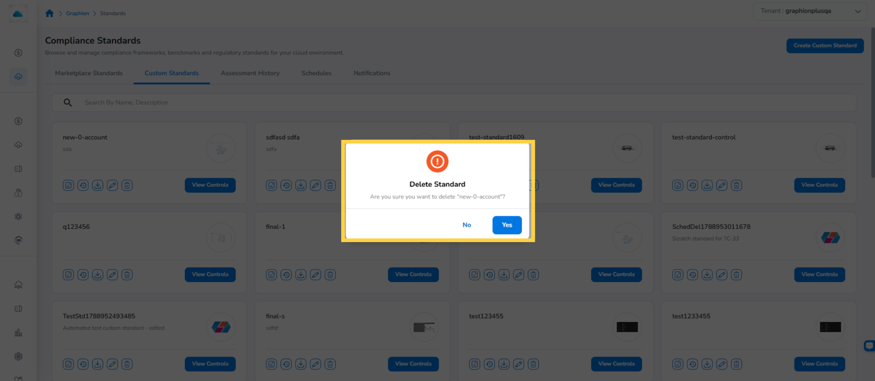
Delete Standard confirmation dialog with No and Yes buttons
Managing Controls in a Custom Standard
Click View Controls on the card to add, edit, or delete controls. You can add a control in two ways:
- Form: Add one control at a time and fill in its fields.
- Upload: Upload a CSV or XLSX file to add many controls at once.
For an automated control, map policies while you create or edit the control. No separate mapping step is needed
Managing Schedules
Schedules run assessments automatically. Open the Schedules tab. The list shows the schedule name, standard, cloud account, recurrence, next run time, and who requested it. Upcoming schedules appear by default.
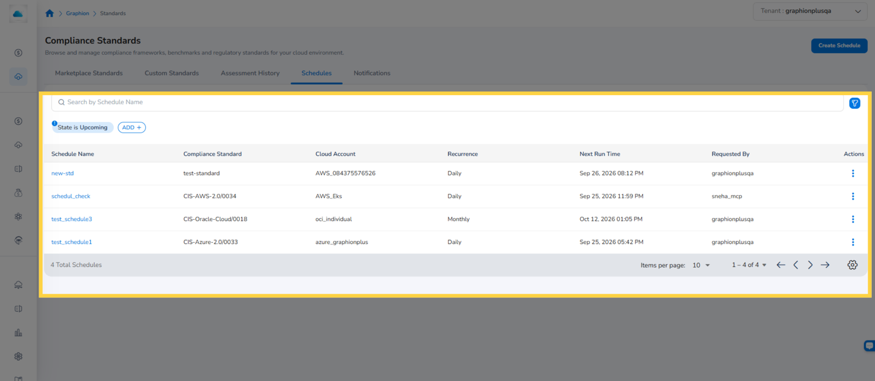
Schedules tab with the schedule list and Create Schedule button
To narrow the list, click ADD and select Compliance Standard or Recurrence.
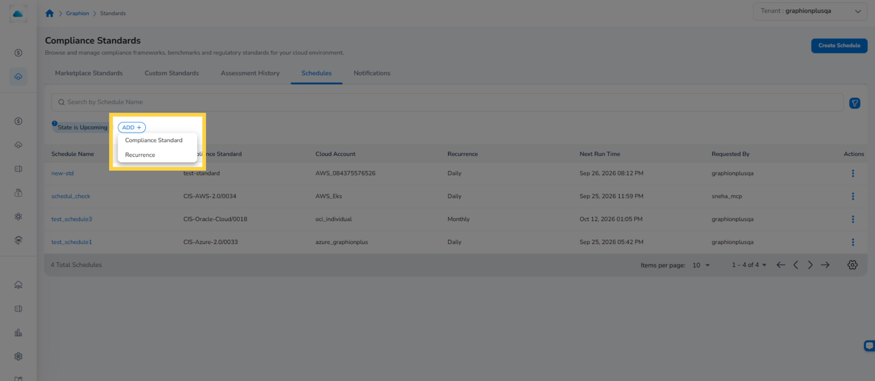
ADD menu with Compliance Standard and Recurrence options
Creating a Schedule
-
Click Create Schedule. The Create Schedule panel opens.
-
In Compliance Standard, select a standard.
-
In Schedule Name, enter a name. Optionally, add a Description.
-
Set the Start Date and Start Time.
-
In Recurrence, select how often the assessment runs, select from Once, Daily, Weekly, or Monthly.
-
Set the End Date.
-
Click Create. The schedule appears in the list.
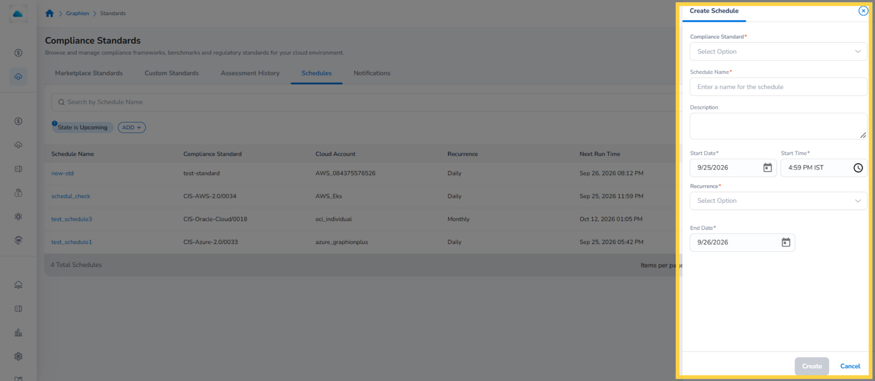
Create Schedule panel with standard, name, start date and time, recurrence, and end date
Editing or Deleting a Schedule
-
Click the ellipsis (…) in the Actions column next to the schedule.
-
Select Edit to change the schedule, then click Update. Select Delete to remove it.
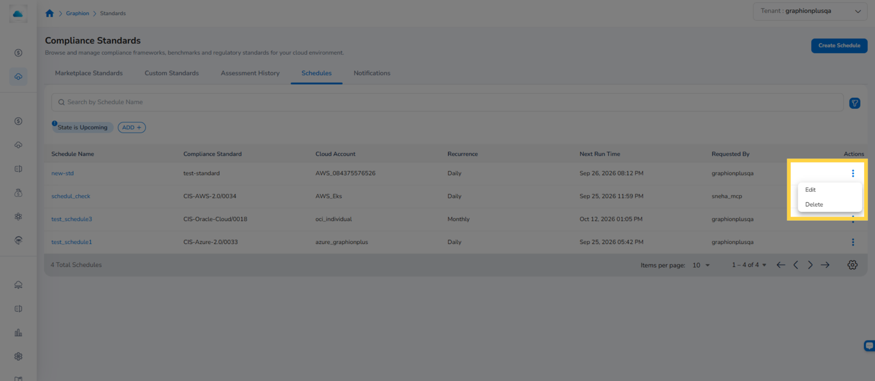
Actions menu with Edit and Delete options
Managing Notifications
Notifications send compliance alerts to the email addresses and webhooks you choose for a cloud account. CoreStack sends a notification only when a full automated policy scan finishes or when an assessment is marked Complete.
Open the Notifications tab. The list shows each cloud account, its provider, and the channels enabled for it.
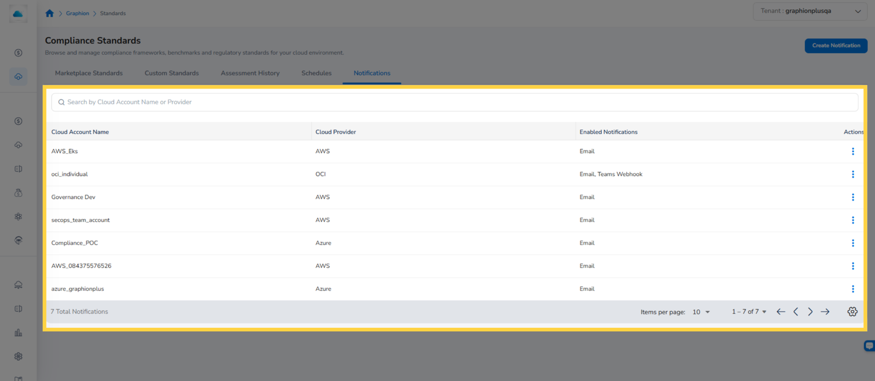
Notifications tab listing cloud accounts, providers, and enabled notifications
Creating a Notification
- Click Create Notification. The Add Compliance Notification panel opens.
- In Cloud Account, select an account onboarded to Compliance.
- Enter an email address and click Add. Repeat for each recipient.
- Enter a webhook URL and click Add. Optionally, do the same for Microsoft Teams Webhook.
- Click Save & Apply.
Note: You must add at least one email address, webhook, or Microsoft Teams webhook.
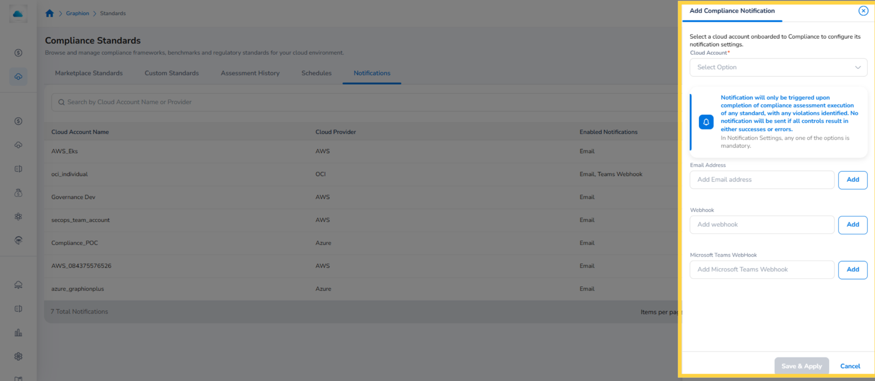
Add Compliance Notification panel with account list and Email, Webhook, and Microsoft Teams fields
Editing or Deleting a Notification
- Click the ellipsis (…) in the Actions column next to the cloud account.
- Select Edit. In the Edit Compliance Notification panel, add or remove recipients, then click Save & Apply. Select Delete to remove the notification
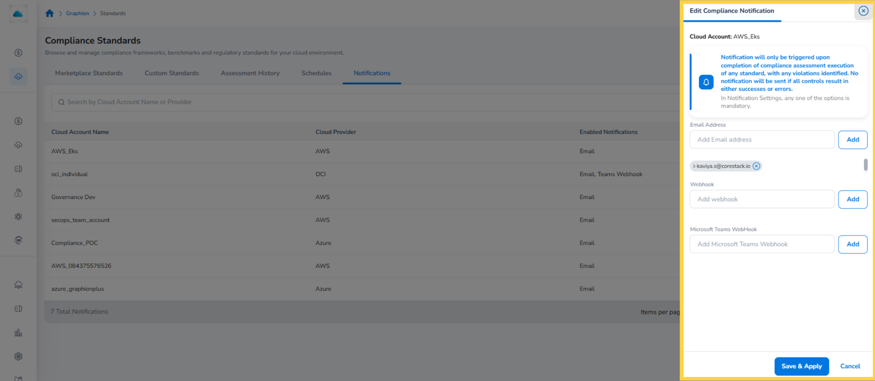
Edit Compliance Notification panel with recipient chips and Save & Apply
Frequently Asked Questions
Q: Why is my assessment still In Progress?
An assessment stays In Progress until you mark it Complete. This lets you track improvements within the same assessment as policies run and controls change. Open the assessment and click Complete when you are done.
Q: Do policy runs from outside Compliance update my assessment?
Yes. Any policy run updates the in-progress assessments that the policy is mapped to, and control statuses update to match. You don’t need to start a new assessment.
Q: What happens to the current assessment when I run a standard again?
You can complete the current assessment first, then start a new one. Completed assessments stay in Assessment History.
Q: Can I change the status of an automated control?
Yes. You can override an automated control’s status and add a comment. Manual controls start as Open and you set them to Success or Violation.
Q: Who can see my custom standards?
Only users in your tenant. Marketplace standards are available to all tenants and cannot be edited.
Q: Do I need a separate step to map policies to a control?
No. Map policies while you create or edit the control.
Troubleshooting
Custom standard upload fails
Cause: The control definitions file did not pass validation, for example a required column is missing or a value is invalid.
Solution:
- Review the error message shown after the upload.
- Correct the file and upload it again.
- Click Create. The standard appears on the Custom Standards tab.
If the issue persists, contact CoreStack support with: tenant ID, standard name, the file you uploaded, and a screenshot of the error.
Standard cannot be updated or deleted
Cause: CoreStack runs validation checks before it updates or deletes a custom standard, and one of the checks failed.
Solution:
- Read the message shown in the panel or dialog.
- Resolve the condition it describes, for example complete an in-progress assessment or delete a linked schedule.
- Try the update or delete again.
Notification email or webhook not received
Cause: Notifications are sent only when a full automated policy scan finishes or an assessment is marked Complete. If neither event has happened, no notification is sent. The recipient address or webhook may also be incorrect.
Solution:
- Open the Notifications tab and confirm the cloud account has the correct recipients.
- Check Assessment History to confirm an assessment completed.
- Re-enter the webhook URL if you changed it recently, then click Save & Apply.
If you still don’t receive notifications, contact CoreStack support with: tenant ID, cloud account name, assessment job ID, and the recipient email or webhook.
Cloud account is missing from the Assess or Notification list
Cause: The cloud account is not onboarded to Compliance.
Solution:
- Confirm the account is onboarded and active.
- Refresh the page and open the list again.
Updated 12 days ago