

Zoho ServiceDesk
Introduction
CoreStack’s integration with Zoho ManageEngine with ServiceDesk enables alerts related to various policies to be generated automatically in Zoho based on how the setup is done. Every alert triggered in the CoreStack application generates a ticket or incident in Zoho ServiceDesk automatically, which users can then view in Zoho ServiceDesk. After the issue related to the ticket is resolved, the open ticket is set to close automatically based on the resolution captured.
To setup this Zoho integration, it’s required for users to be onboarded in the CoreStack application.
- For Software-as-a-Service (SaaS) accounts, an OAUTH authentication method is used for account onboarding.
- For on-premise accounts, an API Key-based authentication method is used for account onboarding.
After this, the modules of ServiceDesk are mapped to appropriate people or teams and alerts are set as per your requirements. These alerts are related to CoreStack policy alerts, monitoring alerts, and budget alerts. After alerts are set, user authorization is done appropriately.
Account Authentication
Perform the following steps to onboard a Zoho ServiceDesk account in CoreStack:
- Login to the CoreStack application and navigate to Settings > Integrated tools.
ZOHO_ServiceDesk is displayed in the left pane. - Click ZOHO_ServiceDesk.
Any accounts already onboarded in CoreStack will be listed here.
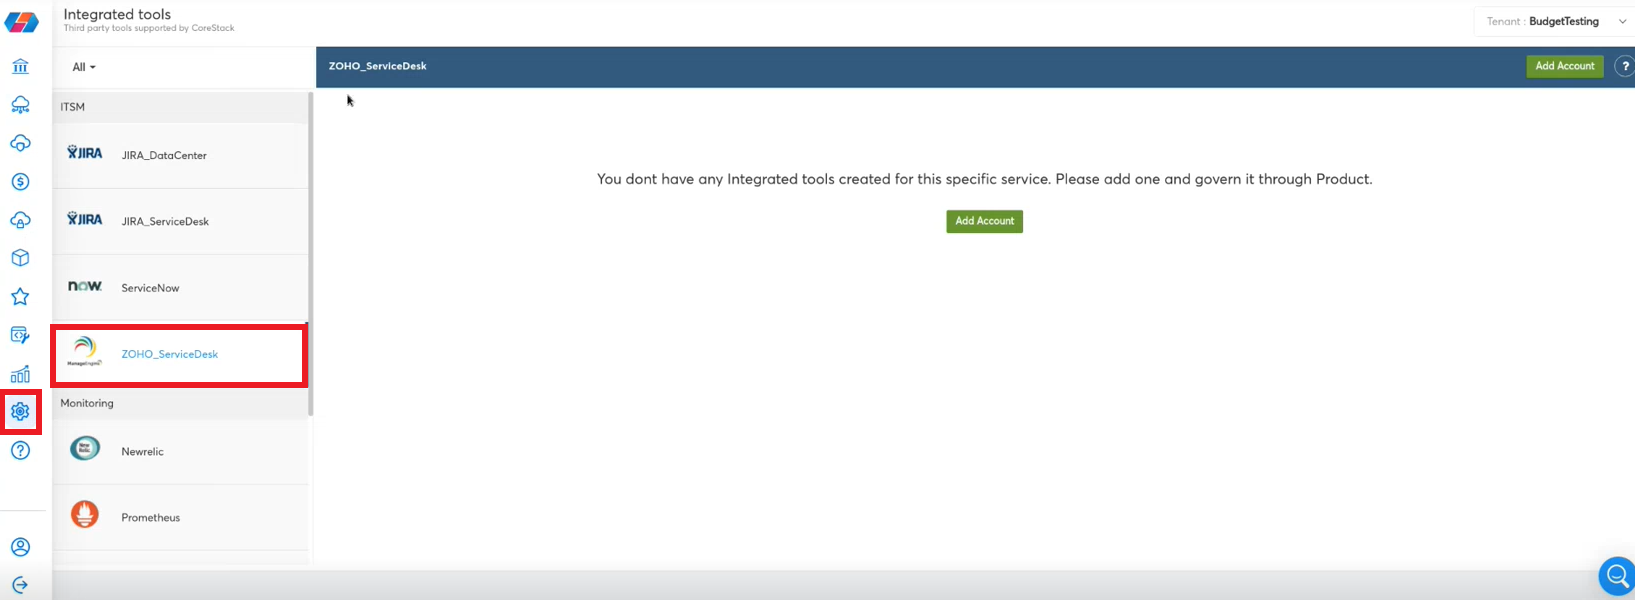
- To add a new account, click Add Account.
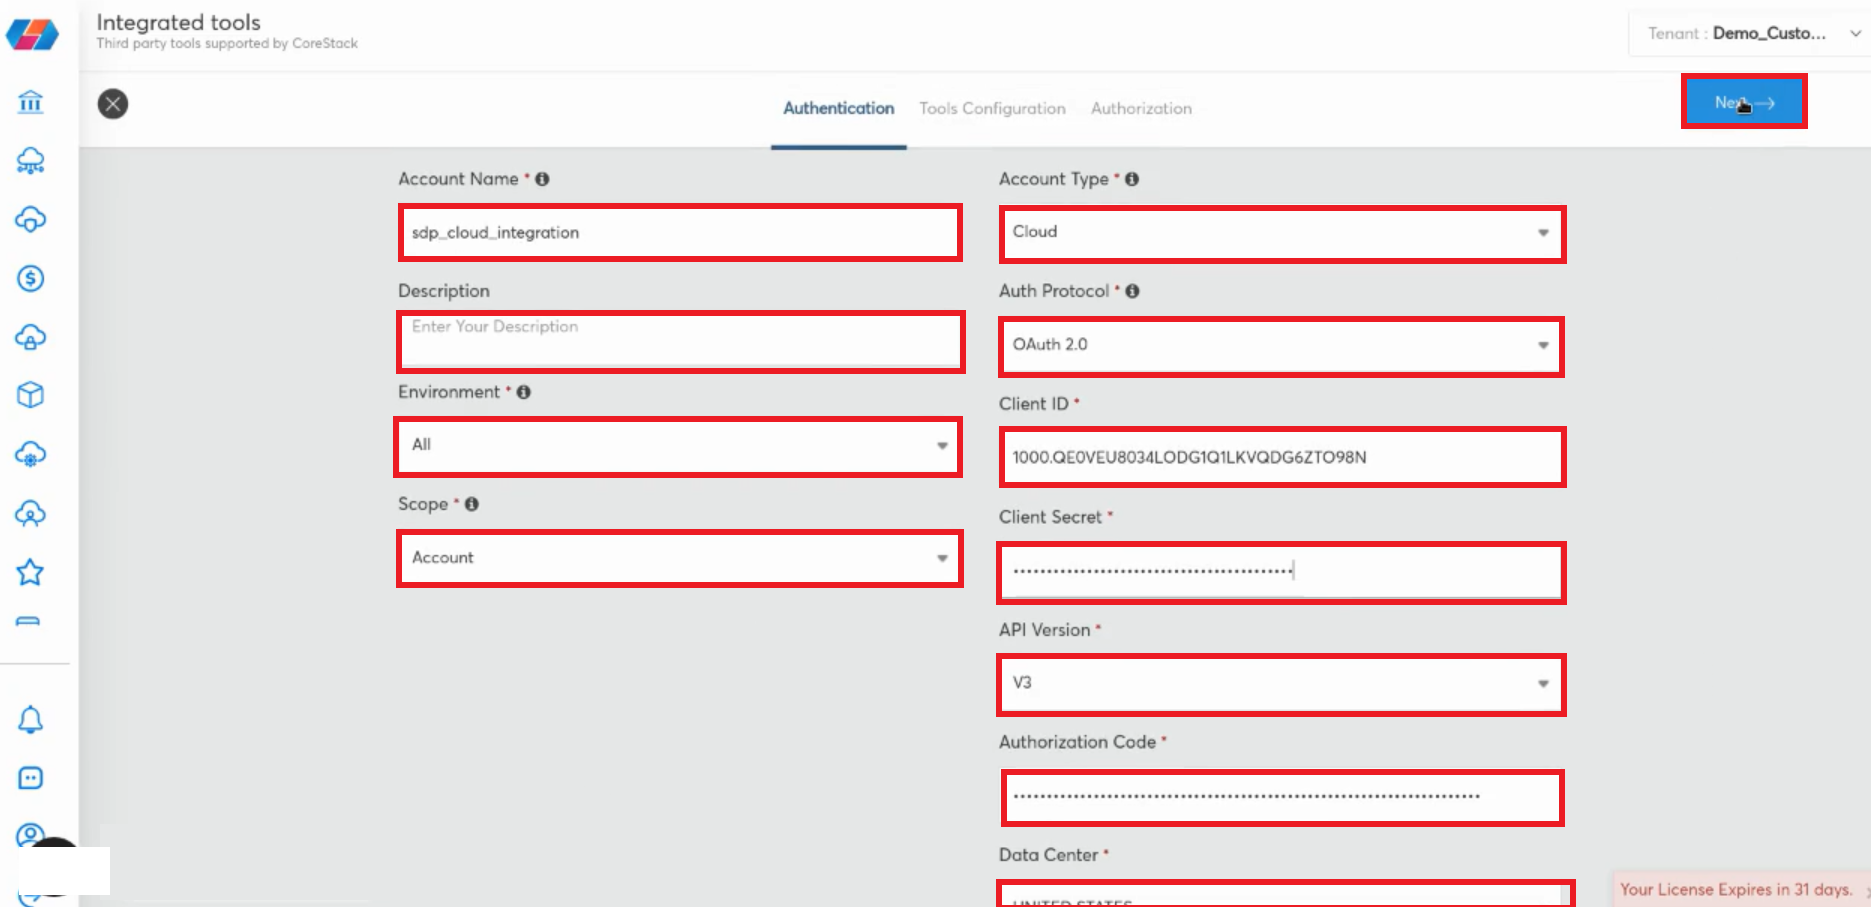
- In the Account Name box, type the name of the account.
- In the Description box, type a description for the account.
- In the Environment list, click to select your preferred option.
- In the Scope list, click to select the scope for this Zoho account (Account, Tenant, or Private):
- Account: This refers to a single account.
- Tenant: Tenants are under a single account.
- Private: This refers to a single account user.
- In the Account Type list, click to select Cloud.
- On-premise: The user needs to select this option for API Key-based authentication for account onboarding.
- Cloud: The user needs to select this option when the user buys the service license and CoreStack performs the integration using OAUTH authentication method for account onboarding.
- In the Auth Protocol box, type OAuth 2.0.
- In the Client ID box, paste the client ID from Zoho API Console. Refer to the topic Setting Up OAUTH Integration for Cloud Accounts and perform steps 1-5 to get the client ID.
- In the Client Secret box, paste the ID from Zoho API Console. Refer to the topic Setting Up OAUTH Integration for Cloud Accounts and perform steps 1-5 to get the client secret code.
- In the API Version list, select the appropriate version of Zoho ServiceDesk.
- In the Authentication Code box, paste the authentication code. Refer to the topic Setting Up OAUTH Integration for Cloud Accounts and perform steps 1-9 to get the authentication code.
- In the Data Center list, click to select the data center location. Refer to the table below for help identifying the data center region.
| Data Center | API Domain URL | Accounts Server URL |
|---|---|---|
| UNITED STATES | ||
| JAPAN | ||
| AUSTRALIA | ||
| INDIA | ||
| CHINA | ||
| EUROPE |
- Select the disclaimer at the end of the page.
- Click Next.
Setting Up OAUTH Integration for Cloud Accounts
Users must access the ZOHO API console to get the Client ID and Client Secret code.
Perform the following steps to configure details for OAUTH integration:
-
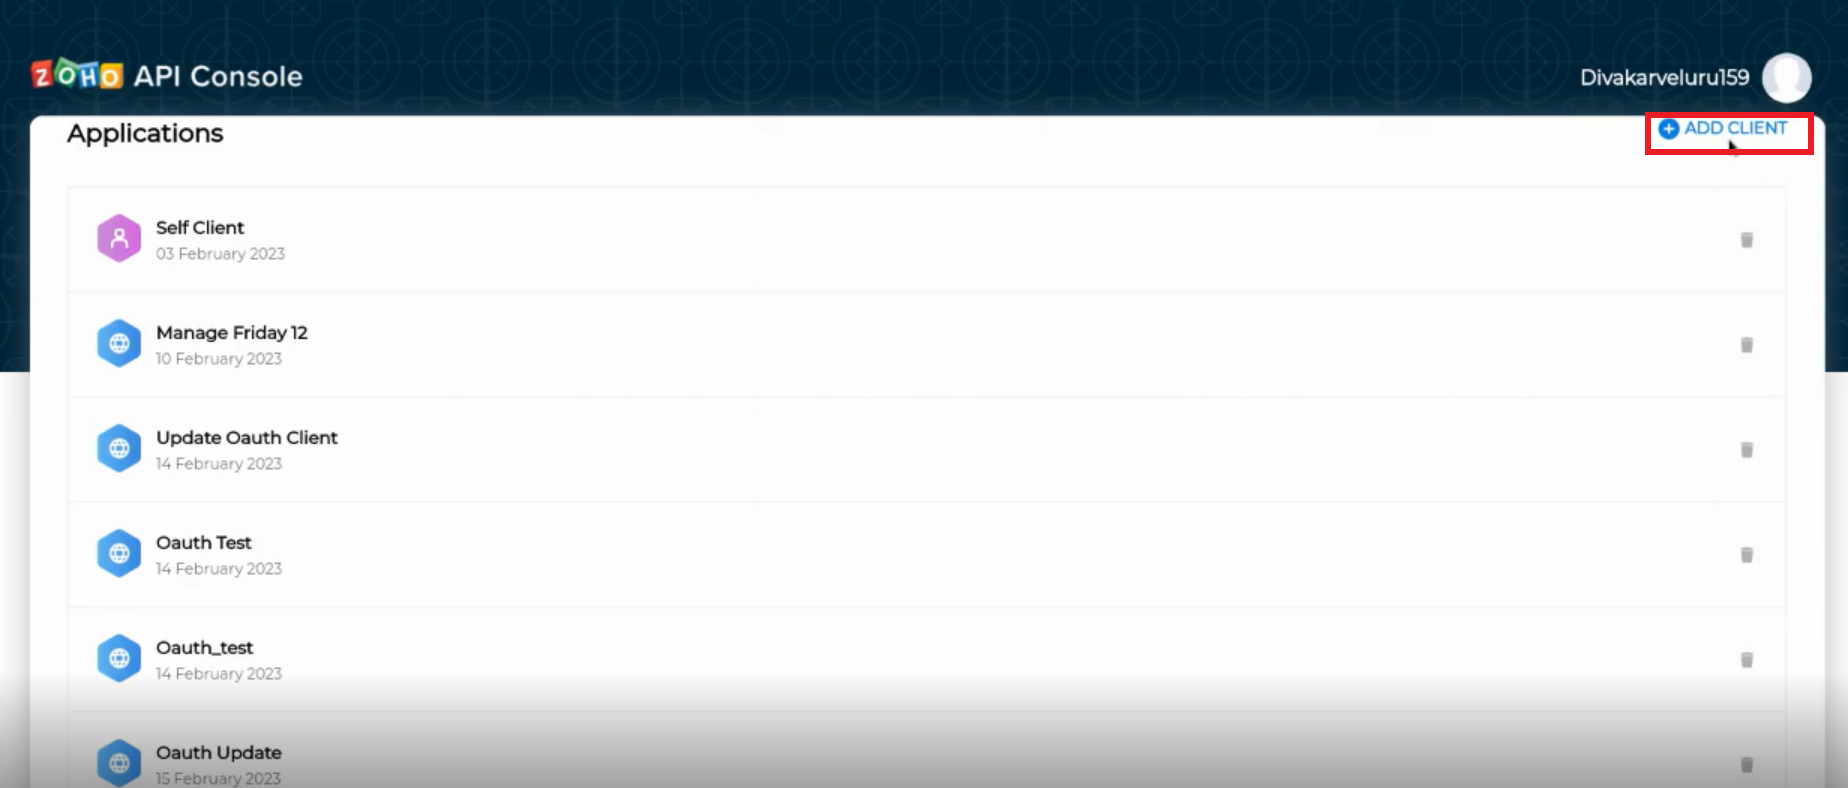
Access the website: https://api-console.zoho.com.
-
Click ADD CLIENT.
- Click Server-based Applications.
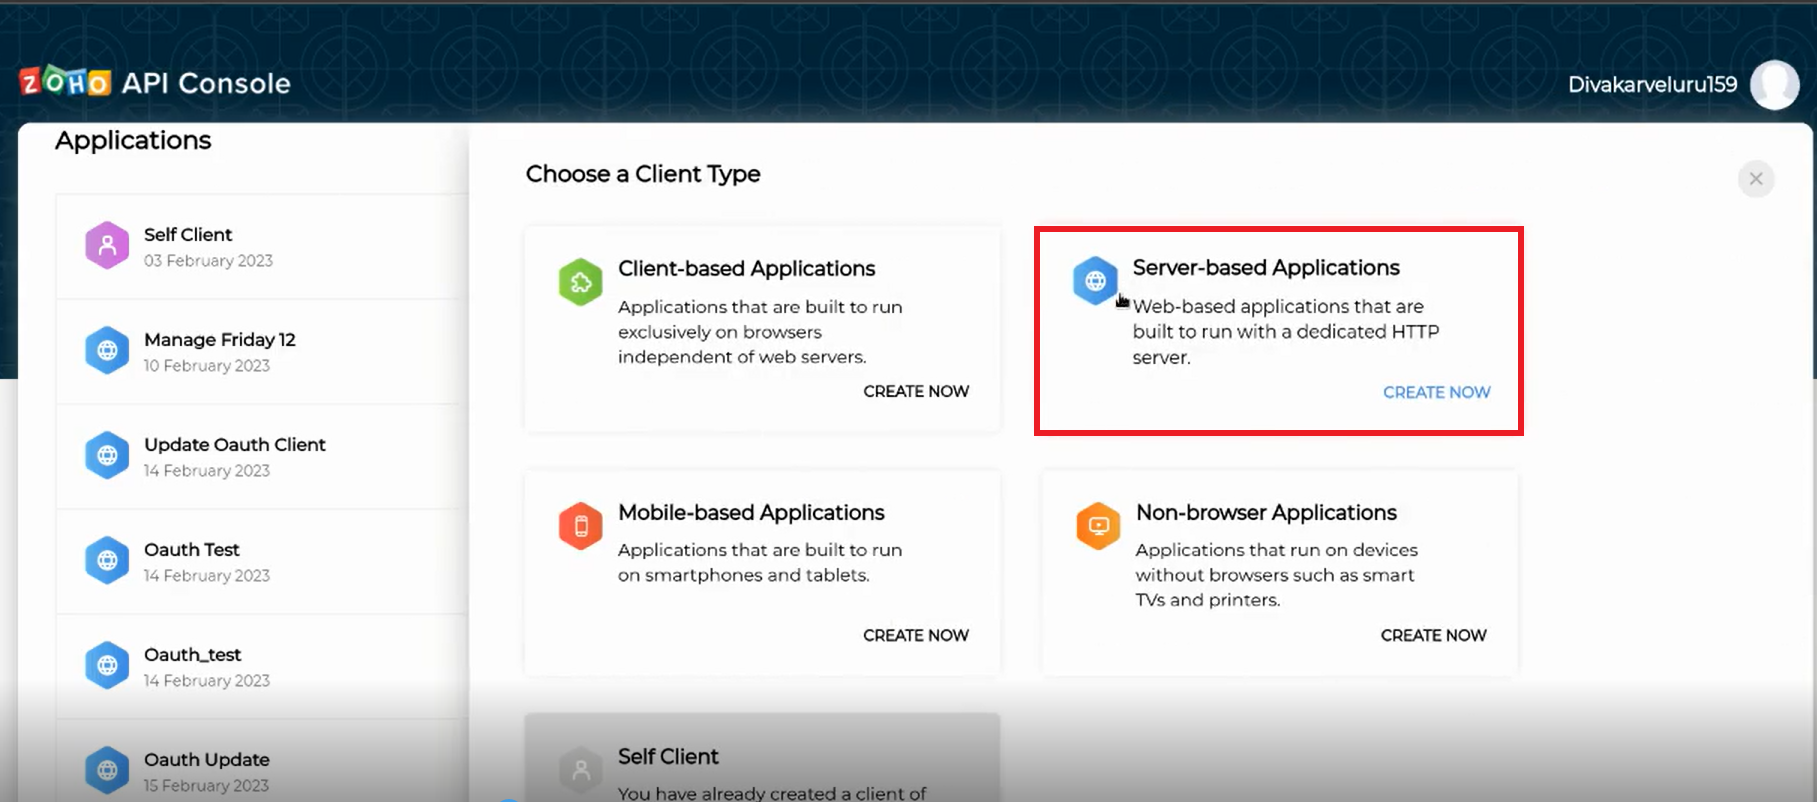
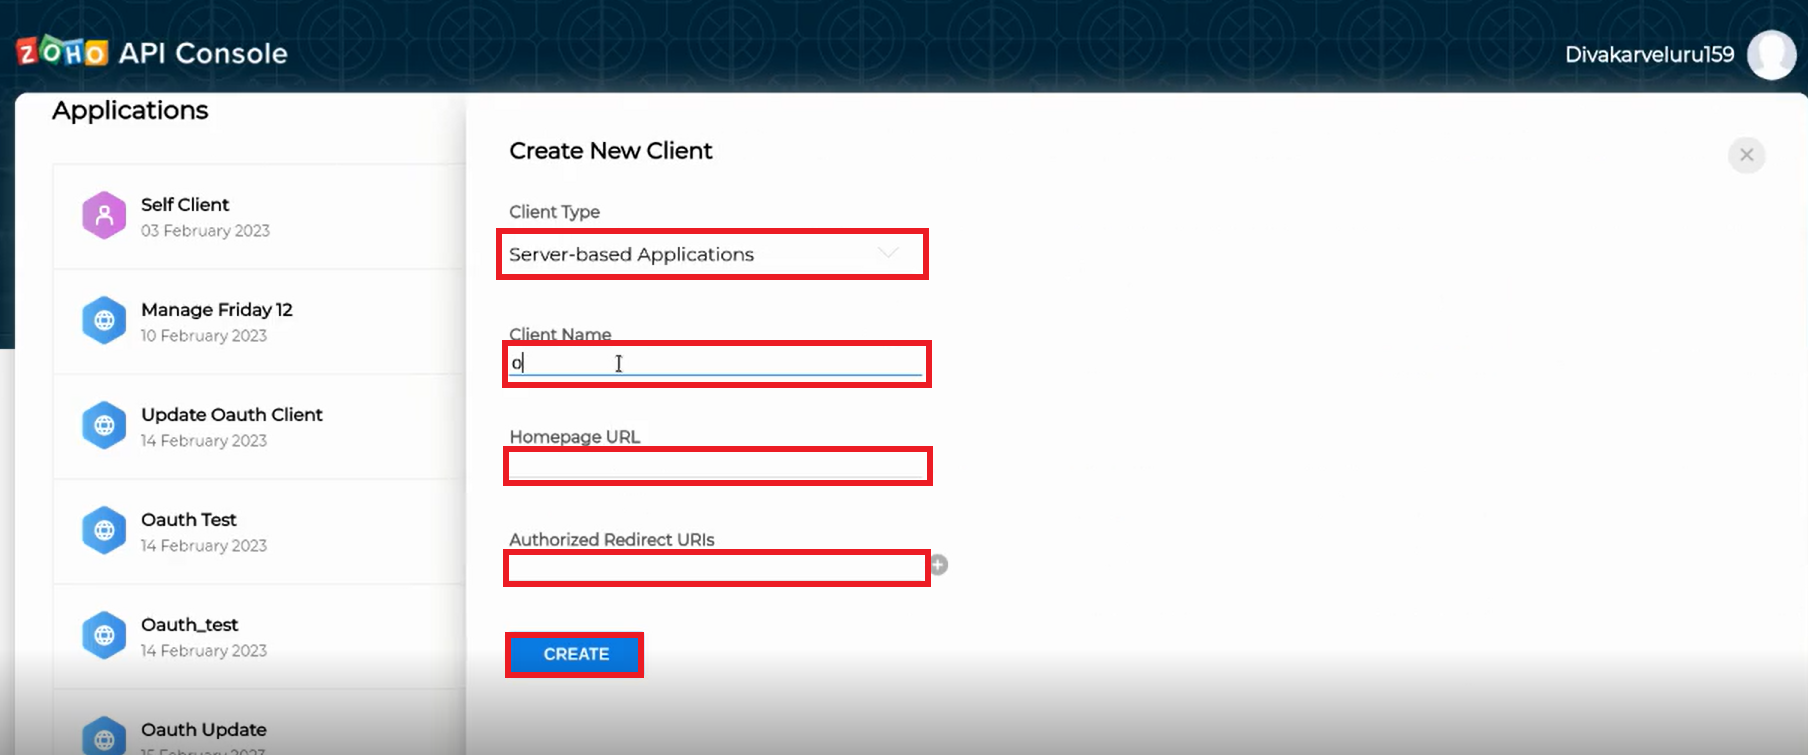
- On the Create New Client screen, fill the following details:
a. In the Client Type list, click to select Server-based Applications.
b. In the Client Name box, type the name of the client.
c. In the Homepage URL box, type the URL .
d. In the Authorized Redirect URLs box, type .
e. Click CREATE.
- In the Client Secret tab, copy the Client ID and Client Secret.
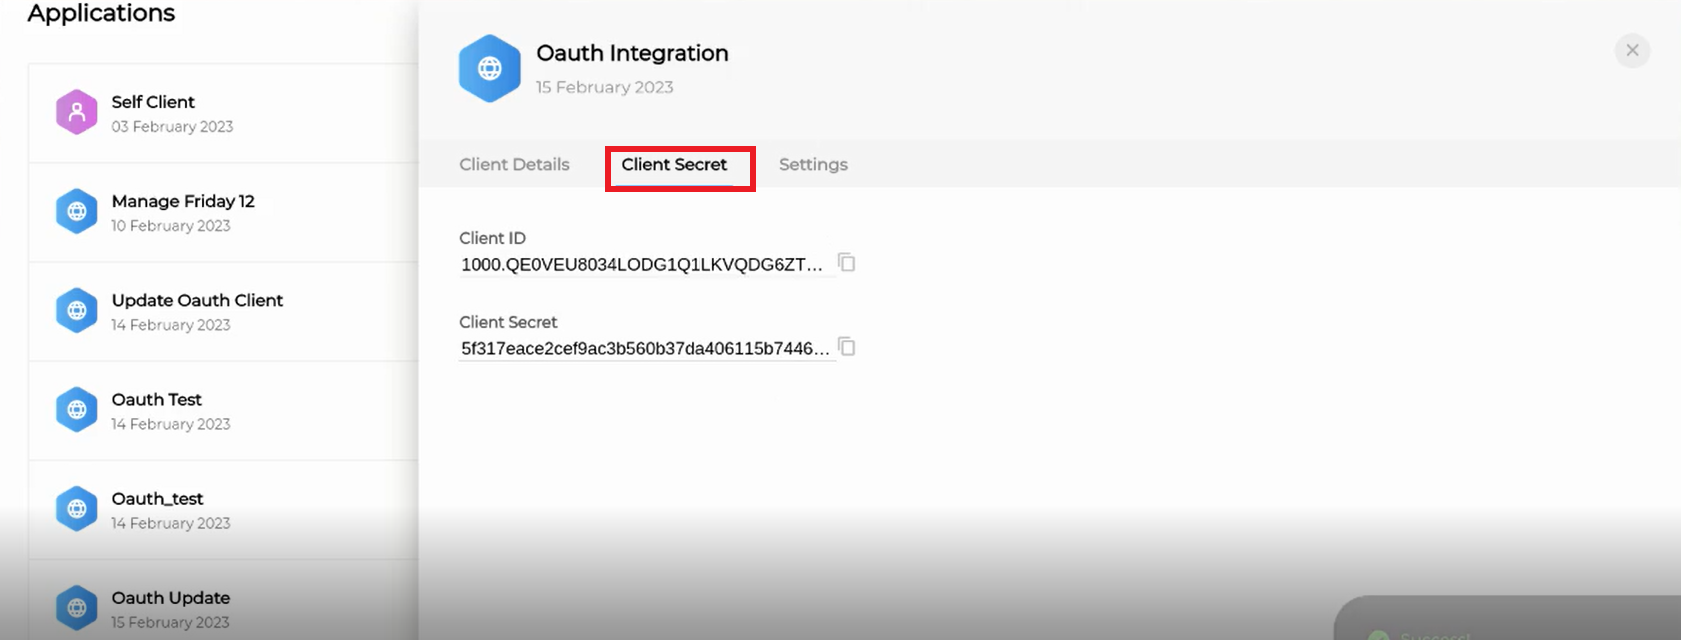
Note:Click the square icon to copy the Client ID and the Client Secret Code.
-
To get the authentication code, use the link format shown below and perform the following:
https://<data_center_token_url>/oauth/v2/auth?access_type=offline&response_type=code&client_id=<client_id>&scope=<scopes>&redirect_uri=http://localhost- <data_center_token_url>: Based on the data center, paste the account’s server URL (for example, accounts.zoho.com is the URL for the data center in the United States).
- <client_id>: Paste the client ID from the Client Secret tab.
- <SCOPES>: Scope can be either the problem module scope or the request module scope, along with the read-only scope.
- Read only scope: SDPOnDemand.setup.READ
- Problem module scope: SDPOnDemand.problems.ALL
- Request module scope: SDPOnDemand.requests.ALL
For example, for the problem module account, scope will be read-only scope along with the problem module scope.
For example, for the request module account, scope will be read-only scope along with the request module scope.https://accounts.zoho.com/oauth/v2/auth?access_type=offline&response_type=code&client_id=<client_id>&scope=SDPOnDemand.setup.READ,SDPOnDemand.Problems.ALL&redirect_uri=http://localhosthttps://accounts.zoho.com/oauth/v2/auth?access_type=offline&response_type=code&client_id=<client_id>&scope=SDPOnDemand.setup.READ,SDPOnDemand.Requests.ALL&redirect_uri=http://localhost
-
After the relevant details are added in the URL format explained above, paste the URL in the address bar of a browser and press the Enter key.
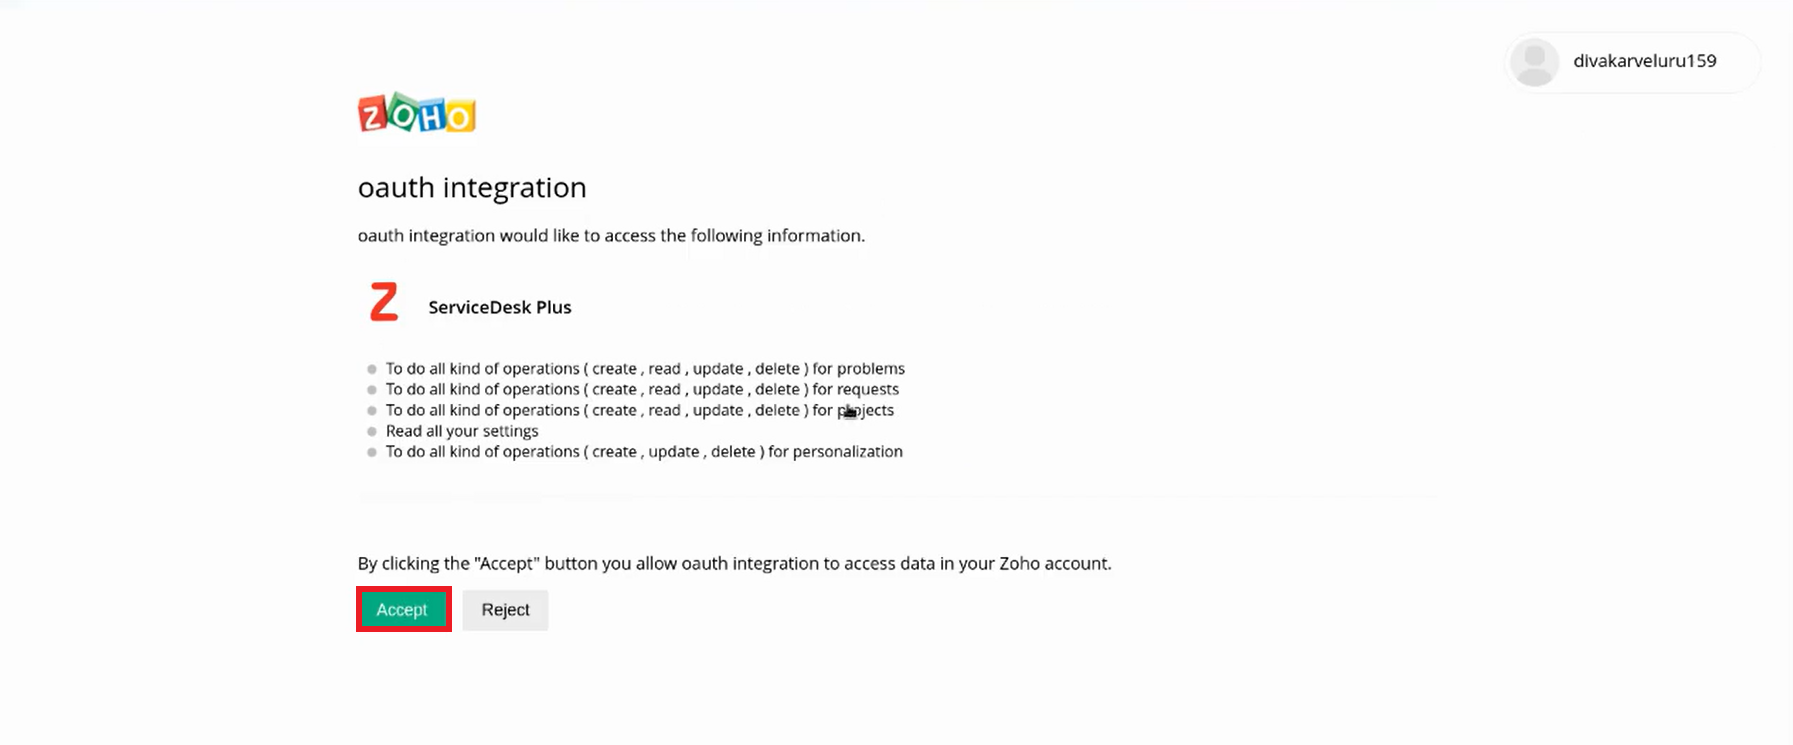
The Zoho API integration screen displays. -
Click Accept.
- On the next screen, copy only the Authentication Code from the address bar of the browser. The authentication code is displayed between code= and &location=.
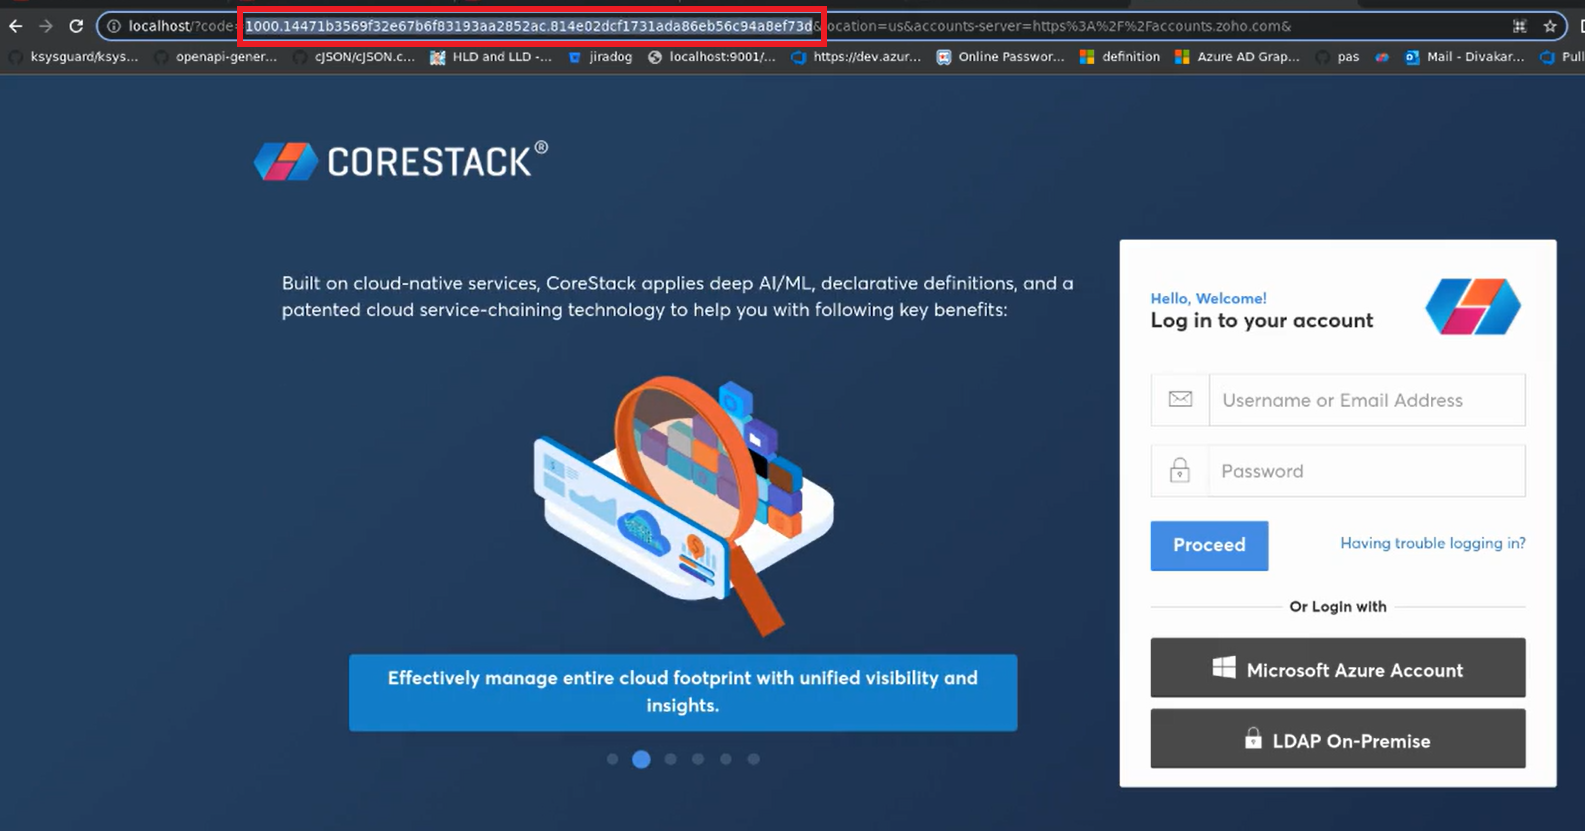
The client ID, client secret code, and authentication code generated through this procedure need to be filled in the Zoho ServiceDesk account onboarding procedure.
Tools Configuration
After the Zoho account is set up with all the relevant details, proceed to the Incident Management tab, where you can select the modules where incident tickets can be viewed and teams/persons who can view the tickets. After this, users must add CoreStack alerts, budget alerts, and monitoring alerts. Based on the alerts that are defined, incidents are triggered accordingly in Zoho ServiceDesk.
Perform the following to complete the Incident Management section and configure alerts:
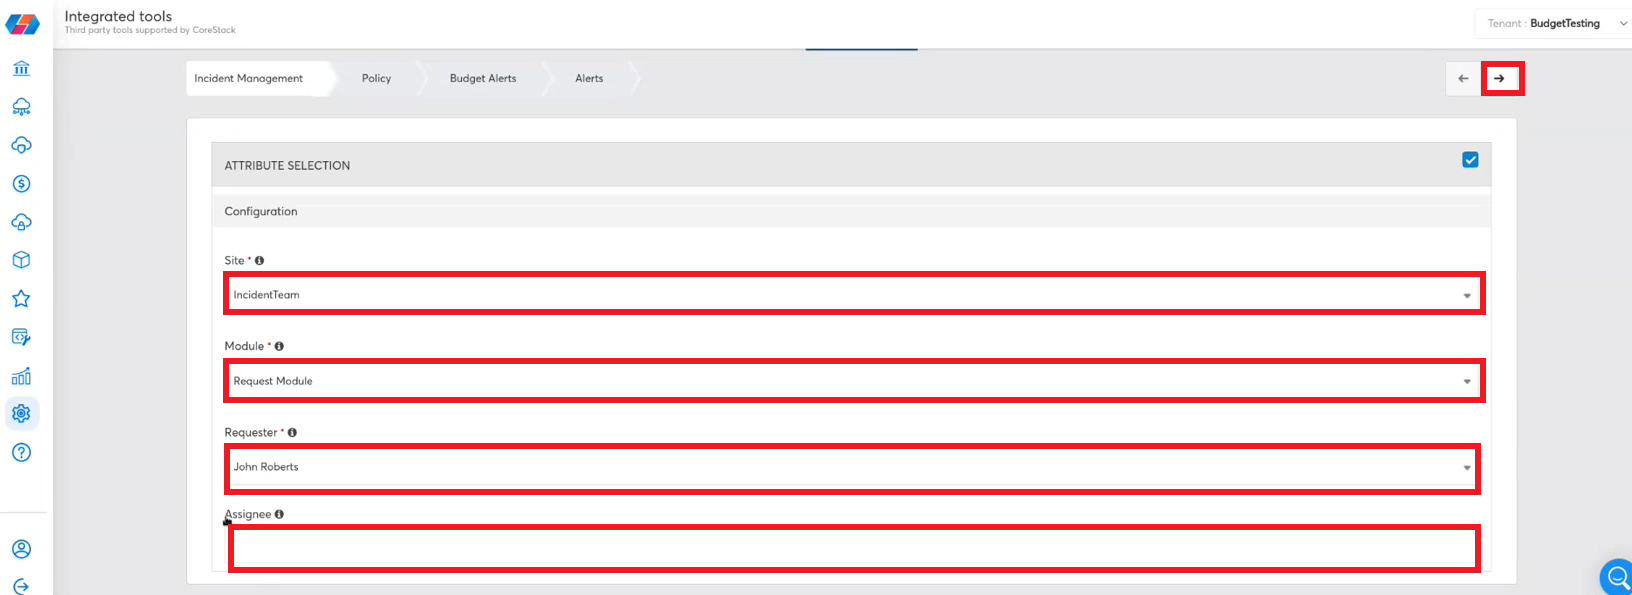
- In the Incident Management section, in the Site list, click to select an appropriate site or team who will be able to view the incidents.
- In the Module list, click to select the module name where the incident tickets can be viewed in ServiceDesk.
If you select Request Module, the Requester list displays. In the Requester list, you need to select the name of the person who will be assigned the incident in ServiceDesk. - In the Assignee box, type the assignee name.
- Click the arrow symbol on the upper-right corner to go to the next page.
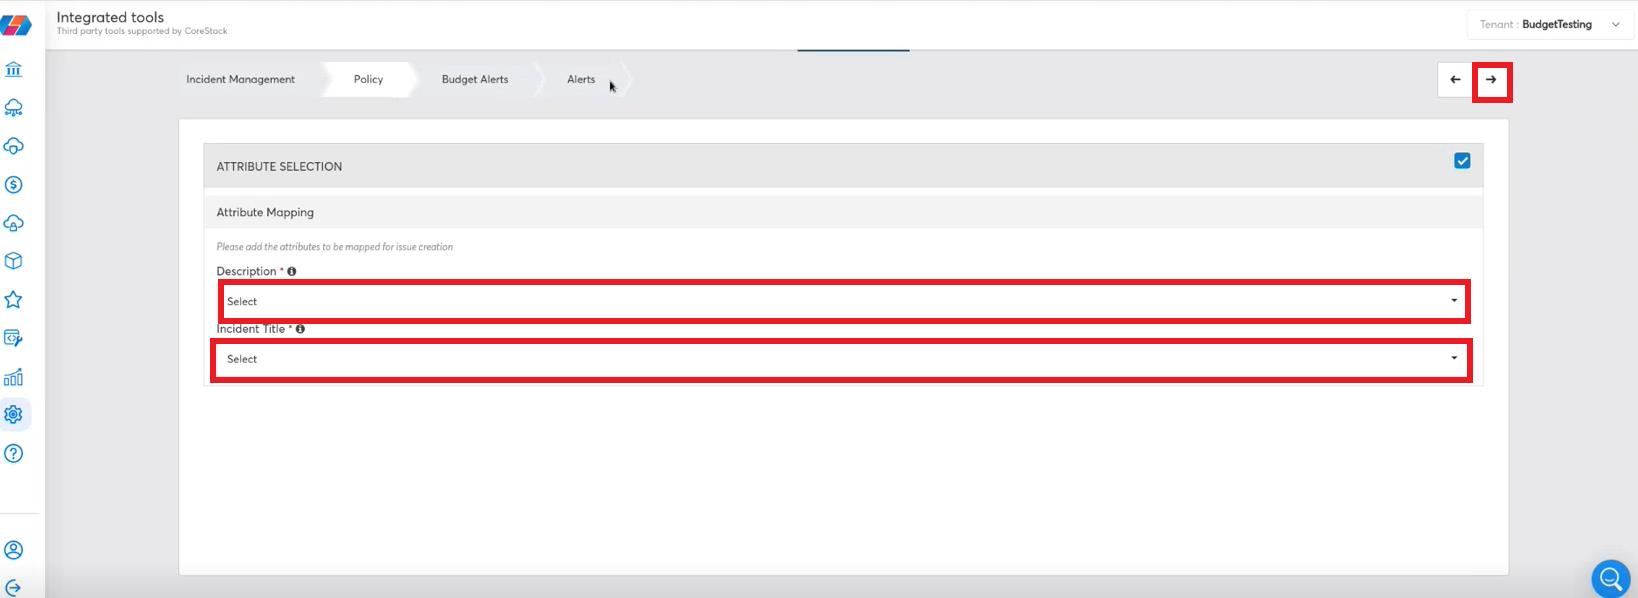
- In the Policy section, in the Description list, select the required options related to mapped issues. The selected descriptions will be displayed in the incident ticket.
- In the Incident Title list, select the appropriate options.
Note:
- Click Check All to select all the options in the list.
- Click Uncheck All to clear all the selected options in the list.
- Click the arrow symbol on the upper-right corner to go to the next page.
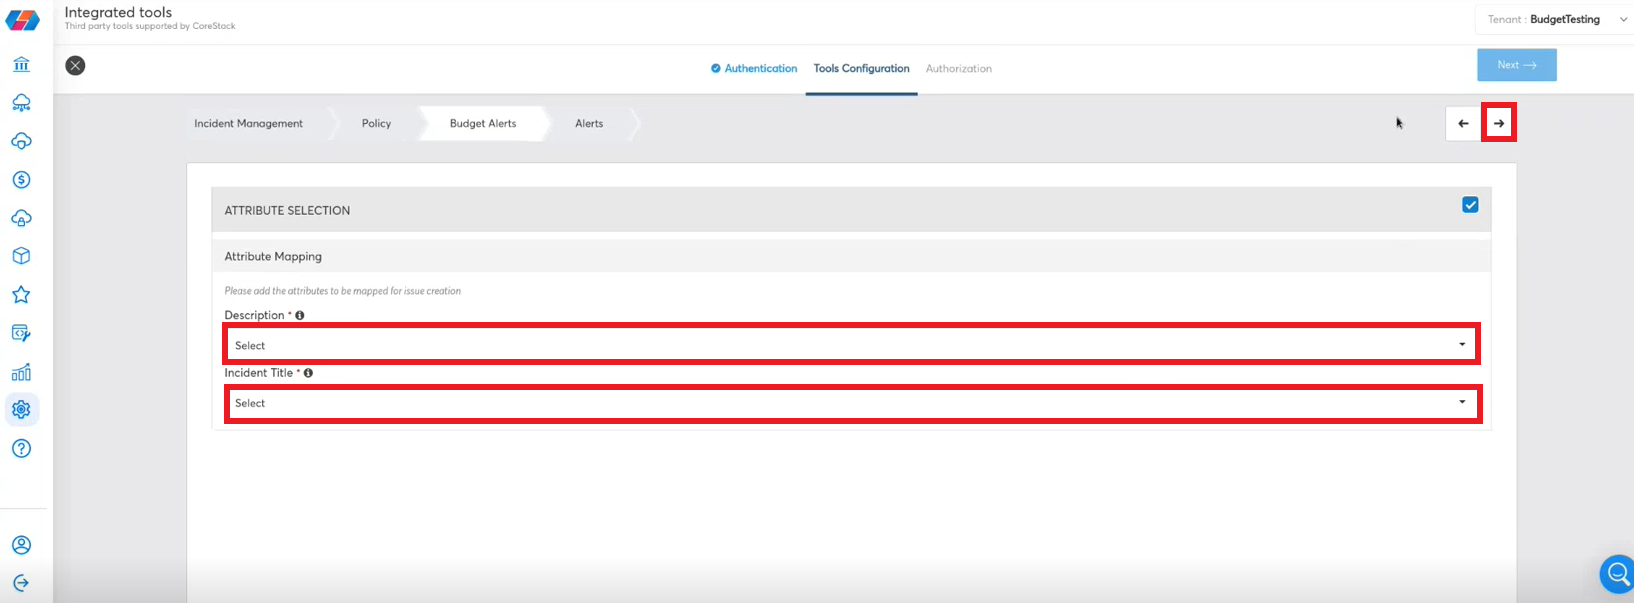
- In the Budget Alerts section, in the Description list, select the required options related to mapped issues. The selected descriptions will be displayed in the incident ticket.
- In the Incident Title list, select all appropriate options.
Note:
- Click Check All to select all the options in the list.
- Click Uncheck All to clear all the selected options in the list.
- Click the arrow symbol on the upper-right corner to go to the next page.
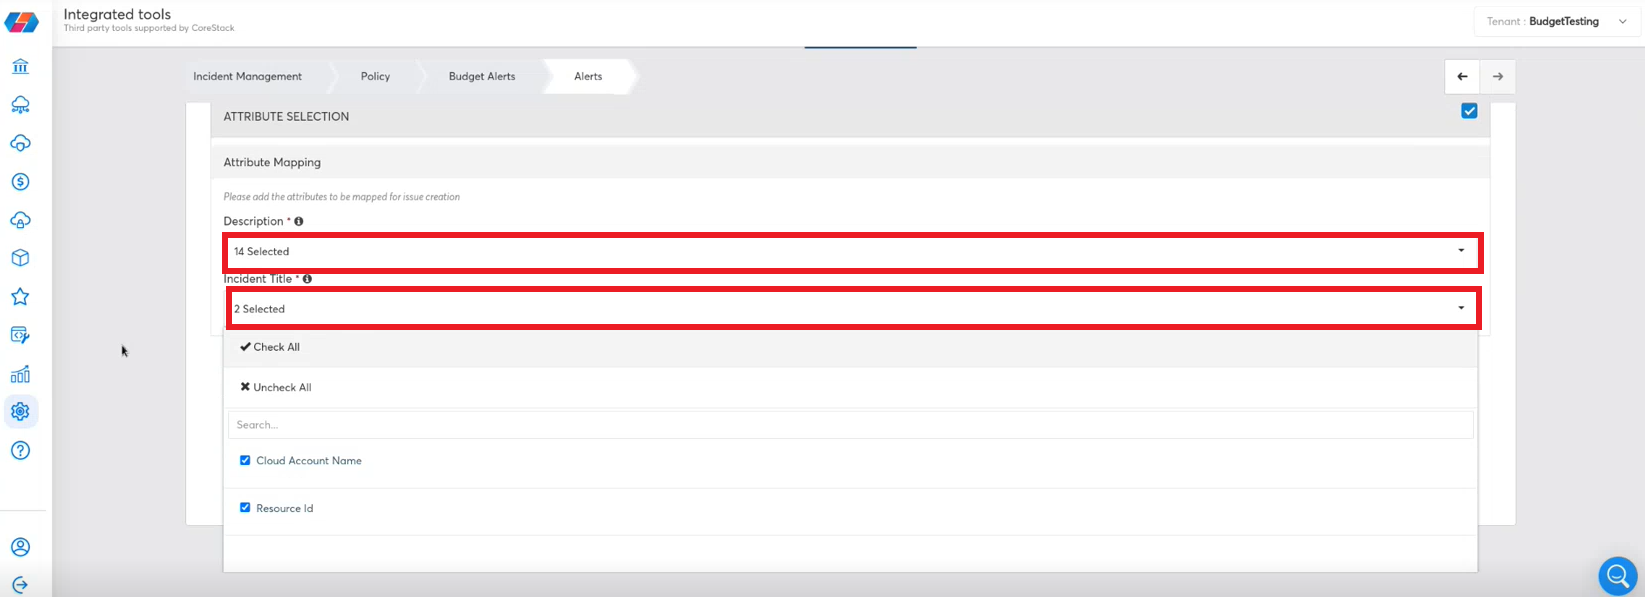
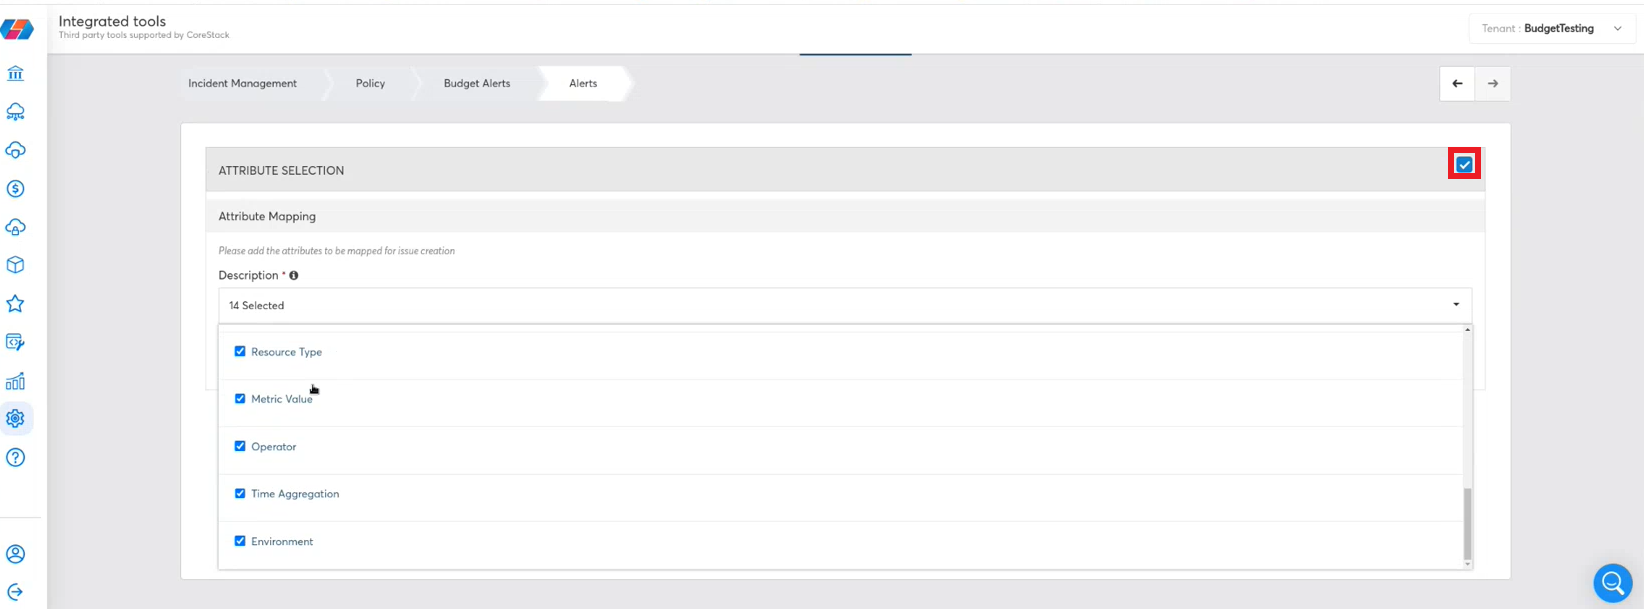
- In the Alerts section, in the Description list, select the required options related to mapped issues. The selected descriptions will be displayed in the incident ticket.
- In the Incident Title list, select all appropriate options.
Note:
- Click Check All to select all the options in the list.
- Click Uncheck All to clear all the selected options in the list.
- Click the arrow symbol on the upper-right corner to go to the next page.
Note:Among the Policy, Budget Alerts, and Alerts sections, if no alert is required to be set in any one of these sections, then navigate to the section where no alert needs to be set and clear the checkbox located at the upper right side of the screen.
Account Authorization
The next step in the integration process is to authorize users to access Zoho ServiceDesk as per their role. After authorization is complete, tenants are mapped to the modules and the appropriate Zoho account is assigned – that is, a tenant can access the modules in the Zoho account as per the mapping done for them in CoreStack.
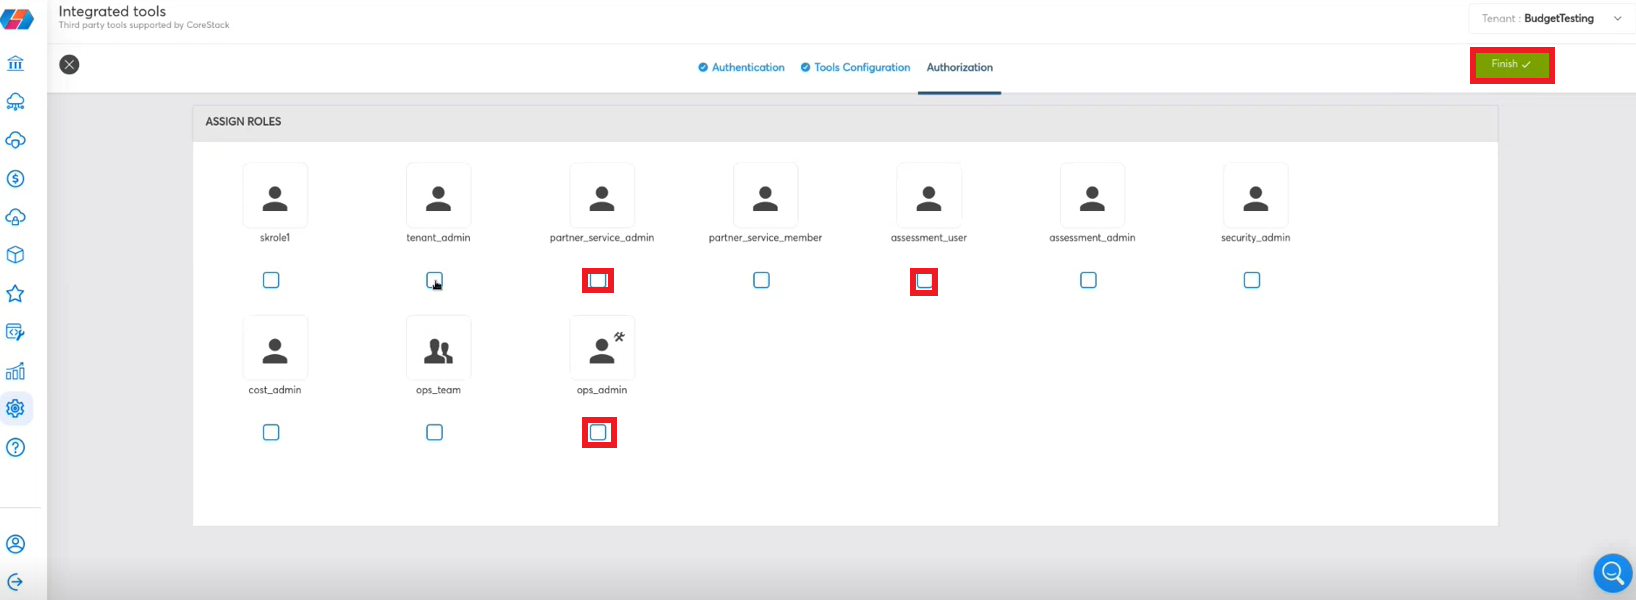
- In the Assign Roles section, select the appropriate role.
- Click Finish.
Click the account name which is onboarded and view the configuration details.
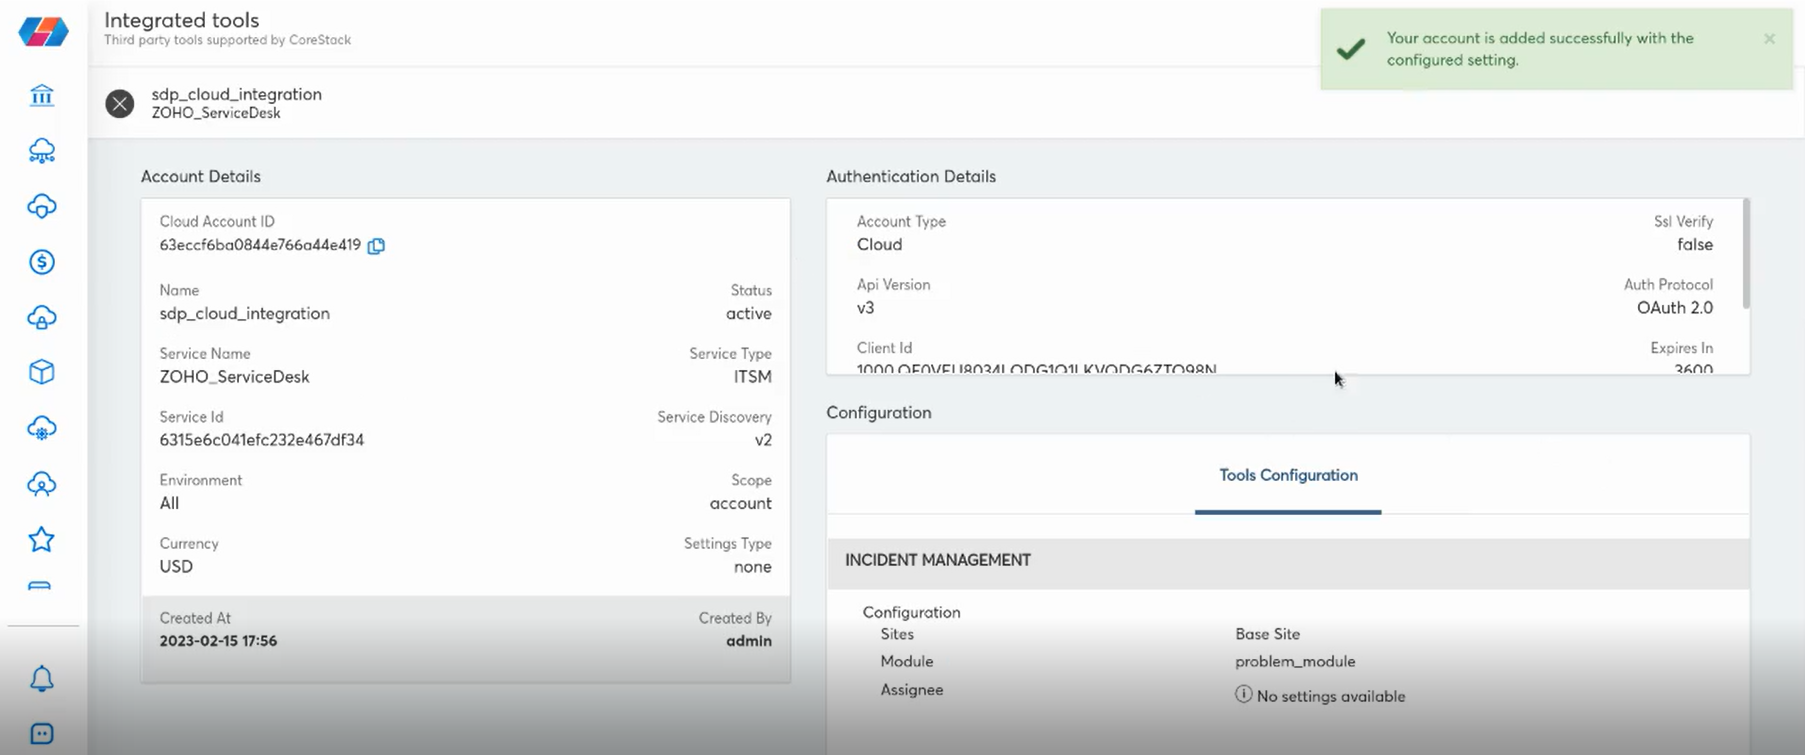
After this, you will have completed all the necessary integration steps for Zoho ServiceDesk in CoreStack.
In Zoho ServiceDesk, incident tickets are created automatically for every issue as per the alerts set in the above steps. An authorized user can view the incidents along with an incident description and status. After the issue is resolved, the incident ticket is closed automatically. If the same issue arises again, a new ticket is opened automatically. If the incident ticket remains in an open state without any resolution, then the user can add any notes about the issue.
Note:
- Fields marked with * symbol are mandatory to be filled.
- Contact the Customer Support Team for any assistance required during any phase of the implementation.
Updated 8 months ago