

JIRA SM - Change Management Configuration
Change Management Configuration
This guide focuses on configuring change management in CoreStack's JIRA Service Management.
1. Login to the Platform
You should see a landing page based on your preferences..
2. Select ITSM > Jira Service Management
On the Integrated Tools page, click ITSM > Jira Service Management.
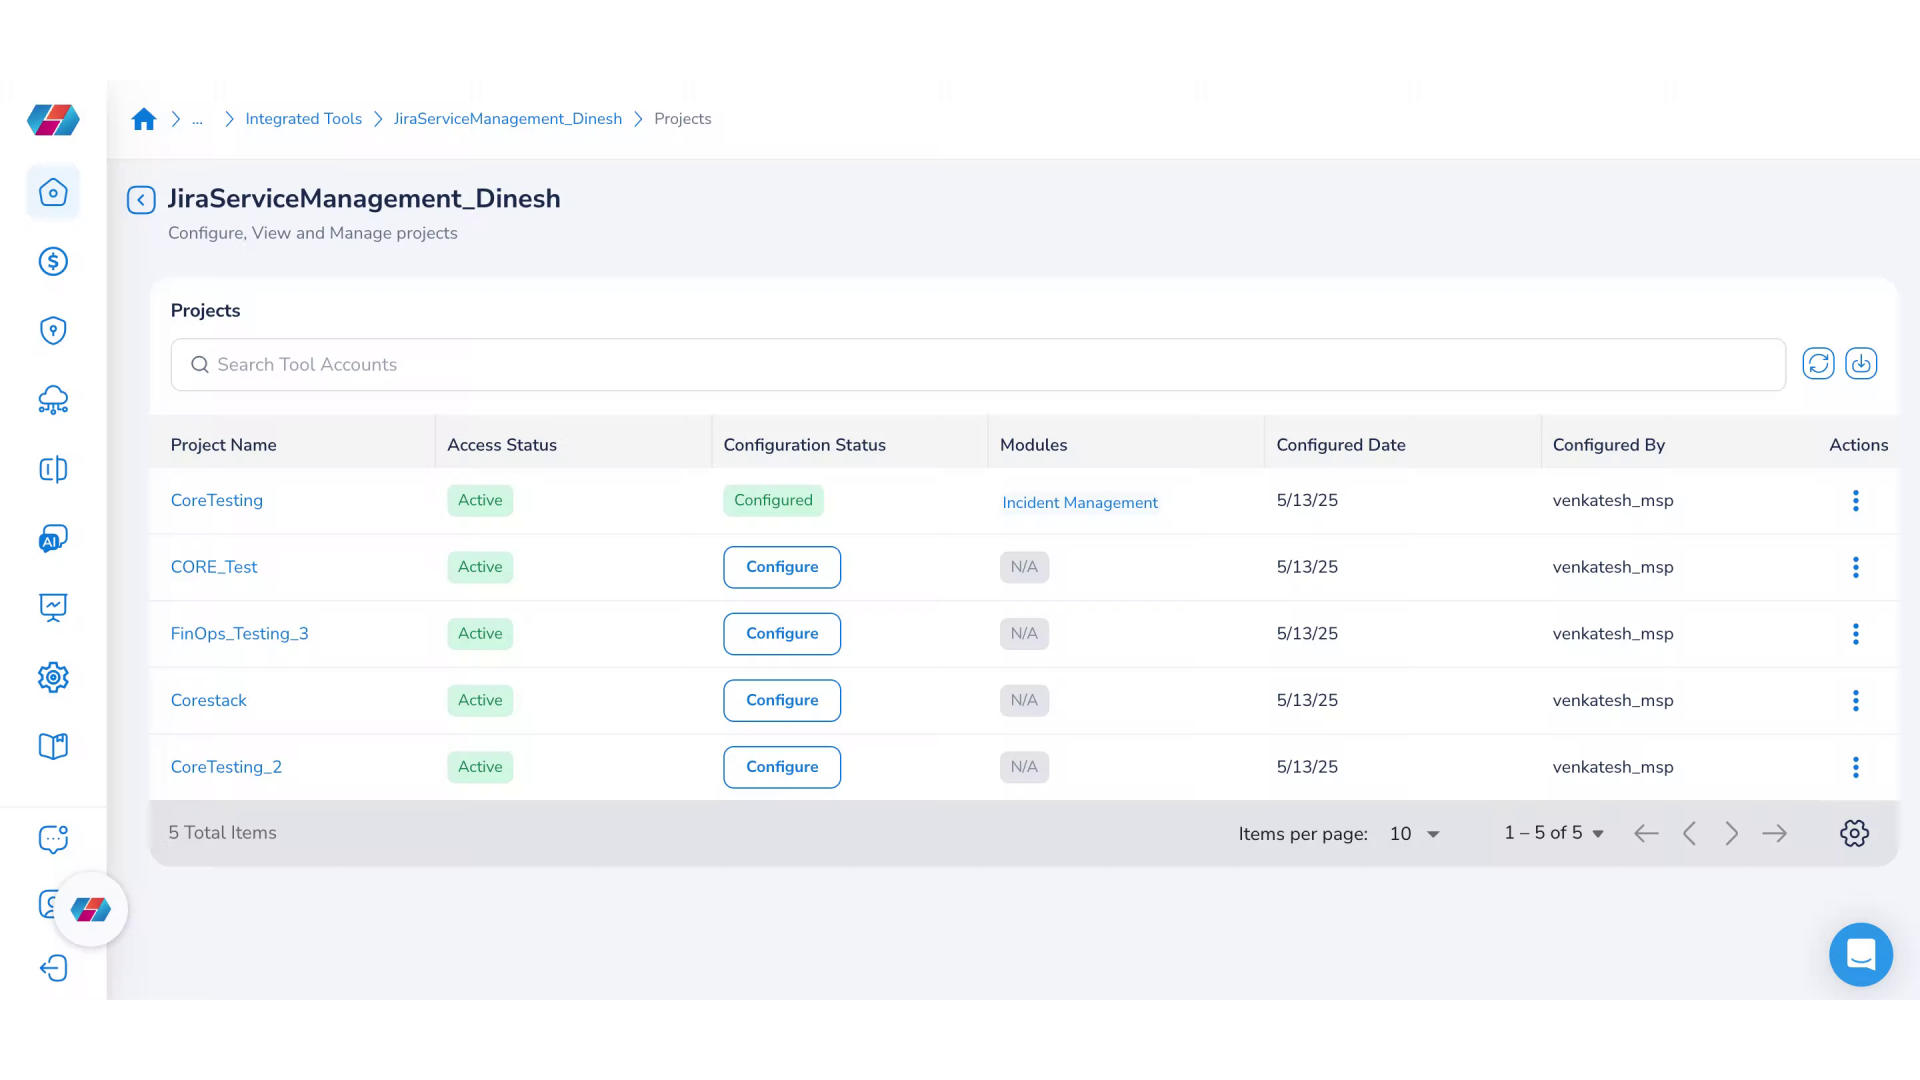
Next, under the #of Projects column, click the number corresponding to a tool account name. You can now view the list of projects for the selected tool account. To take an action on a project, under the Actions column, click ellipses corresponding to a project name.
3. Select "View"
Click the View option. This action takes you to the Tool Account Summary page where you can view all the tool account details.
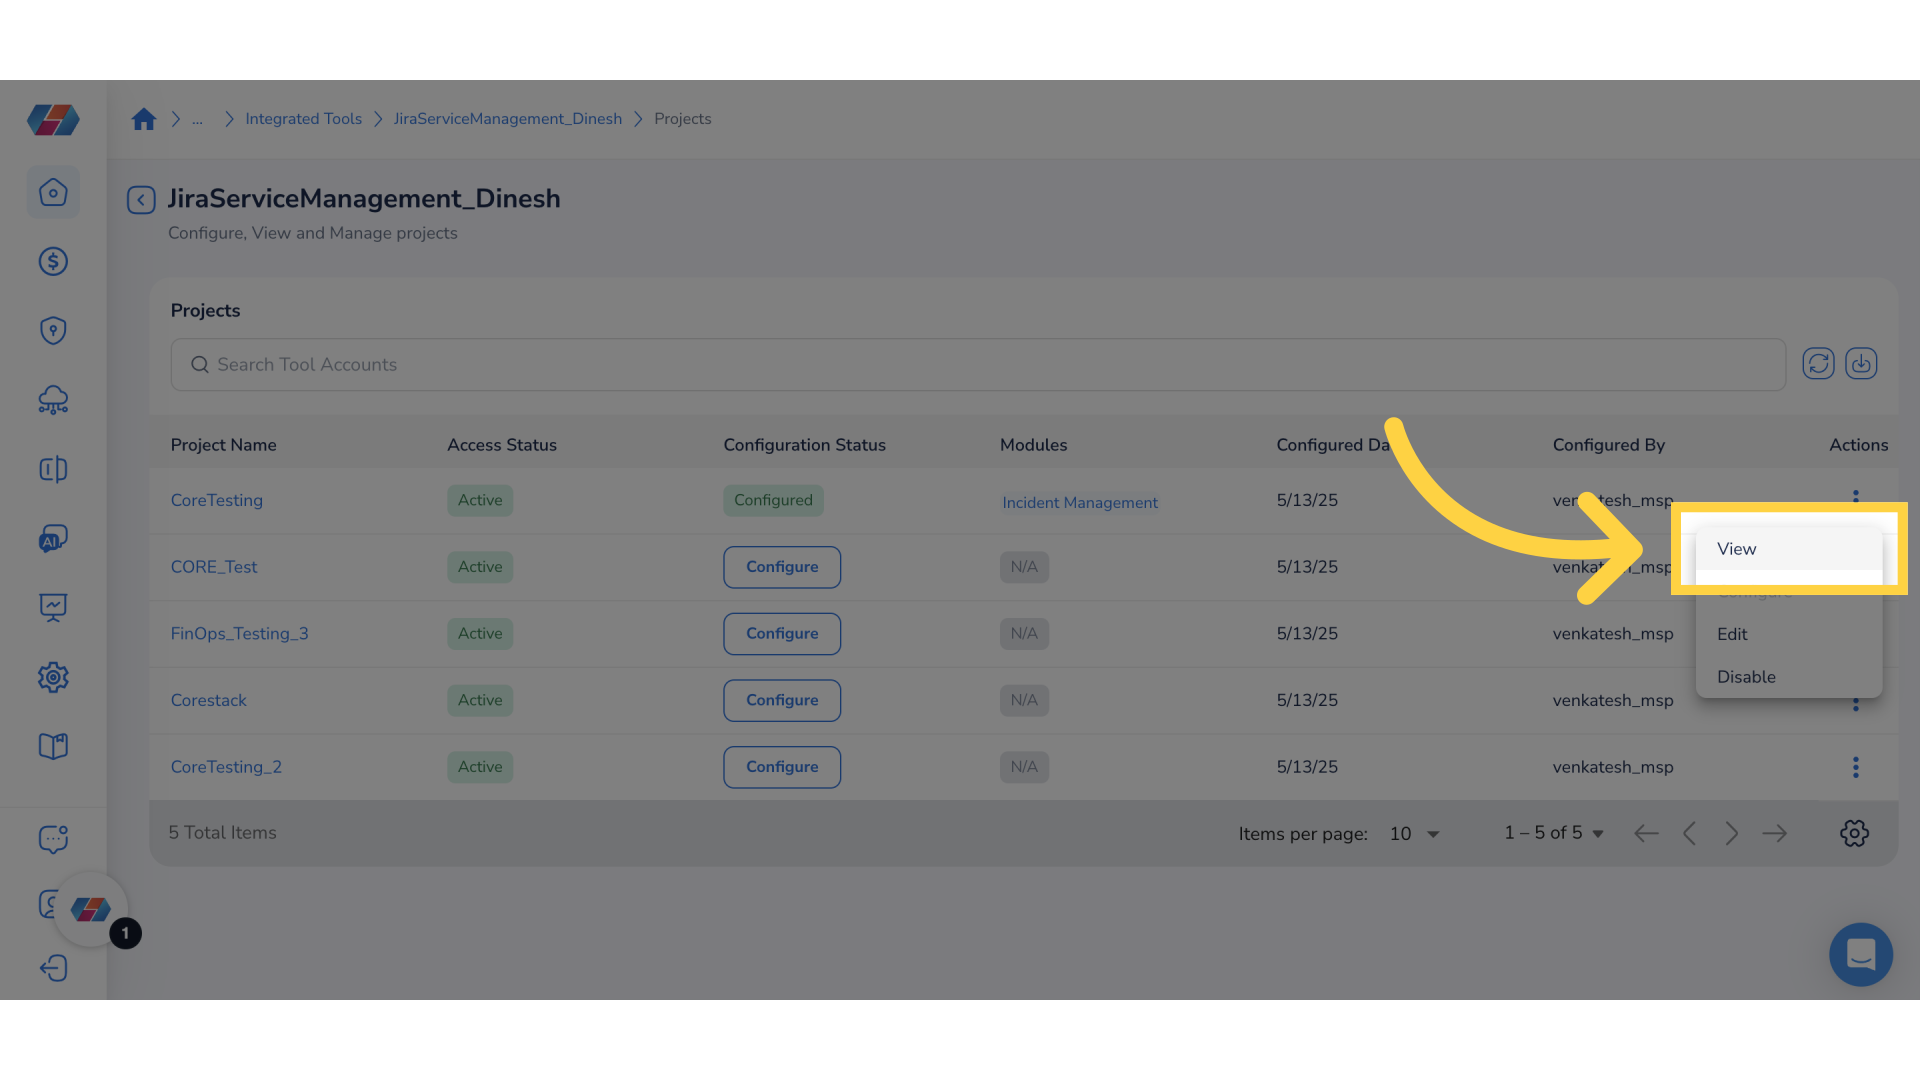
4. Click "Change Management"
Navigate to the Change Management tab. This tab shows the list of projects and its status.
5. Go Back to Previous Page
Click the back arrow to go back to the Integrated Tools page.
6. Take an Action
To take an action on a project -- on the Jira Service Management page, under the #of Projects column, click the number corresponding to a tool account name. You can now view the list of projects for the selected tool account.
To take an action on a project, under the Actions column, click ellipses corresponding to a project name. The actions available to the users are - View, Edit, Configure, and Disable.
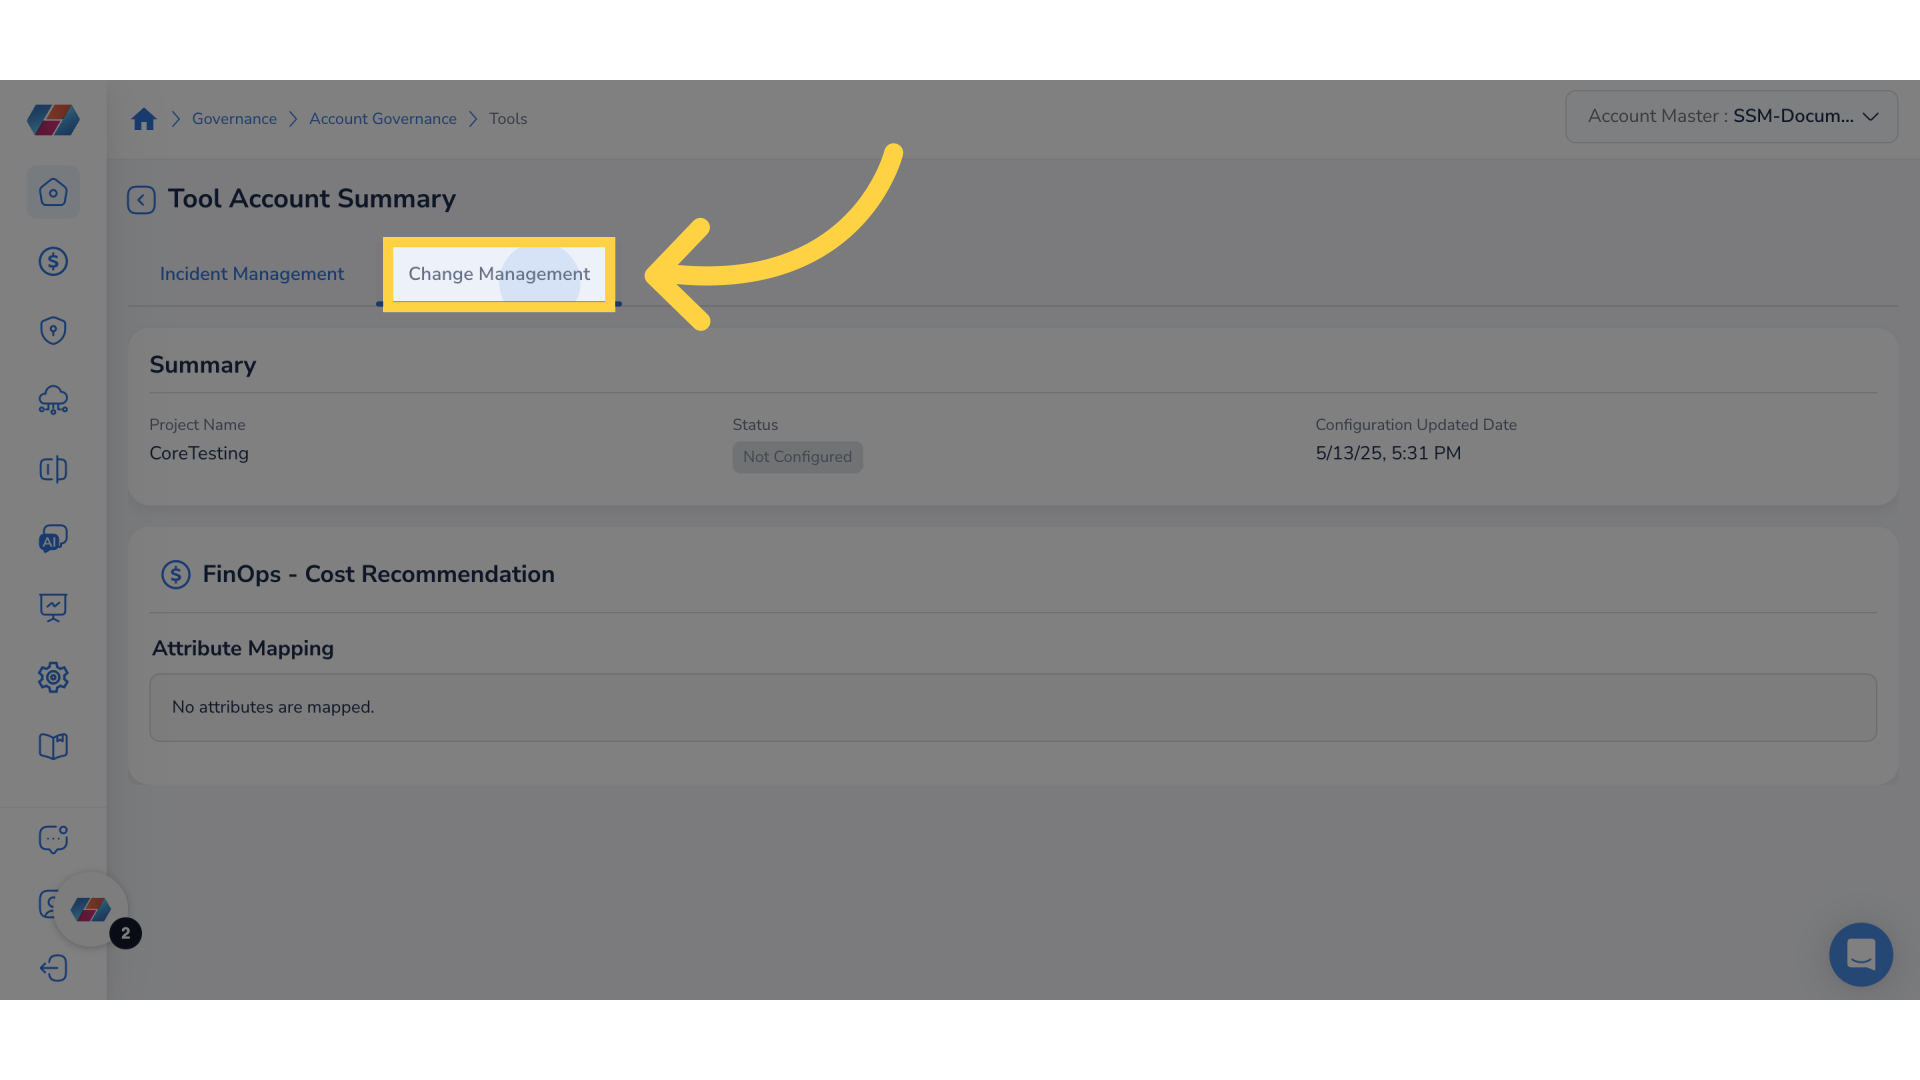
7. Click "Edit"
Select the Edit option.

8. Click "Change Management"
Click Change Management to configure attributes and other settings.
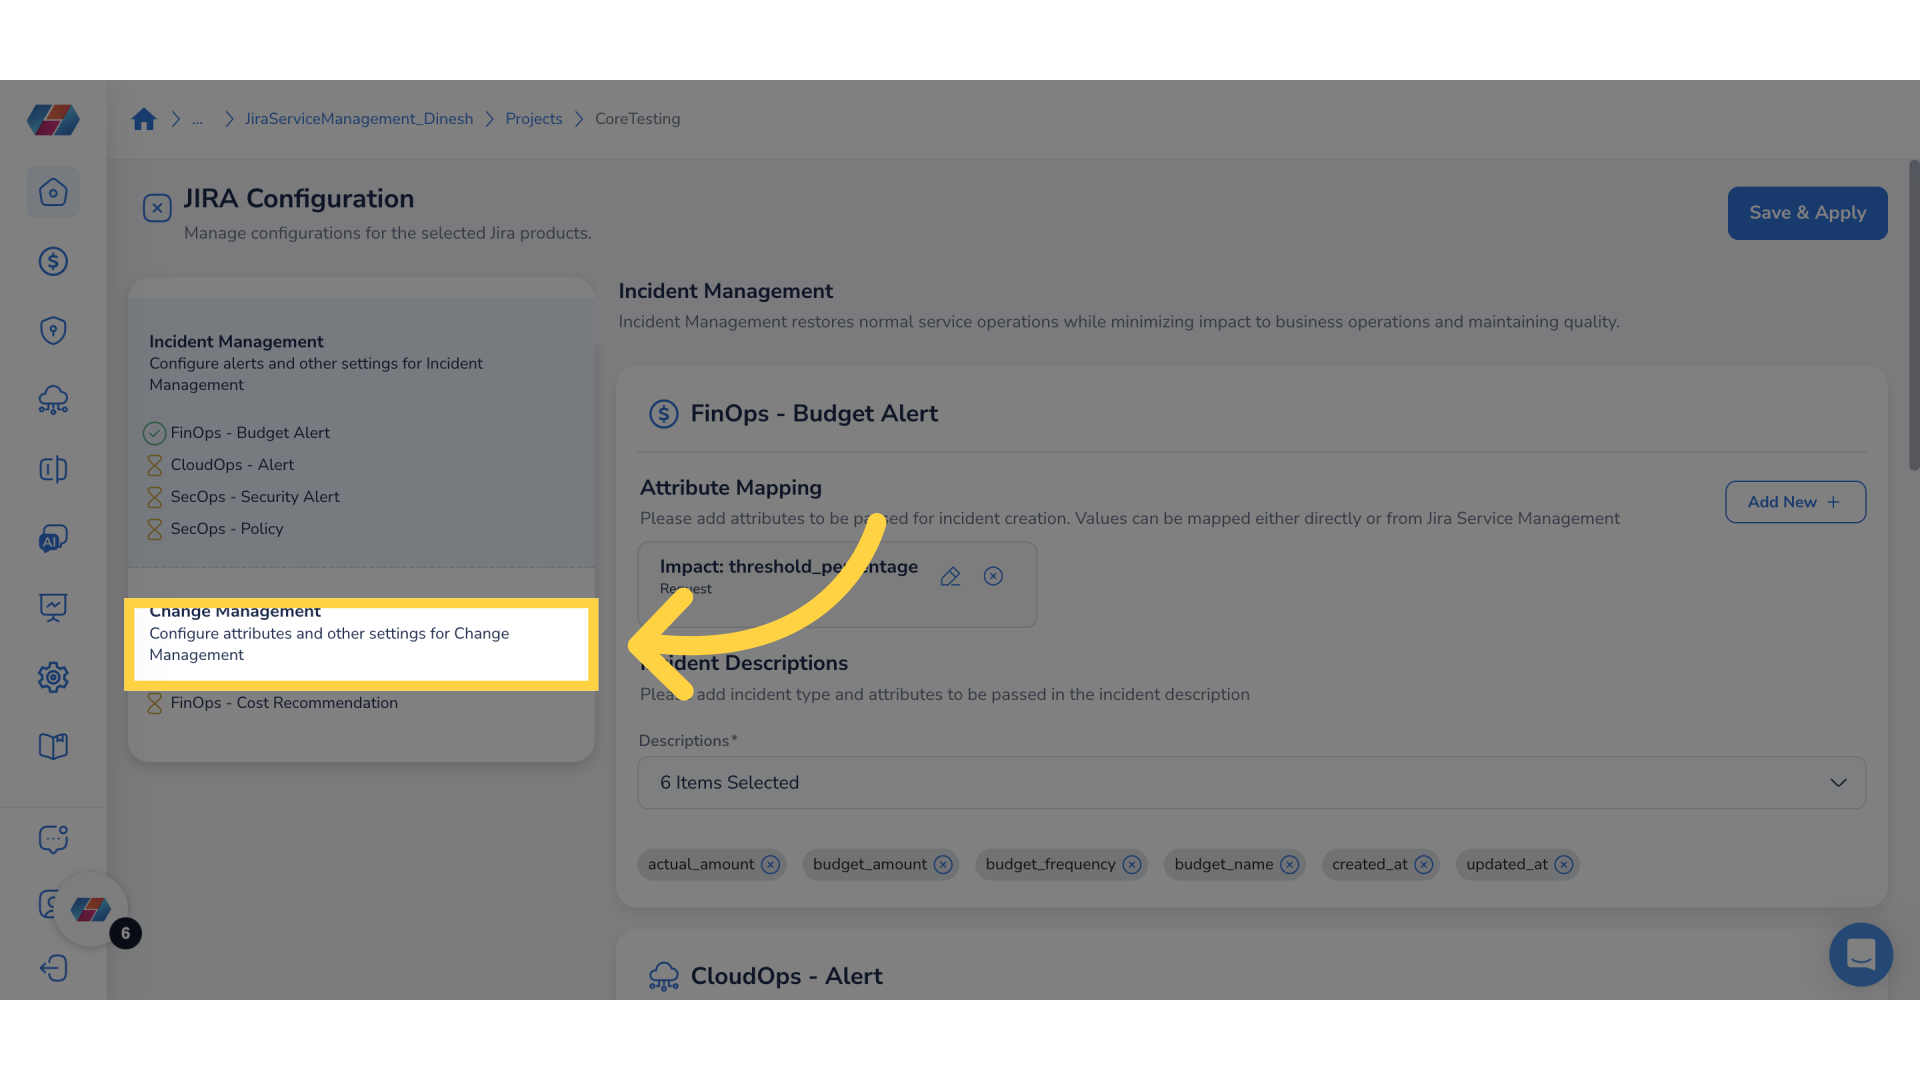
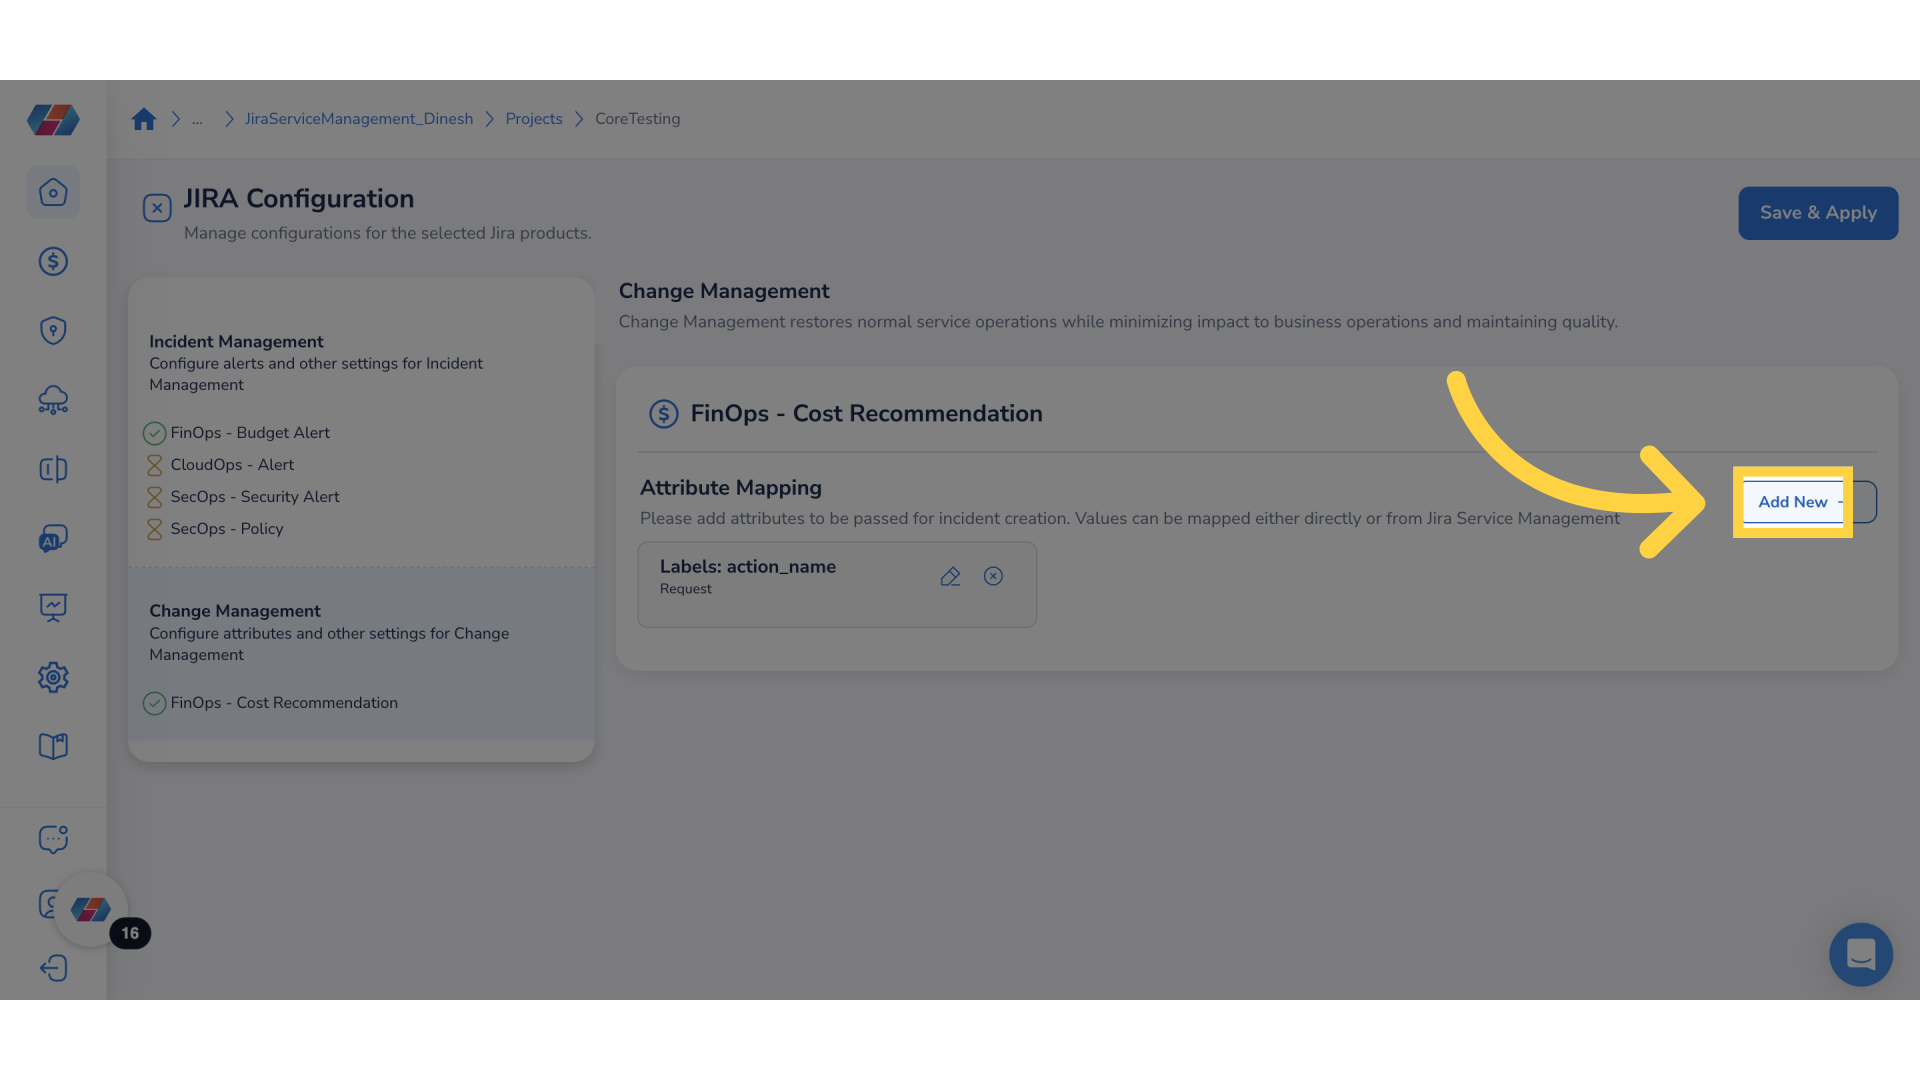
9. Add New Attributes
Click Add New to add attributes to be passed for incident creation.
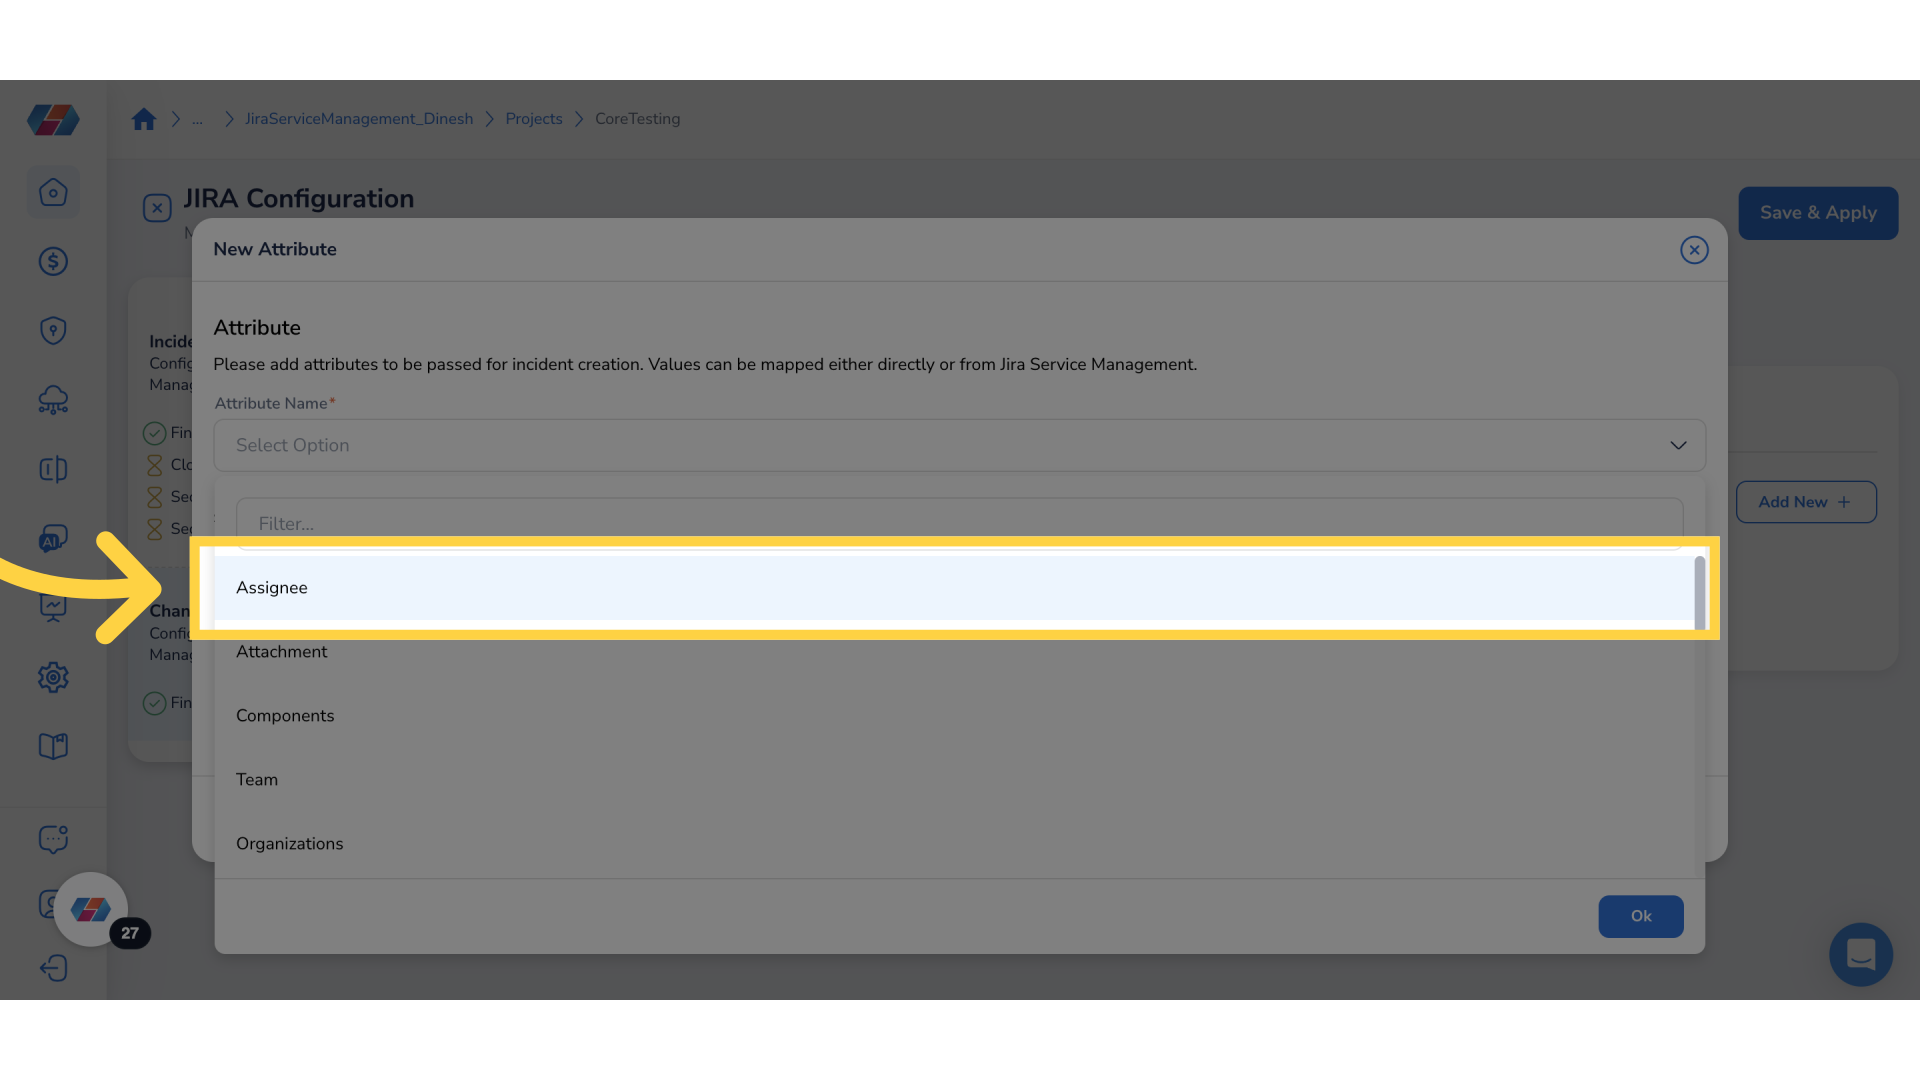
10. Click "Attribute Name" List
In the Attribute Name drop-down list, select an attribute name and then click Ok.

11. Select "Labels"
For example, select the Labels option.
12. Confirm Your Selection
Click Ok to confirm the selection.
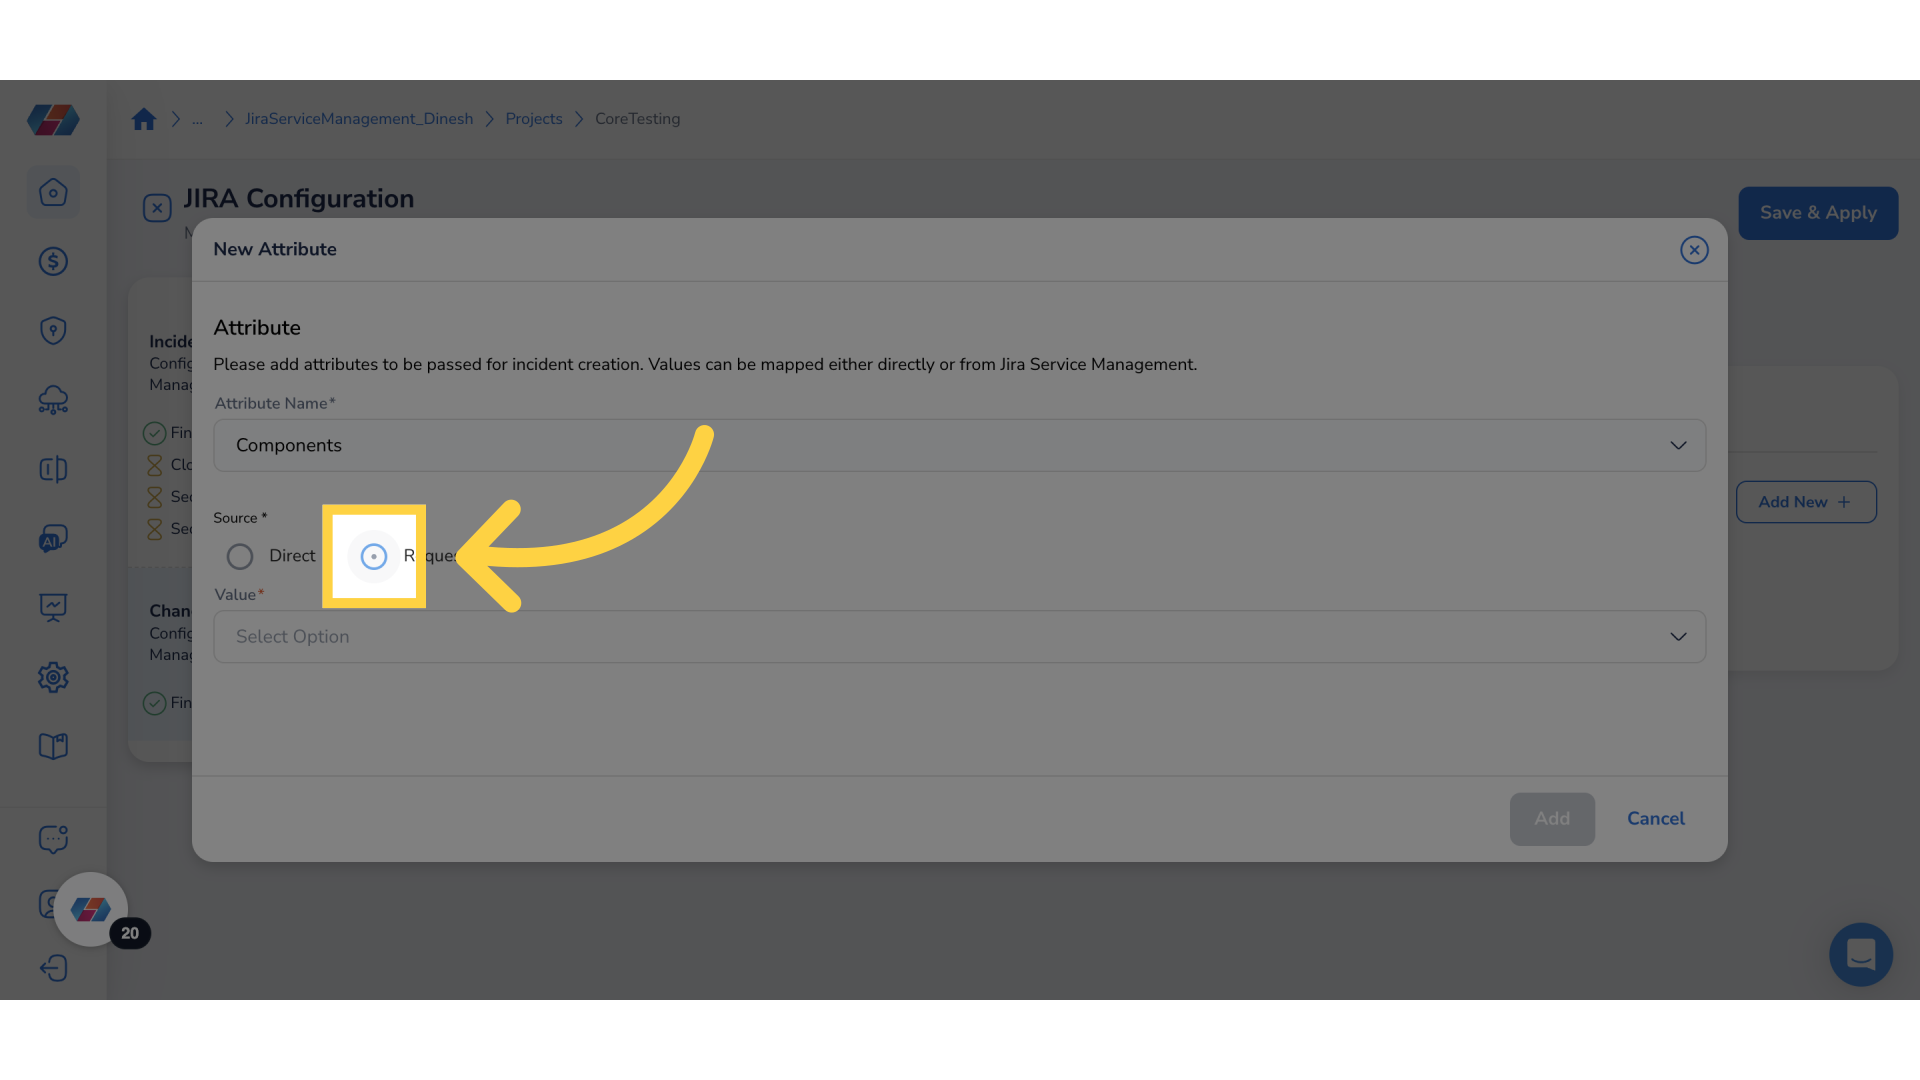
13. Select "Source"
In the Source field, select either Direct or Request.
In this case, the option Request is selected.
- Direct: The value entered in this field will be mapped to the field selected in the attribute drop-down.
- Request: This is a drop-down that shows the field details from the tool. Users can select the required option from the drop-down to map to the Attribute Name field.
14. Select a Value from drop-down
In the Value drop-down list, click to select a value for the source selected above.
15. Confirm Your Selection
Click Ok to confirm your selection.
16. Add Attributes
Click Add to add the attribute.
17. Click "Add New"
Click Add New to add a new attribute.
18. Select "Attribute Name" from drop-down
In the Attribute Name drop-down list, click to select the attribute name.
19. Select "Components"
In this case, in the Attribute Name drop-down list, click to select Components.
20. Confirm Your Selection
Click Ok to confirm your selection.
21. Select "Source"
In the Source field, select either Direct or Request. In this case, the option Request is selected.
22. Select a Value from drop-down
In the Value drop-down list, click to select a value for the source selected above.
23. Confirm Your Selection
Click Ok to confirm the selection.
24. Add New Attribute
Click Add to add the attribute.
25. Add Attribute
Click Add New to add a new attribute.
26. Select Attribute Name from drop-down
In the Attribute Name drop-down list, click to select an attribute name.
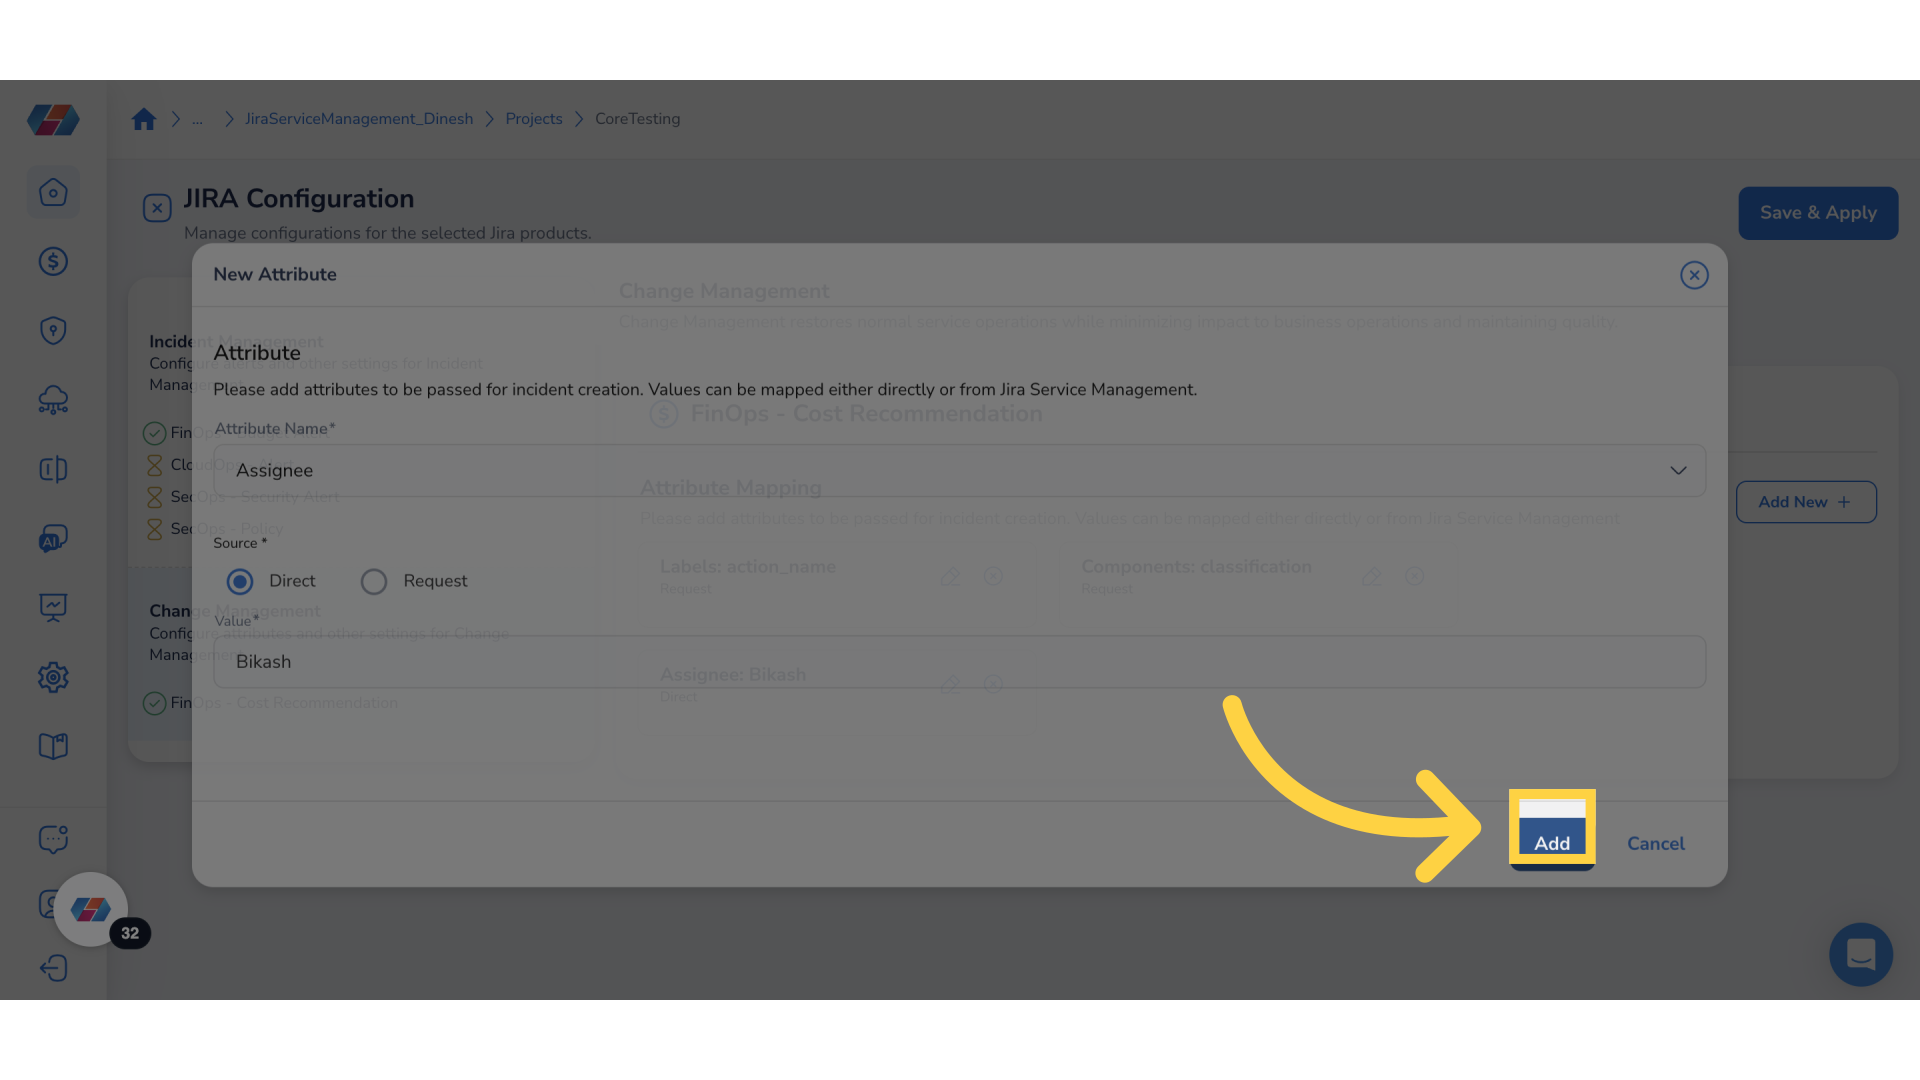
27. Select "Assignee"
For example, select the Attribute Name as Assignee.
28. Confirm Your Selection
Click Ok to confirm your selection.
29. Select "Source"
In the Source field, select either Direct or Request. In this case, the option Direct is selected.
30. Type a Source Value
In the Value box, type a value for the source.
31. Click "Add"
Click Add to add the attribute.
32. Save & Apply
Select Save & Apply to save the configuration and apply them.
33. Click "Change Management"
Go to Change Management to view the attribute mapping done by the user.
- Note: The [System] Incident issue type must include the "Resolved" status to enable automatic resolution of system-generated incidents. If the "Resolved" status is not available, then incidents will not be auto-resolved and must be closed manually by the user.
- Note: Before proceeding with the project configuration, ensure that your Jira project includes the issue types [System] Incident and [System] Change.
This guide covered the process of configuring change management in CoreStack's JIRA Service Management.
Updated 8 months ago