

Onboarding a GCP Billing Account with Terraform
Introduction
As an additional option to onboarding a GCP Billing Account directly in the platform using the built-in onboarding workflow, users can also choose to onboard this type of cloud account using Terraform automation templates.
Onboarding a GCP Billing Account with Terraform
Perform the following steps to onboard GCP billing account using Terraform:
- Sign in to the GCP console: https://console.cloud.google.com.
- Sign in to your organization’s cloud account with a user ID and a password.
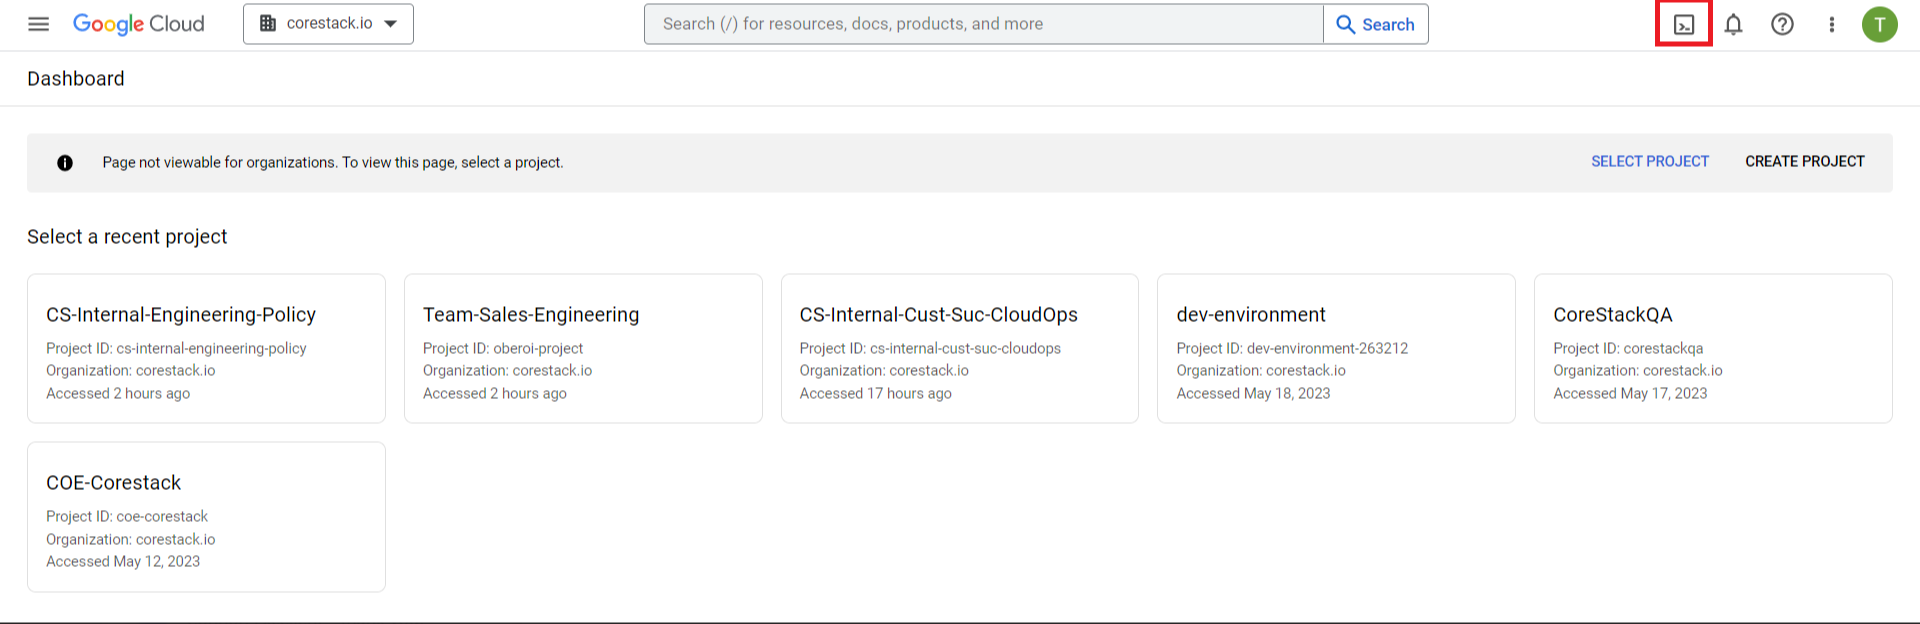
- Click the icon for Command Line Interface as shown in the image below.
-
On the Cloud Shell Terminal screen, clone the GitHub repository by running the below command in a specific folder.
git clone https://github.com/corestacklabs/Onboarding_Templates.git

The repo is now downloaded.
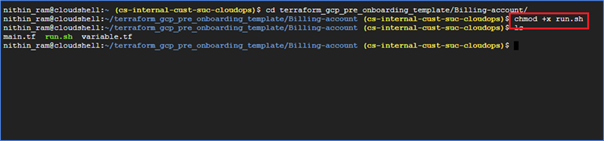
- To switch to a particular directory, use the command provided below.
cd Onboarding_Templates/GCP/Billing-account/

-
To execute the file, run the command:
chmod +x run.sh
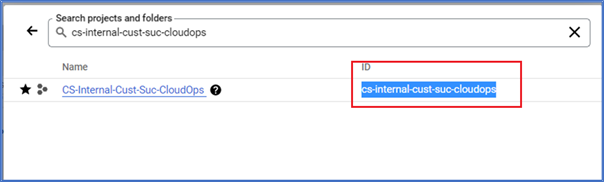
- You need the Project ID which is going to be onboarded as a billing account and can be found in the hierarchy. After you get the Project ID, paste the details in a notepad and use this information when prompted.
- You will also need the Table ID and the data location later, when prompted. Perform the following steps to retrieve them:
a. Click BigQuery > SQL Workspace.
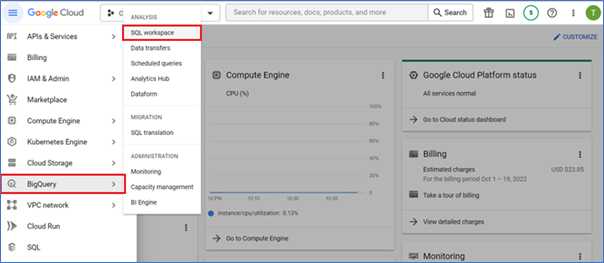
b. On the left panel, click the arrow icon to expand the main project > click the required dataset > click the relevant billing export file.
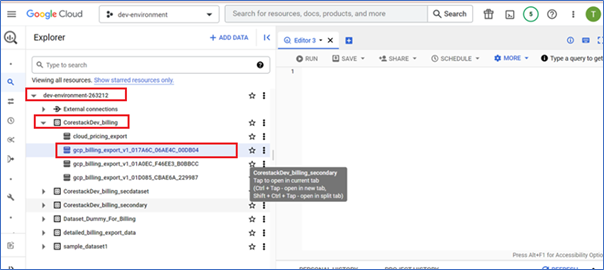
Copy the Table ID and data location.
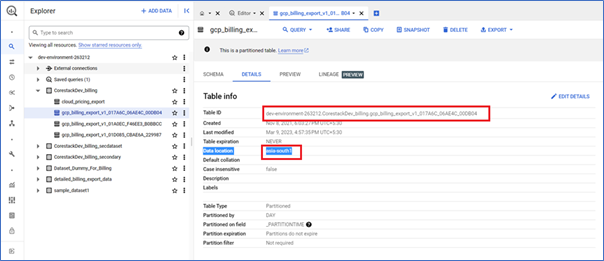
After you get the Table ID and data location, paste the details in a notepad so you can access this information when prompted.
- On the Cloud Shell Editor screen, run the command:
sh run.sh
Note:A Project Owner and BigQuery Admin can successfully execute this script. Make sure to assign both of these roles to the user who is executing the script.
A message is displayed asking if you have the Project Owner role and the BigQuery Admin role needed to successfully run the script.
- In the command prompt, type yes or no.

- If you type no, the script will exit without executing it.
- If you type yes, then you will get prompts to enter the Project ID, bucket location, and Table ID.
- Type the Project ID, data location, and Table ID.

Note:
- Refer to step 7 to get the Project ID.
- Refer to step 8 to get the data location and Table ID.
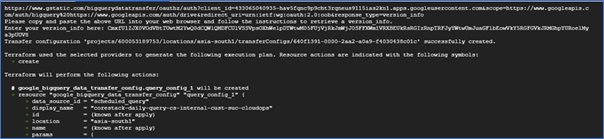
- If the BigQuery data transfer service was never used before, then provide the authentication when prompted. The auth prompt will appear and you must click the link to get the verification code.
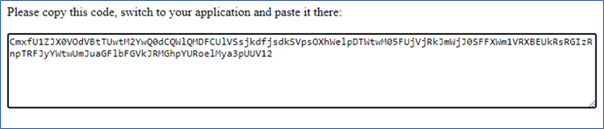
- Click Allow and then you will get the verification code.
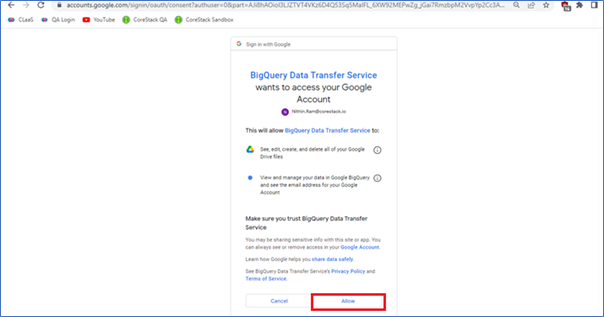
- Copy the verification code and paste it in the Cloud Shell terminal when you see the prompt for version_info.
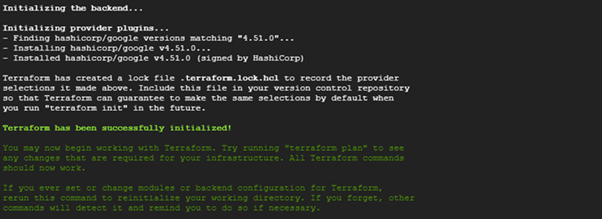
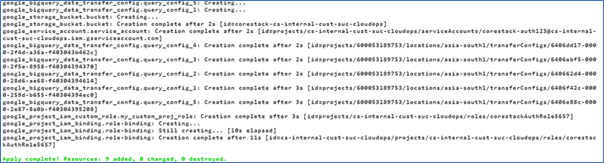
If it works successfully, you will see that a transfer configuration is created and Terraform starts executing.
Run the Shell script to see the resources created through Terraform.
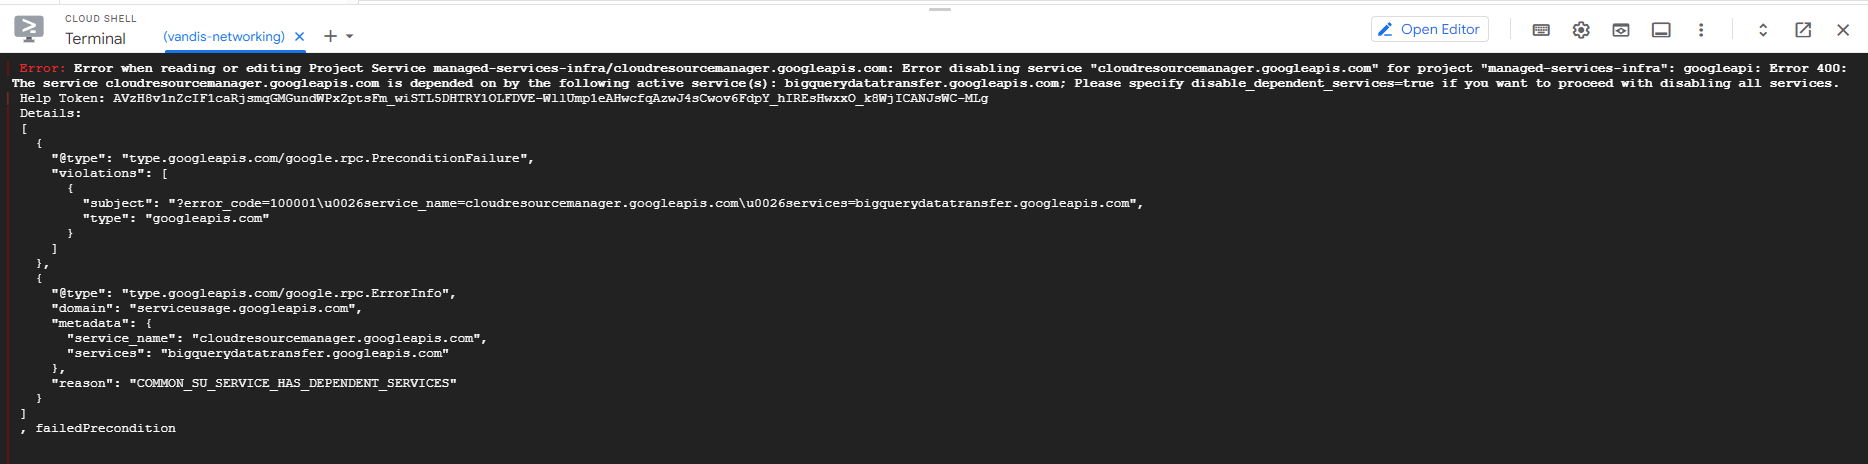
Steps to Overcome Failure
If something fails, perform this step before re-running the Run.sh command:
Sh delete.sh
This will fail into the error, which is a dependency error, but you are good to go and can run the Run.sh command again.
Generating JSON File for Account Onboarding
A key file, also known as JSON file, can be downloaded from the service account which you created from the onboarding script. After the key file is downloaded, you can use the same file to onboard an account in the platform.
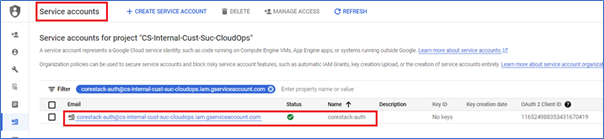
- Navigate to IAM & Admin > Service Accounts.
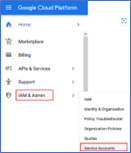
- Click Service accounts and then click the service account name created for the platform. In this case, click corestack-auth.
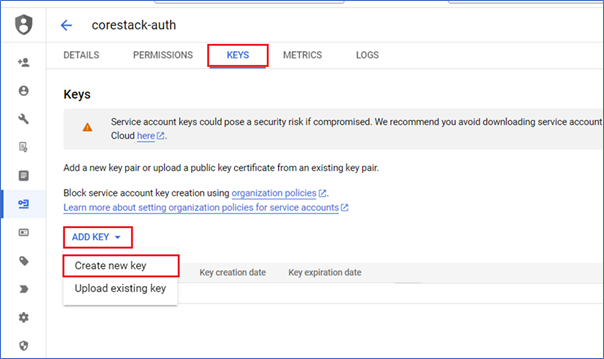
- In the KEYS tab, click ADD KEY list and then select Create new key.
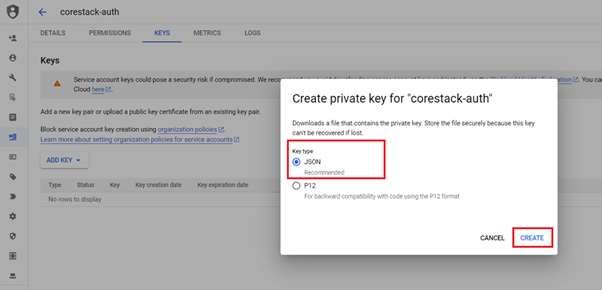
- In the Create private key for “corestack-auth” dialog box, do the following:
- In the Key type field, click to select JSON.
- Click CREATE.
After the key is downloaded, proceed with GCP account onboarding in the platform.
Updated 5 months ago