

Webhooks for Microsoft Teams
Learn how to create a webhook in CoreStack and integrate it with Microsoft Teams to send alert notifications to a specified Teams group.
Overview
A webhook is a lightweight API that powers one-way data sharing triggered by certain events in a software application. They enable applications to share data and functionality with optimized use of server resources. Whenever an event occurs, a webhook allows the application to push data from the triggering event to another application in order to perform an action — such as sending an email notification/alert to a set of users.
This document will provide information on how to integrate CoreStack with Microsoft Teams using webhooks.
Pre-requisites
- Create a group on Microsoft Teams for receiving alert notifications.
- Assign members to the group accordingly.
Configuring the webhook
Login to Microsoft Teams and select the group you just created (to which the alert notifications will be sent).

Once the group is selected, click the ... option next to the group name and select the option "Get link to team."

Copy the link displayed in the field.

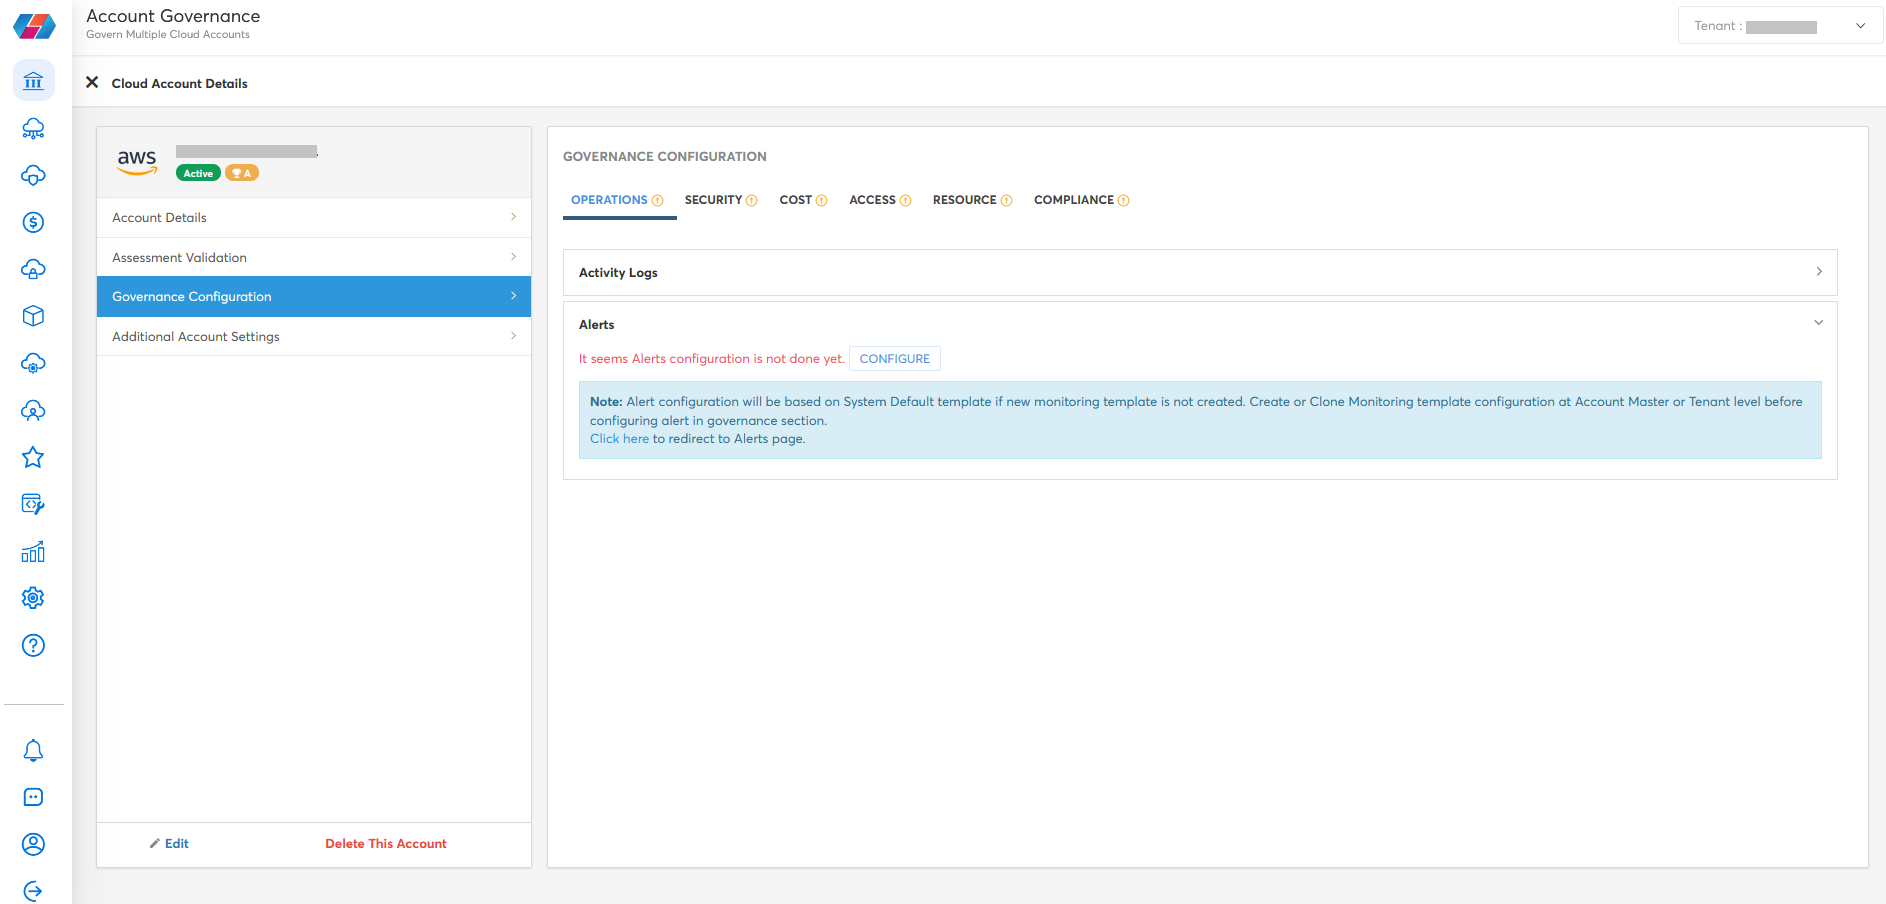
Next, login to CoreStack and navigate to Account Governance. Then choose the account for which the notification needs to be triggered. Under the Action column, select View to open the drop-down menu, then select "View Settings."
Note:For this user guide, we will be using an AWS cloud account as an example.

Once the "View Settings" option is selected, go to the the "Governance Configuration" tab and select Alerts to expand the drop-down tab. You may see a message stating no alerts have been configured for this cloud account yet.
Click Configure to open the alert configurations prompt.
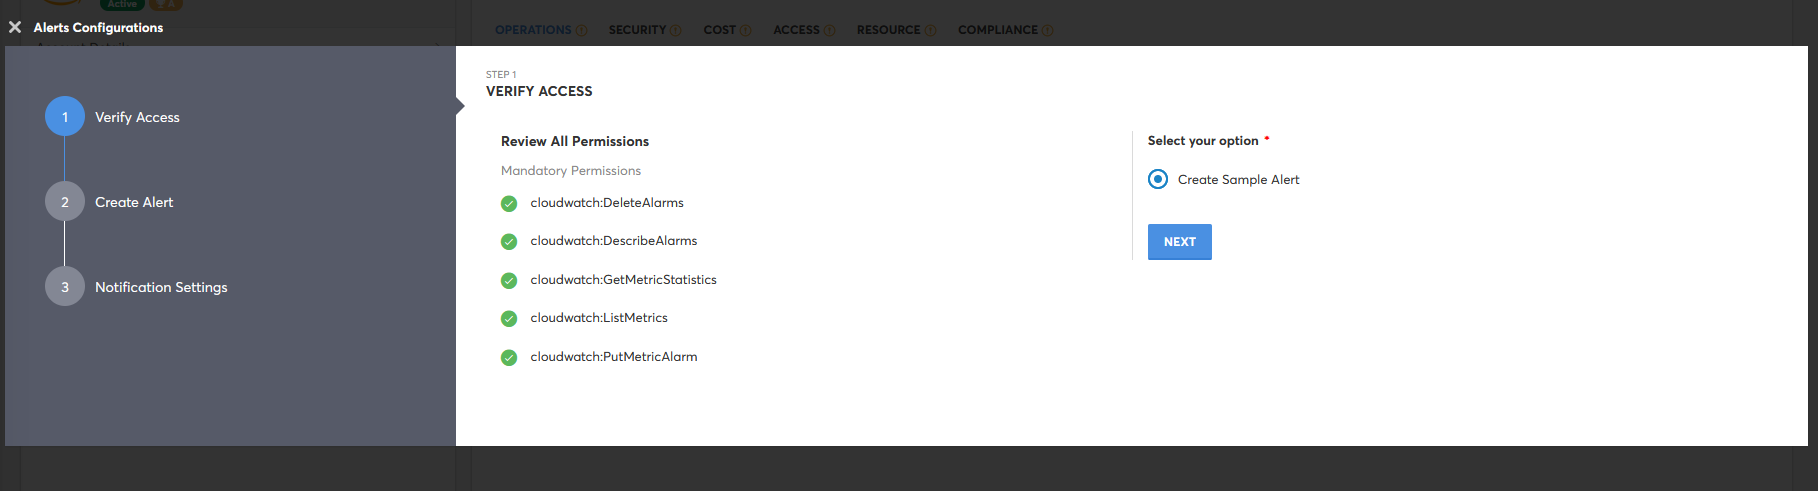
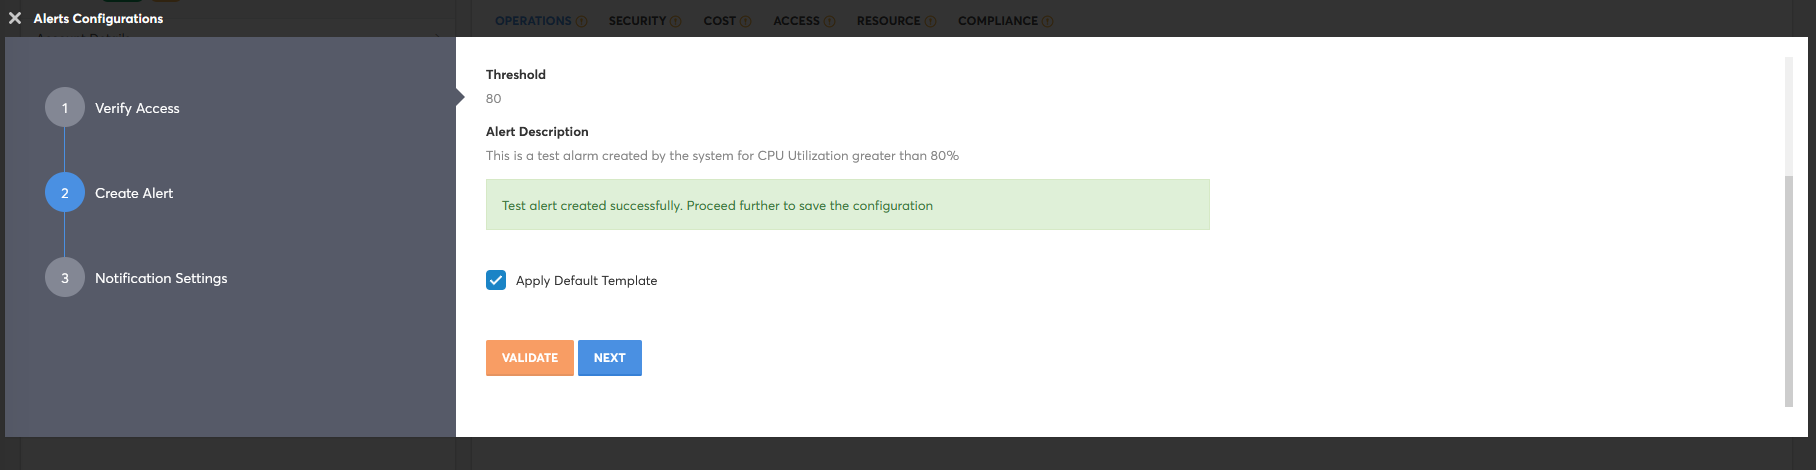
In step 1, before you can create a webhook alert, CoreStack needs to validate that all the necessary permissions are working properly. To do this, select the Create Sample Alert bubble, wait for all the check marks to turn green, then click Next.
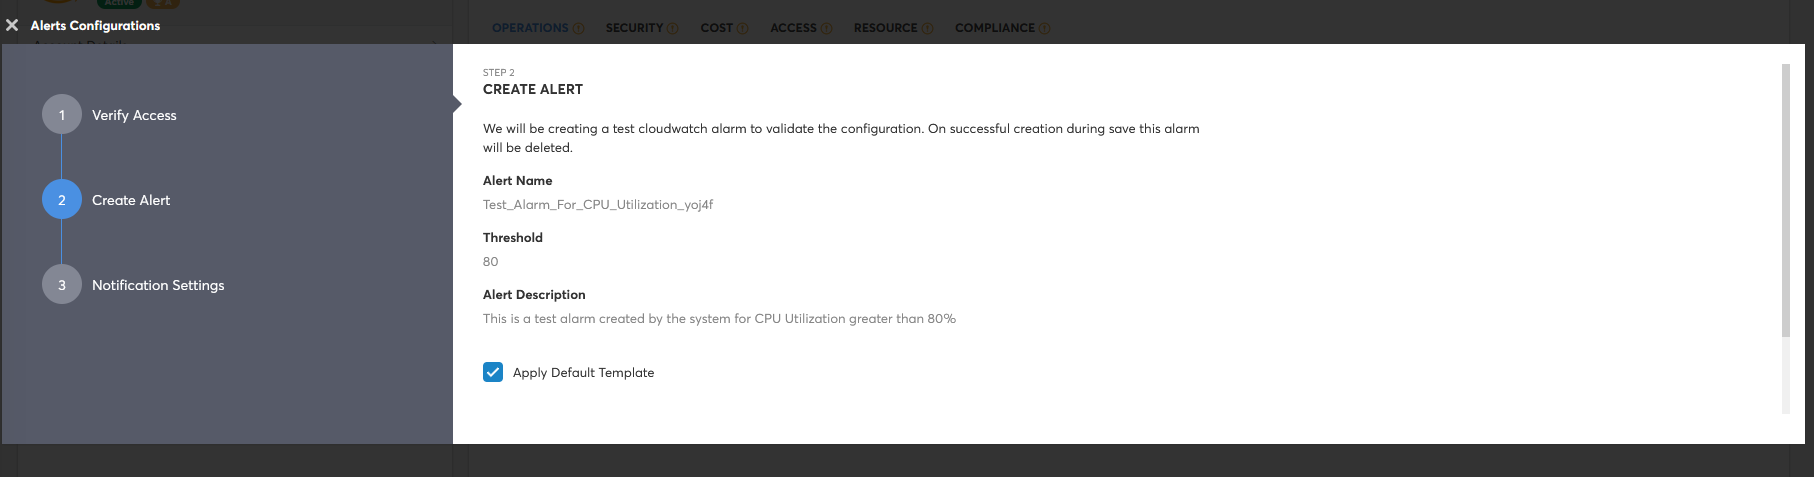
In step 2, CoreStack will create the sample alert and run it to validate everything is working properly for the connection between your cloud account and CoreStack.
You may need to scroll down to see the Validate and Next buttons. You cannot proceed without first clicking the Validate button to validate the process.
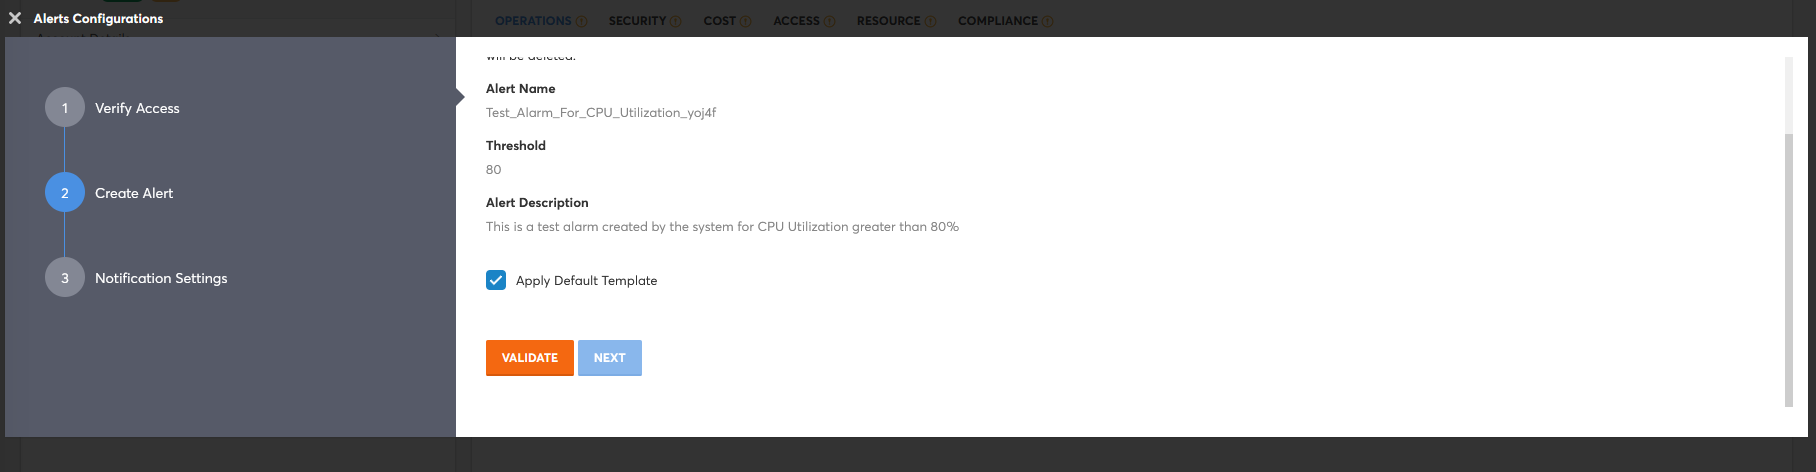
If you like, you can choose to check the Apply Default Template box (optional) to use the default alert template provided by CoreStack. Next, click Validate, then wait a moment. You should see a green success message appear above the buttons, and the Next button will now be enabled. Click Next to proceed.
In step 3, you should see a few options for where you can choose to send this alert to, including Email, Webhook, and Microsoft teams Webhook.
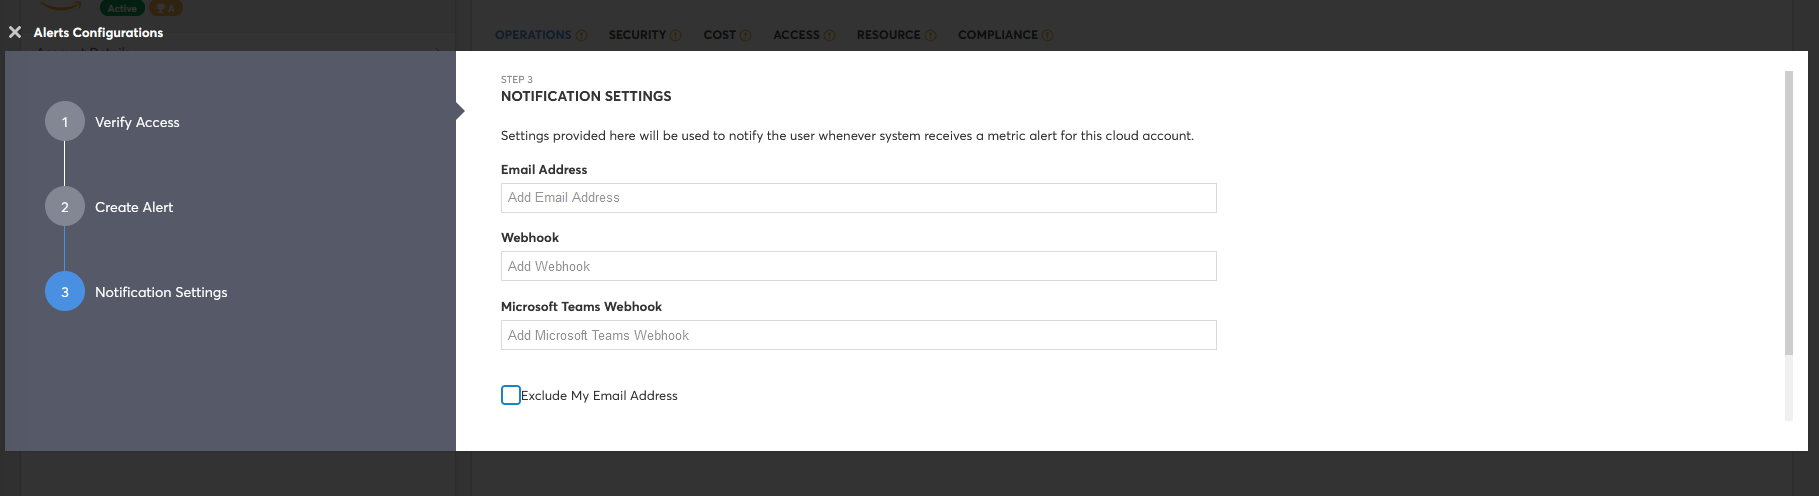
To create a Teams webhook, paste the link copied from Teams previously in the Microsoft Teams Webhook box, then click on the Finish button.
You may need to scroll down further to see the Finish button.

After the configuration is successfully saved, CoreStack will now trigger notifications for any alerts and send them to the specified group in Microsoft Teams.

Updated 8 months ago