

User Delegation
Learn how to delegate access rights and responsibilities from one account master to another account master.
Introduction
User delegation is used to delegate access rights and responsibilities from one account master to another account master. Different rules are created to delegate a particular tenant-role(s)/user(s)/user groups from a source account master to a target account master. One or more options can be selected for delegation to a target account master.
For example, you can select tenant-role(s) to be delegated to a target account master, or you can select tenant-role(s) and user groups to be delegated to a target account master, or you can select tenant-role(s), user(s), and user groups to be delegated to a target account master, etc. Any combination of options can be selected based on your requirements.
Delegating user roles
Perform the following steps to delegate a user role:
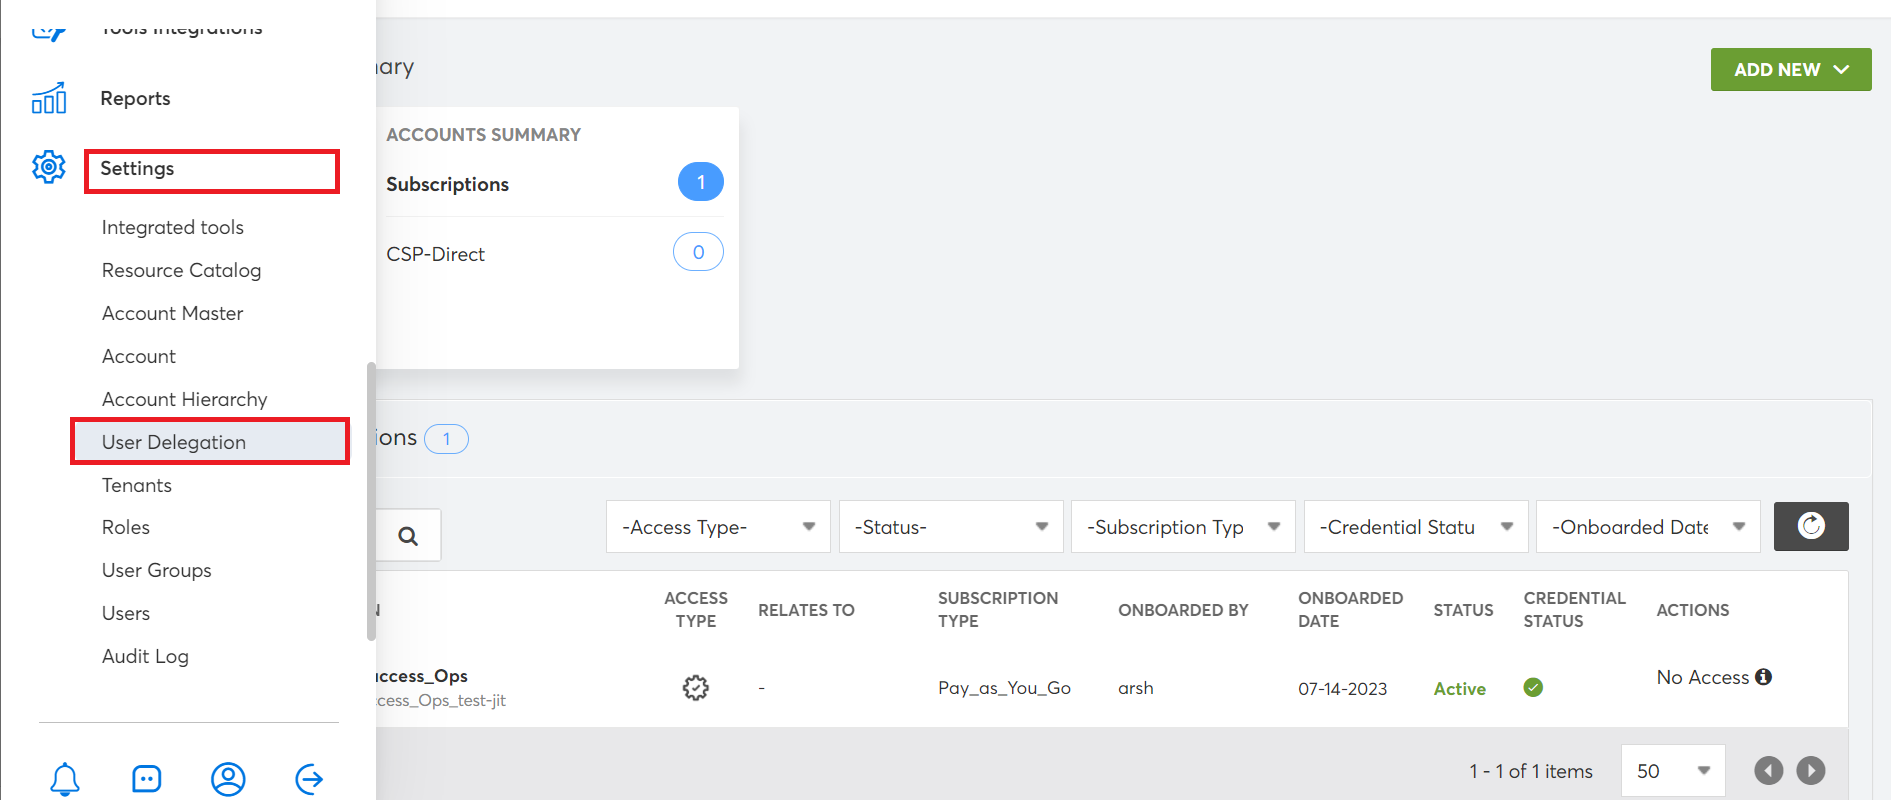
- Access CoreStack and go to Settings > User Delegation.
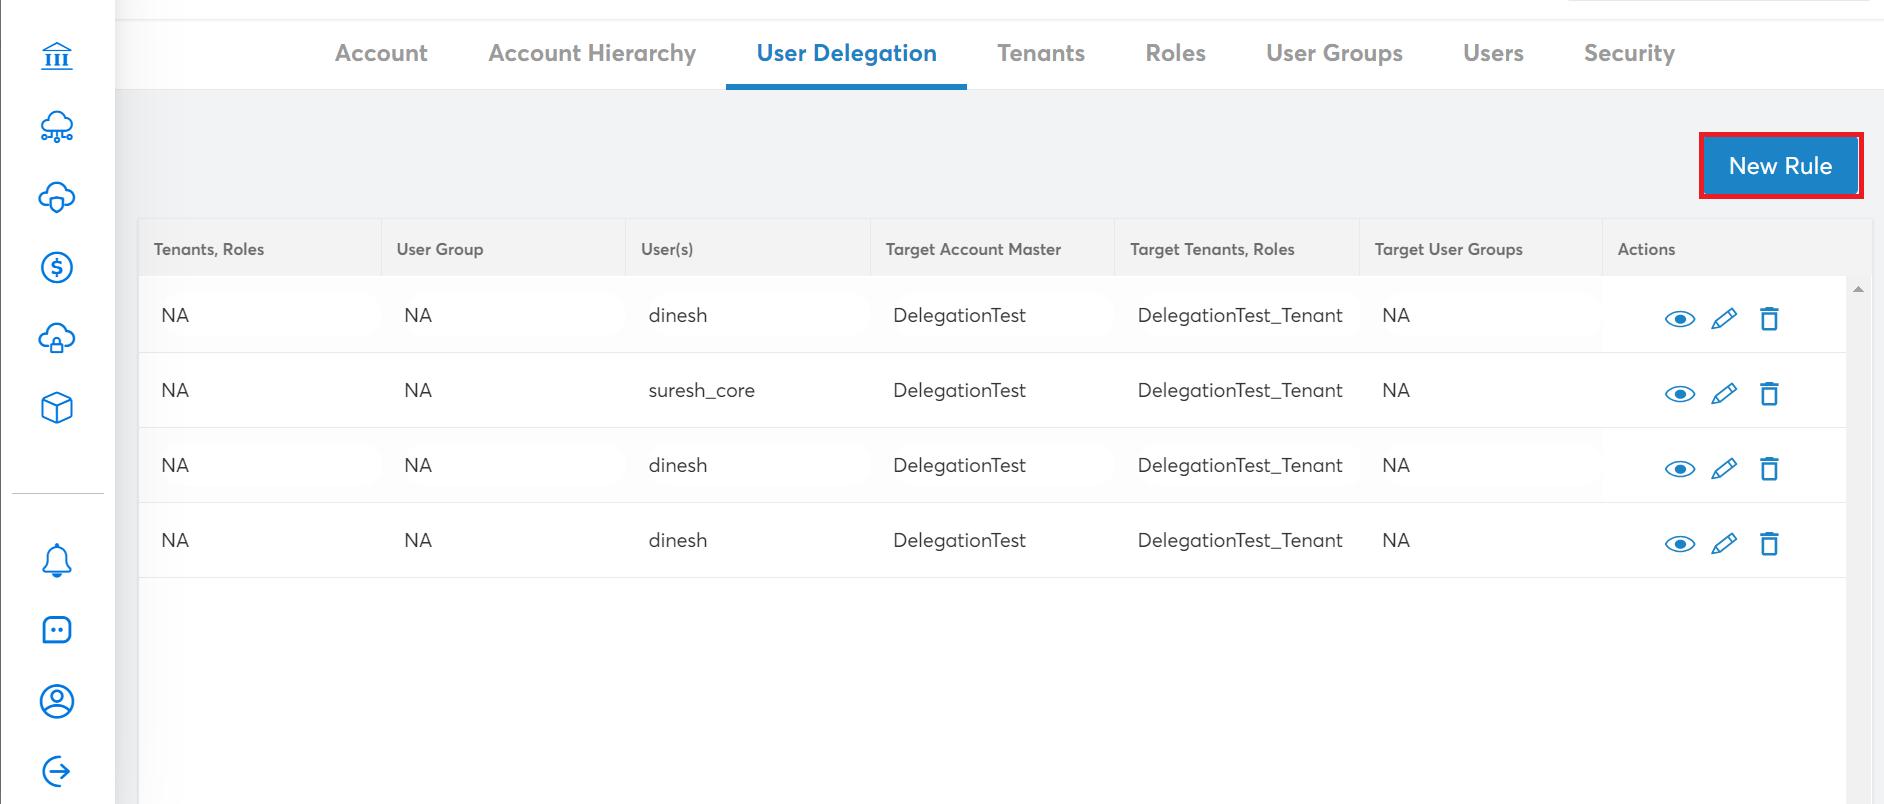
- Click New Rule.
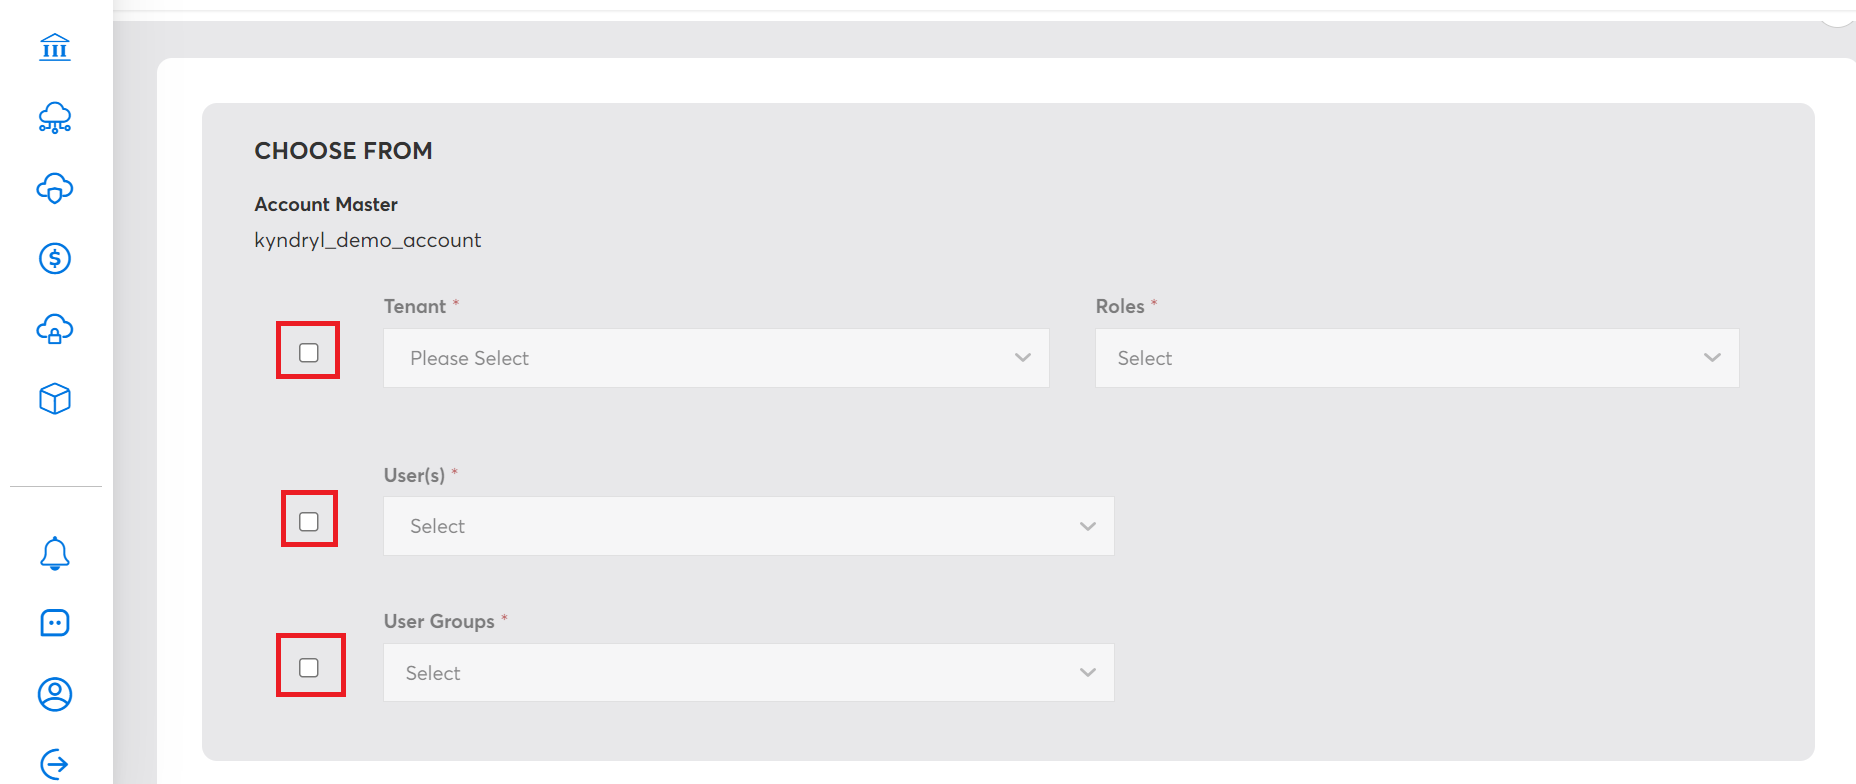
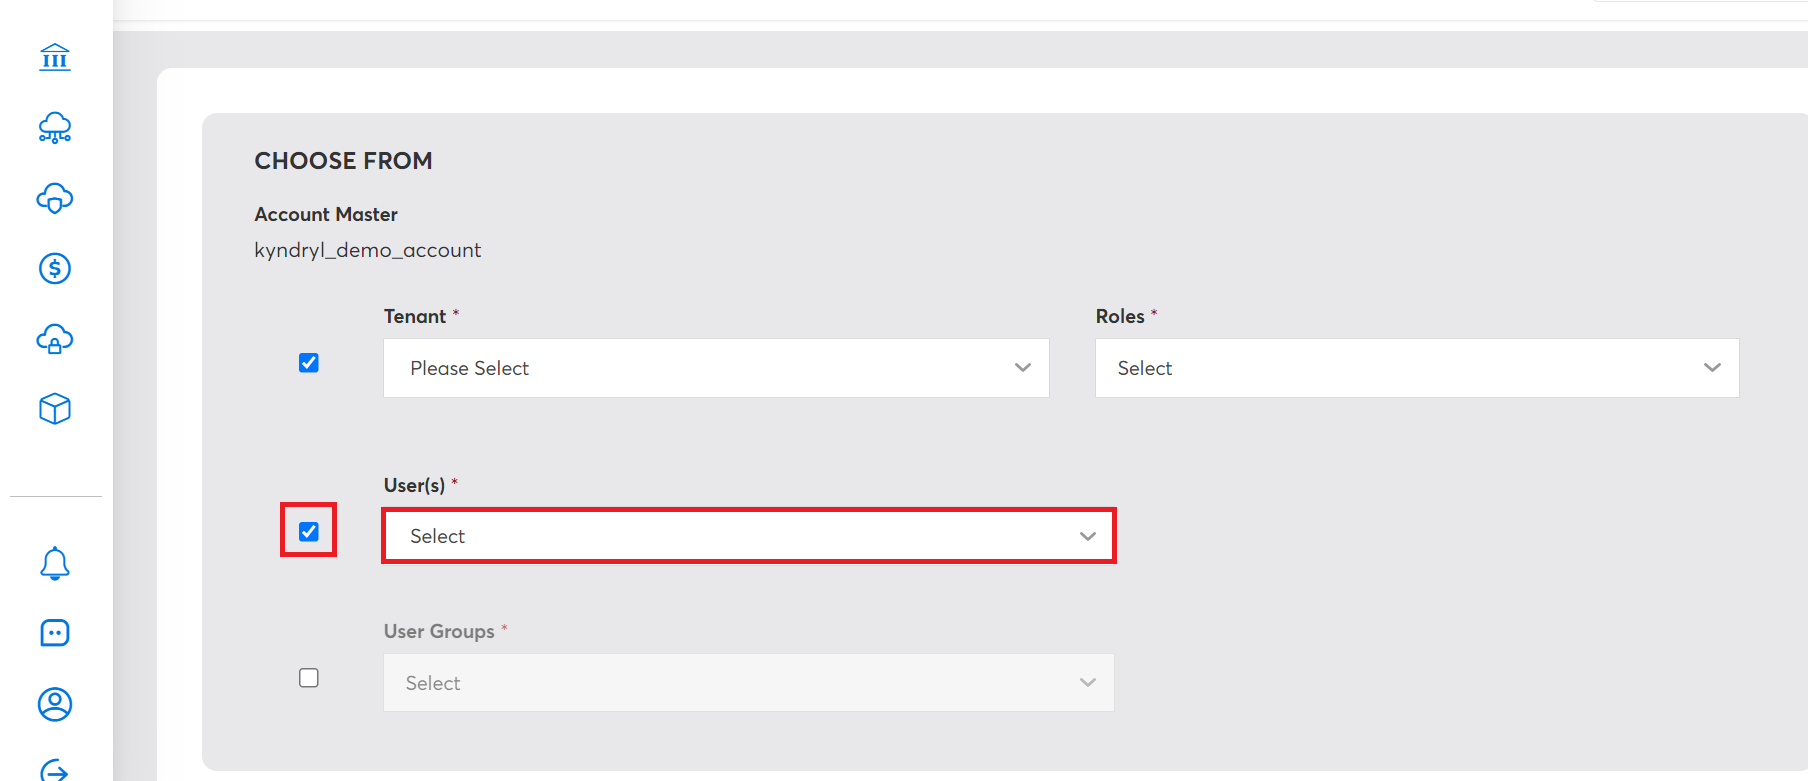
- In the CHOOSE FROM section, click to select the checkbox to the left of Tenant, User(s), or User Groups. Based on your requirements, you can select one or many checkbox(es). The CHOOSE FROM section has source account master details that will be delegated to a target account master.
- If you select the checkbox to the left of Tenant, you can delegate a tenant-role(s) from source account master to target account master. To select a tenant and their role(s):
a. In the Tenant list, click to select a tenant and click Apply.
b. In the Roles list, click to select roles, and click Apply. Multiple roles can be selected.
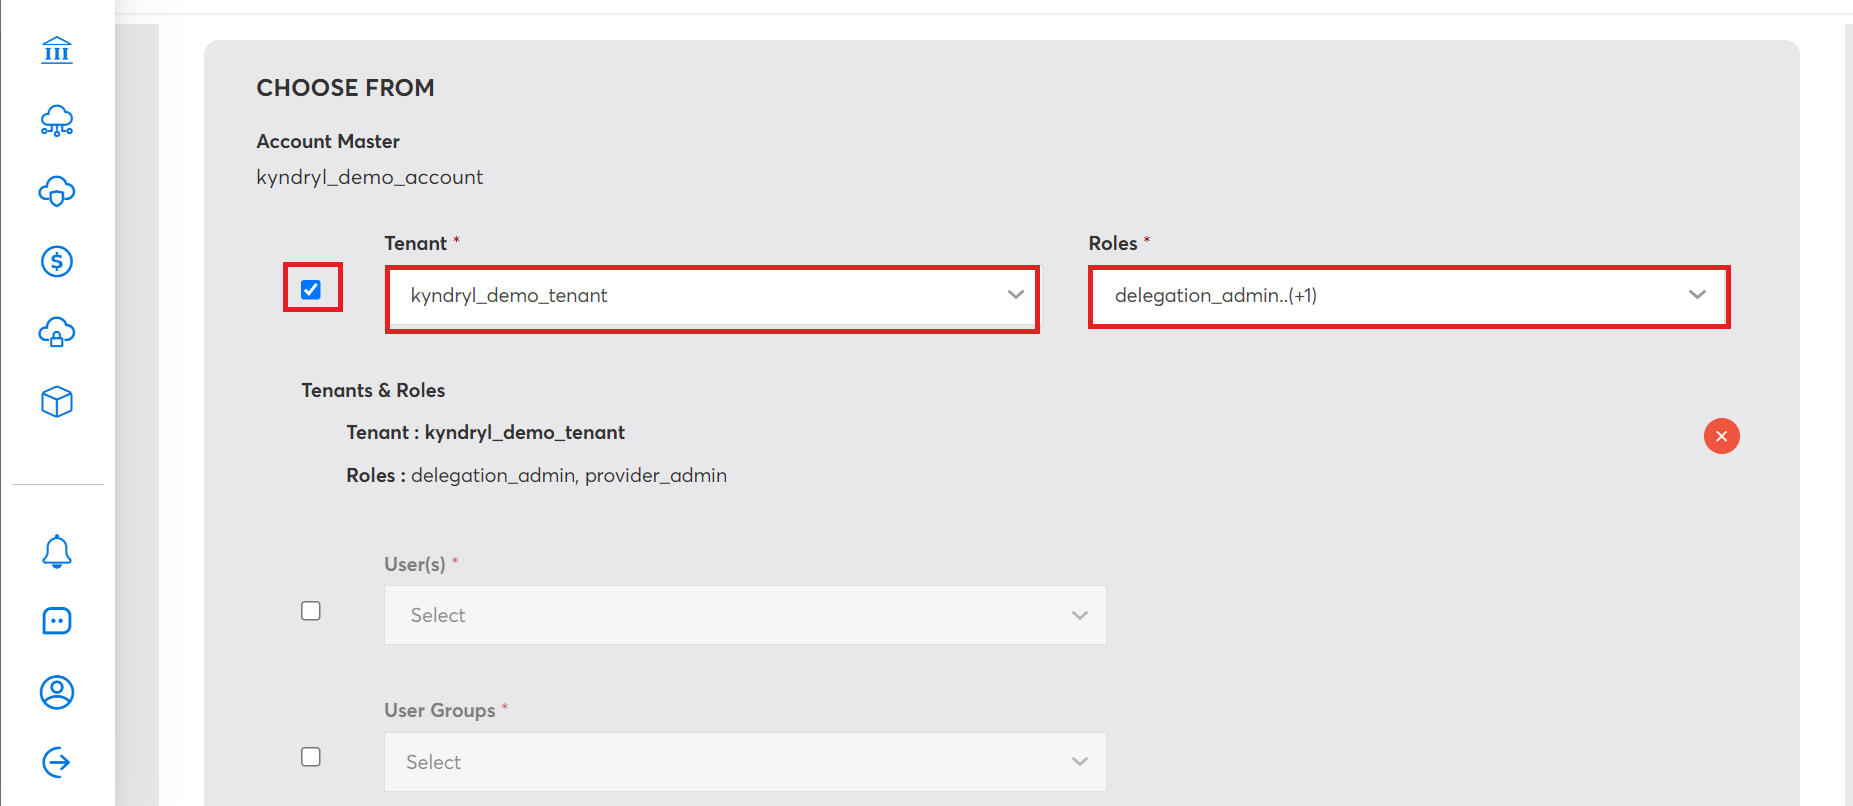
The selected tenant and roles are displayed. To remove the tenant and role(s) you have added, click the cross symbol.
Note:
- Tenant-role(s) from a source account master can be delegated to other tenant-role(s) of a target account master.
- Tenant-role(s) from a source account master can be delegated to user groups of a target account master.
- Among tenant-role(s), user(s), and user groups, you can select any one or two or all of these options to delegate to a target account master.
- If you select the checkbox to the left of the User(s) field, in the User(s) list, click to select the user(s), and click Apply. Multiple users can be selected. This action will delegate the selected user(s) from a source account master to a target account master.
Note:
- A user can be delegated from source account master as a tenant with role(s) in the target account master.
- A user can be delegated from source account master as user groups in the target account master.
- Among tenant-role(s), user(s), and user groups, you can select any one or two or all of these options to delegate to a target account master.
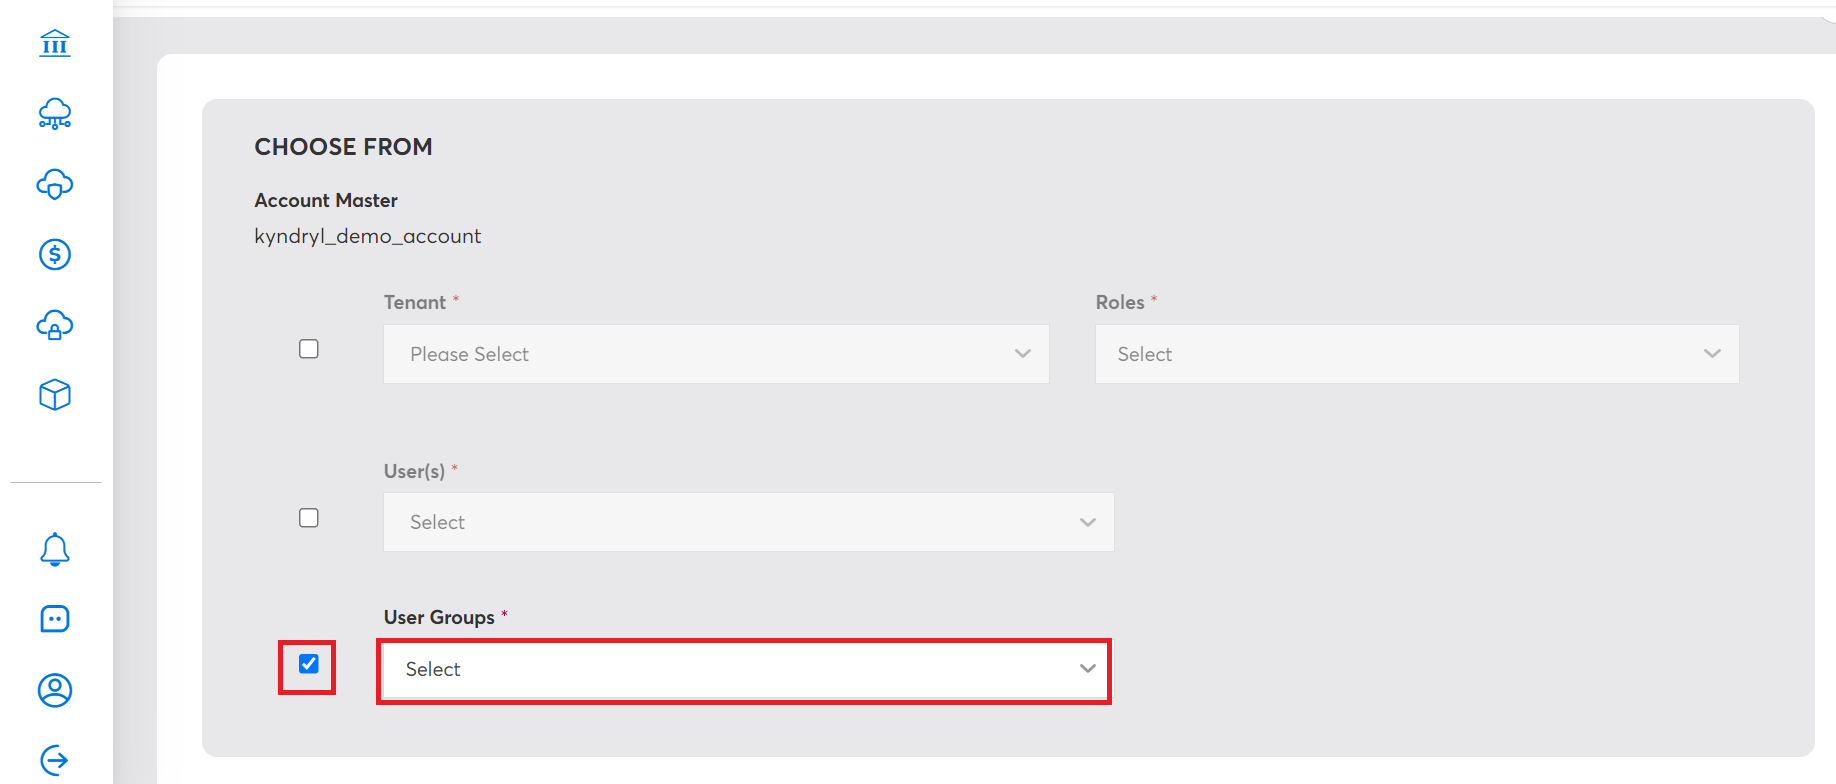
- If you select the checkbox to the left of User Groups, in the User Groups list, click to select user groups, and then click Apply. Multiple user groups can be selected. This action will delegate user groups from a source account master to a target account master.
Note:
- User groups from source account master can be delegated as a tenant with specific role(s) in the target account master.
- User groups from source account master can be delegated as a user group in target account master.
- Among tenant-role(s), user(s), and user groups, you can select any one or two or all of these options to delegate to a target account master.
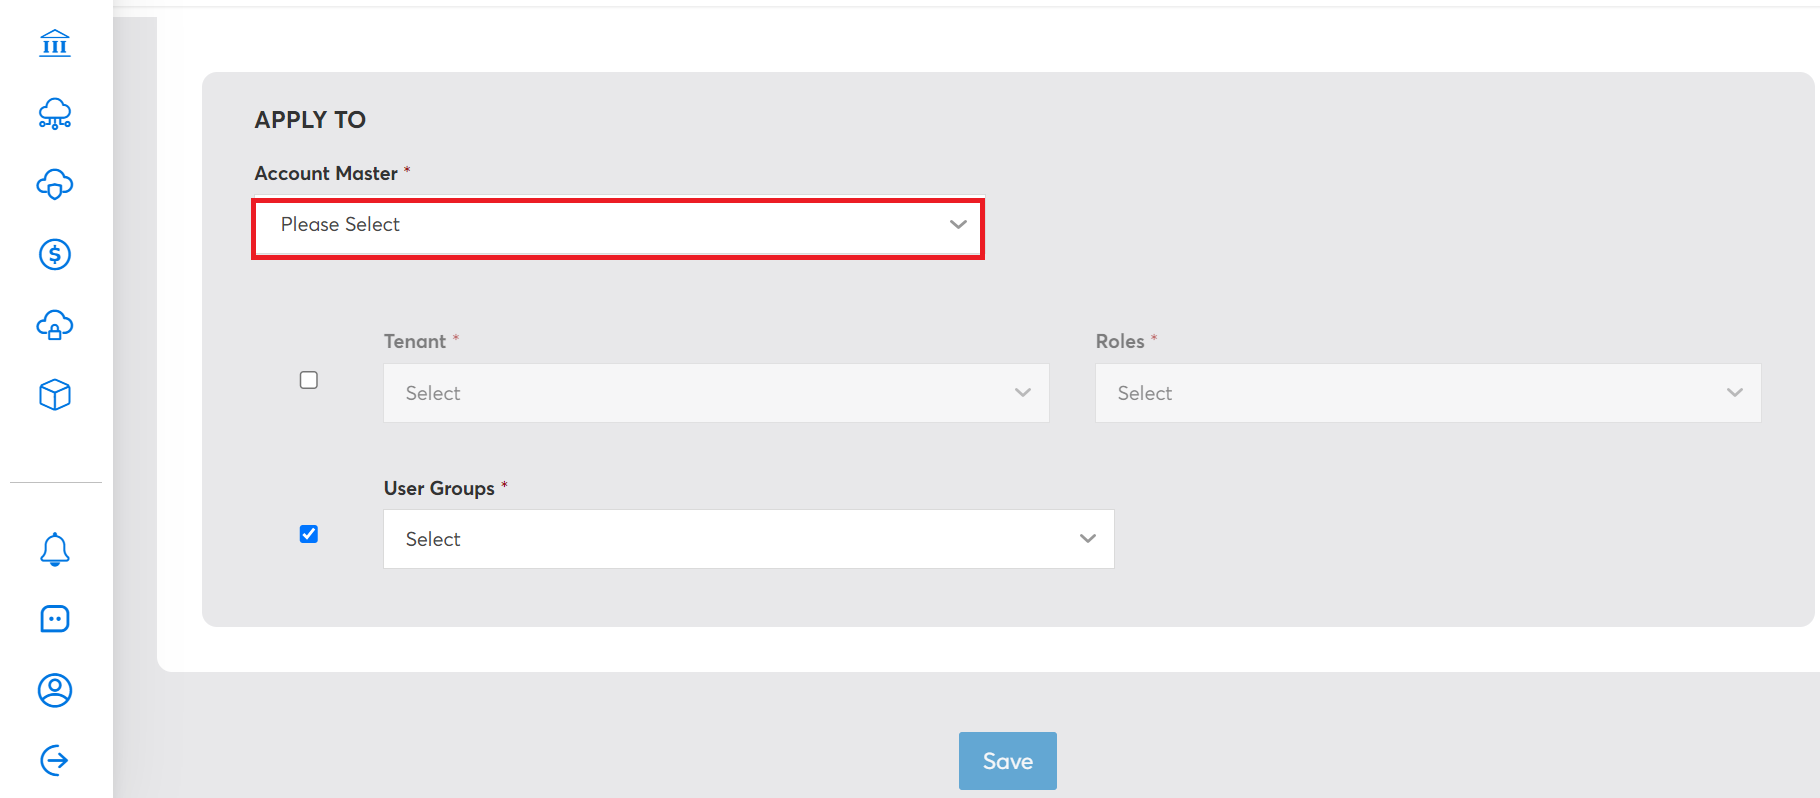
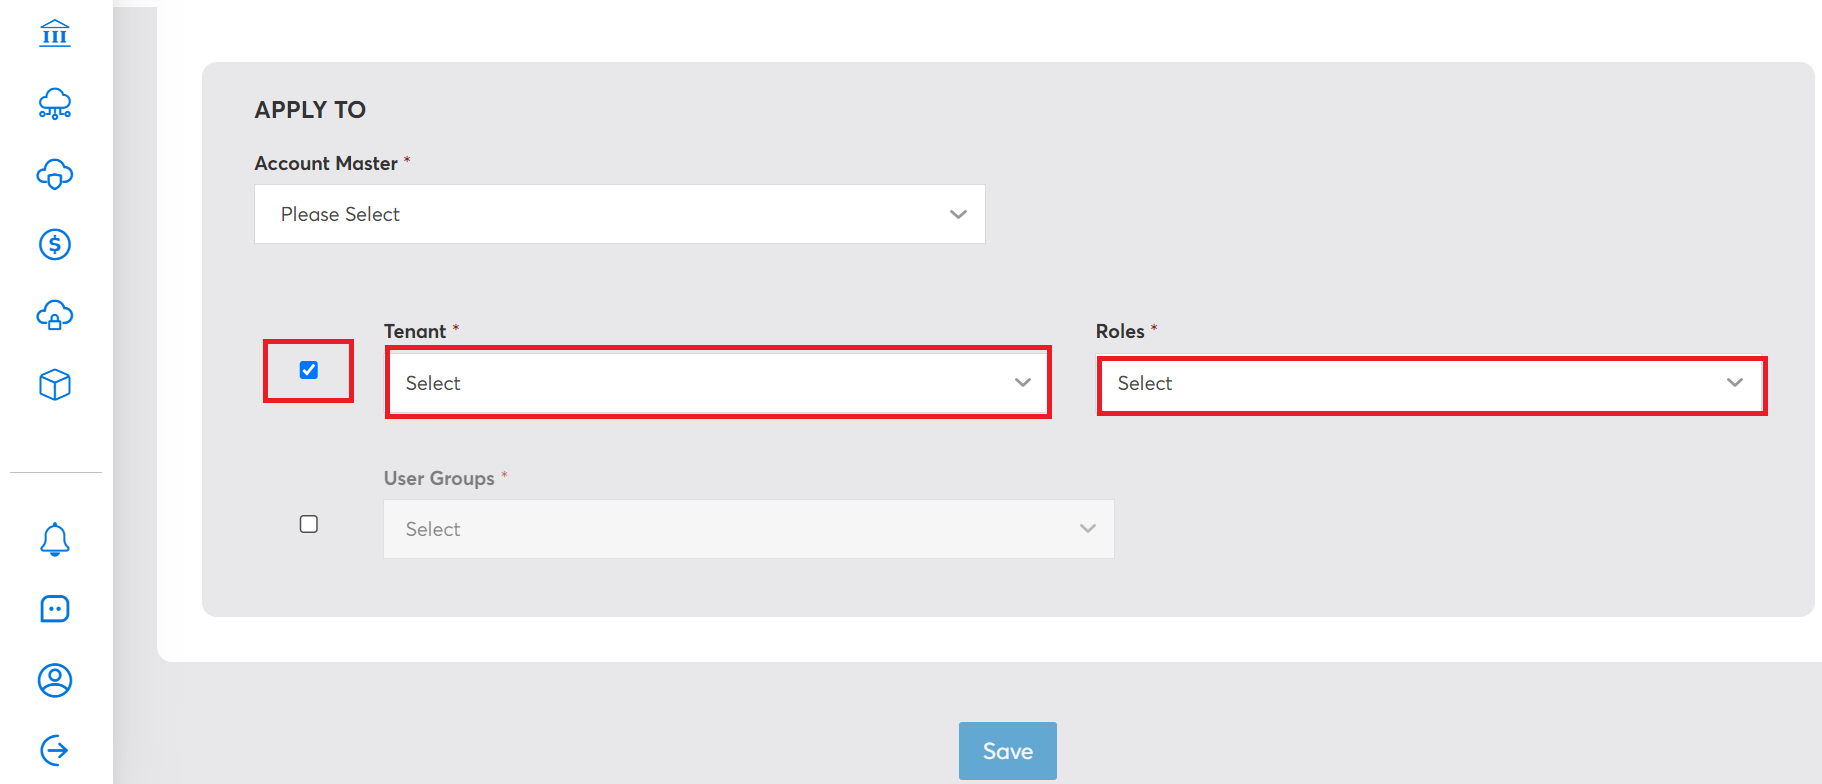
- In the APPLY TO section, in the Account Master list, click to select a target account master where the selected role from source account master will be delegated. The APPLY TO section is the target account master section that takes up the role(s) from the target section.
- Select the checkbox on the left of Tenant or User Groups, or both the options.
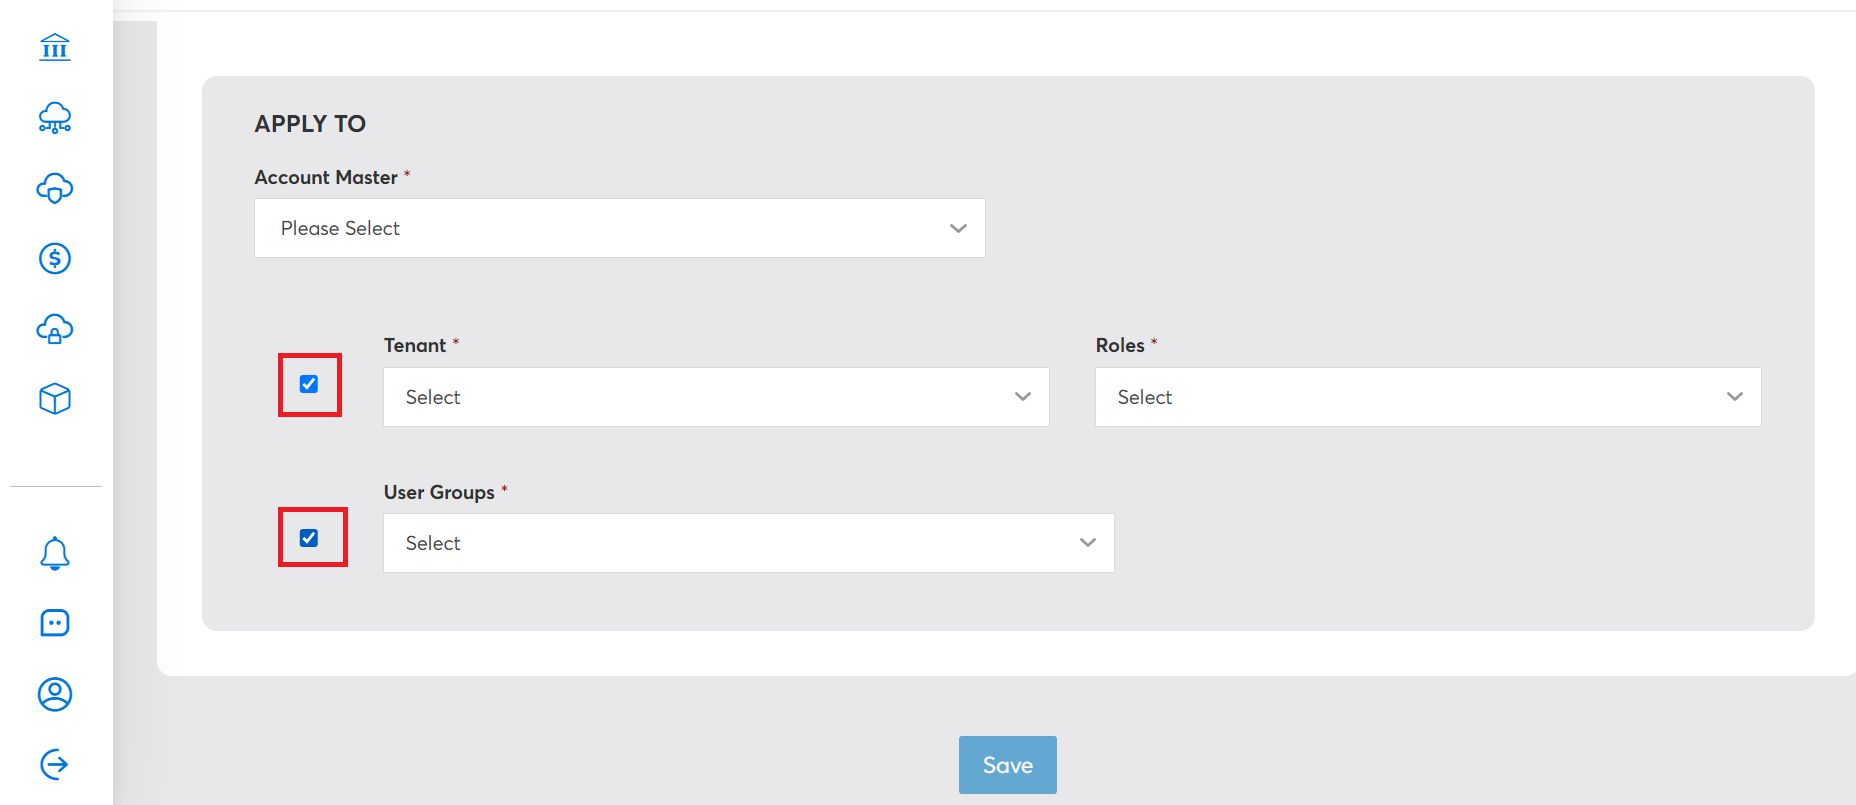
-
If you select the checkbox to the left of Tenant, the selected tenant-role(s)/user(s)/user groups from the source account master is delegated to the tenant-role(s) selected in this step.
To select tenant-role(s):
a. In the Tenant list, click to select a tenant, and click Apply.
b. In the Roles list, click to select roles, and click Apply. Multiple roles can be selected.
The selected tenant and role(s) are displayed. To remove the tenant and role(s) you have added, click the cross symbol.
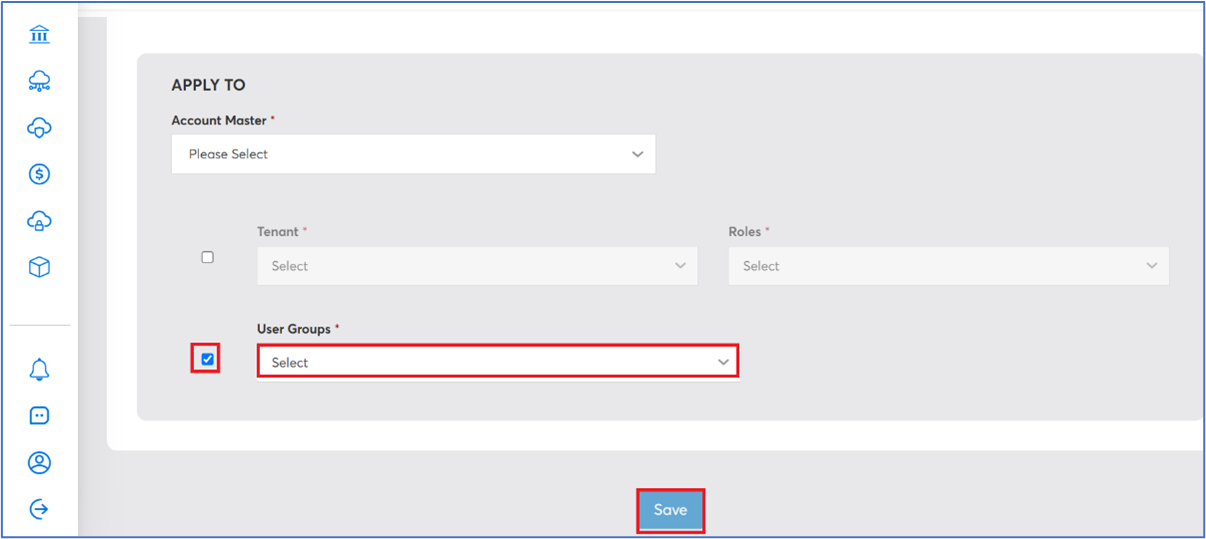
- If you select the checkbox to the left of User Groups, in the User Groups list, click to select user groups, and then click Apply. Multiple user groups can be selected. The selected tenant-role(s)/user(s)/user groups from the source account master will be delegated to the user groups selected in this step.
- Click Save.
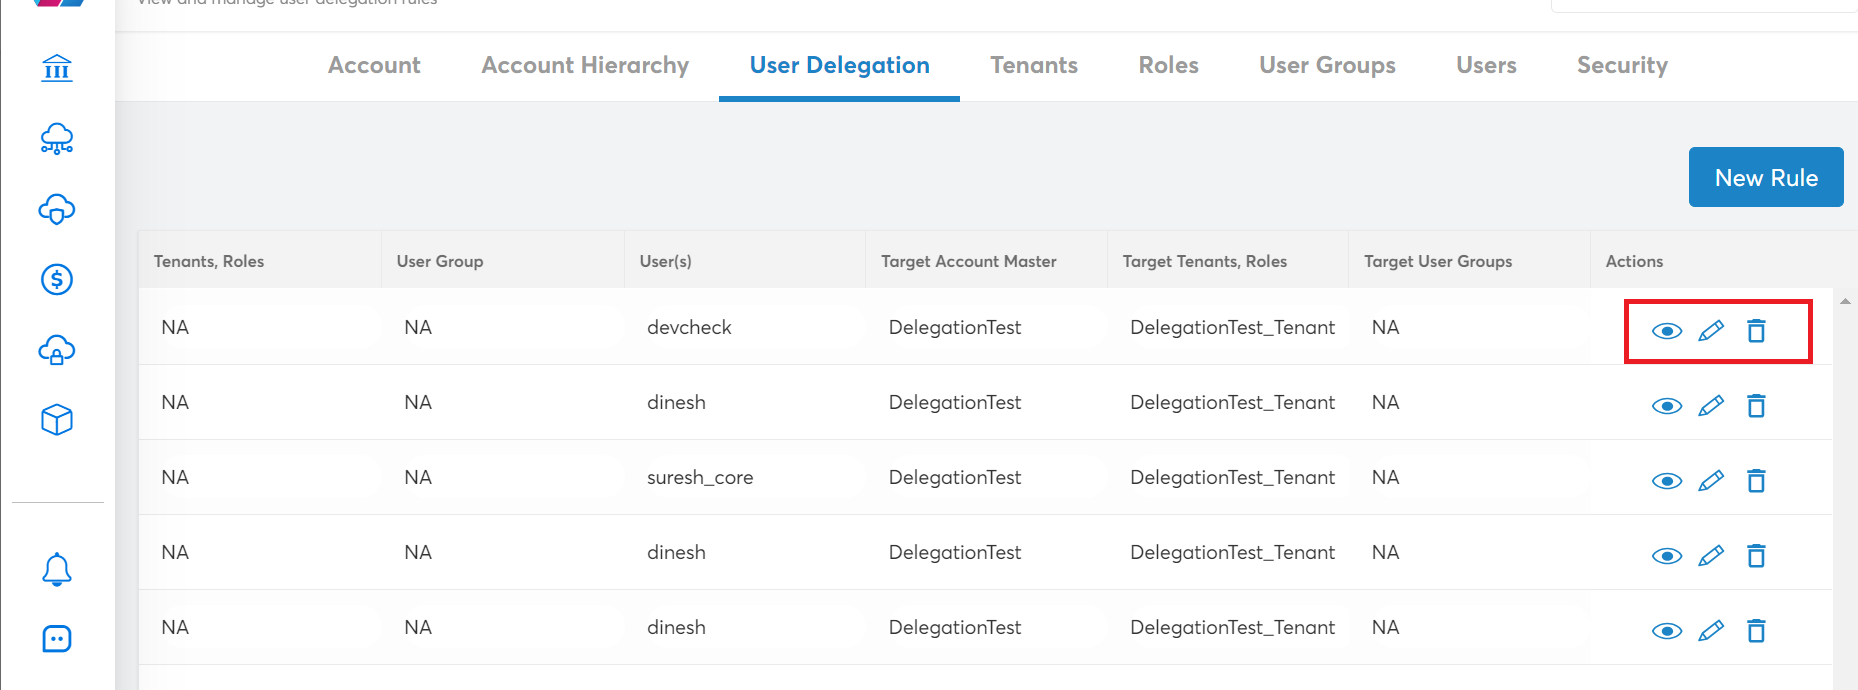
Editing user delegation rules
Use the following icons to view/delete/edit rules:
- Click the eye icon to view an existing rule.
- Click the trash bin icon to delete a rule. After you click the trash bin icon, a dialog box appears, and you need to click OK to proceed further.
- Click the pen icon to edit an existing rule and then save it.
Note:Follow the steps explained in the Delegating Customer Account section of the User Management user guide to perform user delegations.
After a user is delegated, it will show as a rule in User Delegation page.
You can now edit or view or delete that rule from the User Delegation page and apply the available options.
Any change made to the delegation rule will impact the delegated user.
Updated 8 months ago