

Account Management
This user guide will show you how to navigate the core account management sections in the platform settings.
Account Master
An account master, as the name suggests, is a master account created by a platform Product Admin for a customer, with an appropriate Admin role (Provider Admin or Delegation Admin) designated for it.
The Admin user from the customer side can then manage that account and perform required tasks or manage users as per their needs. For example, they can invite users, add or modify roles, etc. A Provider Admin can also create another Provider Admin based on their needs.
On the Account Management screen, a Provider Admin can view the list of existing account masters and can create a new account master.
Viewing Account Master Details
On the Account Management screen, perform the following to view the details of an account master:
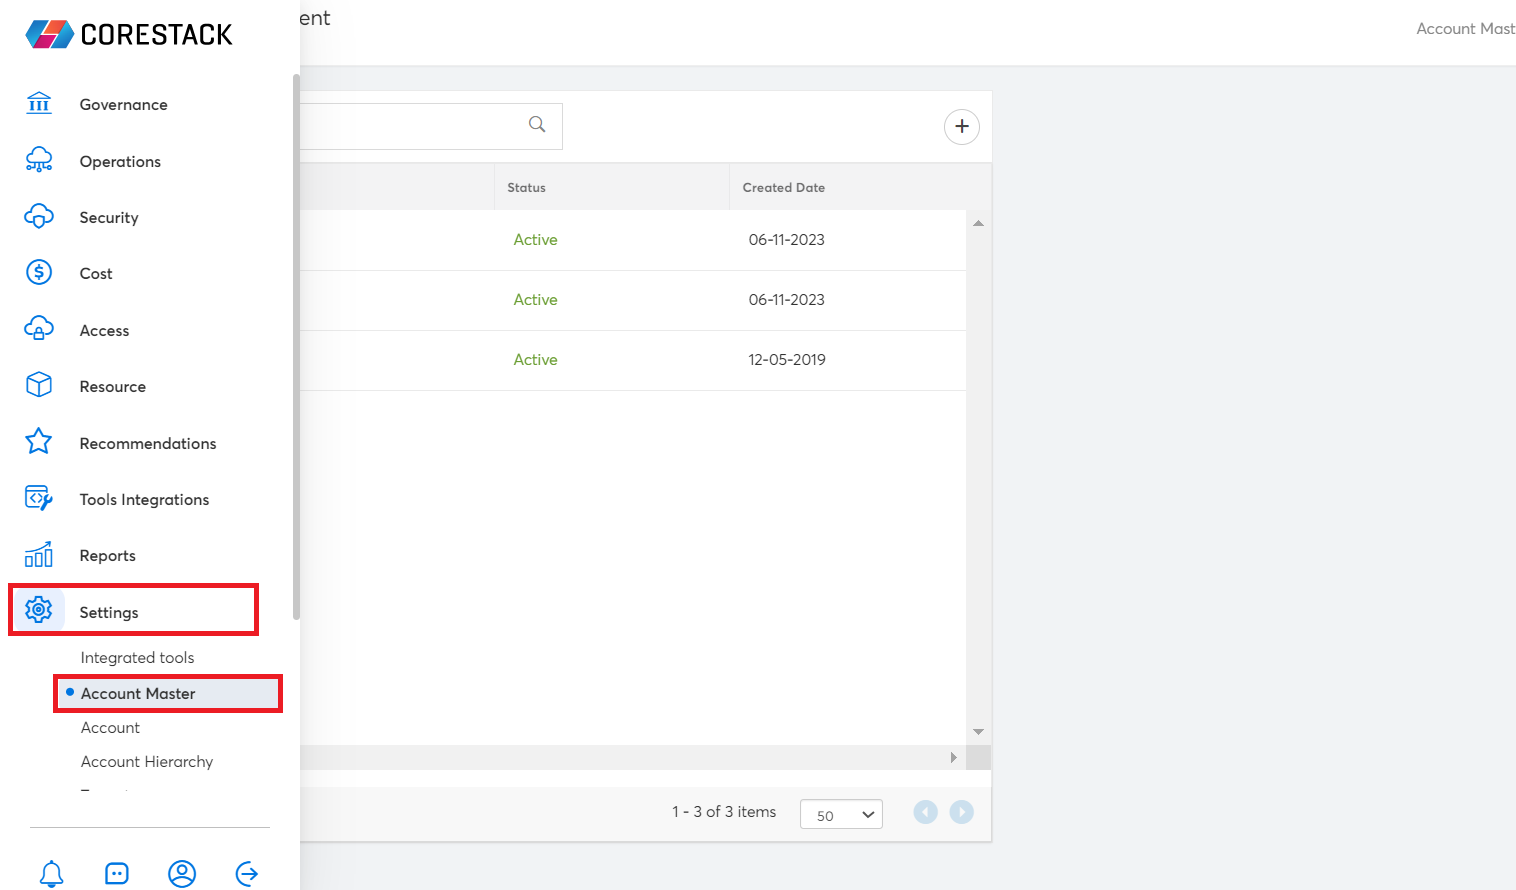
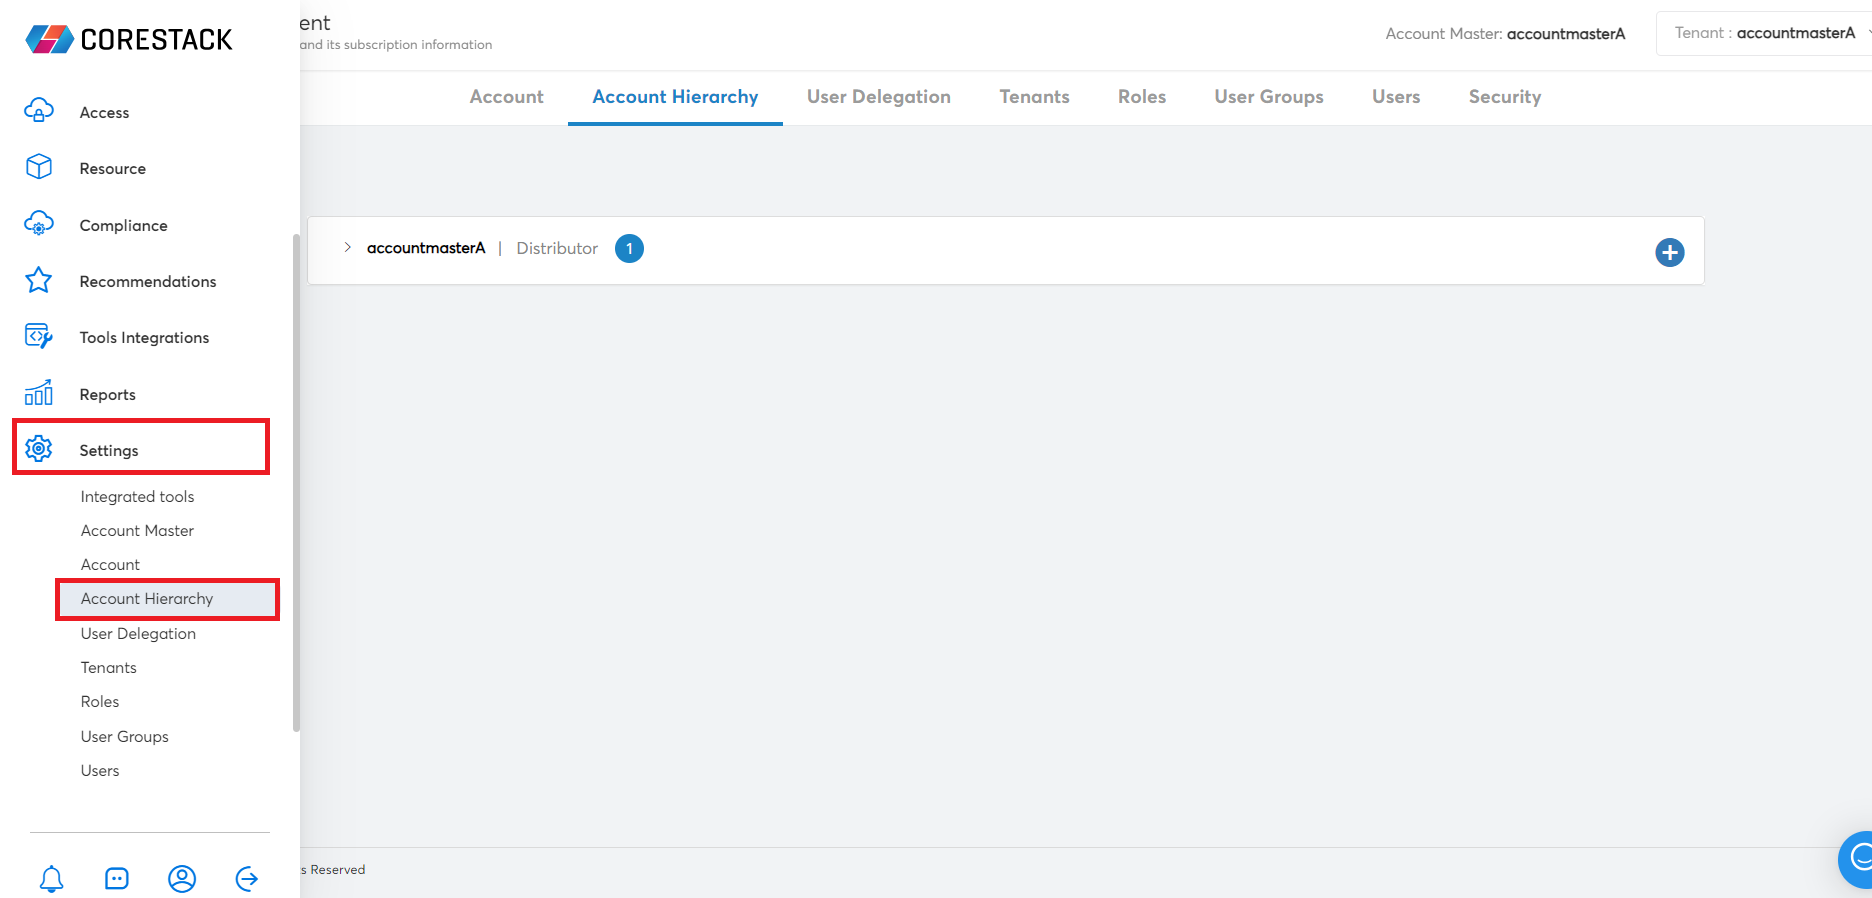
- Login to the platform and navigate to Settings > Account Master.
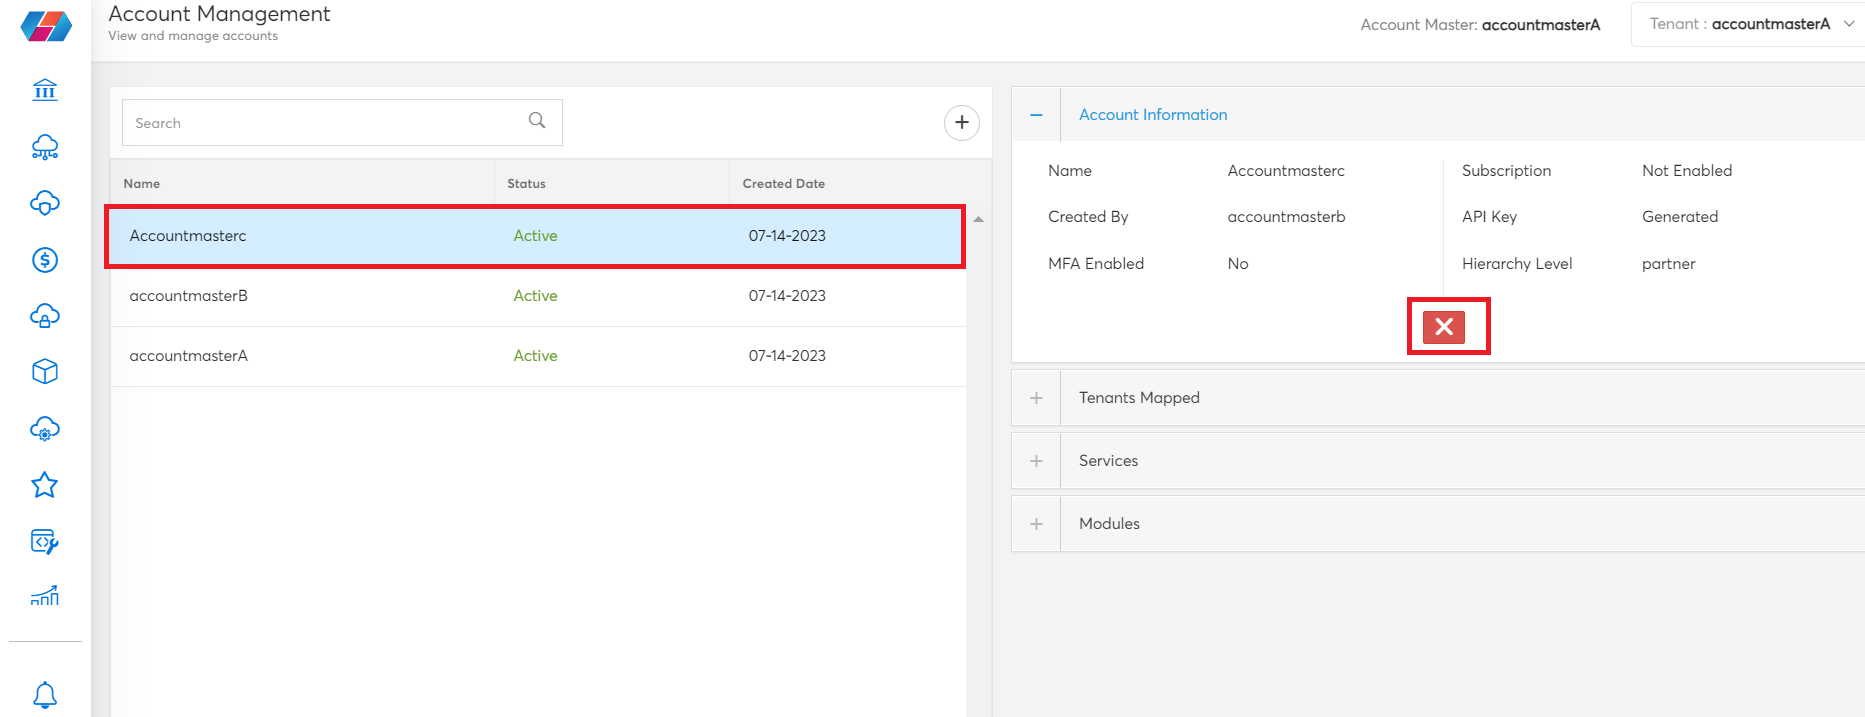
- On the left panel, click to select an account master. All the related details are displayed on the right panel of the screen, as shown in the screenshot below.
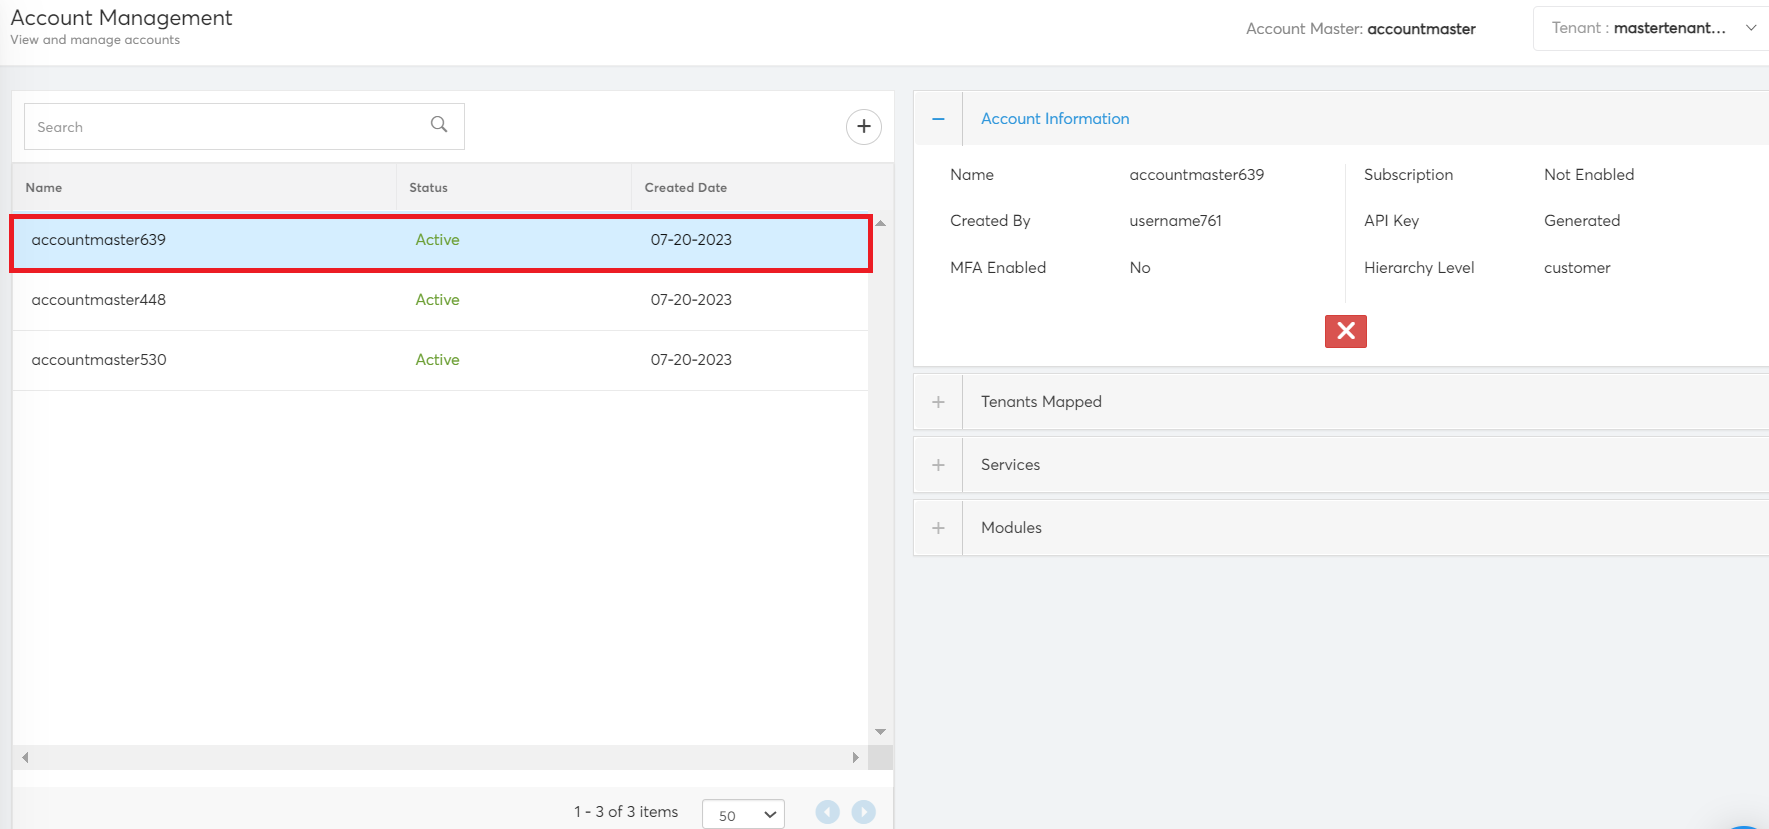
The following sections are displayed on the right side of the screen:
- Account Information: This section shows the account details.
- Tenants Mapped: This section shows the tenants mapped for the account master.
- Services: This section shows the services that are available for the account master.
- Modules: This section shows module-specific permissions.
- Click the plus (+) symbol to expand a section and view more details.
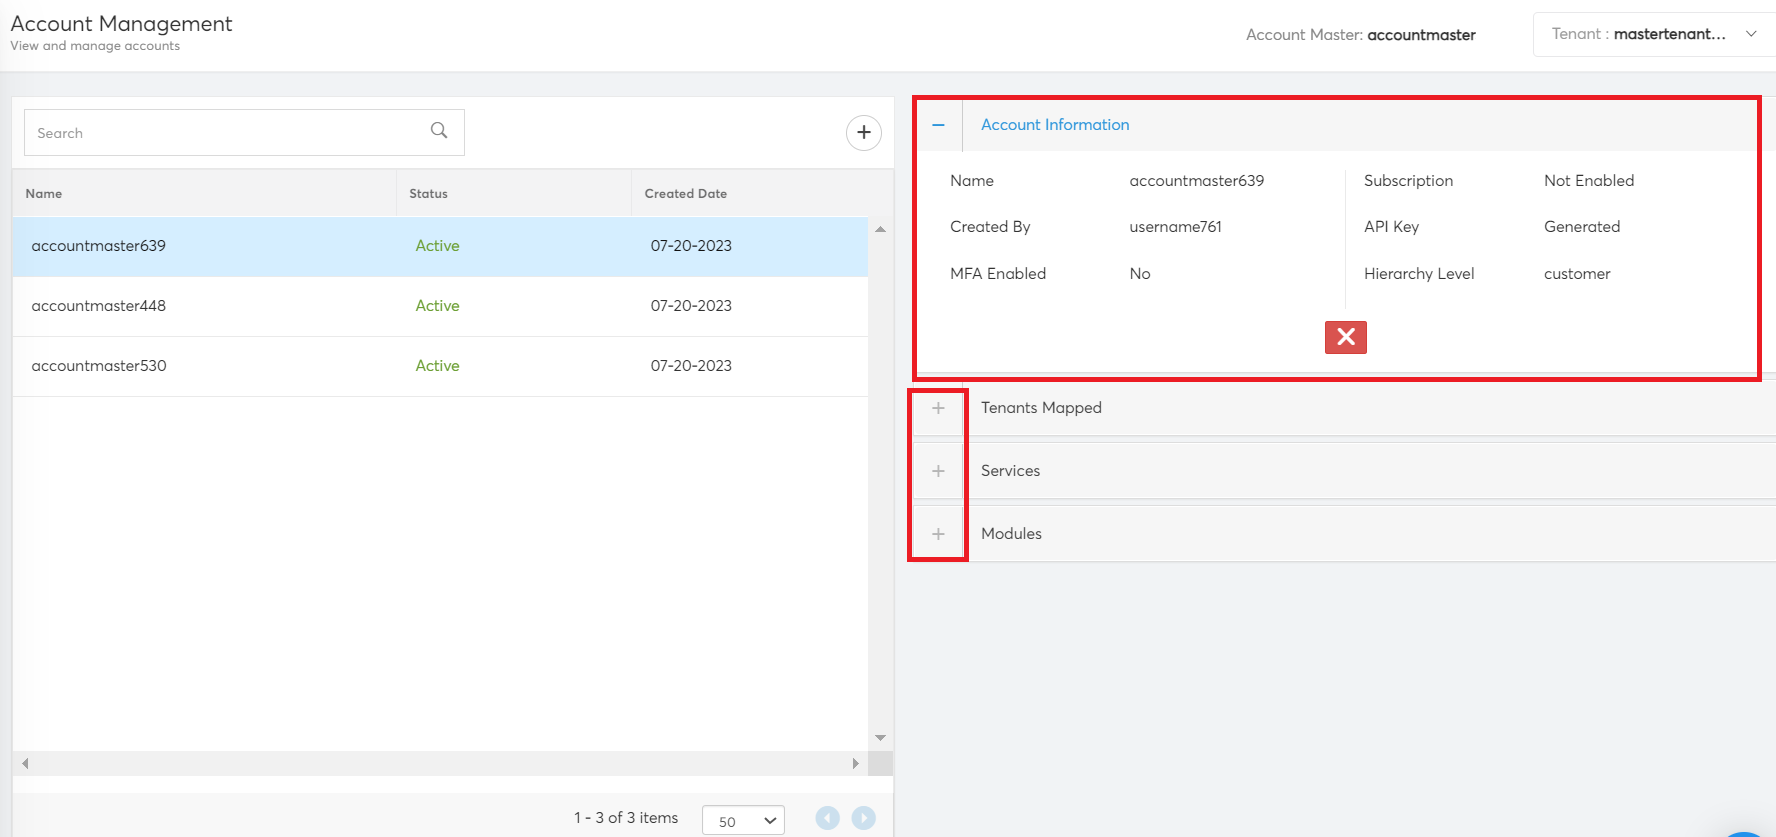
Note:If a user wants to delete the selected account master, they need to click the 'X' icon in the Account Information section, and then click OK in the dialog box that appears after.
Creating an Account Master
An account master can be created by a Product Admin, initially.
Perform the following steps to create an account master:
- Login to the platform and click Settings > Account Master.
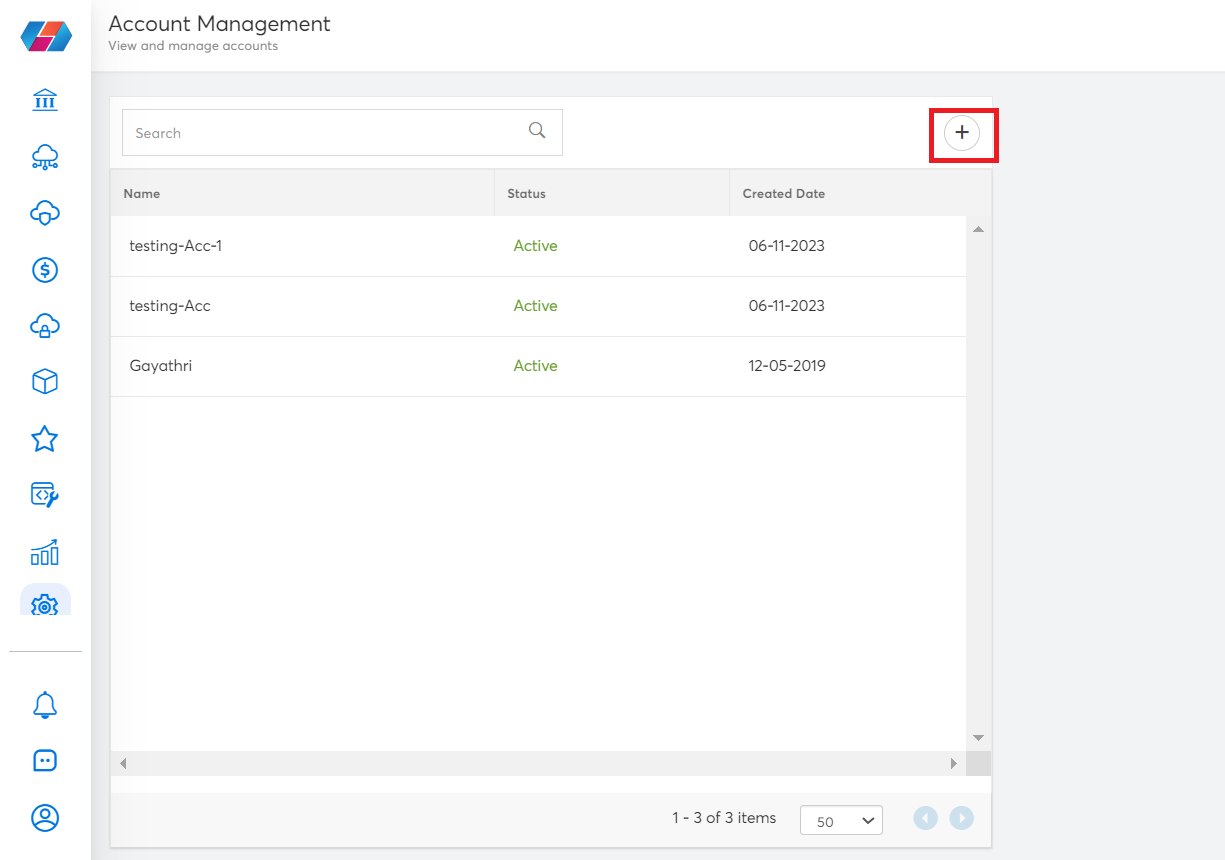
- Click the plus (+) icon to add a new account master.
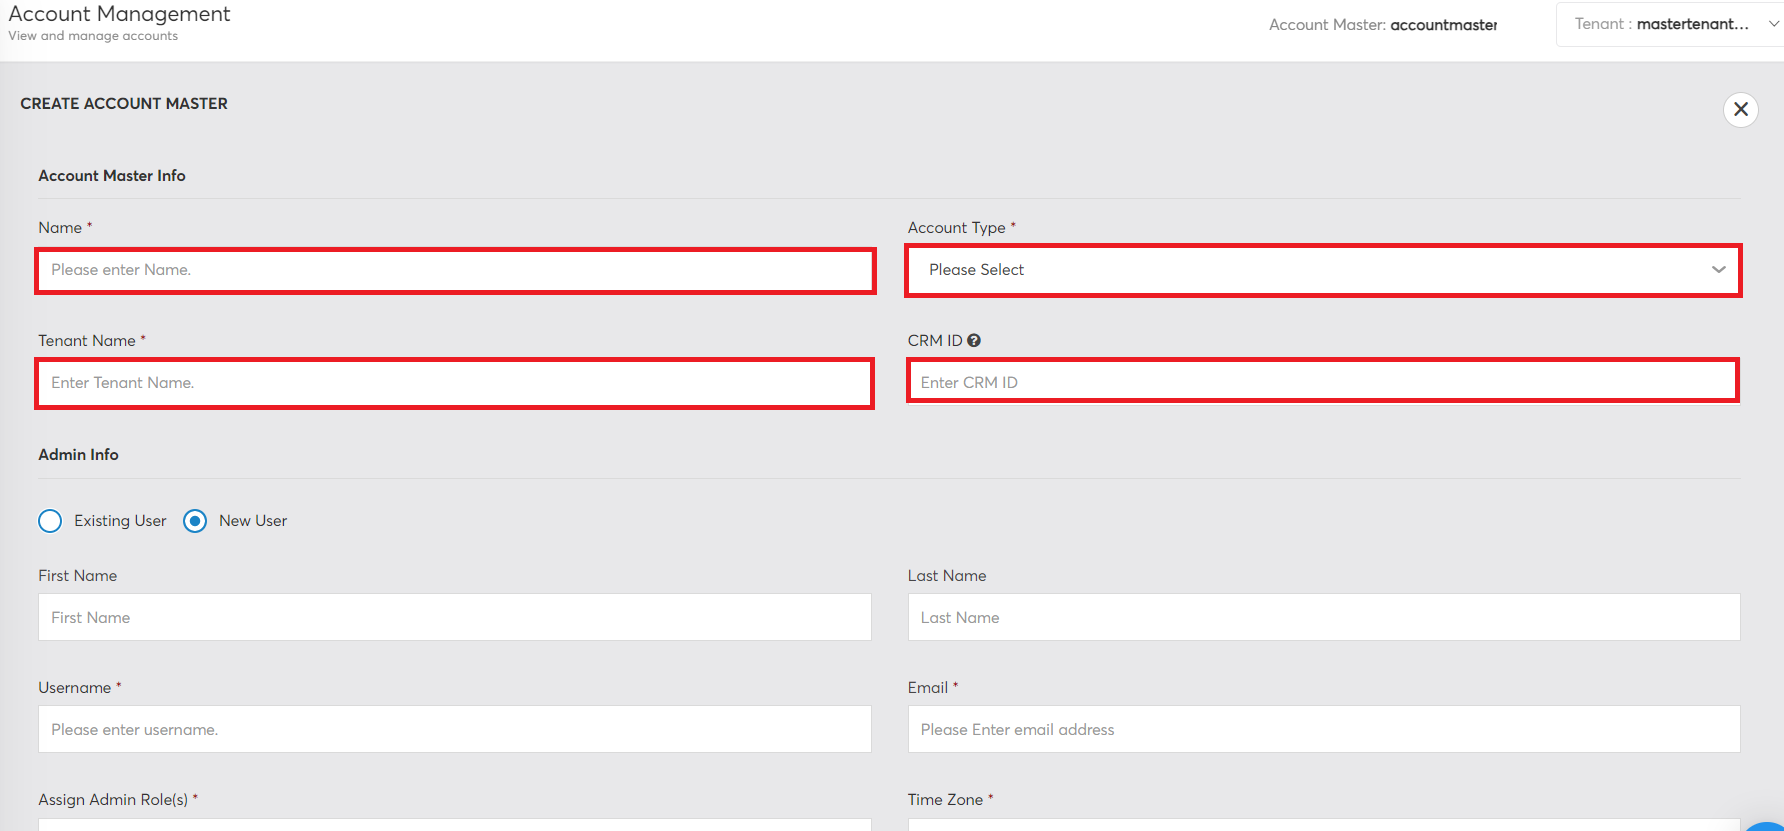
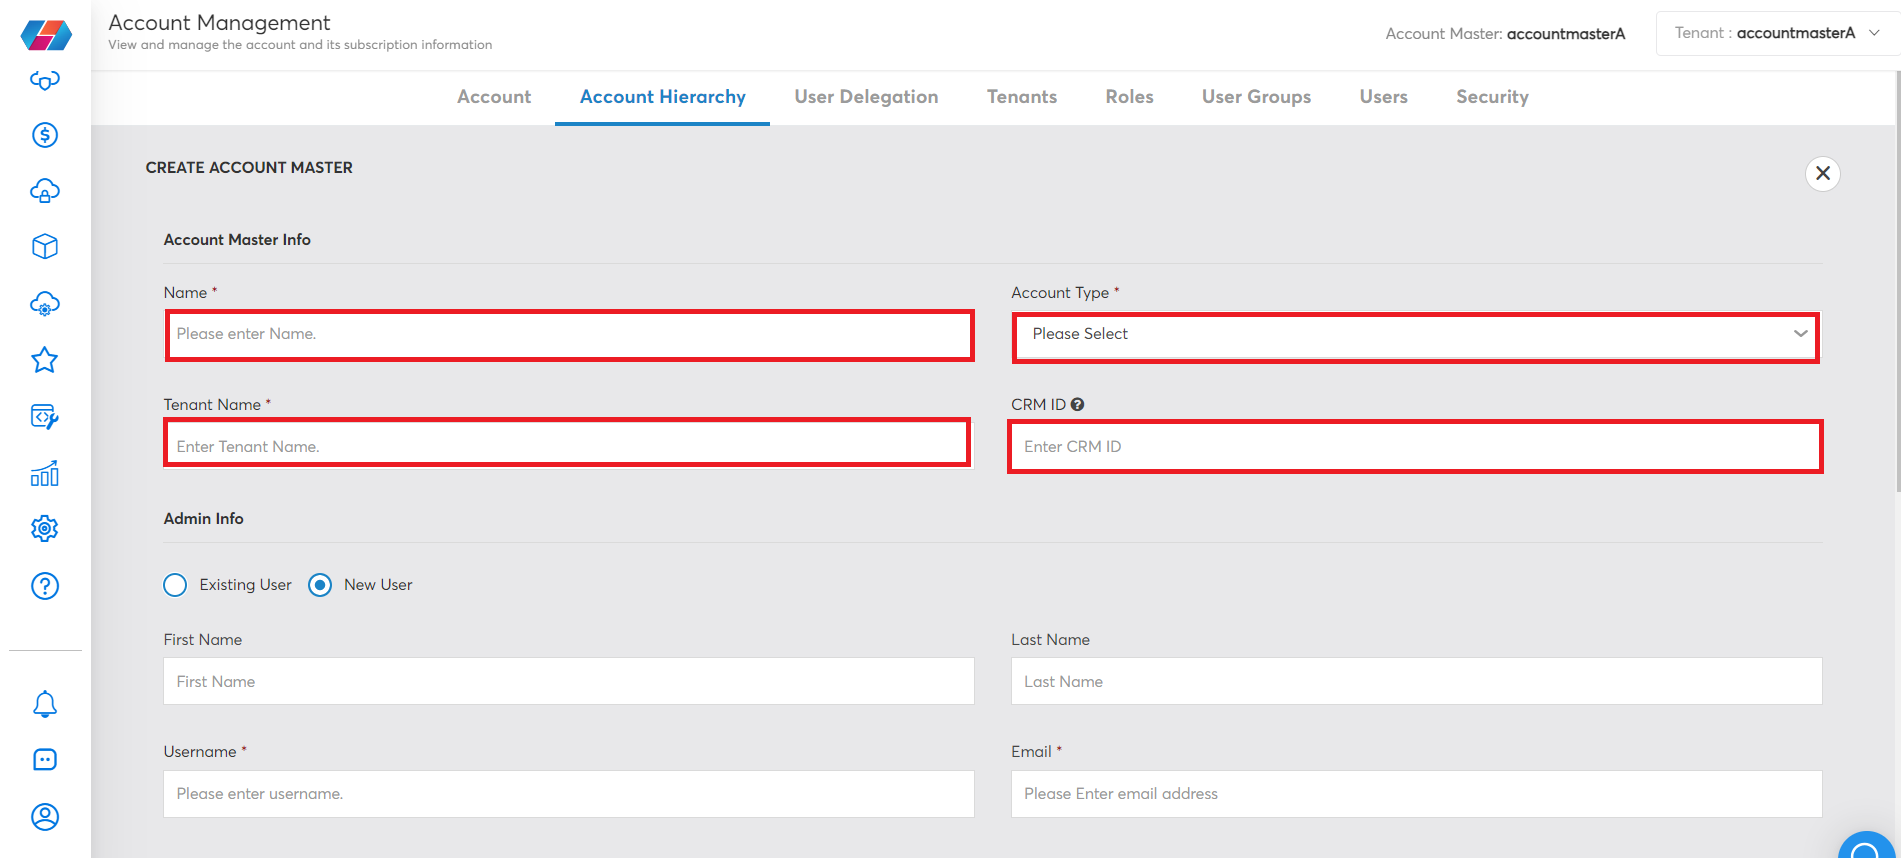
- In the Account Master Info section, fill in the following fields:
- In the Name box, type the desired name for the account master (Note: You can edit this later).
- In the Account Type list, click to select an appropriate account type, and then click Apply. The available options are Distributor, Partner, Customer, Region, Department, Environment, and Other. If users select Other, they can type a custom account type name.
- In the Tenant Name box, the name of the account is auto-populated, but if needed, you can type an account name as per your requirements.
- In the CRM ID box, type the CRM ID. This field is optional.
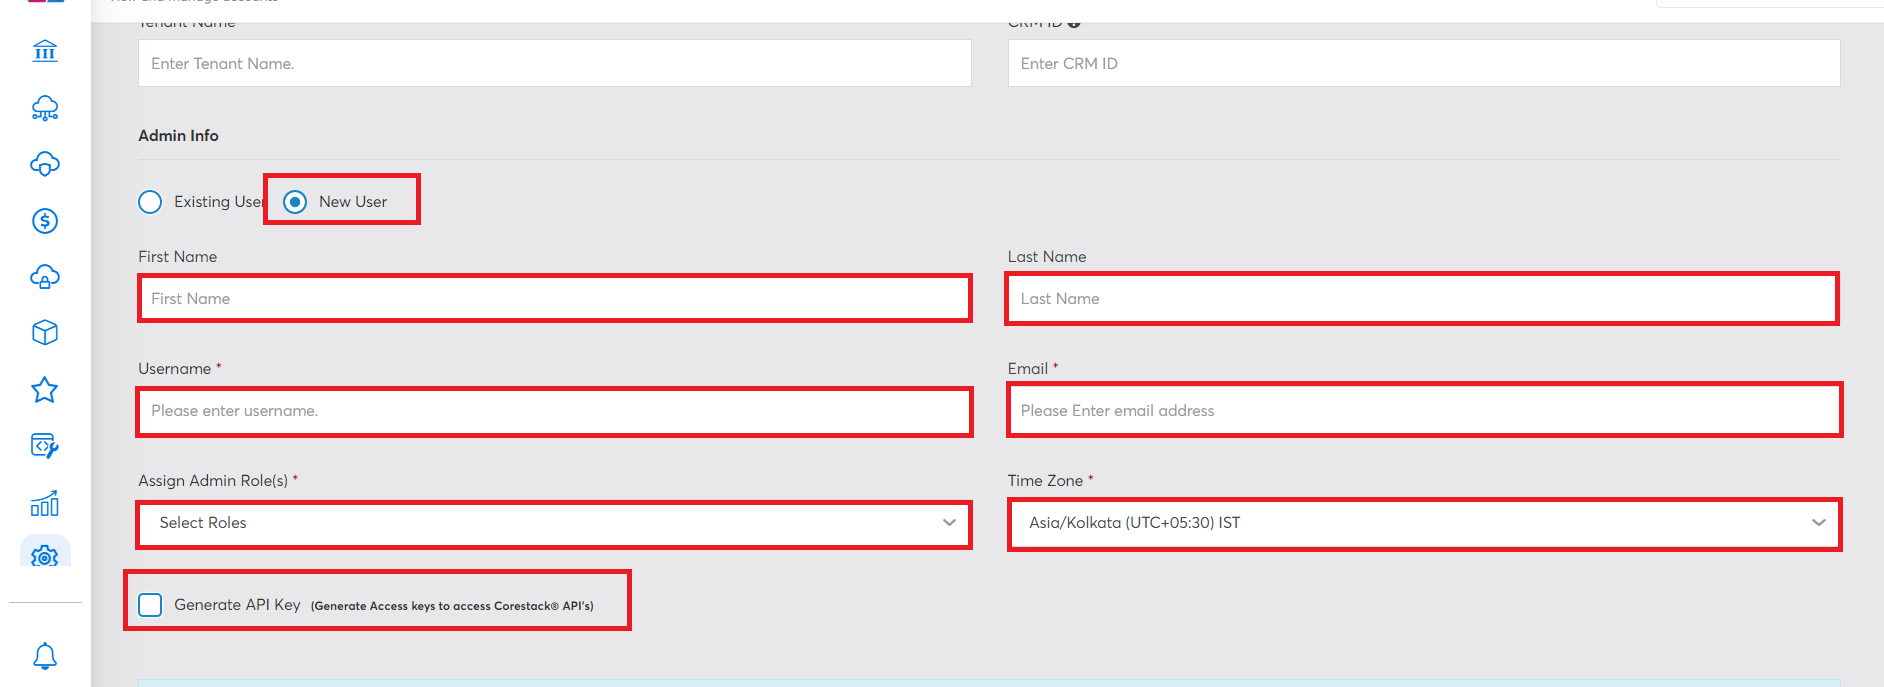
- The Admin Info section has two options. The Provider Admin/Product Admin can either select an existing user (the user is already created and is active in User Management) or create a new user. They must also select a role for the option they have selected.
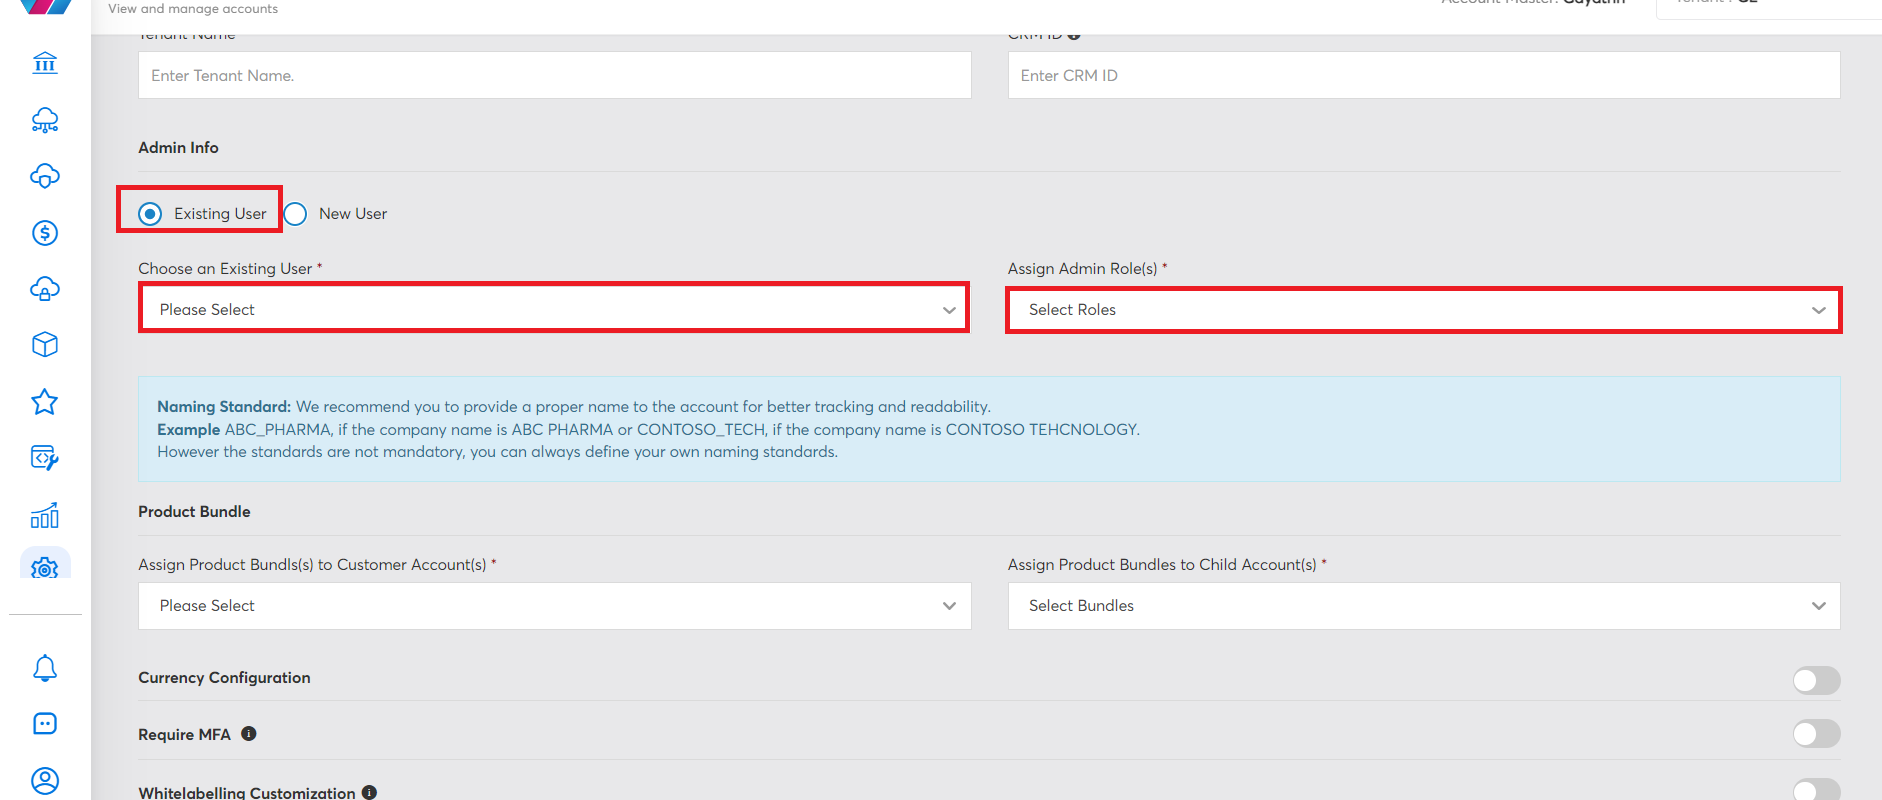
If you select the Existing User option:
-
In the Choose an Existing User list, select an existing user and then click Apply.
-
In the Assign Admin Role(s) list, click to select from Provider Admin, Delegation Admin, and Account Admin, and then click Apply. You can select multiple roles.
If you select the Provider Admin option, the selected user will get the Provider Admin role and will be able to create account masters later.

If you select the New User option:
- In the First Name box, type the first name of the user.
- In the Last Name box, type the last name of the user.
- In the Username box, type the username of the user.
- In the Email box, type the email address of the new user.
- In the Assign Admin Role(s) list, click to select the roles, and then click Apply. You can select multiple roles.
- In the Time Zone list, click to select the user's time zone.
- If you want to access platform APIs, select the checkbox Generate API Key.
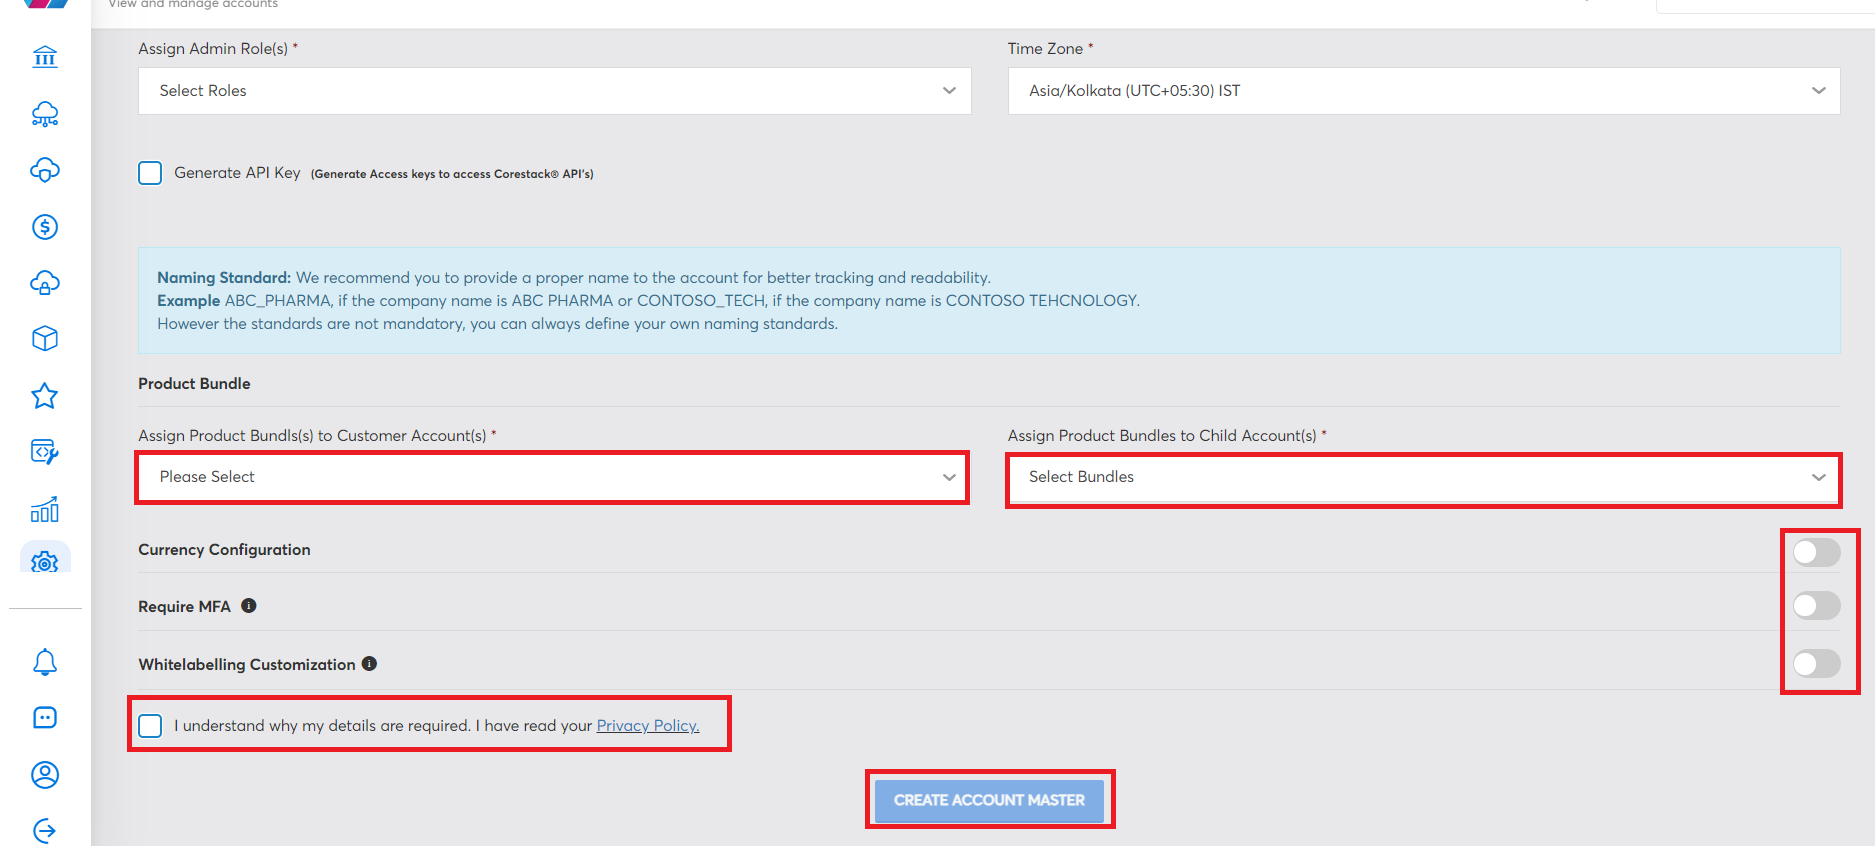
- In the Assign Product Bundle(s) to Customer Account(s) list, click to select the bundle for the account master.
- In the Assign Bundles to Child Account(s) list, select the bundles for the child accounts and click Apply. You can select multiple options.
- To enable the following fields, click to move the slider to right and fill the appropriate fields that appear:
- Currency Configuration
- Require MFA
- Whitelabelling Customization
- Select the checkbox at the end of the page and click CREATE ACCOUNT MASTER.
This creates a new account master. After an account master is created, the user mapped for the account master can access the platform and manage users and other settings.
Editing an Account Master Name
Once an account master has been created, users with the required access can edit the account master name.
To edit the name of an account master, first navigate to the Account Master section in Settings. You should see the list of account masters. Select an account master from the list to view the Account Information on the right in an expanded view.

To edit the name of the account master, select the pencil icon. This will make it so the Name field can be changed. Simply change the value in the Name field however you wish then select the Save icon to save your changes -- or select the red 'X' icon to cancel your changes.

Roles Allowed
The following roles are allowed to access the Account Master menu:
- Product Admin: Can access and create account masters.
- Provider Admin: Can access and create account masters.
Account
An Account Admin can login to an account and view account details. They can also add additional account settings.
To view the account related details, perform the following:
- Navigate to Settings > Account. The Account tab displays all the account-related details like account name, account ID, status of account, owners for the account, and the account creation date.
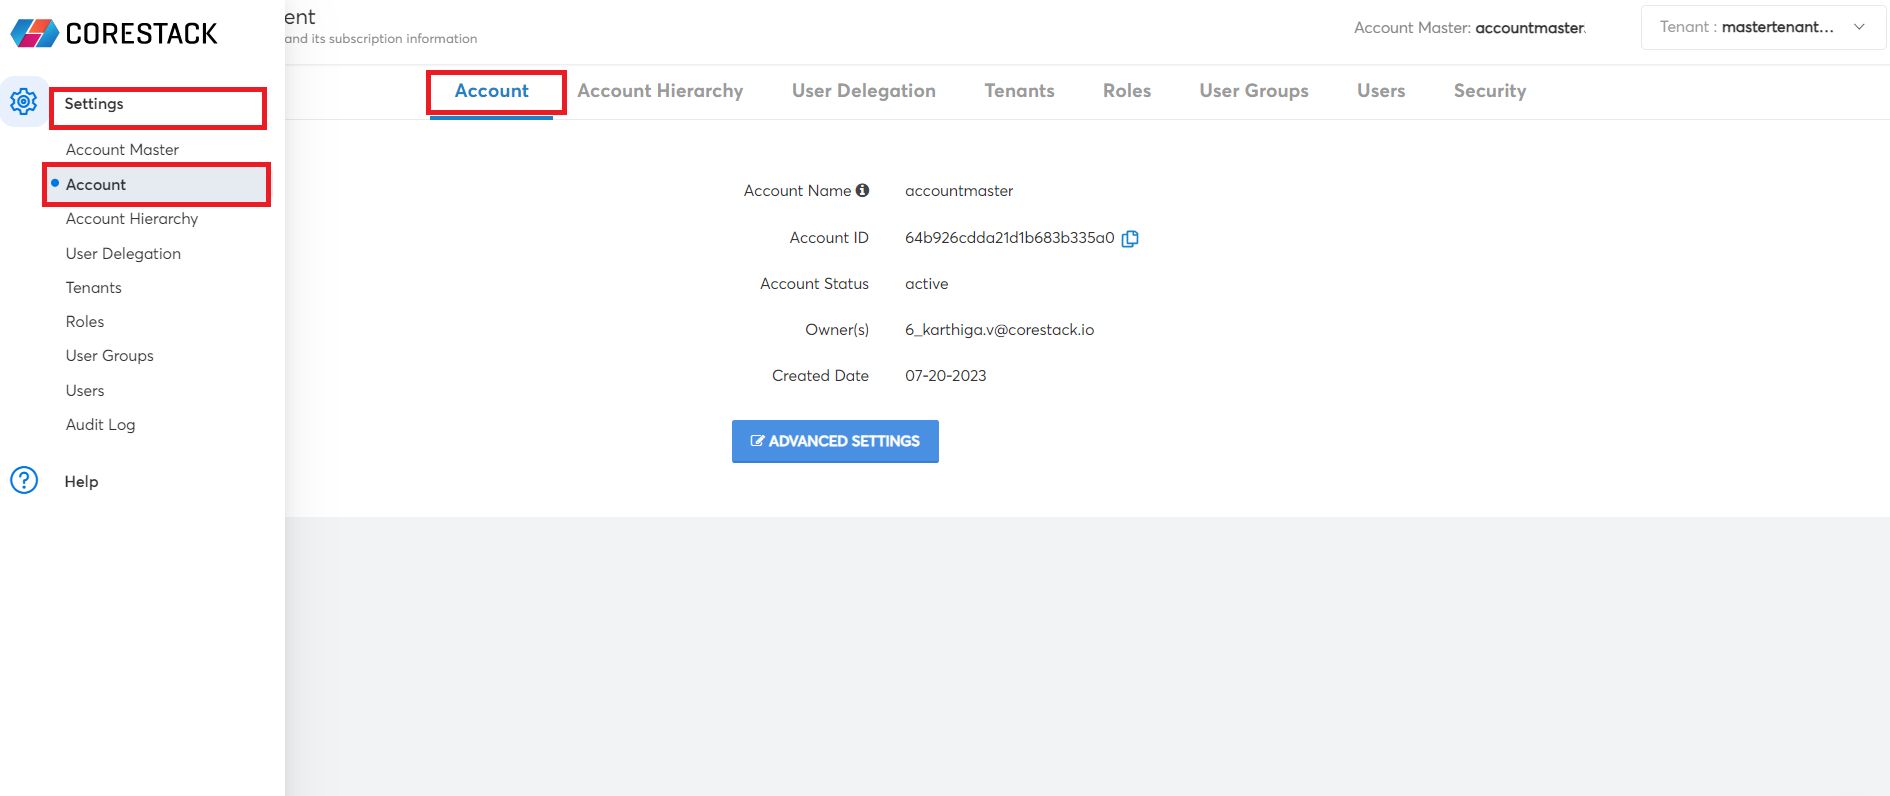
- Click More to view the list of owners for this account. Click Less to shrink the list.
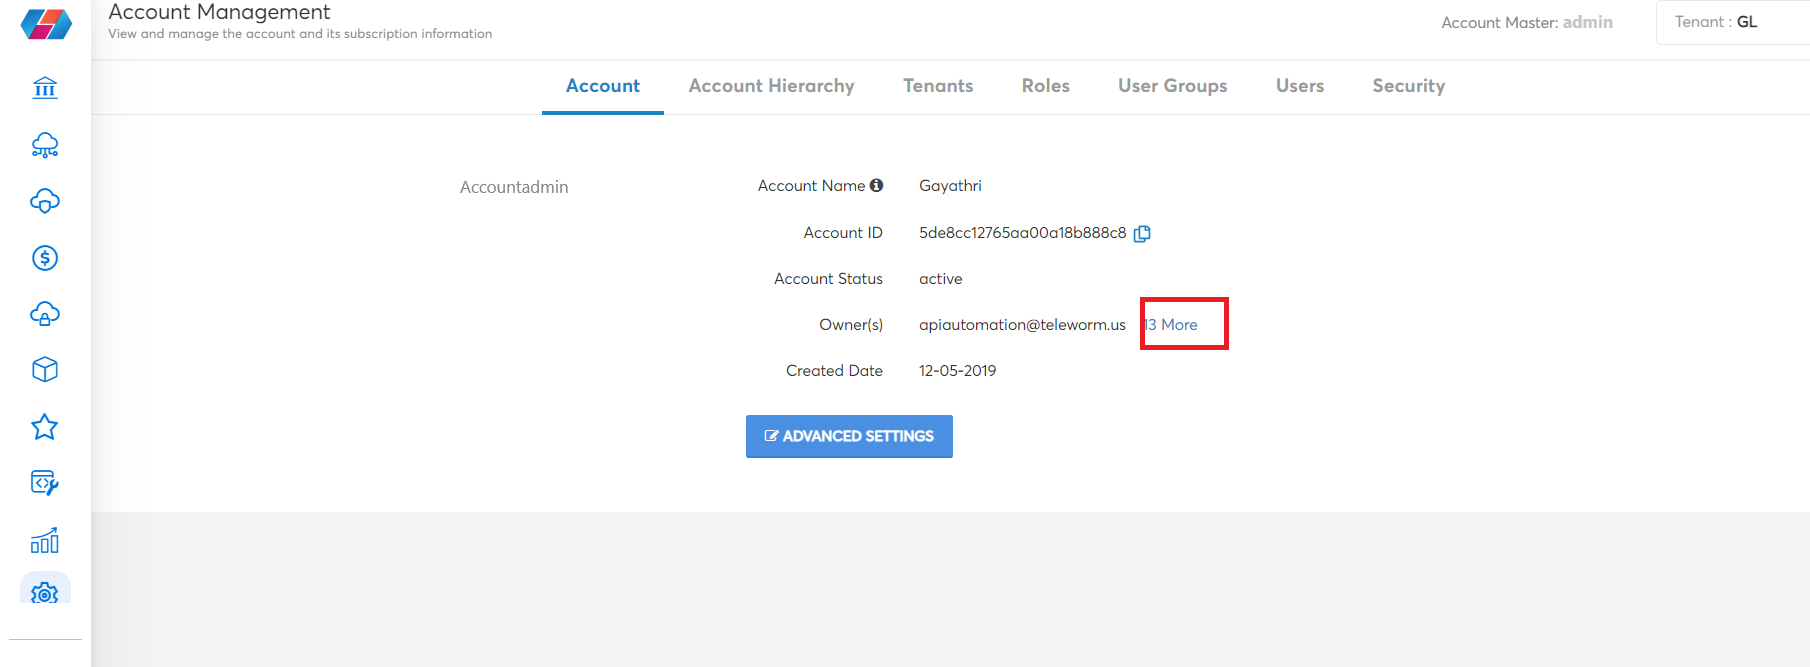
- To view or make additional account settings, click ADVANCED SETTINGS.
- Currency Configuration: Move the slider to right to enable this configuration and then select the appropriate option from the drop-down lists.
- Require MFA: Move the slider to right to enable this configuration.
- Whitelabelling Customization: Move the slider to right to enable this configuration and then fill/select the appropriate options or details related to whitelabelling.
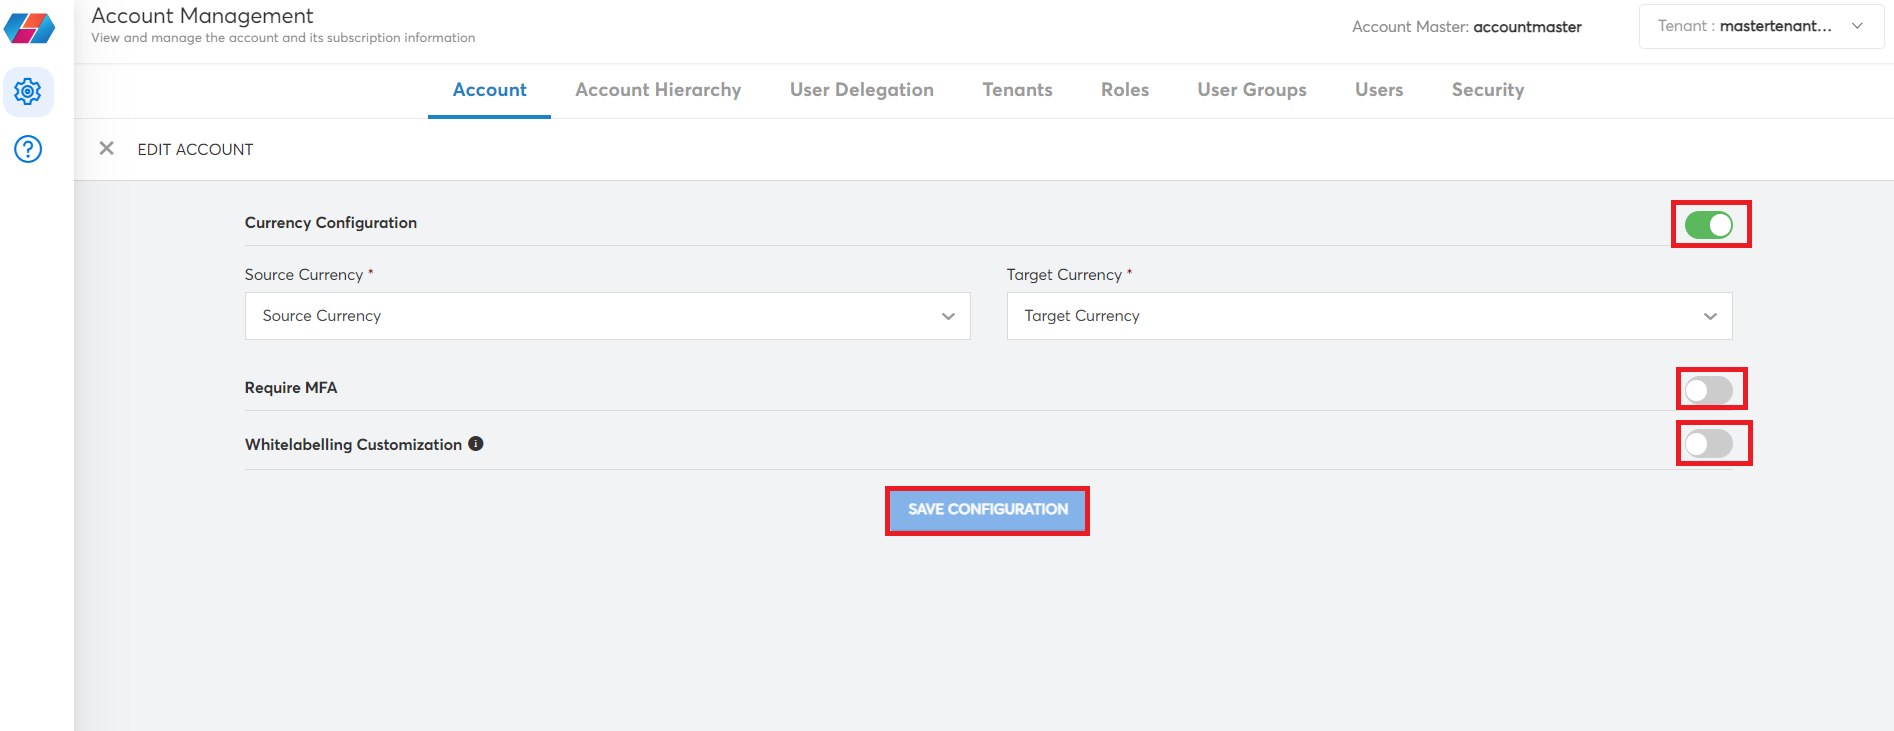
- Click SAVE CONFIGURATION.
Roles Allowed
The following roles are allowed to access the Account menu:
- Product Admin
- Provider Admin
- Account Admin
Account Hierarchy
A Provider Admin is a new role type that can create account master(s), and can also manage the hierarchy as per a user's requirements. A Provider Admin can delegate a user to other Account Master(s) within the root account master.
A Provider Admin is added by a Product Admin. A Provider Admin is a designated person from the customer’s side of workforce. After a Provider Admin is created, they can add child accounts, add another Provider Admin, add account masters, and add new users.
By default, the Provider Admin can only access the Settings menu when logged into the product, including the Account Hierarchy sub-section.
Accessing and Switching Between Multiple Account Masters
An Admin user can have access to multiple account masters. When an Admin user accesses CoreStack, though they may have access to multiple accounts, they can select only one account master at a time and access it. An Admin user can be an Account Admin, Provider Admin, or Delegation Admin.
The Admin user can also switch between account masters while they are already accessing an account master. This enables the Admin user to access another account without logging off from the CoreStack application. After switching account masters, the corresponding tenant(s) for the selected account master is displayed on the screen and the Admin user can select another tenant at any time.
Perform the following steps to access an account master:
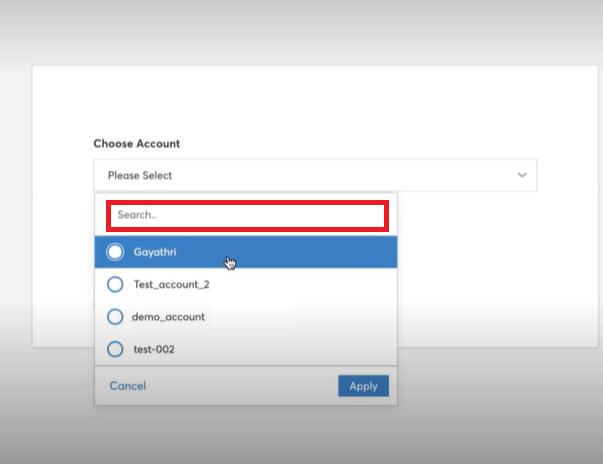
- Access the CoreStack application.
- In the Choose Account list, click to select an account master and click Apply.
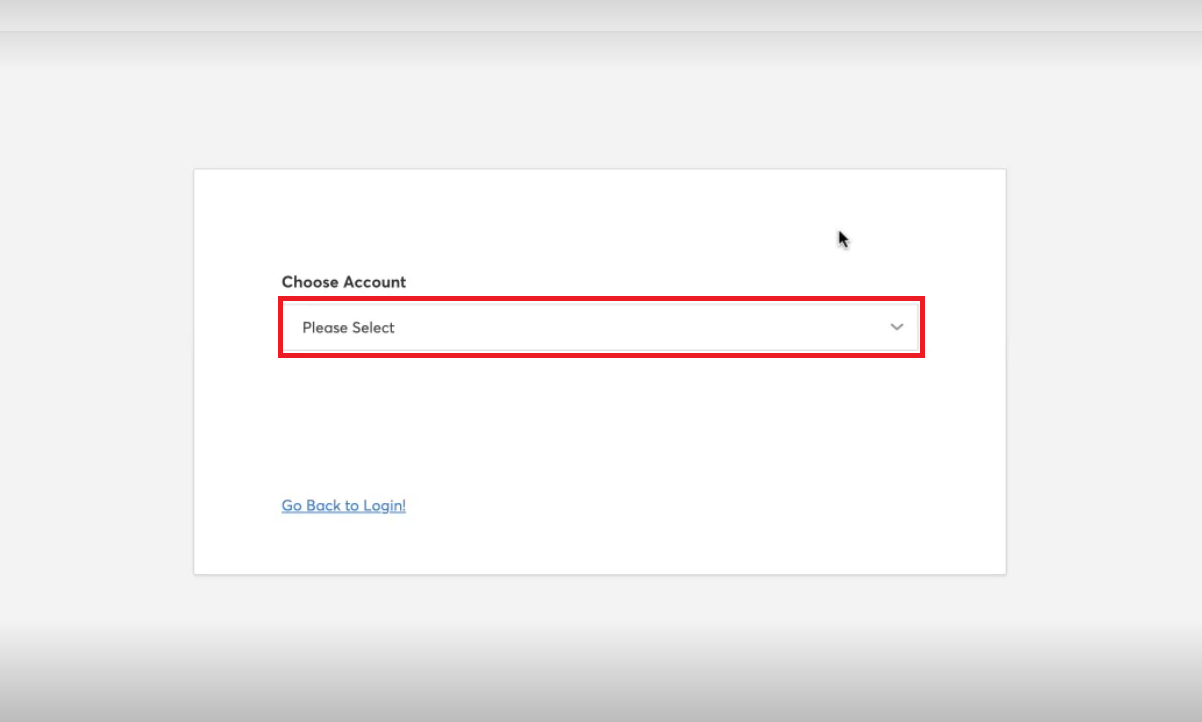
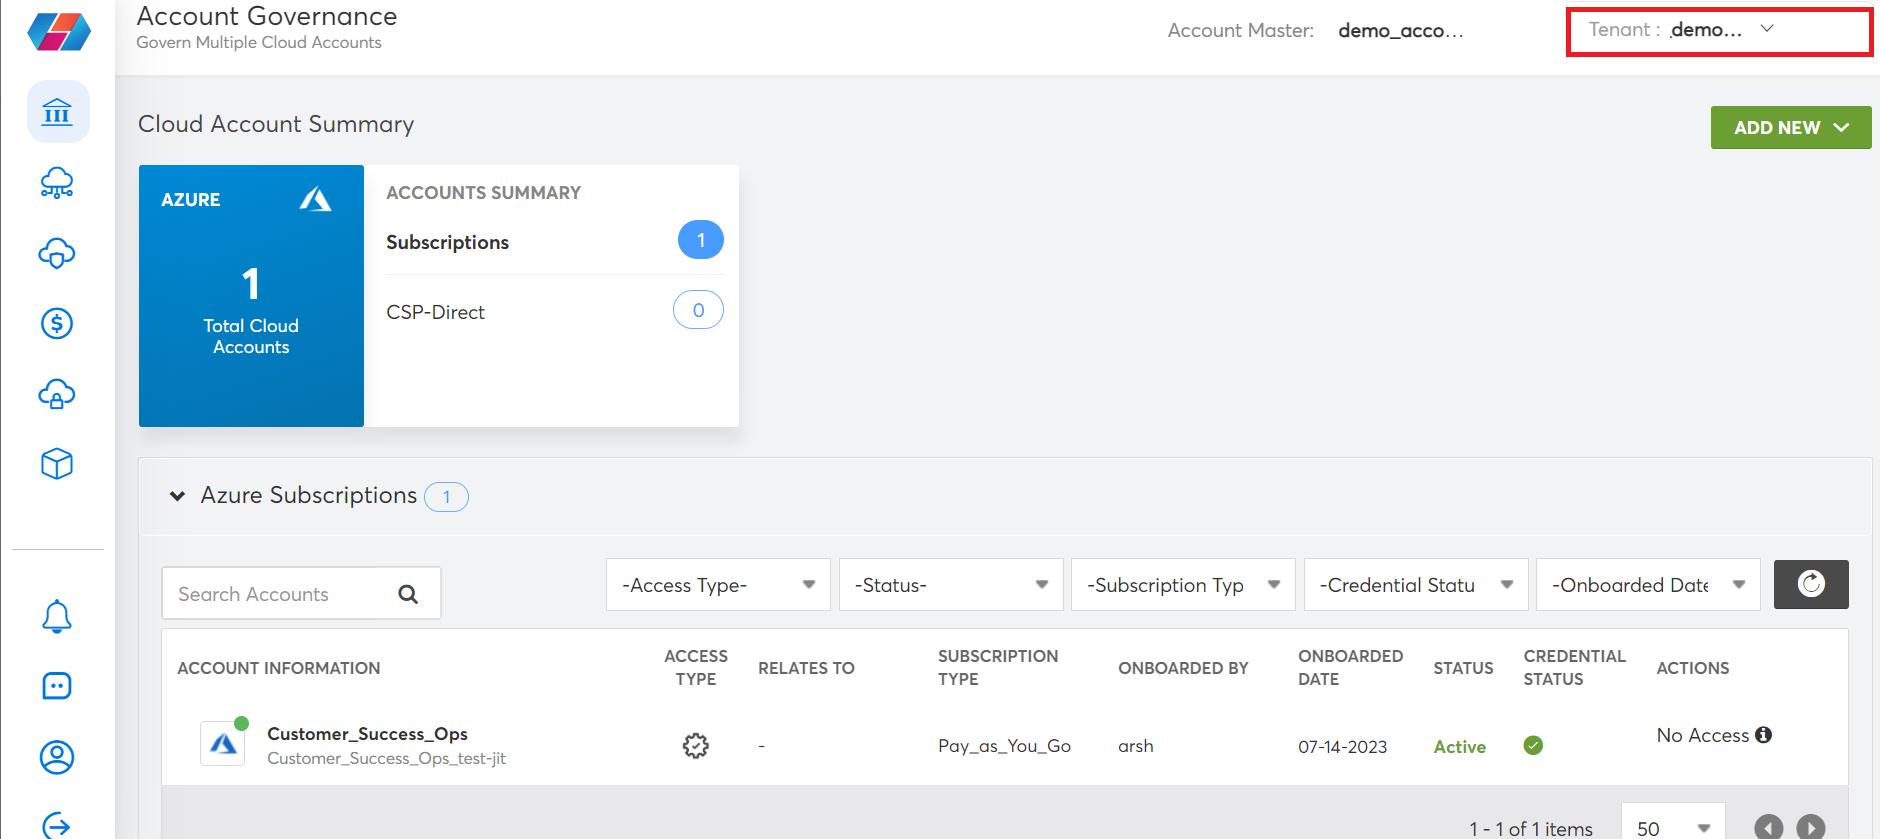
The account master selected by the Admin user is displayed on the top of the screen and the mapped tenant(s) is also displayed next to it.
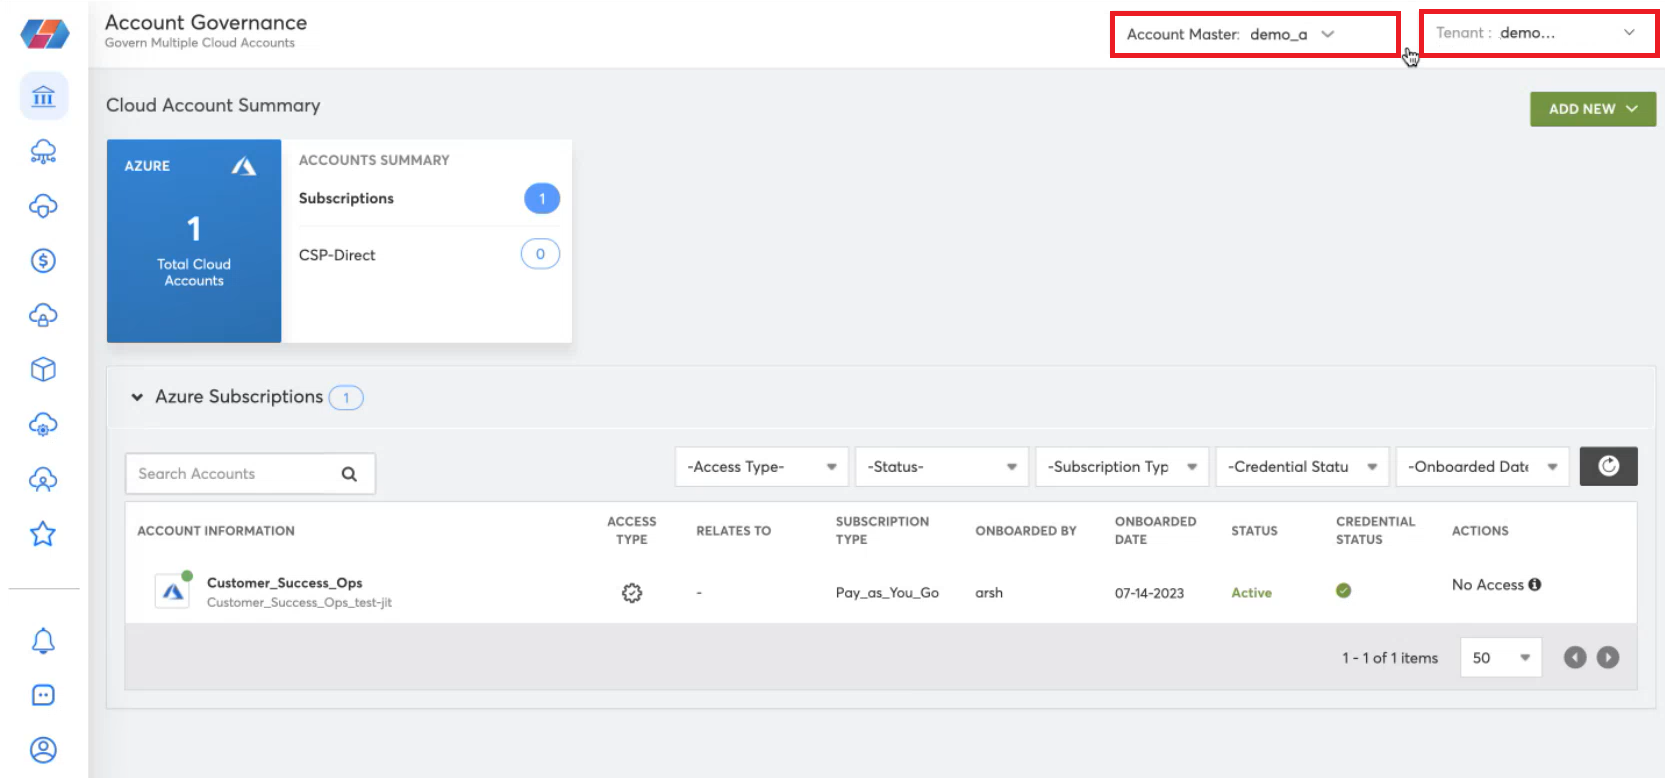
- To switch to another account master, in the Account Master list, click to select another account master, then click Apply.
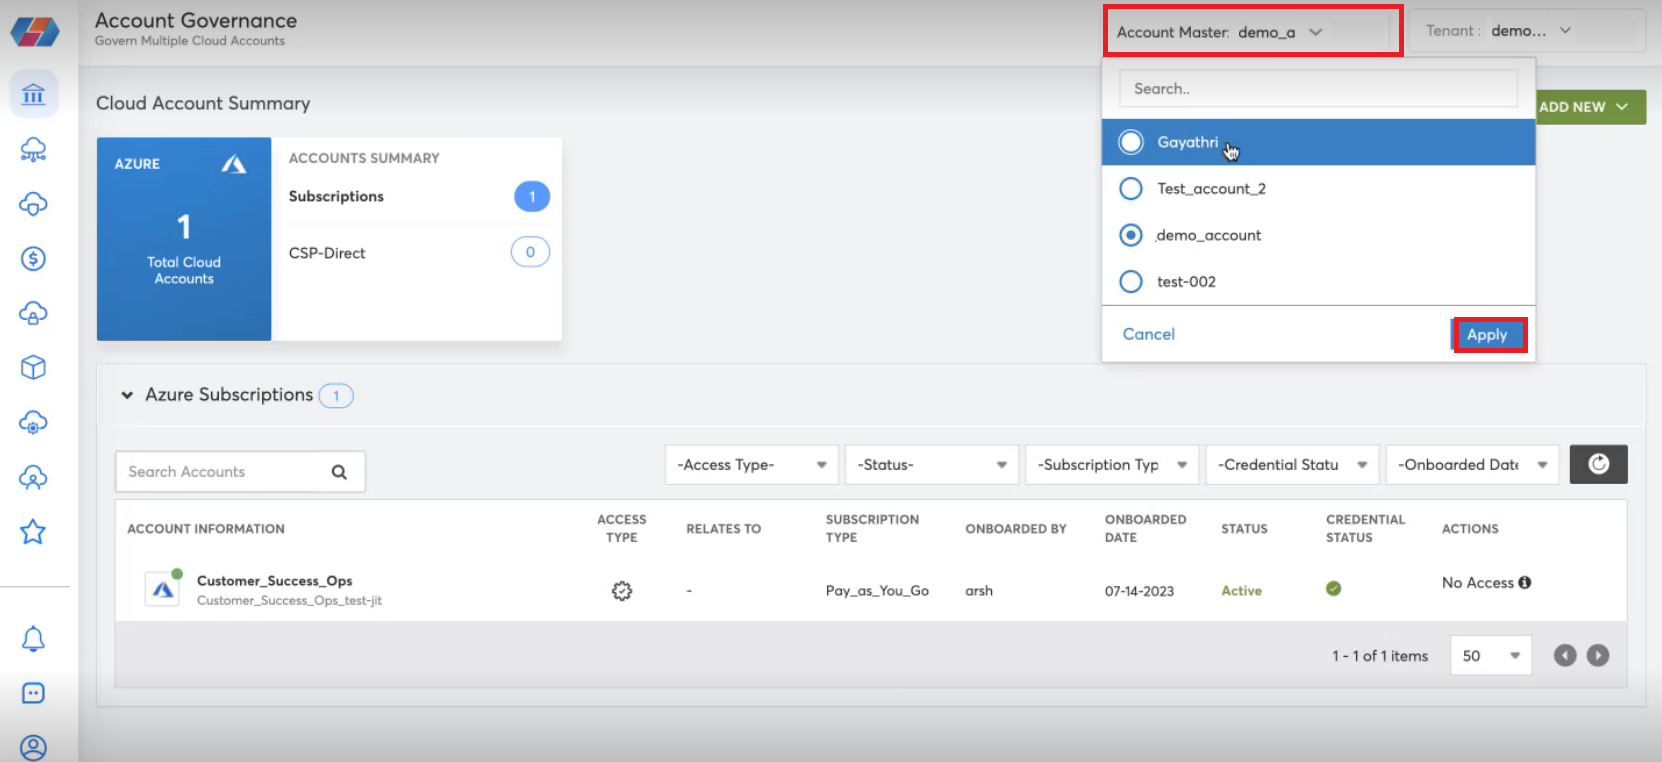
The tenant(s) corresponding to the selected account master will be displayed on the immediate right side.
- To select another tenant for the account master that is displayed on the screen, in the Tenant list, click to select another tenant. The details on the screen are displayed for the selected tenant.
If there is a long list of account masters and the Admin wants to find a specific account, then they can use the Search box and type the name of the account master they are searching for. Similarly, while switching to another account master, the Admin user can type the account master they are searching for in the Search box to find an account.
Creating Account Master(s) from within Account Hierarchy
A Provider Admin can create multiple account master(s). After a Product Admin has added a new account master with the Provider Admin role, the new Provider Admin can then go ahead and add multiple account master(s) as per their organization hierarchy. A Provider Admin belongs to the customer side of the workforce. The Provider Admin can view the Settings menu on the left navigation pane and access any of the options within it. They do not have access to any other menu items.
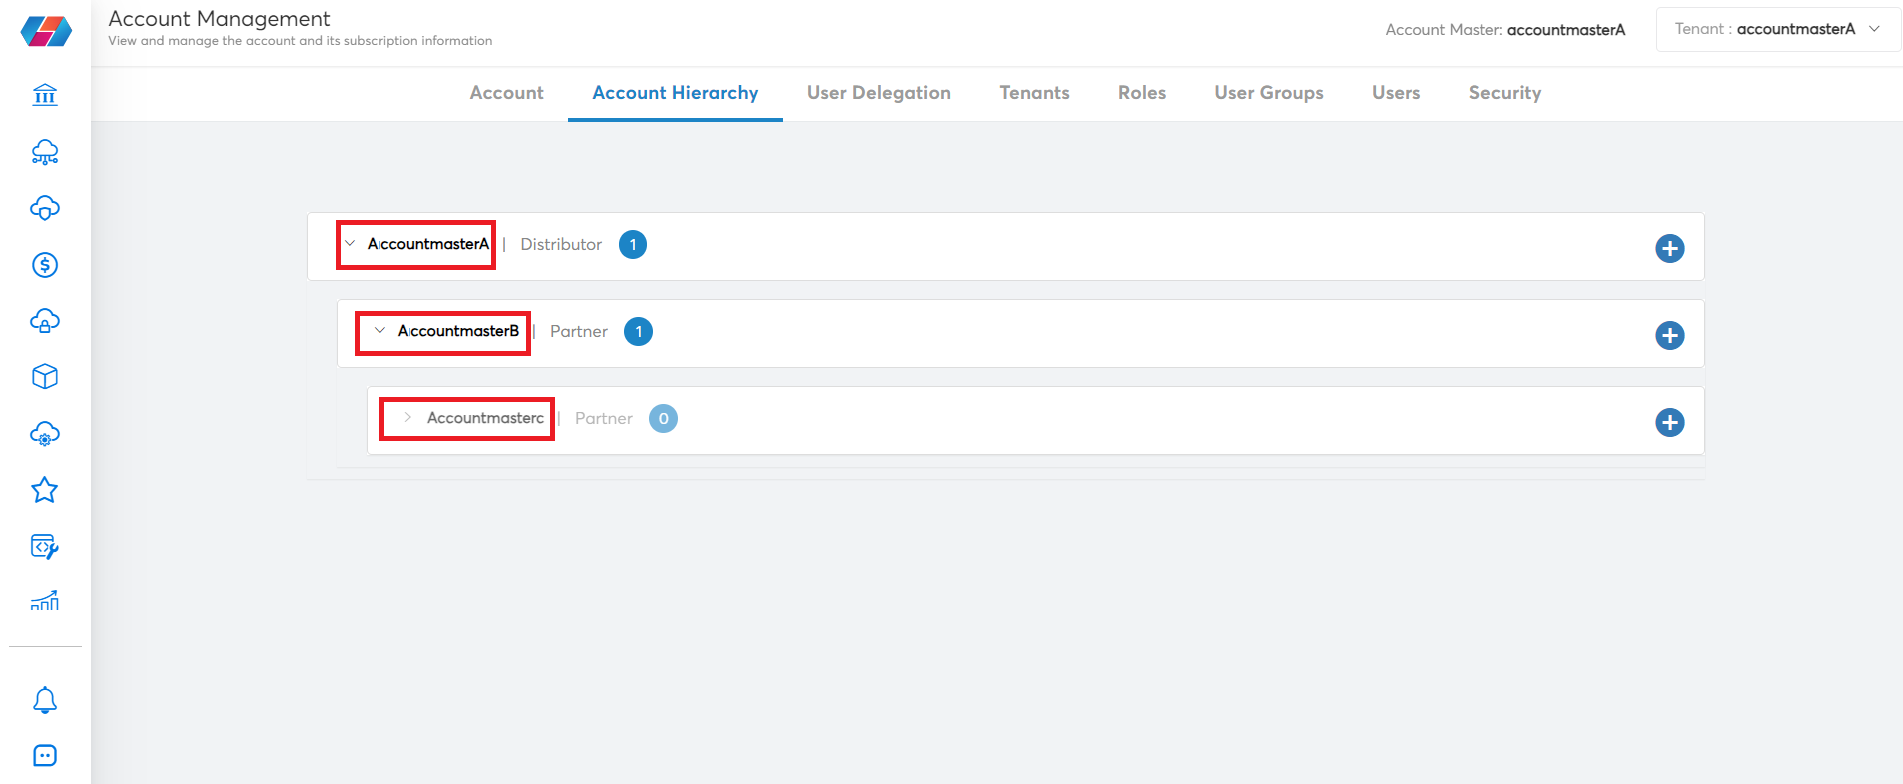
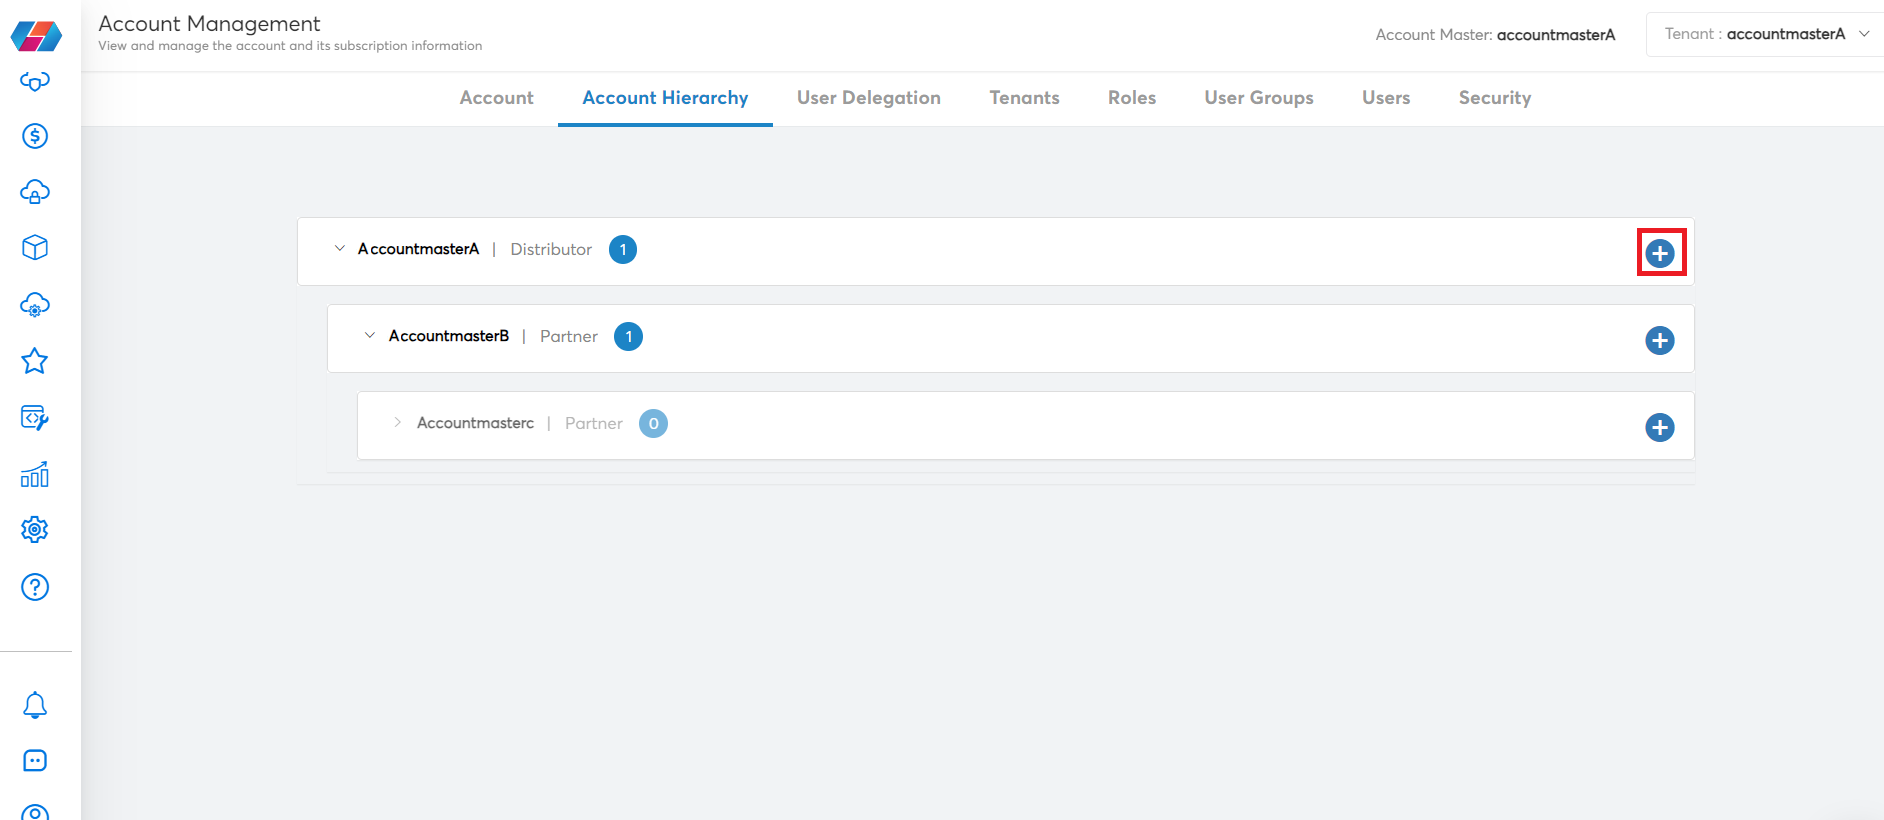
In the example screenshot below, AccountmasterA is the account master at the top of a hierarchy that was added by a Product Admin initially. After this, the Provider Admin added AccountmasterB as a level one account master, and AccountmasterC as a level two account master.
Perform the following steps to create an account master:
- Click Settings > Account Hierarchy.
-
Click the arrow symbol to expand the account master and view the hierarchy or level.
-
Click the plus (+) icon to add a new account master. Be sure to click the correct plus (+) icon so that the account master is created at the correct level.
Note:
- If the top-most plus (+) icon is clicked, then an account master at level one is created (right below the main account master).
- If the second plus (+) icon is clicked, then an account master at level two is created.
- If the third plus (+) icon is clicked, then an account master at level three is created.
-
In the Account Master Info section, fill the following fields:
- In the Name box, type the name of the account master.
- In the Account Type list, click to select an appropriate account type, and then click Apply. The available options are Distributor, Partner, Customer, Region, Department, Environment, and Other.
- In the Tenant Name box, type the name of the tenant.
- In the CRM ID box, type the CRM ID. This field is optional.
- In the Admin Info section, to add an existing user as an admin, select Existing User. To add a new user as an admin, select New User. If the Existing User option is used, then an existing user can be selected from the database and if the New User option is used, a new role-based user has to be created.
If you select the Existing User option:
-
In the Choose an Existing User list, click to select an existing user, and then click Apply.
-
In the Assign Admin Role(s) list, click to select from Provider Admin, Delegation Admin, and Account Admin, and then click Apply. You can select multiple roles.
If you select the Provider Admin option, the selected user will get Provider Admin role and they can create account masters.
If you select the New User option:
- In the First Name box, type the first name of the user.
- In the Last Name box, type the last name of the user.
- In the Username box, type the username of the user.
- In the Email box, type the email address of the new user.
- In the Assign Admin Role(s) list, click to select the roles, and then click Apply. You can select multiple roles.
- In the Time Zone list, click to select the user's time zone.
- If you want to access platform APIs, select the checkbox Generate API Key.

- In the Assign Product Bundle(s) to Customer Account(s) list, click to select the bundle for the account master.
- In the Assign Bundles to Child Account(s) list, select the bundles for the child accounts and click Apply. You can select multiple options.
- To enable the following fields, click to move the slider to right and fill the appropriate fields that appear:
- Currency Configuration
- Require MFA
- Whitelabelling Customization
- Select the checkbox at the end of the page and click CREATE ACCOUNT MASTER.

This creates a new account master. A Provider Admin can set the hierarchy of their organization by adding additional account masters with the appropriate account types, roles, and other specifications.
Deleting an Account Master
Perform the following steps to delete an account master:
- Navigate to Settings > Account Master.
- In the left pane, select the account name that needs to be deleted and in the right pane, click X. A dialog box opens with a confirmation message.
- In the dialog box, click OK to delete the account.
Roles Allowed
The following roles are allowed to access the Account Hierarchy menu option:
- Product Admin: Can access and create account masters, as well as delete account masters. A Product Admin is a part of CoreStack. They can access the entire product and take any necessary actions.
- Provider Admin: Can access and create account masters, as well as delete account masters.
- Delegation Admin: Can delegate customer accounts.
Updated 8 months ago