Onboarding of GCP Linked Project - Manual Approach
Overview
This section guides you through how to onboard a Google Cloud Platform (GCP) Linked Project into CoreStack.
Pre-onboarding
There are certain prerequisites that need to be set up in your GCP project before it can be onboarded into CoreStack.
- We need to onboard a GCP Billing account before proceeding to onboard the Linked project.
- All the costs will be fetched from the billing account and the metadata sync for all the projects linked to this billing account will take 24 hours to be completed.
Note:
- The sync of the cost data will take 24 hours to reflect in CoreStack.
- We will be able to onboard the linked project account only after the sync is completed.
Permissions
The following permissions must be configured in your GCP Project before onboarding:
API access:
- Enable API Access for Cloud Resource Manager API, Security Command Center API, Recommender API, Cloud Pub/Sub API, Organization Policy API, Compute Engine API, Cloud SQL Admin API, and Monitoring API in the API & Services – Library screen.
User account permissions:
- A user account must be created with the following permissions:
- For Assessment: Project Viewer (Read only).
- For Assessment + Governance: Project Owner (View and Modify).
- Security Command Center Access: Either Security Center Admin or Security Center Admin Viewer role is required for security vulnerability and compliance.
- Operations Governance: Logging Admin & Pub/Sub Admin.
Service account permissions:
A service account must be created with the following permissions:
For Assessment: Project Viewer (Read only).
For Assessment + Governance:
- Project Viewer (Read only)
- Security Center admin editor
- Pub/Sub Admin
- Monitoring editor
- Logs Configuration writer
- Compute Admin
Security Command Center Access is required for configuring security vulnerabilities assessment and compliance.
Operations and Inventory Access is required for creating activity templates and alerting configurations through logging and pub/sub based on the utilization data.
Compute Admin Access is required for running most of the templates and blueprints from CoreStack marketplace.
Note:
In the future, if there are any operations-related activities which need more permissions, please grant the service account the necessary permissions.
Note:
If threats and advanced security health analytics policies are required, then the Security Command Center premium tier needs to be enabled.
Retrieving Onboarding Information from GCP Console
Based on the authentication protocol being used in CoreStack, the following information must be retrieved from the GCP console:
1. Service Account Based:
A service account must be created in your GCP Project. You need to create a service account key and download it as a JSON file. Also, Project ID / Folder ID must be retrieved to onboard a GCP Project or GCP folder.
How to Download the Credentials File (JSON):
- Navigate to the Credentials screen.
- Click Create credentials and select Service account. The Create service account page appears.
- Provide the necessary details to create a service account: Name, ID, Description.
- Click Create button.
- Click Select a role to select the required roles.
- Click the Continue button.
- Click Create key.
- Select JSON as the Key type.
- Click the Create button. A JSON key file will be downloaded.
- Click Done.
Project ID:
Refer to the steps in the Project ID topic of the OAuth2 Based section above.
Provide the JSON and Project ID while onboarding the GCP Project in CoreStack when using the Service Account option.
2. OAuth2 Based:
The following values must be generated/copied from your GCP Project and configured in CoreStack:
Client ID & Client Secret:
- Login to the GCP console.
- Navigate to the Credentials screen.
- Click Create credentials and select OAuth client ID.
- Select Web application in the Application type field.
- Specify the following URI in the Authorized redirect URIs by clicking the Add URI button:
<https://corestack.io/>. - Click the Create button. The Client ID and Client secret values will be displayed.
Scope:
The OAuth 2.0 scope information for GCP project is: <https://www.googleapis.com/auth/cloud-platform>.
Project ID:
The project ID is a unique identifier for a project and is used only within the console.
- Navigate to the Projects screen in the GCP console.
- The Project ID will be displayed next to your GCP project in the project list.
Redirect URI:
The following redirect URI that is configured while creating the client ID and client secret must be used: <https://corestack.io/>.
Authorization Code:
The authorization code must be generated with user consent and required permissions.
- Construct a URL in the following format:
<https://accounts.google.com/o/oauth2/auth?response_type=code&client_id=><Client ID>&redirect_uri=<Redirect URI>&scope=<https://www.googleapis.com/auth/cloud-platform&prompt=consent&access_type=offline> - Open an InPrivate or Incognito/Private mode browser window then access the above URL.
- Login using your GCP credentials.
- The page will be redirected to the Redirect URI, but the address bar will have the Authorization Code specified after
code=.
Note:
The values retrieved in the earlier steps can be used instead of
<Client ID>and<Redirect URI>specified in the URL format.
Copy these details and provide them while onboarding your GCP Project into CoreStack using the OAuth2 option.
Project ID/Folder ID:
The Project ID or Folder ID is a unique identifier for a project or folder in GCP respectively. To retrieve a Project ID or Folder ID, perform the following steps:
- Login to the GCP console.
- Click the Select from drop-down menu at the top of the console. The Select from screen appears.
- Search for the project or folder that you want to onboard in the Search projects and folders field. The required project or folder will be displayed in the list.
- The Project ID or Folder ID will be displayed next to your GCP project or folder in the list.
Provide the JSON and Project / Folder ID while onboarding the GCP Project in CoreStack using the Service Account option.
Onboarding
The following steps need to be performed to onboard a GCP Linked Project.
- Click the Add New button in the CoreStack dashboard and select Single Account.
- Click Start Now.
- Select the GCP option in the Public Cloud field.
- Click the Get Started button.
- Select the required option in the Access Type field. The options are: Assessment and Assessment + Governance.
- Select the Linked Project Account option in the Account Type field.
- Select the required option in the Authentication Protocol field. The options are: OAuth2 and Service Account.
- Click Next.
- Provide the necessary details (Client ID, Client Secret, Scope, Project ID, Redirect URI, and Authorization Code OR Hierarchy Scope, Project ID/Folder ID, Credentials File (JSON)) explained in the Pre-onboarding section based on the option selected in the Authentication Protocol field.
If the Service Account option is selected in the Authentication Protocol field, the Hierarchy Scope field will be available and must be configured as follows.
-
In the Hierarchy Scope field, select the required option based on your need as explained below. The option is Project.
- Project: This option will enable a specific GCP project to be onboarded. Specify the ID of the GCP Project in the Project ID field.
-
Click the Validate button.
-
The Advanced Settings section will be displayed with additional fields (Name, Master Account, and Scope).
-
Modify the pre-populated name of the account in the Name field, if required.
-
Select the required account in the Master Account drop-down list.
-
Select the required option in the Scope field. The options are: Account, Private, and Tenant.
-
Click the I'm Done button.
After completing the previous steps, the GCP Project will be onboarded successfully into CoreStack. Any relevant insights and information about the resources available in the GCP Project will be populated under each of the cloud governance pillars available in CoreStack.
Monitoring and Logging Agent Metrics
When you install Cloud Monitoring and Cloud Logging agents on your virtual machine (VM) instances, they transmit data for the metric types listed below for monitoring:
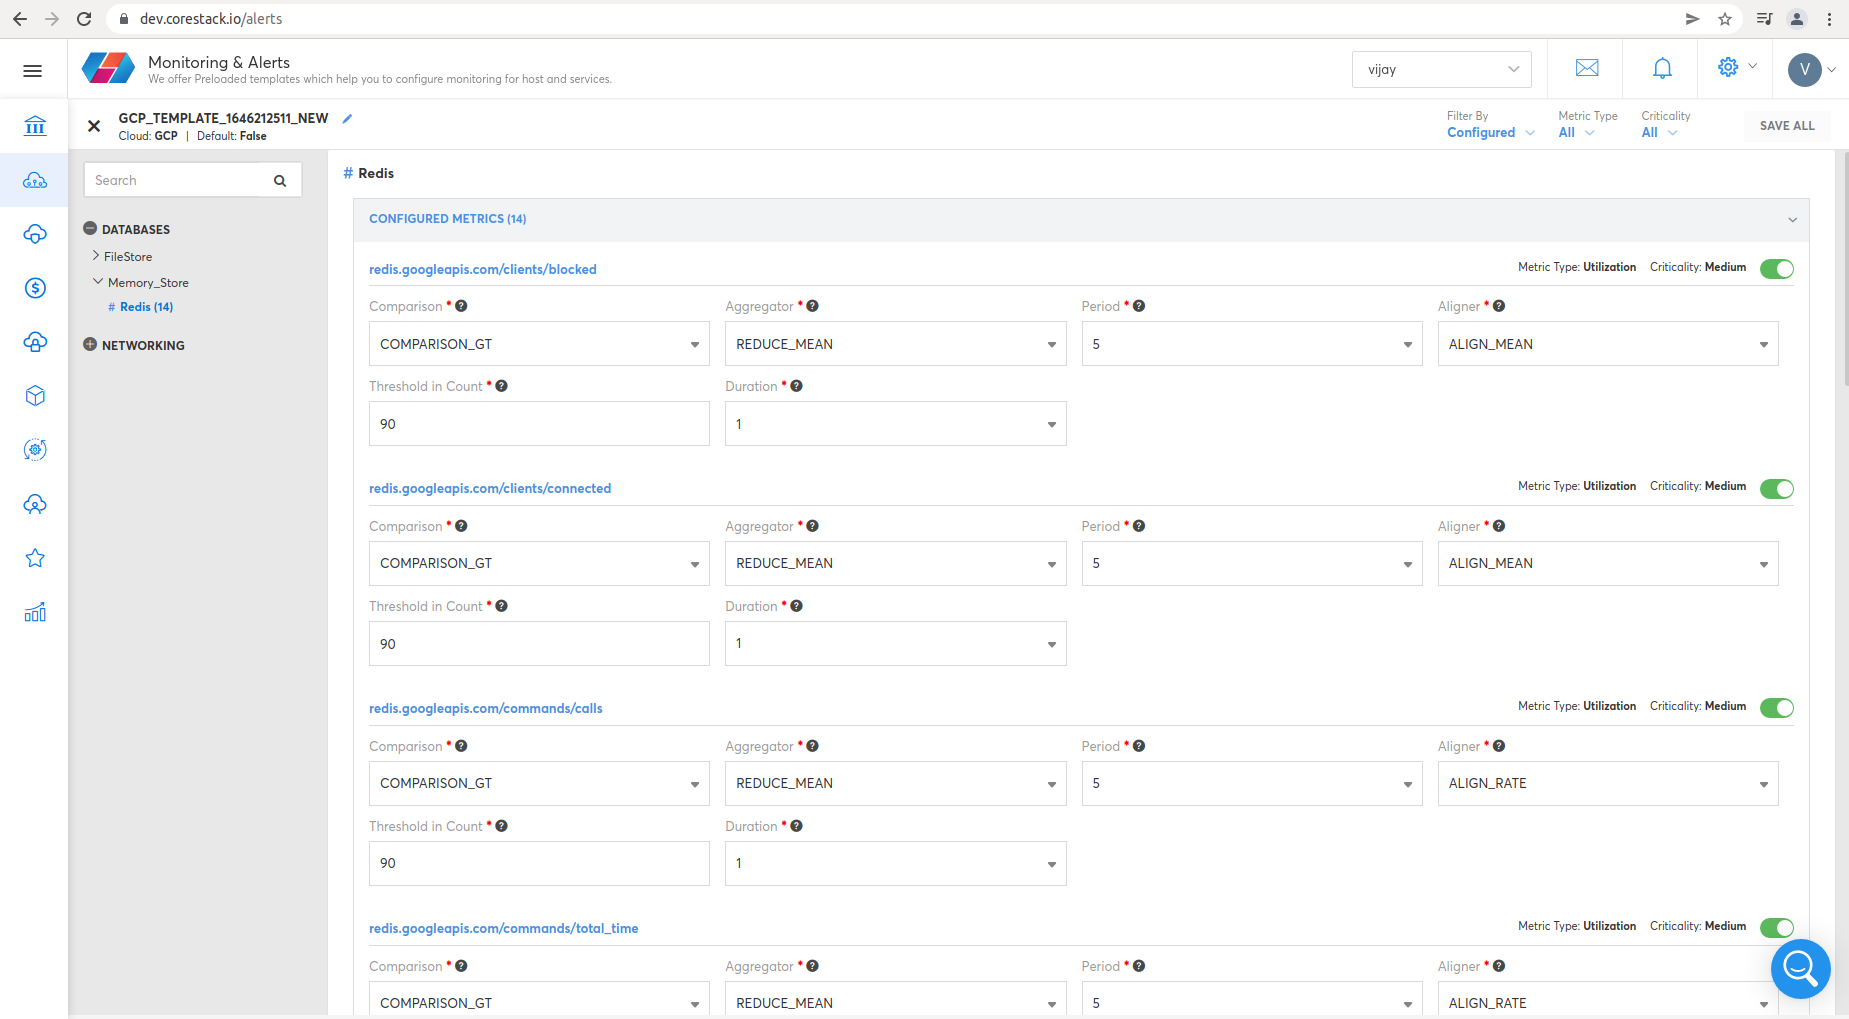
Redis
- clients/blocked
- clients/connected
- commands/calls
- commands/total_time
- commands/usec_per_call
- keyspace/avg_ttl
- keyspace/keys
- keyspace/keys_with_expiration
- persistence/rdb/bgsave_in_progress
- replication/master/slaves/lag
- stats/memory/maxmemory
- stats/memory/system_memory_usage_ratio
- stats/memory/usage
- stats/memory/usage_ratio
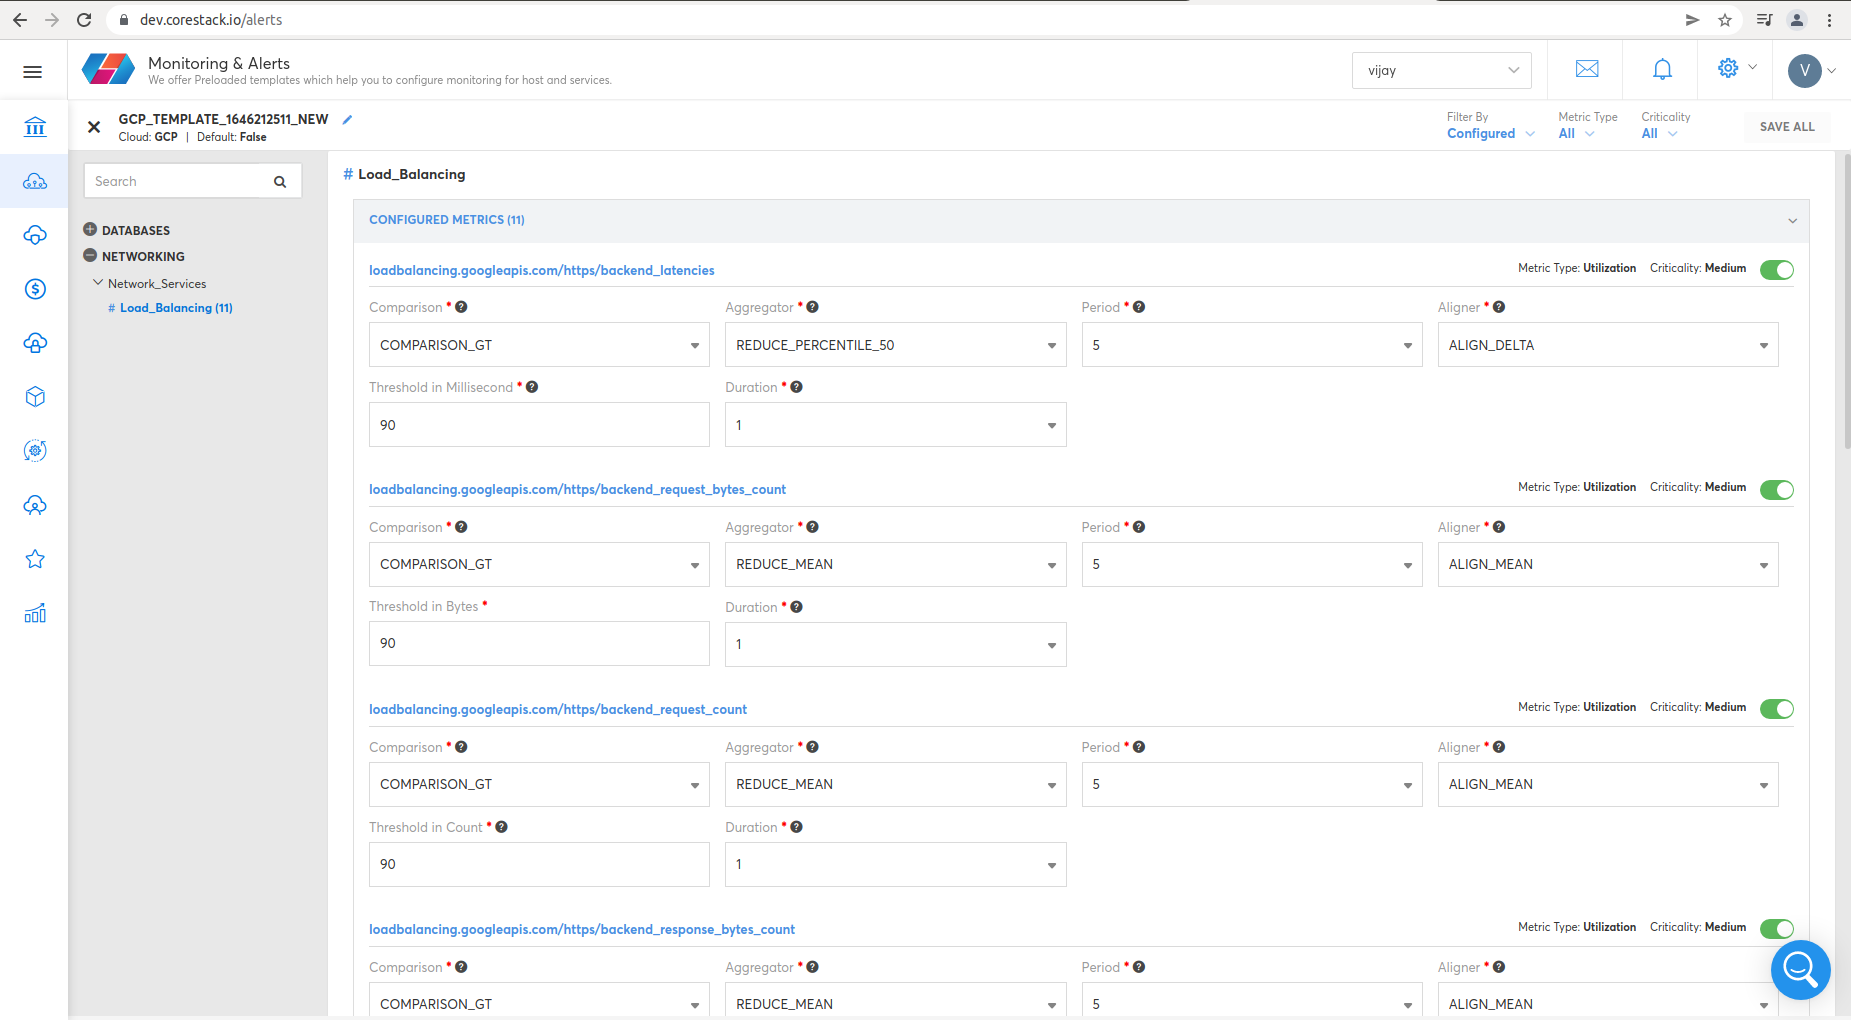
Load_Balancing
- https/backend_latencies
- https/backend_request_bytes_count
- https/backend_request_count
- https/backend_response_bytes_count
- https/frontend_tcp_rtt
- https/internal/backend_latencies
- https/internal/request_bytes_count
- https/internal/request_count
- https/internal/response_bytes_count
- https/internal/total_latencies
- https/request_bytes_count
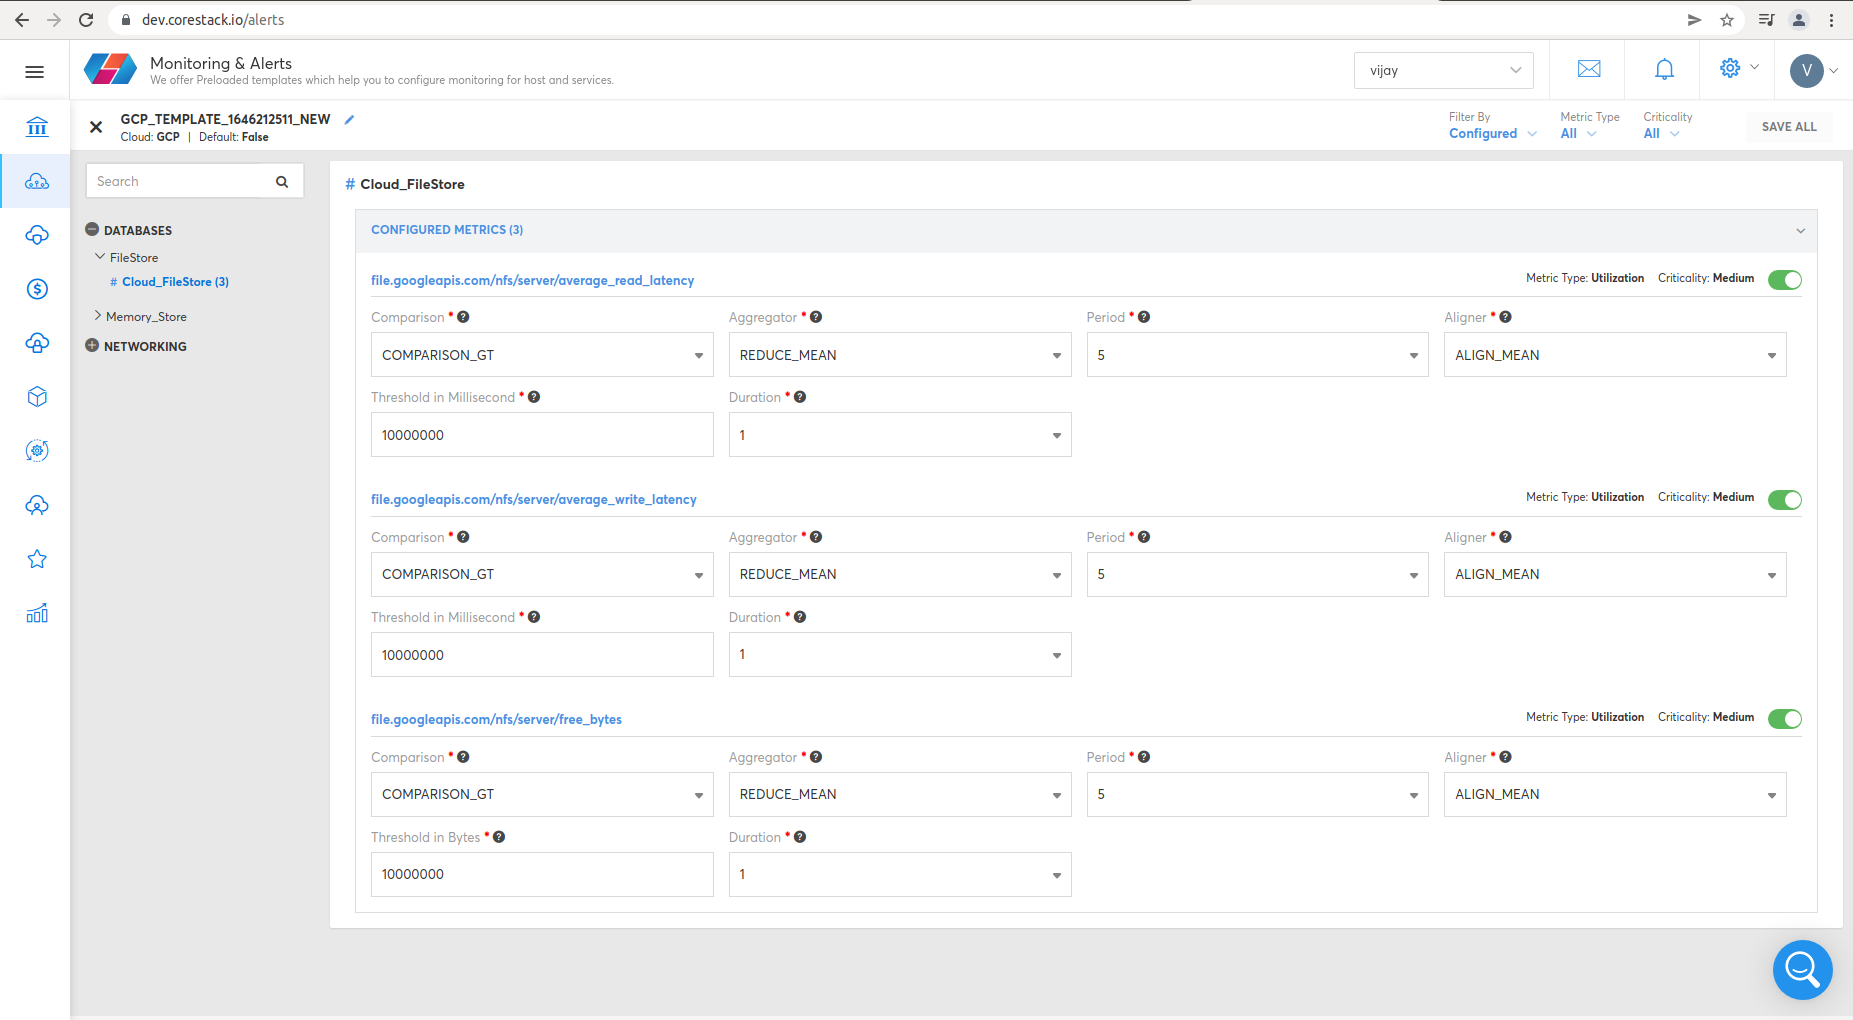
Cloud_Filestore
- nfs/server/average_read_latency
- nfs/server/average_write_latency
- nfs/server/free_bytes
To view Redis metrics, click Operations, then Monitoring & Alerts.

To view Load_Balancing metrics, click Operations, then Monitoring & Alerts.

To view Cloud_Filestore metrics, click Operations, then Monitoring & Alerts.

Updated about 1 year ago