ServiceNow CMDB Integration
Learn how to integrate a ServiceNow account with CoreStack to synchronize your configuration management database across both platforms.
Introduction
In order to ensure smooth functioning of business operations and management of IT resources across on-premises and cloud infrastructure when migrating to the cloud, enterprises and Managed Service Providers (MSPs) typically implement certain tools and processes, such as IT Service Management (ITSM) tools and configuration management databases (CMDB).
CoreStack integrates with some of these tools to help IT teams govern their cloud resources more effectively without having to modify their existing workflows and integrations. Basically, CoreStack acts as a bridge to connect cloud platforms and integrated tools as much as possible.
ServiceNow is an industry-leading tool, and one of the many tools which CoreStack supports today. ServiceNow can be used to categorize, create, and manage data tables in a CMDB format for keeping track of your organization’s virtual assets in the cloud (virtual machines, databases, etc).
In this user guide, we’ll cover how to set up and configure the ServiceNow ITSM tool integration.
Enable the ServiceNow integration
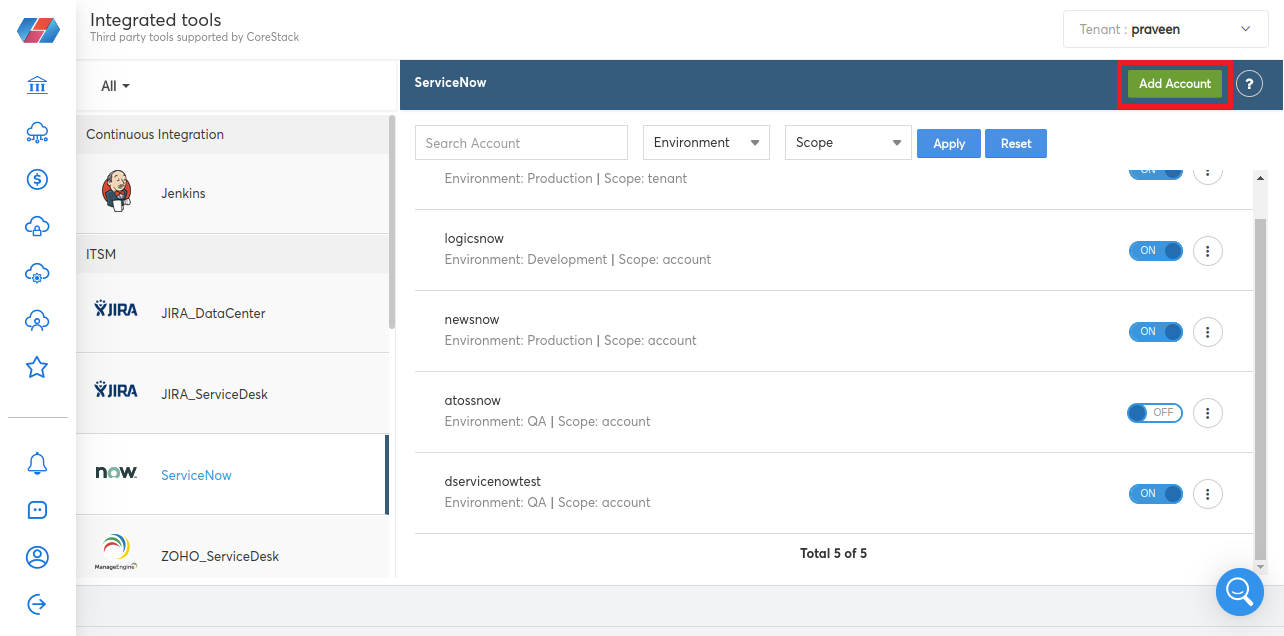
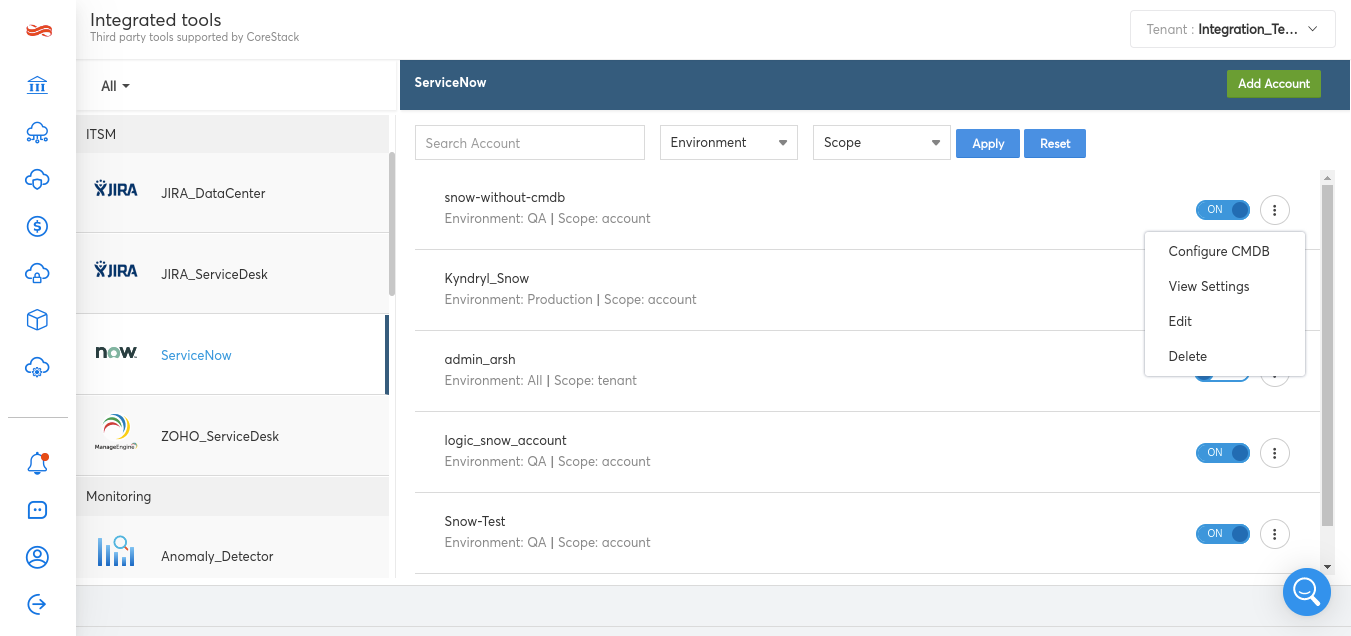
First, to integrate a ServiceNow account, users will need to navigate to Settings > Integrated Tools then select ServiceNow from the ITSM category. Then, click Add Account to add a new ServiceNow account.
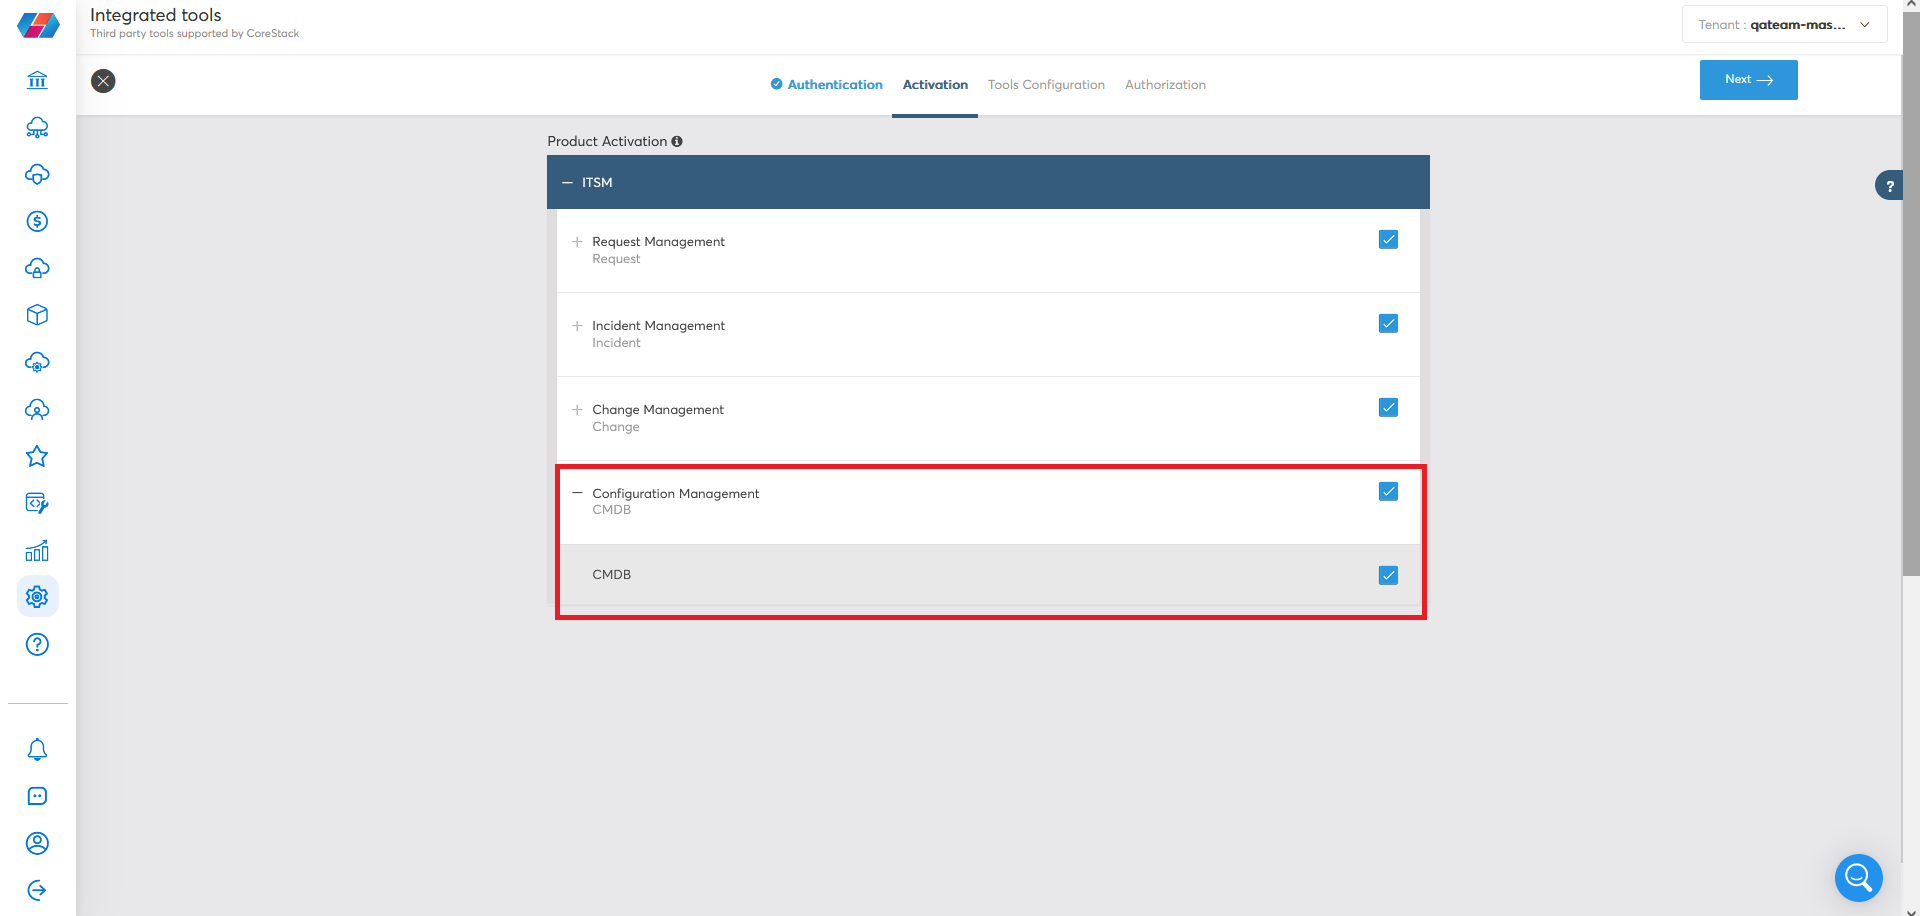
Next, fill out the Authentication section. Afterwards, proceed to the Activation section, then select to enable Configuration Management and check the CMDB box.
Users can then proceed to configure other settings as per their preferences, then click Save & Finish to proceed.
Configure the CMDB dashboard
Once users have enabled the integration between their ServiceNow account and CoreStack, they will be able to go into the integrations settings in CoreStack, click on the three dots next to a SeviceNow account, select "Configure CMDB" from the drop-down menu to be taken to a dashboard view.
This view will initially be empty if it’s your first time creating/visiting it.
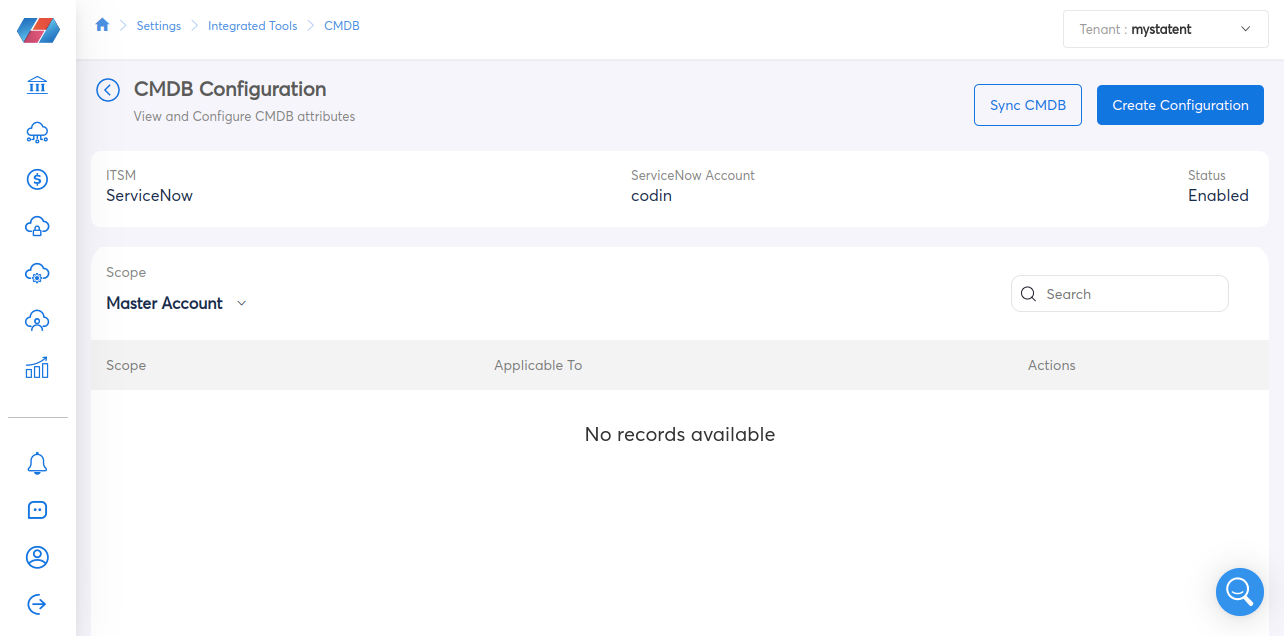
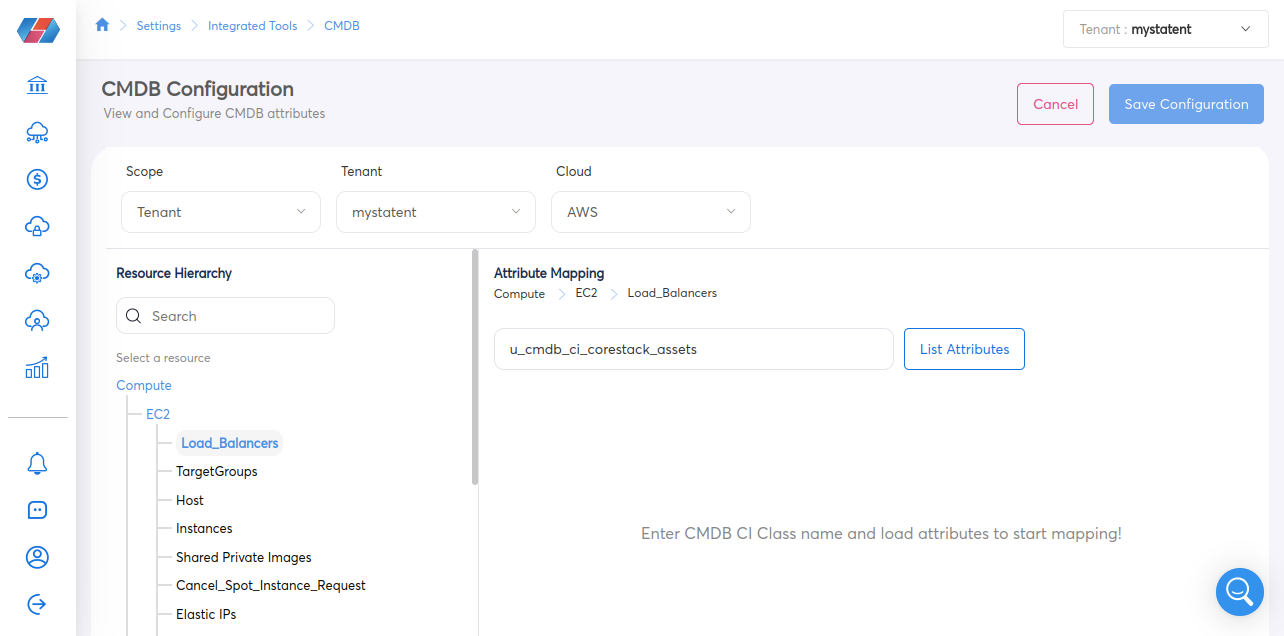
Users can click Create Configuration on the dashboard to go to a page where they can map all the attributes of their cloud resources, set the scope level to Tenant, Account, or Cloud Account, filter by different cloud providers (AWS, Azure, GCP, etc.), and filter by different cloud accounts.
Based on the selections, the list of available attributes under the Attribute Mapping section will change.
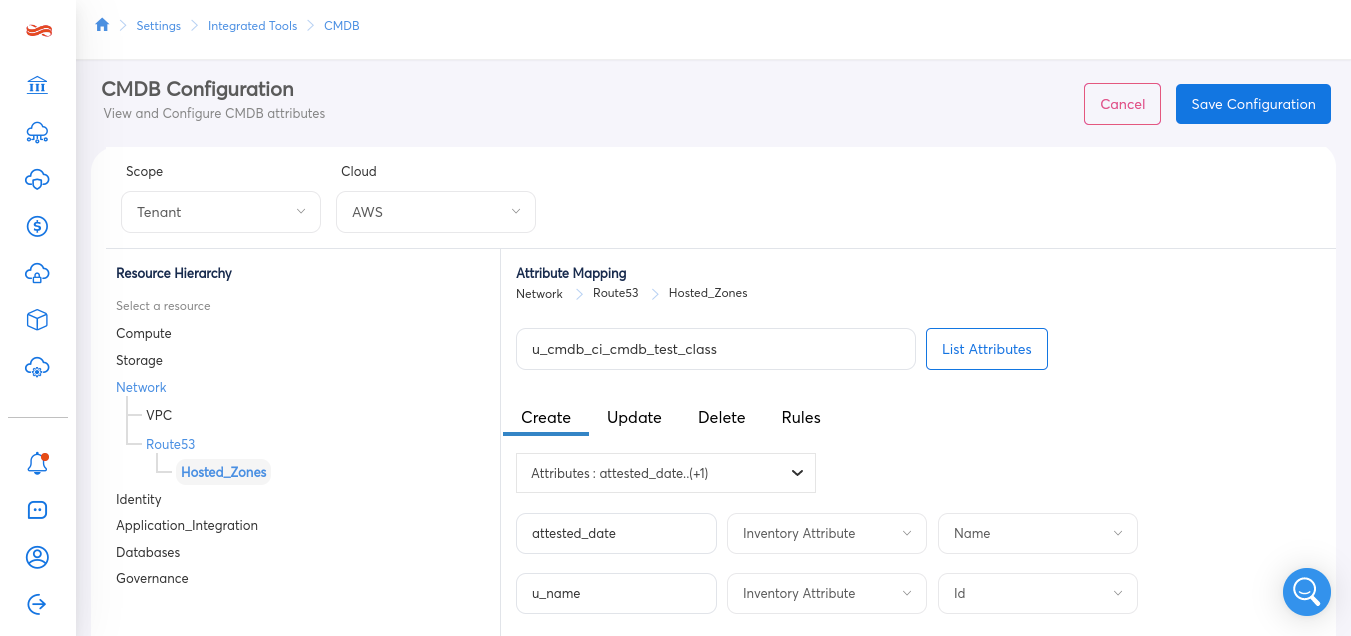
Users can also use the Rules tab to filter by Region, Tags, and/or Cloud Account to only allow resources within those selections to be configured.

Users also have a Schema Mapping section available on this page, which can be used as a reference for how to map cloud resource elements to the CMDB in CoreStack based on the established schema.
Clicking Save Configuration will close this page and the new configuration will now appear on the Configure CMDB dashboard.
Note:Any CMDB configurations you create will only apply to cloud resources that are newly discovered in your cloud environment within the parameters of the configuration rules – not existing resources.
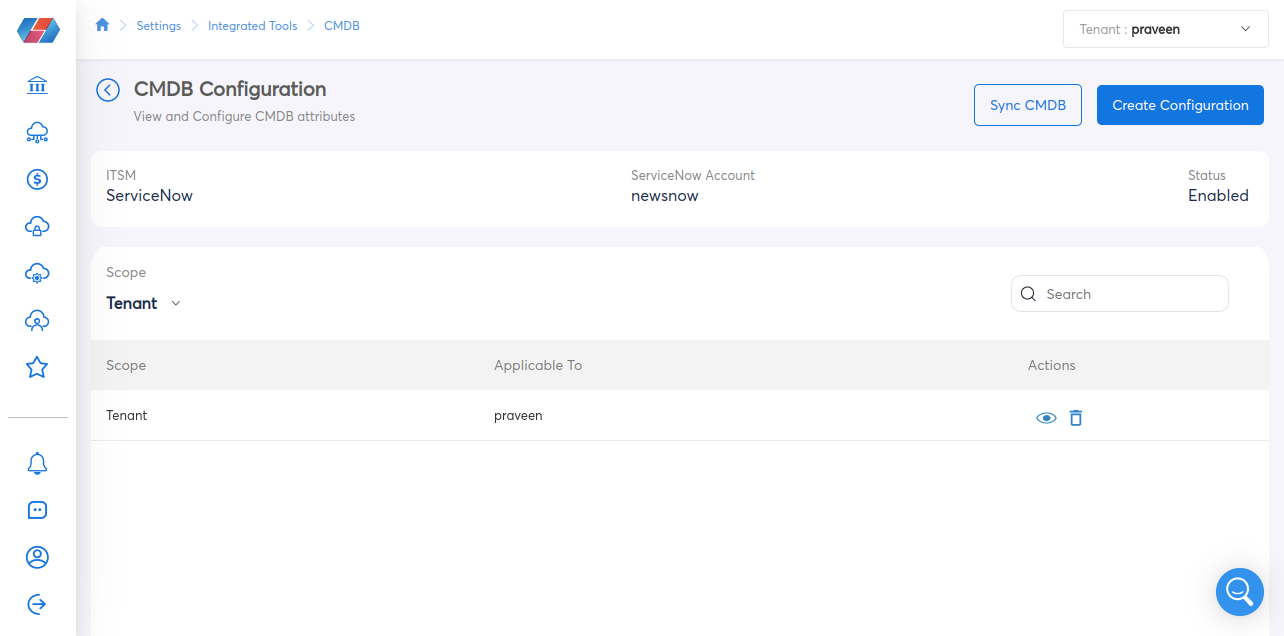
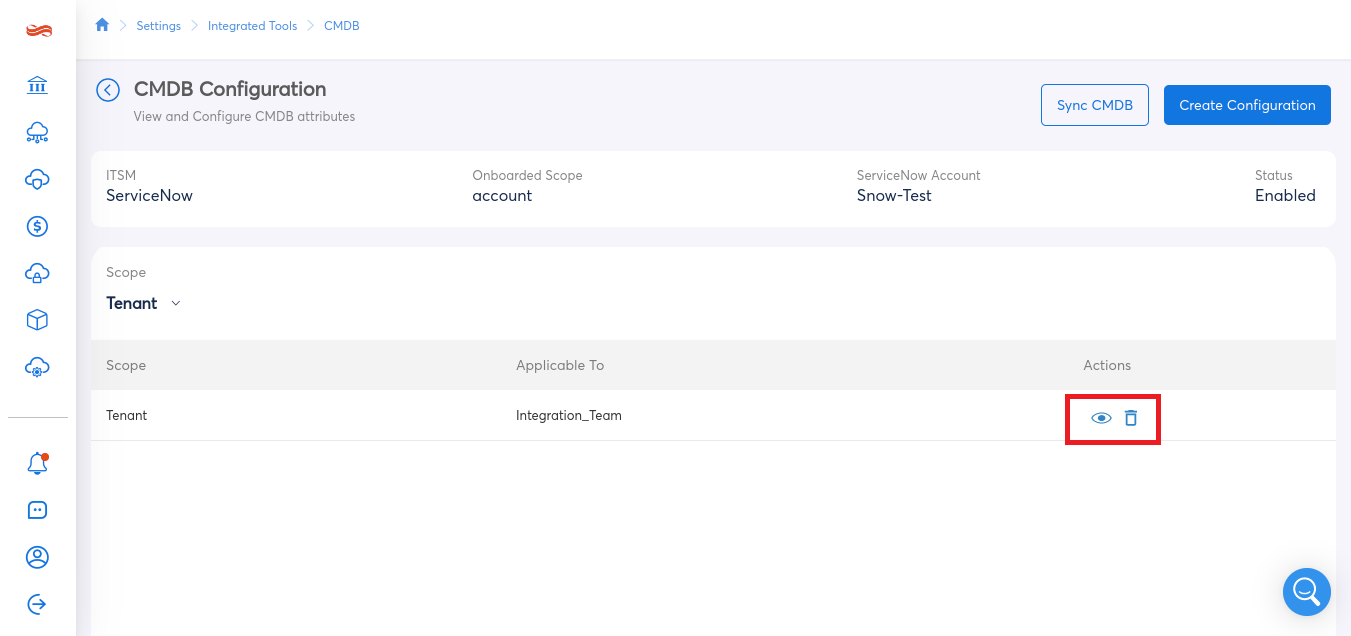
Users can also click the icons under the Actions tab on the dashboard page to View, Update, and Delete any configurations for their table as they wish.
Note:For the CMDB table reference for resources, refer here.
Map Configuration Item (CI) from CMDB in Incident TicketWhen a new threshold alert incident is created in ServiceNow, it will be mapped with the right CMDB configuration item automatically.
Synchronize existing cloud resources with CMDB
While by default any new CMDB configurations created will only apply to newly discovered resources, CoreStack also offers a way to discover existing resource items if users want to do that.
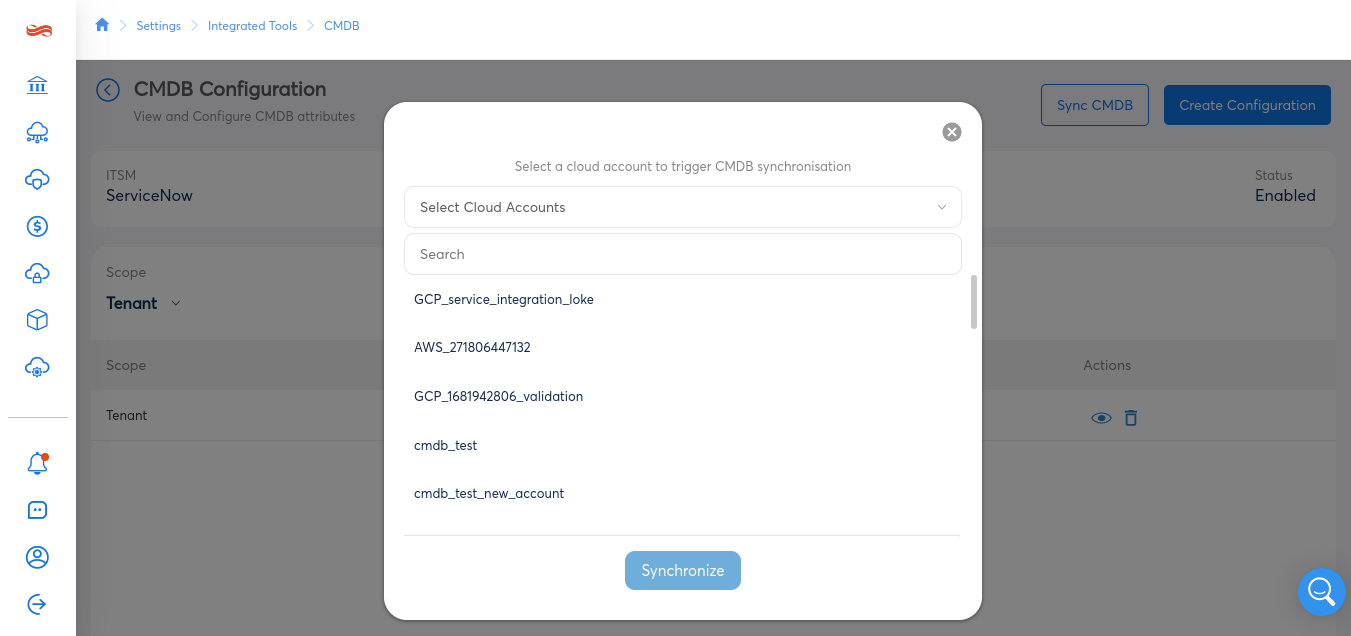
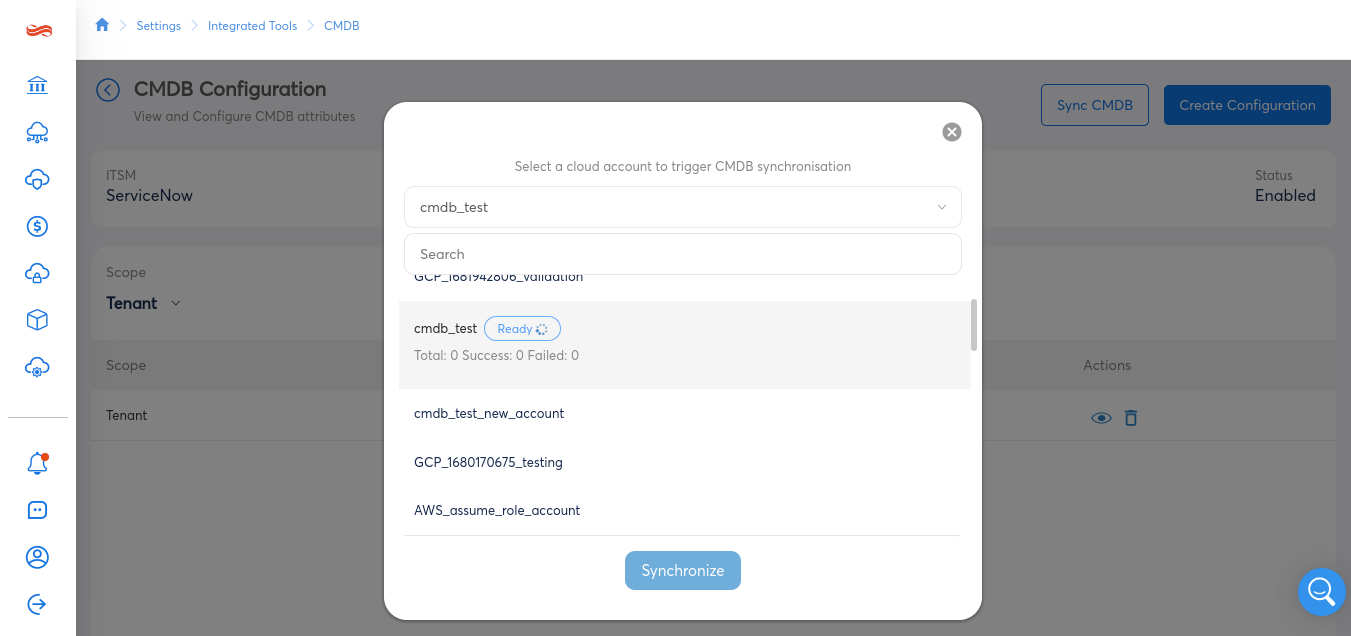
Simply click Actions next to any configuration entry, then select Synchronize.
A pop-up window should appear (if the configuration is set to either Tenant or Account scope) that allows users to select single or multiple tenants/cloud accounts.
After selecting your desired tenants or cloud accounts, click the Synchronize button to trigger CoreStack to manually synchronize whatever existing data you have in those tenants/accounts to your CMDB entry in CoreStack.