How to Onboard an Azure CSP Direct Account
This section guides you to onboard an Azure CSP Direct Parent Account into CoreStack.
Pre-onboarding
There are certain pre-requisites that need to be set up in your Azure CSP Direct Parent Account before it can be onboarded into CoreStack.
Onboarding an Azure CSP Direct Parent Account allows you to discover and onboard the Azure CSP Subscriptions and Azure CSP Customer accounts available within the specific Azure CSP Direct Parent Account. Also, new Azure CSP Customer accounts can be created under an onboarded Azure CSP Direct Parent Account from CoreStack itself.
Once the CSP Direct Parent Account is onboarded, you will need to onboard each CSP Subscription afterwards.
Based on the authentication type you choose while onboarding the Azure CSP Direct Parent Account, the following information must be retrieved from the Azure console.
1. App-only Based
The following values must be generated/copied from your Microsoft Partner Dashboard (partner.microsoft.com) and configured in CoreStack.
- Login to the Microsoft Partner Dashboard using a global admin account: https://partner.microsoft.com.
- Select Account Settings in the Settings menu in the top right (Gear Symbol).
- Select App management in the Account Settings screen.
- If you do not already have an existing app, add a new web app.
- If you have an existing web app, click Add key button.
- Copy the app registration information such as Application ID and Application Secret.
You can retrieve the Tenant ID (Microsoft ID) from the Azure AD Profile screen in the Microsoft Partner Dashboard.
Copy all these details (Tenant ID, Application ID, and Application Secret) and provide them while onboarding your Azure CSP Direct account into CoreStack using App-only based authentication.
2. Authorization Code Based
User account permissions (only for Authorization Code based):
The following permissions must be configured in your Azure CSP Direct Account before onboarding.
- You must login as a Global Admin into the Partner Center and create a user for Partner Center with the following privileges:
- Billing Admin: To view rates, usage, and invoice details.
- Sales Agent: To create and manage customers and their subscriptions.
- A secure application registered with necessary API permissions should be provided.
To enable API access for your Azure CSP Direct account:
- Navigate to API permissions from the Overview screen.
- Click Add a permission. The Request API permissions screen appears.
- Search for Microsoft Partner Center API in the Request API permissions screen.
- Select Microsoft Partner Center API and enable user_impersonation checkbox.
- Set the Delegated Permissions to Partner Center.
- Click Add permissions. The Configured permissions screen appears.
- Click Grant admin consent.
The following values must be generated/copied additionally along with the other information while onboarding an Azure CSP Direct account using Authorization Code option.
Redirect URI:
The following redirect URI that is configured while registering an application to generate the application ID must be used: http://localhost/
Authorization Code:
- Construct an URL in the following format:
https://login.microsoftonline.com/<Tenant ID>/oauth2/authorize?client_id=<Client ID>&redirect_uri=<Redirect URI>&response_type=code&prompt=admin_consent - Open an InPrivate or Incognito mode of browser window and access the above URL.
- Login using your Admin (GA + Admin Agent) credentials and accept when prompted.
- The page will be redirected to the Redirect URI, but the address bar will have the Authorization Code specified after
code=.
Note:
The values retrieved in the earlier steps can be used instead of
<Tenant ID>,<Client ID>, and<Redirect URI>specified in the URL format.
Copy and provide these details additionally in CoreStack while onboarding your Azure CSP Direct account using Authorization Code based authentication.
Onboarding
The following steps need to be performed to onboard an Azure CSP Direct account.
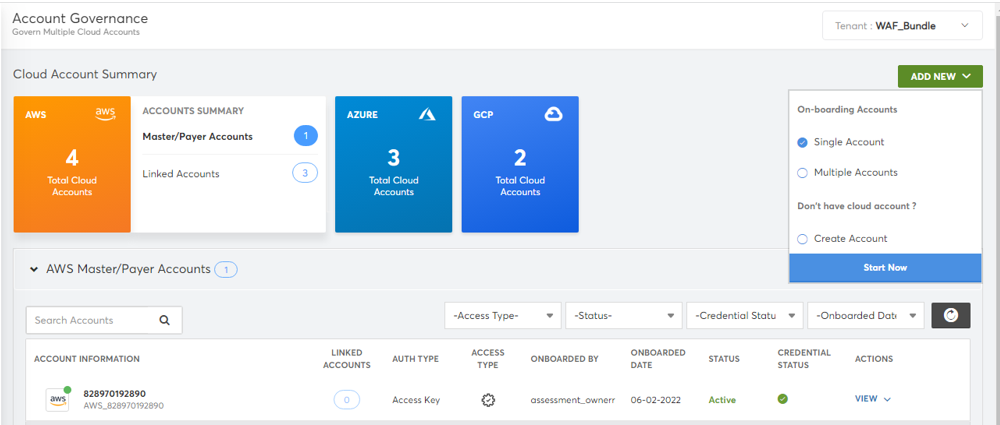
- Click Add New button in the CoreStack dashboard and select Single Account.
- Click Start Now.
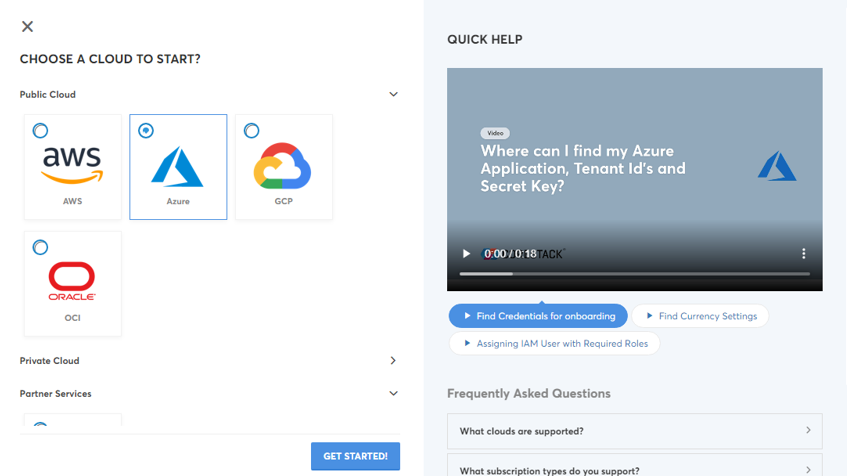
- Select Azure CSP Direct option in the Partner Services field.
- Click Get Started button.
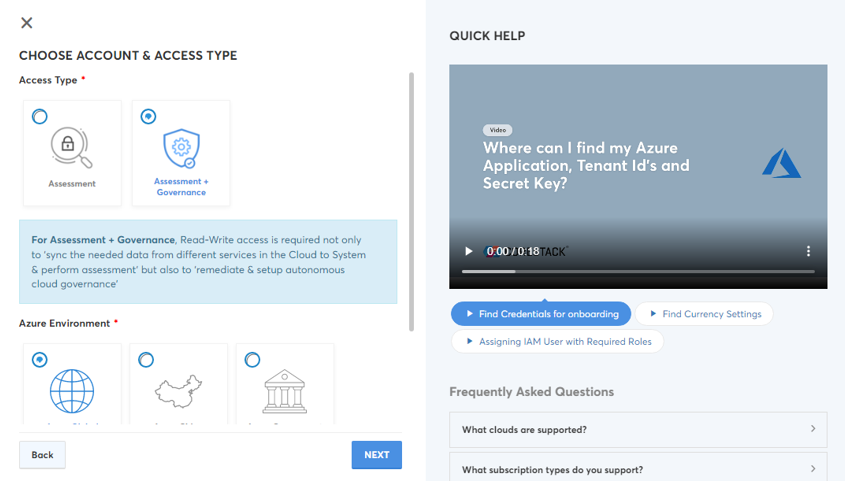
- Select the required option in the Access Type field. The options are: Assessment and Assessment + Governance.
- Select the required option in the Azure Environment field. The options are: Azure Global, Azure China, and Azure Government.
- Select the currency configured in your CSP account from the Currency drop-down list.
- Click Next.
- Provide the details explained (Tenant ID, Application ID, Application Secret) in the Pre-onboarding section.
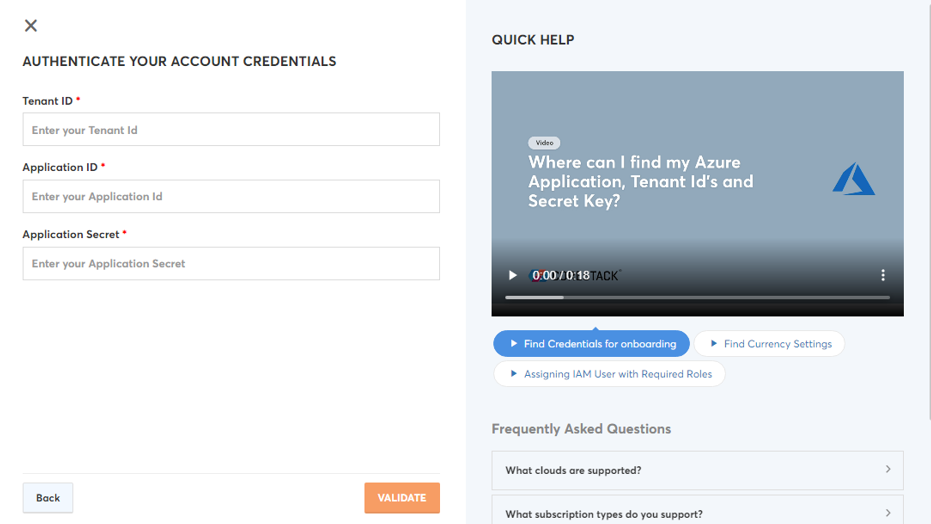
- Select the required option in the Authentication Type field. The options are: App and Authorization Code.
- Provide additional details (Redirect URI, Authorization Code) explained in the Pre-onboarding section, if Authorization Code option is selected in the Authentication Type field.
- Click Validate button.
- If App option is selected in the Authentication Type field, the Advanced Settings section will be displayed with additional fields (Name and Scope) after you click Validate button.
- Modify the pre-populated name of the account in the Name field, if required.
- Select the required option in the Scope field. The options are: Account, Private, and Tenant.
- Click I’m Done button.
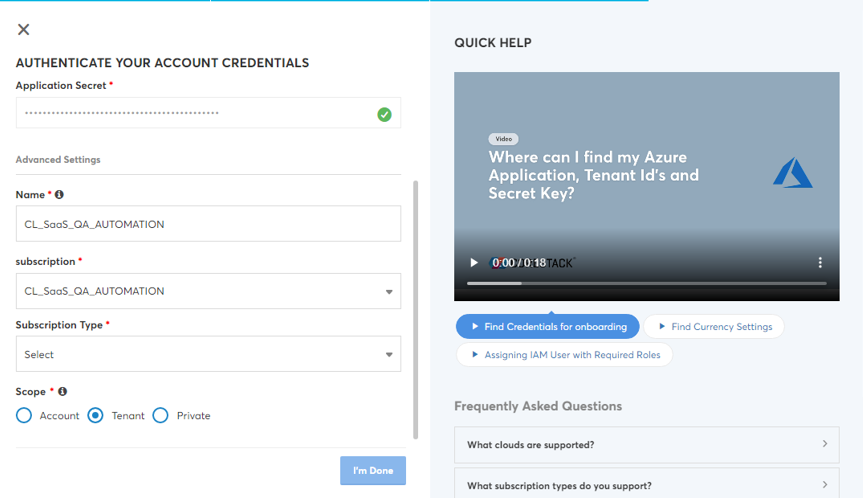
The Azure CSP Direct account will be onboarded successfully into CoreStack. Relevant insights and information about the resources available in the account will be populated under each cloud governance pillars in CoreStack.
NEXT STEPS
Once the Azure CSP Direct account is onboarded successfully, Azure CSP subscriptions/customer accounts can be created/onboarded from CoreStack. While onboarding these subscriptions/customer accounts, the subscription type should be selected as “Azure_CSP-Direct" and relevant parent account must be selected. Please review the following link for instructions: https://docs.corestack.io/docs/how-to-onboard-an-azure-csp-subscription
Updated about 1 year ago