
Azure Threat Management
Configuring Threat Management for Azure
Configuring Threat Management enables users to receive threat information in real time. This way, whenever a threat is detected, users are informed about it through notification emails.
Perform the following steps to configure Threat Management in an Azure account:
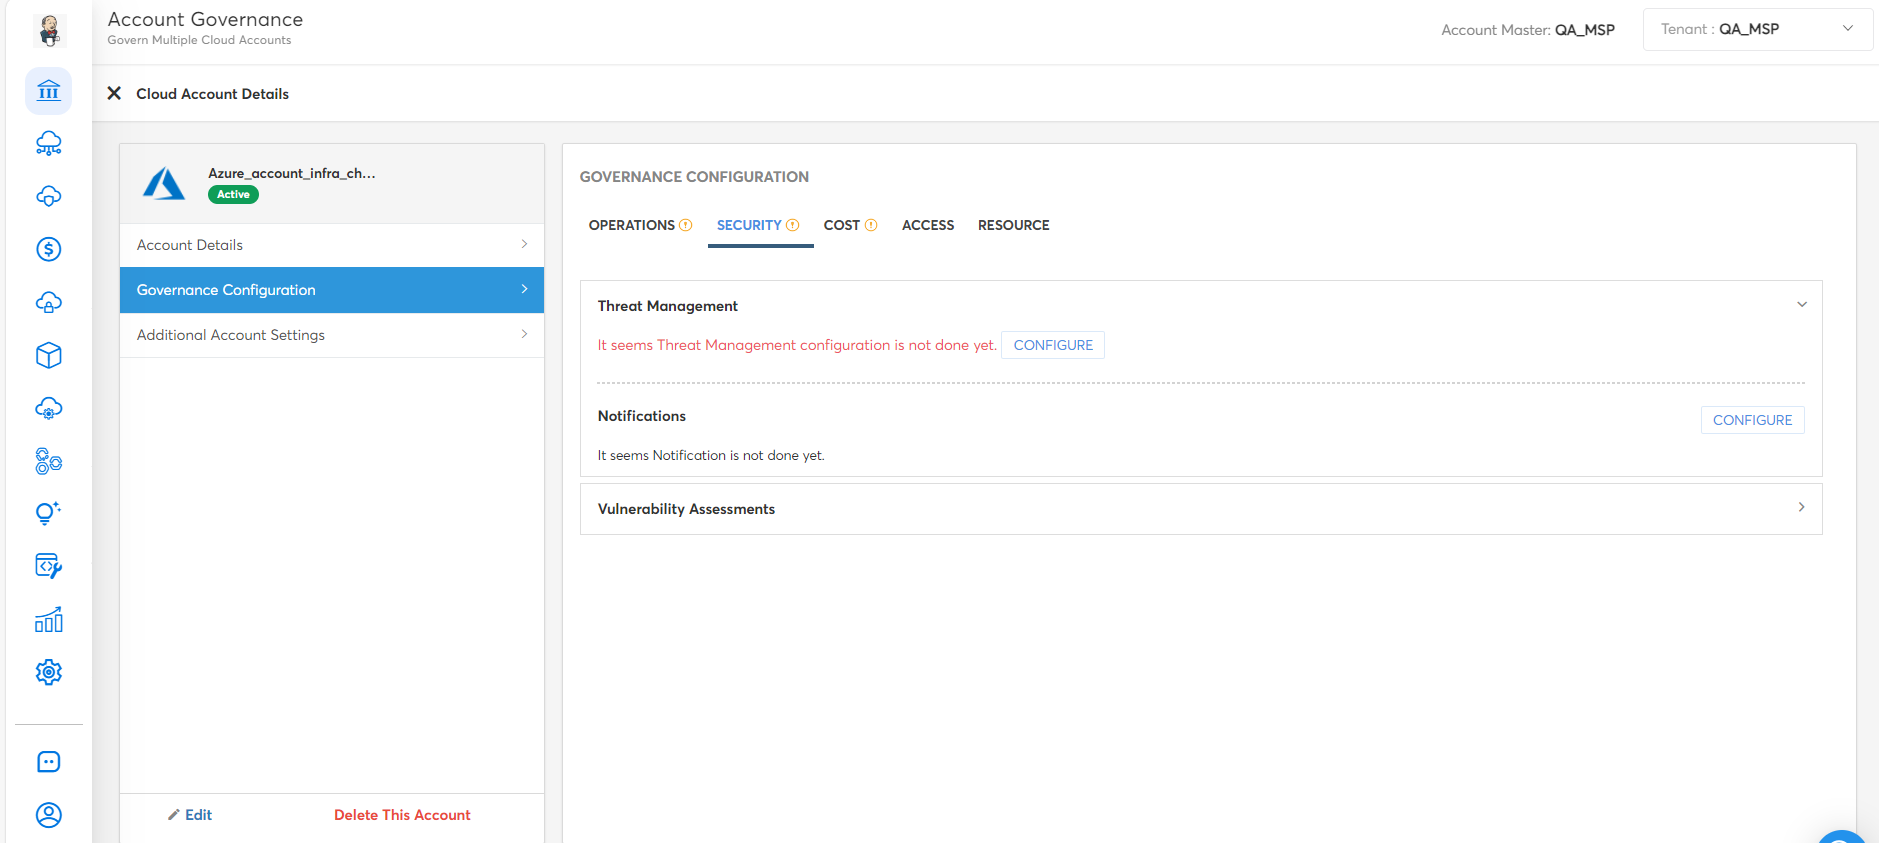
- Login and select Governance > Account Governance.
- Browse to the account for which threat settings need to be made and click VIEW > View Settings.
- Select Governance Configuration > SECURITY.
- Select to expand the Threat Management section.
- Select CONFIGURE.
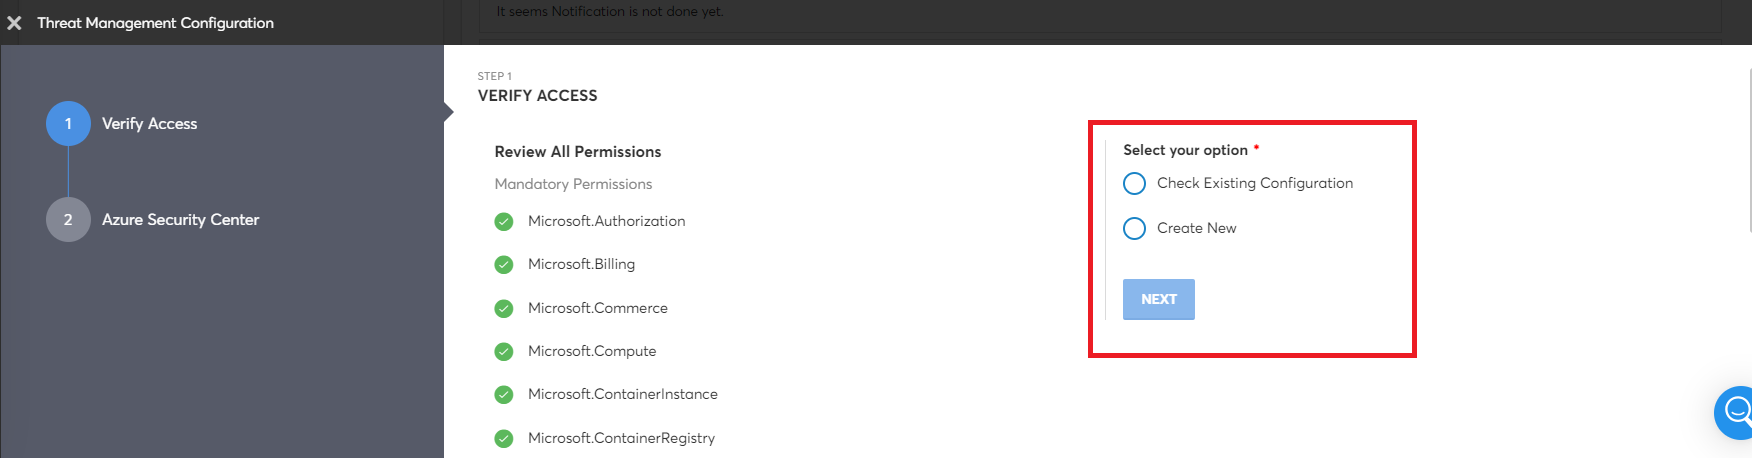
- On the Threat Management Configuration screen, click to select one of the following options and then click NEXT.
- Check Existing Configuration: Select this option to check if threat management is enabled or not in Azure Security Center for the selected Azure account.
- Create New: Select this option to enable threat management for the selected account.
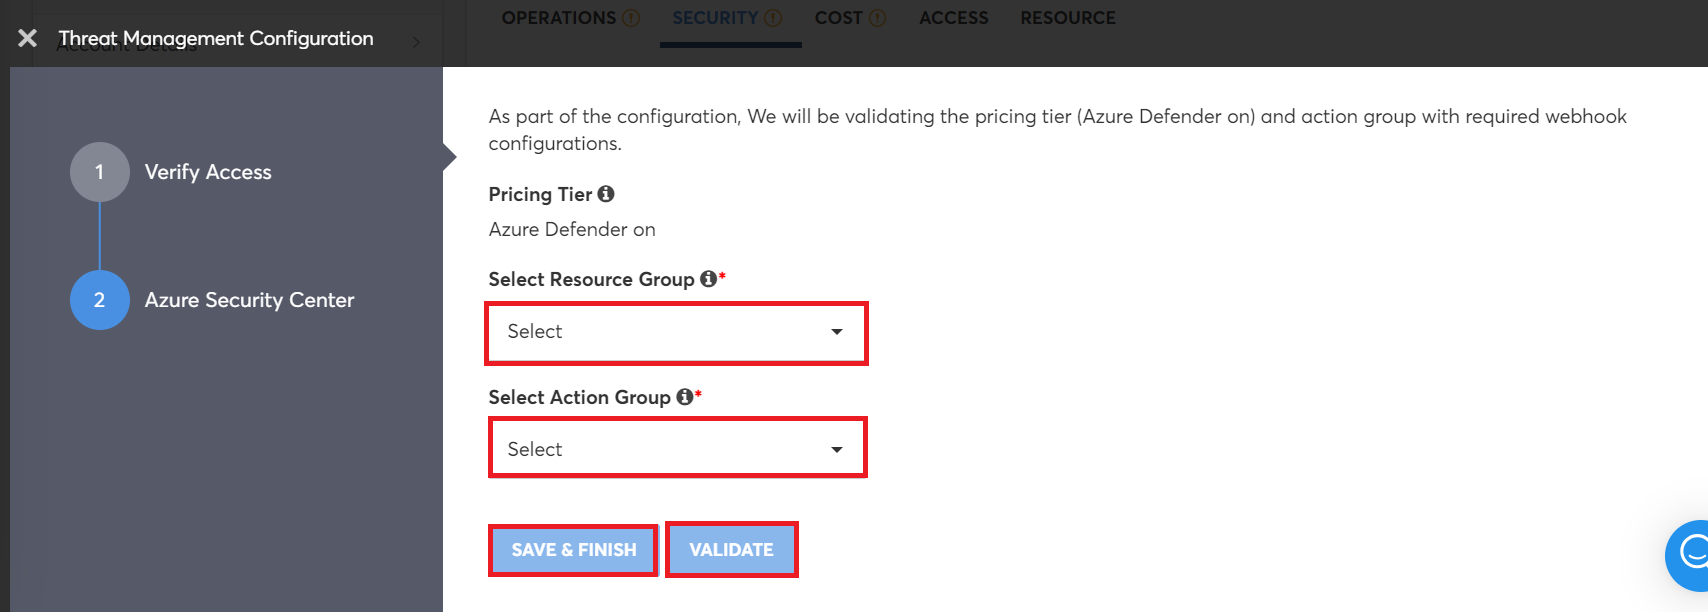
- If selecting Create New, then fill in the following field and click SAVE and then click FINISH.
- Select Resource Group: Select a resource group.

- Select Resource Group: Select a resource group.
- If selecting Check Existing Configuration, then in the Select Resource Group and Select Action Group lists, select an appropriate option. Finally, click VALIDATE.
- If the status of Azure Security Center is ENABLED, then click SAVE & FINISH.
- If the status of Azure Security Center is DISABLED, then click VERIFY ACCESS step (step one) and select the Create New option.
Updated 9 months ago