
Pre-Onboarding for AWS Management Accounts
Introduction
This user guide will explain how to perform the pre-onboarding steps required for onboarding an AWS management account into the platform.
Pre-onboarding
There are certain prerequisites that need to be set up in your AWS account before it can be onboarded into the platform. It primarily involves creating an IAM Role for the platform and providing it with necessary access.
Authorize Access to Your AWS Account
You can use IAM roles to delegate access to your AWS resources. With IAM roles, you can establish trust relationships between your trusting account and other AWS trusted accounts (i.e. the platform). The trusting account owns the resource to be accessed and the trusted account contains the users who need access to the resource.
Note:
IAM User (Access Key and Secret Key) based authentication is no longer supported. This is in compliance with the security standards and recommendations prescribed by AWS.
The platform would use the AWS Security Token Service (AWS STS) “AssumeRole” API operation. This operation provides temporary security credentials that enable access to AWS resources in your account.
Refer this link for more information: https://docs.aws.amazon.com/IAM/latest/UserGuide/id_roles_create_for-user.html
Required Credentials:
- Role ARN: The Amazon Resource Name (ARN) of IAM Role.
- External ID: The external ID can be any word or number that is agreed upon between you and the third-party account.
- Require MFA: Flag to identify if the role is restricted with multi-factor authentication (MFA).
The IAM role must be created with the following access permissions.
- For Assessment: Read-Only Access.
- For Assessment + Governance: Read-Write Access.
The platform simplifies this process by providing a CloudFormation Template that will take care of creating an IAM Role and assign the necessary permissions automatically.
You can use the S3 URLs provided based on the type of access you wish to provide for the platform.
- S3 URL with Templates for Read-Only Access: Click Here
- S3 URL with Template for Read-Write Access: Click Here
Setting up the IAM Role
- Login to the AWS account.
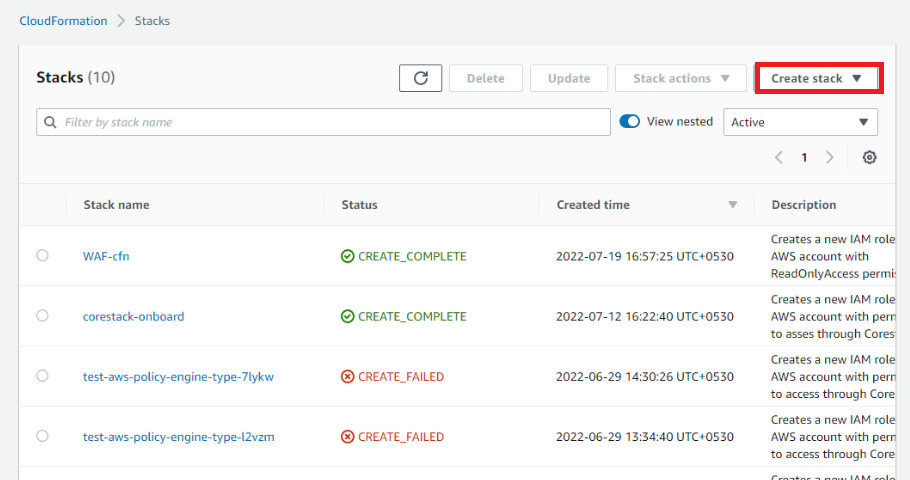
- Navigate to CloudFormation.
- Click Create Stack with new resources. The Step 1 screen of Create Stack section appears.
- Select Template is ready option in the Prepare template field.
- Select Amazon S3 URL option in the Template source field.
- Copy the required S3 URL with Template from the above section and paste it in the Amazon S3 URL text field.
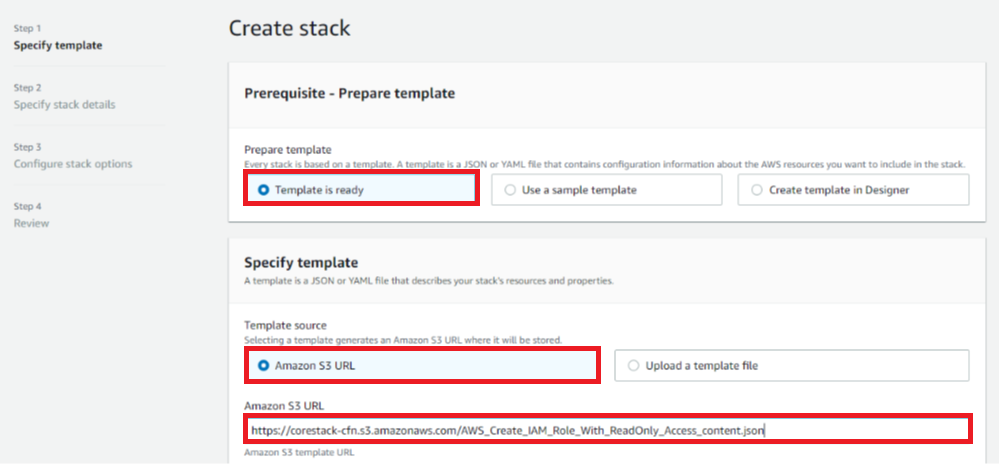
- Click Next. The Step 2 screen appears.
- Provide values for the Stack name and Role name fields. If you have used the Amazon S3 URL with template for Read-Write Access, you can view additional fields that can be left with default values. However, if you do NOT want to configure CFN or GuardDuty or Inspector for your AWS account, you can set them as “false”.
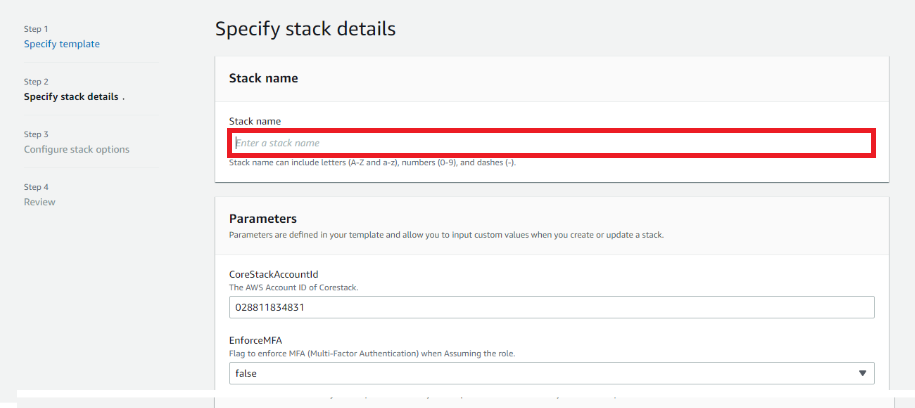
- Click Next. The Step 3 screen appears.
- You can leave the values for the fields in this screen as default or make changes as necessary including assigning Tags, providing notification options, etc.
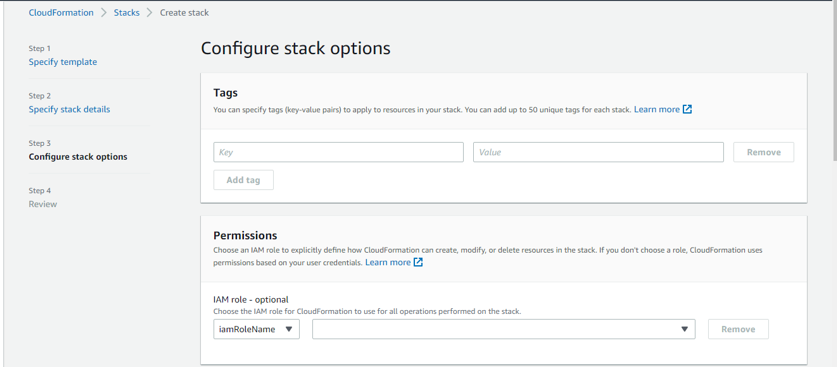
- Click Next. The Step 4 screen appears.
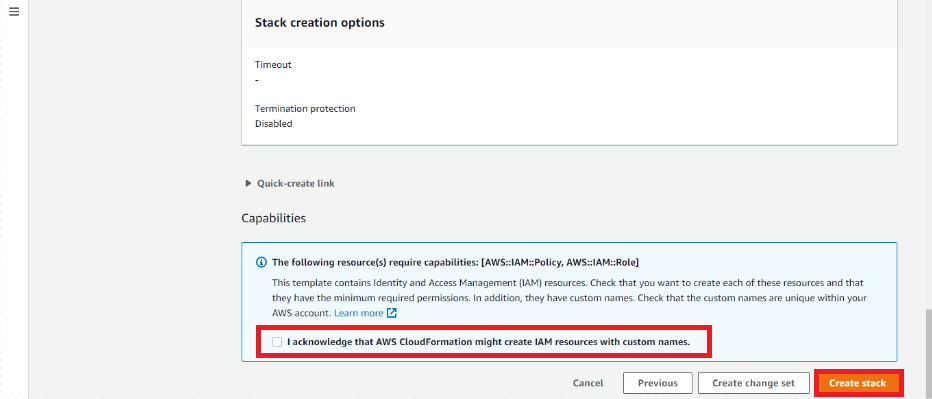
- The information provided in all the steps will be displayed. After reviewing the provided information for correctness, scroll down to the end of the screen and click on the acknowledge checkbox.
- Click Create Stack.
The stack creation process will be initiated, and the status can be viewed.
- Navigate to Stack Info tab to see the overview of the stack and the final status.
- Click Refresh icon to retrieve the updated status. When it is successfully completed, you will see the status as “CREATE_COMPLETE”.
- Navigate to Outputs tab to view the access credentials (ARN).
You need to copy this information and keep it ready in a notepad to be able to copy paste into the platform while onboarding. This is the information required to onboard the account into the platform.
Setting up Cost Reports
Cost and Usage Report (CUR) must be enabled in your AWS account which enables the platform to fetch the billing data from your account. This is required for providing Cost Visibility and Cost Analytics for your accounts. If you already have this enabled, you can skip the below step and just be ready with the S3 Bucket name where the CUR files are being placed by AWS.
Note:
AWS used to provide billing data only at the Management (Payer) Account level. From Dec-2020, AWS provides billing data for member accounts as well. If you have onboarded both your management and member accounts, the platform can directly fetch the billing data from the management account for all the member accounts.
To set up the Cost Usage Report, login with required permissions into your management (Payer) AWS account and complete the following steps:
-
Login to the AWS management account.
-
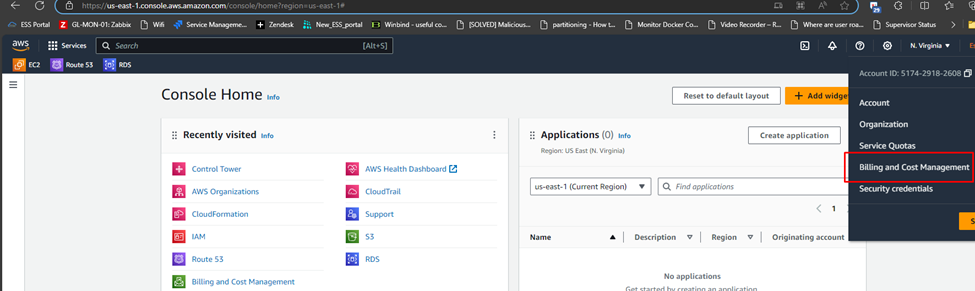
Navigate to Billing and Cost Management.
-
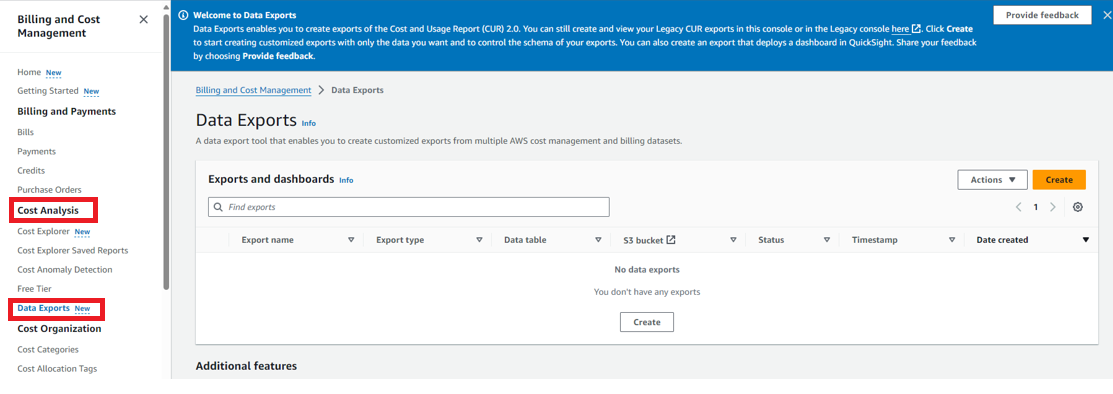
On the left navigation menu, select Cost Analysis > Data Exports.
-
Click Create.
-
In the Export type field, select the Legacy CUR export option.
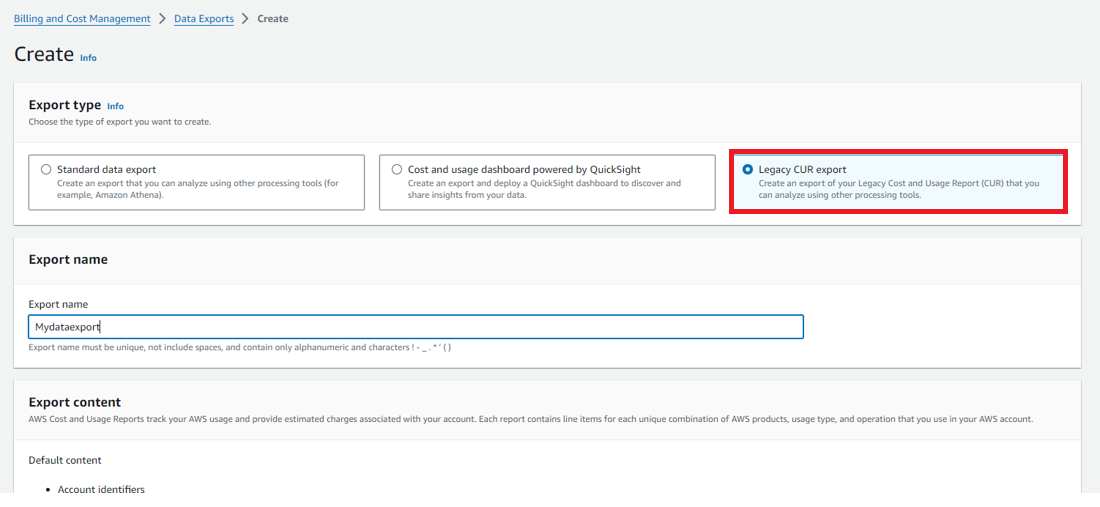
Note:
If you already have a report configured, you can still review the following steps to ensure that all the settings are configured properly. Use the Edit option to make any changes.
- Provide necessary details about the report content in the first step. Ensure that the following two checkboxes are enabled: Include Resource IDs and Automatically refresh.
- Click Next. The screen with Delivery Options appears.
- Select the following values for the respective fields:
- Report Path Prefix: Optional field. It can be left blank. There will be no impact even if some prefix is provided.
- Time Granularity: Daily
- Report Versioning: Create new report version.
- Compression Type: GZIP
- Also, the S3 Bucket configuration must be performed in this step:
- Click Configure.
- If you already have a bucket with the appropriate permissions, you can select the same, or you can select Create a bucket (this is recommended).
AWS will take care of creating this new bucket and attaching the necessary policies. - Click Next to view the policy to be applied.
- Enable the checkbox I have confirmed that is available below.
- Click Save to complete the process. The S3 Bucket will be successfully configured.
- Click Next to proceed to the next step.
- The last step is to review the provided values and complete CUR configuration. Ensure that the following values are configured correctly.
- Time Granularity: Daily
- Report Versioning: Create new report version.
- Compression Type: GZIP
- Click Review and Complete.
The report will be created successfully. You can now continue with onboarding the account to the platform. It will take up to 24 hours before AWS places the first report (.CSV file in GZIP format) in the S3 bucket. Hence, the cost data will not be available for the platform until then.
Select Cost Allocation Tags
It is mandatory to configure cost allocation tags in order to process the cost data.
To set up Cost Allocation Tags, perform the following steps:
- Navigate to Billing Dashboard.
- Select Cost Allocation Tags from the Left Navigation Menu.
- Click Activate button.
The recommended tags to be activated are: Application, Environment, Cost Center, Owner. You can also choose to add additional tags as per your requirement.
Impact on the AWS Account
Read-Only Access:
Since the access is read-only, there are no resources with configurations done by the platform in your AWS account. There is absolutely no resource or billing impact in this case.
Note:
- If you had enabled Cost & Usage Report specifically for the platform, the S3 Bucket will incur some minimal cost based on the size of the usage reports placed by AWS.
- If you had enabled AWS Cost Explorer API to be used by the platform for a faster cost data retrieval, additional cost will be incurred based on the API requests initiated. Approximately, each request will incur a cost of $0.01. Refer AWS Cost Explorer API pricing page for more details.
Read-Write Permissions:
Following resources will be created based on your selection during onboarding:
- Cloud Trail: The platform requires a cloud trail to be available in each of your preferred AWS regions. You may select an existing trail to be used or choose the option to create a new trail. Such new trails created may attract additional charges.
Note:
If the one created is the first trail, it is free of cost. If it is an additional trail, it may involve charges.
- S3 Buckets: As part of the Cloud Trail configurations, S3 buckets are also created in the respective AWS regions to collect the logs.
- If you had chosen to use existing trail, there are no new buckets created.
- If you had chosen to create a new trail, the corresponding S3 Bucket will be created and there will be a charge associated.
- CloudWatch Alarms will be created for selected metrics for various resource types supported by the platform. As part of post-onboarding, you will see the list of metrics for each resource type for which you can define monitoring thresholds and alerts.
Billing Impacts Due to Onboarding in the Platform
There could be additional charges based on the configuration done for your accounts after onboarding:
| Configuration | Description | Billing Impact |
|---|---|---|
| CloudTrail | Case-1: An existing trail is configured for the . Case-2: There are other Trails that were created before / after onboarding your account to the platform. | Case-1: Charges for the S3-Bucket where the Cloud Trails logs are stored. This is usually very minimal. Case-2: Charges for the S3-Bucket where the Cloud Trails logs are stored. management event charges for the second trail at the rate of $2.00 per 100,000 events. |
| CloudWatch Alarm | Standard Resolution (60 sec) | $0.10 per alarm metric |
| CloudWatch Metric Data | GetMetricData – The platform fetches the metric data from AWS | $0.01 per 1,000 metrics requested |
| AWS Configuration Recorder, GuardDuty Notifications, AWS KMS Keys, AWS Config Policy | These services will be used only for Assessment + Governance access type and it is optional for the user to enable them. If enabled, relevant charges will be applicable. • AWS Configuration Recorder: Used to identify issues in resource configurations. • GuardDuty Notifications: Used for threat detection. • AWS KMS Keys: Used to execute guardrail policies for KMS auditing and finding violations. • AWS Config Policy: Used to execute configuration policies evaluation. | Refer to pricing pages of relevant AWS resources for more pricing details. |
Updated 3 days ago