
Azure Post-Onboarding
Post-Onboarding for Azure cloud accounts
This section covers assessment validation and governance configuration for your cloud accounts.
Once you have completed adding your cloud accounts into CoreStack, you can see them listed as part of the Account Governance Dashboard. As a next step, you can check if CoreStack has valid permission to assess the data from cloud and complete the Oscar pillar configurations.
The following resources will be created based on your selection during onboarding:
Azure Monitor, Resource Group, Action Group:
-
Azure monitor collects data from various sources such as applications, operating systems, Azure resources, etc. in the form of metrics and logs. This data can then be processed to perform various functions such as analysis, visualization, alerting, automation and integrations.
-
Azure Resources Groups are logical collections of virtual machines, storage accounts, virtual networks, web apps, databases, and/or database servers. Typically, users will group related resources for an application, divided into groups for production and non-production — but you can subdivide further as needed.
-
Azure Action group is a collection of notification preferences defined by the owner of an Azure subscription. Azure Monitor, Service Health and Azure Advisor alerts use action groups to notify users that an alert has been triggered.
CoreStack requires an Azure Monitor, Resource Group & Action Group to be available in respective Azure account and it will fetch data from these services and publish in operation posture in CoreStack.
(Note: Creating new services may attract additional charges. If the one created is the first trail, it is free of cost. If it is an additional trail, it may involve charges).
Microsoft Defender for Cloud:
Microsoft Defender for Cloud provides you the tools needed to harden your network, secure your services and make sure you're on top of your security posture. It also provides threat protection for workloads running in Azure.
CoreStack requires Microsoft Defender for Cloud service to be available in respective Azure account to configure Security pillar in CoreStack. CoreStack will fetch identified threat and vulnerabilities findings from these services and publish them in the security posture of CoreStack.
You may use an existing Microsoft Defender for Cloud free plan to identify vulnerabilities and for threats to be populated, either plan1/plan2 should be enabled.
(Note: Enabling the Defender service may attract additional charges.)
Please click on the below link to get detail explanation about the Microsoft Defender for Cloud feature:
https://docs.microsoft.com/en-us/azure/defender-for-cloud/enable-enhanced-security
Note :
Ensure that the VM agent collects data and logs them in the LogAnalytics Workspace for vulnerabilities to be populated in CoreStack
Assessment validation for onboarded Azure account in CoreStack:
- Click View under Actions and select View Settings.
- Click Assessment Validation and Select Operations and Click Re-Validate. This will validate if assignment permission to CoreStack is intact.
- On Successful validation will reflect as like below.
- Perform the same validation for “Security & Cost” pillar.
Governance configuration for onboarded Azure account:
Configuring Operation Pillar in CoreStack for onboarded Account
- Click View under Actions and select View Settings.
- Click Governance Configuration and Select Operations.
- Expand Activity logs and Click Configure.
- Select Create New / Existing “Resource Group & Action group” based on Availability in onboarded cloud account and click Next.
- Select desired Resource group and Action Group.
- Click Validate and Save.
- Click Finish.
- Expand Alerts and click configure.
- Select Create New / Existing based on Resource Group & Action Group in onboarded cloud account and click Next.
- Select desired Resource group and Enter Action Group .
- Click Validate. and then Save & Finish.
Configuring Security Pillar in Corestack for onboarded Account
- Click Governance Configuration and Select Security.
- Expand Threat Management and Click Configure.
- Select Create New / Existing Resource Group & Action Group based on Availability in onboarded cloud account and click Next.
- Select desired Resource group and Action Group .
- Click Save & Finish.
- Expand Notification Settings and configure notification list based on your requirements. Click Save & Apply.
Configuring Cost Pillar in CoreStack for onboarded Account
- Enable Cost Anomaly. This will alert us if any deviation of cost from the baseline settings.
- Click Governance Configuration and Select Cost.
- Expand Cost Anomaly.
- Enable Cost Anomaly and configure notification list of Email address or Webhook.
- Click *Save & Apply .
Policy Engine Option for Azure Accounts
CoreStack policy engine support is now available for Azure cloud accounts. Users can select from two options for policy engine -- Azure Policy and CoreStack.
The CoreStack policy engine option is selected by default. This option requires the least amount of access permissions, and the execution results are available in real-time. To learn which permissions are required for the CoreStack policy engine option, refer to Onboarding Permissions for Azure - Assessment.
The Azure Policy engine option is also a free option, but it requires elevated permissions to run policies. The execution results might also have some time delays in terms of when the policies are run and when the results appear in CoreStack. To learn which permissions are required for the Azure Policy engine option, refer to Onboarding Permissions for Azure - Assessment + Governance.
Note:
The policy engine selection done during onboarding can be changed in post-onboarding settings, but in both scenarios, only one engine type can be selected by the user.
For example, when a user selects the CoreStack policy engine and then triggers a compliance assessment against a standard, only the policies mapped to CoreStack will be executed (any other policy engine types will not be executed).
Configuring Policy Engine for Azure
Perform the following steps to configure policy engine:
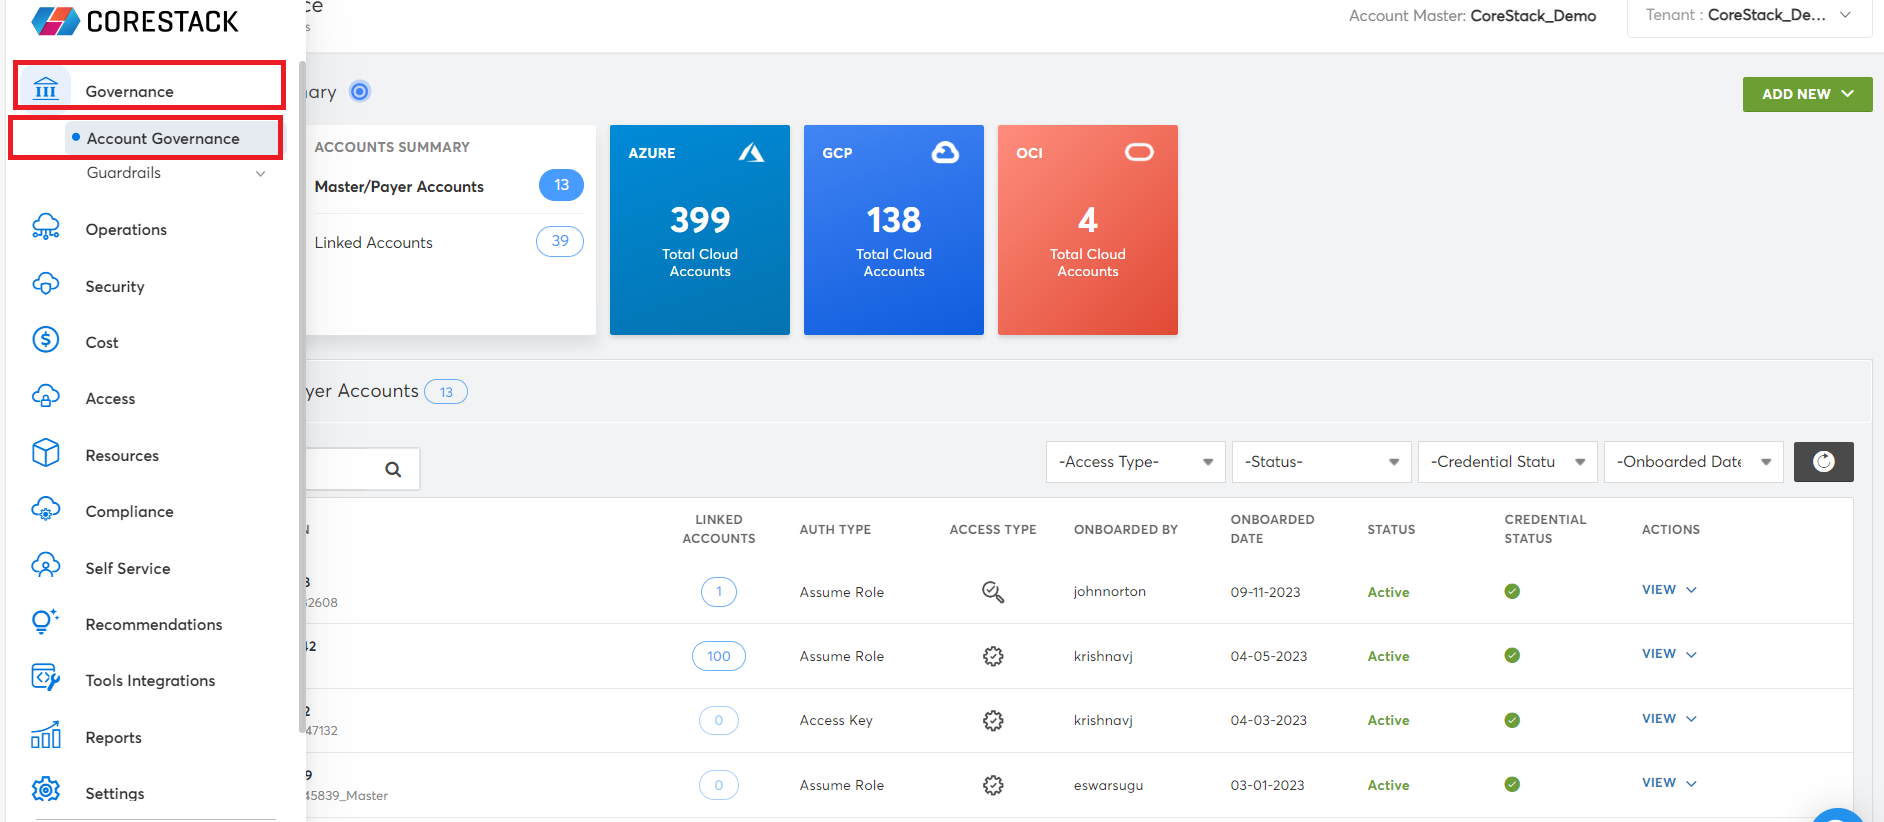
- Access the CoreStack application and go to Governance > Account Governance.
-
In the AZURE block, click Subscriptions to view the list of Azure cloud accounts.
-
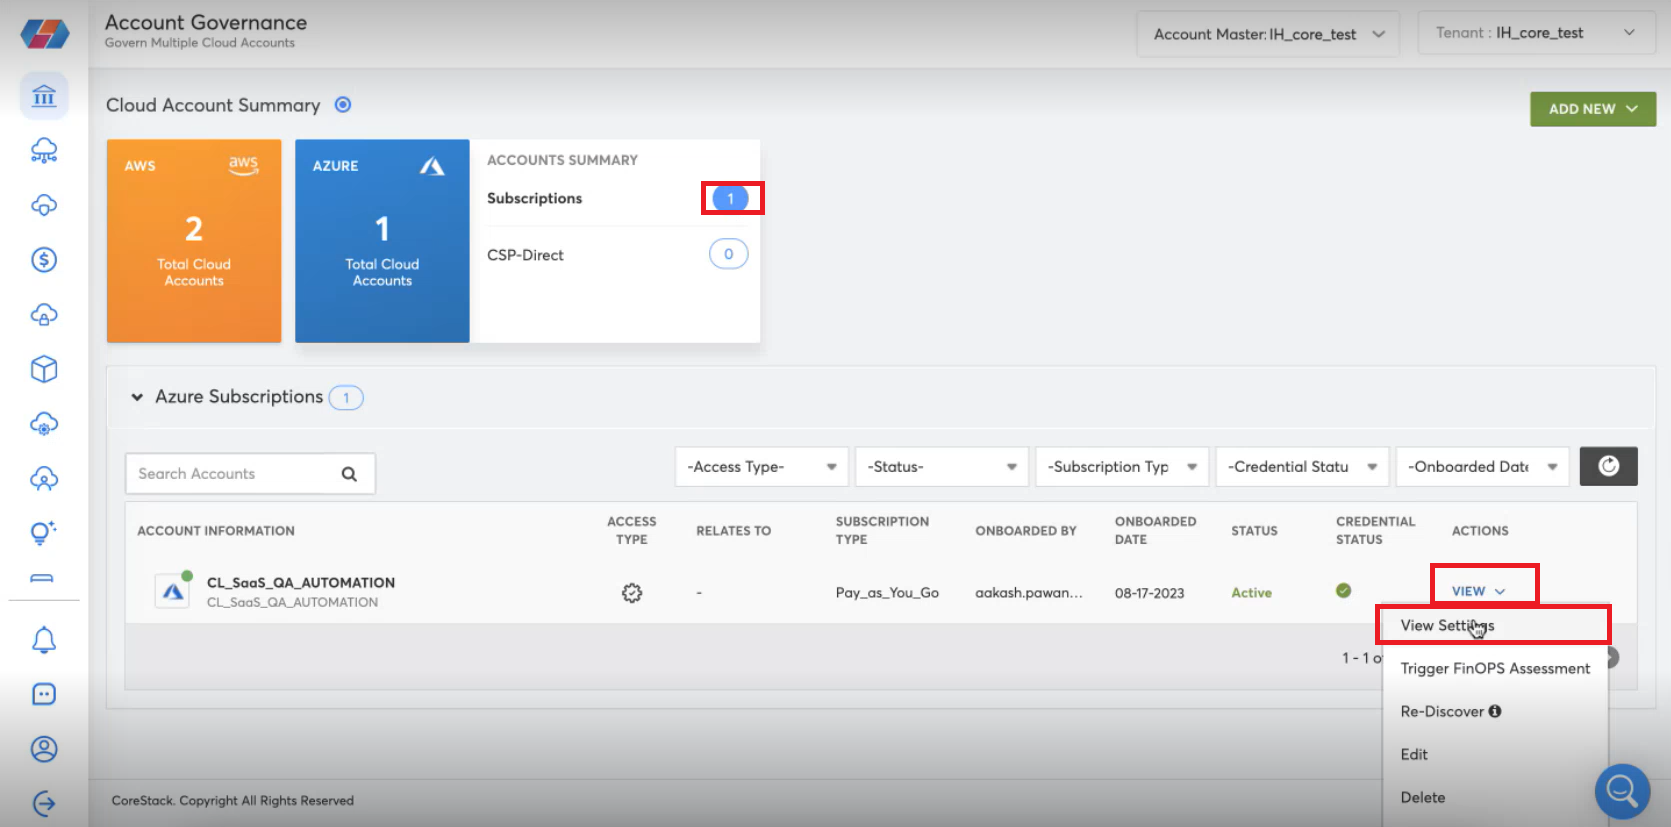
For a particular account, in the ACTIONS column, click VIEW > View Settings.
-
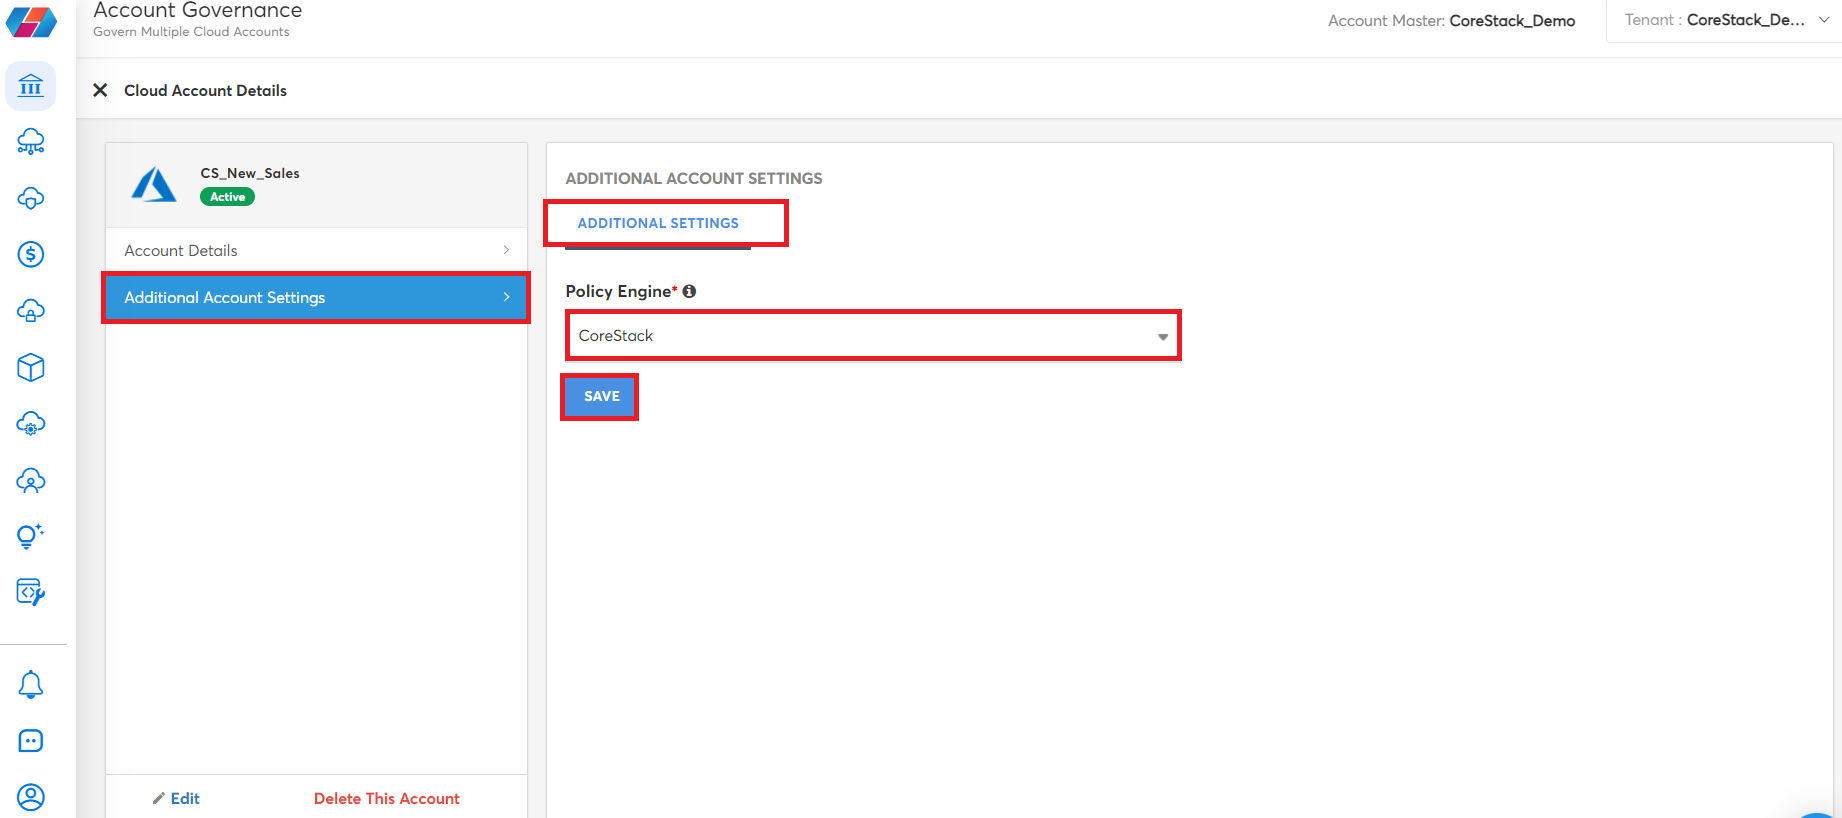
Click Additional Account Settings > ADDITIONAL SETTINGS.
-
In the Policy Engine list, click CoreStack (default) or Azure Policy.
-
Click SAVE.
Updated 8 months ago