
AWS Threat Management
Configuring Threat Management for AWS
Configuring Threat Management enables users to receive threat information in real time. This way, whenever a threat is detected, users will be informed about it through notification emails.
Perform the following steps to configure Threat Management in an AWS account:
- Login and select Governance > Account Governance.
- Browse to the account for which threat settings need to be made and click VIEW > View Settings.
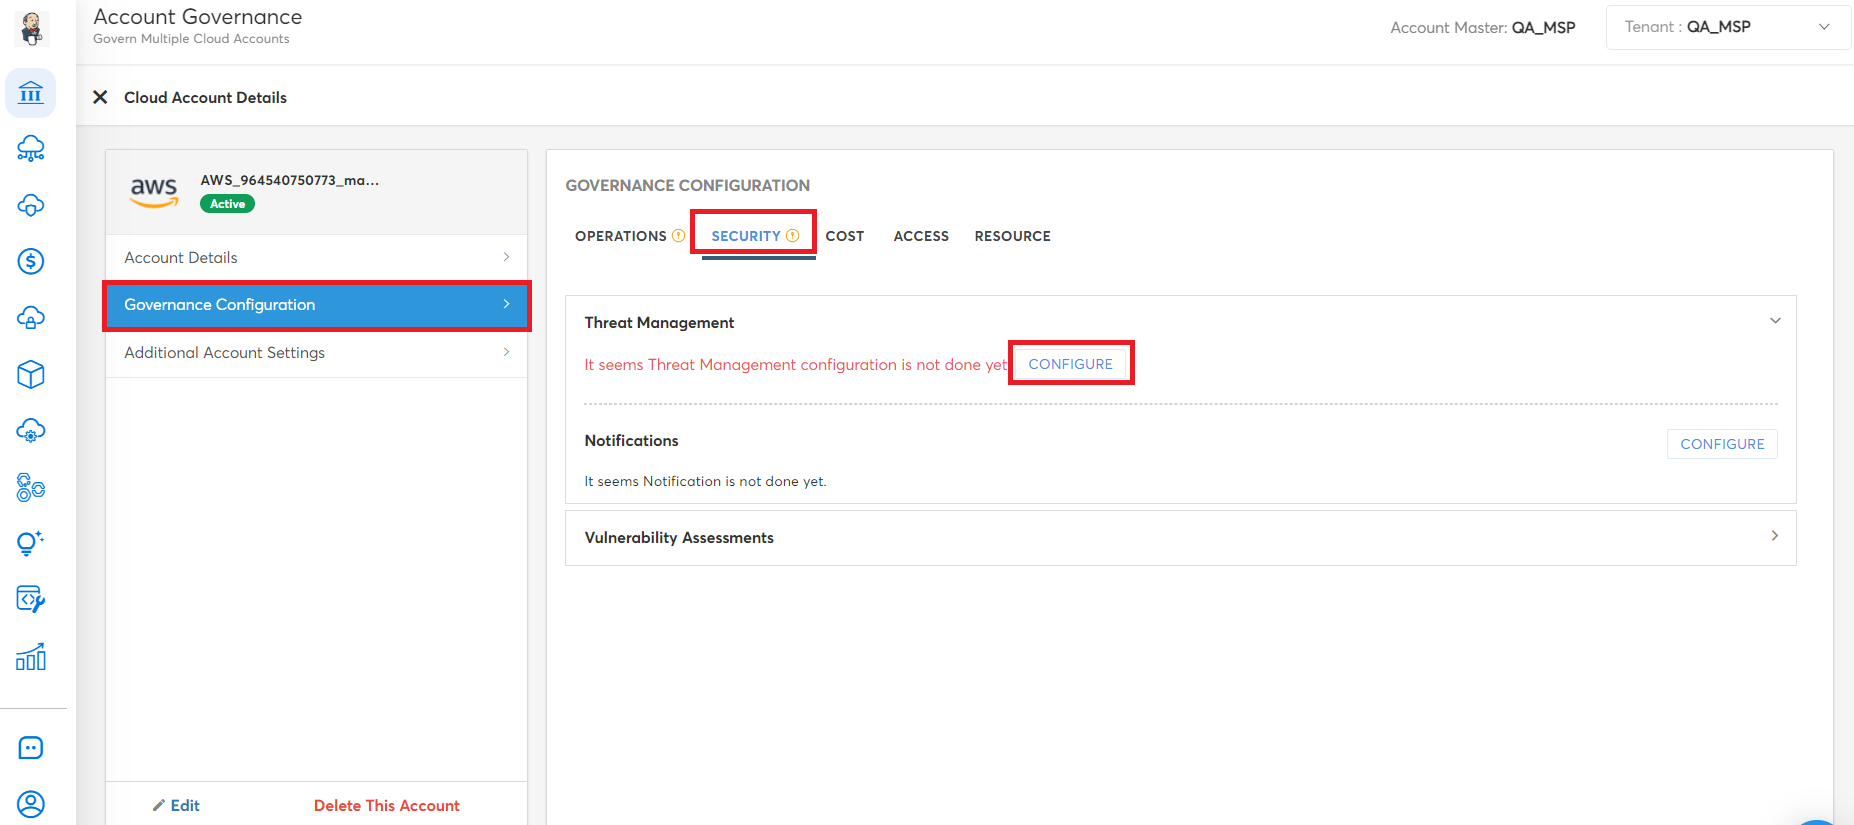
- Select Governance Configuration > SECURITY.
- Select to expand the Threat Management section.
- Select CONFIGURE.
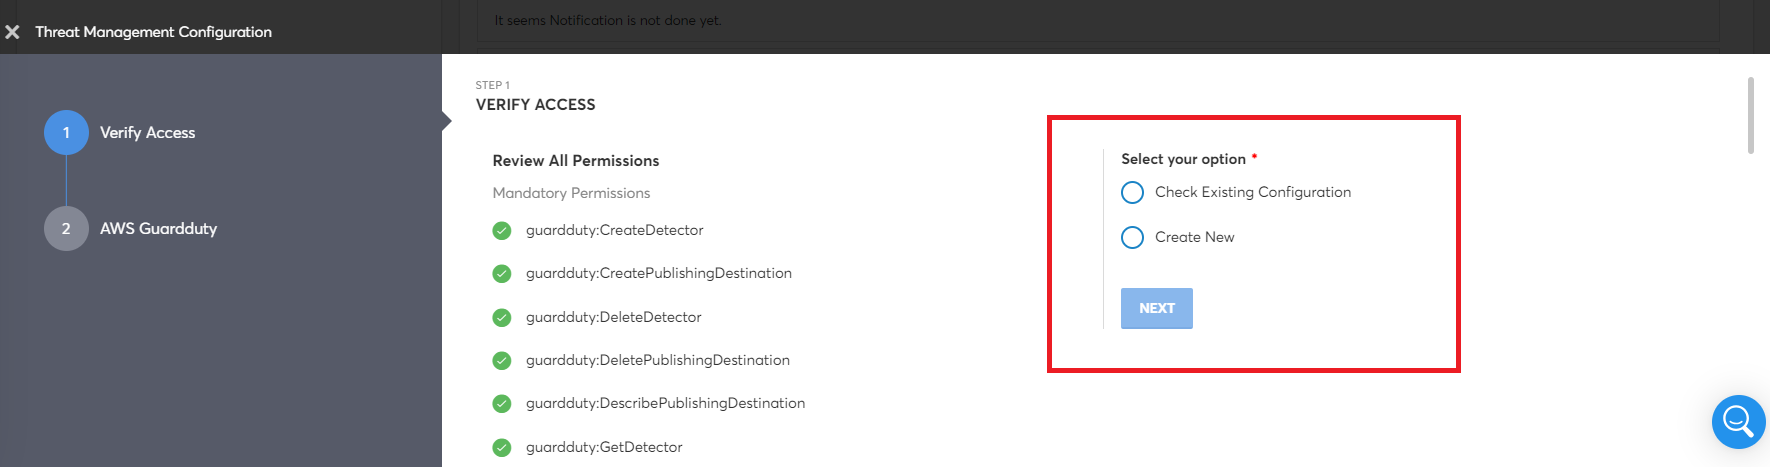
- On the Threat Management Configuration screen, click to select one of the following options and then click NEXT.
- Check Existing Configuration: Select this option to check if threat management is enabled or not in Amazon GuardDuty for the selected AWS account.
- Create New: Select this option to enable threat management for the selected account.
- If selecting Create New, then fill in the following fields and click SAVE and then click FINISH.
- Select Regions: Select the region and then click Apply. You can select multiple options.
- Bucket Name: Type the bucket name.
- KMS Key: Type the KMS key.
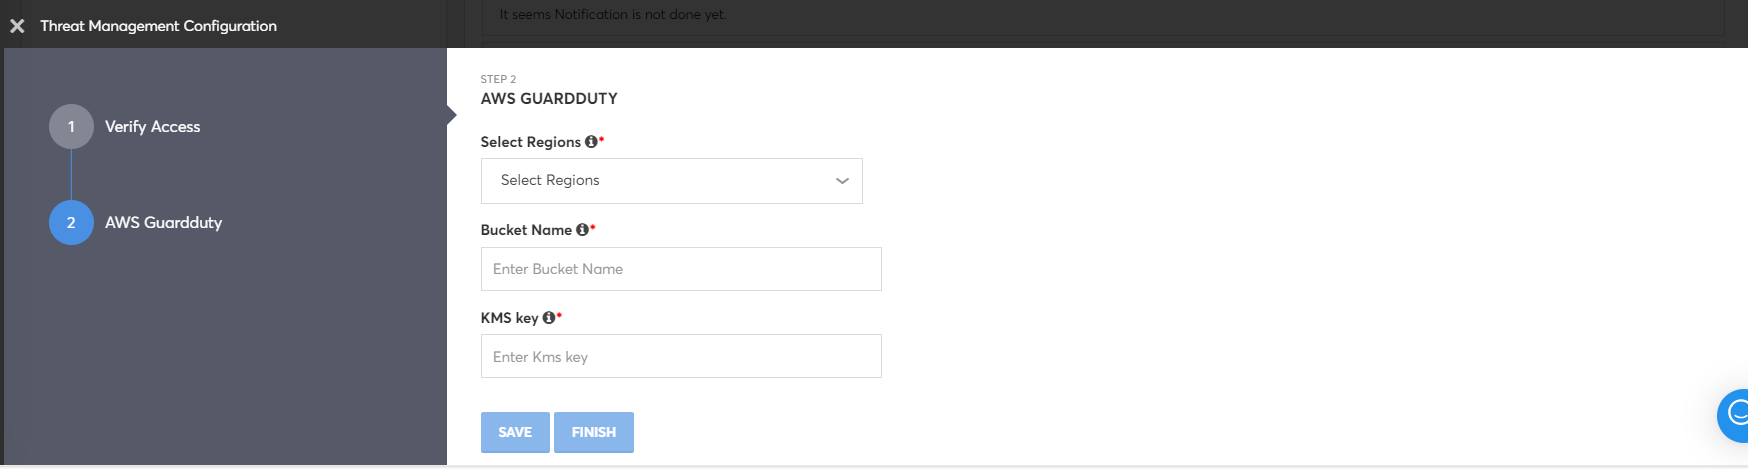
Note:
Hover your mouse pointer over the field names to know more about the rules for defining these fields.
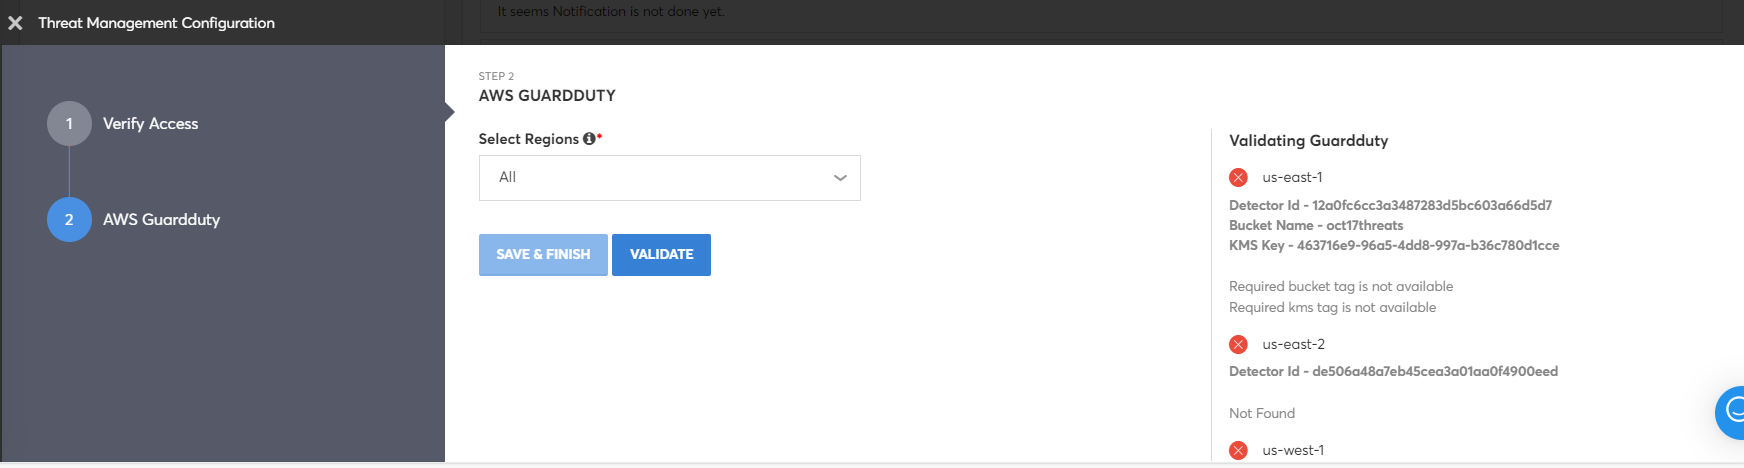
- If selecting Check Existing Configuration, then in the Select Regions list, select the region, and then click Apply. You can select multiple options. Finally, click VALIDATE.
- If the status of Guardduty is ENABLED, then click SAVE & FINISH.
- If the status of Cloud Guard is DISABLED, then click VERIFY ACCESS step (step one) and select the Create New option.
Updated 9 months ago