Onboarding for Microsoft Partner Agreements (Azure CSP Direct)
Please read first:
Before proceeding with onboarding for this type of cloud account, you must ensure the required pre-onboarding steps have been completed first.
For more information on what these prerequisites are and how to address them, please refer to the Pre-Onboarding for Azure Enterprise Agreements (EA) user guide.
Introduction
This document explains how to onboard Microsoft Partner Agreement (CSP Direct) Accounts. An Azure CSP Direct account is a cloud account used by Cloud Solution Providers (CSPs) who have a direct billing relationship with Microsoft.
The account onboarding process follows a step-by-step flow with five steps, described in the list below. Users must complete every step by filling in the appropriate details so that they can proceed to the next step.
The onboarding flow for Azure cloud accounts covers the following main steps:
- Azure Cloud Account Type: Select the type of Azure cloud account that needs to be onboarded.
- Prerequisites: Select the cloud account scope, access type, and product(s).
- Add & Validate Credentials: Select the authentication type and provide the required Azure account credentials.
- Basic Settings: Select and/or input the basic settings for the cloud account.
- Advanced Settings (optional): This optional step allows users to add tags and set up any required governance configurations. Account governance configurations can also be done after the onboarding steps.
As users add all necessary details for each step in the onboarding flow, it will be marked as completed and no longer appears greyed out in the left sidebar.
Detailed onboarding steps are explained in the sections below.
Note:
Before starting the onboarding process on the platform, make sure that you have followed and completed all the prerequisite steps in the GCP cloud portal. Refer to the PRE-ONBOARDING user guides for more information on how to complete these steps.
Onboarding Steps
Perform the following steps to onboard an Azure Microsoft Partner Agreement (CSP Direct) Account:
-
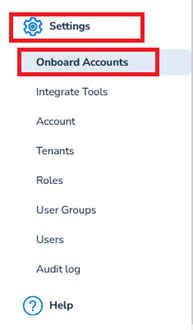
Log in to the platform and on the left menu bar, go to Settings > Onboard Accounts.
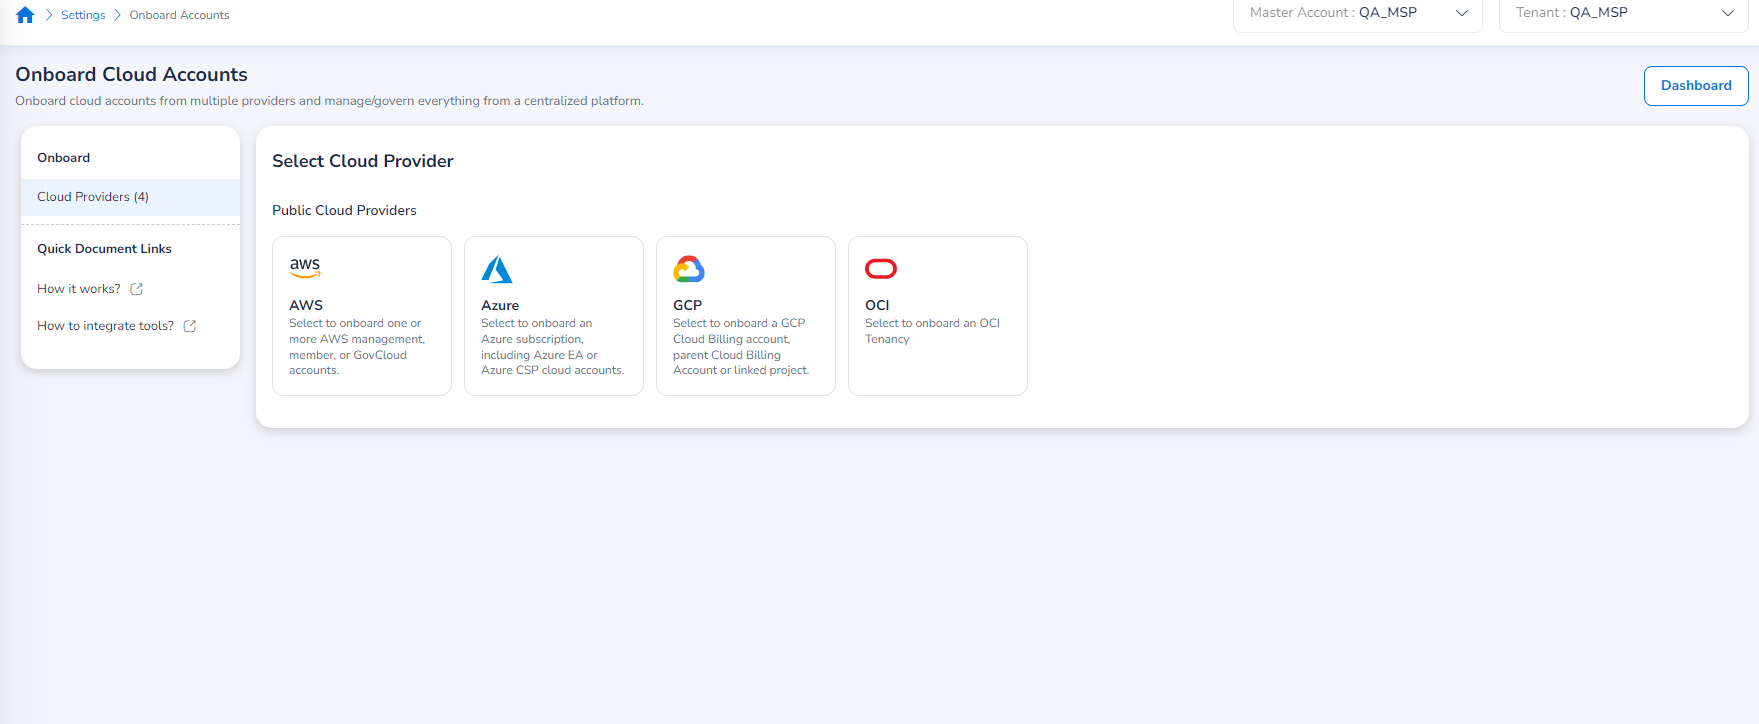
The Onboard Cloud Accounts starting page will appear. Here, users can select which cloud provider to onboard a new account for based on the available options.
Note:
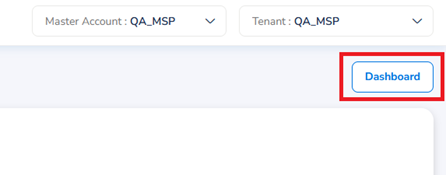
Users can also use the Dashboard button in the upper right corner of the page to go directly to the Account Governance Dashboard (Cloud Accounts) as a shortcut.
-
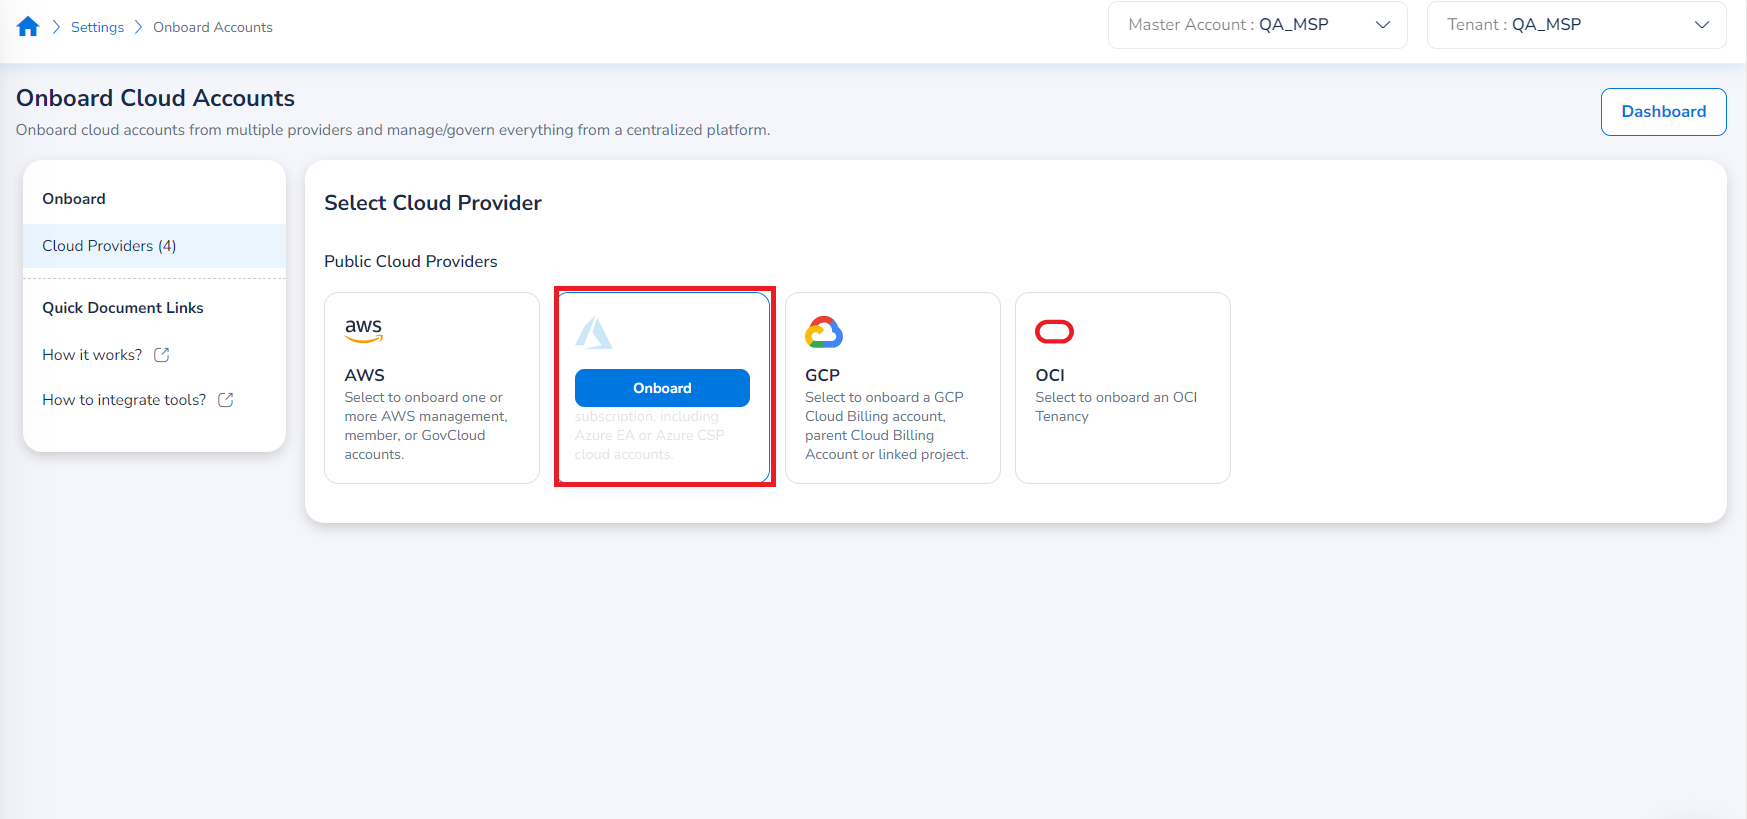
To start the onboarding process, hover over the Azure option under Public Cloud Providers, and an Onboard button should appear. Select Onboard to proceed.
-
The page for the first step of the onboarding workflow should appear – Azure Cloud Account Type. In this step, users must select the specific Azure cloud account type to onboard. You can select one of the following account types to be onboarded:
-
Subscription
-
Enterprise Agreement (EA Application)
-
Microsoft Partner Agreement (CSP Direct)
In this case, select Microsoft Partner Agreement (CSP Direct).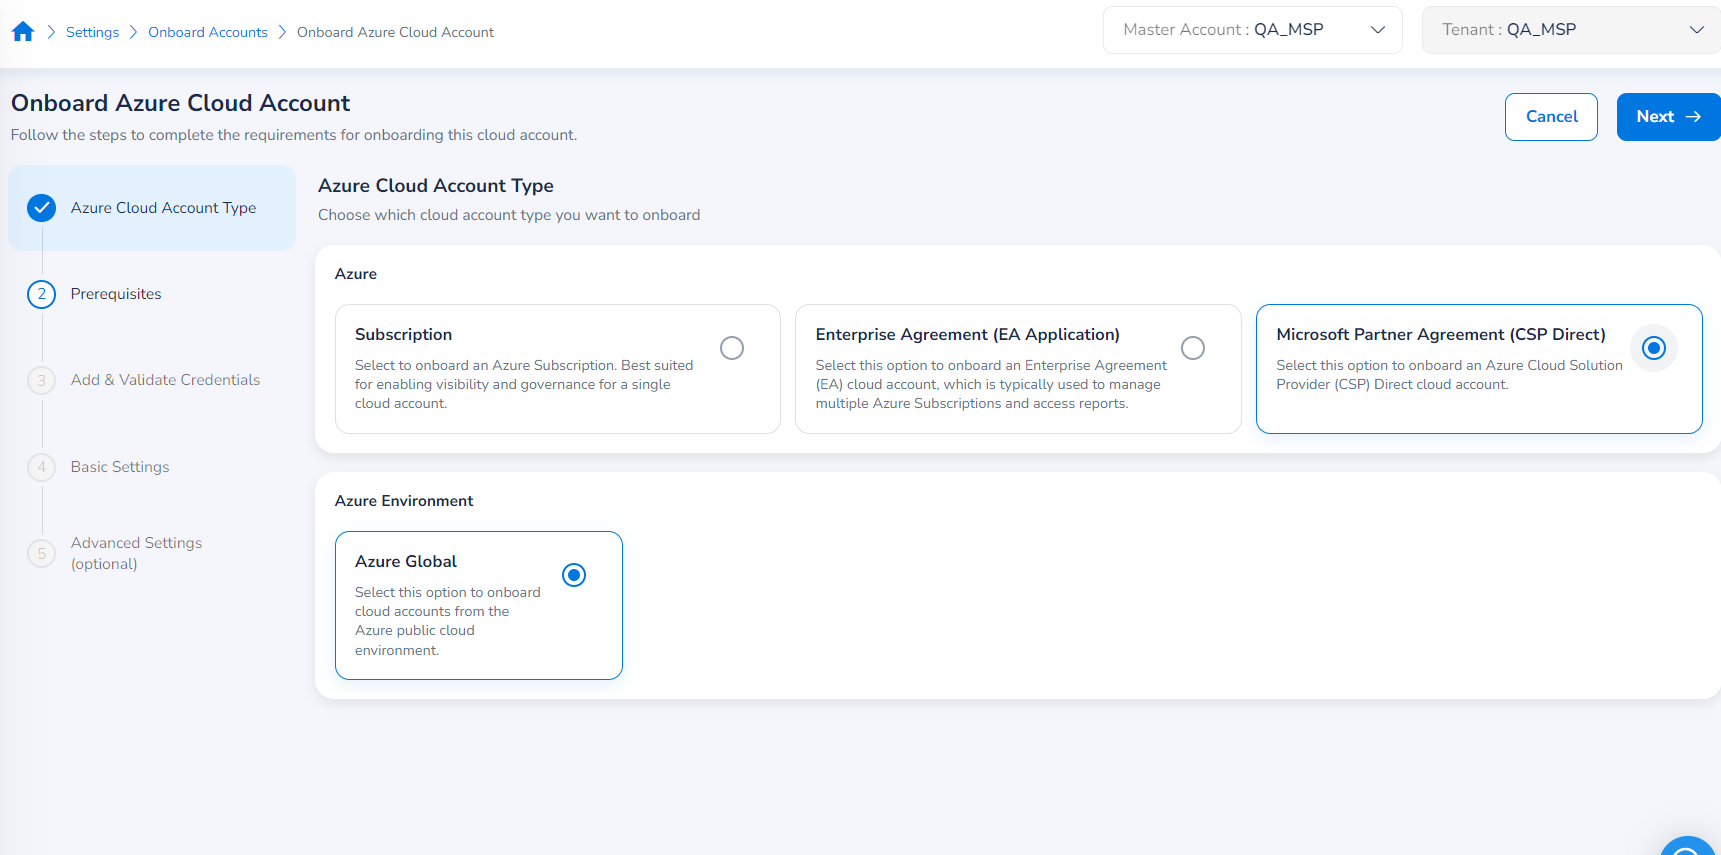
-
-
Click Next. The Prerequisites section appears.
-
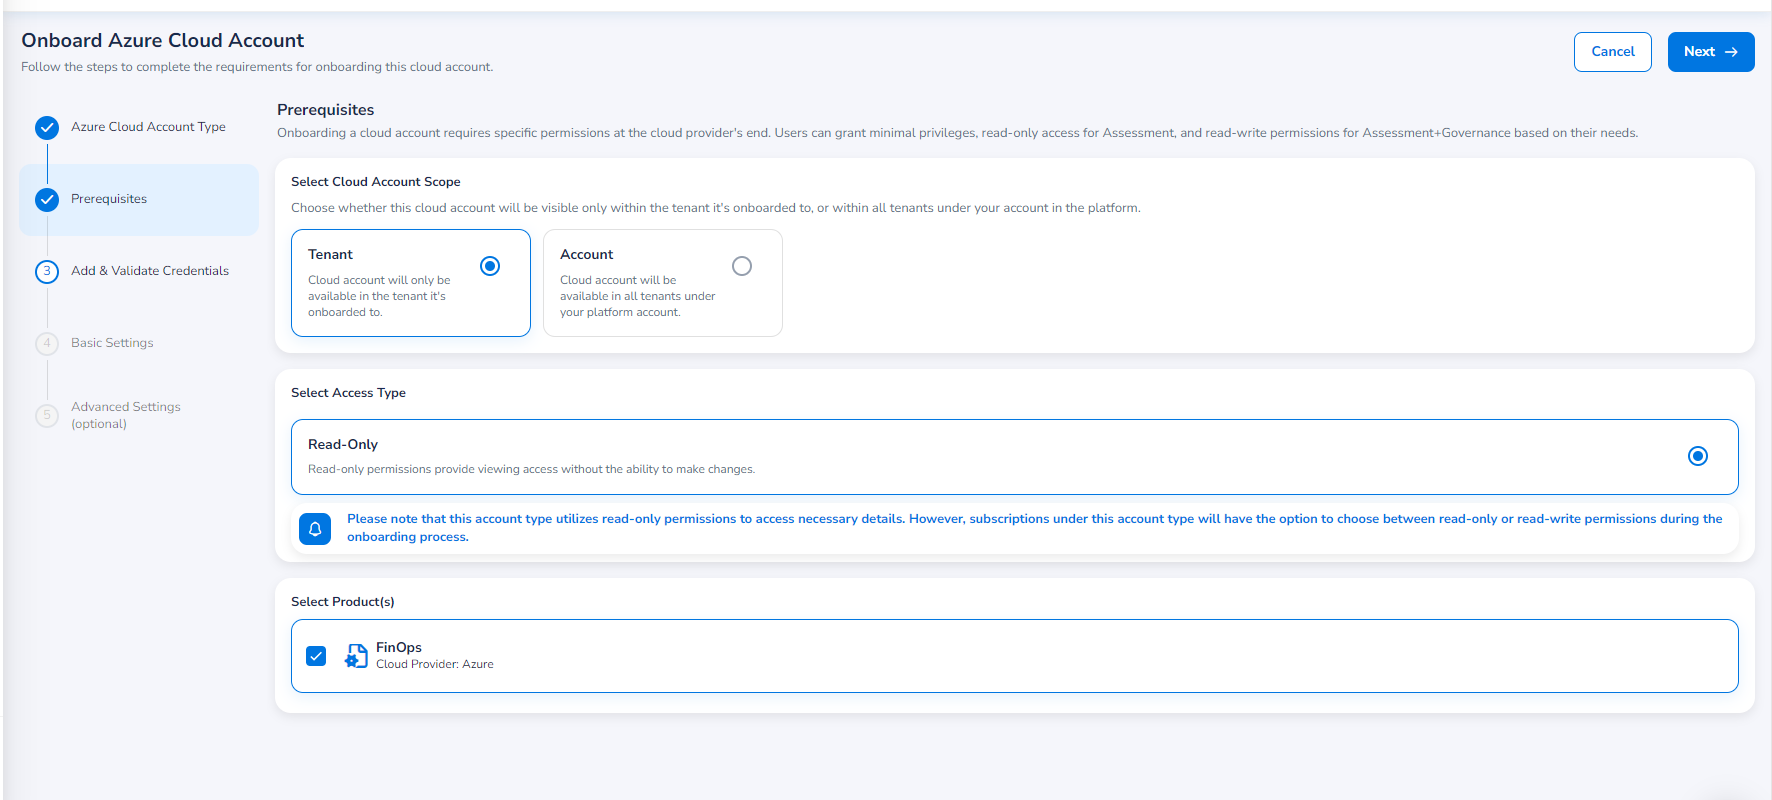
In the Select Cloud Account Scope field, select one of the following options:
- Tenant: This scope allows the cloud account to be available only in the tenant it is onboarded to. This option is selected by default.
- Account: This scope allows the cloud account to be available in all tenants.
-
In the Select Access Type field, Read-Only is the only available option so it will be automatically selected:
- Read-Only: This option provides viewing access without the ability to make changes.
-
In the Select Product(s) field, FinOps is the only available option to be accessible for this cloud account type so it will automatically be selected.
-
Click Next. The Add & Validate Credentials section appears.
-
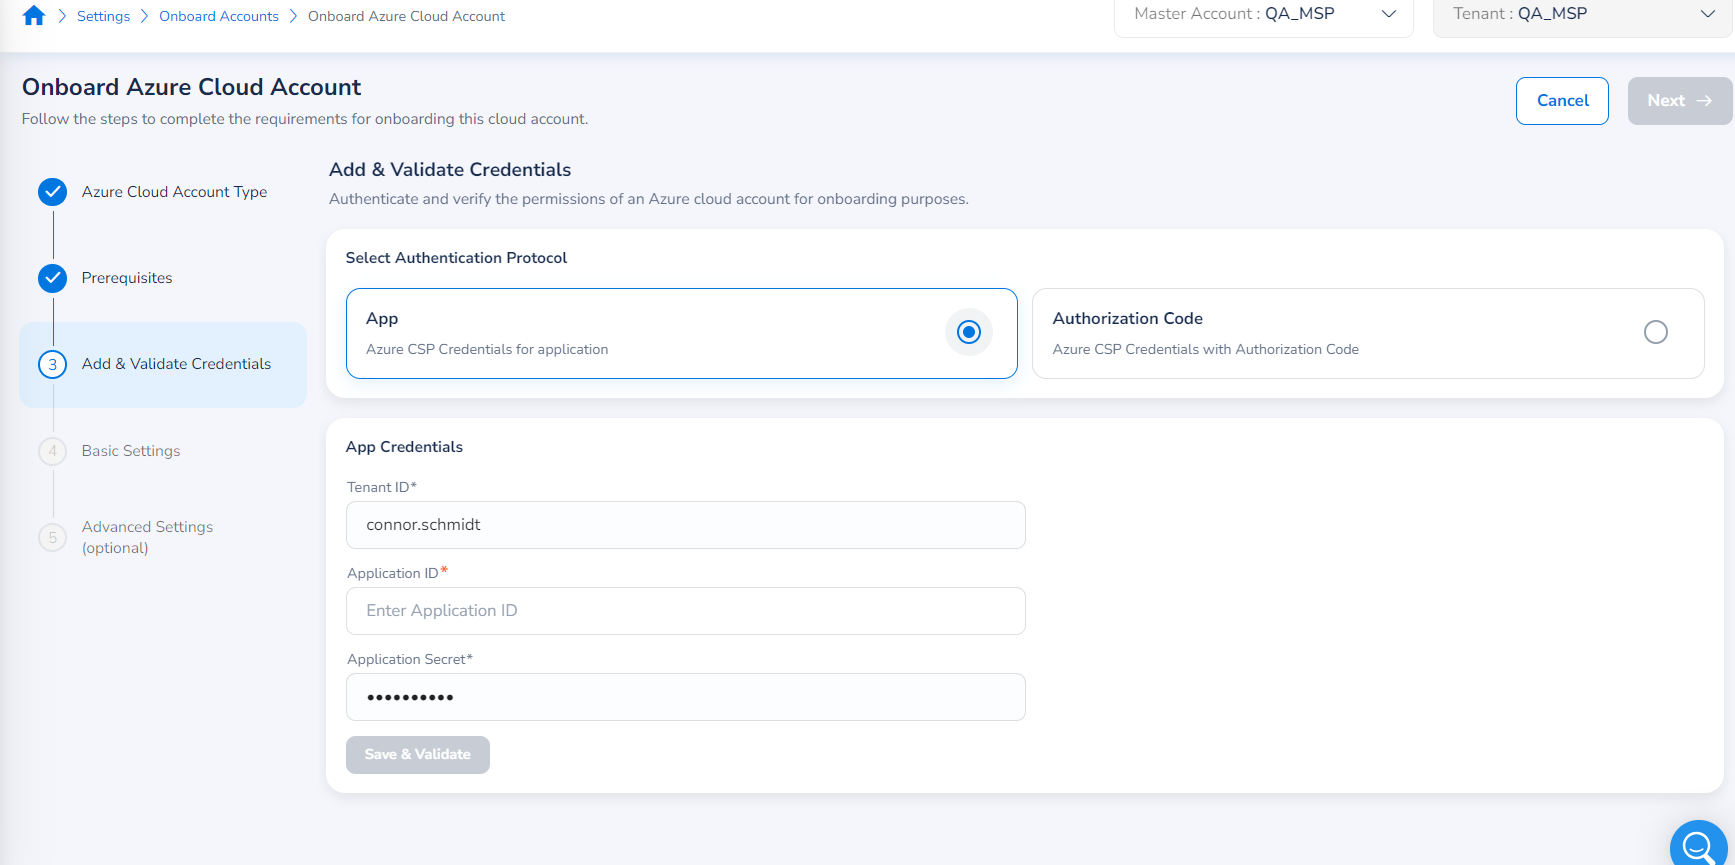
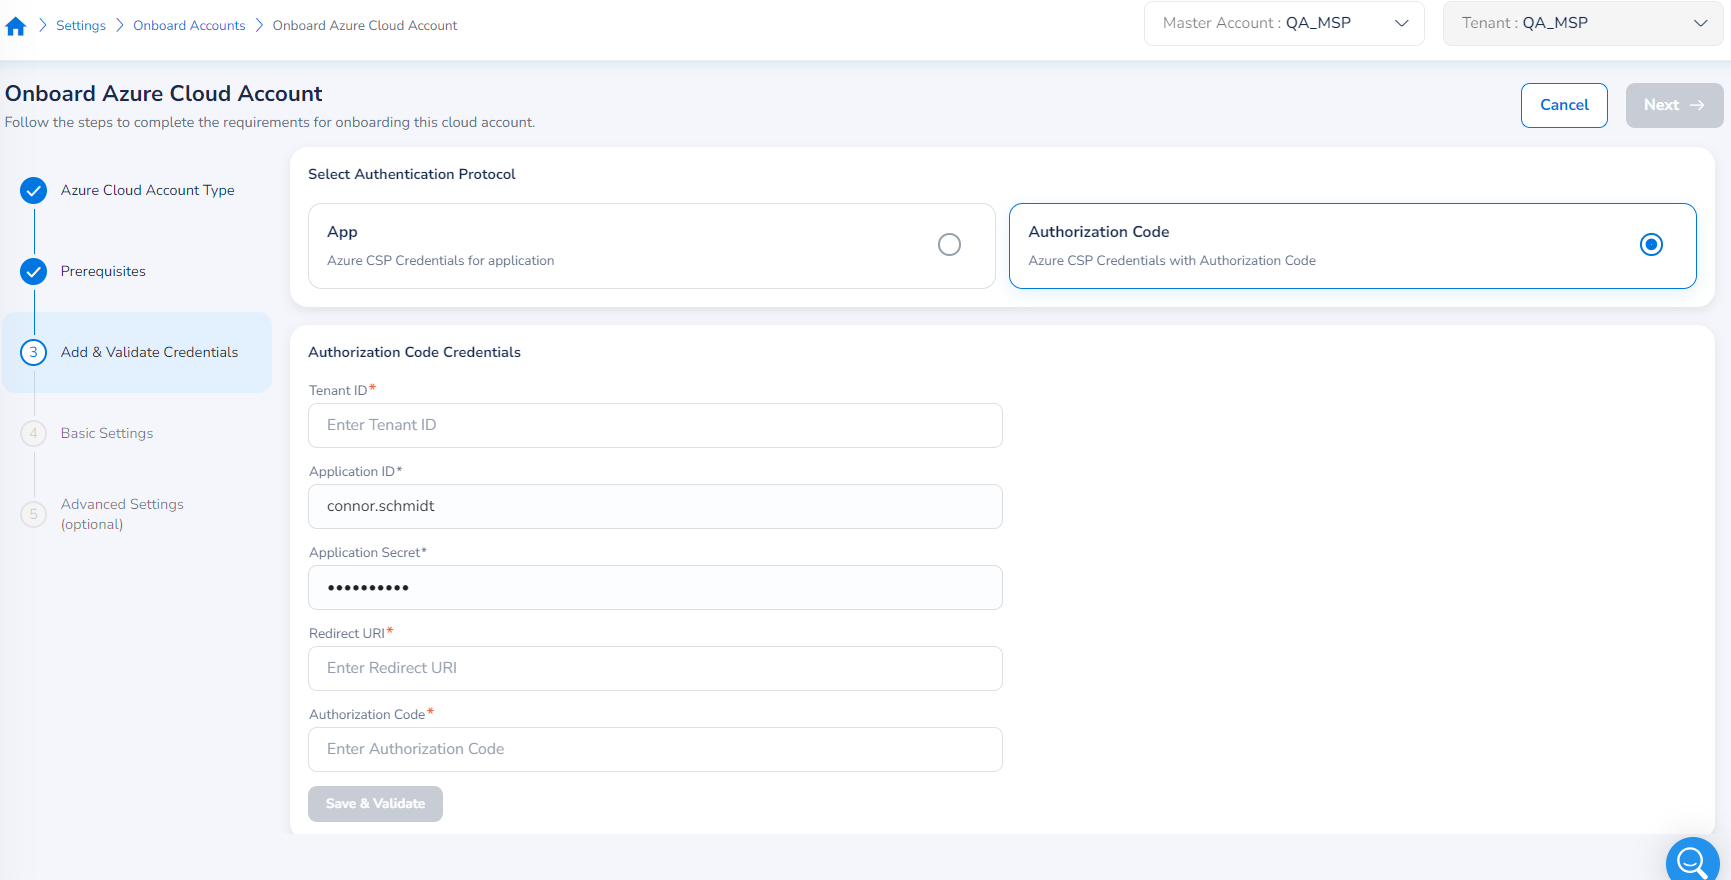
In the Select Authentication Protocol field, select the mode of authorization as either App or Authorization Code.
-
If you select App, then fill the following fields:
-
In the Tenant ID box, type the tenant ID.
-
In the Application ID box, type the application ID.
-
In the Application Secret box, type the application secret code.
-
Click Save & Validate.
-
-
If you select Authorization Code, then fill the following fields:
-
In the Tenant ID box, type the tenant ID.
-
In the Application ID box, type the application ID.
-
In the Application Secret box, type the application secret code.
-
In the Redirect URI box, type the redirect URI.
-
In the Authorization Code box, type the authorization code.
-
Click Save & Validate.
-
-
If the validation is successful, then a success message will be displayed.
If the validation fails, then an error message will be displayed along with an option for View Log. You can click View Log to view the error details and then click Re-Validate to retry the validation.
Note:
After the completion of successful validation, the Save & Validate button turns to Re-Validate. You can click Re-Validate to validate the account again.
-
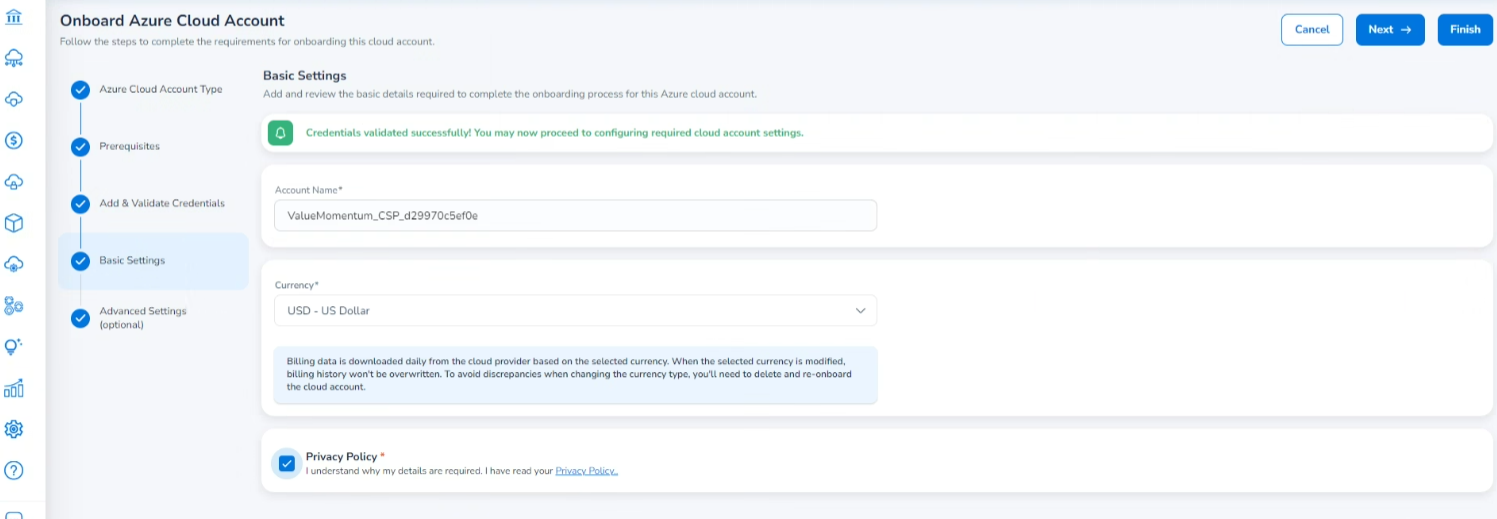
Click Next. The Basic Settings section appears.
-
Fill the following basic details:
-
In the Account Name box, the Azure account name will be prefilled. Based on the need, you can modify the name.
-
In the Currency list, click to select a currency in which the billing data will be downloaded from the cloud provider.
Note:
The Account Name field should not exceed the maximum character limit of 50 characters including special characters.
-
-
You can click Next to set up advanced settings or click Finish to complete the account onboarding. Please note that the step for configuring advanced settings is not mandatory and can be skipped.
-
If you click Next, then the Advanced Settings section will be displayed.
- In the Add/Import Cloud Account Tags section, do any of the following to fill in the tag details:
In the Custom Tags field:- In the Key box, type the tag key.
- In the Value box, type the tag value.
- Lastly, click Add Tag. The added tag appears below.
After clicking View Master Account/Tenant Tags: - This opens the Custom Tags dialog box where you can select the required tags and click Add Selected Tags. The selected tags will now show up for the account to be onboarded.
- In the Governance Configuration field, click Edit to configure the required settings. Refer to Governance Configuration for detailed steps.
- In the Add/Import Cloud Account Tags section, do any of the following to fill in the tag details:
-
Click Finish.

The Onboarding Status dialog box appears that shows the progress of account onboarding. You can click Go to the Dashboard to return to the Account Governance Dashboard.
Governance Configuration
The Governance Configuration page includes many sections where configurations can be made. You need to select the configuration you want to apply to your onboarded account. All the available configuration sections are explained below. Refer to the relevant configuration and follow the steps. These governance configurations can be made while onboarding the account or can be done post onboarding.
FinOps
The configurations that can be done for FinOps are explained below.
Cost Anomaly
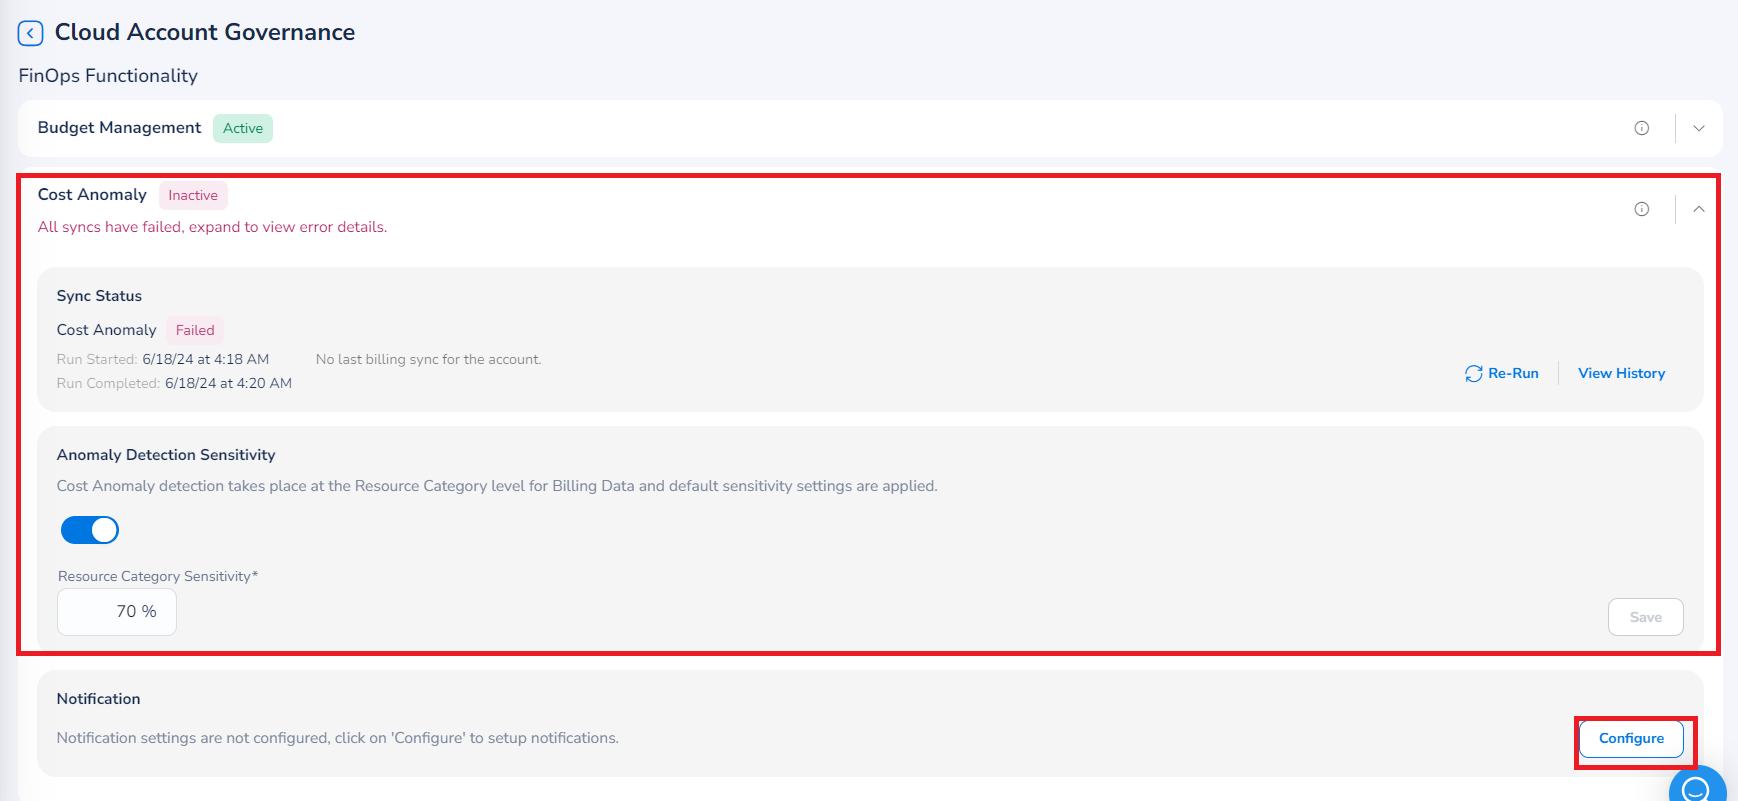
Perform the following steps to configure cost anomaly:
-
Expand the Cost Anomaly section.
-
Ensure that Anomaly Detection Sensitivity field is enabled (the slider is on the right side).
-
In the Resource Category Sensitivity box, the settings are applied by default. If you want to edit the default setting, add the sensitivity based on which anomaly would be detected.
-
In the Notification section, click Configure. The Notifications Settings dialog box appears.
- Select the Enable Notification checkbox. The Email Address, Webhook, and Microsoft Teams Webhook fields are displayed.
- In the Email Address box, type the email address of the user(s) and click Add.
- In the Webhook box, type the webhook link(s) and click Add.
- In the Microsoft Teams Webhook box, type the URL(s) for Microsoft Teams Webhook and click Add.
- Click Save & Apply.
Updated 6 months ago
