Jira
Jira ServiceDesk
When integrated with CoreStack, policy violations identified in CoreStack can be created as incidents in the selected Jira Project. This is useful if you have Jira ServiceDesk as the Incident Management tool for your team and would prefer to use that as the centralized system to capture and resolve incidents.
How to Onboard
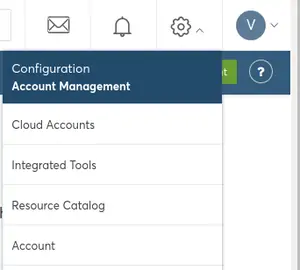
- Navigate to Settings > Integrated Tools in CoreStack.
- Look for JIRA ServiceDesk in the Left panel under the ITSM Category.
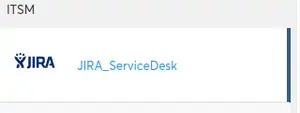
- Click on “Add Account” option in the right side to go to JIRA on-boarding page.
The onboarding process has 3 steps shown as 3 tabs in the page:
- Authentication
- Tools Configuration
- Authorization
1. Authentication
Please keep the following information ready:
- Username for your Jira ServiceDesk account. It is recommended to create a separate user for this integration.
- Auth URL: This is your Jira login URL. Typically in the format as
https://<org_name>.atlassian.net - API Token: Create an API Token for CoreStack to connect to Jira (Instructions below)
- You can create an API Token from your Atlassian Profile. Use the direct link (https://id.atlassian.com/manage-profile/security/api-tokens) or navigate from profile page as given below.
- Navigate to Profile page (https://id.atlassian.com/manage-profile)
- Select “Security” from the left menu
- You can create an API Token from your Atlassian Profile. Use the direct link (https://id.atlassian.com/manage-profile/security/api-tokens) or navigate from profile page as given below.
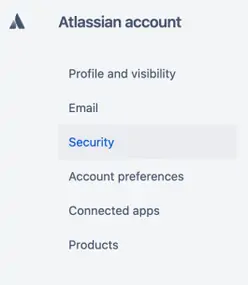
- You will see API Token in the right side as shown below.

- Click on the “Create and manage API tokens” link.

- Once you are at the page, click on “Create API Token”.
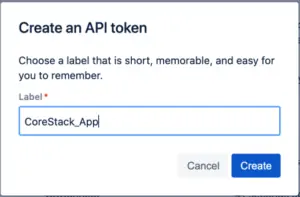
- Provide a meaningful label such as “CoreStack_App” and click on create.
- Your API Token will be created, and you will see token displayed. Click on the “Copy” button to copy the token to clipboard and keep it ready.
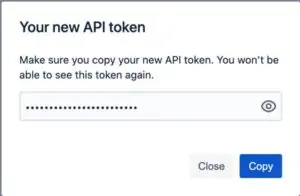
Once you have the above 3 values handy, you can start the onboarding process.
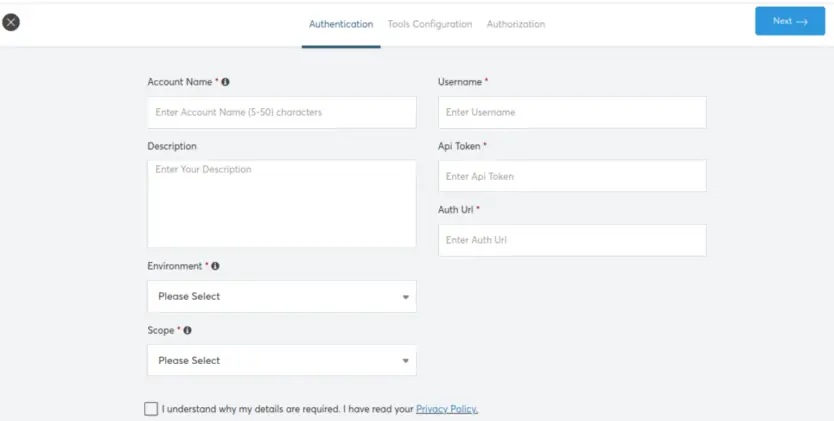
The other fields required are similar to any cloud or tool account. They include:
- Account Name: Any friendly and meaningful name for the Jira account
- Description: Optional description about the Jira account
- Environment: Choose Dev / Test / Prod as applicable
- Scope: Choose Tenant if all users in the CoreStack Tenant can access this account. Choose Private if you would like this account accessible only by you.
Once you have entered all the above information and ticked the checkbox for Privacy Policy, you can click on “Next” at top right to go to the next step.
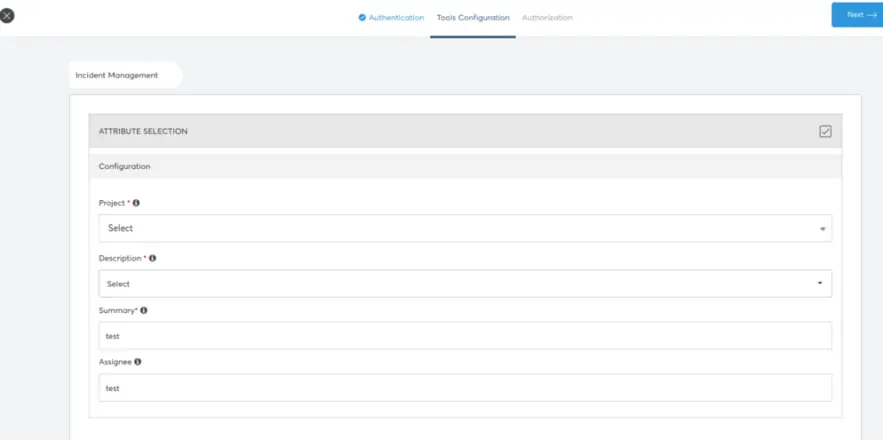
2. Jira Tools Configuration
These settings are required to help CoreStack decide on the right information to use while creating the incident tickets.
- Project name: Choose from the list of projects in the dropdown. This list is fetched from your Jira account. This is the project all incidents created from CoreStack will be mapped to.
- Description: CoreStack can add some relevant information about the incident while creating the ticket. You can choose from the available fields such as Resource Name, Resource Id or Resource Type.
- Summary: This is a standard text to be used in the ticket summary, so that it is identifiable as tickets created from CoreStack.
- Assignee: Can choose the user to which the violation incident will get assigned.
3. Authorization
This is the last step in the onboarding process. The list of Roles in CoreStack for this Tenant will be displayed. You need to select the Roles that can have access to this Integrated Jira account. However the level of access will depend on the role.
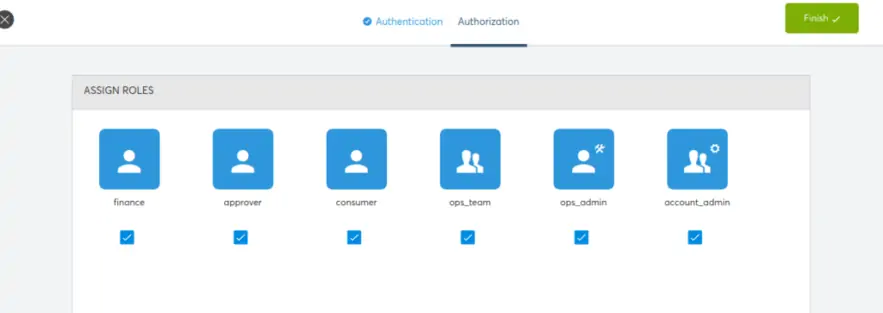
After selecting the roles, you can click on the “Finish” button to complete the process.
Manage Existing Accounts

You can come back and view/edit the settings of the Jira account from the same page: Settings > Integrated Tools > Jira.
Click on the account to view the settings already provided. You will see the details of the account as shown below:
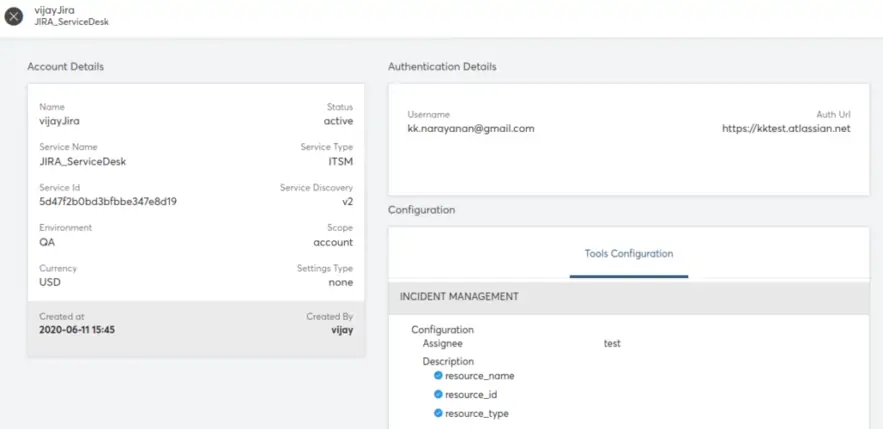
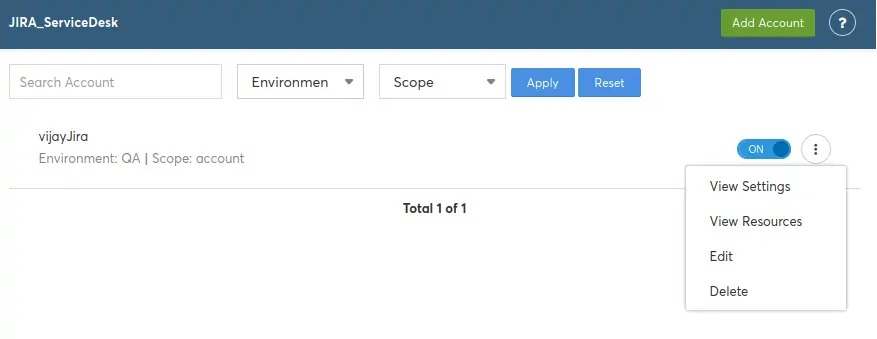
If you need to modify the settings, click on the 3 dots menu at right end to select “Edit” and modify any of the settings. The process is very similar to the onboarding steps explained above.
Tenant Level Configuration
After the account is successfully onboarded into CoreStack, you also need to configure which alerts to send to Jira and the relevant settings. The instructions as provided below:
- Navigate to Settings > Tenants
- Select your Tenant on the Left panel and then look for “Activity Queue Settings” on the right panel. Expand this section and select the Jira account from the dropdown.
There are multiple activities happening in CoreStack and the destination for each of the activity such as monitoring alerts, Template failures, Policy violations etc. can be different Tools onboarded to CoreStack.
Currently for Jira, only Policy violations are supported and hence we are mapping the newly onboarded Jira account for Policies as shown below:
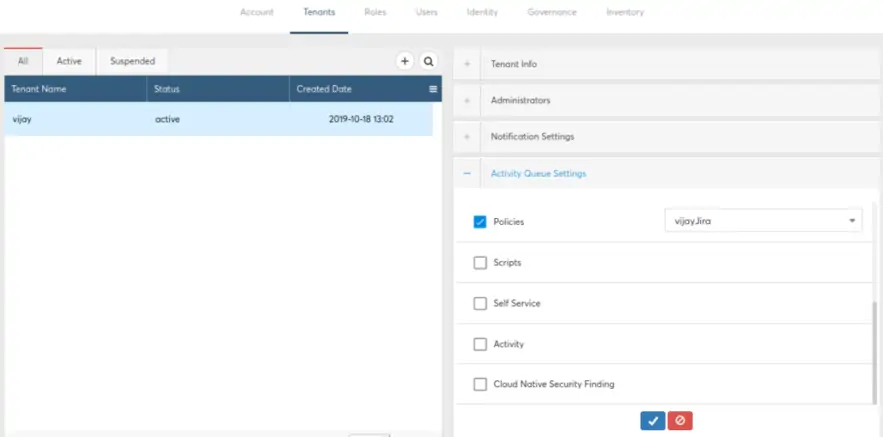
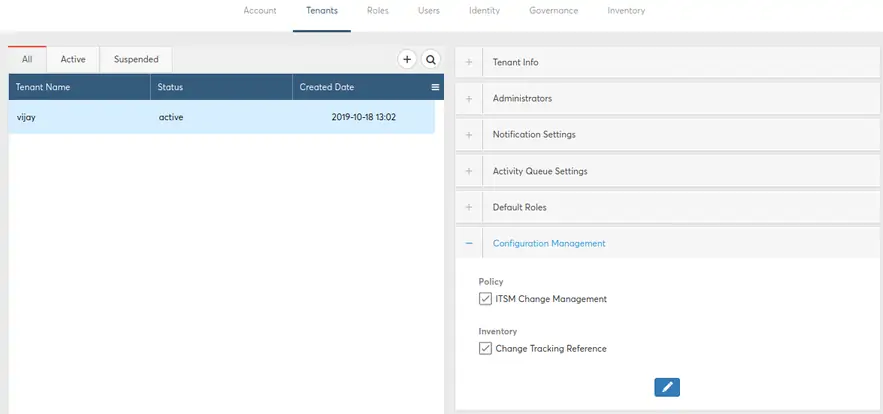
- Next, you need to select “Configuration Management” and then map tick the checkbox under “Policy” for ITSM Change Management. This completes the tenant level configuration required.
Use Cases
As mentioned above, you could have Policy Violations routed to Jira ServiceDesk as tickets.
You can simulate a condition to test this:
Note:
Select “Policies” module from Left Navigation Menu and then search for the Policy “AWS Security Group Port Violation Policy”

Execute the Policy
This Policy is to check for port(s) such as SSH/RDP/DB opened to public (with CIDR block 0.0.0.0/0) in an AWS account. Port(s) can be specified when executing the policy.
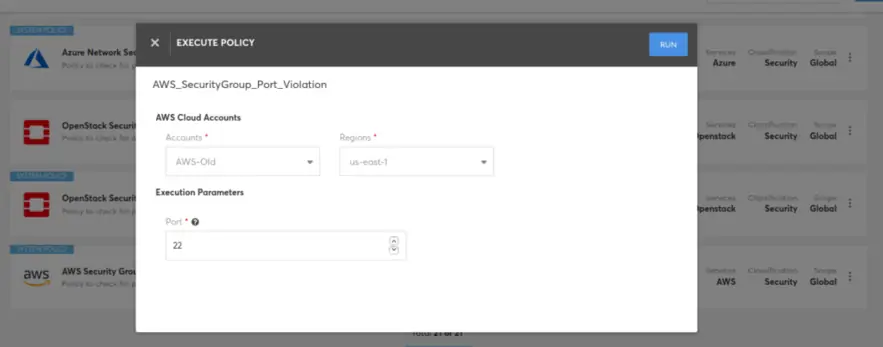
You can run the policy on-demand to check for the selected account and region. Provide the input parameters requested and click on “Run” button at top right. Once the policy execution is initiated, you will be redirected to the Job History page where you can see the status of the job execution.
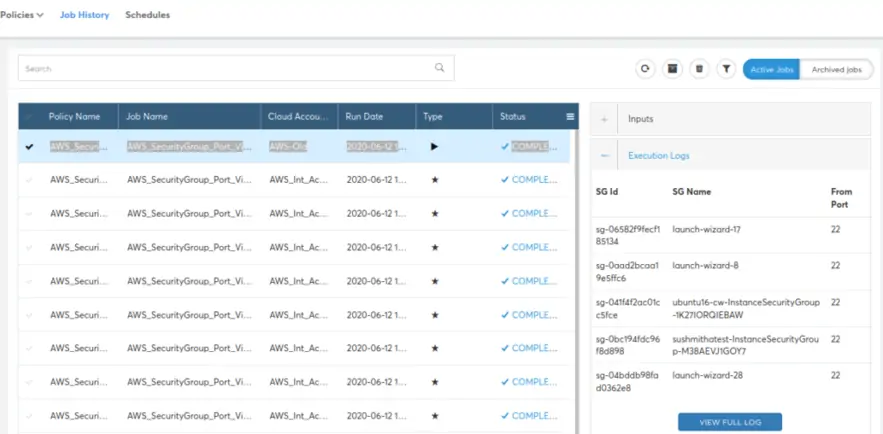
On the left side you have all the jobs recently executed. You can select the right policy to be checked. You can then view the Input parameters provided and the Execution Logs for the policy.
View Incidents in Jira
Navigate to the specific Jira Project that was provided during the Tenant level configuration. You must be able to view any tickets created for Policy violations. If required, you can search by the assignee / summary description provided.
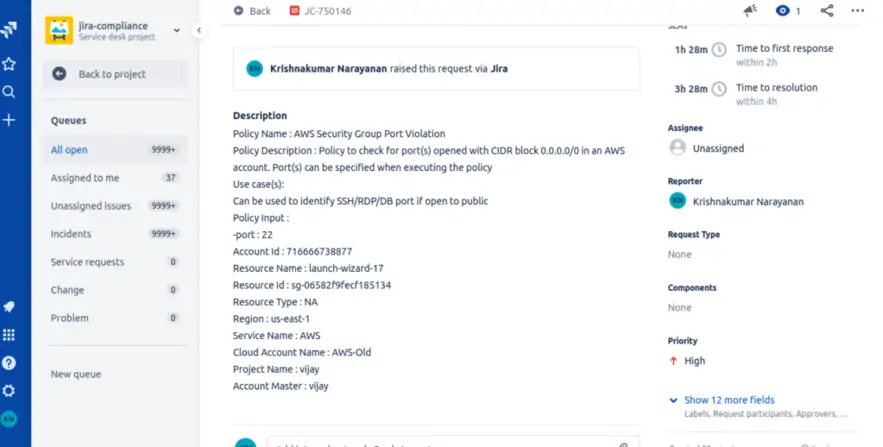
For new policy violation, an incident will be created in JIRA under selected Service Desk project with the details as provided during Tenant level configuration. For the same violation, when there is an update, the same incident gets updated every time by adding a comment in that incident.
Note:
There could be cases where the initial incident creation failed for some reason or the update has different input values – the second/later updates may be created as new incident.
Updated over 1 year ago