

Onboarding SaaS Custom Tool Account
This video guides you through onboarding a custom tool account within the CoreStack platform.
Introduction
CoreStack’s governed onboarding flow enables organizations to centrally track, ingest, and govern costs from external SaaS providers (AI services, data providers, and other tools). It offers a guided, cloud-agnostic onboarding wizard to define provider accounts, validate secure cloud storage, and upload standardized cost reports. Once onboarded, external costs are integrated into CoreStack’s FinOps capabilities—providing unified visibility, consistent governance, accurate cost allocation, and improved financial control across both cloud and third-party spend. Onboarding a SaaS custom tool in CoreStack enables centralized governance, cost visibility, and policy enforcement for third-party SaaS applications. It allows CoreStack to monitor usage, manage access, and ensure compliance while optimizing spend across custom SaaS integrations.
Onboard a Custom Tool Account
Perform the following steps to onboard a custom tool account:
1. Navigate to Governance
On the left navigation pane, click Governance. There are two places on the left menu bar from where onboarding can be initiated. This is one of the options.
2. Open Account Governance
Click Account Governance.
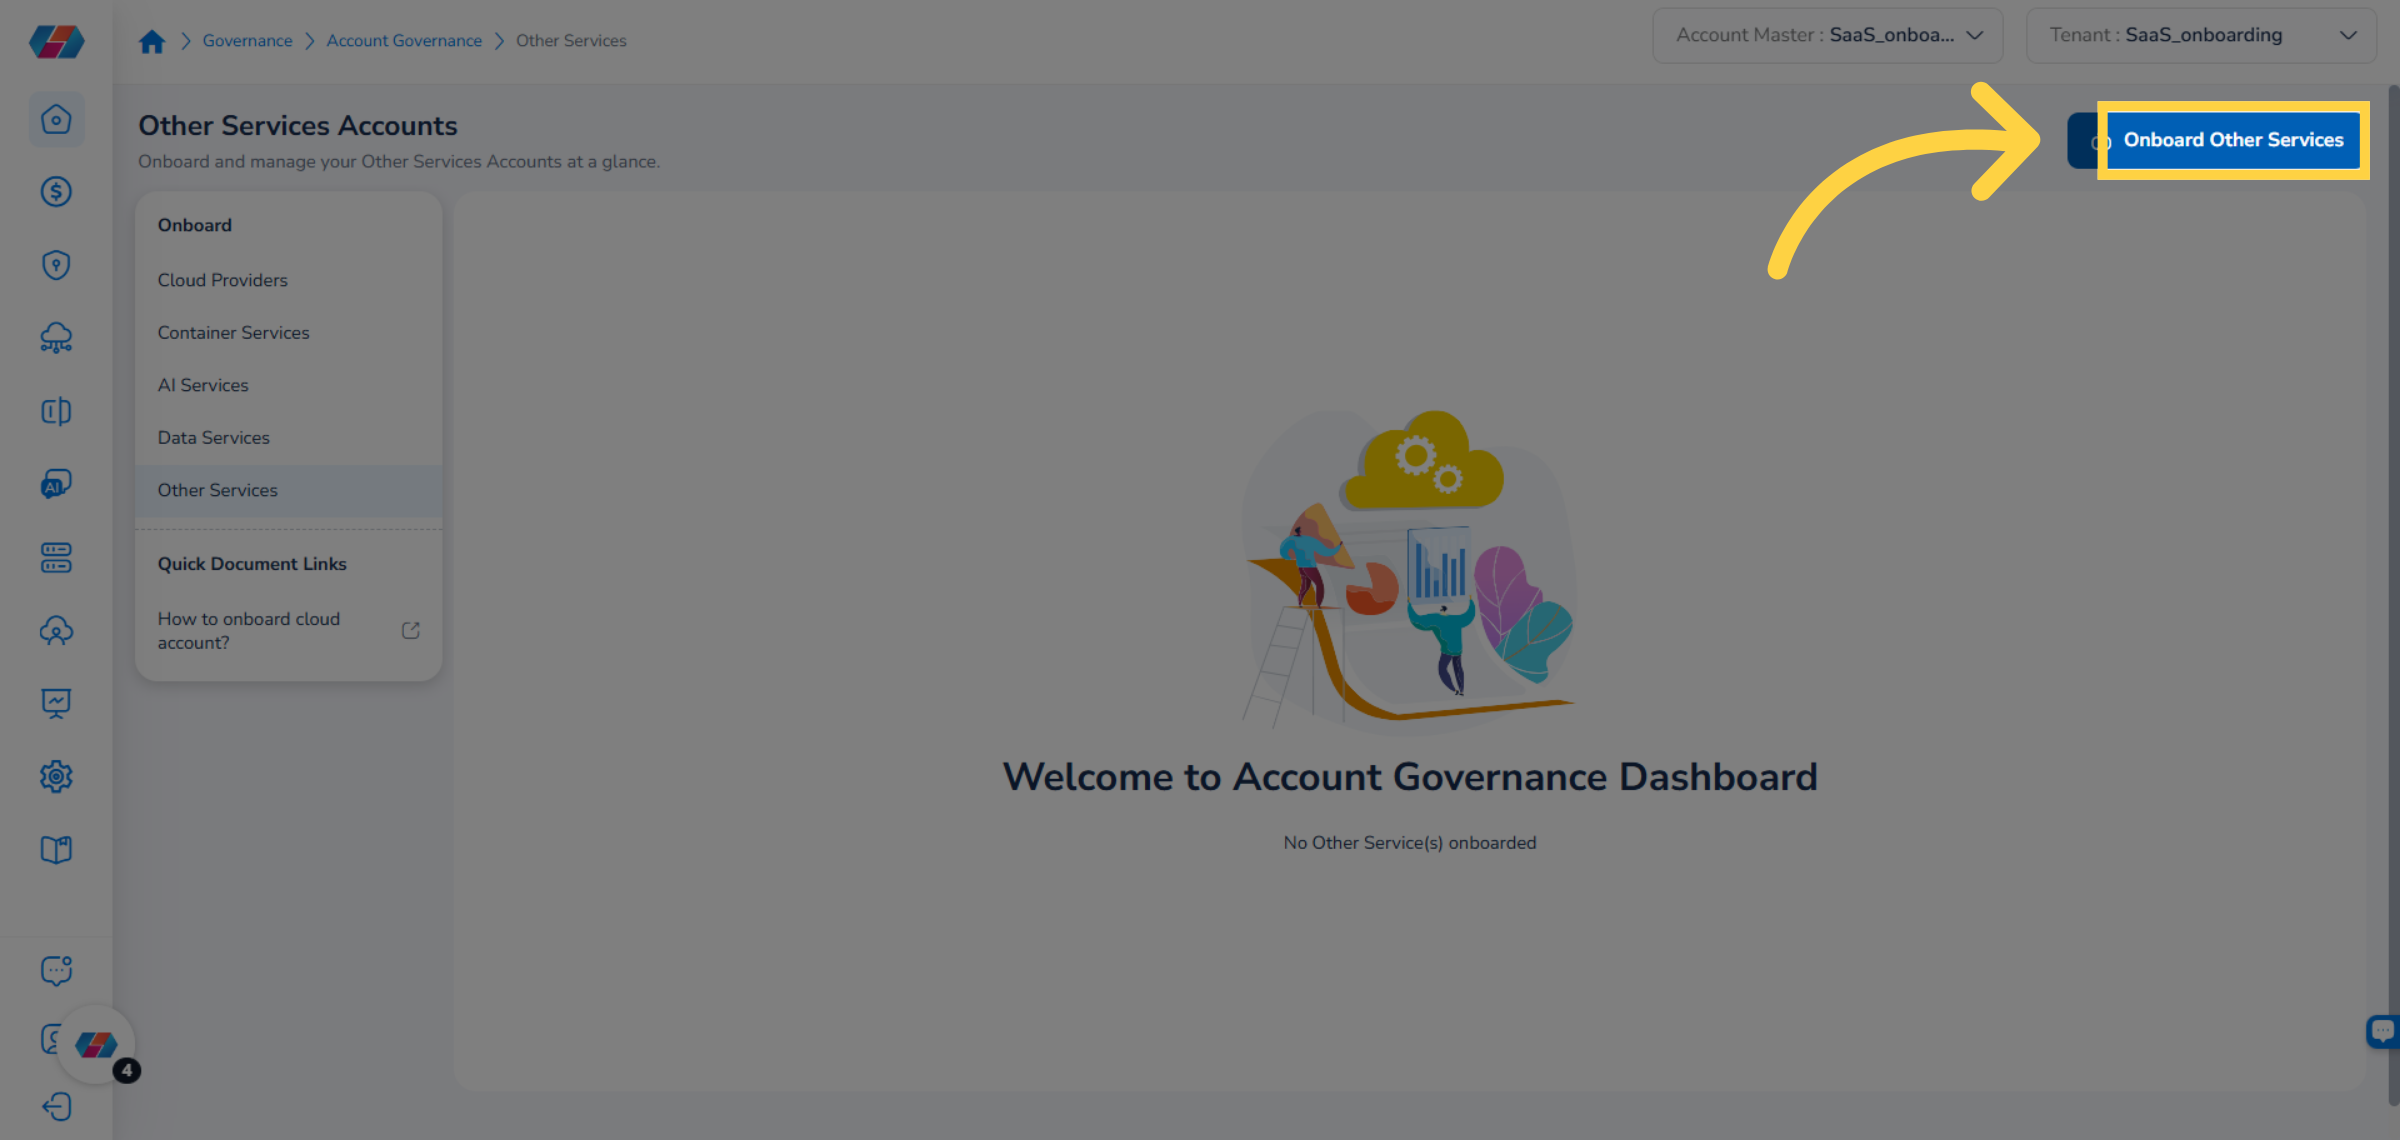
3. Access Other Services
Click Other Services to view and manage accounts related to other services.
4. Click Onboard Other Services
To start the onboarding process, click Onboard Other Services.
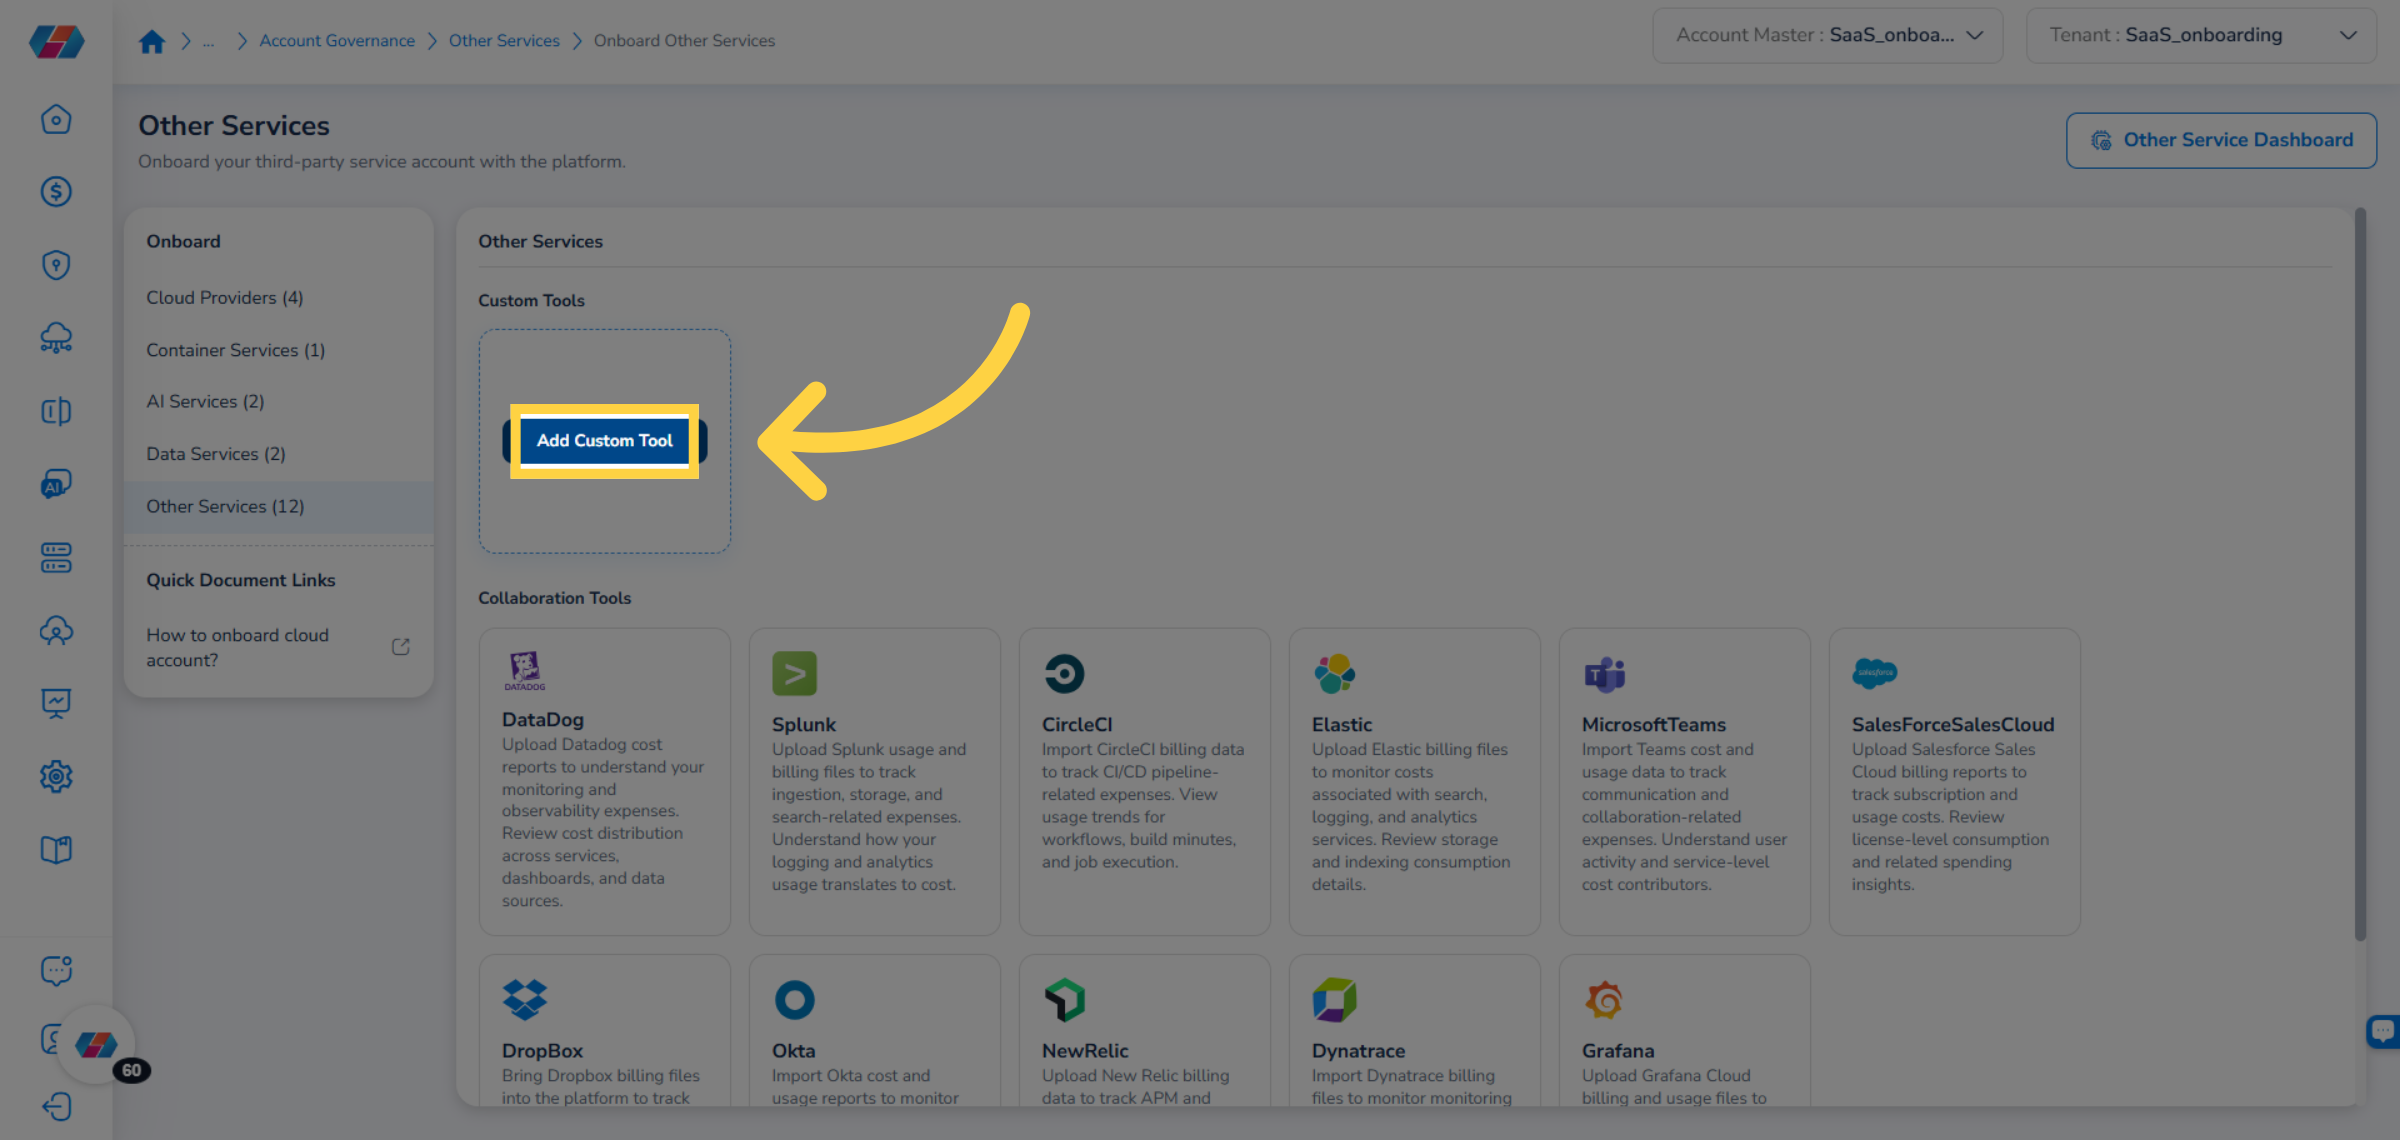
5. Click Add Custom Tool
Hover the mouse pointer over Custom Tools and click Add Custom Tool.
6. Alternative Way: Open Settings Menu
The alternative way to start the onboarding process is to go to the Settings menu.
7. Click Onboard Accounts
Click Onboard Accounts.
8. Select Other Services
On the left panel, click Other Services to view the list of service accounts available for onboarding.
9. Click Add Custom Tool
Hover the mouse pointer over Custom Tools and click Add Custom Tool. The onboarding steps after this remains the same, irrespective of which menu you started the onboarding process.
10. Prerequisites
In the Prerequisites step, the product FinOps is selected by default.
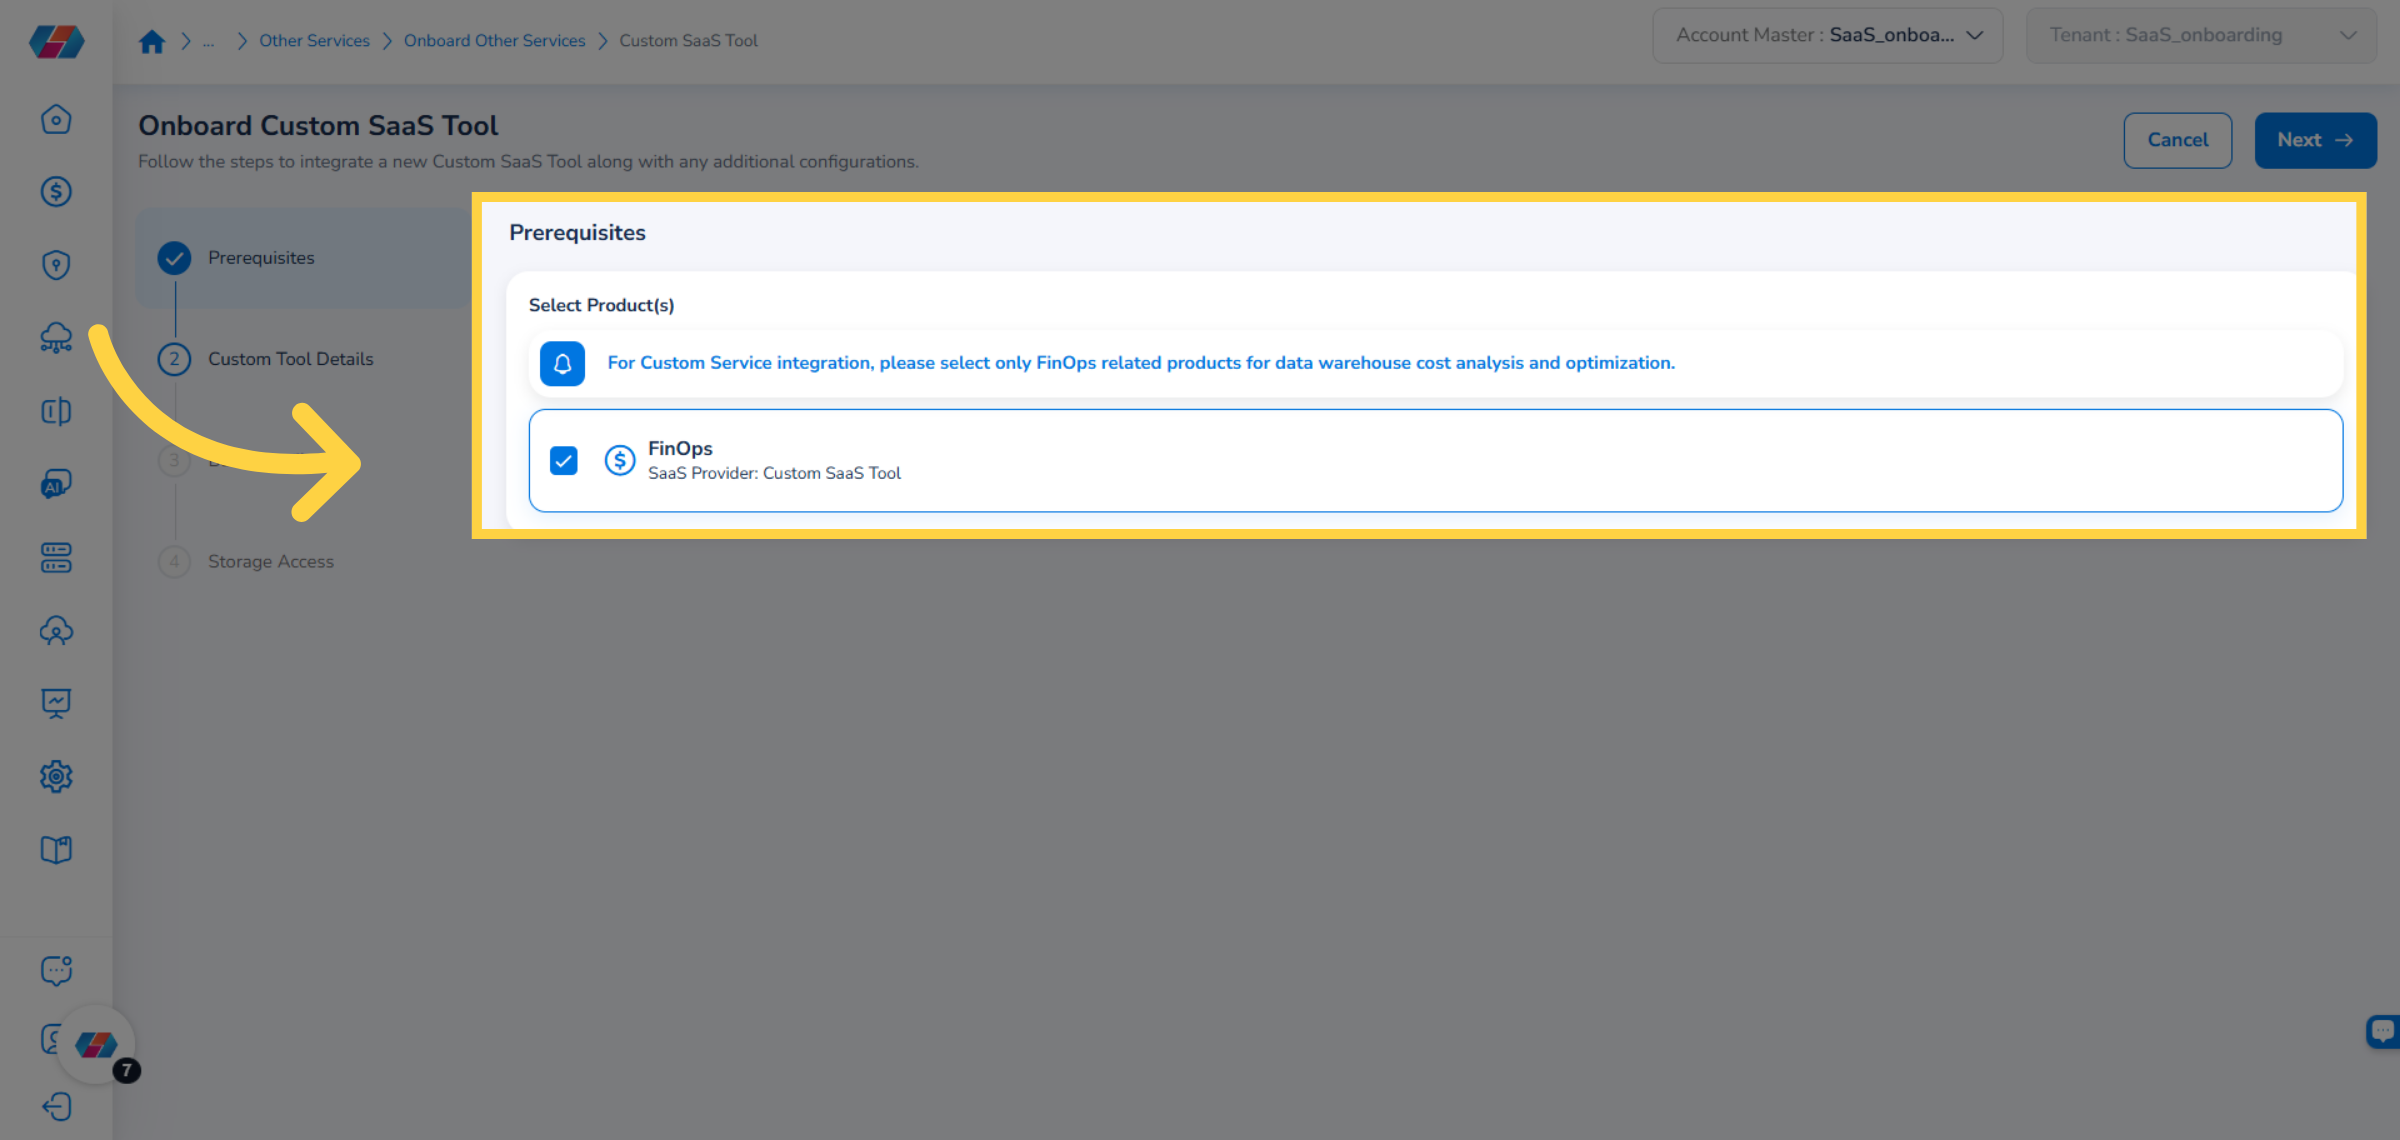
11. Proceed to Next Step
Click Next to proceed to the next step.
12. Enter Tool Name
In the Tool Name box, enter the tool name.
13. Enter Tool Description
In the Tool Description text box, enter the tool description.
14. Upload Custom Logo
Click Upload logo to add a logo for the custom tool account.
15. Choose Image
Click Choose Image and select the logo to be uploaded. After finalizing the image, click Upload Logo.

16. Confirm Logo Upload Details
Supported file formats for the logo are JPG, JPEG, and PNG. The maximum file size for the logo is 5MB.
17. Proceed to Next Step
Click Next to continue to the next stage of the onboarding process.
18. Enter Account Name
In the Account Name box, the account name is pre-populated and you can change it as per need.
19. Enter Account Description
In the Description text box, enter the account description.
20. Continue to Next Step
Click Next to go to the next step.
21. Cloud Account Onboarded with Product Checkbox Enabled
If the Cloud Account Onboarded with Product checkbox is selected, then the following fields need to be filled:
- In the Cloud Account drop-down list, click to select a cloud account.
- In the Storage Bucket drop-down list, click to select an option.
- In the File Path box, enter the storage path.
- Click Save & Validate.
Tip: Users must upload CSV files to an AWS S3 bucket using a specific folder hierarchy -- Name of the folder/Year folder/Month folder/Upload CSV file for the month.
For example: OpenAI/2025/01/usage.csv
22. Cloud Account Onboarded with Product Checkbox Not Selected
If the Cloud Account Onboarded with Product checkbox is not selected, then select either Assume Role or Access Key.
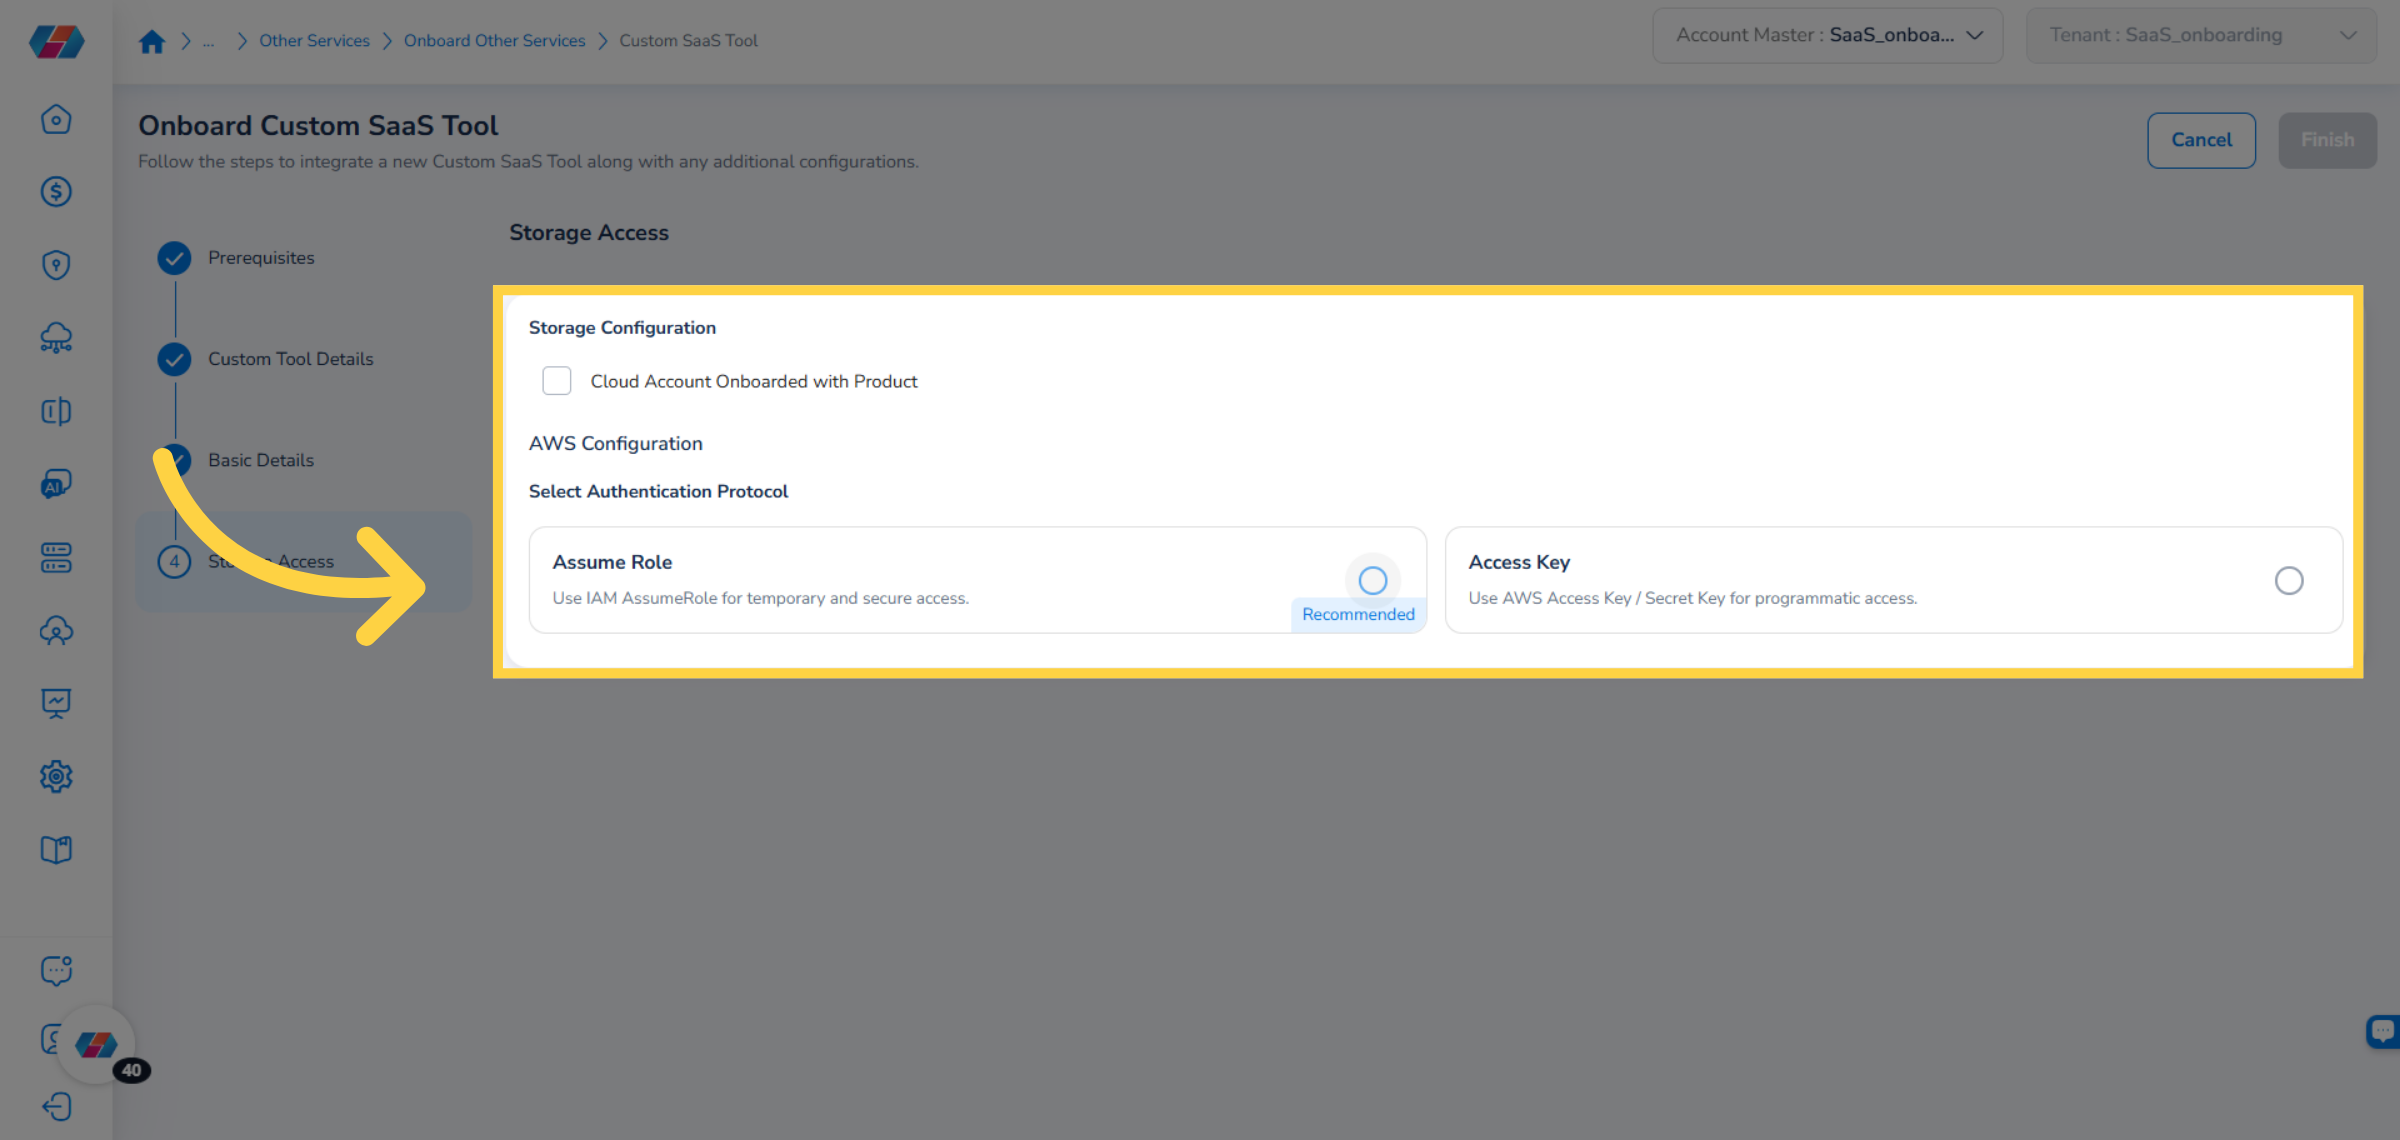
23. Fill Details for Assume Role
If the authentication protocol is selected as Assume Role, then fill the following fields and click Save & Validate:
- Role ARN
- External ID
- MFA Enabled: Select either True or False
- Storage Bucket
- File Path
24. Fill Details for Access Key
If the authentication protocol is selected as Access Key, then fill the following fields and click Save & Validate:
- Access Key
- Secret Key
- Storage Bucket
- File Path
25. Finish Configuration Step
Click Finish to complete the onboarding of the custom tool account.
26. View the Tool Account
View the Othe Services Accounts page that shows the onboarded account. Users can view the account details in these columns -- Name, Tool Name, Account Status, Onboarded By, Created Date, Credential Status, and Actions.

Additional Actions on Account
Download Account Details
Click the Download icon to download account details.

View or Hide Filter
Click the Filter icon to view or hide the ADD+ filter. You can use ADD+ to add custom filter and view specific details.
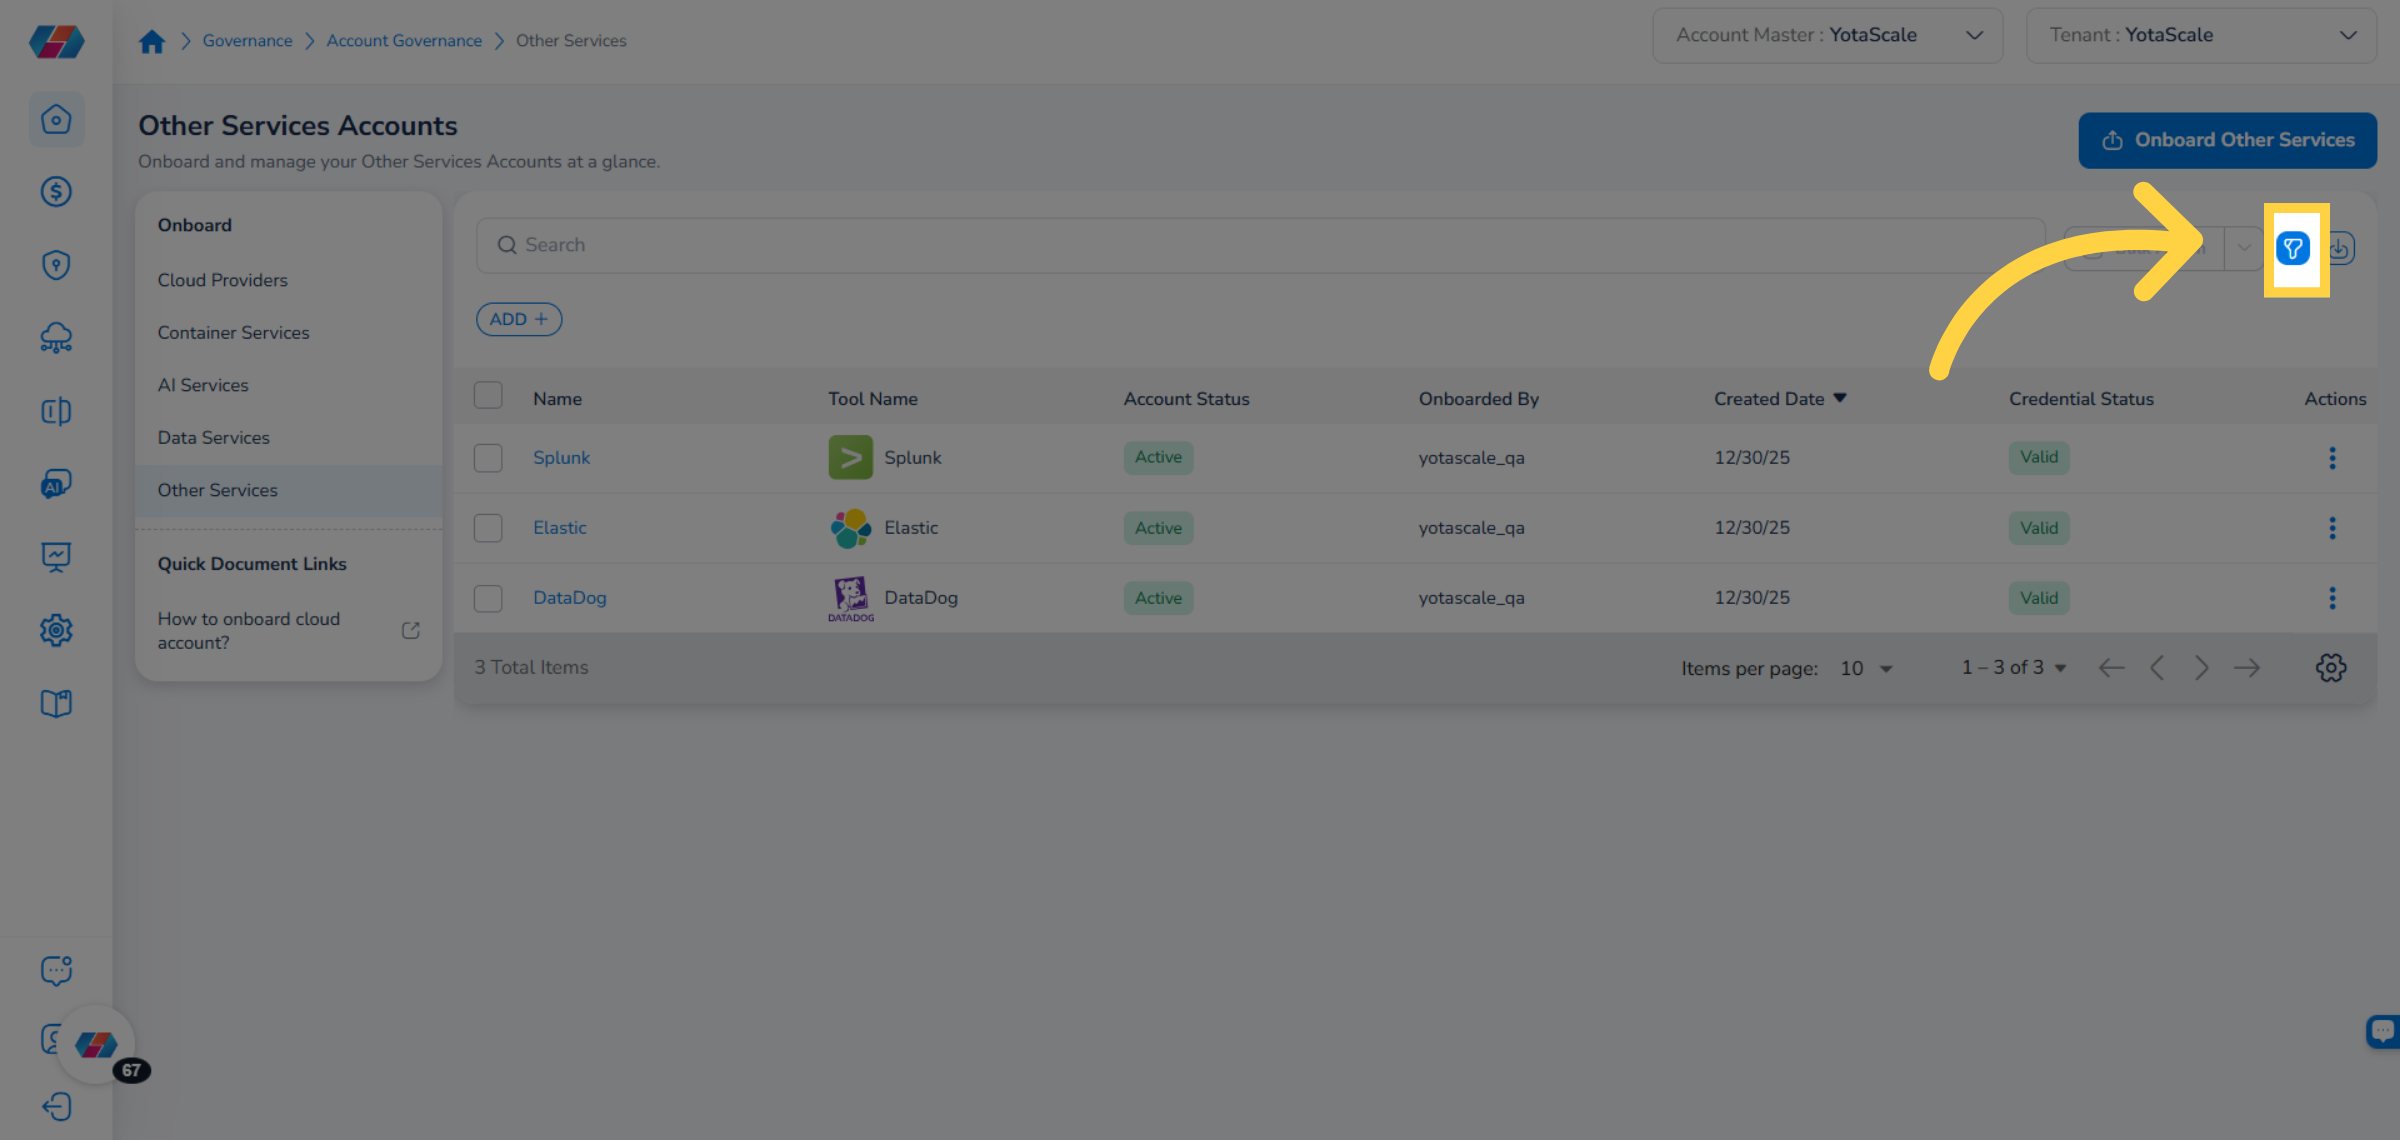
To add a custom filter, click ADD+ and select an option. After that, click the drop-down and select values for the filter to apply them.
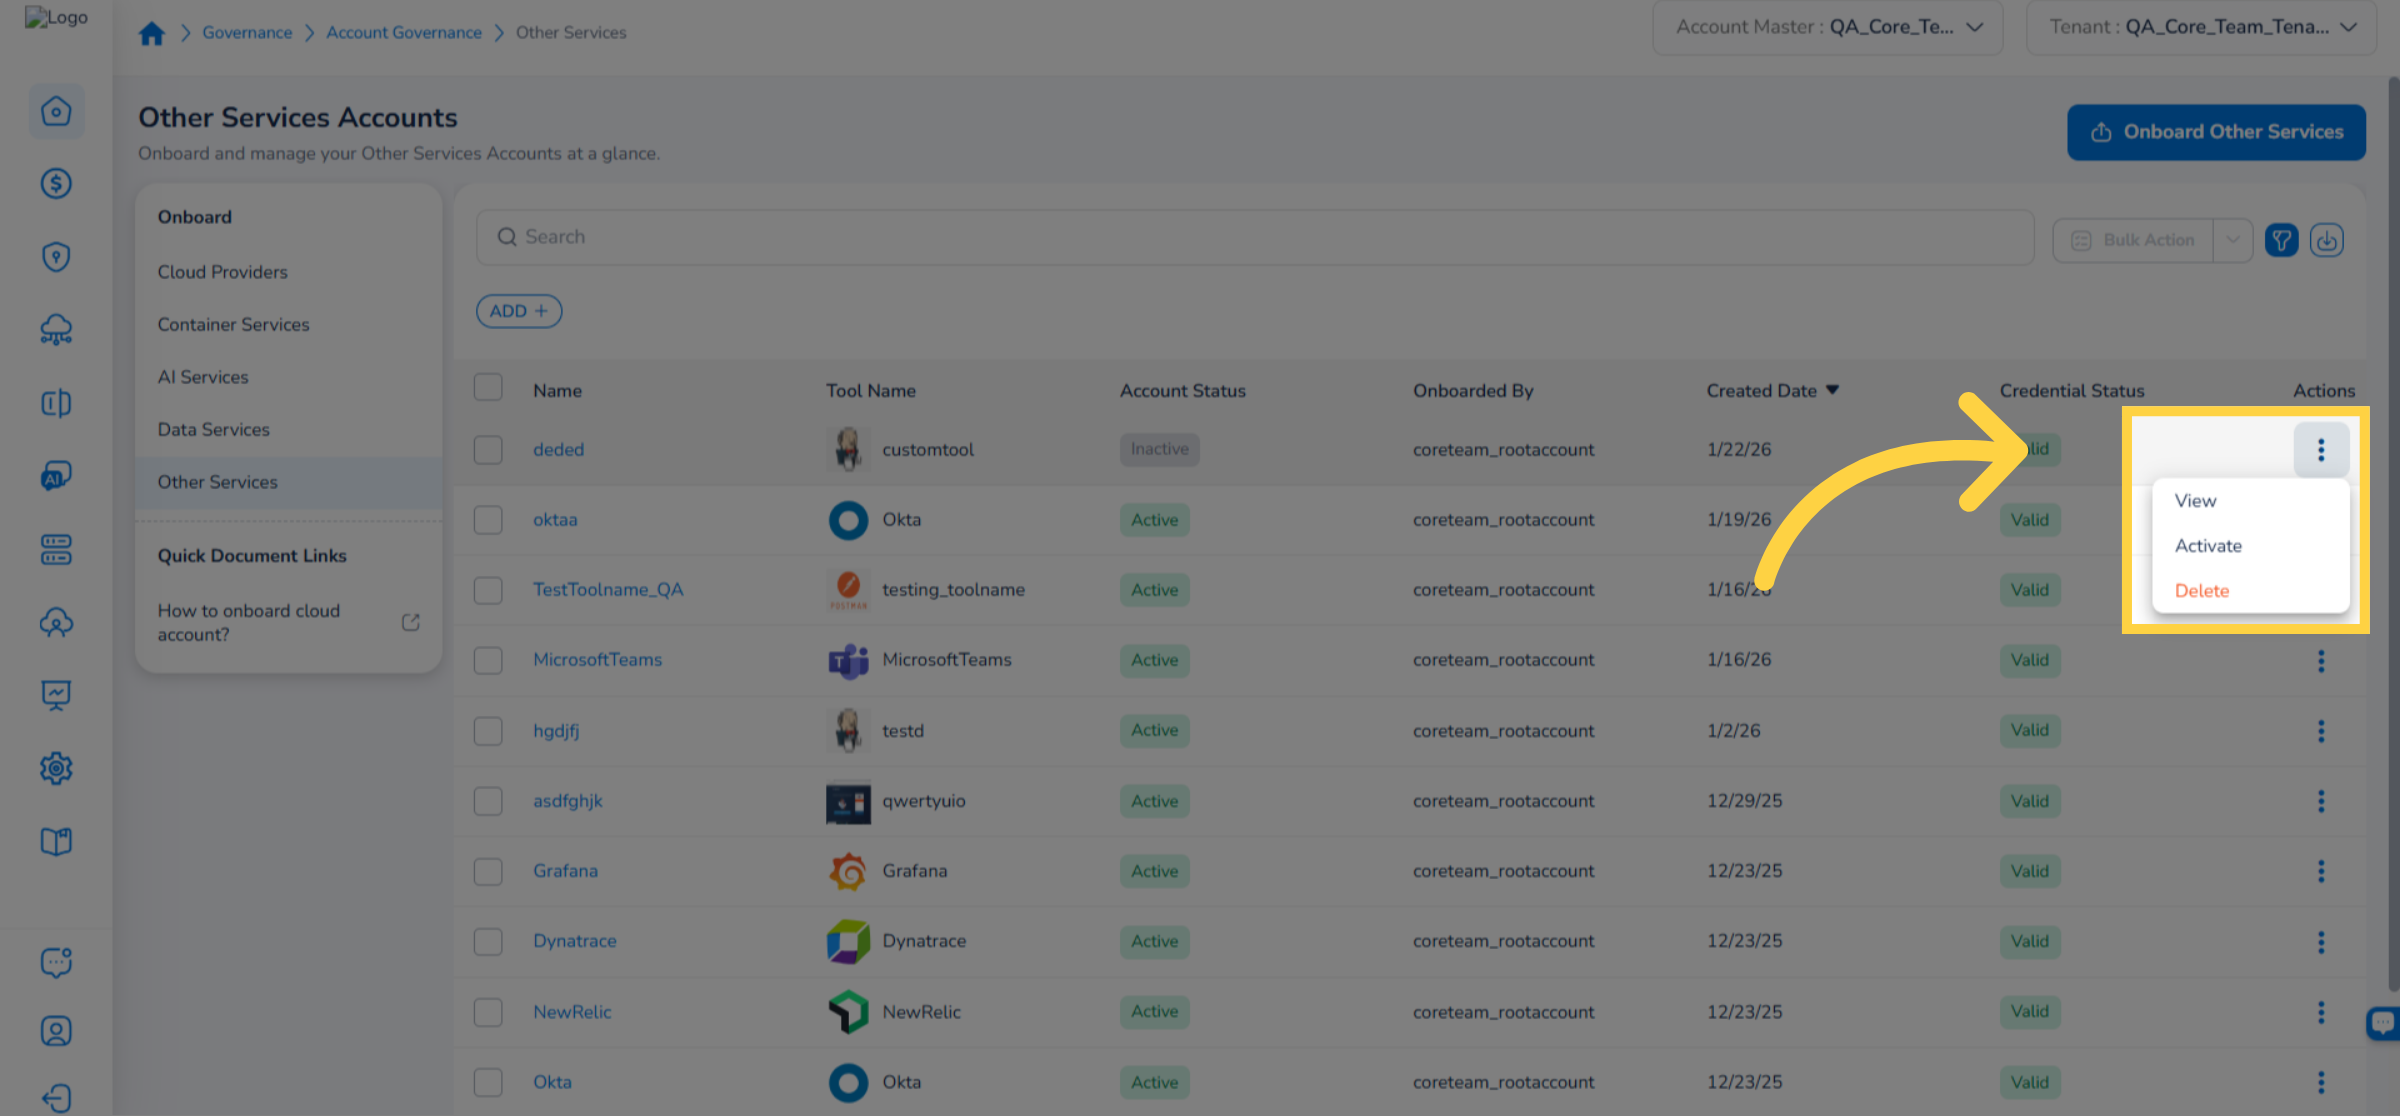
Actions on Custom Tool Account
To take action on a custom tool account, click the ellipses and select an action. Users can take any of these actions -- View, Activate, and Delete.
- View Account Details: Click the ellipses and select View to see the account details for the selected account. Go through the Details tab and FinOps tab to view the account-related details.
- Activate Account: Click the ellipses and select the Activate action to activate the selected account. A dialog box appears, where you can select Yes to activate the account, else click No.
- Delete Account: Click the ellipses and select the Delete action to remove the selected service account from the platform. A dialog box appears, where you can select Yes to delete the account, else click No.
Updated 5 months ago