

Onboarding AWS Government Cloud Account with FinOps Support
Learn how to onboard and govern your AWS Government Cloud accounts effectively using CoreStack.
Introduction
This guide walks you through setting up credentials, configuring permissions, and enabling FinOps support for comprehensive cloud governance.
The AWS Government Cloud Governance solution enhances oversight across FinOps, SecOps, and CloudOps, ensuring cost efficiency, security, and operational control. A key update introduces FinOps visibility for Government Cloud accounts by linking them with their associated Commercial Cloud accounts, where cost data is maintained. Through integrated dashboards, users gain transparency, traceability, and unified cost visibility, simplifying audits, cross-referencing accounts, and managing multi-account architectures. This enhancement improves governance reviews, compliance reporting, and user experience in multi-cloud environments.
Onboarding AWS Government Cloud Account
Perform the following steps to onboard an AWS Government cloud account:
1. Login to the Platform
Login to the platform. You should see a landing page based on your preferences.
2. Two Ways of Onboarding
There are two ways through which users can initiate the AWS Government Cloud account onboarding process. The first option is to go to Onboard Accounts (within the Settings menu) and start the onboarding steps, and another option is to use Account Governance (within the Governance menu). Onboarding the cloud account through the Settings menu is the preferred option. Although the starting point of onboarding is different for both the options, but the onboarding steps are the same.
3. Option 1: Navigate to "Settings" in the Menu
On the left navigation menu, click Settings and then select Onboard Accounts. This is the preferred way of onboarding cloud accounts.
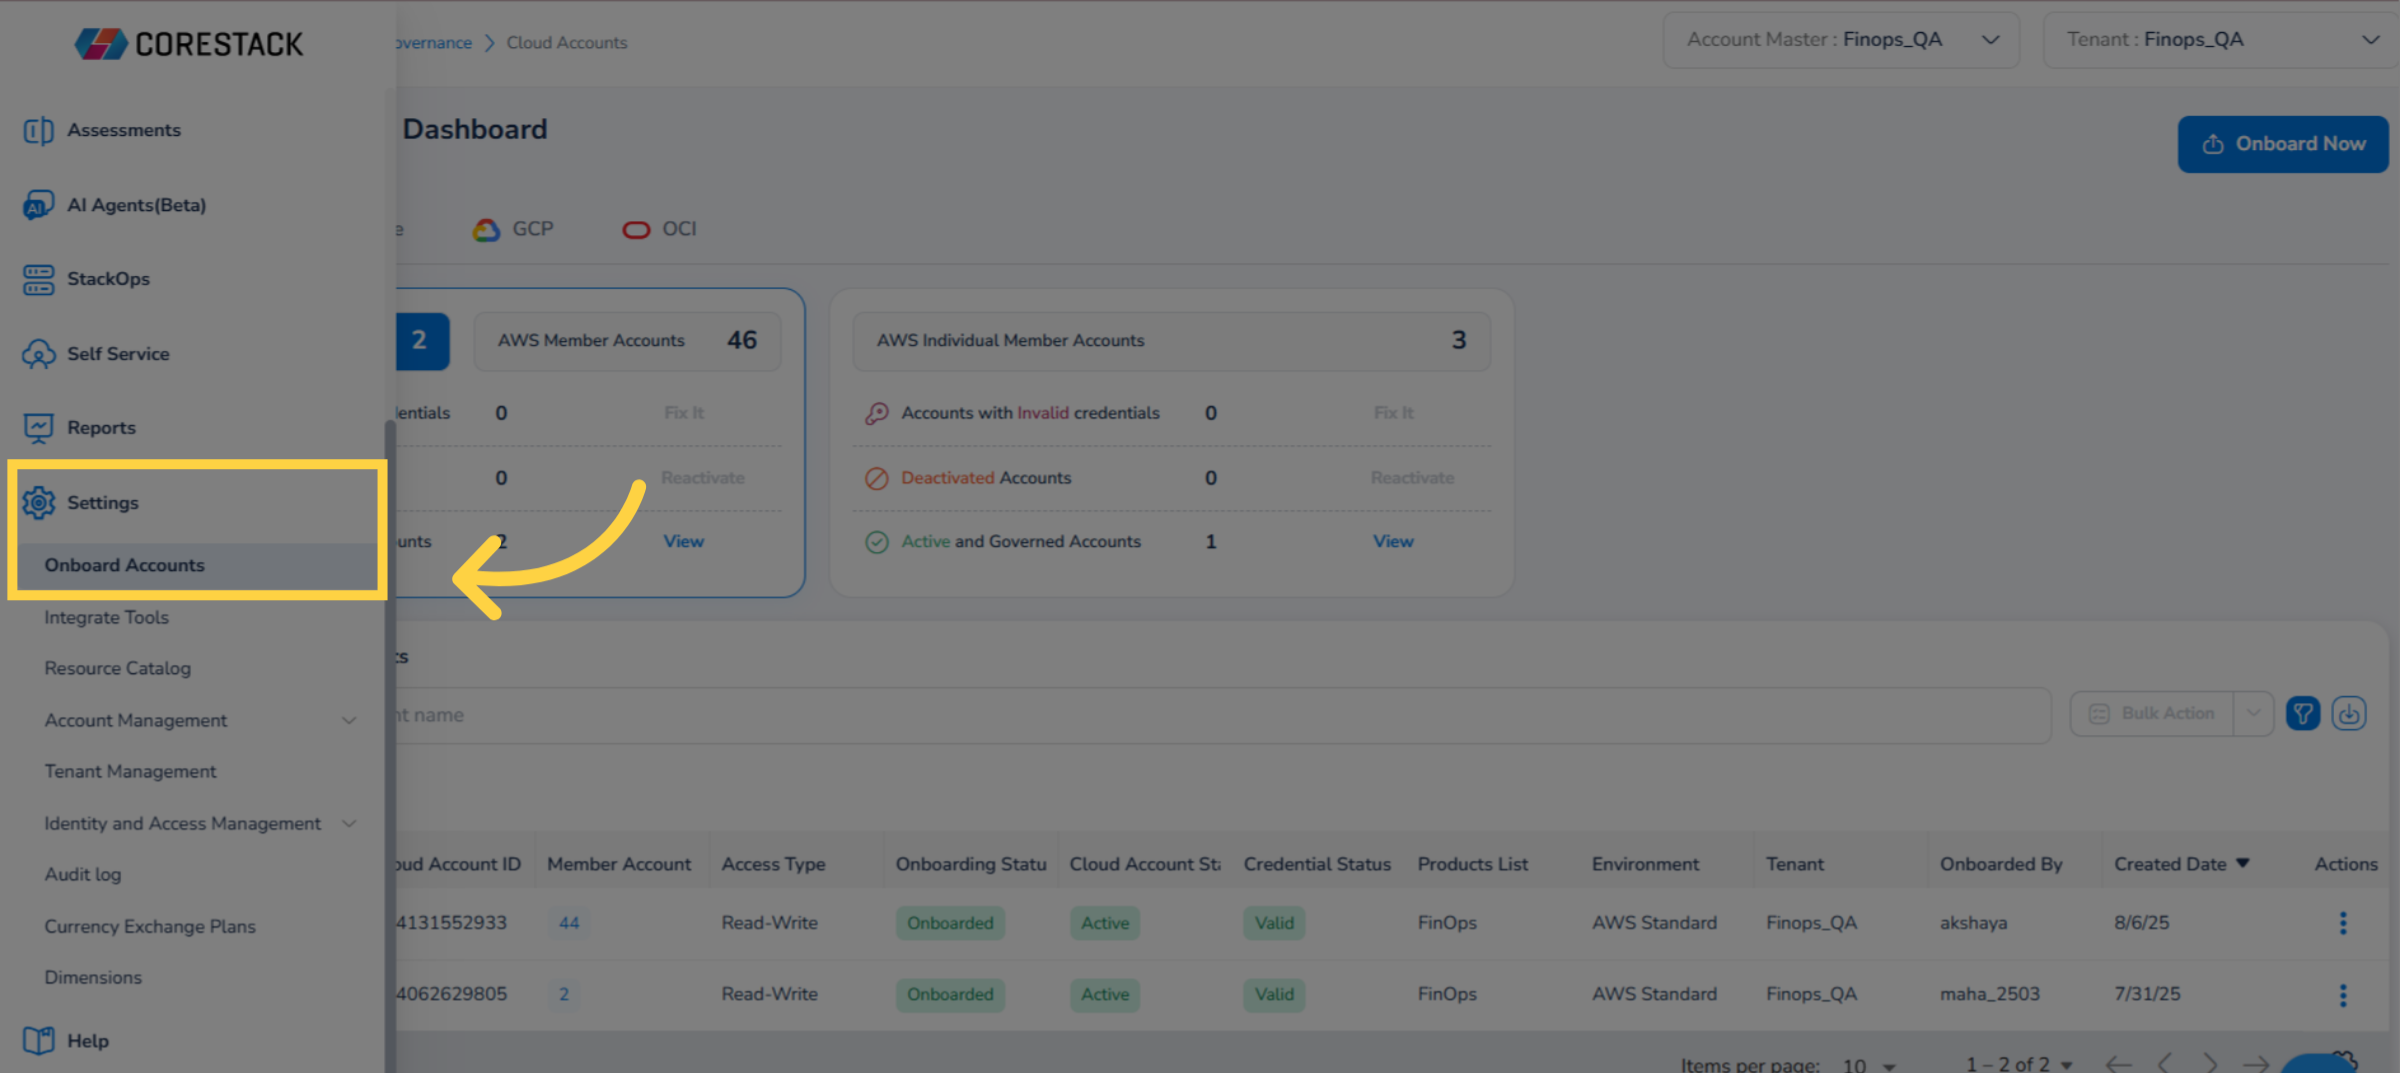
4. Click "Onboard"
In the Select Cloud Provider section, hover the mouse pointer over AWS and click Onboard.
5. Option 2: Navigate to "Governance" in the Menu
On the left navigation pane, click Governance.
6. Select "Account Governance" in the Menu
Select Account Governance.
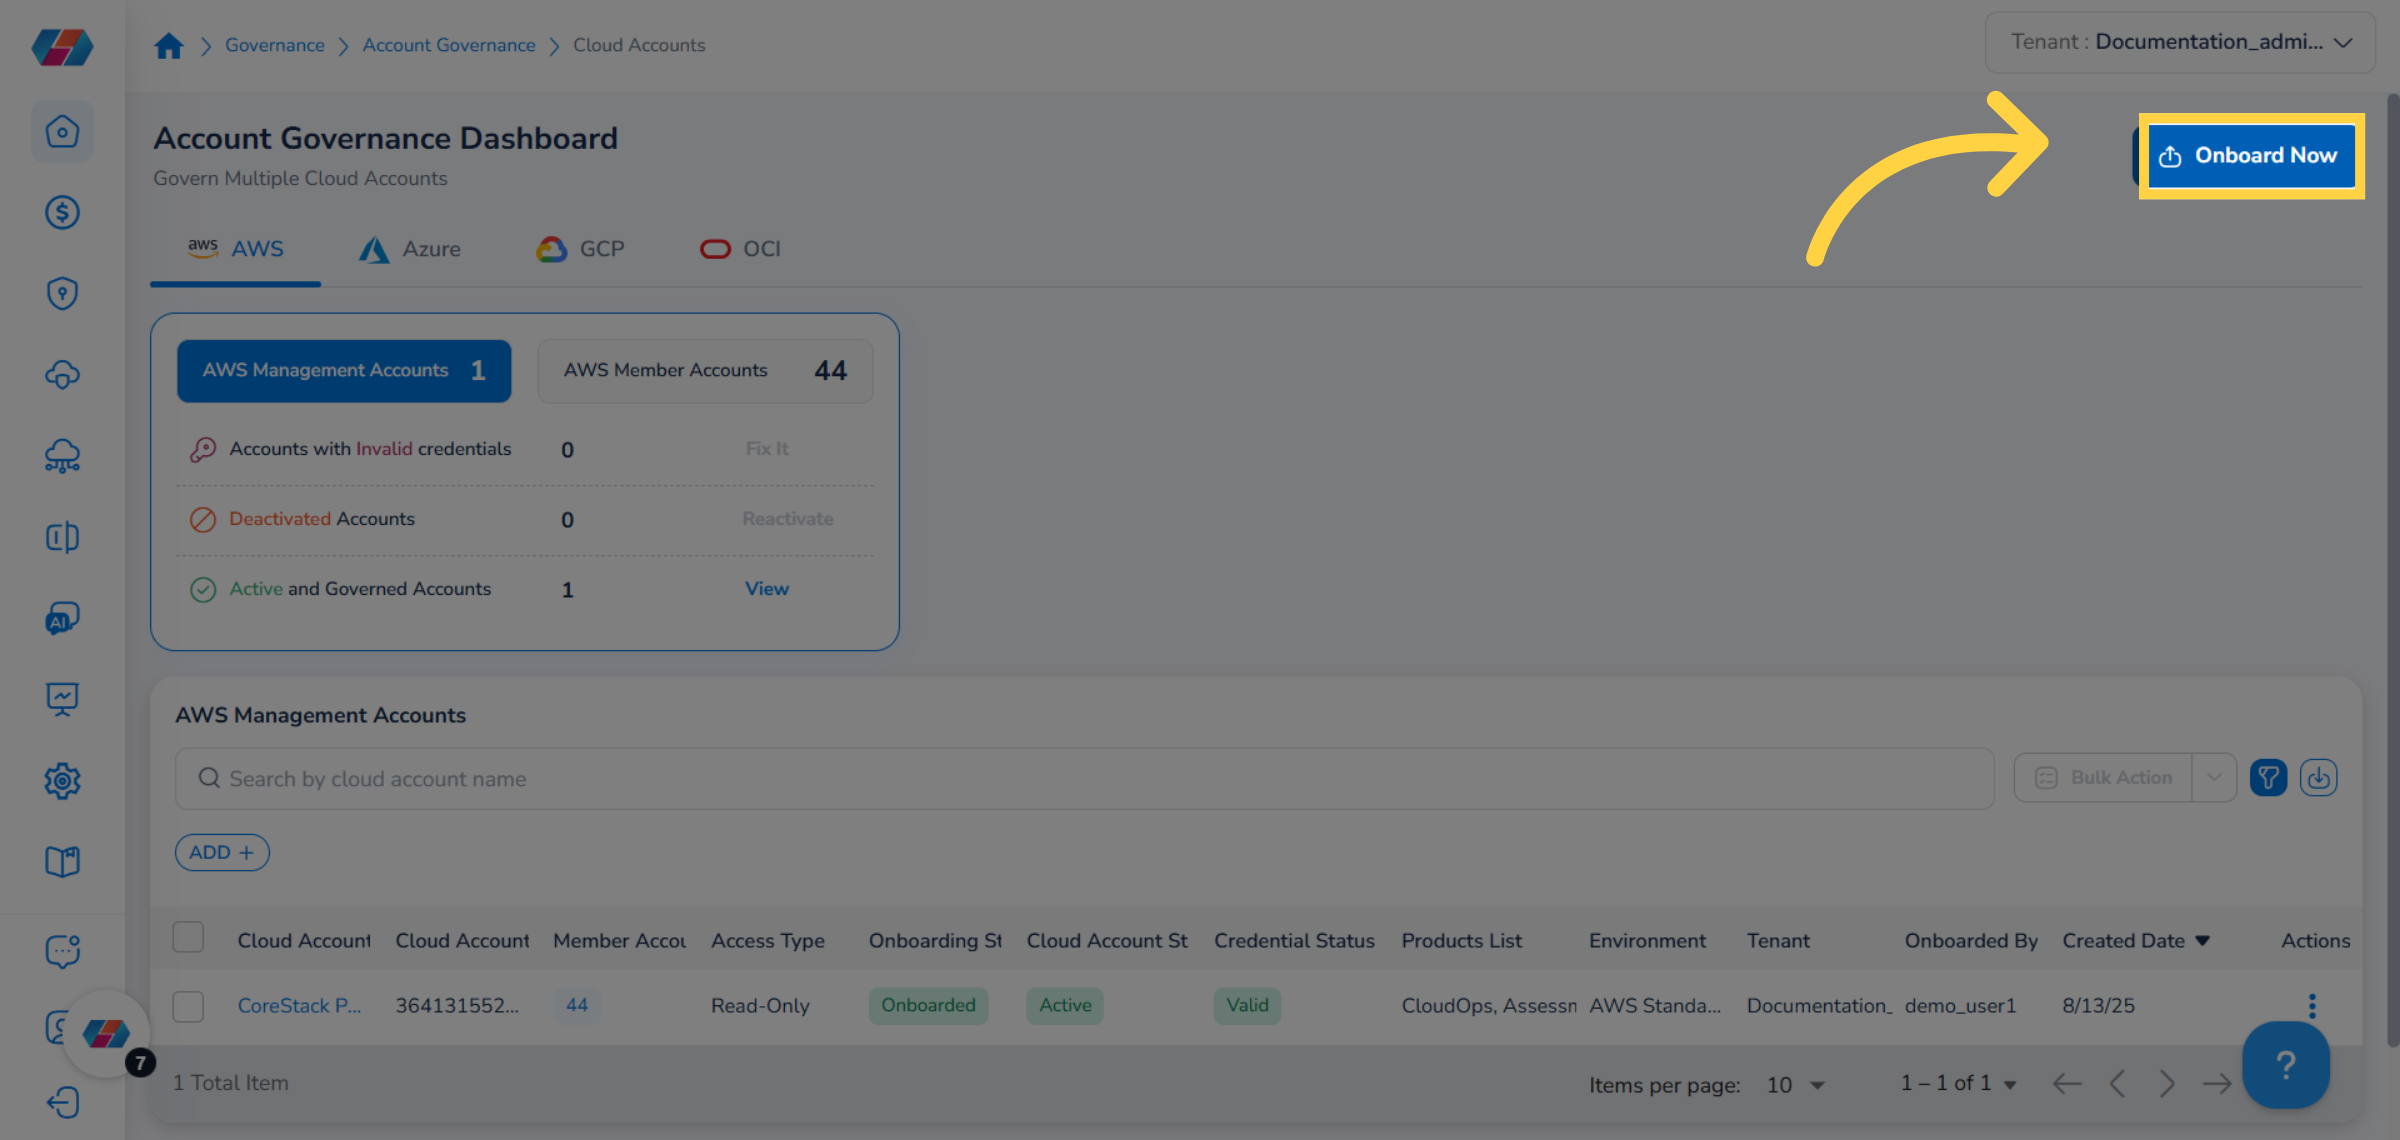
7. Click "Onboard Now"
To initiate the onboarding process of AWS Government cloud account, click Onboard Now.
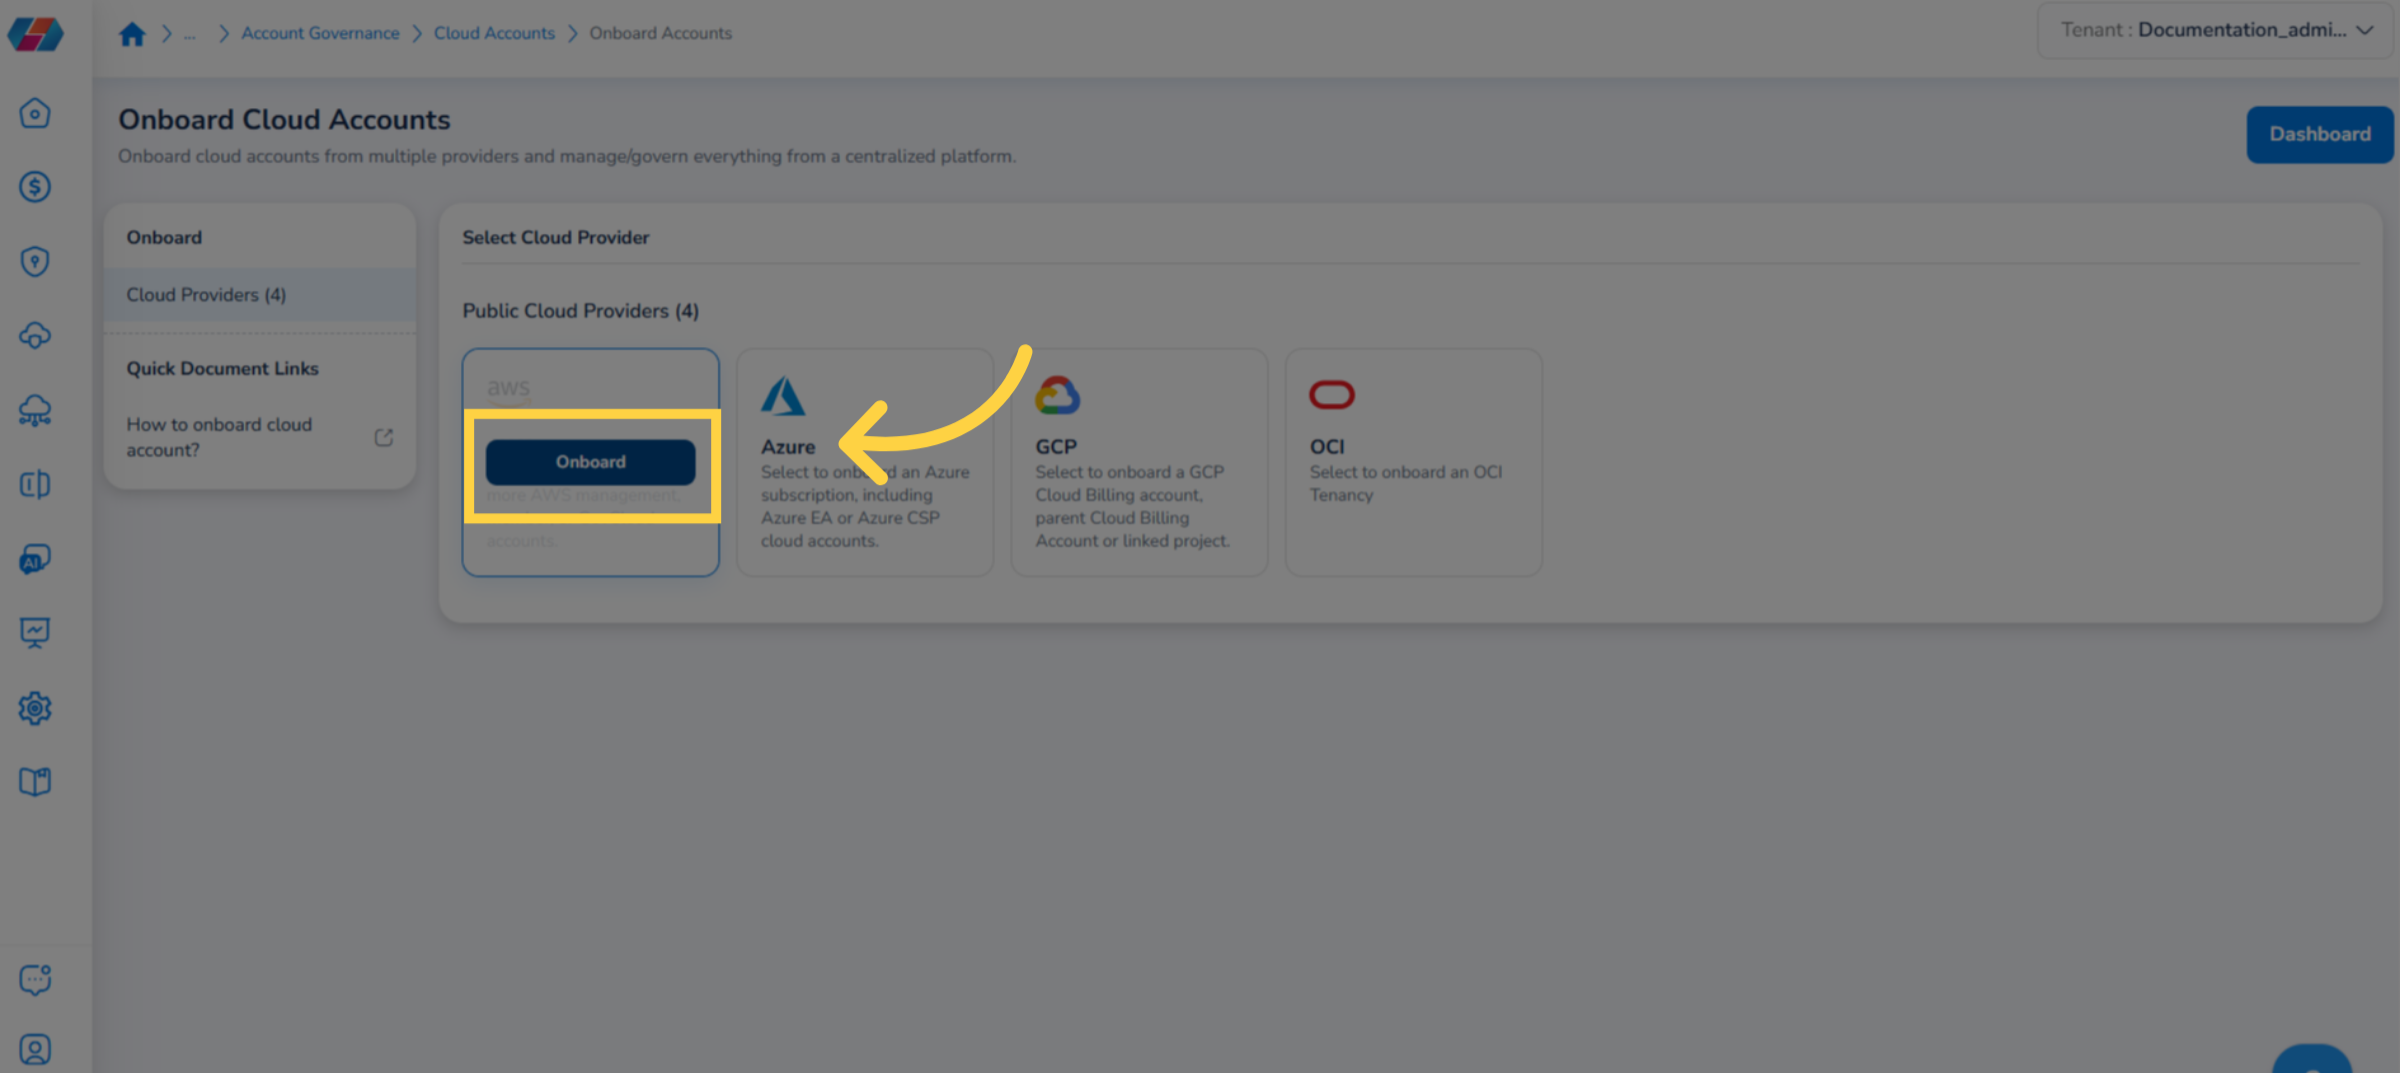
8. Click "Onboard"
Note:From this step onwards, the onboarding process remains the same irrespective of the menu from where you start the onboarding.
In the Public Cloud Providers section, hover the mouse pointer over AWS and click Onboard.
9. Select AWS Cloud Account Type
In the AWS Cloud Account Type section, click to select AWS Member Account.
10. Select "AWS Government"
Next, select the option AWS Government.
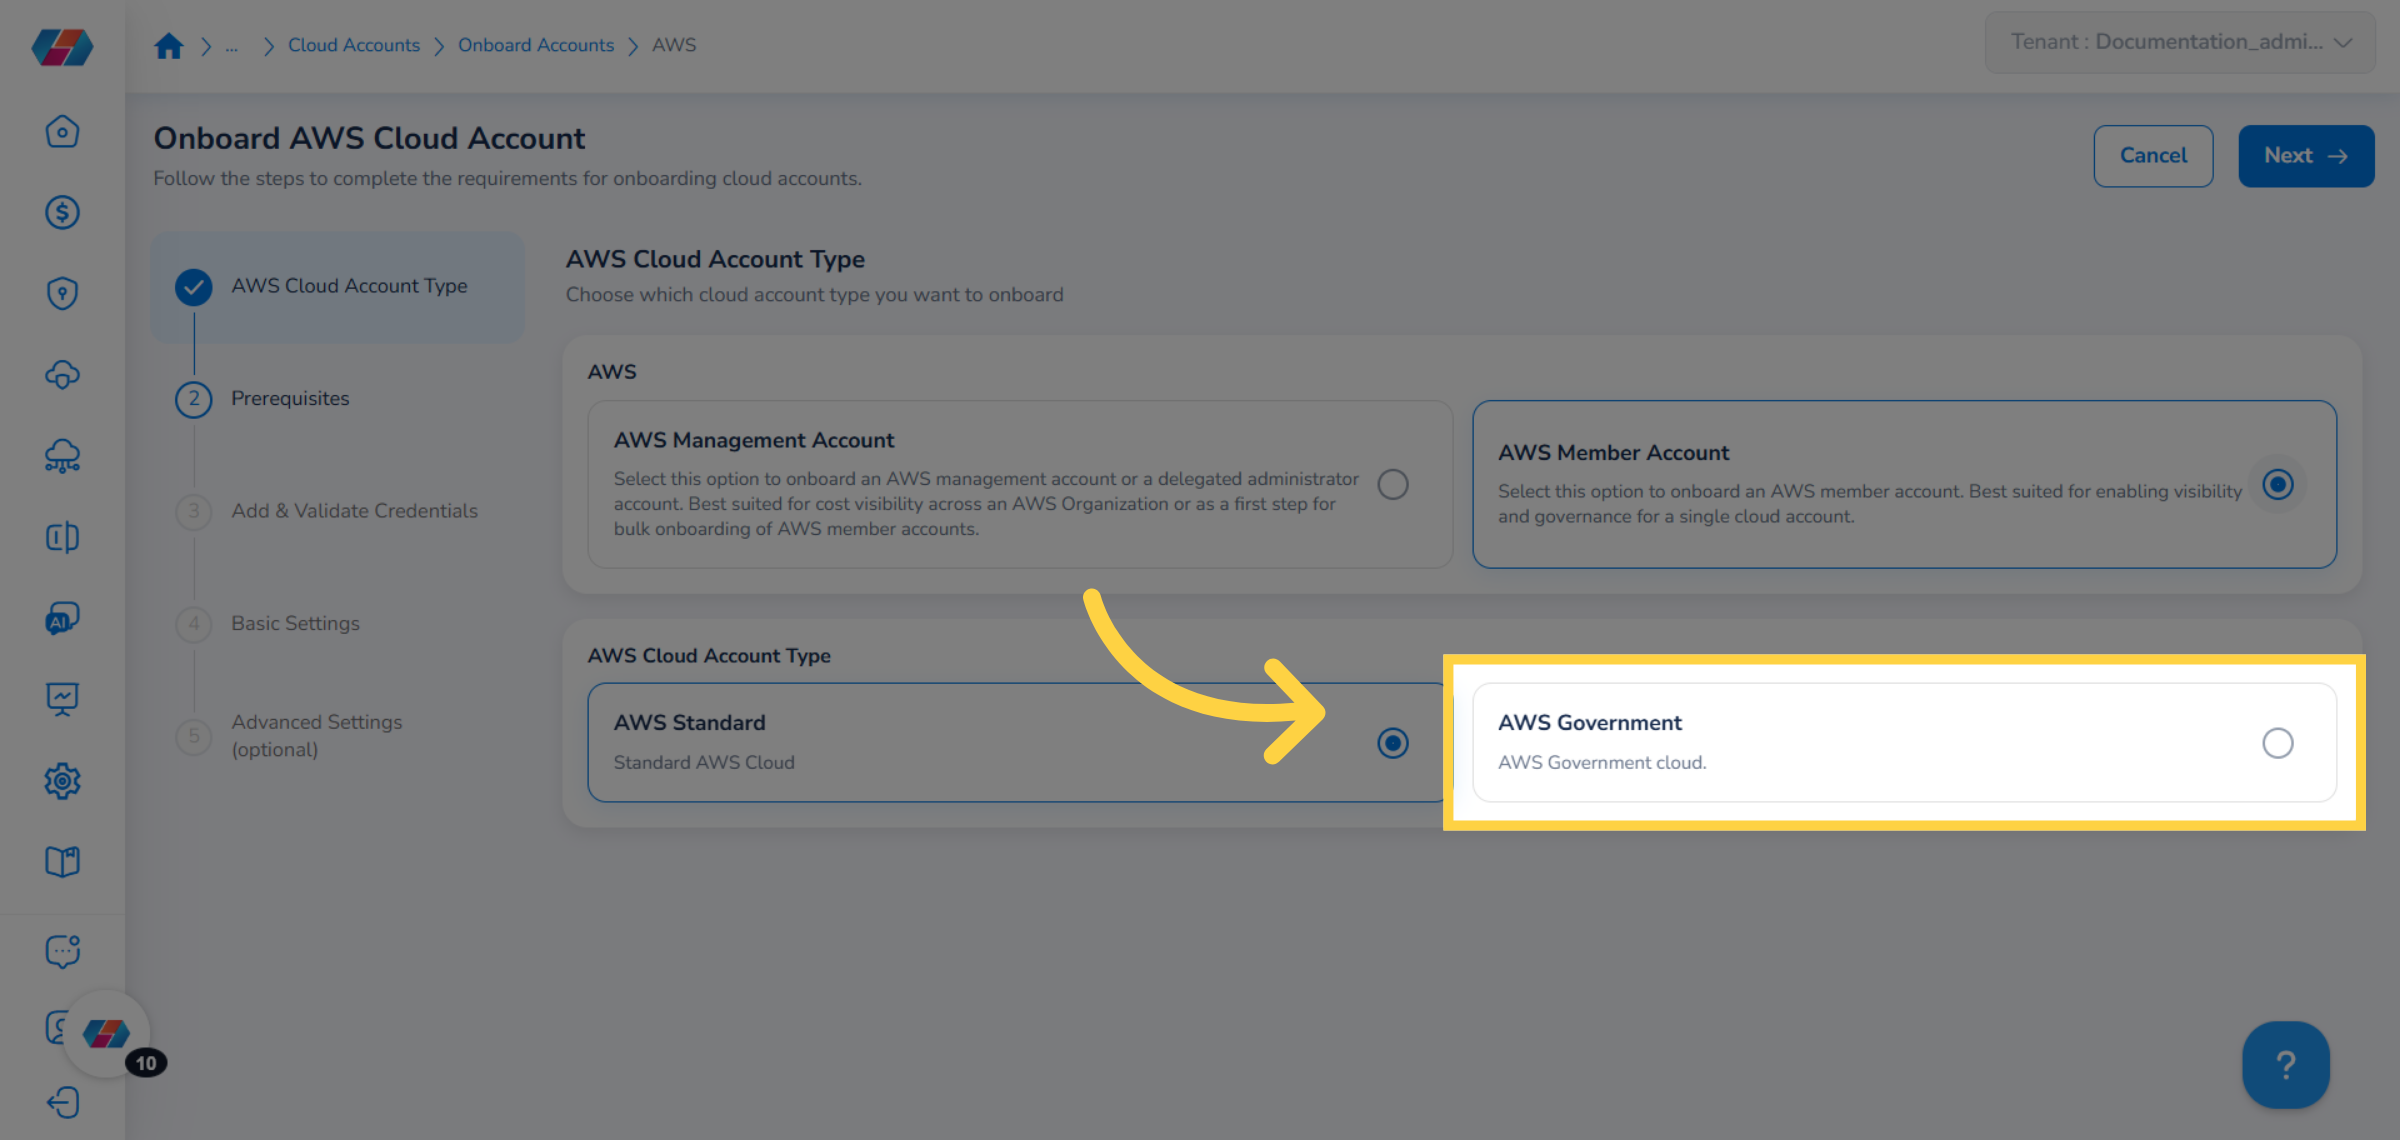
11. Click "Next"
Click Next to proceed to next step.
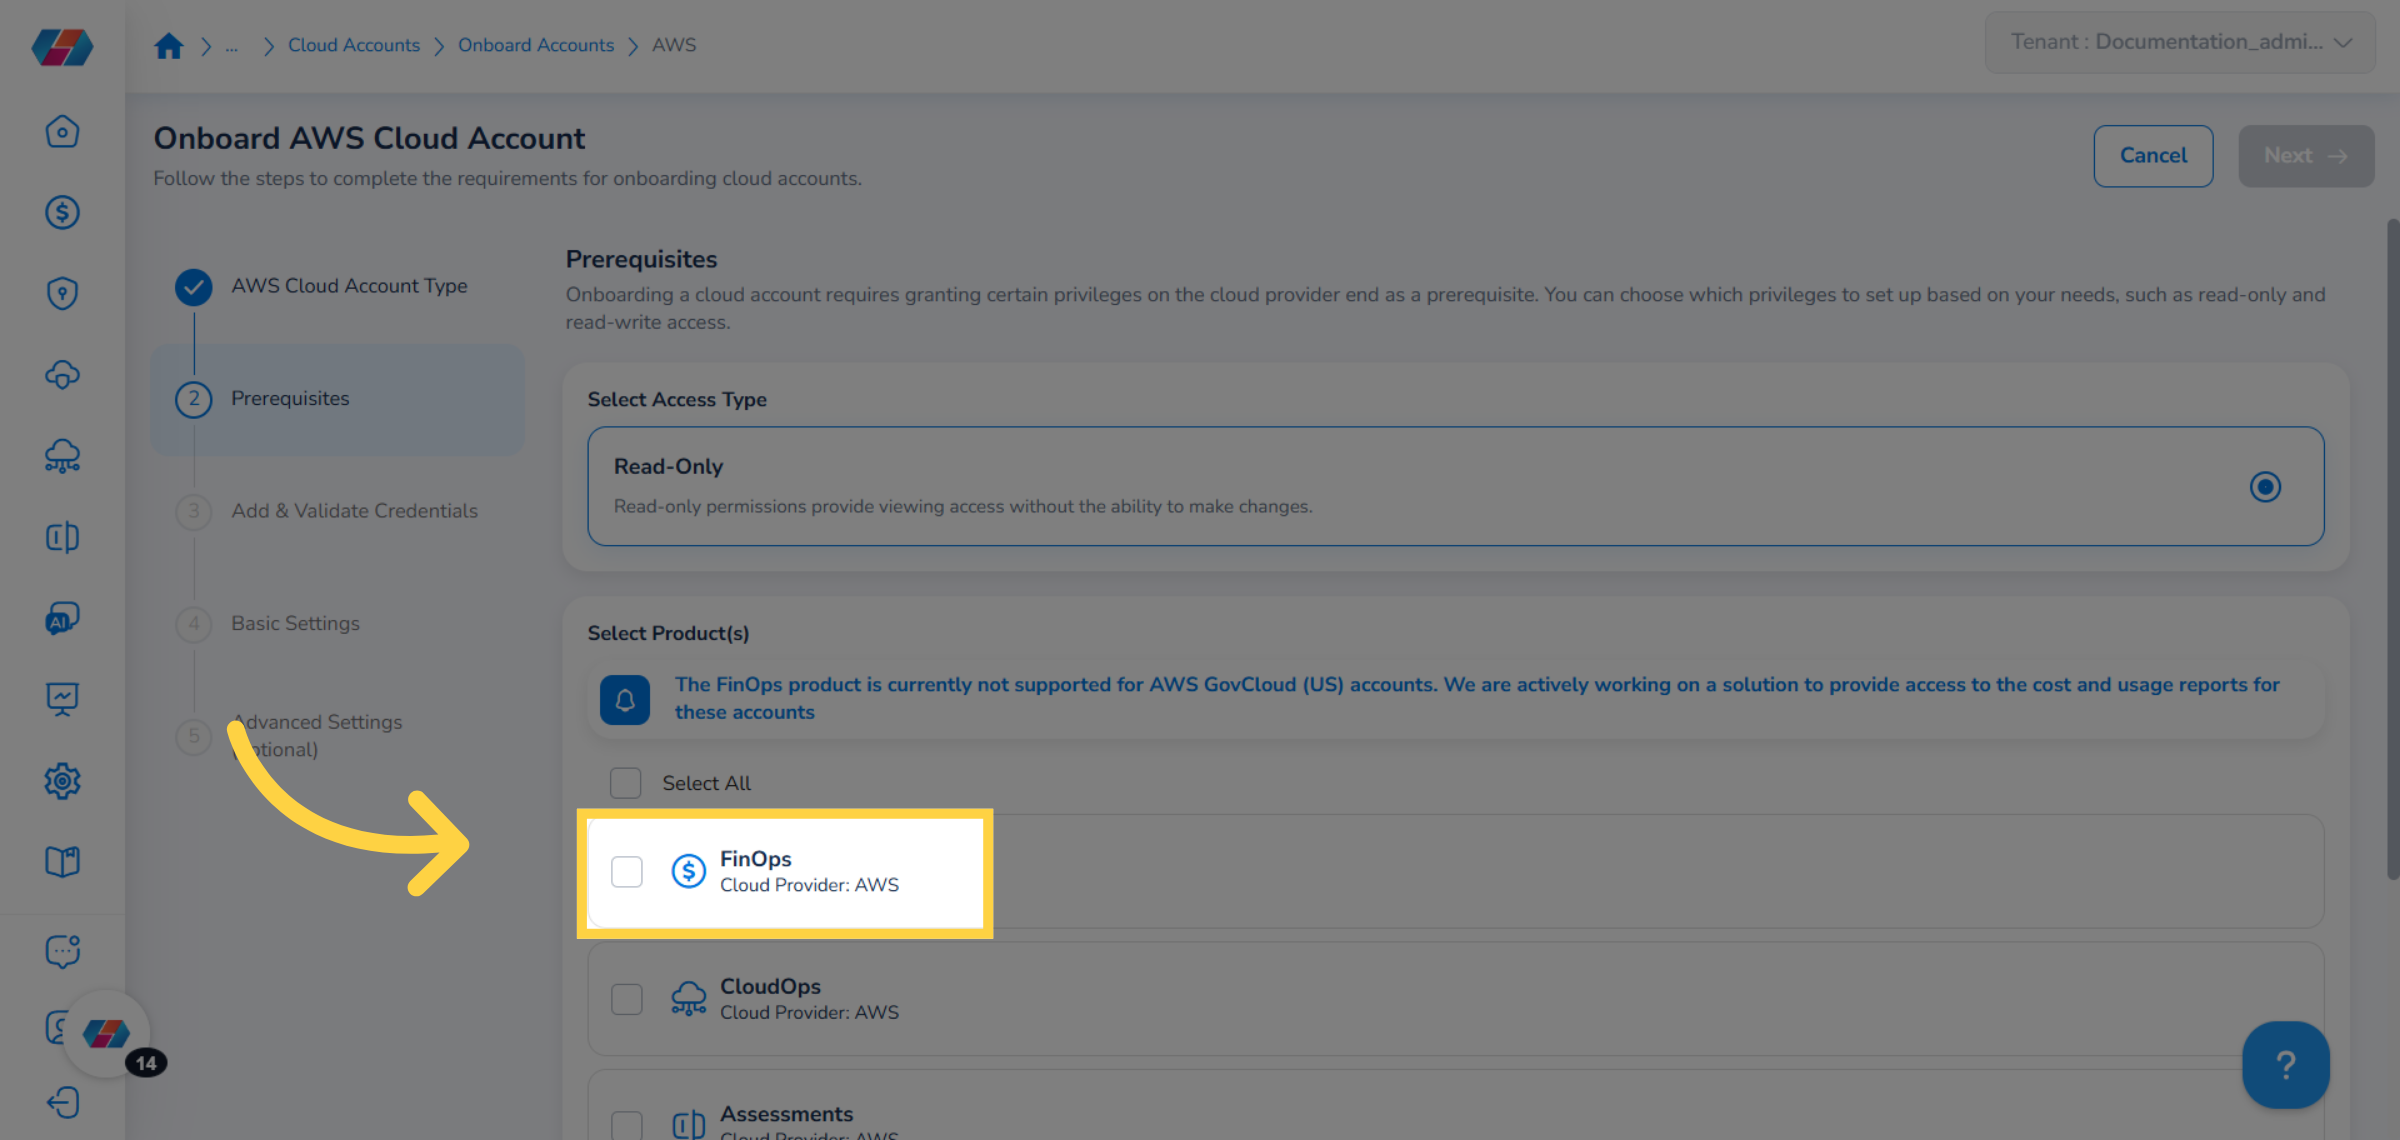
12. Select Product(s)
In the Prerequisites step, the access type is Read-Only since just one option appears.
In the Select Product(s) field, select the applicable option(s). The available options are - FinOps, SecOps, CloudOps, and Assessments. In this case, select FinOps.
13. Click "Next"
Click Next to go to the next step.
14. Add and Validate Credentials step
In the Add and Validate Credentials step, in the Access Key box, enter the access key.
15. Enter "Secret Key"
In the Secret Key box, enter the secret key.
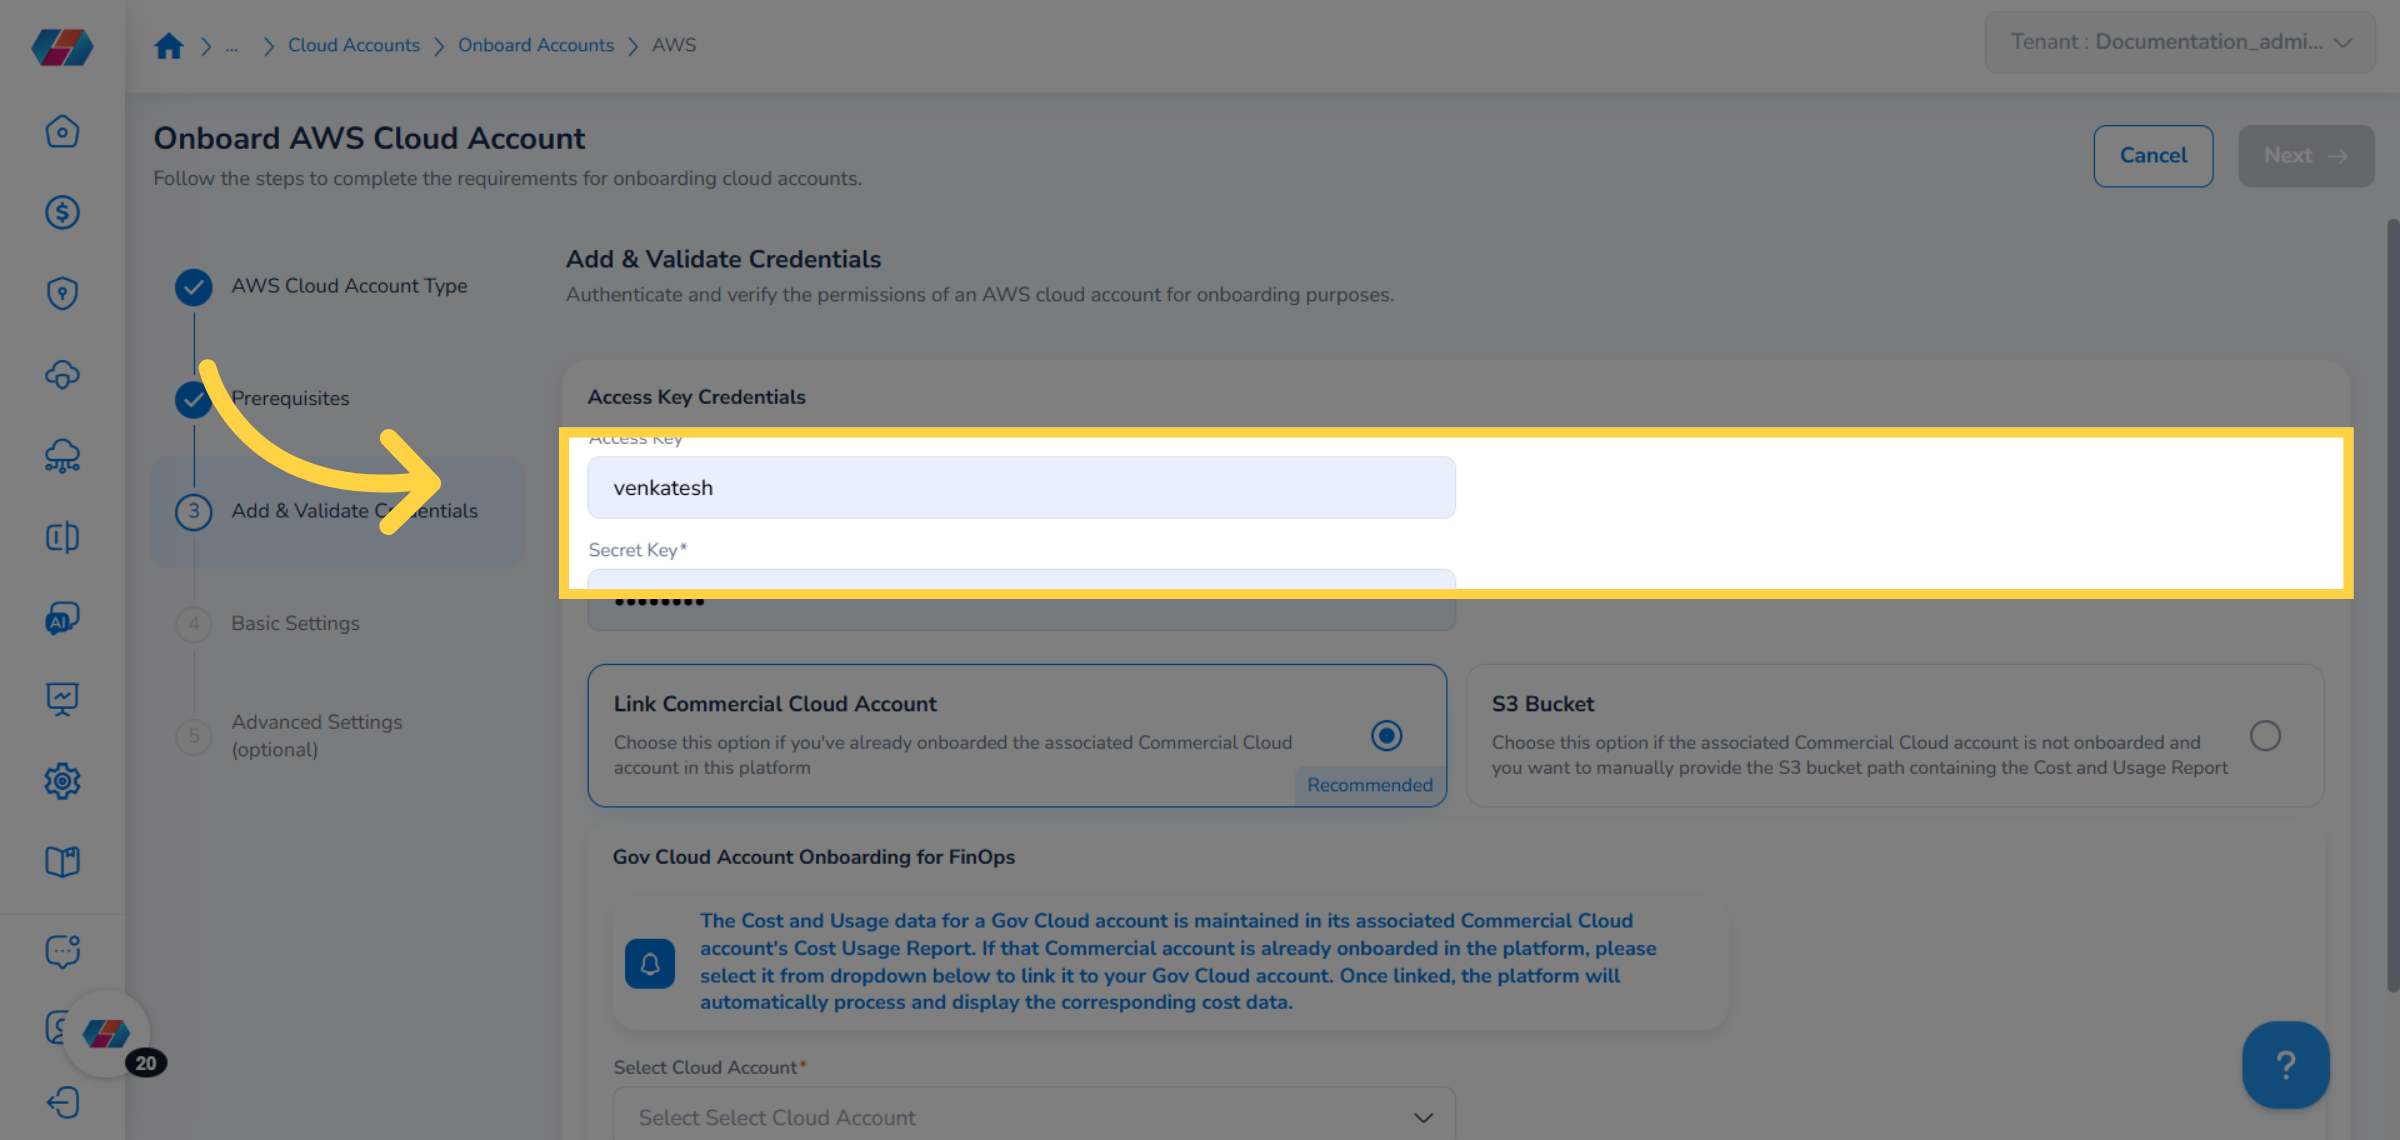
16. Link Commercial Cloud Account
The option Link Commercial Cloud Account is selected by default. When the user wants to use this option, then in the Select Cloud Account drop-down list, click to select an account.
Note:This option is applicable only when an associated commercial cloud account has been onboarded to the platform.
17. Click "Save & Validate"
Click Save & Validate to confirm successful authentication.
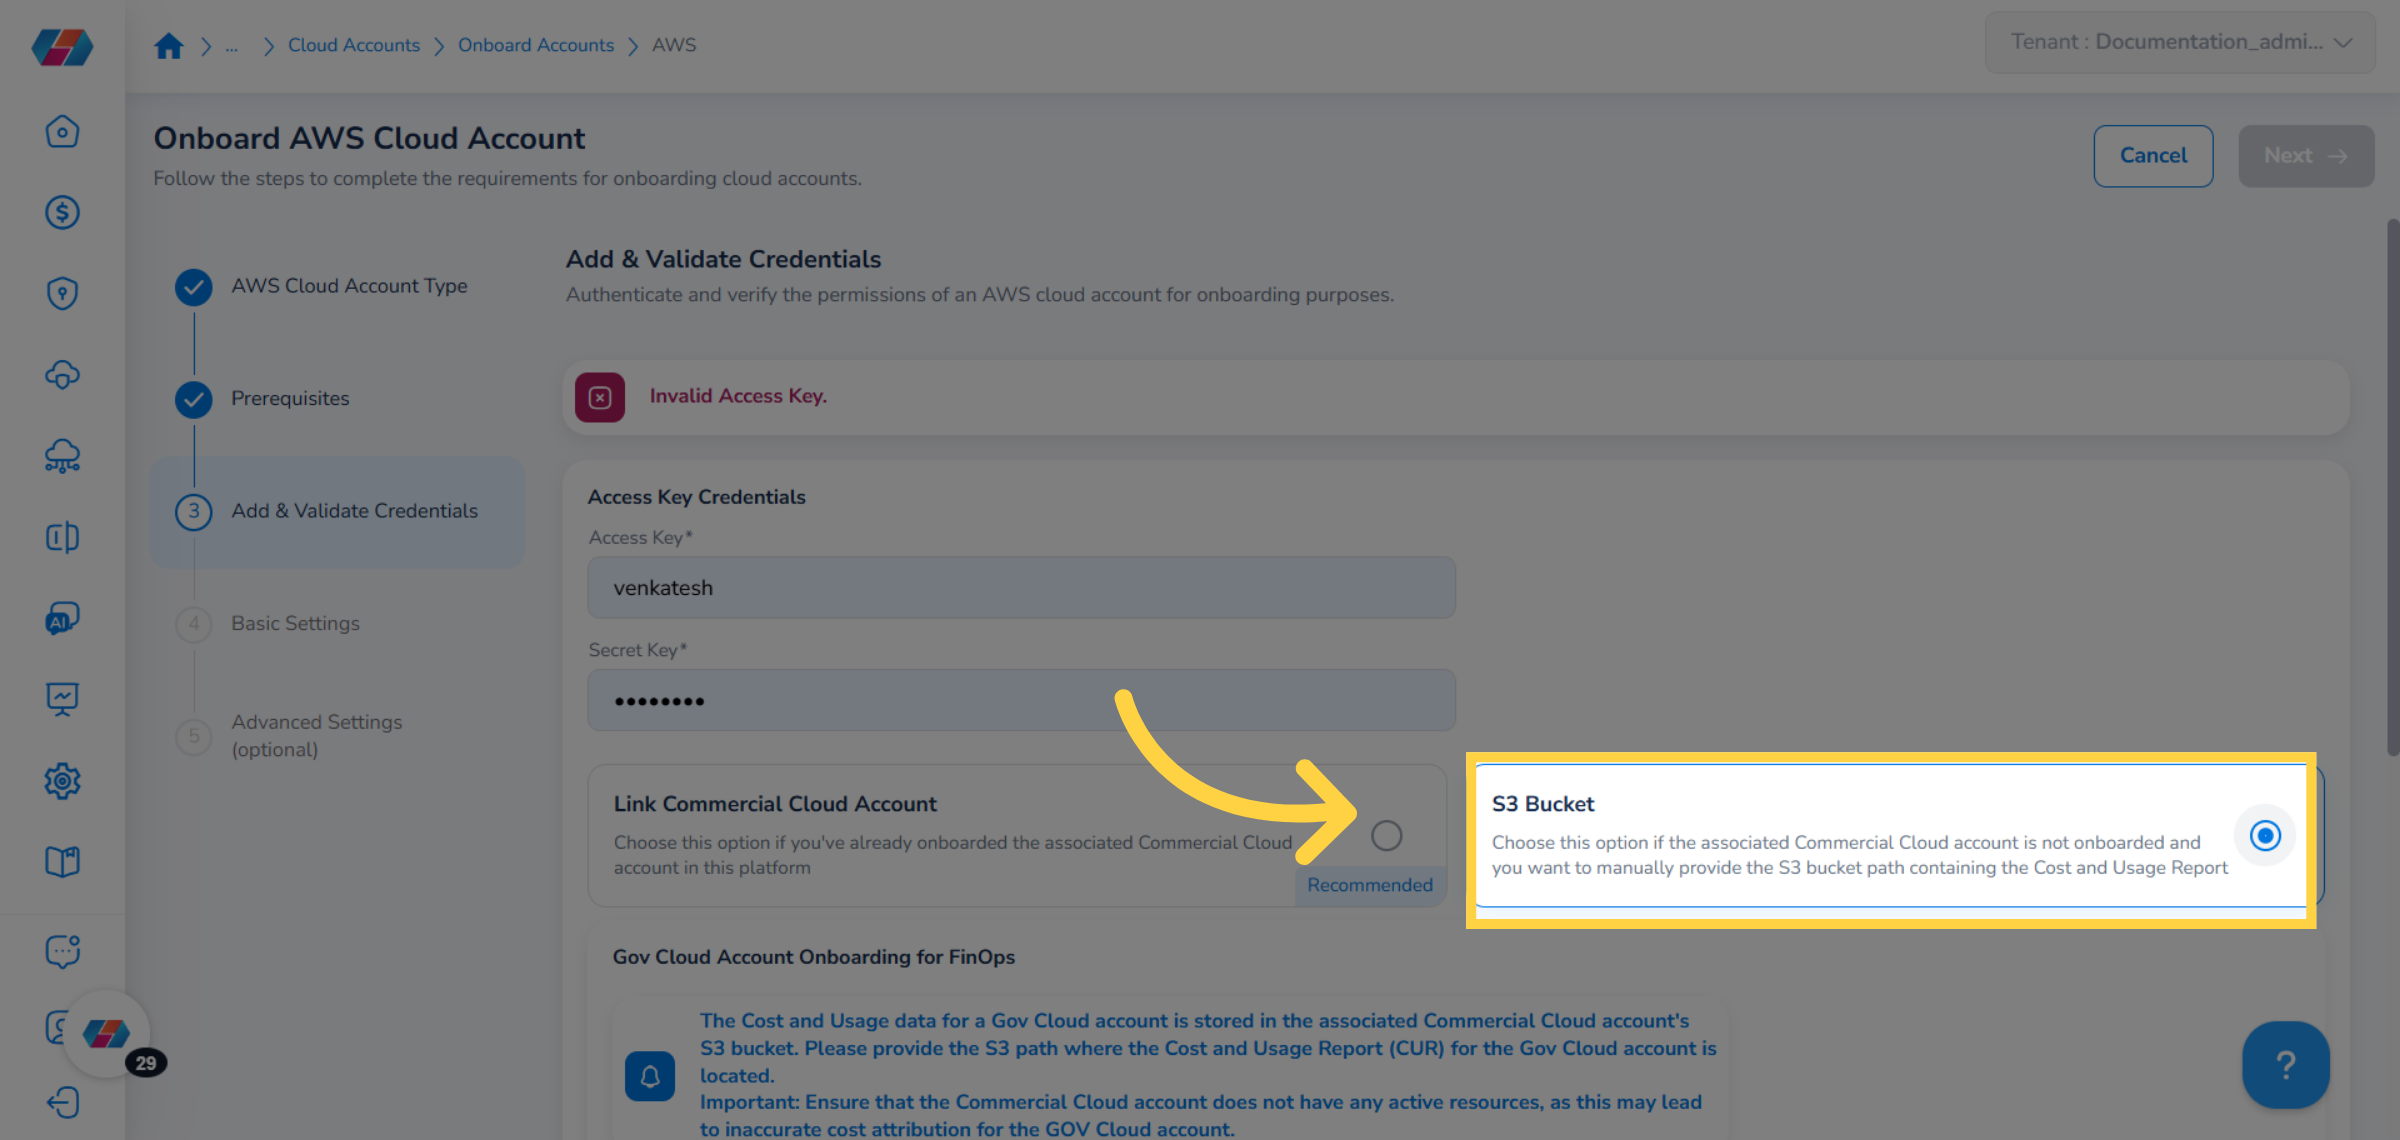
18. Select S3 Bucket
Select the S3 Bucket option. Choose this option if the associated commercial cloud account is not onboarded and you want to manually provide the S3 bucket path containing the Cost and Usage Report.
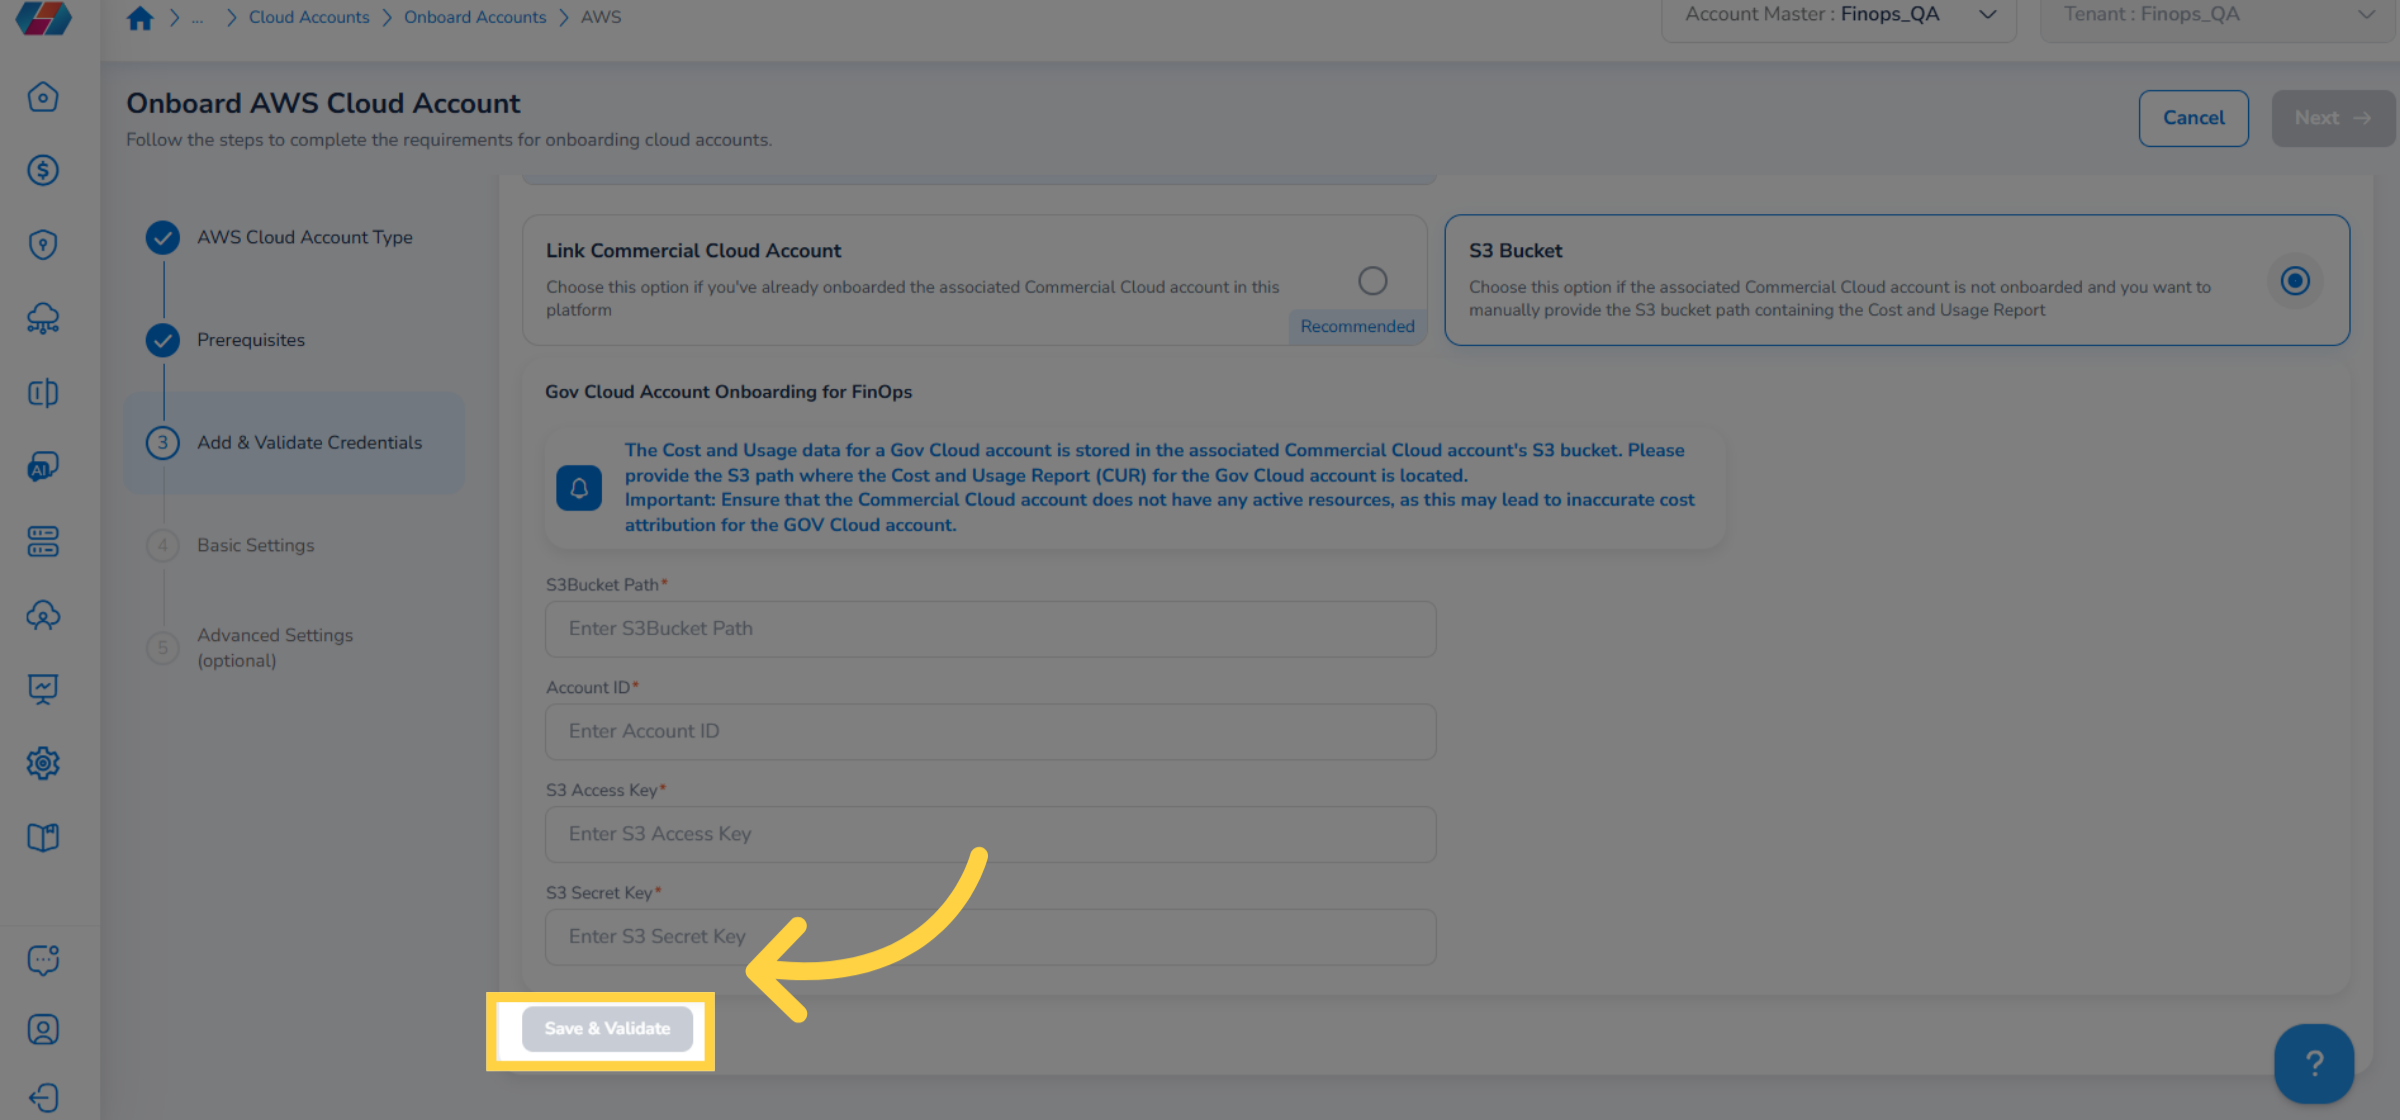
19. Enter "S3Bucket Path"
In the S3Bucket Path box, enter the S3 bucket path.
20. Enter "Account ID"
In the Account ID box, enter the account ID.
21. Enter "S3 Access Key"
In the S3 Access Key box, type the S3 access key.
22. Enter "S3 Secret Key"
In the S3 Secret Key box, enter the S3 secret key.
23. Save & Validate
Click Save & Validate to validate the credentials entered by you.
24. Click "Next"
Click Next to proceed ahead.
25. Enter "Account Name"
In the Basic Settings step, in the Account Name box, enter the account name.
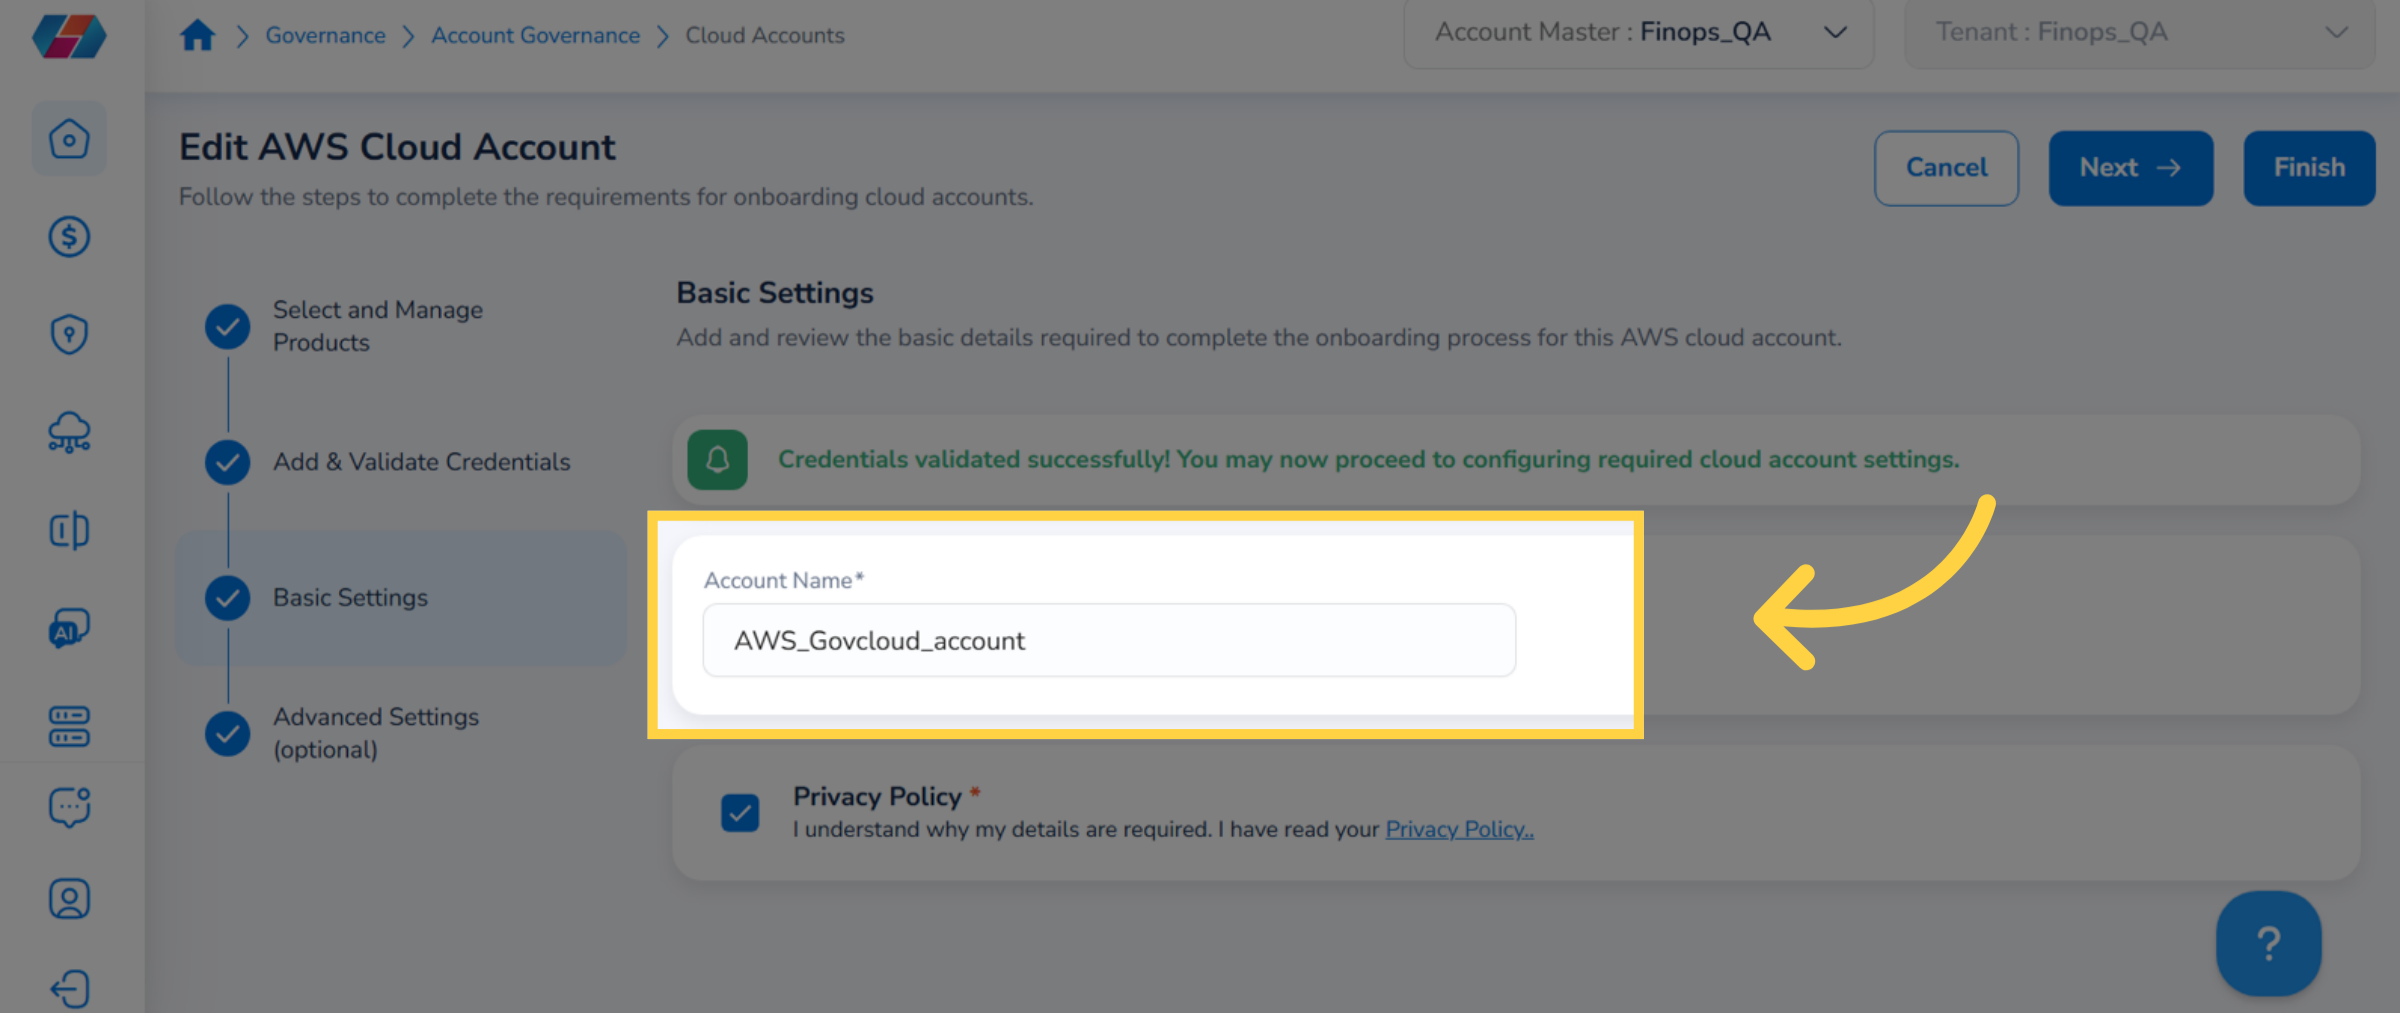
26. Select "Privacy Policy"
Select the Privacy Policy checkbox.
27. Click "Next"
Click Next to go to the next step. The next step is optional, so users can also click Finish to complete the onboarding process.
28. Advanced Settings (Optional)
Next, the users can fill details in the Advanced Settings step. This step is optional and users can address these settings after the initial onboarding process.
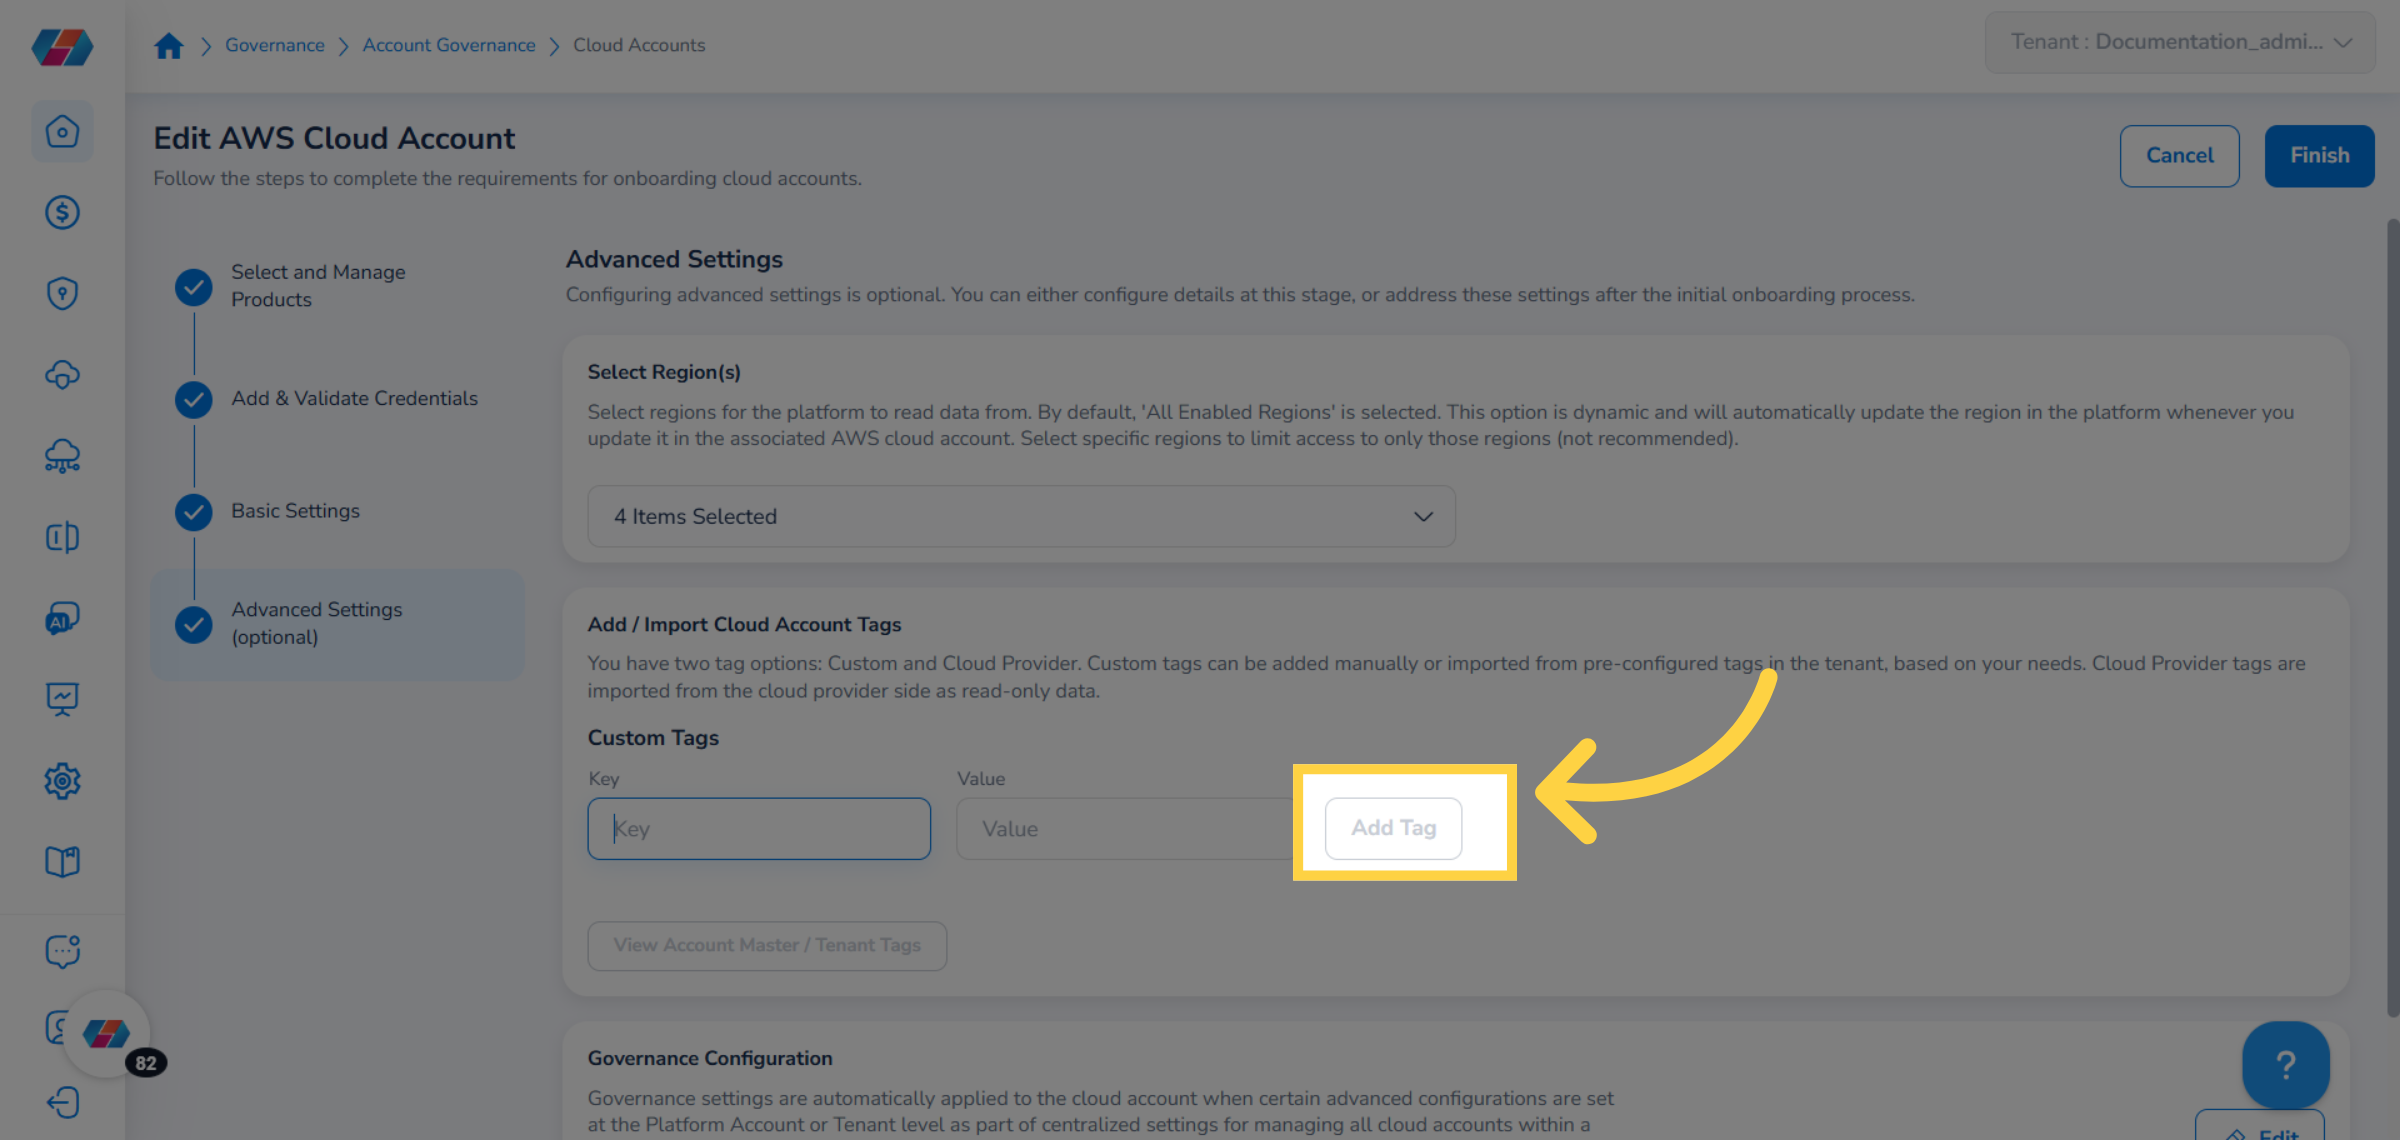
29. Select Region(s)
In the Select Region(s) drop-down list, click to select all relevant regions and click Ok.
30. Enter "Key"
To add custom tags, in the Key box, type the tag key.
31. Enter "Value"
In the Value box, type the tag value.
32. Click "Add Tag"
Click Add Tag to add the tag. The newly added tag will be displayed below.
Note:To delete a tag, just click the cross symbol next to it.
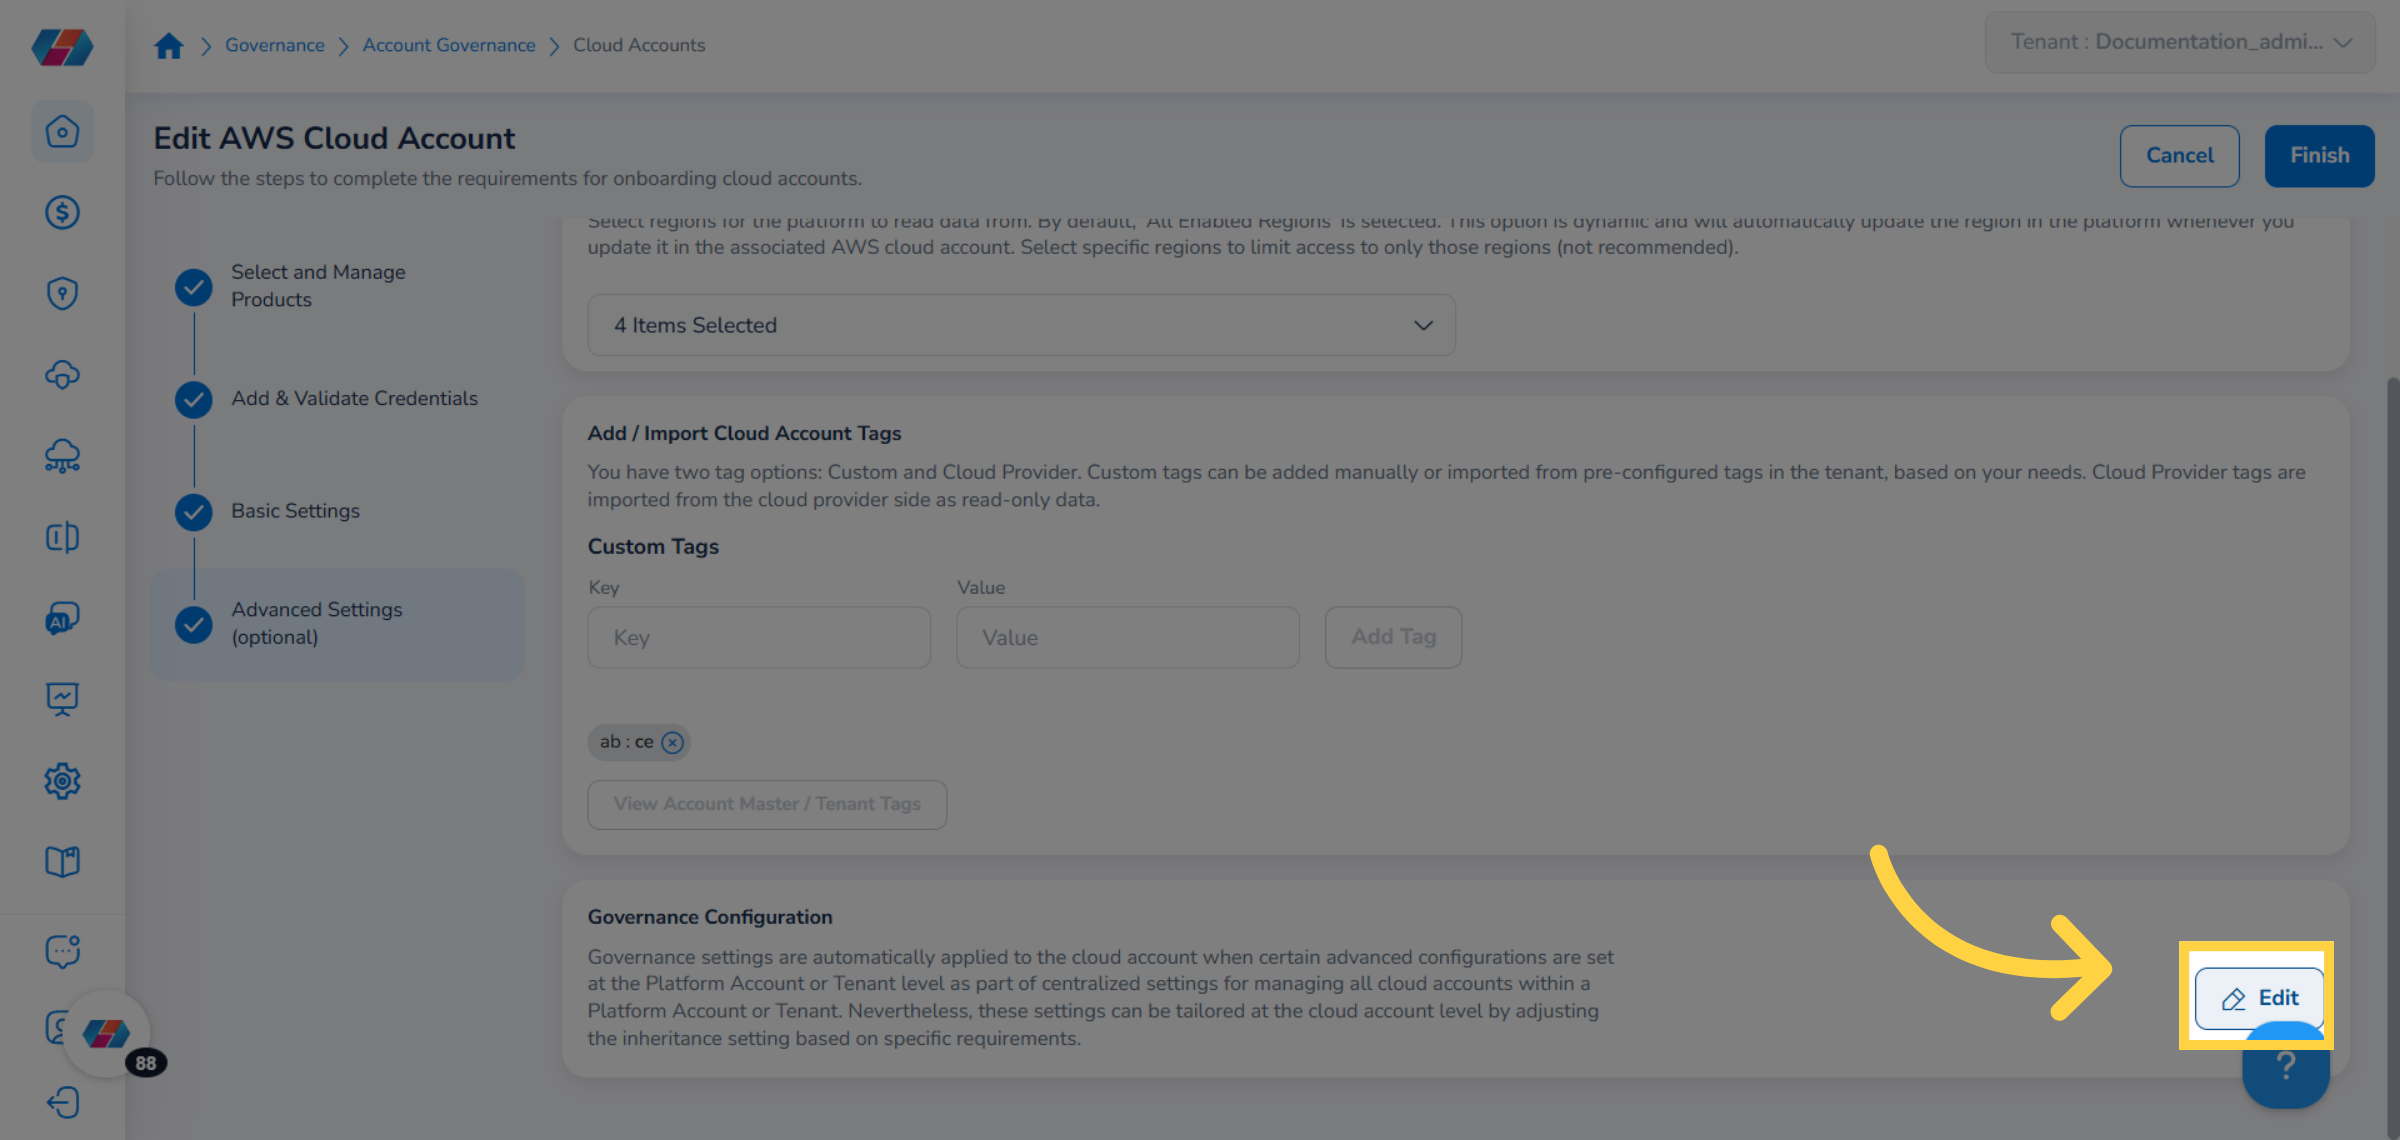
33. Governance Configuration
Governance settings are automatically applied to the cloud account when certain advanced configurations are set at the Platform Account or Tenant level as part of centralized settings for managing all cloud accounts within a Platform Account or Tenant. To perform governance configuration, click Edit.
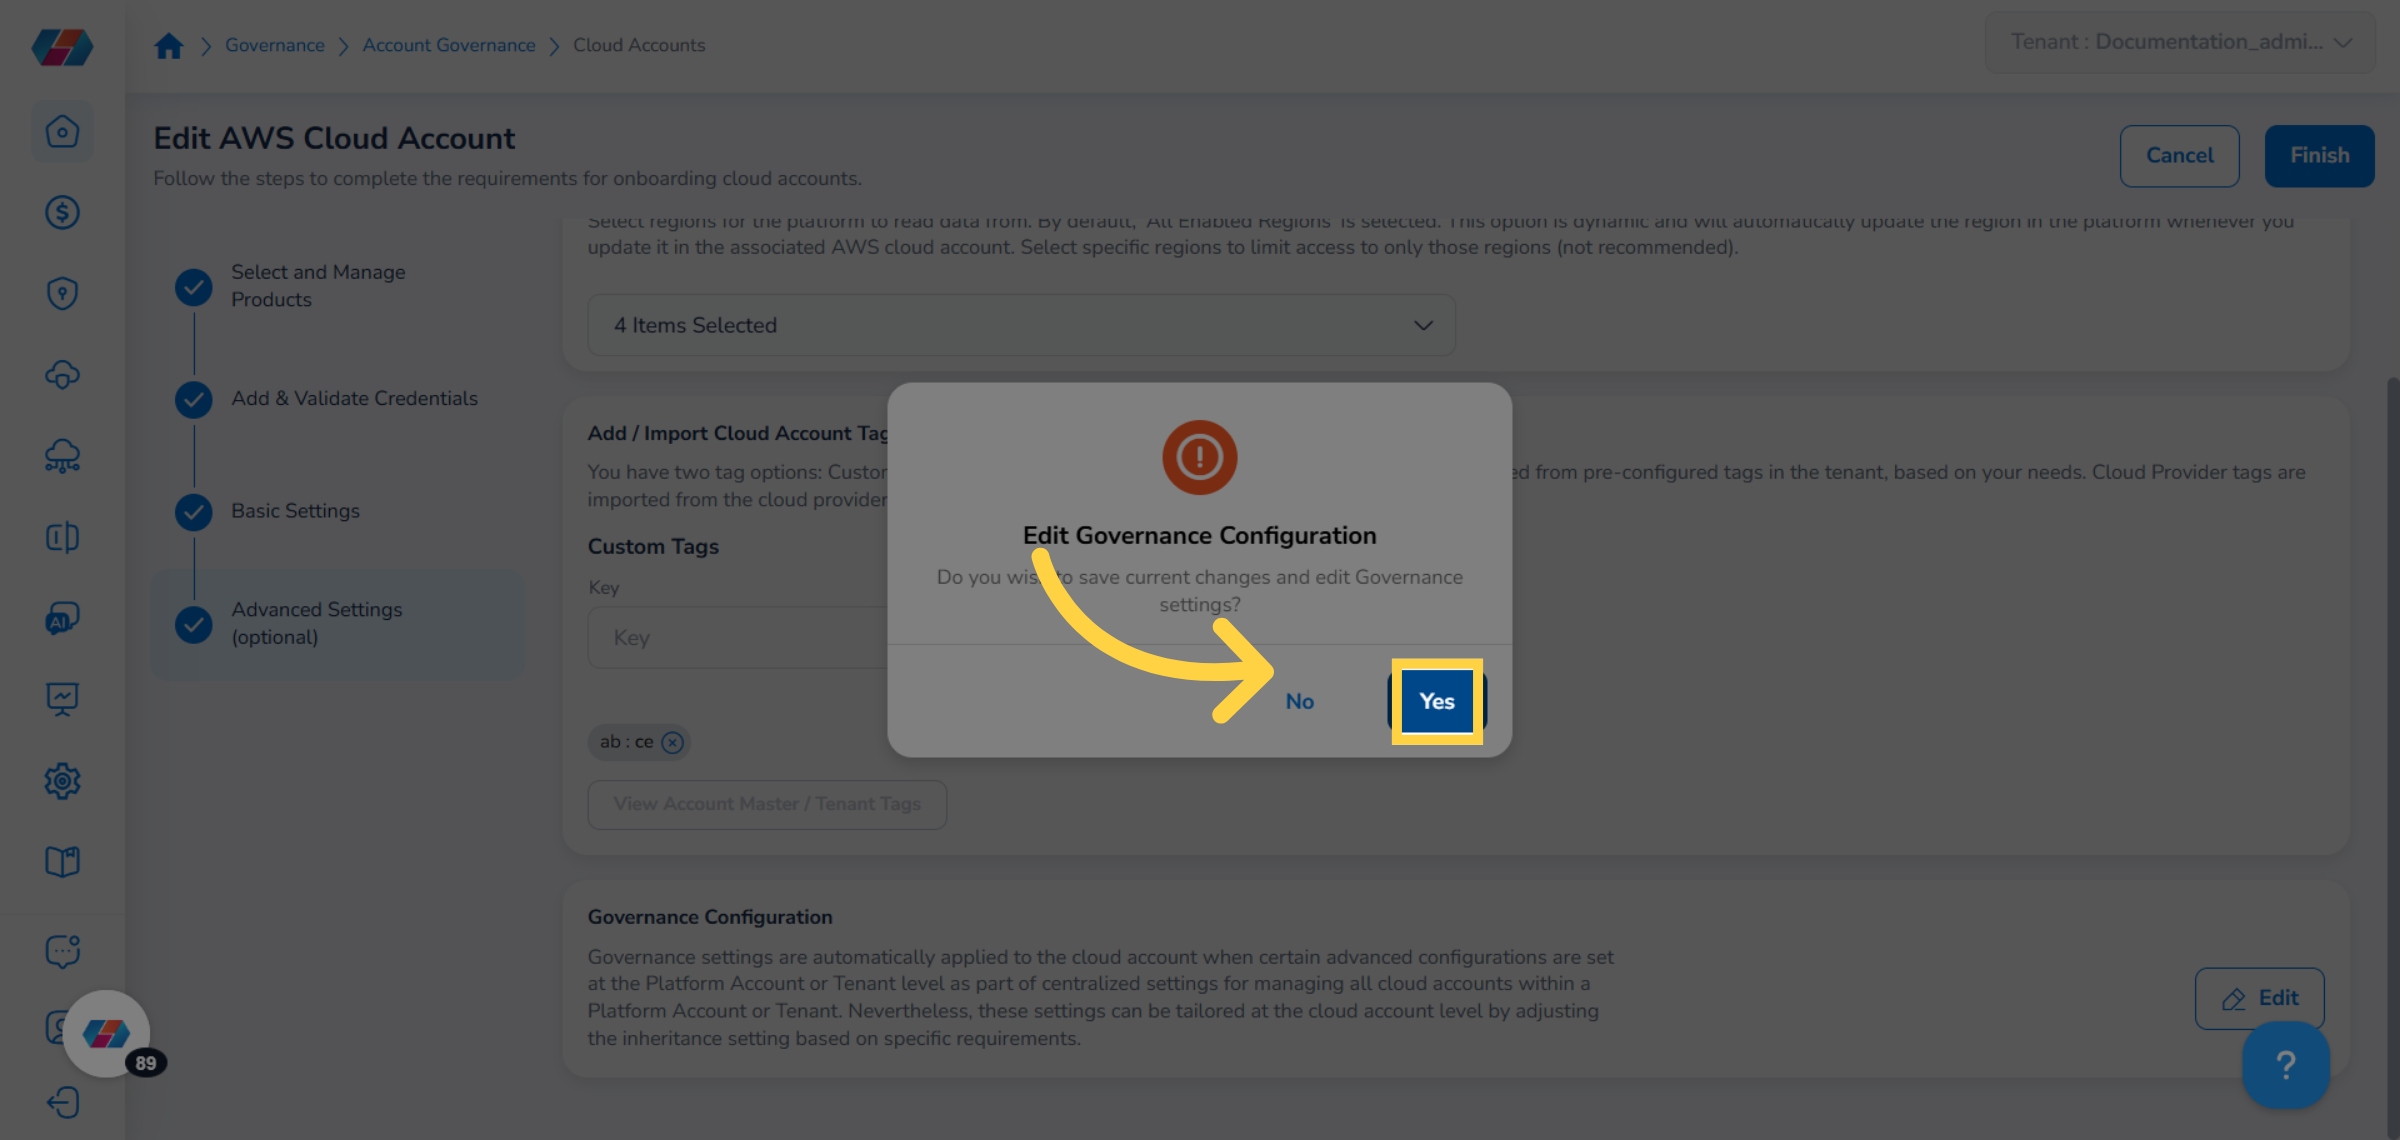
34. Edit Governance Configuration
A dialog box appears. You can click Yes to edit the governance configuration, else click No.
35. Details Tab
The Details tab shows the account details.
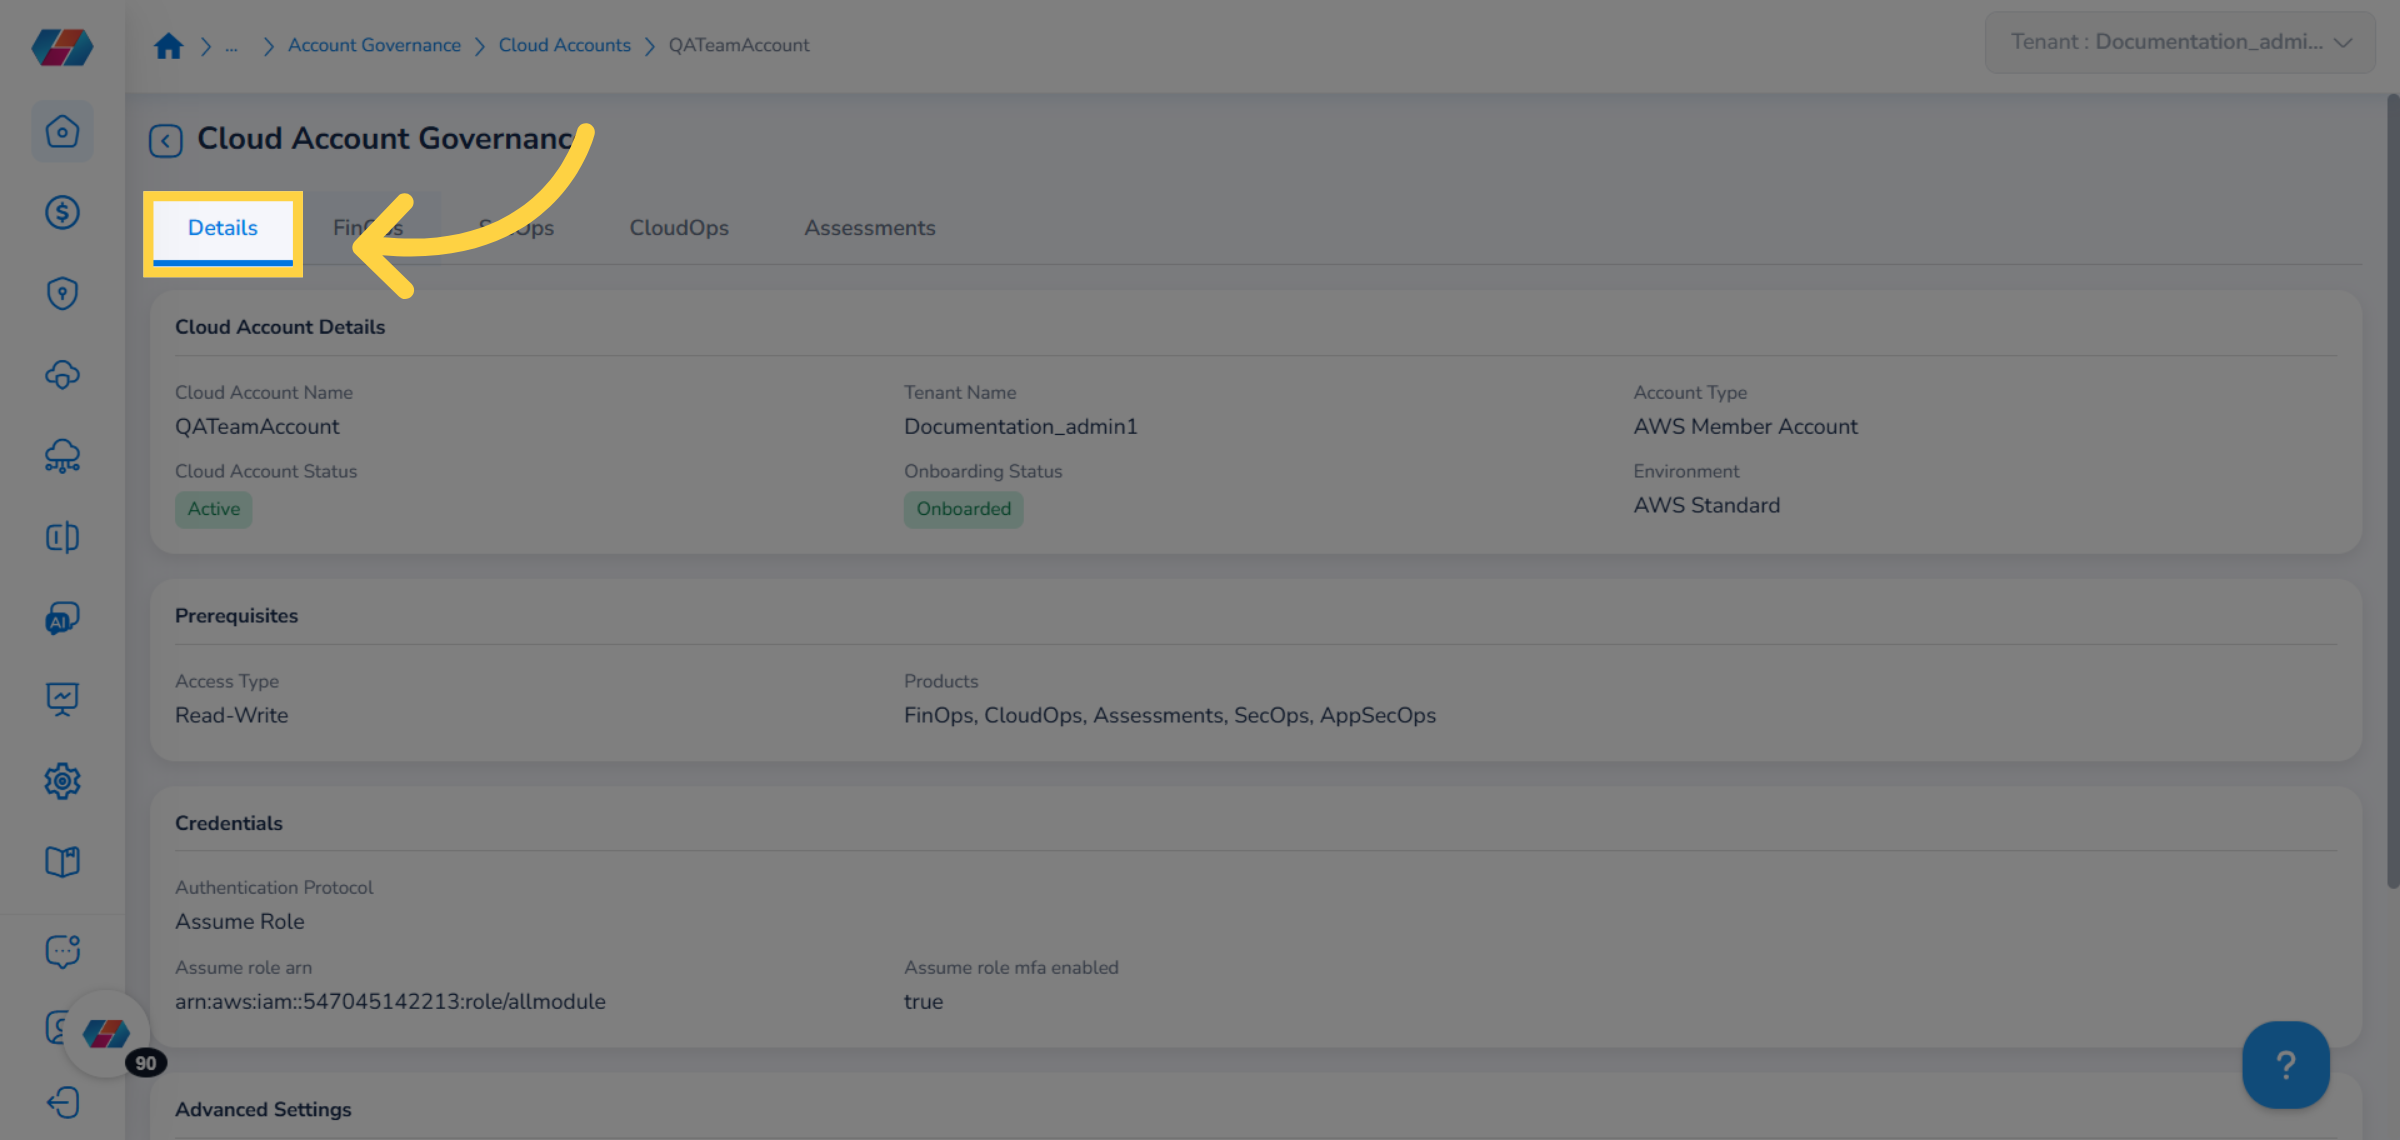
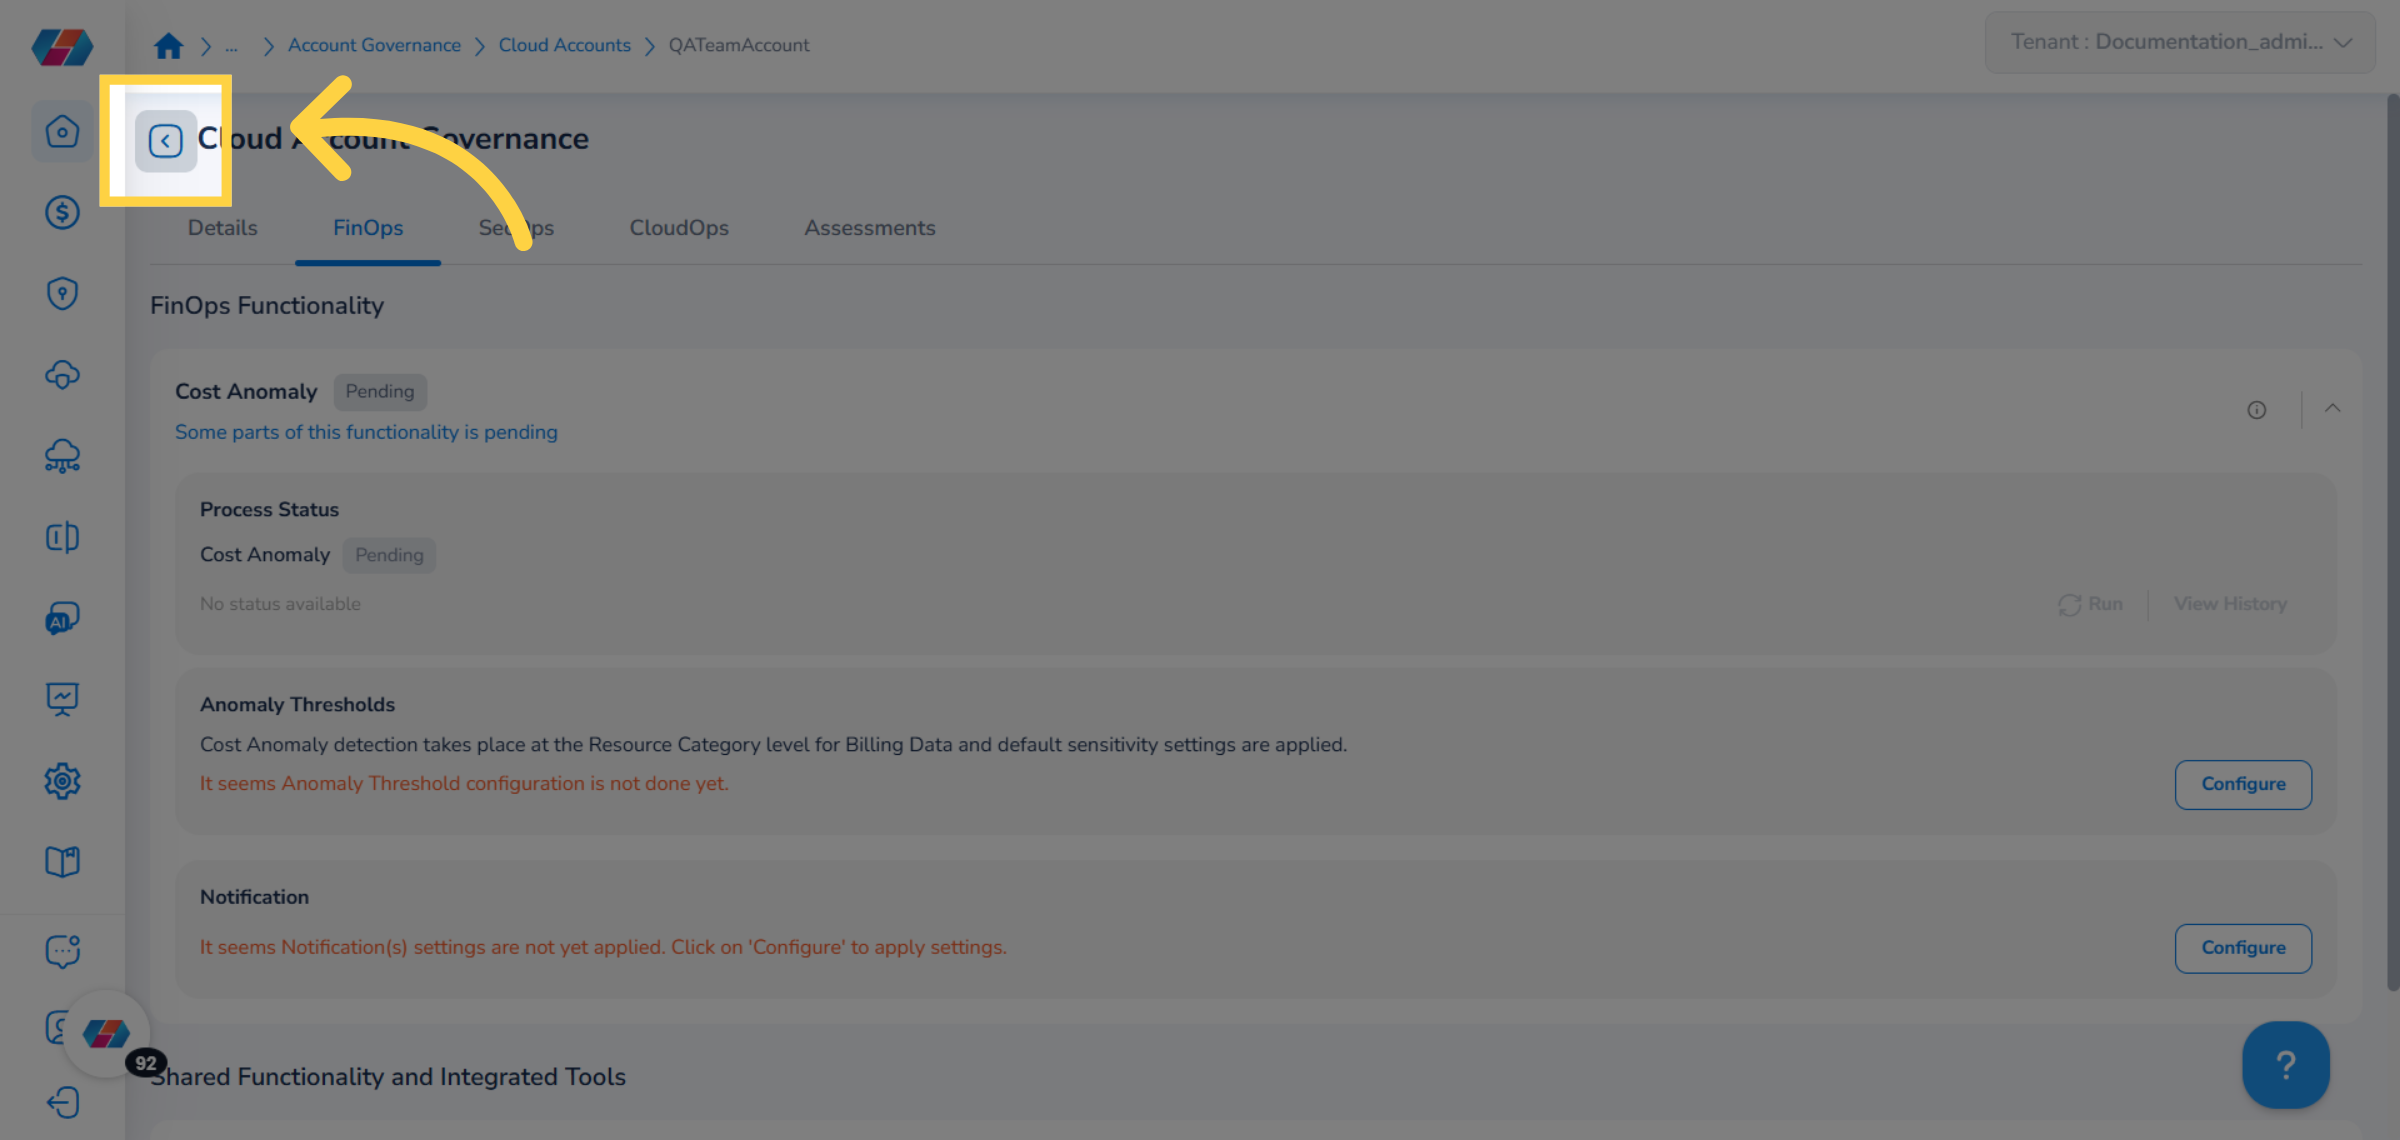
36. Click FinOps Tab
Users can click the product-specific tab and perform the required configurations.
37. Return to Advanced Settings Screen
Click the back arrow to go back to the Advanced Settings page.
38. Click "Finish"
Click Finish to complete the onboarding process.
View Account Governance Dashboard
After the account onboarding process is complete, the onboarded account name appears on the Account Governance Dashboard page. In the Account Governance Dashboard page, the AWS tab shows all account details related to AWS. The top card is divided into two sections -- AWS Management Accounts and AWS Member Accounts. Users can click on either AWS Management Accounts or AWS Member Accounts, and view the account details.
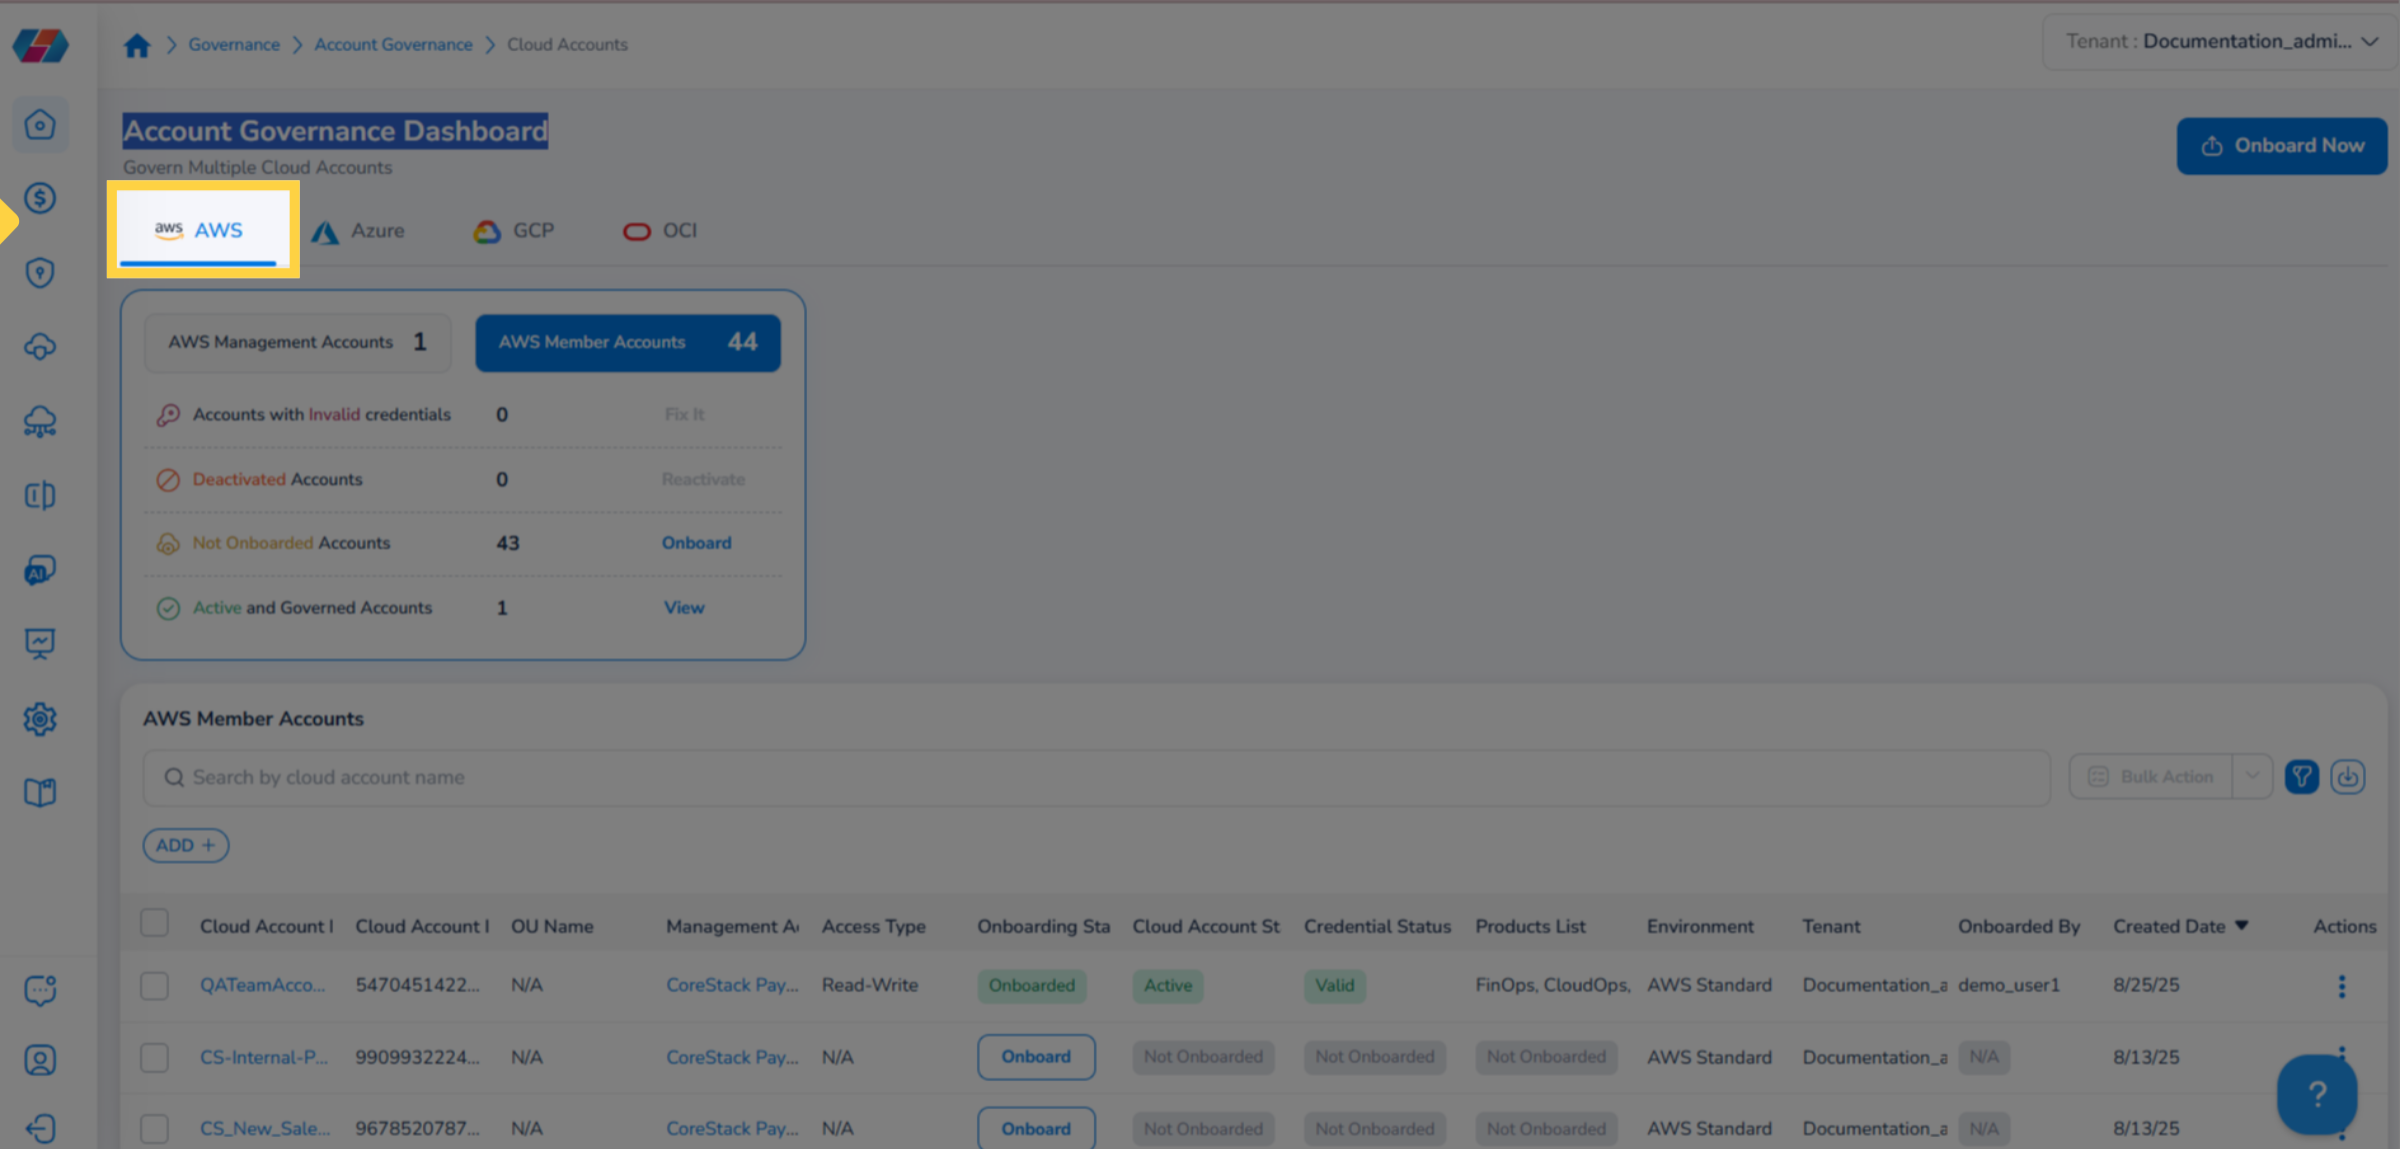
When a user clicks AWS Member Accounts, they can see the accounts categorized into the following, along with the count of accounts and the status:
- Accounts with Invalid Credentials
- Deactivated Accounts
- Not Onboarded Accounts
- Active and Governed Accounts
Users can click on the status like Onboard or View to view the list of accounts within that particular status.
The table that is displayed after the top card shows the list of AWS Member accounts and its details. Users can view the account details in these columns -- Cloud Account Name, Cloud Account ID, OU Name, Management Account, Access Type, Onboarding Status, Cloud Account Status, Credential Status, Product List, Environment, Tenant, Onboarded By, Created Date, and Actions.
Additional Actions
Some additional actions that users can take are:
- Use the search box to search for any account.
- Click the Filter icon on the right side of the screen to hide or display the ADD+ filter option.
- Click the download icon to download account details.
- Users can select multiple accounts and click Bulk Action to take collective action on selected accounts. The options within the Bulk Action drop-down are Activate, Deactivate, and Delete.
Add Custom Filters
Perform the following steps to add custom filters:
1. Click ADD+
To add a custom filter, click ADD+ and select an option. In this case, the option Cloud Account Status is selected.
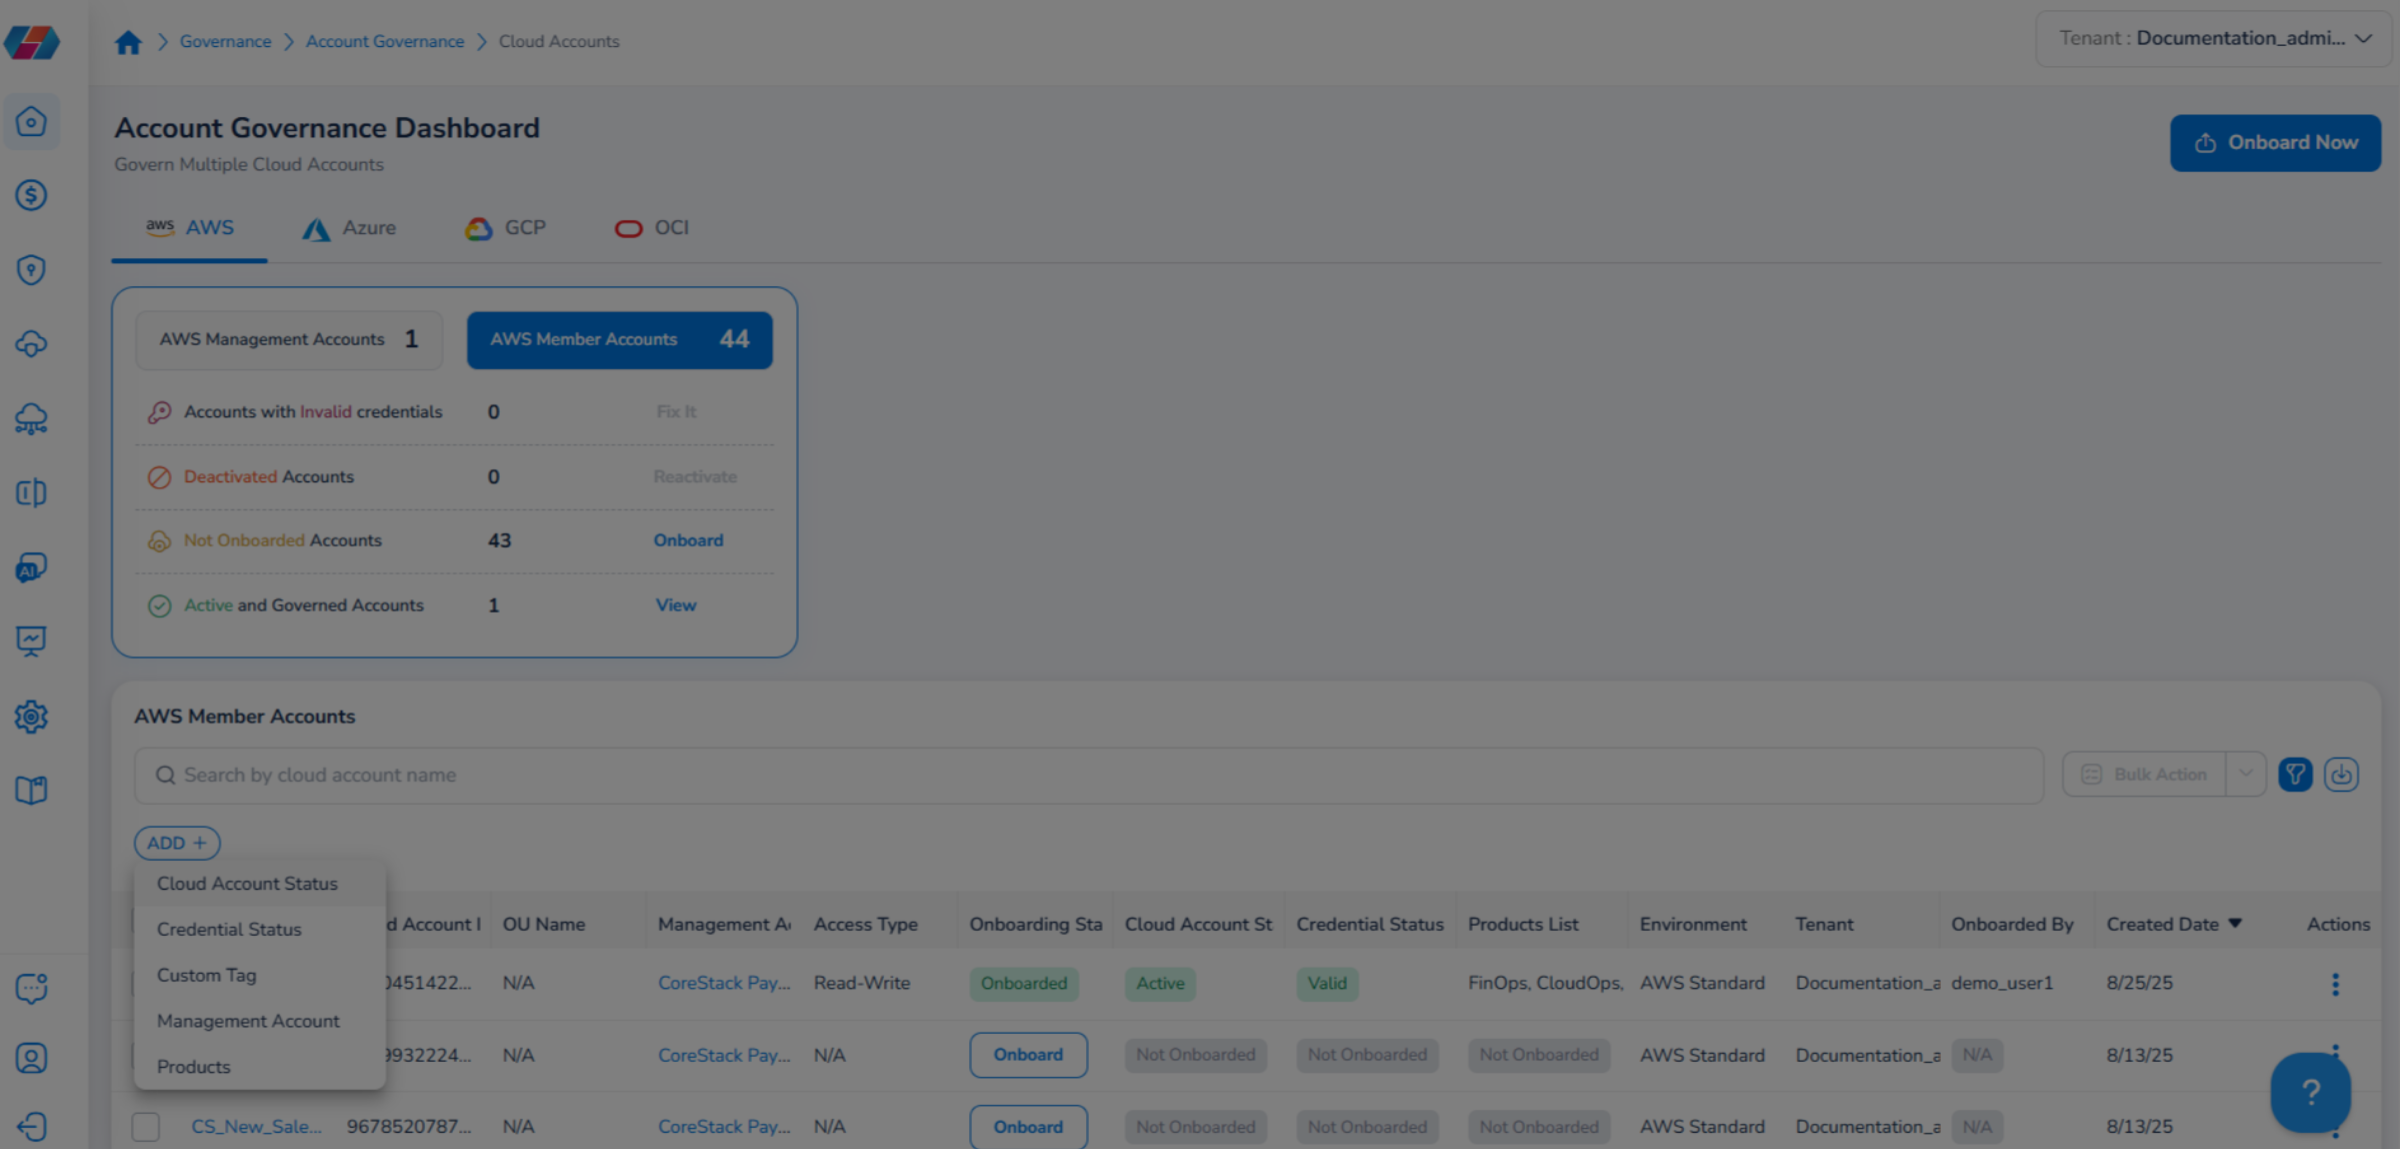
2. Select Option(s) for Filter
Click the drop-down list that appears for the filter and select all relevant options. After that, click Ok.
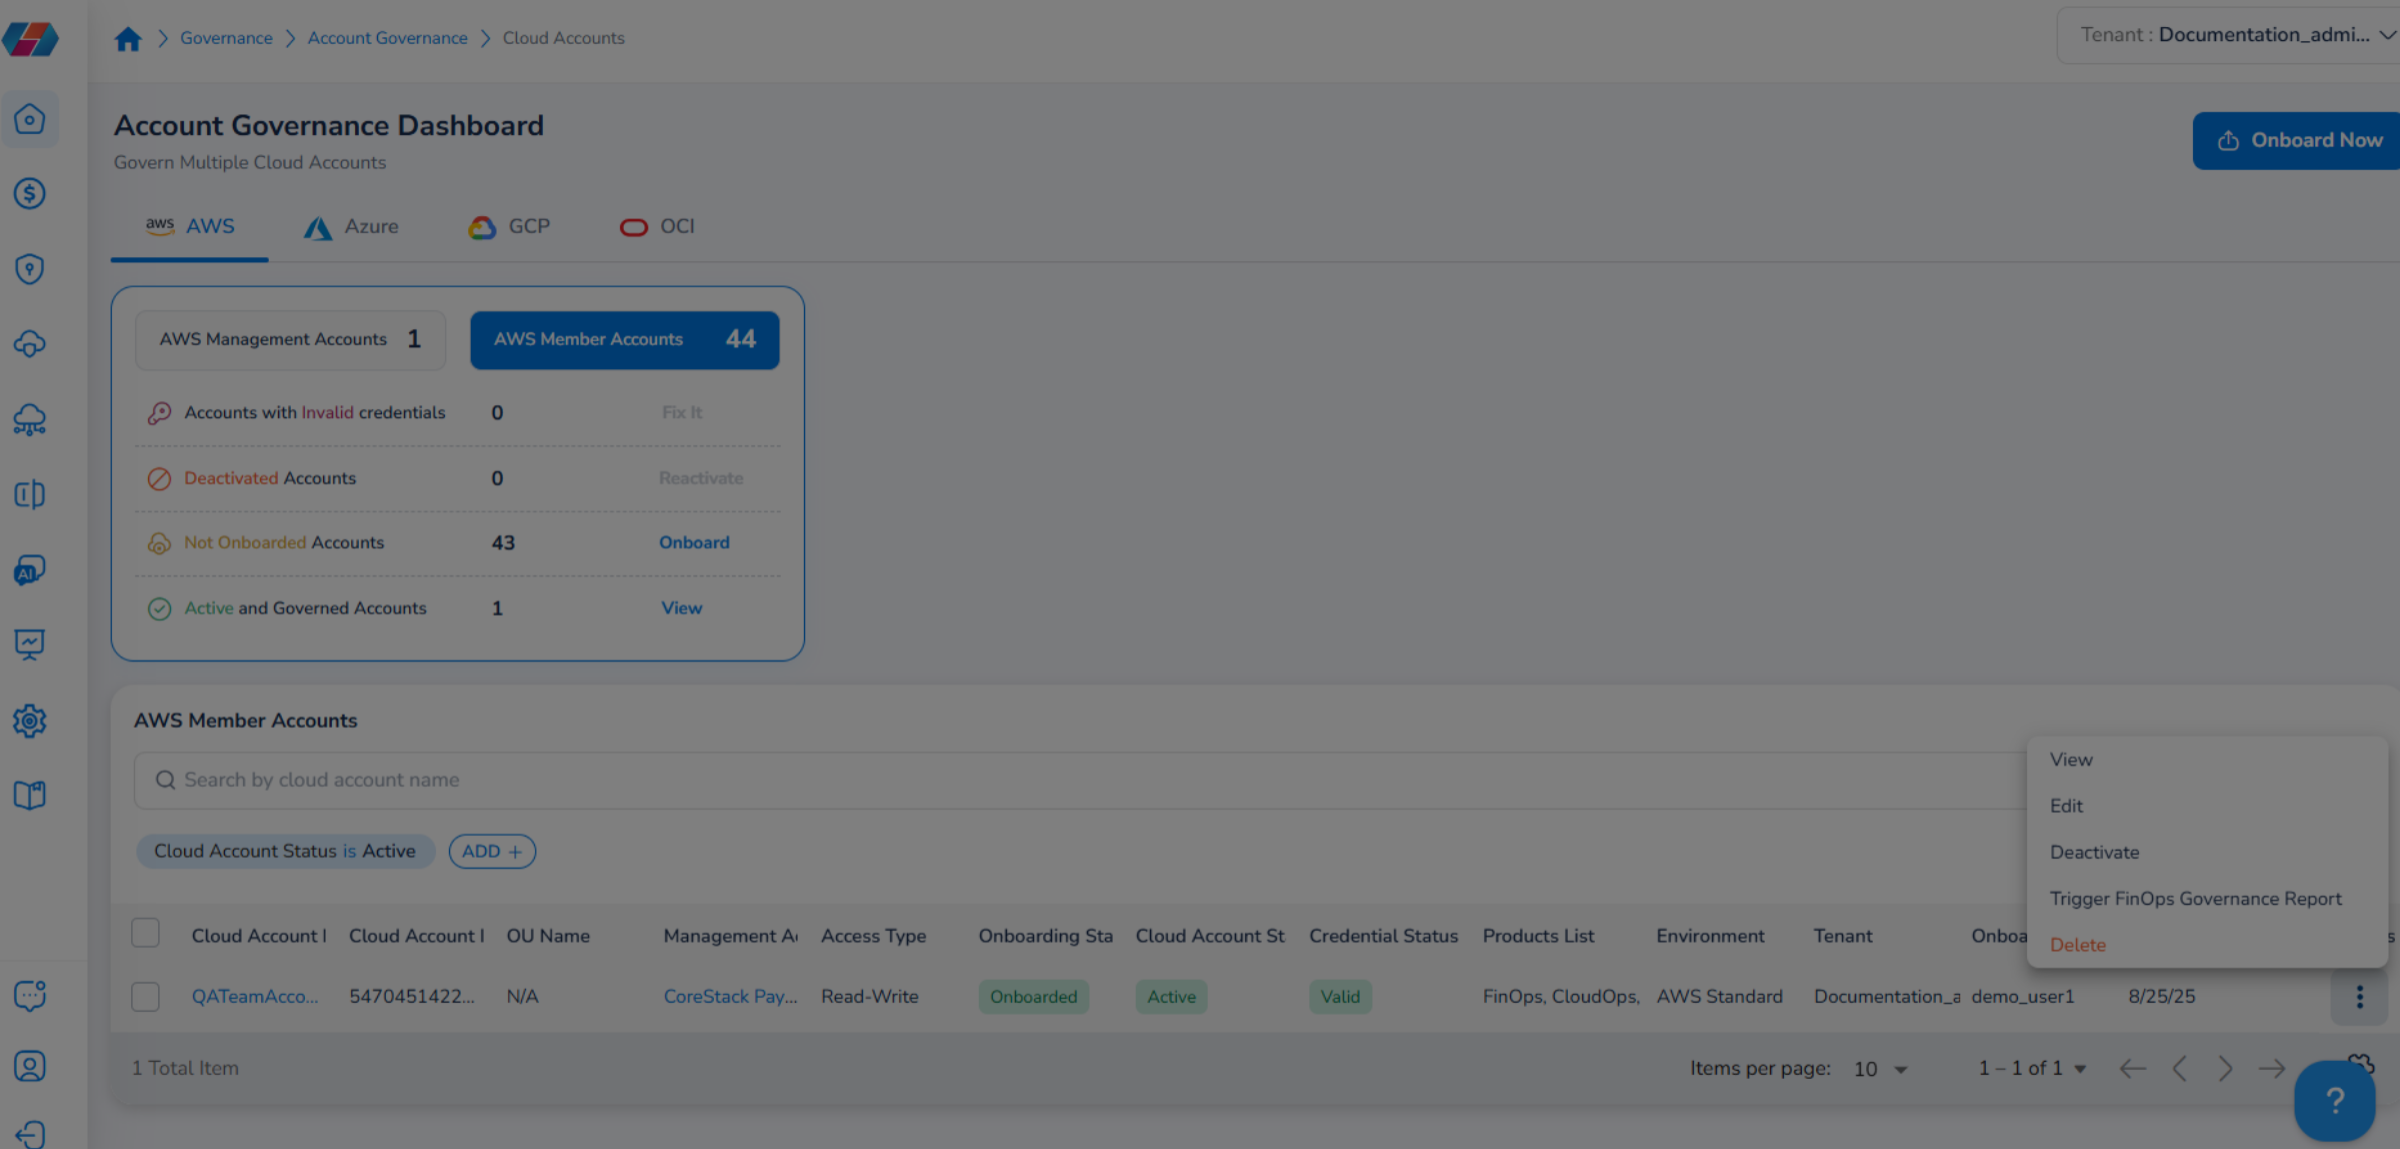
Actions on Account
Users can click the ellipses that appears under the Actions column and take any of the following actions:
- View
- Edit
- Deactivate
- Trigger FinOps Governance Report
- Delete
View Account Details
Perform the following steps to view AWS government cloud details:
1. View Action
Click the ellipses and select the View action.
2. View the "Cloud Account Governance" Page
The Cloud Account Governance page appears and users can view various tabs. Each tab corresponds to the product selected during onboarding the AWS cloud account.
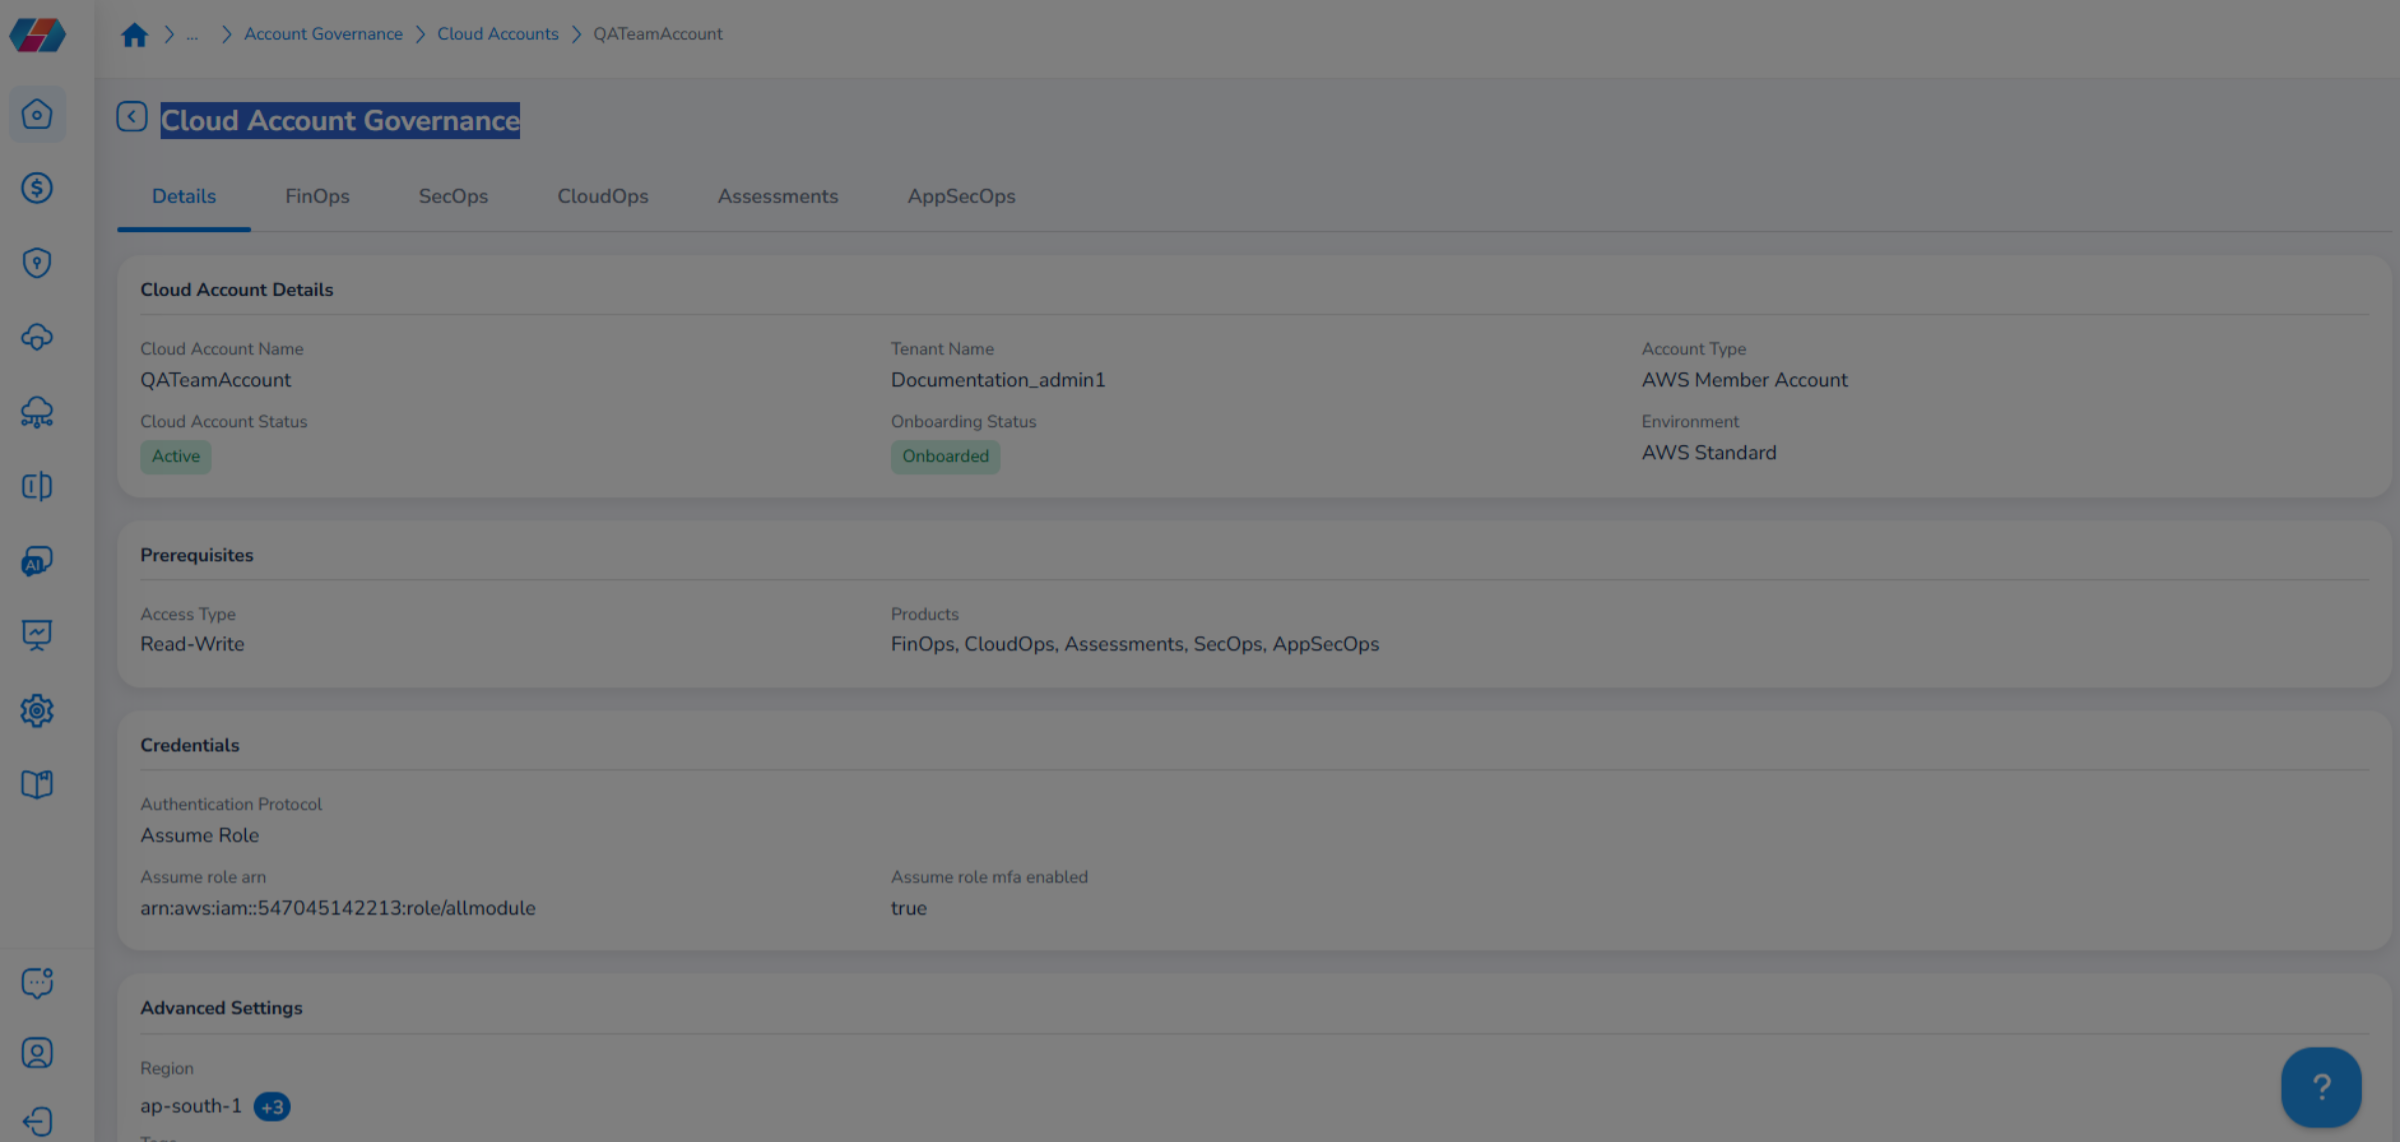
3. View Details Tab
The Details tab shows information in these sections -- Cloud Account Details, Prerequisites, Credentials, and Advanced Settings.
4. View FinOps Tab
The FinOps tab shows the FinOps governance configurations along with shared functionalities and integrated tools. Users cannot make changes in this tab and can only view the details.
Edit Account Details
Perform the following steps to edit account details:
1. Edit Action
Click the ellipses and select the Edit action.
2. Make Updates and Finish
The Edit AWS Cloud Account screen appears and users can now make updates to the cloud account. Users can go to any step and make the updates. After making the updates, ensure to click Finish.
Deactivate an Account
Perform the following steps to deactivate an account:
1. Deactivate Action
Click the ellipses and select the Deactivate action. This opens a dialog box.
2. Select Yes or No
In the dialog box that appears, select Yes to deactivate the account, else click No.
Trigger FinOps Governance Report Action
Perform the following steps to trigger FinOps Governance Report:
1. Select "Trigger FinOps Governance Report"
Click the ellipses and select the Trigger FinOps Governance Report action. This opens a dialog box.
2. Select Yes or No
In the dialog box that appears, select Yes to trigger the FinOps Governance Report, else click No.
Delete an Account
Perform the following steps to delete an account:
1. Delete Action
Click the ellipses and select the Delete action. This opens a dialog box.
2. Select Yes or No
In the dialog box that appears, select Yes to delete the account, else click No.
Note:The government cloud accounts are organized in a hierarchy and each is linked to a single standard AWS account. Costs are always billed to the associated standard account, but CUR/Cost Explorer cannot distinguish government cloud usage. No direct API exists to map accounts, so users must assign this mapping, which can be stored in
service_account_details.billing_account_id.
This guide detailed the comprehensive process of onboarding and managing AWS Government Cloud accounts within CoreStack.
Updated 8 months ago