

Budget - Page View
Learn how to efficiently manage Budget Page Views within the FinOps module.
Introduction
This guide provides step-by-step instructions to customize, save, and organize your budget views for better financial oversight.
Existing Page View
Follow the steps below to know about page views:
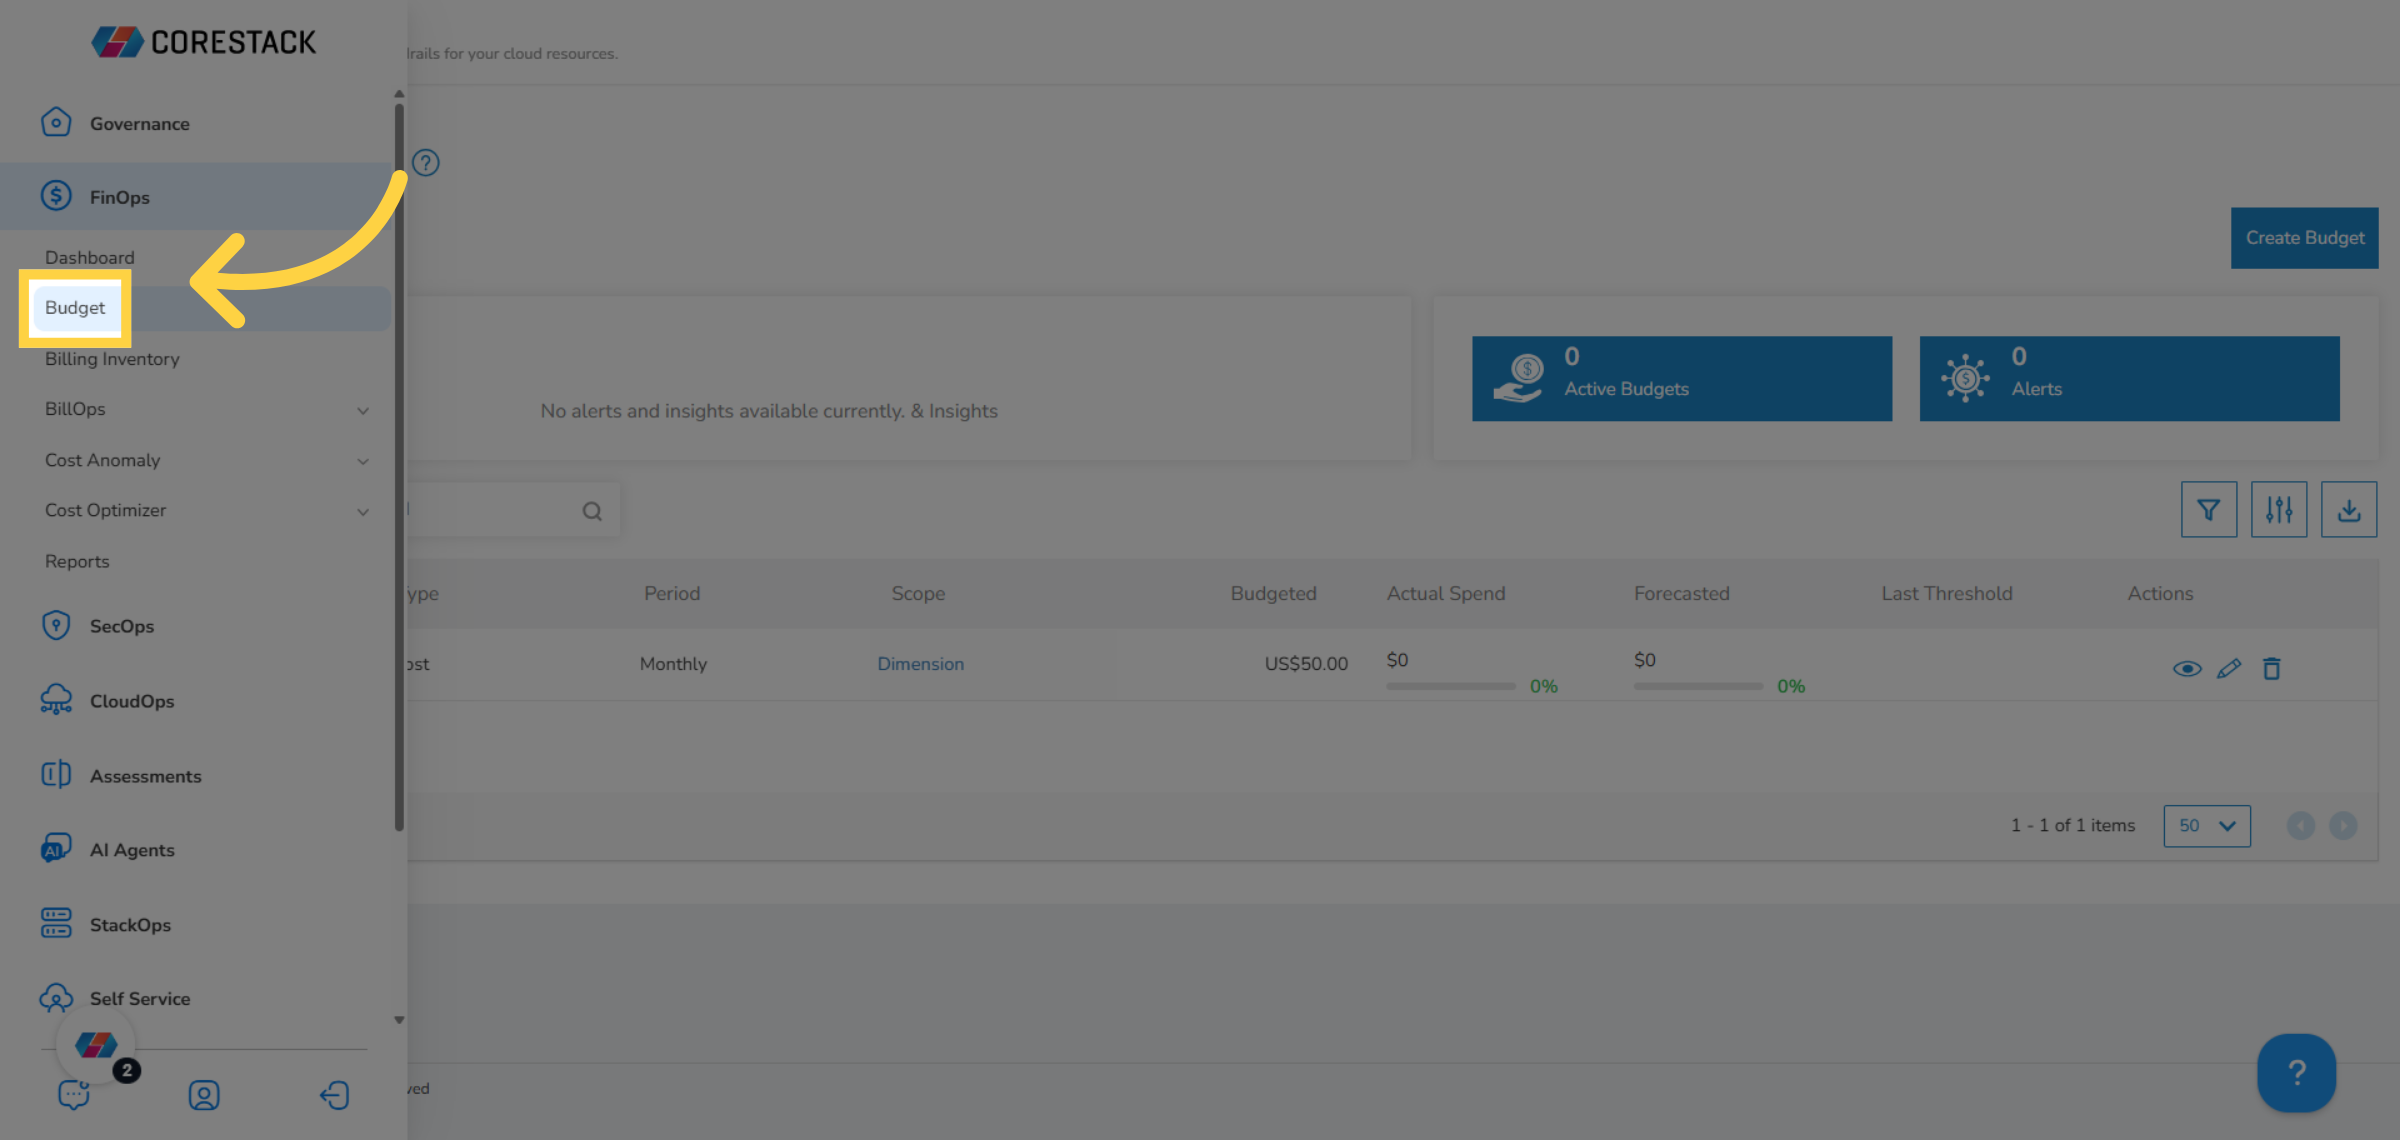
1. Login to the Platform
Login to the platform with your credentials.
2. Navigate to "FinOps" in the Main Menu
On the left navigation pane, click FinOps.
3. Select "Budget" in the Main Menu
Click to select Budget.
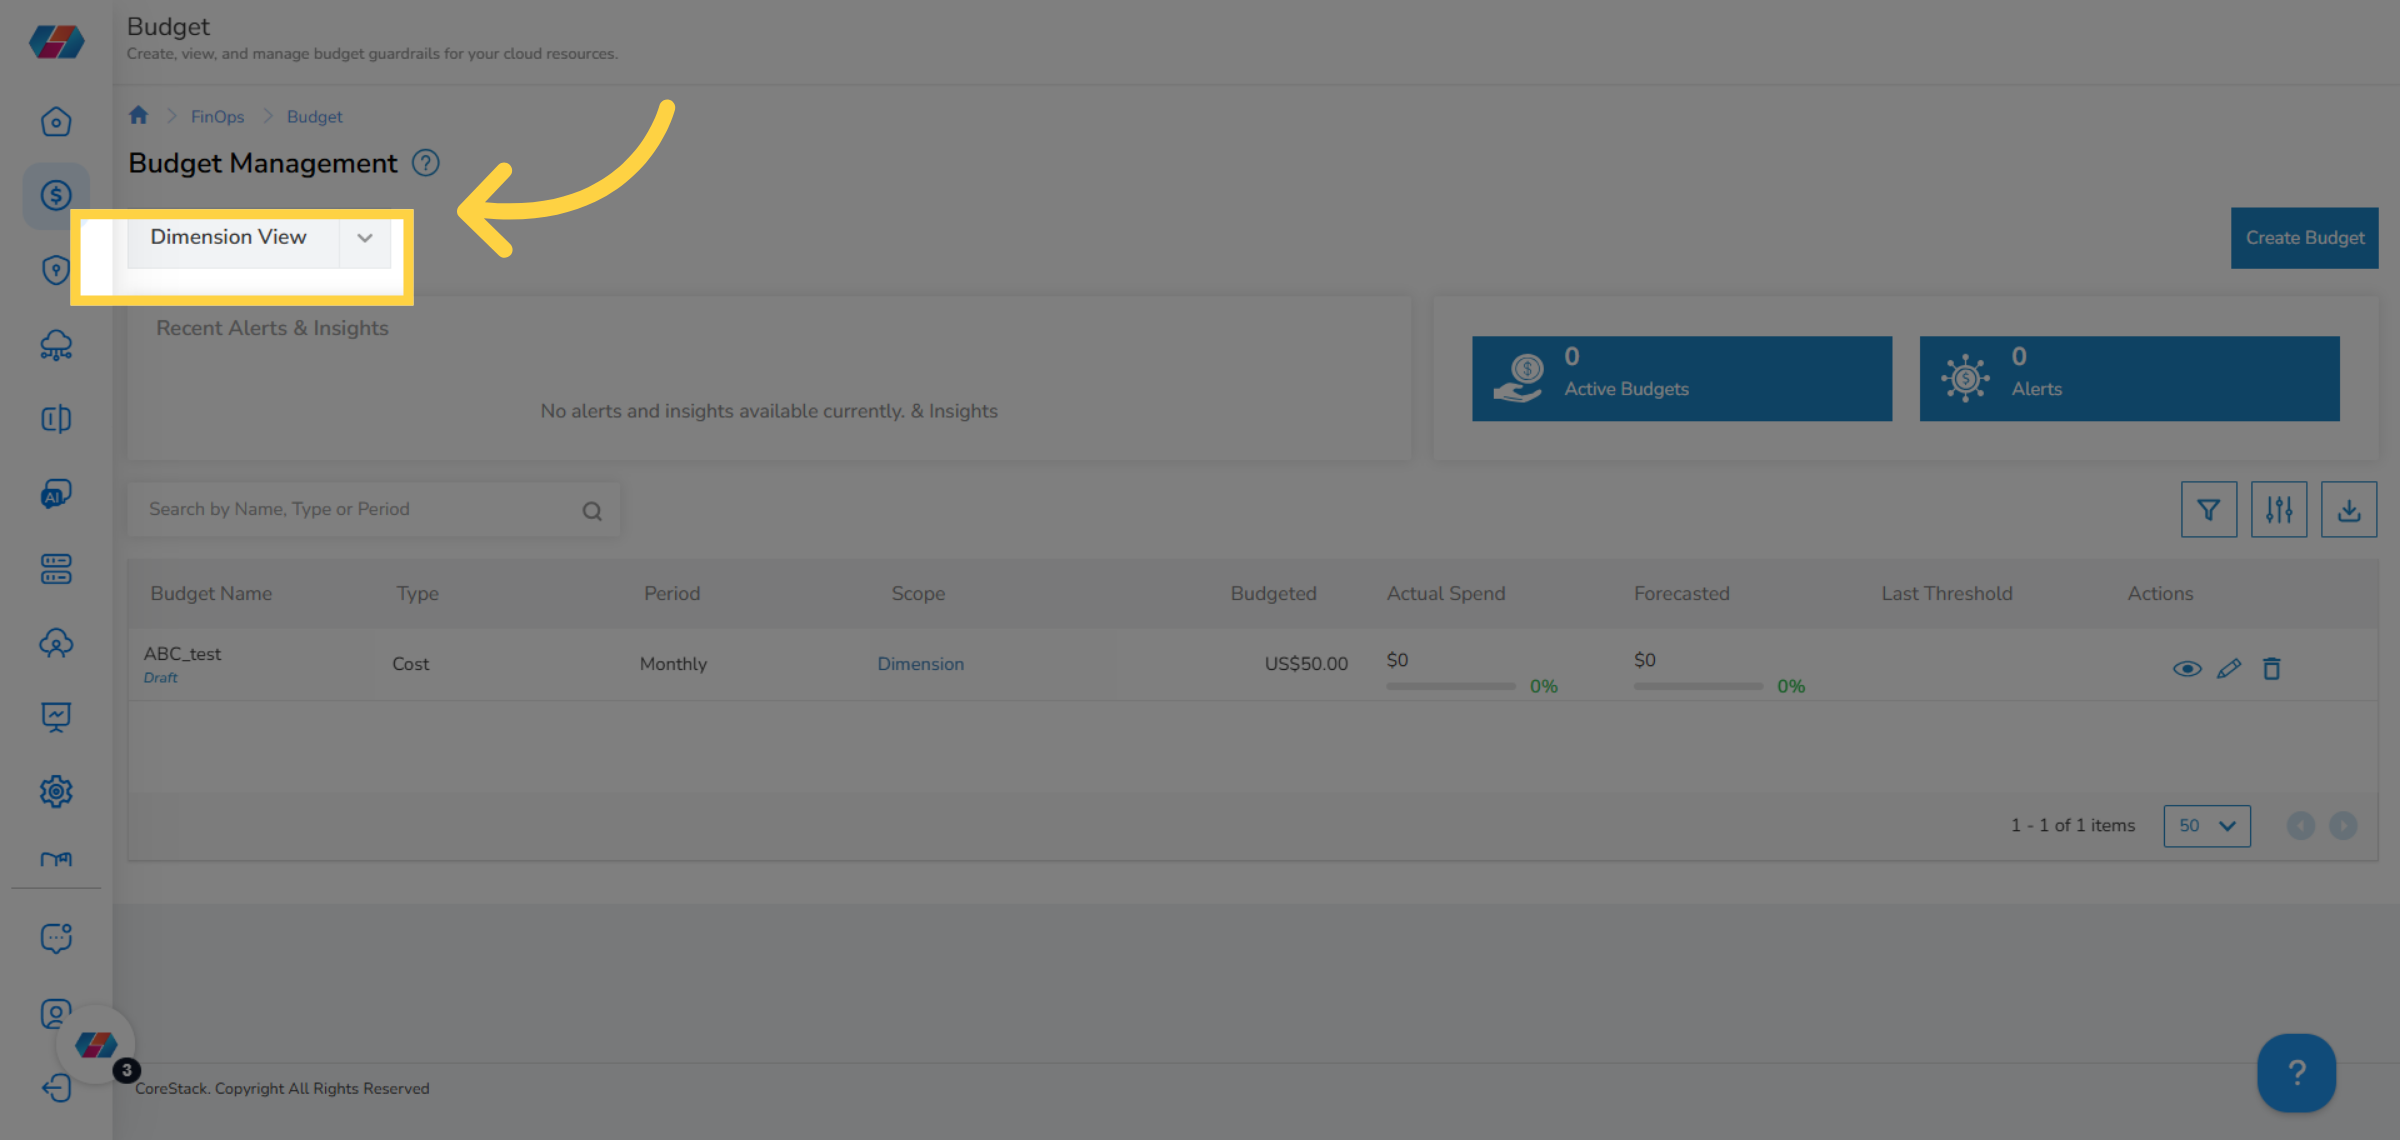
4. Click the drop-down
You can see the current page view name that is being displayed on the screen (towards the top-left corner of the screen). To know about the existing views or to change an existing view, click the drop-down list on the top-left side of the screen.
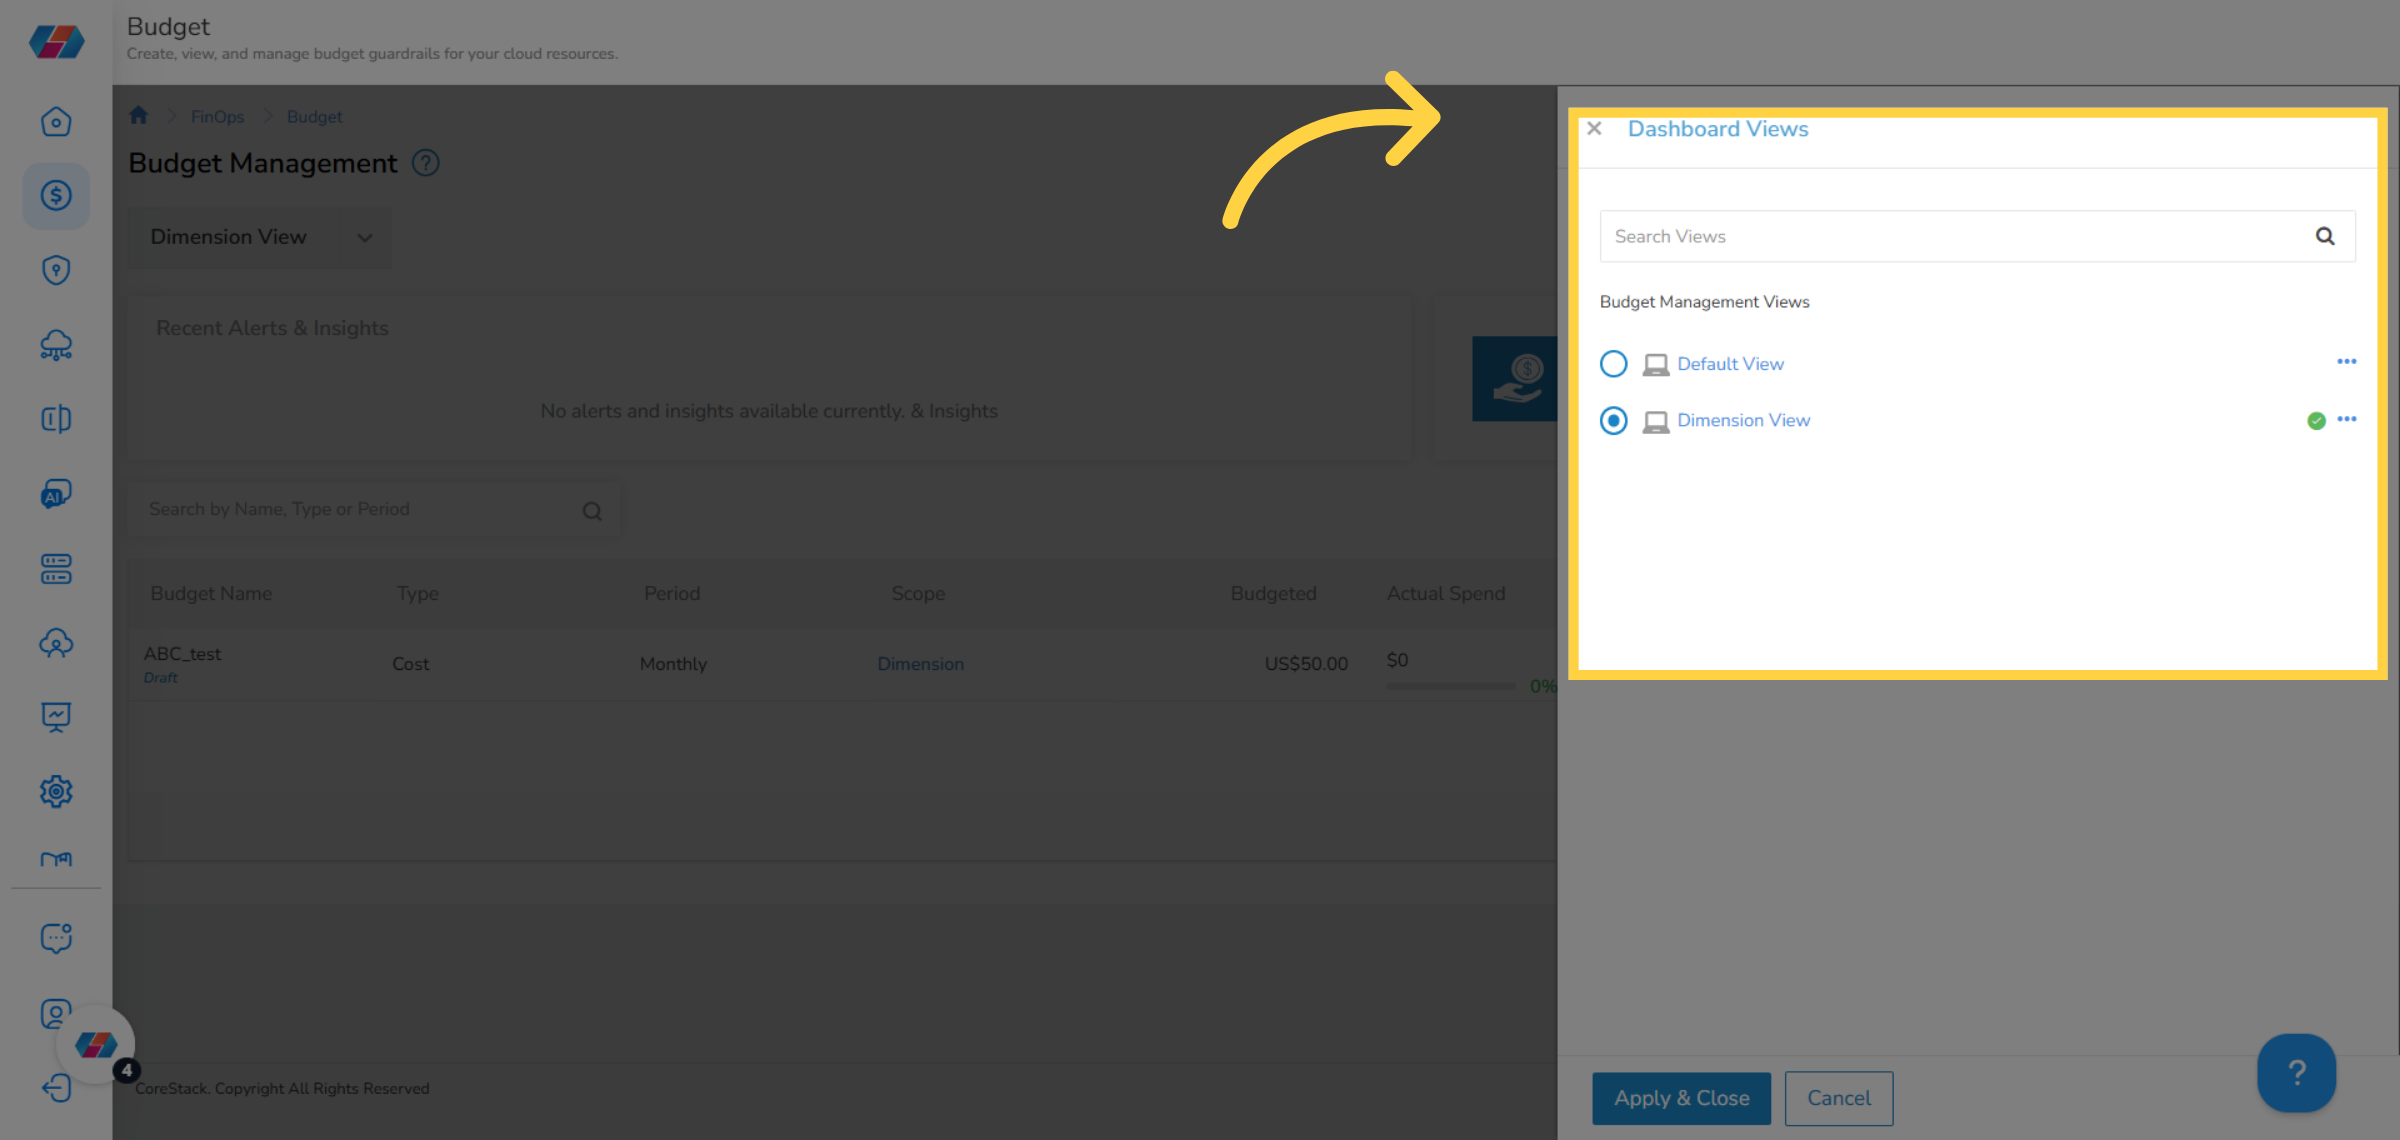
5. Dashboard Views
After you click the drop-down list on the top-left corner of the screen, the Dashboard Views screen appears and users can view the list of existing views. The existing Budget Management Views that users can see in this case are -- Default View and Dimension View. The Dimension View is marked as the default view with a green tick mark next to it.
6. Change View
To switch to another page view, just select another view. You can see details on the Budget page as per the selected view.
7. Search for Views
Use the Search Views box to find any existing budget views quickly.
Create Page View
Perform the following steps to create a page view:
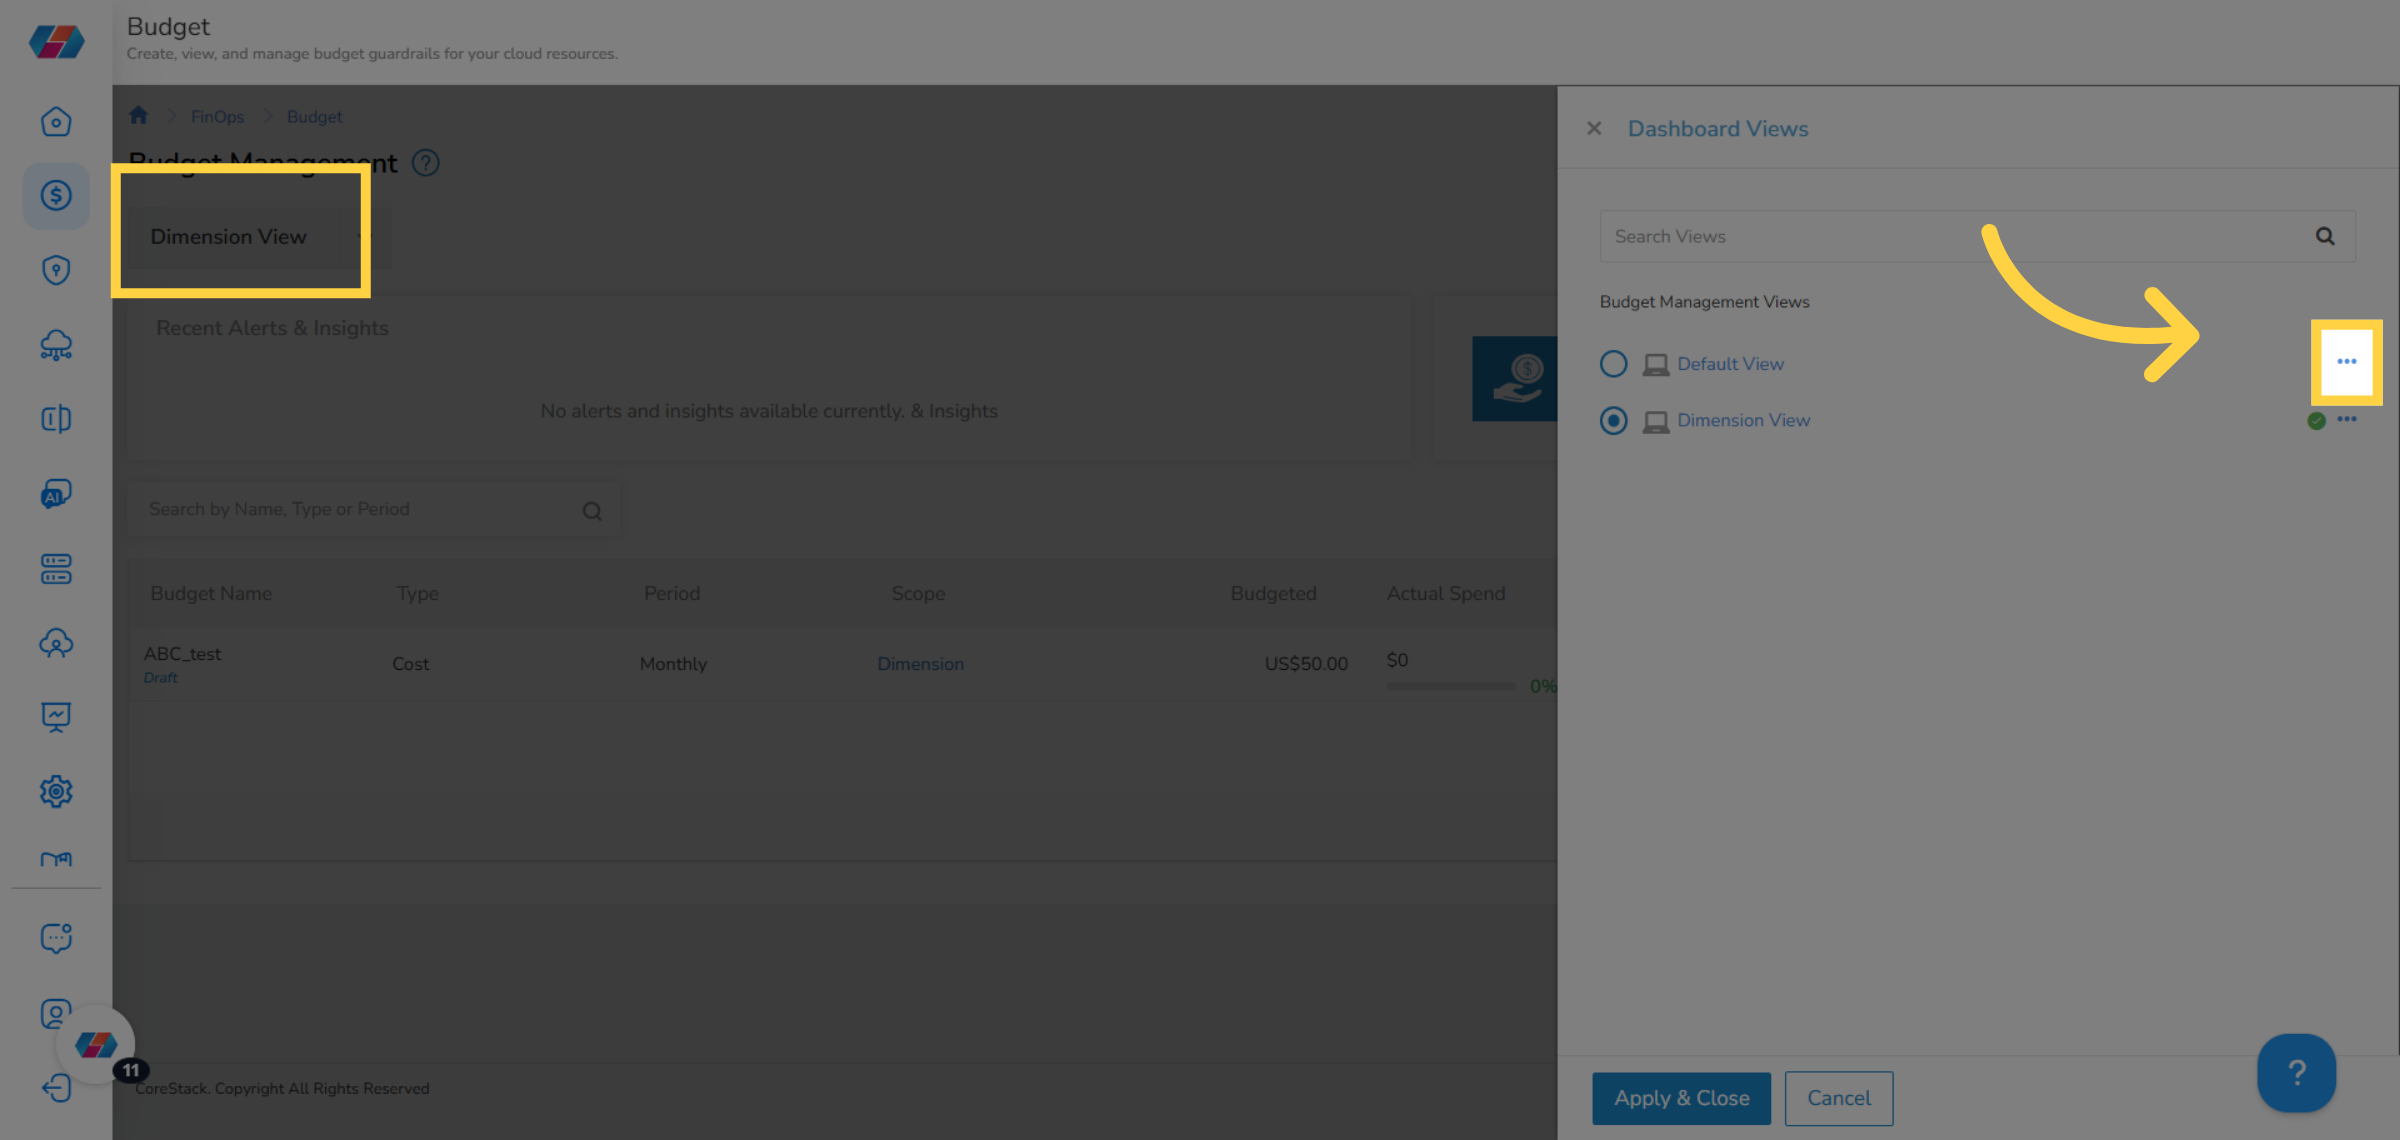
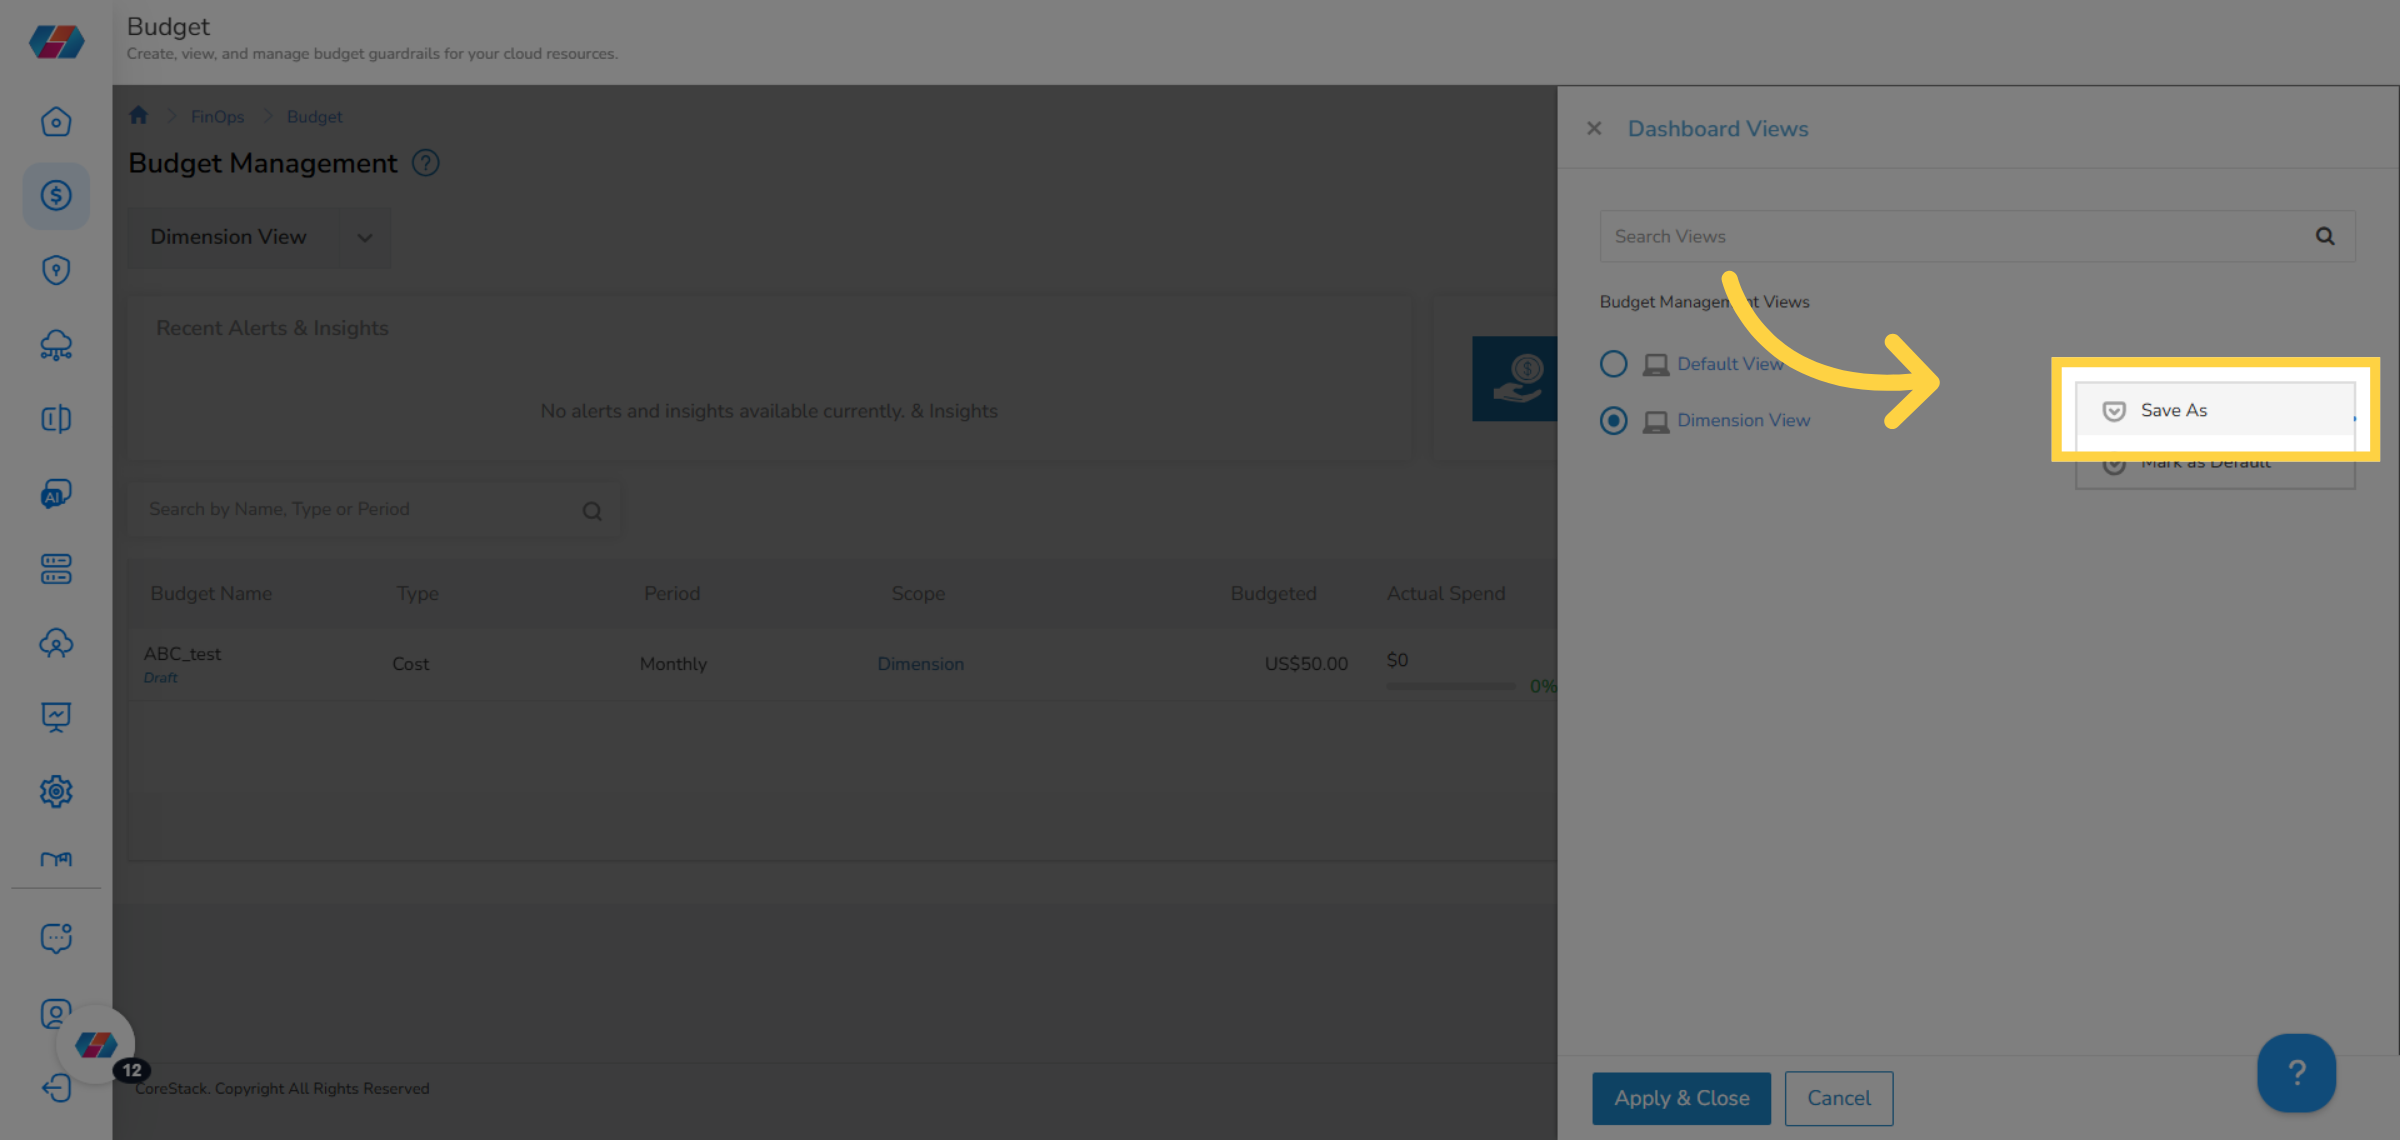
1. Click the Ellipses
To create a custom view, make all settings or apply relevant filters on the Budget page. Next, click the drop-down list on the top-left corner of the screen and on the Dashboard Views screen, click the ellipses.
2. Select "Save As"
Select the Save As option to create a new budget view based on current settings.
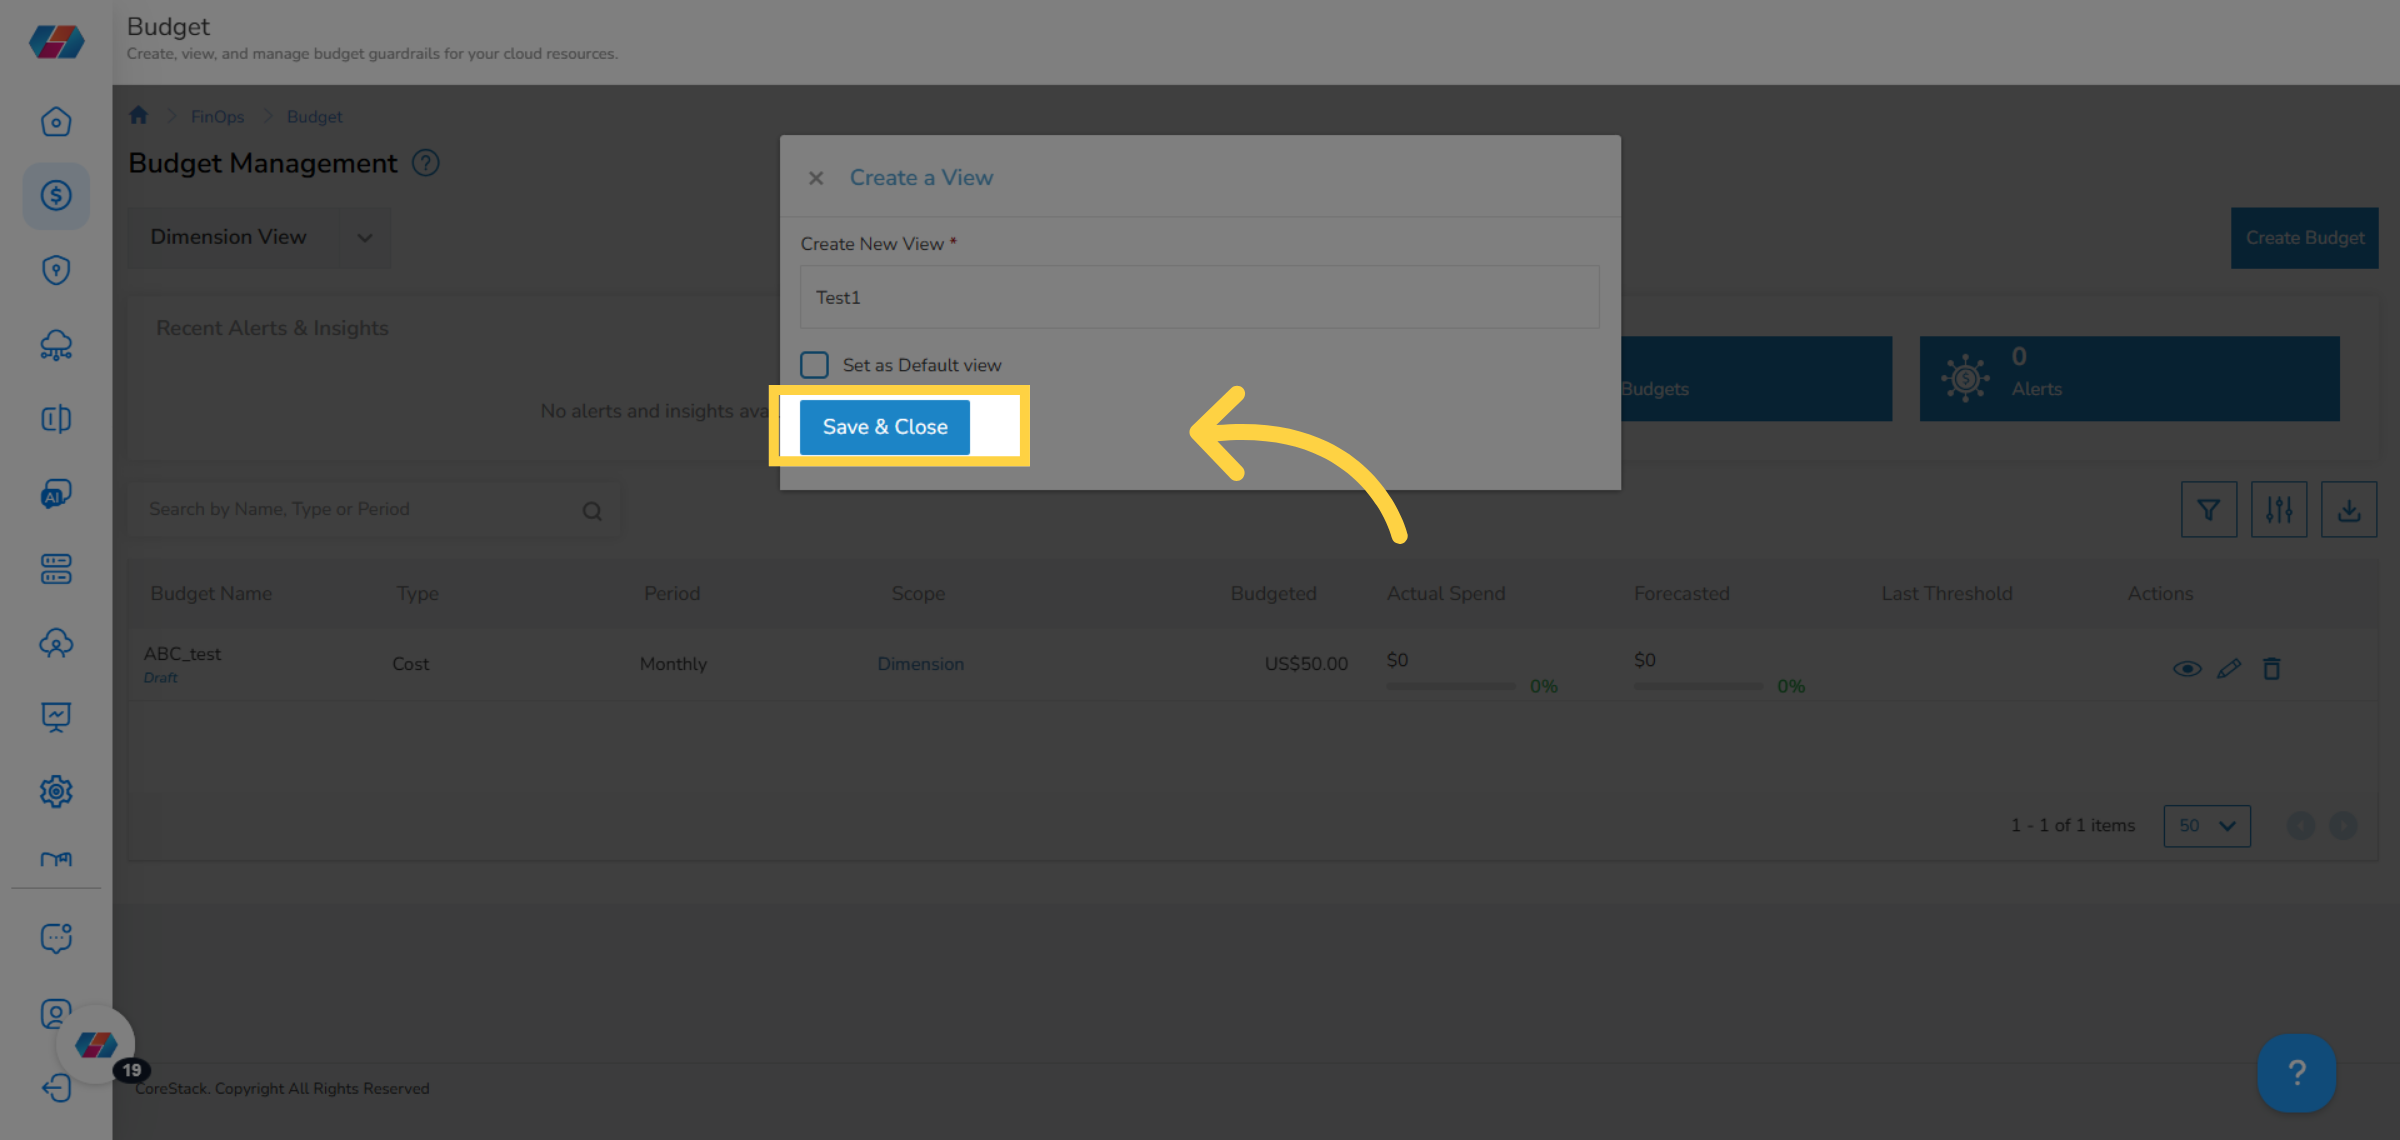
3. Enter Your View Name
In the Create a View dialog box, in the Create New View box, type a custom view name.
4. Set as Default View
To mark this custom view as a default view, select the Set as Default View dialog box.
5. Save & Close
Click Save & Close to save the new custom view.
6. Another Custom View
To create another custom view, click the drop-down list on the top-left corner of the screen to open the Dashboard Views screen. After that, click the ellipses, and select Save As.
7. Enter View Name and Save
In the Create New View box, enter the view name and click Save & Close.
Note:Select the Set as Default View checkbox to mark the new view as a default view. After the new view is created, it will have a green tick mark symbol next to it that represents default view.
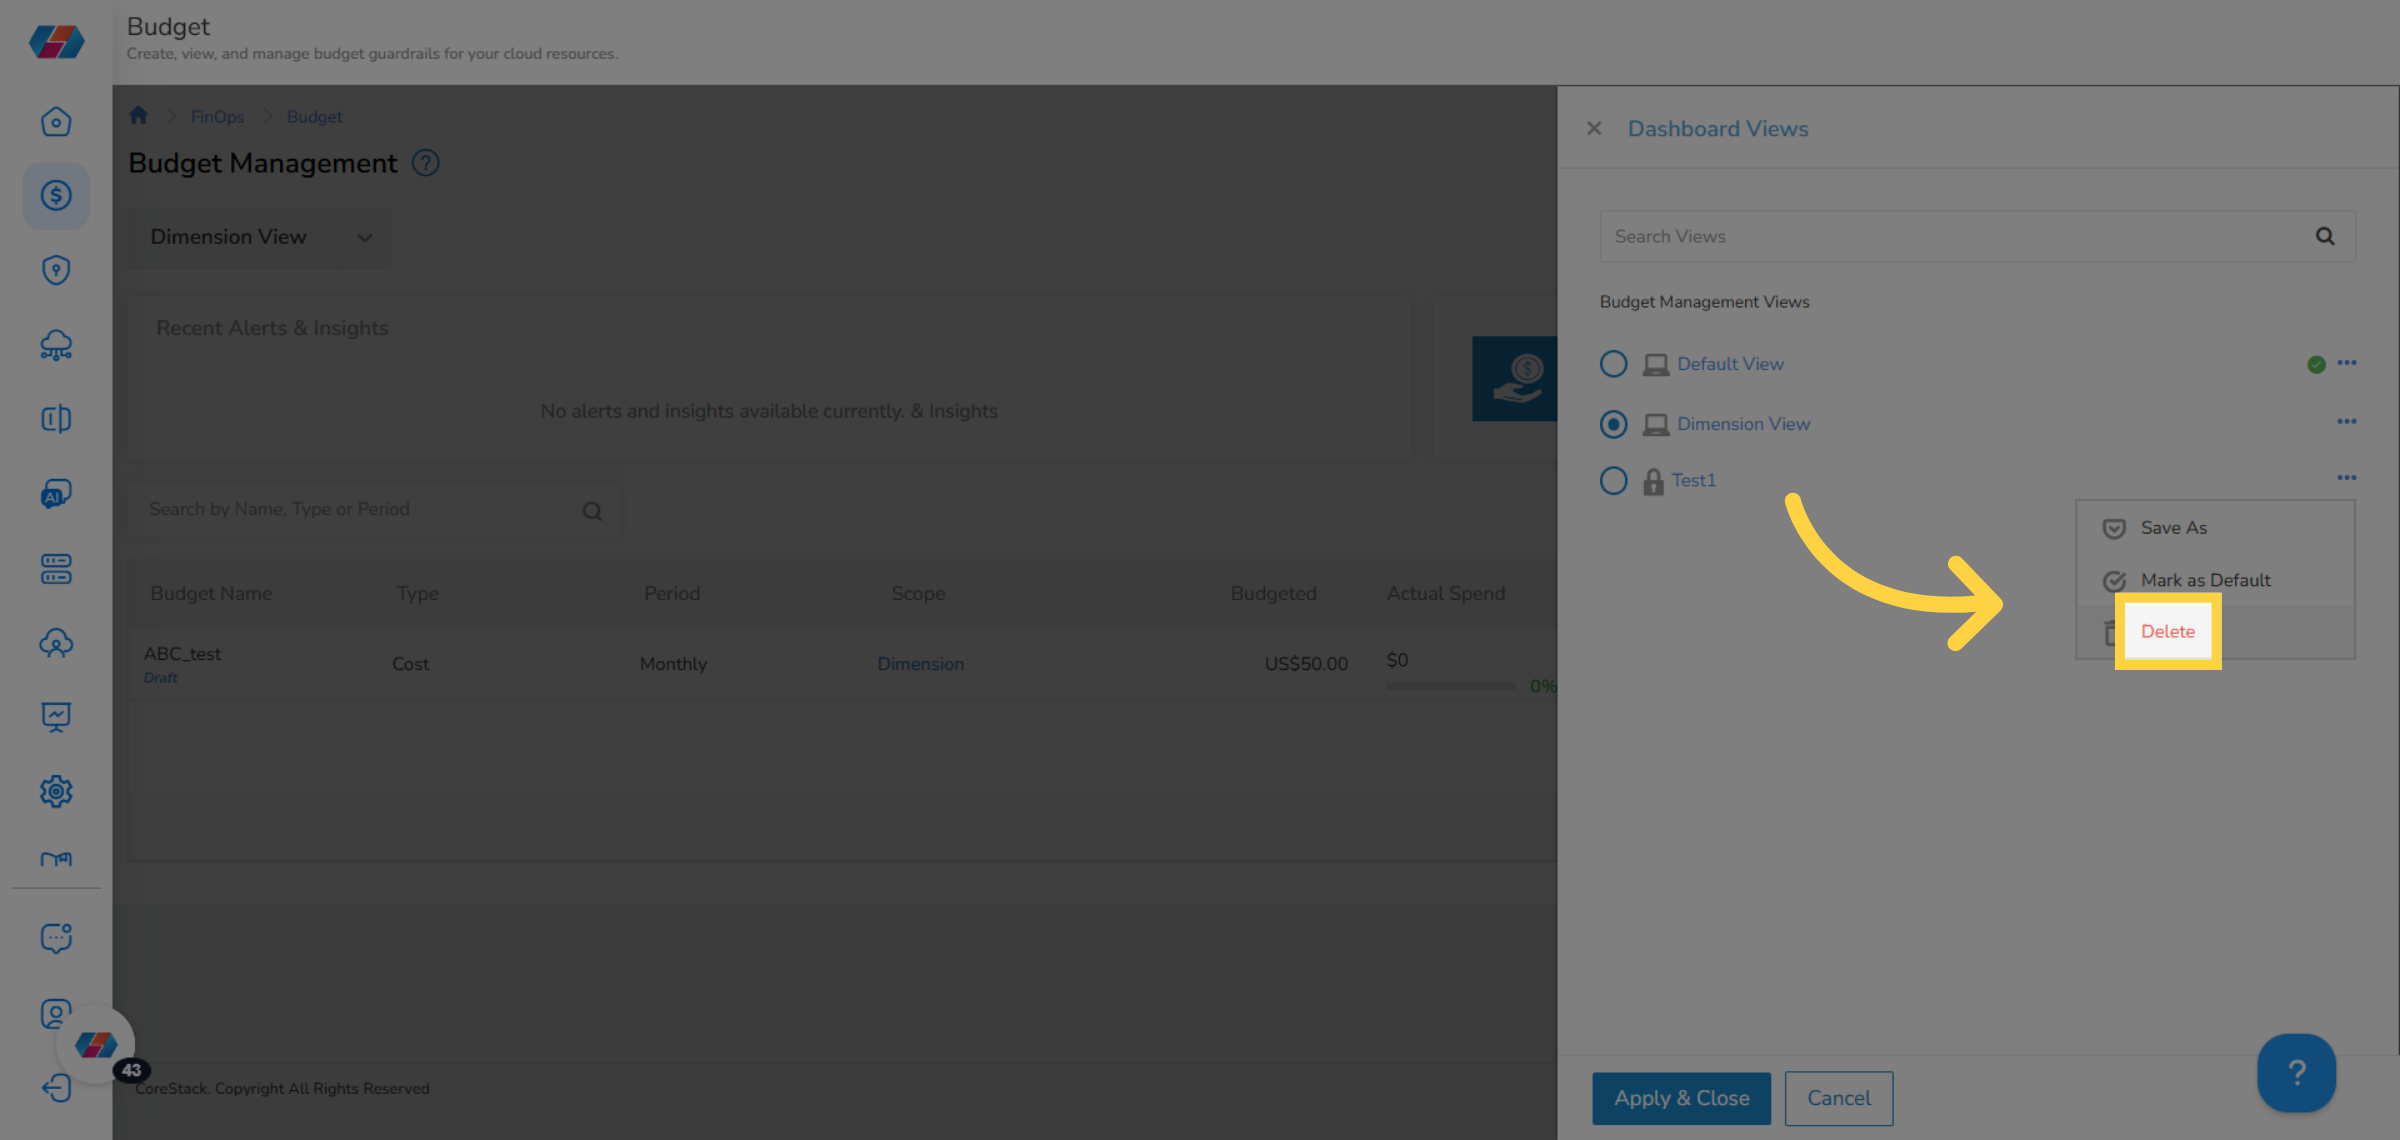
8. Mark as Default
To mark a view as default view, click the ellipses and select the option Mark as Default.

Delete Page View
Perform the following steps to delete a page view:
1. Delete Custom View
To delete a custom view, click the ellipses next to it and select the Delete option.
2. Confirm Deletion
In the WARNING dialog box, click CONFIRM to delete the selected view.
This guide walked you through accessing, customizing, saving, and managing budget views within the FinOps module.
Updated 8 months ago