

Data Services Accounts
Learn how to onboard, monitor, and manage Databricks and Snowflake accounts in CoreStack's Data Services dashboard with summary cards, quick actions, and storage configuration.
Feature Overview
Data Services Accounts is a section within CoreStack's Governance module that enables FinOps Practitioners and Platform Engineers to onboard, monitor, and manage data service provider accounts — currently supporting Databricks and Snowflake. The Data Services dashboard provides interactive summary cards that surface key account health metrics at a glance, alongside a detailed account table for managing individual accounts.
This feature is most relevant when managing multiple data service accounts and needing to quickly assess their governance status, fix credential issues, or onboard new accounts. It is specific to data service providers and does not cover AI Services or Other Services accounts.
How It Works
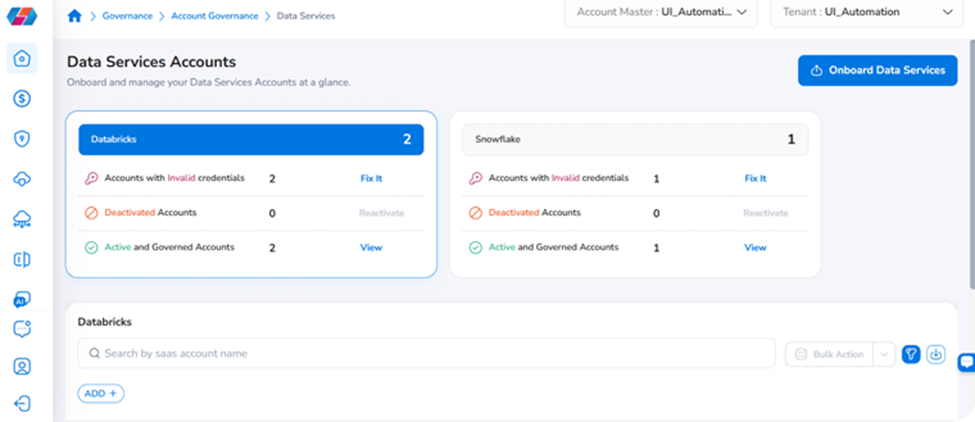
When a user navigates to the Data Services page, interactive summary cards load at the top — one for Databricks and one for Snowflake. Each card displays four key health metrics: total account count, accounts with invalid credentials, inactive accounts, and active and governed accounts. Clicking a card highlights it and filters the account table below to show only accounts for that provider.
Prerequisites
Before using the Data Services Accounts section, ensure the following are in place:
-
Access: You have the required permissions in CoreStack to access Governance > Account Governance.
-
Data service accounts onboarded: At least one account must be onboarded for a provider to show non-zero counts. Cards for providers with no onboarded accounts display zero counts with an Onboard prompt.
-
Valid credentials: Data service account credentials should be valid and active. Accounts with invalid credentials appear in the Fix It count on the relevant card.
-
Cloud account configured: A cloud account must be onboarded in CoreStack with a configured storage bucket for billing data access during the Storage Access step.
Onboarding a Data Service Account
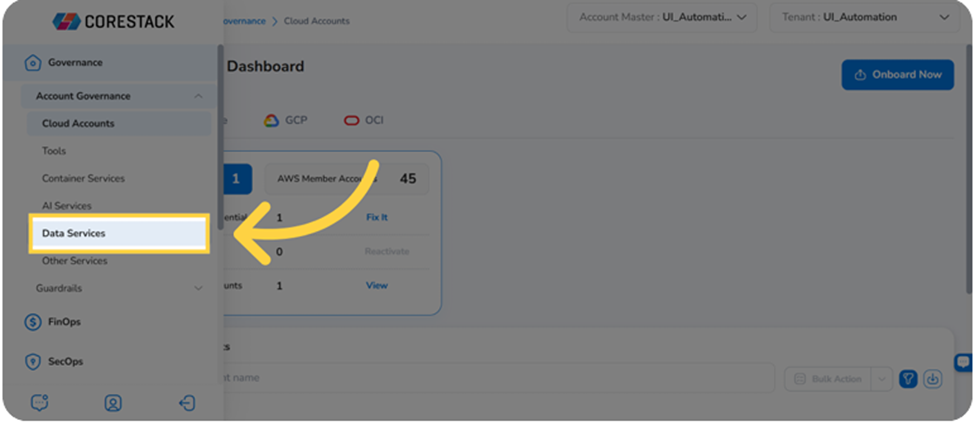
Navigate to Governance > Account Governance > Data Services.
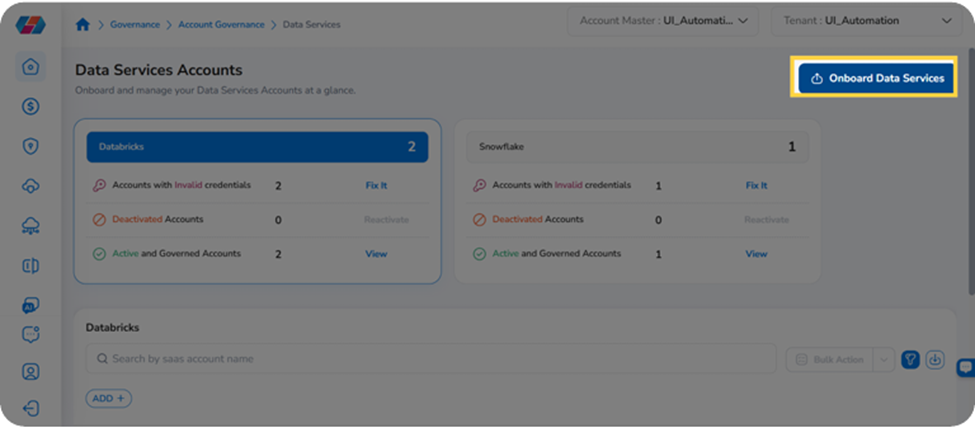
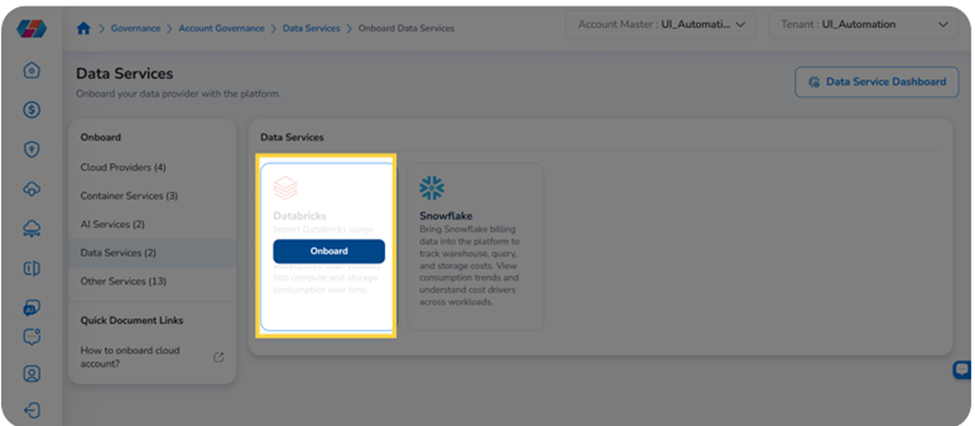
Click Onboard Data Services in the top right corner. On the Onboard Data Services page, select the provider:
-
Databricks — tracks big data costs and compute usage for Databricks workloads.
-
Snowflake — imports billing data to track warehouse, query, and storage costs.
Click Onboard under the chosen provider to enter the onboarding wizard. The wizard has three steps.
Step 1: Prerequisites
In the Prerequisites step, confirm that FinOps is selected under Select Product(s). For data service integrations, only FinOps-related products are applicable for big data cost analysis and optimization.
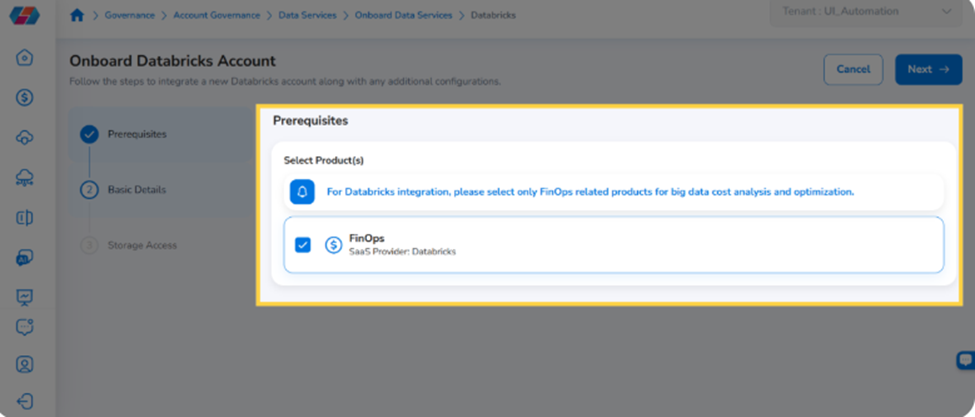
Click Next to proceed.
Step 2: Basic Details
In the Basic Details step, enter the following:
-
Account Name: Enter a name to identify this account within CoreStack.
-
Description (optional): Enter a description for the account.
If you need to onboard multiple accounts at once, click Click here to download the CSV Template to download a bulk import template.
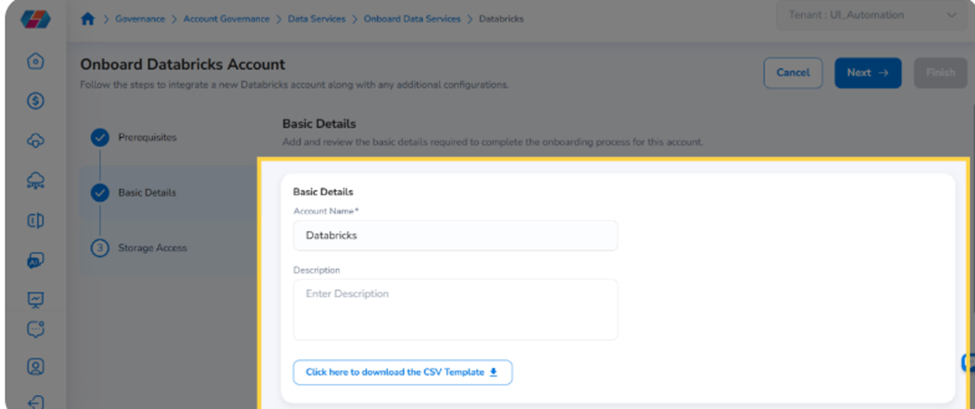
Click Next to proceed.
Step 3: Storage Access
In the Storage Access step, configure how CoreStack accesses billing data for this account. This step uses AWS storage configuration, as billing data is stored in an Amazon S3 bucket.
Under Storage Configuration, choose how CoreStack should access the storage for this account.
Option 1: Use a Cloud Account Onboarded with Product
If your AWS storage bucket is already associated with a cloud account onboarded in CoreStack, select the Cloud Account Onboarded with Product checkbox. Then fill in the following fields:
-
Cloud Account: Select the cloud account from the dropdown. Only active cloud accounts onboarded in CoreStack appear here. If no active accounts are available, the message "No active Cloud Accounts found" is shown.
-
Storage Bucket: Select the S3 bucket where billing data is stored.
-
File Path: Enter the path within the bucket where the billing files are located.
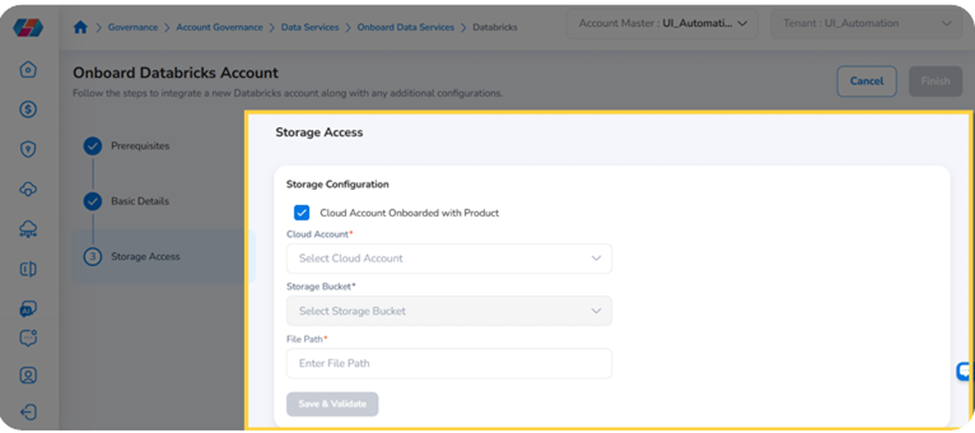
Click Save & Validate to verify the configuration before proceeding.
Option 2: Use a Cloud Account Not Onboarded with Product
If the storage bucket belongs to an AWS account that is not onboarded in CoreStack, leave the Cloud Account Onboarded with Product checkbox unselected. You will need to provide AWS credentials directly. Select the authentication method under AWS Configuration:
Option 2a: Assume Role (Recommended)
Uses IAM-based temporary credentials for secure, short-lived access to AWS resources. In the Assume Role Credentials section, enter the following:
-
Role ARN: The Amazon Resource Name of the IAM role CoreStack will assume to access the bucket.
-
External ID: A unique identifier used to prevent confused deputy attacks. This must match the External ID configured in the IAM trust policy for the role.
-
MFA Enabled: Select True or False depending on whether MFA is required by the IAM role's trust policy.
-
Storage Bucket: Enter the name of the S3 bucket where billing data is stored.
-
File Path: Enter the path within the bucket where the billing files are located.
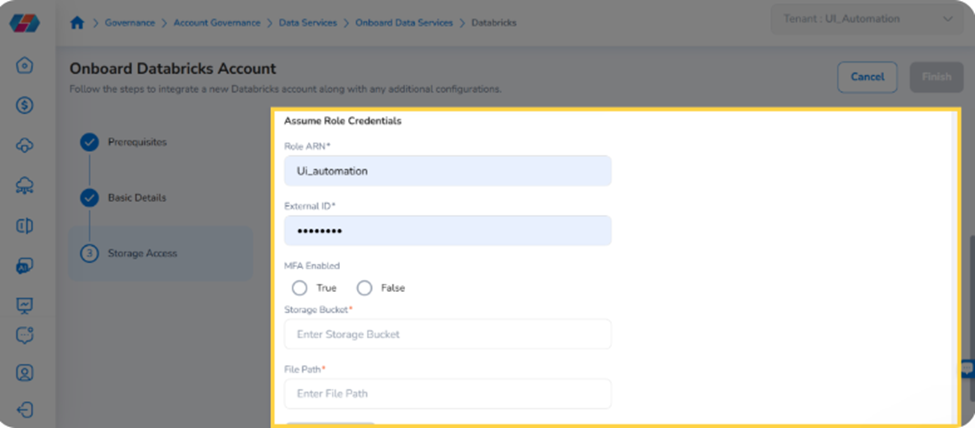
Click Save & Validate to verify the configuration before proceeding.
Option 2b: Access Key
Uses static, long-term AWS credentials. In the Access Key Credentials section, enter the following:
-
Access Key: The AWS access key ID for the IAM user or service account.
-
Secret Key: The corresponding secret access key for the IAM user or service account.
-
Storage Bucket: Enter the name of the S3 bucket where billing data is stored.
-
File Path: Enter the path within the bucket where the billing files are located.
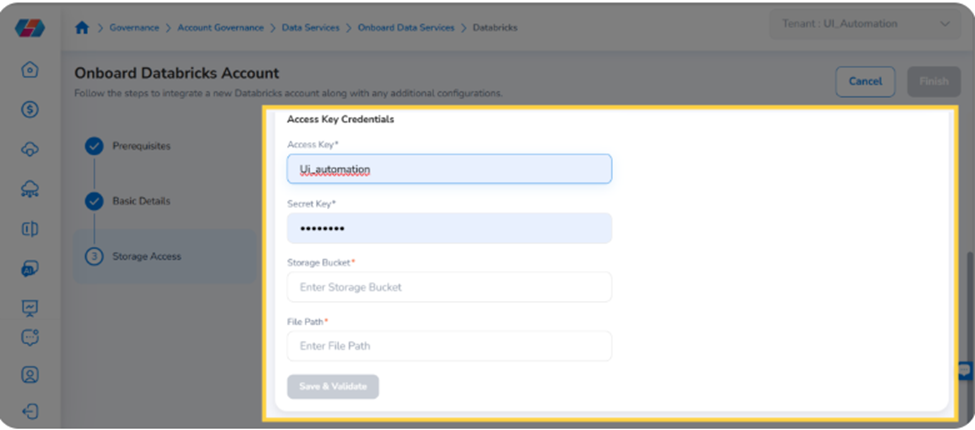
Click Save & Validate to verify the configuration before proceeding.
Click Finish to complete onboarding. The newly onboarded account appears in the account table and the relevant summary card updates its counts.
Note: If you prefer to use an existing cloud account, select the Cloud Account Onboarded with Product option. If no active cloud accounts are available, this option shows 'No active Cloud Accounts found.'
Data Services Dashboard
Navigate to Governance > Account Governance > Data Services.
The Data Services page displays one summary card for Databricks and one for Snowflake. Each card shows:
-
Total Accounts: The total number of onboarded accounts for that provider.
-
Accounts with Invalid Credentials: Accounts with credential issues, with a Fix It action link.
-
Deactivated Accounts: Inactive accounts, with a Reactivate action link.
-
Active and Governed Accounts: Healthy, active accounts, with a View action link.
Click any card to highlight it and filter the account table below to show only accounts for that provider.
Quick Actions
Each summary card includes up to three quick-action links:
| Quick Action | When Active | What It Does |
|---|---|---|
| Fix It | Invalid credential count > 0 | Navigates directly to the account with invalid credentials |
| Reactivate | Inactive account count > 0 | Navigates to the first inactive account for that provider |
| View | Active account count > 0 | Filters the table to show only active and governed accounts |
Note: When the count for a quick action is zero, the link is greyed out and cannot be clicked.
Managing Data Service Accounts
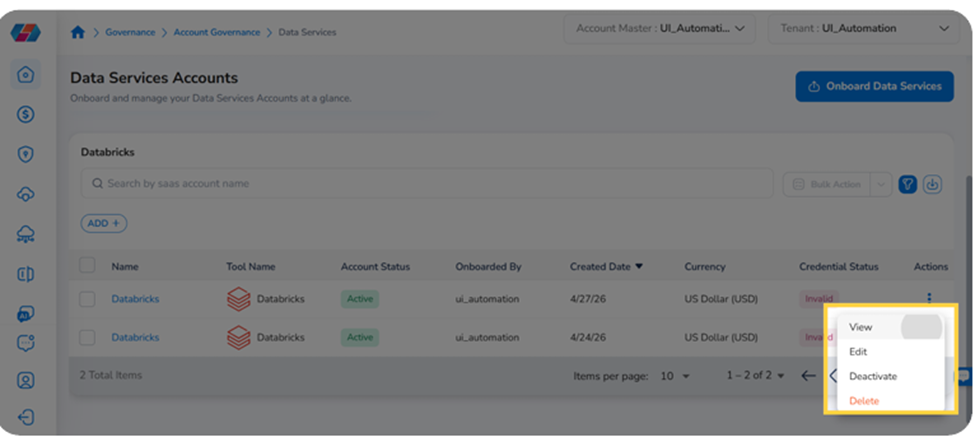
After onboarding, click the ⋯ (actions menu) in the Actions column for any account row:
-
View: Opens the Data Service Account Summary page with full account details.
-
Edit: Opens the account for editing — update the account name, description, or storage configuration.
-
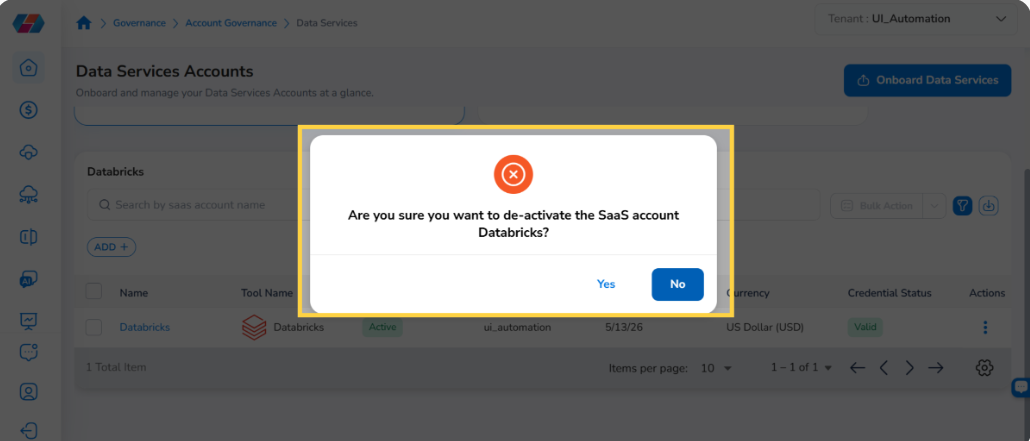
Deactivate: Suspends the account without deleting it.
-
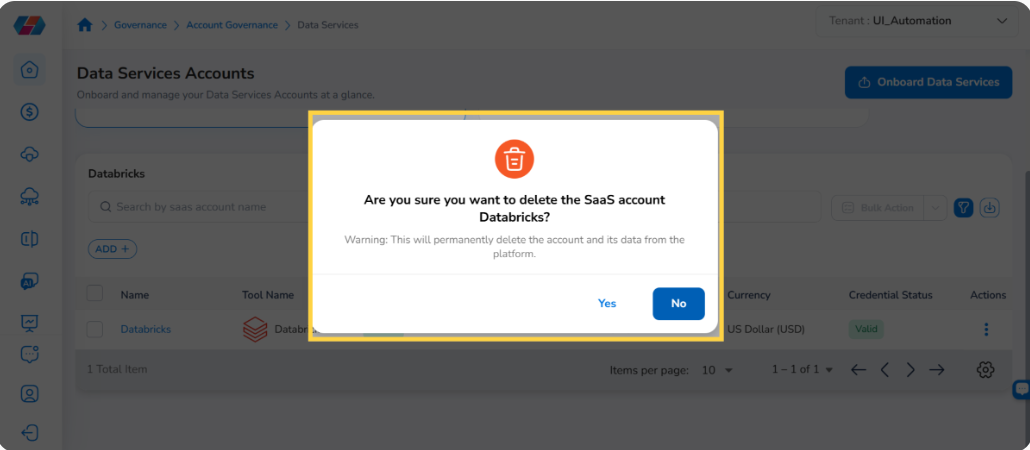
Delete: Permanently removes the account from CoreStack.
Warning: Deleting a data service account permanently removes it and all associated data from CoreStack. This action cannot be undone.
View Account Details
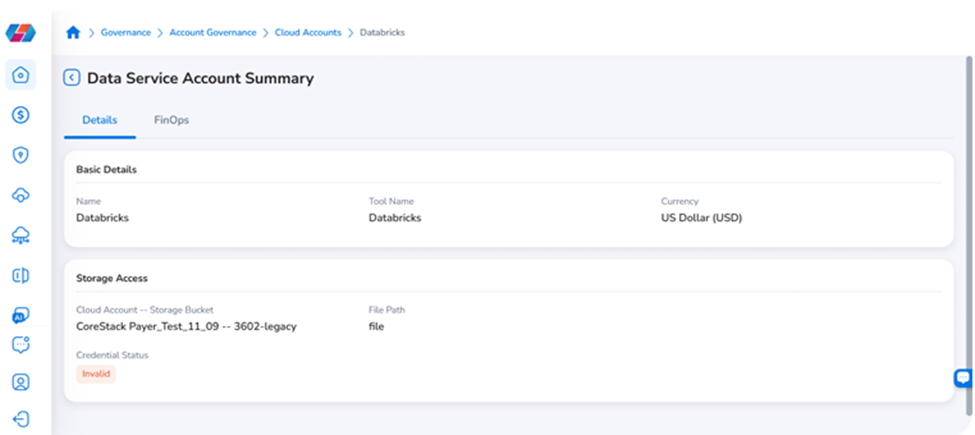
Click View from the actions menu to open the Data Service Account Summary page.
The Details tab shows:
-
Basic Details: Account Name, Tool Name, and Currency.
-
Storage Access: Cloud Account, Storage Bucket, File Path, and Credential Status.
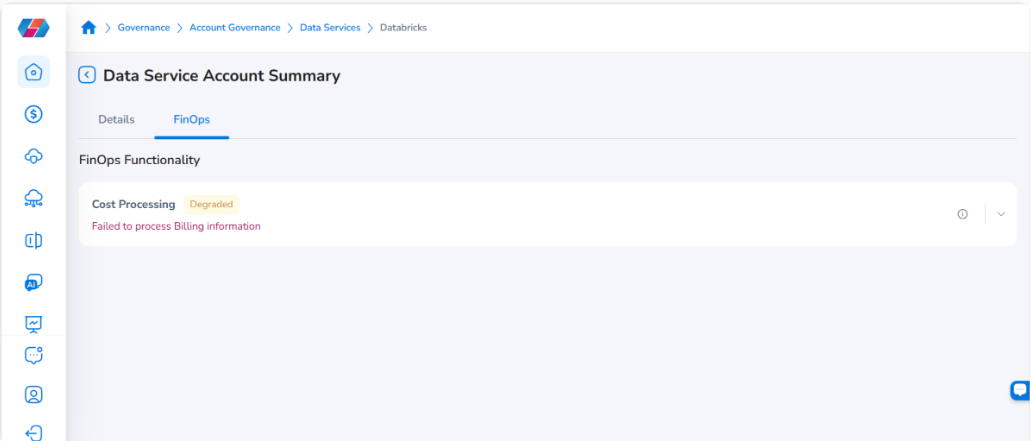
Click the FinOps tab to review FinOps functionality. The Cost Processing status shows whether cost data is being actively collected and processed.
Edit
Click Edit from the actions menu to open the account for editing.
The Basic Details tab allows you to update the account name and description.
The Storage Access tab allows you to update the storage credentials. You can switch between authentication methods — Assume Role or Access Key — and modify the Role ARN, External ID, Storage Bucket, and File Path for Assume Role, or the Access Key, Secret Key, Storage Bucket, and File Path for Access Key. Click Finish to save your changes.
Deactivate
Click Deactivate from the actions menu to suspend the account without deleting it. A deactivated account stops collecting and processing cost data but retains all previously ingested data and configuration. The summary card for the relevant provider reflects the updated count under Deactivated Accounts. You can reactivate the account at any time using the Reactivate quick action on the summary card or from the actions menu.
Delete
Click Delete from the actions menu to permanently remove the account from CoreStack. Once deleted, the account no longer appears in the account table, all associated data is removed and cannot be recovered, and the summary card count for the relevant provider updates to reflect the removal. Use this option only when the account is no longer needed.
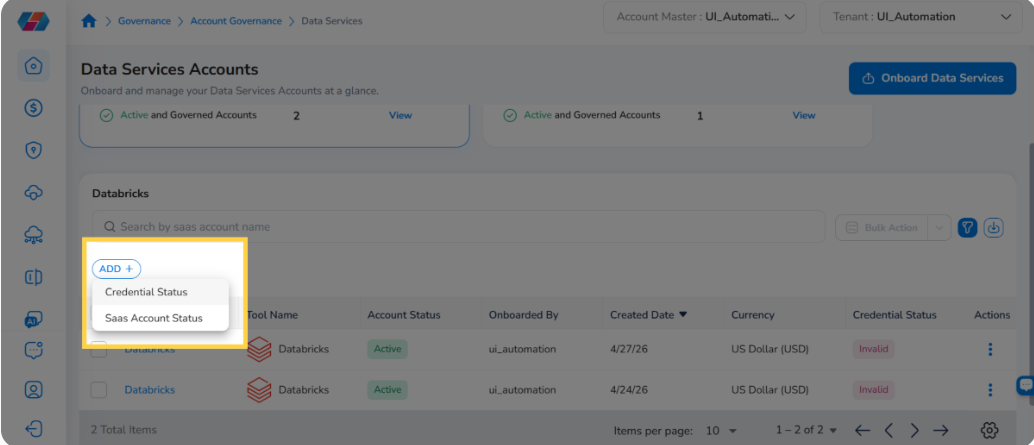
Filtering the Account Table
Use the ADD+ button above the account table to filter accounts. Available filter options:
-
Credential Status — filter by Valid or Invalid credentials.
-
SaaS Account Status — filter by account status (Active, Deactivated, etc.).
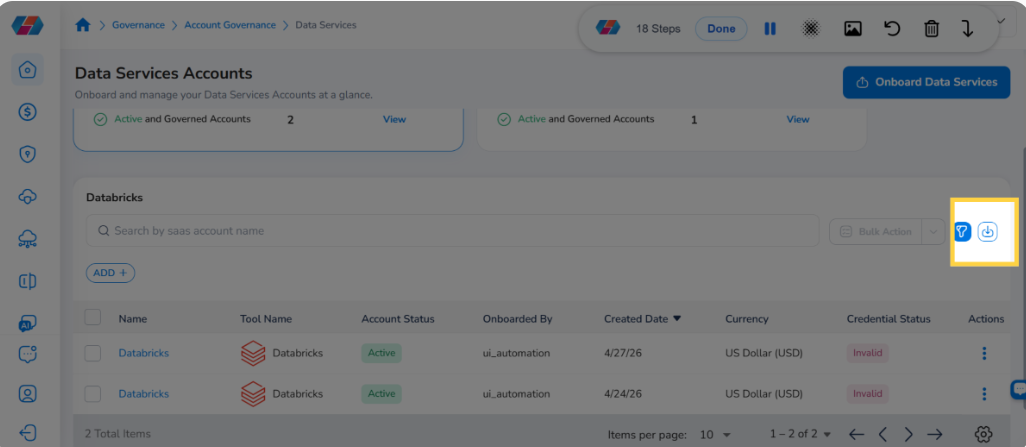
Exporting the Account List
Click the download icon in the top right to export the full account list. The exported file contains all account details visible in the table.
Frequently Asked Questions
Q: Why is the Fix It link greyed out on my card?
The Fix It link is only active when the invalid credentials count is greater than zero. When all credentials are valid, the link is greyed out.
Q: What happens when I click a summary card?
Clicking a card highlights it and instantly filters the account table to show only accounts for that data service provider. No full page reload occurs.
Q: A card shows zero accounts — what should I do?
No accounts have been onboarded for that provider yet. Click Onboard Data Services and follow the onboarding wizard to add the first account.
Q: My storage configuration has changed — how do I update it?
Click the ⋯ actions menu for the relevant account and select Edit. Update the Cloud Account, Storage Bucket, or File Path in the Storage Access step and click Finish to save.
Q: Can I onboard multiple accounts at once?
Yes. During the Basic Details step, click Click here to download the CSV Template to download a bulk import template.
Q: What is shown on the FinOps tab?
The FinOps tab shows the FinOps Functionality section with the Cost Processing status — confirming whether cost data is being actively collected and processed for the account.
Troubleshooting
Summary cards are not loading
Cause: The API failed to load account health data.
Solution:
-
Check your network connection and refresh the page.
-
If the cards display a loading error, click the Retry option on the card.
-
If the issue persists, contact CoreStack support.
Storage validation fails during onboarding or edit
Cause: The selected cloud account does not have access to the specified storage bucket, or the file path is incorrect.
Solution:
-
Confirm the cloud account has the required permissions to access the storage bucket.
-
Verify the storage bucket exists and is accessible.
-
Confirm the file path format is correct.
-
Re-enter the details and click Save & Validate again.
Note: If the issue persists, contact CoreStack support with the provider name and the error message displayed.
Card counts do not reflect recent account changes
Cause: Card counts update on the scheduled data refresh cycle.
Solution:
-
Wait for the next scheduled refresh cycle and reload the page.
-
If counts appear stale for an extended period, contact CoreStack support with the provider name and expected count change.
Updated 2 months ago